
For your safety and continued enjoyment of this product, always read the Instruction Book carefully before using.
INSTRUCTION AND
RECIPE BOOKLET
Precision Master
®
Pro 5.5-Quart Digital Stand Mixer
SMD-50 Series

2
IMPORTANT
SAFEGUARDS
When using electrical appliances, basic
safety precautions should always be taken,
including the following:
1. READ ALL INSTRUCTIONS.
2. Press and hold the center of the dial for
5 seconds when the unit is running and it
will stop. Then unplug from outlet when
not in use, before tting or removing
accessories or attachments, after use and
before cleaning. To unplug, grasp the plug
and pull from the outlet. Never pull from
the power cord.
3. This appliance is not intended for use
by children or by persons with reduced
physical, sensory, or mental capabilities,
or lack of experience and knowledge.
Close supervision is necessary when any
appliance is used near children. Children
should be supervised to ensure that they
do not play with the appliance.
Cuisinart does not recommend the use of
this appliance by children.
4. Avoid contact with moving parts. Keep
hands, hair, clothing, as well as spatulas
and other utensils away from attachments
during operation to reduce the risk
of injury to persons and/or damage
to the mixer. Remove accessories or
attachments from mixer before washing.
5. The use of accessories or attachments
not recommended or sold by Cuisinart
may cause re, electric shock or injury.
6. Do not use more than one accessory
or attachment at a time.
7. Do not exceed the maximum capacities
listed in this Instruction Book.
8. Do not use the stand mixer if it is
damaged or if the cord is damaged.
After having been damaged, have the
stand mixer checked and serviced
before resuming use.
9. When using an attachment, make sure
that you have read the safety instructions
that come with the particular attachment.
10. Do not use outdoors.
11.
Keep stainless steel bowl away from
heat sources such as stovetops, ovens
or microwaves
.
12.
To protect against the risk of electric
shock, do not put the power unit,
the power cord or the plug in water
or other liquids
.
13. Remove all accessories and attachments
from stand mixer before washing.
14. Do not let cord hang over edge of table
or counter.
15. Do not operate any appliance with a
damaged cord or plug, or after the
appliance malfunctions, or is dropped
or damaged in any manner. Contact the
manufacturer at their customer service
telephone number for information on
examination, repair, or adjustment, or
return appliance to the nearest authorized
service facility for examination, repair or
electrical or mechanical adjustment.
16. Do not operate your appliance in an
appliance garage or under a wall cabinet.
When storing in an appliance garage,
always unplug the unit from the electrical
outlet. Not doing so could create a risk
of re, especially if the appliance touches
the walls of the garage or the door
touches the unit as it closes.
17. Do not place on or near a hot gas or
electric burner or in a heated oven.
SAVE THESE
INSTRUCTIONS
FOR HOUSEHOLD
USE ONLY
NOTE: The maximum rating is based on the
attachment that draws the greatest power.
Other recommended attachments may draw
signicantly less power.
3
WARNING: RISK OF FIRE
OR ELECTRIC SHOCK
The lightning ash with arrowhead
symbol within an equilateral triangle
is intended to alert the user to the
presence of dangerous uninsulated
voltage within the product’s enclosure
that may be of sufcient magnitude
to constitute a risk of re or electric
shock to persons.
The exclamation point within an
equilateral triangle is intended to
alert the user to the presence of
important operating and maintenance
(servicing) instructions in the literature
accompanying the appliance.
SPECIAL CORD
SET INSTRUCTIONS
A short power-supply cord is provided to
reduce the risks resulting from becoming
entangled in or tripping over a longer cord.
Longer extension cords may be used if care
is exercised in their use. If a long extension
cord is used, the marked electrical rating of
the extension cord must be at least as great
as the electrical rating of the appliance, and
the longer cord should be arranged so that it
will not drape over the countertop or tabletop
where it can be pulled on by children or
tripped over.
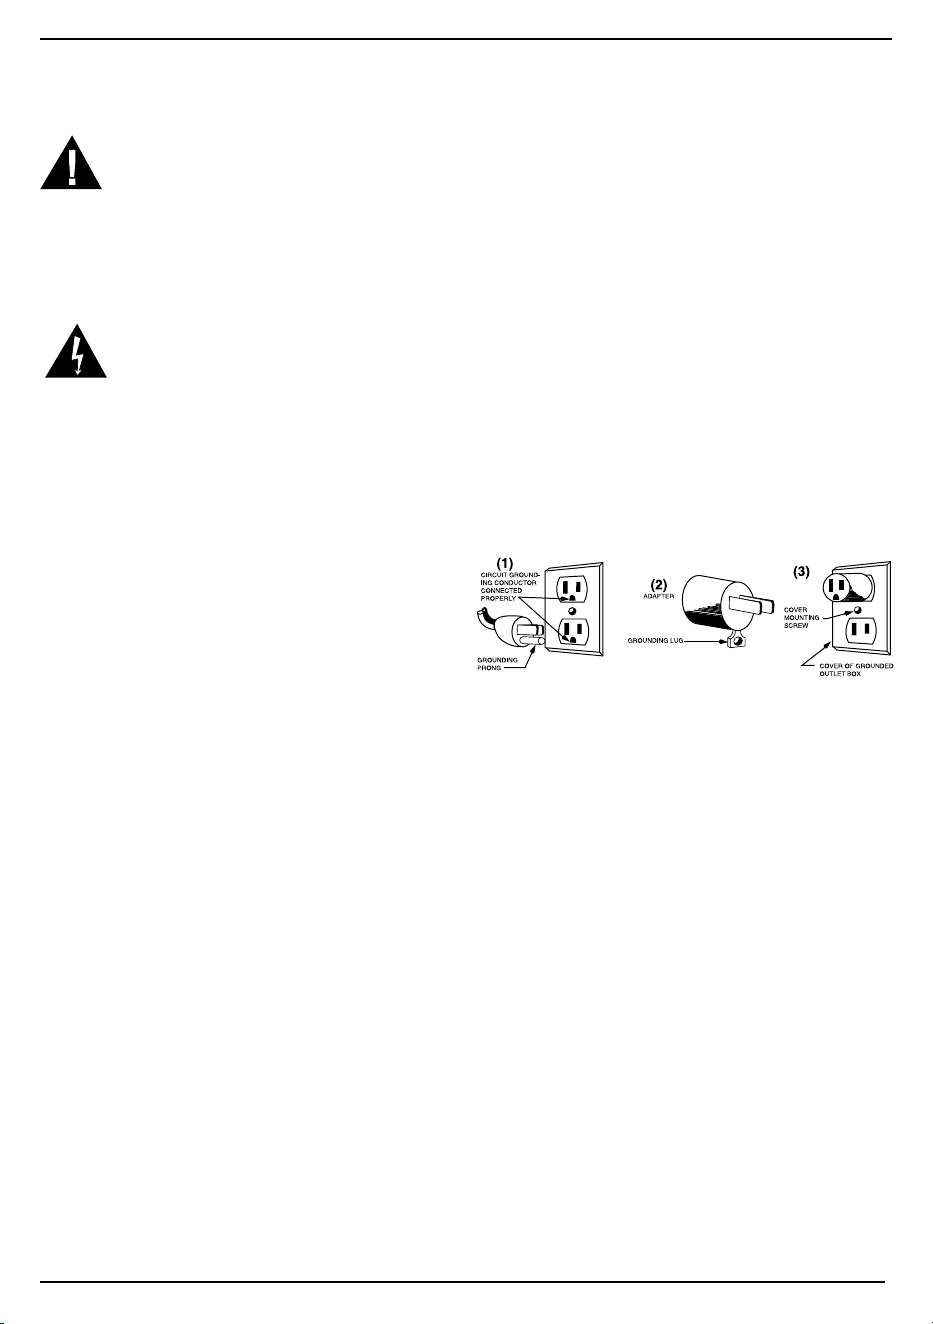
GROUNDING INSTRUCTIONS
For your protection, the Cuisinart
®
Precision
Master
®
Pro 5.5-Quart Digital Stand Mixer is
equipped with a 3-conductor cord set that has
a molded 3-prong grounding-type plug, and
should be used in combination with a properly
connected grounding-type outlet. If a
grounding-type outlet is not available, an
adapter may be obtained so that a 2-slot wall
outlet can be used with a 3-prong plug.
The adapter must be grounded by attaching
its grounding lug under the screw of the
outlet cover plate.
CAUTION: Before using an adapter, it must
be determined that the outlet cover plate
screw is properly grounded. If in doubt,
consult a licensed electrician. Never use an
adapter unless you are sure it is properly
grounded.
NOTE: Use of an adapter is not permitted in
Canada and Europe.
This appliance is for 120 volts only and
should not be used with a converter.
IMPORTANT: Always unplug the Cuisinart
®
Precision Master
®
Pro 5.5-Quart Digital
Stand Mixer from outlet when assembling
and disassembling.
NOTICE
This appliance has a grounding plug.
To reduce the risk of electric shock, this
plug will t into a grounding outlet only one
way. If it still does not t, contact a qualied
electrician. Do not modify.
CONTENTS
Important Safeguards ....................................2
Features and Components ........................... 4
Assembly Instructions ...................................5
Operation ...................................................... 5
To Pause a Program ..................................... 6
To Resume a Program from Pause ............... 6
To Stop a Program ....................................... 6
Cleaning and Maintenance ........................... 8
Maximum Capacities ..................................... 8
Troubleshooting .............................................8
Tips and Hints .............................................. 8
Suggested Speed Control Guide ............... 12
Warranty Information .................................. 13
Preprogrammed Recipe Guide. ................... 14
Recipes ........................................................15
4
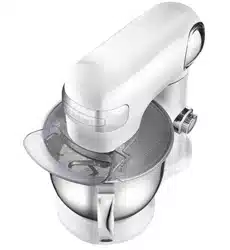
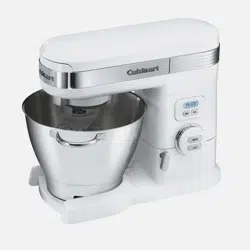
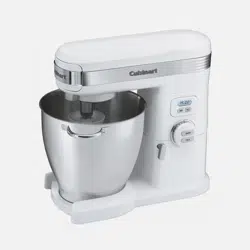
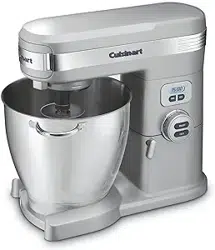
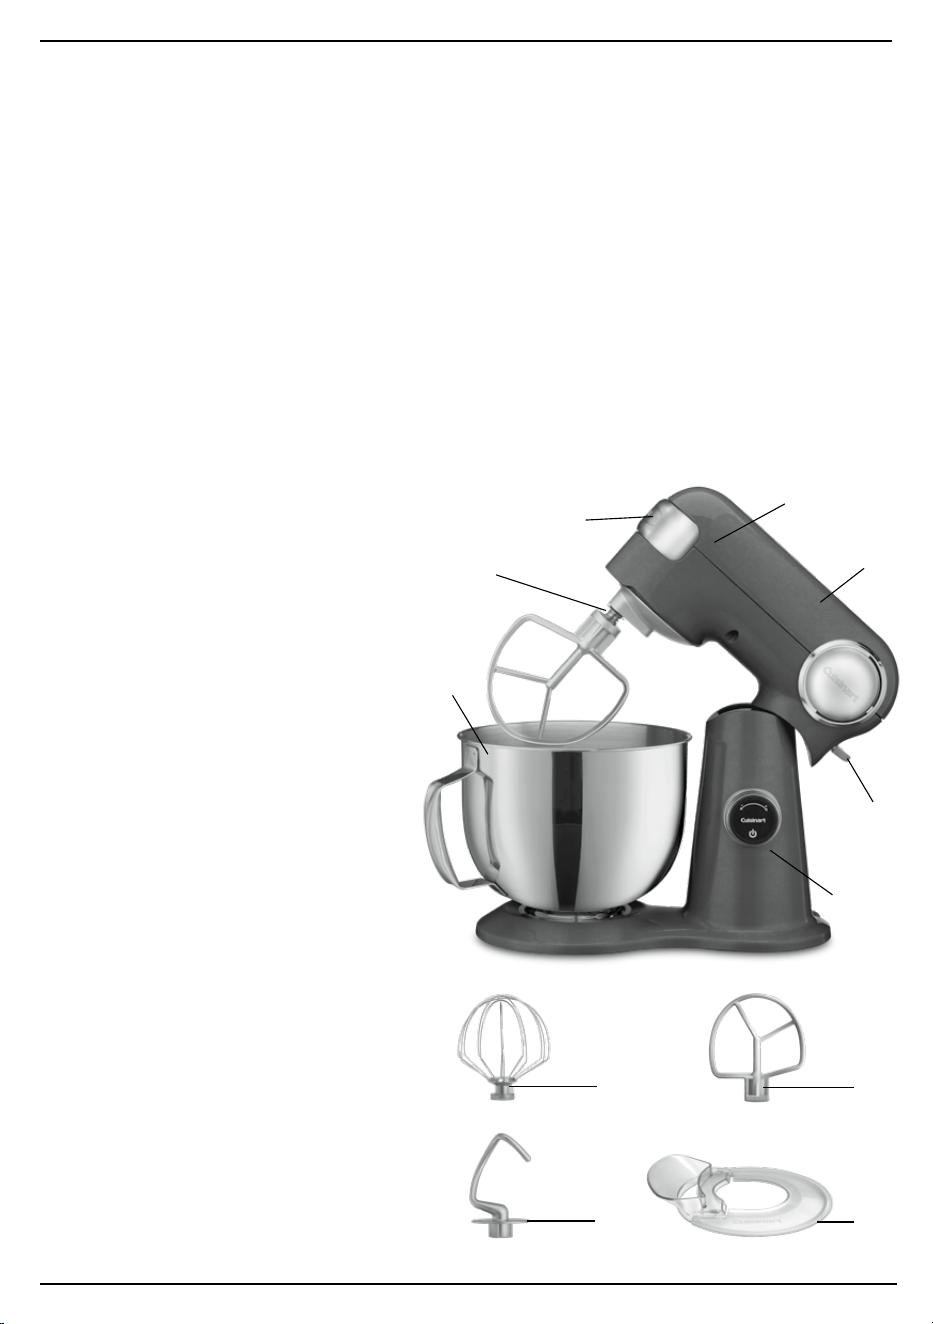
FEATURES AND
COMPONENTS
1. 500 Watt Motor
Plenty of power for large recipes and
heavy mixing tasks.
2. Tilt-Back Head
Makes it easy to attach accessories
and scrape sides and bottom of bowl.
3. Attachment Port
Meat Grinder, Pasta Extruder and
other attachments (sold separately)
connect to the port located behind
the port cover on the front of the
stand mixer head. A locking screw
makes attachments easy to put on
and secure.
4. Accessory Port
Chef’s whisk, at mixing paddle,
and dough hook connect to this port.
5. 5.5-Quart (5.2 L) Stainless Steel
Bowl with Handle
Handle makes the bowl easy to lift, hold,
scrape, and remove. Large capacity bowl
lets you mix larger quantities.
6. Head-Lift Release Lever
Securely locks stand mixer head into
raised, tilt-back position. Also used to
return mixer head to mixing position.
7. LED Digital Control Dial
Allows you to control speeds, adjust
the timer, and select from a menu of
preprogrammed recipe tasks.
1
6
3
4
5
2
7, 8
11 12
10 9
INTRODUCTION
Introducing the digital stand mixer with the perfect blend of power, precision, and speed!
Equipped with a high-performance, 500 watt motor, the Cuisinart
®
Precision Master
®
Pro Stand
Mixer powers through even the heaviest mixing jobs in a 5.5-quart, large capacity bowl. A turn
of the digital LED dial is all it takes to select from 12 speed options, including 3 preprogrammed
food-prep settings and 7 recipe tasks to be performed in the food-prep settings. Premium
attachments include chef’s whisk, at mixing paddle, dough hook, and splash guard with pour
spout for maximum versatility with minimal mess. Die-cast housing provides superior durability,
and commercial mixing for today's kitchen ensures precise, thorough mixing. Leave it to
Cuisinart to combine digital convenience with powerful performance in the must-have stand
mixer for today’s home chef.
Cuisinart offers optional attachments that can be purchased separately. The selected attachments
(PE-50, MG-50, PRS-50 and SPI-50) connect to the port on the front of the mixer, so you can
make homemade pastas or grind your own meats. You can even turn your mixer into an ice
cream maker! The Cuisinart
®
Fruit Scoop™ Ice Cream and Fresh-Fruit Frozen Dessert Maker
(IC-50) attachment lets you make all-fruit frozen desserts, ice cream or frozen yogurt.

5
8. Light Ring
3 colors for different modes:
a. STANDBY – White, with Cuisinart name
illuminated on the dial
b. RUNNING – Blue, unit is running with
selected mode illuminated on the dial
c. STOP/PAUSE – Red, ashing with either
Stop or Pause illuminated on the dial
9. Chef’s Whisk
Incorporates air into ingredients/mixtures.
Ideal for whipping eggs, egg whites, or
heavy cream. Used in recipes for angel
food cake, chiffon cake, meringue, some
types of candy, such as marshmallows,
and quickly whips potatoes.
10. Flat Mixing Paddle
Used for stirring, mixing, and beating
ingredients/mixtures. Best accessory
for mixing cookie dough, cake and other
batters, and for frostings. Also use for
making pie crusts, biscuits and short
cakes, and combining ingredients for
meatloaf or meatballs.
11. Dough Hook
Used for the mixing and kneading of yeast
dough for breads, rolls, pizza/focaccia, and
coffee cakes. Also for mixing and kneading
pasta dough.
12. Splash Guard with Pour Spout
Prevents splattering when mixing and
adding ingredients. Guides ingredients
into the bowl.
ASSEMBLY INSTRUCTIONS
1. Raise Mixer Head – Push down the head-
lift release lever and raise the stand mixer
head until it locks into place.
2. Attach Accessory – Place at mixing
paddle, chef’s whisk, or dough hook into
the accessory port. Push up and turn
counterclockwise until it locks. Push up
and turn clockwise to remove.
3. Place Bowl on Base – Turn clockwise to
secure.
4. Lower Mixer Head – Holding the stand
mixer head, push down the head-lift lever
again and fully lower the mixer head.
5. Attach Splash Guard with Pour Spout –
After attaching the accessory and lowering
the stand mixer head, slide the splash
guard onto the bowl. Attach the pour
spout by placing it into the tabs on the
splash guard ring and slide it into place.
The splash guard ring can rotate in any
direction to more easily add ingredients.
To remove: Remove the pour spout from
the splash guard and slide splash guard
off the bowl.
OPERATION
TO TURN STAND MIXER ON
1. Plug in the stand mixer.
2. To secure mixing bowl on base,
turn clockwise.
3. Press the dial to select language once the
dial illuminates and Main Menu will appear.
4. All subsequent times “Cuisinart” will appear.
5. Rotate the dial to choose from the
following menu options:
• MANUAL (Normal Operation)
• TIMER (Normal Operation with a
Countdown Timer)
• DOUGH (Recipe Task)
• MIXING (Recipe Task)
• WHISKING (Recipe Task)
6. Select preset program by pressing the dial.
7. Program will begin.
NOTE: After 5 minutes of inactivity, the “Cuisinart”
screen will appear and the digital dial will turn
off. To wake the unit, press or rotate the dial.
The unit will go into Standby mode.
MANUAL MODE
1. Rotate the dial to MANUAL, then press to
select. To select the desired speed setting,
rotate the dial clockwise; select from
speeds 1–12 (see Speed Control Guide on
page 12). Press to select the speed to start
the stand mixer. The timer will begin to
count down.
2. To change the speed while the unit is
operating, rotate the dial clockwise or
counterclockwise to the desired speed.
The speed will automatically adjust
without stopping the timer.
3. To PAUSE the mixer, press and release
the center of the dial.

6
4. To STOP the mixer, press and hold the
center of the dial until it beeps and says
STOP.
Warning: When light is ashing, avoid any
contact with moving parts.
TO PAUSE A PROGRAM
1. While in a program, press the dial once
to PAUSE.
2. The unit will go into PAUSE mode.
3. The unit will also PAUSE when the head
of the stand mixer is lifted. To lift the stand
mixer head, press down on the head-lift
release lever.
NOTE: To avoid splatter, it is recommended
to use the PAUSE feature in the dial.
TO RESUME A PROGRAM FROM PAUSE
1. If the head of the mixer has been raised,
rst return the head to the down locked
position.
2. Press and hold the dial for 2 seconds.
3. The unit will beep, and then it will continue
in your selected program from the point it
was stopped.
TO STOP A PROGRAM
1. Press and hold the dial until the unit
beeps and the screen says STOP.
2. Release the dial – mixer will still be in the
selected program.
3. Press the dial to get out of STOP to return
to the Main Menu.
TO USE TIMER
1. When you rst turn on the mixer, rotate
the dial clockwise to select the TIMER
setting. This mode allows you to run the
mixer at a specic speed or at various
speeds, for a set time.
2. Press the dial to select the TIMER mode.
The digital dial will ash 01:00 minute.
3. To adjust the time, rotate the dial
(clockwise to increase the time;
counterclockwise to decrease the time),
then press the dial to select the desired
time.
NOTE: The unit will change in increments
of 10 seconds. Maximum time setting is
60 minutes.
4. To adjust the speed setting (from 1 to 12),
turn the dial to select the desired speed
and then press the dial to set. The unit
will then start to mix. PAUSE the MIXING
at any time by pressing and releasing the
dial once. Hold the dial for 3 seconds and
the unit will display STOP for a moment
and then return to the Main Menu.
5. MIXING process automatically stops when
total time has elapsed. One tone signals
shutoff.
TO TURN STAND MIXER OFF
Press and hold the center of the dial for 5
seconds when the unit is running and it will
stop. After 5 minutes of inactivity, the unit will
go into Standby mode and the digital dial will
turn off. Unplug from the outlet when not in use.
TO USE THE PRESET PROGRAMS
FOR DIFFERENT RECIPE TASKS
PROGRAM 1: DOUGH
Use this program for yeasted bread and
pizza doughs. Follow instructions below to
use program and refer to dough recipes in
the recipe section as a guide.
1. Gather ingredients and put liquid, sweetener
(if using), and yeast into the mixing bowl.
2. Connect the dough hook to the mixer.
3. Rotate the dial clockwise to select the
DOUGH setting. Press the dial to activate.
4. Rotate the dial clockwise to select the
desired program: PIZZA DOUGH, WHITE
BREAD, WHOLE WHEAT.
5. Once the desired recipe task is selected,
press the dial and the mixing process will
begin.
6. After the kneading is complete, the unit
will stop and a 60 minute countdown
timer will begin. This is for proong the
bread dough. It is recommended to rst
remove the dough, shape into a smooth
ball and place back into the mixing bowl.
Cover with a damp towel or plastic wrap
and allow to proof for the allotted time.
NOTE: This program is designed to mix and
knead ingredients for a yeasted dough. There
may be some recipes that require the user to

7
PAUSE to scrape down the sides of the bowl
during the mixing process, or others that
require additional kneading time at the end
of the process. Additional kneading time can
be added by stopping the DOUGH program
and then selecting the MANUAL or TIMER
program to knead. If additional kneading
time is necessary, this will cancel out the
DOUGH program and not include the timer
for proong the dough.
PROGRAM 2: MIXING
Dry Ingredient Mixing
This setting is intended to mix dry ingredients
for just about any recipe. Always use the chef's
whisk for this task to "sift" the ingredients.
1. Put the dry ingredients into the mixing bowl.
2. Turn on your mixer, and rotate the dial
to the MIXING setting. Press the dial to
activate. Turn the dial clockwise to the
DRY INGREDIENT MIXING setting.
Press the dial to begin MIXING. The mixer
will run at Speed 1 for 1 minute. Once
complete, it will automatically shutoff.
Creaming
This setting is designed for effortlessly
creaming butter and sugars for a number of
different recipes, such as cookie dough or
frostings. Remember to press the PAUSE
feature (press and release the dial to PAUSE
and repeat to continue mixing) to scrape
down the sides of the bowl and mixing
paddle. If additional time is needed for
particular recipes, just repeat the program.
1. Gather ingredients and put them into the
mixing bowl.
2. Attach either the mixing paddle or chef's
whisk, depending on the mixing task.
3. Rotate the dial clockwise to select the
MIXING setting. Press the dial to activate.
4. Rotate the dial clockwise to select
CREAMING.
5. Once the desired program is selected,
press the dial and the MIXING process
will begin.
PROGRAM 3: WHISKING
Whipping Cream
This program is designed to whip 2 cups of
heavy cream to yield about 3½ cups whipped
cream (see specic recipe on page 44 in the
Recipe Section). It will produce medium-soft
peaks at the end of the program. If stiffer
peaks are desired add additional time by
either using the MANUAL setting or restarting
the WHIPPING CREAM recipe task.
1. Put heavy cream into the mixing bowl.
2. Connect the chef's whisk to the mixer.
3. Rotate the dial clockwise to select the
WHISKING setting. Press the dial to activate.
4. Rotate the dial clockwise to select
WHIPPING CREAM.
5. Press the dial and the WHISKING process
will begin.
6. It is best to add sifted confectioners’
sugar, and any avorings, after the cream
has reached soft peaks. This will produce
the best tasting and most stable whipped
cream.
Mash Potatoes
This program is designed to mash 3 to 5
pounds of cooked potatoes (see our specic
recipe on page 17 in the Recipe Section).
If more or fewer potatoes are being prepared,
keep an eye on the consistency to be sure
they are not being under- or over-mixed.
1. Put the warm potatoes into the mixing bowl.
2. Connect the chef's whisk to the mixer.
3. Rotate the dial clockwise to select the
WHISKING setting. Press the dial to
activate.
4. Rotate the dial clockwise to select
MASH POTATOES.
5. Press the dial and the WHISKING process
will begin.
6. It is best to add butter, milk, and
seasonings after the potatoes have
been mashed a bit. This will make for a
smoother tasting potato without being
over-whipped.

8
CLEANING AND
MAINTENANCE
Unplug your Cuisinart
®
Stand Mixer before
cleaning.
Power Unit
Wipe with a damp cloth and dry. Never use
abrasives or immerse in water.
Bowl
Wash by hand and dry thoroughly, or put in
dishwasher. Never use a wire brush, steel
wool, or bleach.
Accessories
Mixing paddle and dough hook are top rack
dishwasher safe; you can also wash by hand
and dry thoroughly. Chef’s whisk must be
washed by hand.
Attachments
Clean as directed in instructions included
with each attachment you purchase.
Splash Guard with Pour Spout
Top rack dishwasher safe; you can also wash
by hand and dry thoroughly.
Maintenance
Any other servicing should be performed by
an authorized service representative.
MAXIMUM CAPACITIES
• Yeast doughs (most breads, pizza) –
6 cups white our
• Cookie dough – 5 dozen cookies
• Whipping cream – 6 cups liquid
(12 cups whipped)
• Egg whites – 12 large
TROUBLESHOOTING
If the stand mixer shuts off, the unit may
have overheated. Your stand mixer has an
overload protection device; it will shut down
to protect the motor.
Solution: In the unlikely event that this happens:
• Turn off and unplug the unit.
• Reduce the load by removing some of the
ingredients, and allow the mixer to rest for
a few minutes.
• Plug in and reset the speed. If the stand
mixer does not start when you activate
a program, allow the unit to rest for
additional time.
TIPS AND HINTS
• Before preheating your oven, adjust racks
to accommodate your baking task. Most
recipes use the middle rack; pies bake
best in the lower third of the oven.
• Carefully follow each mixing step in a
recipe. Take care not to over- or under-mix.
• Don’t crowd the oven, and avoid opening
the oven door during baking – use the
oven light to help you watch. With certain
recipes, particularly when baking more
than one tray of cookies at a time, rotate
halfway through baking.
• Proper measurements are very important
when baking. To measure our correctly,
stir the our rst, then spoon into the
measuring cup. Level off the top with the
blunt side of a knife blade or the handle
of a spoon. Do not press or compact our.
It is also very important not to measure
directly from the bag – while the our is
pre-sifted, it has been pressed/compacted
to t into the bag. Baked goods made
from unstirred our are likely to be heavy
and dry because too much our is used.
• For most baking recipes, refrigerated
items like butter, milk and eggs incorporate
better when they are at room temperature.
• Remove butter from the refrigerator and
cut into ½-inch pieces to help it come
to room temperature faster while you
measure out the remaining ingredients.
Do not warm butter in the microwave; this
can change the structure of the butter if
it melts and give the nished product a
different texture.
• To separate eggs for use in any recipe,
break them one at a time into a small
bowl. Gently remove the yolks, then
transfer the whites to a spotlessly clean
glass or stainless bowl. If a yolk breaks
into a white, use that egg for another
recipe. Just a drop of egg yolk in the

9
white prevents the white from whipping
properly.
• Scraping the entire bowl – sides, bottom
and paddle over the course of mixing and
adding new ingredients – ensures even
incorporation of ingredients and overall
best results. The more you scrape the
bowl, the better.
• For whipping egg whites, both the mixing
bowl and chef’s whisk must be spotlessly
clean and dry. Any trace of fat/oil will
prevent the egg whites from whipping
properly.
• To check the freshness of eggs, place
them in a bowl of warm water – if they
oat, they are not fresh. This is most
important when using for whipping egg
whites. The fresher the eggs, the more
stable the foam.
• To melt chocolate for a recipe, put
chopped chocolate in a double boiler
insert or larger bowl over a pan of barely
simmering water. The water should not
boil, nor should it touch the bottom of the
double boiler insert or bowl. If it does, this
could cause the chocolate to “seize” and
you will not be able to use it in your recipe.
• Always test yeast for freshness before
using it in a recipe. Sprinkle a little over
warm (105°F–110°F [40°C-43°C]) water
and add a pinch of sugar or our from
the recipe. If it does not become foamy/
bubbly in 5 to 10 minutes, the yeast may
be “dead.” Start over with fresh yeast
from a new package.
COOKIE BAKING
• Use an ice cream scoop to measure out
cookie dough – this keeps the cookies
evenly shaped and uniform in size. We
recommend ice cream scoops in several
sizes – #40, #50 and #60, as well as a
larger one (about ¹⁄
³
to ½ cup) for jumbo
cookies. Ice cream scoops are also good
for lling mufn tins. Use a #16 ice cream
scoop to make mufns or meatballs.
• To better maintain cookie shapes, put
scoops of cookie dough onto sheets of
waxed paper or plastic wrap on a tray
and chill before baking. This will keep the
cookie dough from spreading too much
and will maintain a nice round cookie.
If rolling and cutting cookie dough, always
chill cut cookie dough prior to baking to
be sure the cookies keep their shape.
Most cookie dough can be refrigerated
for 2 to 3 days prior to baking – be sure to
wrap well.
• Cookie dough may also be frozen. Shape
into individual cookies, double wrap and
freeze for up to 3 months. Thaw before
baking.
•
Line baking sheets with parchment paper
for easy release and easy cleanup.
• Let cookies rest on sheets for 2 to
3 minutes before removing them to a wire
rack to cool. This keeps cookies from
wrinkling, crumbling or breaking.
• Cookies must cool completely before
being put into storage containers to
ensure they don’t get soggy or misshapen.
BREAD BAKING
• One ¼-ounce packet of yeast equals
2¼ teaspoons yeast.
• Using milk in place of water will produce a
softer crust.
• After baking, you can soften the crust, if
desired, by rubbing it with unsalted butter
soon after removing it from the oven.
This prevents crust from drying out quickly.
• If a recipe calls for a specic type of our,
use the our recommended. If you do
not have bread our, you can substitute
unbleached, all-purpose our, but your
bread may not rise quite as much.
• Do not use “lite” or tub margarines
for bread baking – they have different
structures and do not work as well in
baking.
• Vital wheat gluten is the dried protein
taken from the our by eliminating the
starch. It is a good dough conditioner or
enhancement for yeast breads, especially
for whole-grain breads or when using
all-purpose our. If a recipe specically

10
calls for vital wheat gluten, we recommend
that it be used for best results.
• For 100% whole-wheat bread, use
1½ teaspoons vital wheat gluten per
cup of our.
• Many bread recipes have a “range”
amount of our – start by using the lower
end of the range, then add more our as
needed to produce a smooth, not sticky,
dough.
• Using too much liquid, or baking on a
humid day, can cause your bread to fall or
wrinkle on top.
• An instant-read thermometer is helpful to
have on hand when making bread. It can
be used to measure the temperature of
the liquid for proong yeast and for
taking the internal temperature of the
baked bread.
• Liquid for proong yeast should be
between 105°F and 110°F (40°C-43°C).
• Finished bread should have an internal
temperature between 190°F and 210°F
(87°C-98°C).
CAKE BAKING
• Have all ingredients and mixing bowls at
room temperature. Room temperature
ingredients incorporate and blend more
easily.
• Fill pans immediately after mixing.
• Bake immediately after lling pans.
• Check for doneness at the beginning of
the time range given.
• Cool cakes in pans until cool to touch,
then remove from pans to completely cool
on a wire rack after baking.
• An offset spatula will make spreading
frosting easier than a knife or regular
spatula.
EGG WHITES
• Egg whites at room temperature are best
for whipping. Bring to room temperature
safely by placing uncracked eggs in a
bowl of warm water for 10 to 15 minutes.
• Add a small amount of acid, such as
cream of tartar, lemon juice or vinegar,
when whipping egg whites to stabilize
them and allow them to reach their
optimum volume and stiffness. Use
1
⁄
8
teaspoon cream of tartar per large egg
white – or 1 teaspoon cream of tartar per
cup of egg whites (8 to 10 large).
• The time required to whip egg whites
will vary with the temperature of the
egg whites, age of egg whites, and
temperature/humidity of the kitchen.
Keep a close watch while whipping
egg whites.
• In humid or damp weather, you may not
get the volume of whipped egg whites
that you do in drier, warmer weather.
• Place room temperature egg whites in
clean, dry mixing bowl. Attach clean, dry
chef’s whisk. Start whipping egg whites
on Speed 1 and gradually increase to
Speed 6 until foamy, then gradually
increase to Speed 12. If egg whites are
beaten too rapidly in the beginning, their
structure will not be as stable and strong,
and they will not reach the volume that
they should when completely beaten.
Overbeaten egg whites will also separate
or deate in a meringue topping.
• Timing is important when adding sugar
to egg whites. Add sugar slowly and
gradually to the whipped egg whites once
they start to foam. Always add sugar in
a slow, steady stream along side of bowl
while egg whites are being whipped – do
not add sugar directly to the center of the
bowl on top of beaten egg whites; doing
this may cause them to deate.
• When whipping egg whites, they will at
rst appear foamy or frothy. Then they
will become stiffer and start to hold their
shape. Next, soft peaks will form – at this
point, the tips of the peaks fall when the
whisk is lifted up. Soft peaks are often
required for mousses or soufés. The
next stage is medium to stiff peaks – the
whites will appear dry, the peaks will
hold their shape and the whites will be
shiny. This is used for recipes such as
meringues. The nal stage is stiff and dry.

11
The whites will not be uniformly white,
but will appear speckled, and they will no
longer be shiny in appearance.
• Beaten egg whites should be used
immediately after beating them. If they
wait for longer than 5 minutes, they will
begin to deate and lose volume and
structure. Egg whites beaten with sugar
or cream of tartar are more stable and will
last a little longer.
SANITIZING EGG WHITES
Take care when adding raw egg whites to
recipes that are not cooked or baked, as
there is a chance they may carry harmful
bacteria. If you have a recipe that calls for raw
egg whites, you may wish to use powdered
egg whites or “sanitize” the egg whites by
doing the following:
• Put the egg whites, 2 tablespoons of the
granulated sugar from your recipe,
2 tablespoons water, and a pinch of
cream of tartar into the Cuisinart
®
mixing
bowl and stir until smooth.
• Put over a pan of simmering water and
stir constantly with a spotlessly clean
rubber spatula until the mixture registers
160°F (71°C) on an instant-read thermometer
– start checking the temperature after about
a minute of stirring.
• When the egg white mixture registers
160°F (71°C), dry off the bottom of the
bowl and place it on the Cuisinart
®
stand
mixer. Insert the chef’s whisk. Continue as
directed in your recipe.
WHIPPING CREAM
The difference between heavy cream and
whipping cream is the butterfat content. The
higher the butterfat content, the more stable
the whipped cream. Heavy cream has a
higher butterfat content than whipping cream
does. Creams that are not ultra-pasteurized
are best for whipping.
The yield of cream generally doubles in
volume. To make 2 cups of softly whipped
cream, put 1 cup of heavy/whipping cream
into a well-chilled mixing bowl. Add about ½
teaspoon pure vanilla or other pure avored
extract and 1 to 4 tablespoons granulated,
superne or confectioners’ sugar.
Follow the recipe task for WHIPPING CREAM
under the WHISKING program for medium-
soft peaks. Add additional time using the
manual mode, on Speed 12, if stiffer peaks
are desired.
• If you are making a sweetened, avored
whipped cream, begin to slowly add
the sugar and avorings as the cream
becomes soft and billowy in appearance.
• Sugars should be sifted before adding to
whipping cream.
• Stop whipping cream when it has
doubled in volume – it should be smooth,
creamy and thick, forming either soft (for
garnishing desserts, folding into desserts)
or stiff (for topping cakes, desserts, piping
decoratively) peaks.
• Unless stabilized, whipped cream should
be served immediately.
STABILIZED WHIPPED CREAM
Stabilized whipped cream will hold longer in
the refrigerator before using, and it can also be
used for decorating, using a pastry bag and
tip. Using gelatin or a purchased stabilizer will
prevent whipped cream from weeping.
To make stabilized whipped cream, soften
powdered gelatin by sprinkling it over water
in a measuring cup. Let stand 5 minutes to
soften. Then place the measuring cup in a
pan of simmering water and stir over low
heat until gelatin is dissolved. Let cool slightly
before adding to cream – but do not allow to
get cold.
• For 1 cup of cream, use ½ teaspoon gelatin
soaked in 1 tablespoon water.
• For 2 cups of cream, use 1 teaspoon
gelatin soaked in 2 tablespoons water.
• For 8 cups of cream, use 1 tablespoon plus
1 teaspoon gelatin soaked in 8 tablespoons
water.
Follow basic whipping instructions, adding
cooled gelatin mixture to cream all at once
after it has whipped to a slightly thickened
stage.

12
1
• Sifting dry ingredients
• Folding in ingredients, such as mix-ins
• Whipping cream and egg whites
(gradually increasing speed)
7
• “Cutting in” butter to our
(for pastry/pie dough)
• Mashing potatoes/vegetables
• Whipping cream and egg whites
(gradually increasing speed)
2
• Sifting dry ingredients
• Folding in ingredients, such as mix-ins
• Mixing quick breads (mufns, etc.)
• Creaming butter and sugar
• Whipping cream and egg whites
(gradually increasing speed)
8
• “Cutting in” butter to our
(for pastry/pie dough)
• Mashing potatoes/vegetables
• Whipping cream and egg whites
(gradually increasing speed)
3
• Creaming butter and sugar
• Incorporating eggs
• Kneading bread dough
• Whipping cream and egg whites
(gradually increasing speed)
9
• Mashing potatoes/vegetables
• Whipping cream and egg whites
(gradually increasing speed)
4
• Creaming butter and sugar
• Kneading bread dough
• Kneading pasta dough
• “Cutting in” butter to our
(for pastry/pie dough)
• Whipping cream and egg whites
(gradually increasing speed)
10
• Whip potatoes/vegetables
• Whipping cream and egg whites
(gradually increasing speed)
5
• Creaming butter and sugar
• “Cutting in” butter to our
(for pastry/pie dough)
• Mashing potatoes/vegetables
• Whipping cream and egg whites
(gradually increasing speed)
11
• Whip potatoes/vegetables
• Whipping cream and egg whites
(gradually increasing speed)
6
• “Cutting in” butter to our
(for pastry/pie dough)
• Mashing potatoes/vegetables
• Whipping cream and egg whites
(gradually increasing speed)
12
• Whip potatoes/vegetables
• Whipping cream and egg whites
(gradually increasing speed)
SUGGESTED MANUAL SPEED CONTROL GUIDE
NOTE: Do not exceed Speed 5 when preparing yeast doughs, as this would cause damage to the stand mixer.

13
WARRANTY
Limited Three-Year Warranty
This warranty is available to U.S. consumers
only. You are a consumer if you own a Cuisinart
®
Precision Master
®
Pro 5.5-Quart Digital Stand
Mixer that was purchased at retail for personal,
family or household use. Except as otherwise
required under applicable law, this warranty is
not available to retailers or other commercial
purchasers or owners. We warrant that your
Cuisinart
®
Precision Master
®
Pro 5.5-Quart
Digital Stand Mixer will be free of defects
in materials and workmanship under normal
home use for 3 years from the date of original
purchase.
We recommend that you visit our website,
https://cuisinart.registria.com, for a fast,
efcient way to complete your product
registration. However, product registration does
not eliminate the need for the consumer to
maintain the original proof of purchase in order
to obtain the warranty benets. In the event
that you do not have proof of purchase date,
the purchase date for purposes of this warranty
will be the date of manufacture.
CALIFORNIA RESIDENTS ONLY
California law provides that for In-Warranty
Service, California residents have the option
of returning a nonconforming product (A) to
the store where it was purchased or (B) to
another retail store that sells Cuisinart products
of the same type. The retail store shall then,
according to its preference, either repair the
product, refer the consumer to an independent
repair facility, replace the product, or refund
the purchase price less the amount directly
attributable to the consumer’s prior usage of
the product. If neither of the above two options
results in the appropriate relief to the consumer,
the consumer may then take the product to an
independent repair facility, if service or repair
can be economically accomplished. Cuisinart
and not the consumer will be responsible for
the reasonable cost of such service, repair,
replacement, or refund for nonconforming
products under warranty. California residents
may also, according to their preference, return
nonconforming products directly to Cuisinart
for repair or, if necessary, replacement by
calling our Consumer Service Center toll-free at
1-800-726-0190. Cuisinart will be responsible
for the cost of the repair, replacement, and
shipping and handling for such nonconforming
products under warranty.
HASSLE-FREE REPLACEMENT WARRANTY
Your ultimate satisfaction in Cuisinart products
is our goal, so if your Cuisinart
®
Precision
Master
®
Pro 5.5-Quart Digital Stand Mixer
should fail within the generous warranty period,
we will repair it or, if necessary, replace it at
no cost to you. To obtain a return shipping
label, email us at https://www.cuisinart.com/
customer-care/product-return/product-
assistance/product-inquiry. Or call our
Consumer Service Center toll-free at
1-800-726-0190 to speak with a representative.
Your Cuisinart
®
Precision Master
®
Pro 5.5-Quart
Digital Stand Mixer has been manufactured
to the strictest specications and has been
designed for use only in 120-volt outlets
and only with authorized accessories and
replacement parts. This warranty expressly
excludes any defects or damages caused by
attempted use of this unit with a converter,
as well as use with accessories, replacement
parts or repair service other than those
authorized by Cuisinart. This warranty does
not cover any damage caused by accident,
misuse, shipment or other than ordinary
household use. This warranty excludes all
incidental or consequential damages. Some
states do not allow the exclusion or limitation
of these damages, so these exclusions may not
apply to you. You may also have other rights,
which vary from state to state.
Important: If the nonconforming product is to
be serviced by someone other than Cuisinart’s
Authorized Service Center, please remind the
servicer to call our Consumer Service Center
at 1-800-726-0190 to ensure that the problem
is properly diagnosed, the product is serviced
with the correct parts, and the product is still
under warranty.

14
PREPROGRAMMED
RECIPE GUIDE
Program 1: DOUGH
PIZZA DOUGH:
Use this program to prepare yeasted doughs
for pizza or focaccia. After the kneading is
complete, the program will go into a 1 hour
proong mode. First remove the dough hook,
reshape the dough into a smooth ball and
return the dough to the mixing bowl. Cover
the bowl with a damp towel or plastic wrap
and let the dough proof for the allotted time.
After the proong stage, remove the dough
and shape and use as desired.
WHITE BREAD:
Use this program to prepare bread doughs
that call for white all-purpose or bread our.
After the kneading is complete, the program
will go into a 1 hour proong mode. First
remove the dough hook, reshape the dough
into a smooth ball and return the dough to
the mixing bowl. Cover the bowl with a damp
towel or plastic wrap and let the dough proof
for the allotted time. After the proong stage,
remove the dough and shape into the desired
loaf/loaves. Most recipes will then call for
a second or third proof once shaped (to be
completed out of the mixing bowl either on a
baking sheet or in a baking pan).
WHOLE WHEAT:
Use this program to prepare bread doughs
that call for whole wheat or multi-grain ours
(or a mixture of white and whole wheat ours).
After the kneading is complete, the program
will go into a 1 hour proong mode. First
remove the dough hook, reshape the dough
into a smooth ball and return the dough to
the mixing bowl. Cover the bowl with a damp
towel or plastic wrap and let the dough proof
for the allotted time. After the proong stage,
remove the dough and shape into the desired
loaf/loaves. Most recipes will then call for
a second or third proof once shaped (to be
completed out of the mixing bowl either on a
baking sheet or in a baking pan).
Program 2: MIXING
DRY INGREDIENT MIXING
This setting is intended to mix dry ingredients
for just about any recipe. Always use
the chef's whisk for this task to "sift" the
ingredients.
CREAMING
This program is designed for effortlessly
creaming butter and sugars for a number of
different recipes, such as cookie dough or
frostings. Remember to press the PAUSE
feature (press and release the center of the
dial to pause; repeat to continue mixing)
to scrape down the sides of the bowl and
mixing paddle. If additional time is needed
for particular recipes, just repeat
the program.
Program 3: WHISKING
WHIPPING CREAM
This program is designed to whip 2 cups
of heavy cream, to yield about 3½ cups
whipped cream. It will produce medium-soft
peaks at the end of the program. If stiffer
peaks are desired, add additional time by
either using the MANUAL setting or restarting
the WHIPPING CREAM program.
MASH POTATOES
This program is designed to mash 3 to 5
pounds of cooked potatoes. If more or fewer
potatoes are being prepared, keep an eye on
the consistency to be sure they are not being
under- or over-mixed.

15
RECIPES
SAVORIES
Gougères ................................................... 16
Spinach and Feta Soufé .......................... 16
Mashed Potatoes ...................................... 17
Cauliower Purée ...................................... 17
Pasta Dough .............................................. 18
YEAST DOUGHS, BREADS, AND ROLLS
Pretzels with Rosemary and
Flake Sea Salt ............................................ 18
Prosciutto and Fig Pizza
with Goat Cheese ...................................... 19
Pizza Dough .............................................. 19
Gluten-Free Pizza Dough .......................... 20
Basic White Bread ..................................... 20
Molasses Wheat Bread ............................. 21
Multigrain Bread ........................................ 21
Buttery Dinner Rolls .................................. 22
Challah ...................................................... 22
Rustic Italian Bread ................................... 23
COFFEE CAKES, MUFFINS,
AND QUICK BREADS
Blueberry Buttermilk Crumb Cake ............ 24
Banana Chocolate Chip Bread .................. 25
Lemon Bundt Cake ................................... 25
Pecan Sticky Buns .................................... 26
COOKIES AND BARS
Pecan Linzer Cookies ................................ 27
Ginger Cookies .......................................... 27
Strawberry Sandwich Cookies .................. 28
Chocolate Chunk Cookies......................... 29
Cherry and Almond Biscotti ...................... 30
Mocha Sugar Cookies ............................... 30
Black & White Cookies .............................. 31
Power Cookies .......................................... 31
Fudge Brownies ........................................ 32
Blondies ..................................................... 32
Blueberry Cheesecake Bars ...................... 33
PIE CRUSTS AND PIES
Basic Flaky Pastry Dough ......................... 34
Cookie Crumb Crust ................................. 34
Lemon Meringue Pie ................................. 35
Chocolate Cream Pie ................................ 35
CAKES AND CUPCAKES
Golden Yellow Cake .................................. 36
Deep Chocolate Layer Cake ..................... 36
Ginger-Orange Icebox Cake ...................... 37
Birthday Sheet Pan Cake with
No-Fuss Vanilla Frosting............................ 38
Chocolate Chip Cookie Cake .................... 39
Key Lime Mini Cheesecakes ..................... 39
Gluten-Free Golden Cupcakes ................. 40
Angel Food Cake ....................................... 41
FROSTINGS, ICINGS, MOUSSES,
AND FILLINGS
French Buttercream ................................... 41
Swiss Buttercream .................................... 42
Chocolate Frosting .................................... 42
Cream Cheese Frosting ............................. 42
Dairy-Free Vanilla Frosting......................... 43
Royal Icing ................................................. 43
Chocolate Glaze/Ganache ........................ 43
Simple Chocolate Mousse ........................ 43
Whipped Cream ........................................ 44
Whipped Coffee ........................................ 44

16
SAVORIES
Gougères
Gruyère is the classic cheese used in gougères,
but you may substitute your favorite.
Makes about 65, one-inch gougères
½ cup water
4 tablespoons (½ stick) unsalted butter,
cut into 1-inch pieces
½ teaspoon kosher salt, divided
½ teaspoon granulated sugar
1 cup unbleached, all-purpose flour
2 large eggs, plus up to 2 more if necessary
1 cup shredded Gruyère cheese, divided
¼ teaspoon cayenne
¼ teaspoon paprika
Preheat oven to 500°F. Line two baking sheets
with parchment paper. Reserve.
Put the water, butter, ¼ teaspoon of the salt, and
sugar into a medium saucepan set over medium
heat. Once the mixture comes to a boil, remove
from heat and stir in all of the flour. Return to the
burner and raise the heat to medium high. Using
a wooden spoon, continuously stir the mixture
until it “dries out” and a thick, hard film remains
on the bottom of the pot, about 1½ to 2 minutes.
Remove from heat and put flour mixture into the
Cuisinart
®
mixing bowl. Attach the flat mixing
paddle and mix on Speed 3 to release steam
and cool, about 2 to 3 minutes. Once the dough
has cooled (and the bowl is no longer warm),
increase the speed to 4 and add the eggs, one
at a time, until each is fully incorporated before
adding the next. Scrape down the entire bowl
between each addition. Dough is ready when it
becomes a pale yellow color and drops from the
beater in a slow, steady stream. If the dough is
too thick, beat the remaining 2 eggs together
and slowly begin to add them, 1 teaspoon at a
time, with the mixer running. Do not make the
dough too runny or it will not hold its shape. Add
½ cup of Gruyère, the remaining salt and spices
and mix on Speed 2 to incorporate.
Transfer the batter to a large pastry bag fitted
with a small to medium-sized round tip. Pipe the
gougère dough into 1-inch rounds, ½ inch apart
on the prepared baking trays. Top each with a
pinch of the reserved Gruyère. Put in the oven,
and immediately turn the heat down to 300°F.
Bake until gougères are nicely browned,
completely hollow and not wet inside, about 20
minutes. Serve immediately.
Nutritional analysis per gougère:
Calories 29 (61% from fat) • carb. 1g • pro. 1g • fat 2g
sat. fat 1g • chol. 11mg • sod. 39mg • calc. 36mg • fiber 0g
Spinach and Feta Soufflé
Looking for a new idea for a fun and festive side
dish? The classic combination of spinach and feta
comes together in this tasty soufflé.
Makes 12 servings
1 tablespoon unsalted butter, softened,
for coating the dish
½ cup grated Romano cheese, divided
5 large eggs
1 large egg white
5 tablespoons unsalted butter, cut into
1-inch pieces
½ cup unbleached, all-purpose flour
1½ cups whole milk
3 ounces feta cheese
¼ teaspoon kosher salt
¼ teaspoon freshly ground black pepper
¹⁄8 teaspoon freshly ground nutmeg
1 10-ounce package frozen, chopped
spinach, thawed, with any moisture
squeezed out
¼ teaspoon lemon zest
Preheat oven to 400°F. Position racks so that
the soufflé can bake in the middle of the oven.
Generously butter a 2-quart (8-cup) soufflé dish
thoroughly with 1 tablespoon of butter. Sprinkle
¼ cup of the Romano in the dish so that the
bottom and sides are coated. Shake out any
excess. Wipe the rim of the dish with a paper
towel to remove any butter or cheese; reserve.
Separate eggs, putting whites (including extra
white) into the Cuisinart
®
mixing bowl and the
yolks into a separate mixing bowl. Break yolks
up by stirring with a fork. Attach the chef’s whisk
and reserve both bowls containing eggs.
Put the remaining 5 tablespoons of butter in a
saucepan over medium-low heat. Once butter
melts, add the flour to the pan and stir to cook
off any raw flour taste, about 3 to 4 minutes.
While continuously whisking the butter/flour
mixture, slowly add the milk. When all the milk
is added, whisk until a smooth and homogenous
consistency is achieved. Once mixture is
smooth, beat in remaining Romano and feta,

17
salt, pepper, and nutmeg. Stir in the spinach and
lemon zest.
While continuously mixing with a whisk, spoon a
small amount of the milk and spinach mixture into
the yolks. Continue mixing in the remaining
mixture, a third at a time.
Beat egg whites, starting on Speed 1 and
gradually increasing to Speed 12. Whip only until
medium-stiff peaks form, about 1½ minutes total.
Mix a third of the egg whites into the spinach
mixture until evenly combined. Continue by
carefully folding the remaining egg whites in two
additions with a large rubber spatula. Fold just
until combined. Pour mixture into prepared dish
and gently smooth the top to ensure an even rise.
Put into preheated oven and reduce temperature
to 375°F. Bake until golden and just set, about 45
to 50 minutes.
Serve immediately.
Nutritional analysis per serving (½ cup):
Calories 207 (64% from fat) • carb. 9g • pro. 9g • fat 15g
sat. fat 8g • chol. 152mg • sod. 418mg • calc. 175mg
fiber 1g
Mashed Potatoes
This basic recipe is perfect to serve as is, or be creative
and add different flavors, like fresh herbs or cheese.
Makes about 9 cups
5 pounds Yukon Gold potatoes,
peeled and cut into 1-inch pieces
5¹⁄
³
tablespoons unsalted butter, cut into
1-inch pieces
1 cup crème fraîche
½ cup milk (any fat variety works)
1 teaspoon kosher salt
½ teaspoon freshly ground black pepper
Put potatoes into a stockpot and cover with cold
water. Bring to a boil and simmer until potatoes
are tender. Once the potatoes are tender, drain
the potatoes completely and then transfer to the
Cuisinart
®
mixing bowl.
Attach the chef’s whisk and select the WHISKING
setting and the MASH POTATOES program.
Pause to scrape bowl as necessary. Once there is
about 1 minute remaining on the program, pause
and then add the remaining ingredients.
Scrape the bowl once to make sure all ingredients
are evenly incorporated. Taste and adjust
seasoning as desired.
Nutritional analysis per serving (½ cup):
Calories 172 (42% from fat) • carb. 21g • pro. 3g • fat 8g
sat. fat 5g • chol. 27mg • sod. 155mg • calc. 55mg • fiber 3g
Cauliflower Purée
A great, healthy alternative to traditional mashed
potatoes, plus this recipe is dairy free!
Makes 6 cups
1 large head cauliflower, cored,
about 3¼ pounds
1 pound Yukon Gold potatoes, peeled and
cut into 1-inch pieces
¼ cup extra virgin olive oil
2 teaspoons kosher salt
½ teaspoon freshly ground black pepper
Cut cauliflower into large chunks and put into a
large stockpot with the potatoes. Cover with cold
water and place over high heat until water comes
to a boil. Reduce heat to maintain a healthy
simmer and cook until vegetables are tender,
about 25 minutes.
Once tender, drain all water from the vegetables
and place into the Cuisinart
®
mixing bowl.
Attach the chef’s whisk and select the WHISKING
setting and the MASH POTATOES program.
Pause to scrape bowl as necessary. Once there is
about 1 minute remaining on the program, pause
and then add the remaining ingredients.
Scrape the bowl once to make sure all ingredients
are evenly incorporated. Taste and adjust
seasoning as desired.
Nutritional analysis per serving (½ cup):
Calories 142 (56% from fat) • carb. 13g • pro. 3g • fat 10g
sat. fat 1g • chol. 0mg • sod. 394mg • calc. 27mg • fiber 3g

18
Pasta Dough
The combination of “00” and semolina flours give
this dough the perfect bite when cooked, compared
to traditional pasta dough made with just “00” flour.
Makes about 1½ pounds of dough, enough for
8 servings
5 large eggs
2½ cups “00” flour
²⁄
³
cup semolina flour
Put all of the ingredients, in the order listed, into
the Cuisinart
®
mixing bowl. Attach the dough
hook and mix on Speed 5 to combine, about 1
minute. Continue mixing until dough mostly
comes together, about 4 to 6 minutes. At about 5
minutes of mixing, check the texture. If it is too
dry, add water one tablespoon at a time;
alternatively, if it is too wet, add the “00” flour
one tablespoon at a time to desired consistency.
Keep in mind, this dough won’t resemble a
smooth ball, it will only just come together in
large chunks with some possible smaller bits to
knead in by hand. Should any flour or loose,
dry bits be left behind at the bottom of the bowl,
leave them there and do not incorporate into
final dough.
Transfer dough to a lightly floured surface and
knead all dough together into a ball by hand until
smooth and it springs back to the touch, about
2 minutes. Wrap in plastic wrap and let rest at
room temperature before using, at least 20
minutes. Pasta dough can be made and stored in
the refrigerator for up to 3 days. For best results,
use the Cuisinart
®
Pasta Roller and Cutter to
make the perfect lasagna sheets, pappardelle,
linguine or spaghetti.
Nutritional analysis per serving (3 ounces):
Calories 218 (15% from fat) • carb. 35g • pro. 10g • fat 4g
sat. fat 1g • chol. 11mg • sod. 41mg • calc. 13mg • fiber 3g
YEAST DOUGHS, BREADS,
AND ROLLS
Pretzels with Rosemary
and Flake Sea Salt
Homemade soft pretzels are easier than you would
think. The characteristic chewy-malty flavor comes
from a boil and baking soda wash prior to baking.
Makes 12 soft pretzels
1 cup warm water (105°F to 110°F)
1 tablespoon packed light brown sugar
2¼ teaspoons active dry yeast
3 cups bread or unbleached, all-purpose
flour
2 teaspoons fine sea salt
Baking soda wash (1 cup warm water
and 1 teaspoon baking soda whisked
together to dissolve baking soda)
Egg wash (1 large egg and 1 tablespoon
water whisked together)
2 tablespoons chopped fresh rosemary
Flake sea salt, for sprinkling
Put the water, sugar, and yeast in the Cuisinart
®
mixing bowl; stir to dissolve. Let stand 5 to 10
minutes, or until mixture is foamy.
While the yeast is proofing, combine the flour and
salt in a separate mixing bowl.
Once the yeast is foamy, add the flour mixture to
the mixing bowl and fit with the dough hook.
Select the DOUGH setting and the WHITE BREAD
program. At the end of the program, dough
should be smooth and spring back to the touch.
If sticky, add 1 tablespoon of flour at a time until
smooth. Alternatively, if the dough seems too dry,
add 1 tablespoon of water at a time.
When the kneading process of the program is
complete, press the dial to pause the program.
Remove the dough hook and cover bowl with a
damp towel or plastic wrap and let rise for the
allotted 60 minutes (the dough should double in
volume in a room temperature setting, about
70°F. If it has not doubled in this time, allow to
rise for some additional time).
Gently punch dough down and then roll into a
16-inch rope. Divide dough into 12 equal pieces.
Roll each piece into a thin rope. Twist dough into
a pretzel shape by taking the two ends and
crossing them over one another, making sure that

19
the ends hang over the bottom; press firmly to
seal. Place on a baking sheet lined with
parchment paper. Repeat with remaining pieces
of dough, being sure to keep all shaped pretzels
under plastic wrap or a damp towel. Allow
pretzels to rest for about 20 to 30 minutes.
While they are resting, stir together the 1 cup of
water and baking soda in a small bowl. Place a
6-quart saucepan filled with water over high heat
and bring to a boil. Preheat oven to 425°F.
Once pretzels have rested and water comes to a
boil, carefully slide one pretzel into the boiling
water at a time, flipping each after 1½ minutes.
Boil for 3 minutes total. Allow pretzels to drain on
a wire cooling rack.
Dip each pretzel into the stirred baking soda
solution and place on prepared baking sheet.
Lightly brush the pretzels with the egg wash and
sprinkle generously with the rosemary. Bake in
the oven until dark and golden, approximately 10
to 12 minutes.
When pretzels are finished, transfer to a wire
cooling rack and sprinkle generously with the
flake sea salt.
Nutritional analysis per pretzel:
Calories 118 (0% from fat) • carb. 25g • pro. 4g • fat 0g
sat. fat 0g • chol. 0mg • sod. 261mg • calc. 1mg • fiber 1g
Prosciutto and Fig Pizza
with Goat Cheese
These flavors elevate homemade pizza with gourmet
ingredients. It is best with fresh figs, but when those
are out of season or not available, fig jam is a good
substitute (just be sure to be light handed with it or
it can burn).
Makes 1 pizza
½ recipe Pizza Dough (recipe follows)
½ garlic clove
Olive oil, for brushing and drizzling
¹⁄
³
cup crumbled goat cheese
4 fresh figs, thinly sliced (or use ¼ cup
fig jam)
1½ ounces prosciutto, torn into pieces
½ teaspoon fresh thyme leaves
Pinch sea salt
Preheat oven to 450°F with the rack in the middle
position.
Stretch the dough to form a 12-inch circle. Set on
top of a cornmeal-dusted pan. Rub the top of the
dough with the ½ garlic clove and then brush
with olive oil.
Bake the crust for 10 minutes, or until lightly
browned. Top with the cheese. Bake for an
additional 5 minutes. Remove and top with the
figs (or jam, dolloping all over the crust), and
prosciutto. Bake for 1 to 2 additional minutes.
Sprinkle with the thyme leaves and drizzle with
olive oil and pinch of salt. Allow to cool for a few
minutes before slicing and serving.
Nutritional analysis per serving (based on 12 servings):
Calories 114 (22% from fat) • carb. 22g • pro. 9g • fat 3g
sat. fat 0g • chol. 0mg • sod. 209mg • calc. 23mg • fiber 1g
Pizza Dough
This dough can be used for more than just the
obvious, although who doesn’t love homemade
pizza? Visit our website, www.cuisinart.com, for a
variety of pizza, calzone and stuffed bread recipes.
Makes 1½ pounds of dough, enough for two
12-inch pies
1 cup warm water (105°F to 110°F)
1½ teaspoons granulated sugar
2¼ teaspoons active dry yeast
3 cups bread flour (unbleached,
all-purpose flour may be substituted),
plus additional for dusting and rolling
1½ teaspoons kosher salt
1 tablespoon extra virgin olive oil, plus
more for coating the dough
Stir together the warm water, sugar, and yeast in
the Cuisinart
®
mixing bowl. Attach the dough
hook and let stand until the mixture is foamy and
bubbly, about 5 to 10 minutes.
While the yeast is proofing, combine the bread
flour and salt in a separate mixing bowl. Once the
yeast is foamy, add the flour mixture and olive oil
to the bowl. Select the DOUGH setting and the
PIZZA DOUGH program. At the end of the
program, dough should be smooth and spring
back to the touch. If sticky, add 1 tablespoon of
flour at a time until smooth. Alternatively, if the
dough seems too dry, add 1 tablespoon of water
at a time.
When the kneading process of the program is
complete, press the dial to pause the program.
Remove the dough hook and cover bowl with a
damp towel or plastic wrap and let rise for the
allotted 60 minutes (the dough should double in
volume in a room temperature setting, about 70°F.

20
If it has not doubled in this time, allow to rise for
some additional time).
Place dough on a lightly floured surface and form
into desired crust size(s) or as directed by recipe.
NOTE: Dough can be made a day ahead. Place
in a resealable bag and refrigerate after it has
proofed. When ready to prepare, gently punch
down dough and allow it to come to room
temperature before using. Dough can also be
frozen for up to 3 months.
Nutritional analysis per serving (based on 12 servings
for two 12-inch pies):
Calories 114 (9% from fat) • carb. 23g • pro. 3g • fat 1g
sat. fat 0g • chol. 0mg • sod. 286mg • calc. 1mg • fiber 1g
Gluten-Free Pizza Dough
Finally! Pizza that folks with gluten allergies or
sensitivities can cheer about.
Makes about 1 pound of dough, enough for
about two 10-inch pies
¾ cup tapioca flour
¾ cup white rice flour, plus additional for
dusting and rolling
¹⁄
³
cup quinoa flour
¹⁄
³
cup arrowroot flour
1 teaspoon xanthan gum
1 teaspoon kosher salt
2 teaspoons granulated sugar
½ cup rice milk
¼ cup water
2 tablespoons extra virgin olive oil
Put the flours, xanthan gum, salt, and sugar into
the Cuisinart
®
mixing bowl. Attach the dough
hook and mix on Speed 4 to combine. Combine
the rice milk, water and olive oil together in a
liquid measuring cup.
With the stand mixer running on Speed 3, slowly
add the liquid ingredients. Once a dough ball
forms, knead the dough on Speed 4, for about 3
to 4 minutes. Dough should be smooth. If sticky,
add 1 tablespoon of rice flour at a time until
smooth. Alternatively, if the dough seems too dry,
add 1 tablespoon of water at a time.
Since there is no yeast in this dough, it does not
need to rise like a yeasted pizza dough recipe
does. It can rest to relax the dough a bit, but if
not using immediately, store in the refrigerator.
This dough can be refrigerated for up to 3 days
and frozen for up to 3 months. Bring to room
temperature prior to rolling.
When ready to roll, dust a large surface with rice
flour. Divide the dough into 2 equal pieces. Roll
dough out into about a 12-inch circle. Liberally
dust a pizza peel or the bottom of a sheet tray
with rice flour. Transfer pizza dough to the well-
floured surface and decorate with desired pizza
toppings before baking.
Nutritional analysis per serving (based on 12 servings
for two 10-inch pies):
Calories 114 (22% from fat) • carb. 22g • pro. 9g • fat 3g
sat. fat 0g • chol. 0mg • sod. 209mg • calc. 23mg
fiber 1g
Basic White Bread
A basic white bread, great for sandwiches.
Makes two loaves, about 1 pound, 6 ounces each
1²⁄
³
cups warm water (105°F to 110°F)
1½ tablespoons honey
2¼ teaspoons active dry yeast
5½ cups unbleached, all-purpose or bread
flour, divided
½ cup nonfat, dry powdered milk
2 teaspoons kosher salt
4 tablespoons (½ stick) unsalted butter,
cut into ½-inch pieces, room temperature
Nonstick cooking spray
Stir together the warm water, honey and yeast in
the Cuisinart
®
mixing bowl. Attach the dough
hook and let stand until the mixture is foamy and
bubbly, about 5 to 10 minutes.
While the yeast is proofing, combine the flour,
powdered milk and salt in a separate mixing bowl.
Once the yeast is foamy, add the flour mixture
and the butter to the yeast mixture in the bowl.
Select the DOUGH setting and the WHITE
BREAD program. At the end of the program,
dough should be smooth and spring back to the
touch. If sticky, add 1 tablespoon of flour at a
time until smooth. Alternatively, if the dough
seems too dry, add 1 tablespoon of water at a
time.
When the kneading process of the program is
complete, press the dial to pause the program.
Remove the dough hook and cover bowl with a
damp towel or plastic wrap and let rise for the
allotted 60 minutes (the dough should double in
volume in a room temperature setting, about 70°F.
If it has not doubled in this time, allow to rise for
some additional time).

21
Lightly coat two 9-inch loaf pans with cooking
spray. Punch the dough down and divide dough
into 2 equal portions. Shape into loaves and
place in prepared pans. Cover with plastic wrap
and let rise until nearly doubled, about 30 to 45
minutes.
While loaves are rising, preheat oven to 375°F.
When loaves have doubled, bake until the bread
is browned and sounds hollow when tapped,
about 35 to 40 minutes. Remove from oven and
cool on wire rack until cool to touch, remove from
pans and allow to cool completely before slicing.
Nutritional analysis per serving (one 1-ounce slice):
Calories 64 (15% from fat) • carb. 12g • pro. 1g • fat 1g
sat. fat 1g • chol. 3mg • sod. 116mg • calc. 7mg • fiber 1g
Molasses Wheat Bread
A hearty wheat bread flavored lightly with molasses.
Makes two loaves, about 1¼ pounds each
1²⁄
³
cups warm water (105°F to 110°F)
1½ tablespoons molasses
2 teaspoons active dry yeast
3¼ cups whole-wheat flour, divided
2½ cups unbleached, all-purpose or bread
flour, divided
¼ cup nonfat, dry powdered milk
2 teaspoons kosher salt
4 tablespoons (½ stick) unsalted butter,
cut into ½-inch pieces, room temperature
Nonstick cooking spray
Stir together the warm water, molasses, and
yeast in the Cuisinart
®
mixing bowl. Attach dough
hook and let stand until mixture is foamy and
bubbly, about 5 to 10 minutes.
While yeast is proofing, combine 3 cups of the
whole-wheat flour and 1¾ cups of the bread flour
with powdered milk and salt.
Once the yeast mixture proofs, add the flour
mixture to the yeast mixture with the unsalted
butter. Select the DOUGH setting and the WHEAT
BREAD program. At the end of the program,
dough should be smooth and spring back to the
touch. If sticky, add 1 tablespoon of flour at a
time until smooth. Alternatively, if the dough seems
too dry, add 1 tablespoon of water at a time.
When the kneading process of the program is
complete, press the dial to pause the program.
Remove the dough hook and cover bowl with a
damp towel or plastic wrap and let rise for the
allotted 60 minutes (the dough should double in
volume in a room temperature setting, about
70°F. If it has not doubled in this time, allow to
rise for some additional time).
Lightly coat two 9-inch loaf pans with cooking
spray. Punch the dough down and divide into 2
equal portions. Shape into loaves and place in
prepared pans. Cover and let rise until nearly
doubled, about 30 to 45 minutes.
While bread is rising, preheat oven to 375°F. Bake
until bread is browned and sounds hollow when
tapped, about 35 to 40 minutes. Remove from
oven and cool on wire rack until cool to touch;
remove from pans and allow to cool completely
before slicing.
Nutritional analysis per serving (one 2-ounce slice):
Calories 154 (16% from fat) • carb. 28g • pro. 5g • fat 3g
sat. fat 2g • chol. 11mg • sod. 224mg • calc. 33mg • fiber 3g
Multigrain Bread
This nutrient-dense bread with subtle honey flavor
is great for sandwiches.
Makes two loaves, about 1¼ pounds each
1 cup warm water (105°F to 110°F)
1½ tablespoons honey
2¼ teaspoons active dry yeast
3 cups whole-wheat flour
1½ cups unbleached, all-purpose or
bread flour
2 tablespoons vital wheat gluten
2 teaspoons kosher salt
½ cup rolled oats
¼ cup hulled sunflower seeds
¼ cup flax seeds
2 tablespoons wheat germ
2 tablespoons flax oil or vegetable oil
Nonstick cooking spray
Stir together the warm water, honey and yeast
in the Cuisinart
®
mixing bowl. Attach dough hook
and let stand until mixture is foamy and bubbly,
about 5 to 10 minutes.
While yeast is proofing, combine flours, vital
wheat gluten, salt, oats, seeds and wheat germ
in a separate large bowl
Once the yeast mixture proofs, add the flax oil
and flour mixture to the yeast mixture. Select the
DOUGH setting and the WHEAT BREAD program.
At the end of the program the dough should be
smooth and spring back to the touch. If sticky,

22
add 1 tablespoon of the all-purpose flour at a time
until smooth. Alternatively, if the dough seems too
dry, add 1 tablespoon of water at a time.
When the kneading process of the program is
complete, press the dial to pause the program.
Remove the dough hook and cover bowl with a
damp towel or plastic wrap and let rise for the
allotted 60 minutes (the dough should double in
volume in a room temperature setting, about
70°F. If it has not doubled in this time, allow to
rise for some additional time).
Lightly coat two 9-inch loaf pans with cooking
spray. Punch dough and divide into 2 equal
portions. Shape into loaves and place in prepared
pans. Cover and let rise until nearly doubled,
about 30 to 45 minutes.
While bread is rising, preheat oven to 375°F. Bake
loaves until bread is browned and sounds hollow
when tapped, about 35 to 40 minutes. Remove
from oven and cool on wire rack until cool to
touch; remove from pans and allow to cool
completely before slicing.
Nutritional analysis per serving (one 2-ounce slice):
Calories 137 (23% from fat) • carb. 24g • pro. 1g • fat 4g
sat. fat 0g • chol. 0mg • sod. 215mg • calc. 15mg • fiber 3g
Buttery Dinner Rolls
The classic dinner roll we all remember from
Sunday or holiday dinners.
Makes 16 dinner rolls
¾ cup whole milk
8 tablespoons (1 stick) unsalted butter,
cut into 1-inch pieces
1 teaspoon kosher salt
4 tablespoons granulated sugar, divided
¼ cup warm water (105°F to 110°F)
2¼ teaspoons active dry yeast
1 large egg
4 cups bread flour, plus additional for
dusting and rolling
Unsalted butter for greasing pan
1 tablespoon whole milk
1 tablespoon unsalted butter, melted
Scald milk (heat until just bubbling around
edges). Stir in unsalted butter, salt, and 3
tablespoons of sugar. Let cool until just warm
(105°F to 110°F).
Stir together the warm water, remaining
tablespoon of sugar, and yeast in the Cuisinart
®
mixing bowl. Attach the dough hook and let
stand until the mixture is foamy and bubbly,
about 5 to 10 minutes.
While the yeast is proofing, measure out the
bread flour in a separate mixing bowl. Once the
yeast is foamy and the milk mixture is at the
appropriate temperature, add the milk mixture,
egg and flour to the yeast mixture.
Select the DOUGH setting and the WHITE BREAD
program. At the end of the program the dough
should be smooth. If sticky, add 1 tablespoon of
flour at a time until smooth. Alternatively, if the
dough seems too dry, add 1 tablespoon of water
at a time.
When the kneading process of the program is
complete, press the dial to pause the program.
Remove the dough hook and cover bowl with a
damp towel or plastic wrap and let rise for the
allotted 60 minutes (the dough should double in
volume in a room temperature setting, about
70°F. If it has not doubled in this time, allow to
rise for some additional time).
Preheat oven to 375°F. Lightly butter a 9-inch
round baking pan. Divide the dough into 16 equal
pieces (about 2¼ ounces each). Roll into balls
and arrange in the prepared pan. Cover with
plastic wrap and let rise until about doubled,
about 30 to 45 minutes.
Combine remaining tablespoon of milk and butter
and heat until butter is melted. Just before
baking, gently brush rolls with milk and melted
butter. Bake until golden brown, about 25 to 30
minutes (internal temperature of rolls will be
200°F when tested with an instant-read
thermometer). Remove from oven and cool on
wire rack until cool to touch; remove from pan
and allow to cool completely.
Nutritional analysis per roll:
Calories 183 (35% from fat) • carb. 26g • pro. 4g • fat 7g
sat. fat 5g • chol. 34mg • sod. 153mg • calc. 13mg • fiber 1g
Challah
Our challah makes the best French toast — that’s if
you have any left over, of course!
Makes one loaf
¾ cup warm water (105°F to 110°F)
2¼ teaspoons active dry yeast
4 tablespoons granulated sugar, divided
8 tablespoons (1 stick) unsalted butter,

23
melted and cooled to room temperature
2 large eggs, room temperature
4¹⁄
³
cups unbleached, all-purpose flour
2 teaspoons kosher salt
Nonstick cooking spray
Egg wash (1 large egg and 1 tablespoon
water whisked together)
Stir together the warm water, yeast, and 2
teaspoons of the sugar into the Cuisinart
®
mixing
bowl. Attach the dough hook and let stand until
foamy, about 5 minutes.
Once the yeast has proofed, add the melted
butter, eggs, flour and salt to the mixing bowl.
Select the DOUGH setting and the WHITE BREAD
program. At the end of the program the dough
should be soft and spring back to the touch.
If sticky, add 1 tablespoon of flour at a time until
smooth. Alternatively, if the dough seems too dry,
add 1 tablespoon of water at a time.
When the kneading process of the program is
complete, press the dial to pause the program.
Remove the dough hook and cover bowl with a
damp towel or plastic wrap and let rise for the
allotted 60 minutes (the dough should double in
volume in a room temperature setting, about
70°F. Enriched doughs, meaning ones with
additional fat/butter/milk/sugar, take longer to rise
than traditional breads. It is likely that this bread
dough will need an additional 30 minutes or so).
Transfer dough to a lightly floured surface and
punch down. Divide dough into 3 equal pieces.
Use your hands to roll each piece into a cylinder
about 1½ x 14 inches. Place the cylinders side by
side on the prepared tray. Braid loosely from one
end. Gently pull and taper each end to a point,
then pinch and tuck under loaf. Cover with plastic
wrap coated with cooking spray and let rise until
doubled in size, about 45 minutes. Preheat oven
to 375°F with the rack positioned in the lower
third of the oven. Brush the loaf with the egg
wash. Bake until loaf is browned and sounds
hollow when tapped, about 30 to 40 minutes.
Remove from oven and cool on wire rack.
Nutritional analysis per serving (one 2-ounce slice):
Calories 119 (61% from fat) • carb. 18g • pro. 3g • fat 4g
sat. fat 2g • chol. 30mg • sod. 202mg • calc. 4mg • fiber 0g
Rustic Italian Bread
This airy and crusty loaf proves that making
artisan-style bread at home can be so simple.
Makes 1 round loaf
1 cup warm water (105°F to 110°F)
¾ teaspoon granulated sugar
1¾ teaspoons active dry yeast
3 cups bread flour
¹⁄
³
cup wheat bran
1½ teaspoons kosher salt
2 tablespoons extra virgin olive oil
Egg wash (1 egg and 1 tablespoon water
whisked together)
Stir together the warm water, sugar and yeast in
the Cuisinart
®
mixing bowl. Attach the dough
hook and let stand until the mixture is foamy and
bubbly, about 5 to 10 minutes.
While the yeast is proofing, combine the bread
flour, wheat bran and salt in a separate mixing
bowl.
Once the yeast is foamy, add the flour mixture
and the olive oil to the yeast mixture. Select the
DOUGH setting and the WHITE BREAD program.
At the end of the program the dough should be
smooth and spring back to the touch. If sticky,
add 1 tablespoon of flour at a time until smooth.
Alternatively, if the dough seems too dry, add 1
tablespoon of water at a time.
When the kneading process of the program is
complete, press the dial to pause the program.
Remove the dough hook and cover bowl with a
damp towel or plastic wrap and let rise
for the allotted 60 minutes (the dough should
double in volume in a room temperature setting,
about 70°F. If it has not doubled in this time, allow
to rise for some additional time).
Punch the dough down, reshape again into a ball,
cover again and allow to rise until once again
doubled in size (the additional rise at this stage
helps in building the flavor of the bread).
Gently punch down the dough and shape into
a tight, large round. Put the round on a baking
sheet lined with parchment paper and loosely
cover with plastic wrap. Allow to rise one last
time, for about 30 minutes.
While bread is rising, preheat oven to 400°F.
When ready to bake, cut an “X” into the top of
the loaf with a serrated knife, brush with egg
wash and bake for about 30 minutes, until bread

24
is nicely browned and has an internal
temperature of 200°F. Remove from oven and
cool completely on a wire rack before slicing.
Nutritional analysis per serving (one 1.5-ounce slice):
Calories 95 (15% from fat) • carb. 17g • pro. 3g • fat 2g
sat. fat 0g • chol. 12mg • sod. 219mg • calc. 2mg
fiber 1g
COFFEE CAKES, MUFFINS,
AND QUICK BREADS
Blueberry Buttermilk
Crumb Cake
This coffee cake is guaranteed to receive
rave reviews.
Makes one cake, 16 servings
Nonstick cooking spray
Crumb Topping:
1¾ cups unbleached, all-purpose flour
¾ cup packed light brown sugar
12 tablespoons (1½ sticks) unsalted butter,
cut into 1-inch pieces, room temperature
2 teaspoons ground cinnamon
¾ teaspoon pure vanilla extract
¼ teaspoon kosher salt
Buttermilk Cake:
2²⁄
³
cups unbleached, all-purpose flour
¾ teaspoon baking soda
¾ teaspoon cream of tartar
½ teaspoon kosher salt
10²⁄
³
tablespoons (1¹⁄
³
sticks) unsalted
butter, cut into 1-inch pieces, room
temperature
1¹⁄
³
cups granulated sugar
2 large eggs, room temperature
¾ teaspoon pure vanilla extract
²⁄
³
cup buttermilk
3 cups blueberries
Preheat oven to 350°F. Lightly coat a 13 x 9-inch
baking pan with cooking spray; reserve.
To prepare the Crumb Topping: Put all of the
crumb topping ingredients in the Cuisinart
®
mixing
bowl. Attach the flat mixing paddle and mix on
Speed 2 to break up, scrape if necessary and then
turn up the mixer to Speed 4 until the mixture
resembles large crumbs, stopping to scrape bowl
as necessary. Remove and reserve in refrigerator
until ready to use.
To prepare the Buttermilk Cake: Put the flour,
baking soda, cream of tartar, and salt into the
mixing bowl. Using the chef's whisk, select the
MIXING setting and the DRY INGREDIENT
MIXING program to combine the ingredients.
Transfer to another bowl and reserve.
Put the butter and granulated sugar in the
Cuisinart
®
mixing bowl. Attach the flat mixing
paddle and select the MIXING setting and the
CREAMING program. Press the dial to pause the
program as necessary to scrape the entire bowl
and paddle. The mixture should be light and fluffy
by the end of the program. It may not need the
full program time, so keep an eye on the mixture
and stop when it is nice and creamy. Once the
butter and sugar are nicely mixed, stop and
scrape the bowl well. Start mixing on Speed 3
and add the eggs, one at a time, and the vanilla
extract and mix until each is fully incorporated
and batter is smooth. Scrape the entire bowl.
Add half the reserved dry mixture and half the
buttermilk. Mix on Speed 1 until just blended.
Scrape the entire bowl. Add remaining dry
ingredients and buttermilk. Continue mixing on
Speed 1 until smooth and blended.
Pour batter into prepared pan and smooth over
top. Sprinkle blueberries evenly over the top;
lightly press blueberries into batter (submerging
blueberries slightly). Crumble any large clumps in
the crumb mixture and sprinkle the crumb
mixture evenly over the blueberries.
Bake in preheated oven until crumbs are evenly
golden brown and tester is clean when inserted
in center of pan, about 60 to 65 minutes. Remove
from oven and cool on a wire rack before cutting
in pan.
Nutritional analysis per serving (based on 16 servings):
Calories 381 (38% from fat) • carb. 55g • pro. 5g • fat 16g
sat. fat 12g • chol. 70mg • sod. 178mg • calc. 16mg • fiber 1g

25
Banana Chocolate Chip
Bread
The secret to soft banana bread is a light mixing
hand. Although the mixer is tough enough for
your heaviest breads, Speed 1 ensures delicate
mixing and folding.
Makes 2 loaves
Softened butter or nonstick cooking
spray for pans
2 cups unbleached, all-purpose flour
1 cup whole-wheat flour
1 teaspoon baking soda
1 teaspoon fine sea salt
½ teaspoon ground cinnamon
1 cup toasted, chopped walnuts
1 cup chocolate chips
3 large eggs
1 cup granulated sugar
1¹⁄
³
cups vegetable oil
1½ cups mashed banana (about 3 to 4
medium)
½ cup buttermilk
1 teaspoon pure vanilla extract
Preheat oven to 350°F with the rack in the middle
position. Lightly coat two standard 9-inch loaf
pans with softened butter or nonstick cooking
spray.
Put the flours, baking soda, salt, cinnamon,
walnuts, and chocolate chips into the mixing
bowl. Using the chef’s whisk, select the MIXING
setting and the DRY INGREDIENT MIXING
program to combine the ingredients. Transfer to
another bowl and reserve.
Add the eggs and sugar to the mixing bowl.
Fitted with the chef’s whisk, start mixing on
Speed 1 and gradually increase to Speed 7.
Once the mixture is well combined and it seems
as though most of the sugar has dissolved, about
3 minutes, decrease to Speed 4 and then very
slowly add the oil. The mixture will become light
and thickened, this will take about 2 minutes.
Once fully incorporated, pause and add the
mashed bananas, buttermilk, and vanilla
extract and continue to mix on Speed 4 until
homogenous. Press the dial to pause the
program to scrape down the sides and bottom
of the bowl as necessary, and then add the dry
ingredients. Reduce to Speed 2 and mix until
just combined. Press and hold the dial to stop
the mixer.
Pour batter into the prepared pans. Bake in the
preheated oven for about 50 to 55 minutes, or
until a cake tester comes out clean.
Nutritional analysis per serving (based on 16 servings):
Calories 381 (38% from fat) • carb. 55g • pro. 5g • fat 16g
sat. fat 12g • chol. 70mg • sod. 178mg • calc. 16mg
fiber 1g
Lemon Bundt Cake
A bright take on the classic Bundt cake. The glaze is
not to be skipped; it locks in the moisture that keeps
this cake fresh tasting for days.
Makes one 10-inch Bundt cake; 16 servings
Cake:
Softened butter and flour for dusting Bundt pan
3 cups unbleached, all-purpose flour
2 teaspoons baking powder
1¼ teaspoons fine sea salt
2½ sticks unsalted butter, room temperature
and each cut into 4 pieces
2 cups granulated sugar
¹⁄
³
cup grated lemon zest (from about
5 medium to large lemons)
3 tablespoons fresh lemon juice
4 large eggs, room temperature
2 large egg yolks, room temperature
1¹⁄
³
cups sour cream, room temperature
Lemon Glaze:
1 cup confectioners’ sugar, sifted
3 tablespoons heavy cream
3 tablespoons fresh lemon juice
(strained of all pulp)
Coat a standard (10-inch) Bundt pan with
softened butter and lightly dust with flour;
reserve. Preheat oven to 350°F with the rack
in the lower third position.
Put the flour, baking powder, and salt into the
Cuisinart
®
mixing bowl. Using the chef’s whisk,
select the MIXING setting and the DRY
INGREDIENT MIXING program to combine the
ingredients. Transfer to a separate mixing bowl;
reserve.
Put the butter and sugar into the mixing bowl.
Using the mixing paddle, select the MIXING
setting and the CREAMING program. Press the
dial to pause the program as necessary to scrape
the entire bowl and paddle. The mixture should
be light and fluffy by the end of the program.
It may not need the full program time, so keep

26
an eye on the mixture and stop when it is nice
and creamy. Once the butter and sugar are nicely
mixed, stop and scrape the bowl well. Add the
lemon zest and mix for an additional 30 seconds
on Speed 5. Scrape down bowl and paddle.
Combine the lemon juice, eggs, yolks, and sour
cream in a small bowl. Whisk well to combine.
While mixing on Speeds 2 to 3, gradually add
one-third of the dry ingredients to the butter/
sugar mixture and then half of the wet
ingredients, alternating until all of the ingredients
are added and well mixed, pausing to scrape
down as needed.
Transfer the batter to the prepared Bundt pan.
Smooth to the edges of the pan and tap a few
times on the counter to remove any air bubbles.
Put in the preheated oven and bake until the
cake is set and a cake tester comes out mostly
clean, about 1 hour.
Allow cake to cool in pan on a cooling rack until
the pan is cool to the touch and then remove
from the pan.
While cake is fully cooling, prepare the glaze.
Put all of the glaze ingredients into a small bowl.
Whisk well until completely smooth, adding more
sifted sugar or cream to achieve desired
consistency.
Once the cake is cool, place it on the cooling
rack atop a baking pan (or foil or parchment,
something that will catch excess glaze). Drizzle or
spread over cake as desired. Allow glaze to set
and cake to cool completely before cutting and
serving.
Nutritional analysis per serving:
Calories 403 (45% from fat) • carb. 51g • pro. 5g • fat 20g
sat. fat 13g • chol. 111mg • sod. 185mg • calc. 420mg
fiber 1g
Pecan Sticky Buns
The Cuisinart
®
Stand Mixer makes it easier than
you’d ever imagine to make a large amount of light,
silky smooth dough needed for sticky buns.
Makes 18 sticky buns
Sweet Dough:
¹⁄
³
cup warm water (105°F to 110°F)
¹⁄
³
cup granulated sugar, divided
2¼ teaspoons active dry yeast
½ cup fat-free milk
5¹⁄
³
tablespoons unsalted butter, cut into
1-inch pieces, room temperature
1 large egg
3½ cups unbleached, all-purpose flour
¾ teaspoon kosher salt
Topping:
¾ cup pecans, chopped and divided
¹⁄
³
cup granulated sugar
¾ teaspoon ground cinnamon
1½ tablespoons unsalted butter, room
temperature
½ cup raisins
5¹⁄
³
tablespoons (²⁄
³
stick) unsalted butter,
melted
½ cup packed light brown sugar
Nonstick cooking spray
To make dough: Stir together the warm water,
1 teaspoon of the sugar and the yeast in the
Cuisinart
®
mixing bowl. Let stand until foamy,
about 5 minutes.
Once the yeast has proofed, add the milk, butter,
and egg. Attach the flat mixing paddle and mix
on Speed 2 to break up egg. Add the flour and
salt, and mix to just combine. Remove flat
mixing paddle and attach dough hook. Select the
DOUGH setting and the WHITE BREAD program.
At the end of the program the dough should be
smooth and spring back to the touch. If sticky,
add 1 tablespoon of flour at a time until smooth.
Alternatively, if the dough seems too dry, add 1
tablespoon of water at a time.
At the end of the kneading process, press the
dial to pause the program. Remove the dough
hook and cover bowl with a damp towel or
plastic wrap and let rise for the allotted 60
minutes (the dough should double in volume in a
room temperature setting, about 70°F. Enriched
doughs, meaning ones with additional fat/butter/
milk/sugar, take longer to rise than traditional
breads. It is likely that this bread dough will need
an additional 30 minutes or so).
To make topping/assemble buns: In a small bowl,
combine half of the pecans, sugar and cinnamon.
Reserve. Transfer dough to a lightly floured
surface and punch dough down. Roll into a
20 x 12-inch rectangle. Spread with the softened
butter (1½ tablespoons), sprinkle with cinnamon/
sugar mixture and top with raisins. Beginning on
long side (this is easiest if it is the side closest to
you), roll dough up tightly and pinch seam to
seal. Using a sharp knife, cut into 18 slices
(about ¾ inch thick). Pour melted butter evenly

27
into a 13 x 9-inch baking pan. Sprinkle brown
sugar and remaining pecans over butter. Place
buns, cut side up, in pan. Cover with plastic wrap
coated with cooking spray and let rise in a warm
place for 40 minutes. While buns are rising,
preheat oven to 375°F.
Bake until tops are well browned, about 30
minutes. Remove from oven and invert pan
immediately onto serving plate, allowing sugar
mixture to drip onto buns. Scrape any remaining
sugar/nut mixture onto buns and serve warm.
Nutritional analysis per sticky bun:
Calories 259 (38% from fat) • carb. 36g • pro. 4g • fat 11g
sat. fat 5g • chol. 32mg • sod. 109mg • fiber 1g
COOKIES AND BARS
Pecan Linzer Cookies
This shortbread is perfect for linzer cookies.
Makes about 45 cookie sandwiches
3 cups unbleached, all-purpose flour,
plus additional for rolling
½ teaspoon fine sea salt
20 tablespoons (2½ sticks) unsalted butter,
cut into 1-inch pieces, room temperature
¼ cup toasted pecan halves, finely ground
¼ cup granulated sugar
1 cup confectioners’ sugar, sifted, plus
extra for dusting
1 teaspoon pure vanilla extract
¾ cup seedless raspberry jam
Combine the flour and salt in a small bowl.
Reserve.
Put the butter, finely ground pecans and
granulated sugar into the Cuisinart
®
mixing bowl.
Insert the flat mixing paddle and select the
MIXING setting and the CREAMING program.
Press the dial to pause the program as necessary
to scrape the entire bowl and paddle. The mixture
should be light and fluffy by the end of the
program. It may not need the full program time,
so keep an eye on the mixture and stop when it
is nice and creamy. Once the butter and sugar
are nicely mixed, stop and scrape the bowl well.
Set to Speed 2 and add the confectioners’ sugar.
Mix until combined. Scrape down the bowl.
Add the flour mixture in 3 batches and the vanilla
extract; mix until fully combined and smooth,
about 2 to 3 minutes. Scrape down the bowl as
necessary. Dough should be one large, smooth
ball when done.
Remove dough from bowl and divide into two equal
pieces. Form each into a disk and wrap in plastic
wrap and refrigerate for at least 2 hours.
Preheat oven to 350°F. Line two baking sheets
with parchment paper. Reserve.
Remove one dough disk from refrigerator.
On a floured surface, roll the dough into an
even ¹⁄8-inch thickness. Using a 2-inch round,
fluted cookie cutter, cut rounds and place on
parchment-lined baking sheet. Roll out and cut
any remaining dough scraps in the same manner
and transfer to the lined baking sheets. Bake until
cookies are very lightly browned on the edges,
about 16 to 20 minutes. Remove from oven and
cool completely in pan. While the first batch of
cookies is baking, roll out and cut the second
dough disk with the same 2-inch cookie cutter.
Make a second cut with a ¾-inch round cookie
cutter in the center of each cookie. Roll and cut
remaining scraps. Transfer cookies to baking
sheets and bake as directed above
Warm jam either in microwave or on stovetop
until just liquid – jam will be too runny if it is too
hot. Once the cookies have cooled, spread about
¾ teaspoon of warm jam on the center of the
solid cookie. Then place the cutout cookie on
top. Sprinkle with confectioners’ sugar. Store in
an airtight container with cookie layers separated
by wax paper.
Nutritional analysis per 1 cookie sandwich:
Calories 107 (47% from fat) • carb. 13g • pro. 1g • fat 6g
sat. fat 4g • chol. 13mg • sod. 26mg • calc. 1mg • fiber 0g
Ginger Cookies
Not your ordinary ginger cookie. We up the zing
with chopped, crystallized ginger in these chewy and
spicy treats.
Makes about 2½ dozen cookies
2¼ cups unbleached, all-purpose flour
1 teaspoon baking soda
1 tablespoon ground ginger
1 teaspoon ground cinnamon
½ teaspoon ground allspice
¾ teaspoon fine sea salt
¼ cup finely chopped crystallized ginger
(omit if preparing dough for the
Ginger-Orange Icebox Cake on page 37)

28
12 tablespoons (1½ sticks) unsalted butter,
cut into 1-inch pieces, room temperature
¼ cup molasses
¾ cup packed light brown sugar
¼ cup granulated sugar
1 large egg, room temperature
1 teaspoon pure vanilla extract
¹⁄
³
cup turbinado sugar, for rolling
Preheat oven to 350°F with racks in the lower
and upper thirds of the oven. Line two baking
sheets with parchment paper.
Put the flour, baking soda, spices, salt, and
chopped ginger into the Cuisinart
®
mixing bowl.
Using the chef’s whisk, select the MIXING setting
and the DRY INGREDIENT MIXING program to
combine the ingredients. Remove and reserve in
a separate mixing bowl.
Put the butter and molasses into the mixing bowl.
Using the mixing paddle, select the MIXING
setting and the CREAMING program. Once the
butter and molasses are well mixed, gradually
add the sugars. Scrape down the sides of the
bowl before adding the sugars. Press the dial to
pause the program as necessary to scrape the
entire bowl and paddle. The mixture should be
light and fluffy by the end of the program. It may
not need the full program time, so keep an eye
on the mixture and stop when it is nice and
creamy. Once the butter, molasses and sugars
are nicely mixed, stop and scrape the bowl well.
Set to Speed 3, add the egg and the vanilla
extract. Stop to scrape down well and then add
the dry ingredients and mix on Speed 2 until just
combined.
Put the turbinado sugar into a shallow bowl or
baking pan.
Scoop the dough into evenly sized, golf-ball
rounds. Roll in the turbinado sugar and then
place the sugared dough on prepared baking
sheets. Gently press each round down with the
bottom of a clean glass.
Bake in the preheated oven until the edges are
set but the centers are still soft, about 12 to 15
minutes. Allow pans to cool before baking
remaining dough.
Nutritional analysis per cookie:
Calories 96 (23% from fat) • carb. 18g • pro. 1g • fat 2g
sat. fat 2g • chol. 12mg • sod. 99mg • calc. 10mg • fiber 0g
Strawberry Sandwich
Cookies
The great part about these cookies is that you can
enjoy the taste of summer fruit any time of year,
thanks to the intense flavor in freeze-dried
strawberries. Adjust the amount in the filling if a
richer strawberry flavor is desired.
Makes about 2 dozen sandwich cookies
Cookie Dough:
1¾ cups unbleached, all-purpose flour
½ teaspoon fine sea salt
16 tablespoons (2 sticks; ½ pound)
European-style, unsalted butter, cut into
8 pieces, room temperature
¹⁄
³
cup granulated sugar
¼ cup confectioners’ sugar, sifted
½ teaspoon pure vanilla extract
1 cup freeze-dried strawberries, finely
ground and sifted*
2 large egg yolks, room temperature
Strawberry Filling:
4 tablespoons unsalted butter, room
temperature
2 ounces cream cheese, room temperature
2 cups confectioners’ sugar, sifted
Pinch fine sea salt
2 tablespoons whole milk, room
temperature
¼ teaspoon pure vanilla extract
½ cup freeze-dried strawberries, finely
ground and sifted*
Prepare the cookie dough. Put the flour and salt
into the Cuisinart
®
mixing bowl. Using the chef's
whisk, select the MIXING setting and the
DRY INGREDIENT MIXING program to combine
the ingredients. Transfer to a separate bowl
and reserve.
Put the butter into the mixing bowl. Using the
mixing paddle, select the MIXING setting and the
CREAMING program. Once the butter seems
nicely softened, gradually add the sugars and
vanilla extract. Press the dial to pause the
program as necessary to scrape the entire bowl
and paddle. The mixture should be light and fluffy
by the end of the program. It may not need the
full program time, so keep an eye on the mixture
and stop when it is nice and creamy. Once the
butter and sugars are nicely mixed, stop and
scrape the bowl well.

29
Set to Speed 2, then add the egg yolks and mix
until combined. Add the dry ingredients and mix
on Speed 2 until evenly mixed. Add the ground
strawberries and mix, still on Speed 2, until fully
combined.
Divide dough into two discs. Wrap in wax
paper/parchment, then wrap well in plastic wrap.
Refrigerate overnight.
Take dough out of fridge to soften slightly.
Preheat oven to 350°F with two racks in the
lower and upper thirds of the oven. Line two
rimmed baking sheets with parchment paper.
Roll dough out to ¼-inch thickness and use
a 1½-inch round cutter to form small discs.
Put onto baking sheets and chill for about
10 minutes.
Bake chilled cookies for about 12 minutes, until
just set, rotating pans if necessary – you want to
avoid browning of any kind. Cool cookies
completely.
While cookies are cooling, prepare the filling.
Be sure that the mixing bowl and paddle are
clean and dry. Put the butter and cream cheese
into the mixing bowl. Using the mixing paddle,
mix on Speeds 3 to 4 to soften and fully combine,
about 1 minute. Add the sugar, salt, milk, and
vanilla extract and mix, starting on Speed 1 and
gradually increasing to Speed 6 until light and
fluffy. Press the dial to pause the program as
necessary to scrape the entire bowl and paddle.
Add the ground strawberries and mix on Speed 3
until fully incorporated.
Once cookies are fully cooled, scoop filling onto
the bottom of one cookie, about 1 tablespoon,
and then top with another cookie to make a
sandwich. Repeat with remaining cookies.
NOTE: This recipe makes more filling than
needed. It can be used on top of cupcakes or
cakes, or frozen for up to 2 months for future
cookies.
* A spice or coffee grinder is the best way to
achieve the finest grind.
Nutritional analysis per cookie sandwich:
Calories 201 (47% from fat) • carb. 25g • pro. 1g • fat 10g
sat. fat 7g • chol. 43mg • sod. 57mg • calc. 8mg • fiber 1g
Chocolate Chunk Cookies
Chunks of three different types of chocolate make
these cookies quite decadent.
Makes about 48 cookies
3 cups unbleached, all-purpose flour
1 teaspoon baking soda
½ teaspoon kosher salt
16 tablespoons (2 sticks) unsalted butter,
cut into 1-inch pieces, room temperature
1 cup packed light brown sugar
½ cup granulated sugar
2 large eggs, room temperature
1½ teaspoons pure vanilla extract
4 ounces bittersweet chocolate, broken
into ½-inch pieces (may substitute with
½ cup chocolate chips)
4 ounces semisweet chocolate, broken
into ½-inch pieces (may substitute with
½ cup chocolate chips)
4 ounces milk chocolate, broken into
½-inch pieces or (may substitute with
½ cup chocolate chips)
Line two baking sheets with parchment paper;
reserve.
Put the flour, baking soda, and salt into the
Cuisinart
®
mixing bowl. Attach the chef’s whisk
and select the MIXING setting and the DRY
INGREDIENT MIXING program to combine the
ingredients. Remove and reserve in a separate
bowl.
Put the butter and sugars into the mixing bowl.
Attach the flat mixing paddle and select the
MIXING setting and the CREAMING program.
Press the dial to pause the program as necessary
to scrape the entire bowl and paddle. The mixture
should be light and fluffy by the end of the
program. It may not need the full program time,
so keep an eye on the mixture and stop when it
is nice and creamy. Once the butter and sugars
are nicely mixed, stop and scrape the bowl well.
Set to Speed 3 and add the eggs, one at a time,
and the vanilla extract, allowing each egg to fully
incorporate before adding the next. Scrape the
entire bowl. With the mixer running on Speed 2,
add the dry ingredients and mix until just
combined. Scrape the entire bowl well and then
add the chocolate. Increase to Speed 3 and mix
just until fully incorporated.
Drop well-rounded scoops (about 1½ tablespoons
or use #40 ice cream scoop) onto the prepared

30
pans. Cover with plastic wrap and refrigerate for
at least 2 hours.
When ready to bake, preheat oven to 350°F. Bake
until cookies are nicely browned at the edges, but
still a bit soft in the center, about 12 to 16
minutes. Remove from oven and cool in pan;
transfer to a wire rack to cool completely.
TIP: For evenly baked cookies, be sure to rotate
baking trays halfway through baking time.
Nutritional analysis per cookie:
Calories 170 (47% from fat) • carb. 22g • pro. 2g • fat 9g
sat. fat 4g • chol. 22mg • sod. 151mg • calc. 5mg • fiber 1g
Cherry and Almond Biscotti
These biscotti resemble the more traditional dunking
biscuit − they have an excellent crunch.
Makes 96 biscotti
2¾ cups unbleached, all-purpose flour,
plus additional for rolling
2 cups granulated sugar
1 teaspoon baking powder
Pinch fine sea salt
3 large eggs
2 large yolks
½ cup tart dried cherries
½ cup almonds, toasted and roughly
chopped
Preheat oven to 350°F. Line two baking sheets
with parchment paper. Reserve.
Put the flour, sugar, baking powder and salt in
the Cuisinart
®
mixing bowl. Using the chef’s
whisk, select the MIXING setting and the DRY
INGREDIENT MIXING program to combine the
ingredients. When it’s done, switch to the mixing
paddle and, while mixing on Speed 3, add the
eggs and then yolks, one at a time, allowing each
to fully incorporate before adding the next. Scrape
down the entire bowl well. Add the cherries and
chopped almonds and mix until just incorporated.
Dough may be sticky – this is OK.
Turn dough out onto a floured surface and divide
into four equal pieces. Shape each piece into a
rectangular log that is 12 x 1½ x 1½ inches. Place
2 logs on each prepared baking sheet. Bake in
preheated oven until golden, about 35 minutes.
Remove from oven and, when cool to touch, slice
each log into about 25 ½-inch slices. Put back
into oven and bake until golden, about 30
minutes. Remove from oven and cool in pan;
transfer to a wire rack to cool completely.
Once cool, serve or store in an airtight container.
Nutritional analysis per biscotti:
Calories 82 calories (66% from fat) • carb. 3g • pro. 4g
fat 6g • sat. fat 4g • chol. 19mg • sod. 97mg • calc. 116mg
fiber 0g
Mocha Sugar Cookies
These sugar cookies have a deep mocha flavor.
Makes about 45 cookies
3 cups unbleached, all-purpose flour
2 tablespoons unsweetened cocoa powder
1½ teaspoons baking powder
¾ teaspoon kosher salt
½ teaspoon baking soda
2 tablespoons milk (may use low-fat)
2 tablespoons instant espresso powder
2 tablespoons pure vanilla extract
24 tablespoons (3 sticks) unsalted butter,
cut into ½-inch pieces, room temperature
1½ cups granulated sugar, divided
1 large egg
1 large egg yolk
½ cup turbinado sugar for rolling
(granulated sugar may be substituted)
Preheat oven to 350°F. Line two baking sheets
with parchment paper; reserve.
Put the flour, cocoa, baking powder, salt, and
baking soda into the Cuisinart
®
mixing bowl.
Using the chef’s whisk, select the MIXING setting
and the DRY INGREDIENT MIXING program to
combine the ingredients. Remove and reserve in
a separate bowl.
Put the milk, espresso powder and vanilla extract
into a small bowl. Stir to combine; reserve.
Put the butter and sugar into the mixing bowl.
Attach the flat mixing paddle and select the
MIXING setting and the CREAMING program.
Press the dial to pause the program as necessary
to scrape the entire bowl and paddle. The mixture
should be light and fluffy by the end of the
program. It may not need the full program time,
so keep an eye on the mixture and stop when it
is nice and creamy. Once the butter and sugar
are nicely mixed, stop and scrape the bowl well.
Set to Speed 3 and add the egg and yolk, one at
a time, allowing each to fully incorporate before
adding the next. Add the milk mixture and mix
until fully incorporated. Scrape down the entire

31
bowl as necessary. Decrease speed to 2.
Add the reserved dry ingredients and mix until
just combined.
Using a small cookie scoop (about 1½ tablespoons
or a #40 ice cream scoop), scoop out the cookie
dough and roll each cookie in the turbinado
sugar. Place rolled cookies on prepared baking
sheets, about 1 inch apart.
Bake in the preheated oven until just set, about
12 minutes. Remove from oven and cool in pan;
transfer to a wire rack to cool completely.
Nutritional analysis per cookie:
Calories 119 (46% from fat) • carb. 15g • pro. 1g • fat 6g
sat. fat 4g • chol. 25mg • sod. 67mg • calc. 5mg • fiber 0g
Black & White Cookies
These irresistible cookies are sure to be your new
favorite, a step up from the standard diner version.
Makes about 45 cookies
Cookies:
1½ cups unbleached, all-purpose flour
1½ cups cake flour, not self-rising
1 teaspoon baking soda
1 teaspoon fine sea salt
½ teaspoon grated lemon zest
1 cup buttermilk
1 teaspoon pure vanilla extract
12 tablespoons (1½ sticks) unsalted butter,
melted and cooled to room temperature
1¹⁄
³
cups granulated sugar
2 large eggs, room temperature
Icing:
3 cups confectioners’ sugar, sifted
3 tablespoons light corn syrup, divided
¾ teaspoon pure vanilla extract
¼ cup water, plus additional tablespoons if
necessary, divided
4 ounces bittersweet chocolate, chopped,
melted and cooled to room temperature
Put the flours, baking soda, salt, and zest into
the Cuisinart
®
mixing bowl. Using the chef’s
whisk, select the MIXING setting and the DRY
INGREDIENT MIXING program to combine the
ingredients. Remove and reserve in a separate
bowl.
In a liquid measuring cup, combine the buttermilk
and vanilla extract; reserve.
Put the butter into the mixing bowl. Attach the
flat mixing paddle and mix on Speed 5 while
gradually adding the sugar. Increase to Speed 8
and mix until light, about 2 minutes. Scrape the
entire bowl well. With the mixer running on Speed
3, add the eggs, one at a time. Mix until fully
incorporated, about 2 minutes. Scrape the bowl
well. Reduce to Speed 1 and add
¹⁄
³
of the dry
ingredients. Once almost fully combined, add
half of the buttermilk mixture. Repeat with the
dry and wet ingredients, scraping the entire bowl
as necessary. End with the final third of the dry.
Chill dough for at least one hour.
When ready to bake, preheat oven to 350°F.
Line two baking sheets with parchment paper;
reserve.
Using a small cookie scoop (1½ tablespoons or a
#40 ice cream scoop), measure the chilled dough
and place on a cookie sheet, leaving about 2 inches
between each cookie. Bake until edges of the
cookies are lightly golden, about 10 to 15 minutes.
While cookies are baking, make the icings.
Put the sifted confectioners’ sugar, 2 tablespoons
of the corn syrup, vanilla extract, and ¼ cup
water in the mixing bowl. Attach the chef’s whisk.
Begin mixing by slowly increasing to Speed 5
until ingredients are smooth and incorporated.
Using a small offset spatula, ice half of each
cooled cookie. Add cooled chocolate, 1
tablespoon of corn syrup and 1 tablespoon of
water to remaining icing. Mix at Speed 5. If
necessary, add additional water 1 tablespoon at a
time until smooth and glossy. Spread chocolate
icing on the other half of each cookie. Allow
cookies to set before serving.
Nutritional analysis per cookie:
Calories 157 (28% from fat) • carb. 27g • pro. 2g • fat 5g
sat. fat 3g • chol. 20mg • sod. 105mg • calc. 12mg
fiber 0g
Power Cookies
With no added sugar or salt, these gluten- and
dairy-free bites are practically guilt free.
Makes 28 cookies
1 medium banana, broken into 1-inch
pieces
2 tablespoons chia seeds
¹⁄
³
cup almond butter
1 teaspoon pure vanilla extract
2 cups rolled oats
½ cup chopped almonds
½ cup tart dried cherries
½ cup carob chips

32
Preheat oven to 350°F. Line two baking trays with
parchment paper; reserve. Put the banana pieces
into the Cuisinart
®
mixing bowl. Attach the flat
mixing paddle and mix on Speed 2 to soften,
about 20 seconds. Increase speed to 6 and mix
until completely broken up, about 1 minute.
Add chia seeds and mix until incorporated, about
30 seconds. Add the almond butter and vanilla
extract and mix until incorporated, about 30
seconds. Decrease speed to 2 and add oats in
batches. Mix until incorporated and add almonds,
dried cherries and carob chips in batches.
Using a small cookie scoop (1½ inches or a #40
ice cream scoop), drop batter onto lined baking
trays. Gently press down with a fork to flatten,
re-forming if they break apart. Bake until golden
and slightly firm, 12 minutes. Remove from oven
and cool in pan; transfer to a wire rack to cool
completely.
Nutritional analysis per cookie:
Calories 93 (42% from fat) • carb. 12g • pro. 3g • fat 5g
sat. fat 1g • chol. 0mg • sod. 4mg • calc. 29mg • fiber 2g
Fudge Brownies
These rich, fudgy brownies are for true
chocolate lovers.
Makes 24 brownies
Nonstick cooking spray
16 tablespoons (2 sticks) unsalted butter,
cut into 1-inch pieces
6 ounces unsweetened chocolate,
chopped
2 ounces bittersweet chocolate, chopped
1 tablespoon cocoa powder
4 large eggs, room temperature
1 large egg yolk, room temperature
2 cups granulated sugar
1 cup packed light brown sugar
2 teaspoons instant espresso powder
2 teaspoons pure vanilla extract
¾ cup unbleached, all-purpose flour
¼ cup cake flour, not self-rising
1 teaspoon kosher salt
¾ cup bittersweet chocolate chips
Preheat oven to 375°F. Coat a 13 x 9-inch
baking pan with nonstick cooking spray;
line with parchment paper or aluminum foil,
leaving a 1-inch overhang on either side.
Put the butter and chocolates into a heatproof
bowl and place over a pot of simmering water.
Once both are completely melted, stir in the
cocoa powder and set aside to cool to room
temperature. Reserve.
Put the eggs and egg yolk into the Cuisinart
®
mixing bowl. Attach the flat mixing paddle and
mix on Speed 3 until broken up and lightened,
about 30 seconds. Add the granulated and brown
sugars and beat on Speed 4 until light and
thickened, about 1 more minute. Scrape the
entire bowl as necessary. Add espresso powder
and vanilla extract; mix until well combined.
Combine the flours and salt and stir the mixture
into the melted chocolate and butter. Decrease
speed to 2 and add the chocolate/flour mixture.
Mix until just combined, about 45 seconds.
Scrape the entire bowl well. Decrease speed to
1 and add the chocolate chips to fold in.
Pour into prepared pan. Bake until edges are dry,
about 45 to 50 minutes. The brownies will still be
a bit wet inside and that is what you want to
create a nice, fudge-like brownie. Remove from
oven and cool slightly in pan; then, using the
parchment paper/foil overhang, lift brownies out
of pan and transfer to a wire rack to continue
cooling. Cut and serve warm if desired. Store
remaining brownies in an airtight container.
Nutritional analysis per brownie:
Calories 269 (48% from fat) • carb. 35g • pro. 3g • fat 15g
sat. fat 9g • chol. 59mg • sod. 102mg • calc. 15mg
fiber 2g
Blondies
These blondies are hard to resist − loaded with just
the right amount of sweetness and a combination of
chocolate and white chocolate chips.
Makes 24 blondies
Nonstick cooking spray
2 cups unbleached, all-purpose flour
1½ teaspoons kosher salt
½ teaspoon ground cinnamon
16 tablespoons (2 sticks) unsalted butter,
cut into 1-inch pieces, room temperature
½ cup granulated sugar
1 cup packed light brown sugar
3 large eggs, room temperature
1 tablespoon pure vanilla extract
1½ cups bittersweet chocolate, chopped
1 cup white chocolate chips
1 cup walnut halves

33
Preheat oven to 350°F. Coat a 13 x 9-inch baking
pan with nonstick cooking spray; line with
parchment paper or aluminum foil with a 1-inch
overhang on either side to aid in removing from
pan. Reserve.
Combine the flour, salt, and cinnamon in a small
bowl. Reserve.
Put the butter and sugars into the Cuisinart
®
mixing bowl. Attach the flat mixing paddle and
select the MIXING setting and the CREAMING
program. Press the dial to pause the program as
necessary to scrape the entire bowl and paddle.
The mixture should be light and fluffy by the end
of the program. It may not need the full program
time, so keep an eye on the mixture and stop
when it is nice and creamy. Once the butter and
sugars are nicely mixed, stop and scrape the
bowl well.
Set to Speed 3 and add the eggs, one at a time,
and the vanilla extract, allowing each egg to fully
incorporate before adding the next. Scrape the
entire bowl as necessary. Decrease speed to 1
and slowly add the dry ingredients. Once almost
fully mixed, add the chopped chocolate,
chocolate chips and nuts. Mix until combined and
then pour into the prepared pan.
Bake until top is just starting to crack, about 30
to 35 minutes. Remove from oven and cool
slightly in pan; then, using the parchment paper/
foil overhang, lift blondies out of pan and transfer
to a wire rack to continue cooling. Cut and serve
warm if desired. Store remaining blondies in an
airtight container.
Nutritional analysis per blondie:
Calories 317 (48% from fat) • carb. 39g • pro. 3g • fat 18g
sat. fat 10g • chol. 44mg • sod. 153mg • calc. 317mg • fiber 1g
Blueberry
Cheesecake Bars
Makes 16 servings
Softened butter, for greasing pan
Graham Cracker Crust:
1 cup graham cracker crumbs (about 8 to
9 full graham cracker sheets)
2 tablespoons granulated sugar
Pinch ground cinnamon
Pinch fine sea salt
4 tablespoons unsalted butter, melted and
cooled slightly
Filling:
16 ounces cream cheese (2 standard
packages), cut into 4 pieces, room
temperature
²⁄
³
cup granulated sugar
1 lemon, zested and juiced, divided
½ teaspoon fine sea salt
2 large eggs, room temperature
½ cup sour cream or full-fat plain
Greek yogurt
½ teaspoon pure vanilla extract
¼ cup blueberry jam, preferably smooth
1 cup fresh blueberries
Preheat oven to 300°F with the rack in the middle
of the oven. Lightly grease a 9-inch square
baking pan with butter and then line with
parchment paper.
Prepare the crust. Put all of the crust ingredients
into a small bowl and stir together with a fork
(if using full graham crackers, this crust can be
prepared in a mini food processor. First grind
the graham crackers and then process in the
remaining ingredients). Divide the crumb crust
evenly into the bottom of the prepared baking
pan, pressing down with your fingers or a spoon
to make it even. Bake for 10 minutes and then
allow to cool while preparing filling.
Put the cream cheese into the Cuisinart
®
mixing
bowl. Attach the flat mixing paddle and select the
MIXING setting and the CREAMING program.
Mix until the cream cheese is very smooth –
absolutely no lumps (press the dial to pause to
scrape down the bowl and paddle as often as
necessary). When the cream cheese is sufficiently
smooth, and the CREAMING program is still
running, gradually add the sugar, about ¼ cup at
a time, the zest, and the salt, mixing until very
smooth. When the program is complete, scrape
down the bowl and paddle well and mix for
additional time on Speed 6 if necessary.
While mixing on Speed 4, add the eggs, one at a
time, being sure each is fully incorporated into
batter before adding the next. Scrape down the
bowl between adding eggs. Add the sour cream,
lemon juice, and vanilla extract. Mix on Speed 2
until creamy, about 1 minute. Pour the batter on
top of the crust – do not scrape any thick bits
from the sides of the bowl, as they are not
thoroughly mixed in and will change the texture
of your finished cheesecake. Tap the pan a few
times to remove air bubbles. Dollop the blueberry
jam on top of the cream cheese batter and with

34
the tip of a knife, or with a chopstick, make a
decorative swirl pattern. Top with the blueberries
and press them down slightly into the batter.
Transfer the filled pan to the preheated oven and
bake for about 20 to 25 minutes, until the edges
are set but the center is still jiggly. Remove from
oven and bring to room temperature. Cover well
and refrigerate to fully chill prior to cutting and
serving.
Nutritional analysis per serving:
Calories 201 (60% from fat) • carb. 18g • pro.2g • fat 13g
sat. fat 8g • chol. 36mg • sod. 191mg • calc. 282mg
fiber 1g
PIE CRUSTS AND PIES
Basic Flaky Pastry Dough
This recipe will make ample dough for a 9- to
10-inch regular or deep-dish pie, or for a tart up to
11 or 12 inches.
For a One-Crust Pie:
1½ cups unbleached, all-purpose flour
¼ teaspoon fine sea salt
8 tablespoons (1 stick) unsalted butter,
cut into ½-inch pieces, well chilled
2 tablespoons vegetable shortening
(preferably non-hydrogenated), cut into
½-inch pieces, well chilled
2 to 4 tablespoons ice water
For a Double-Crust Pie (or two single crusts):
3 cups unbleached, all-purpose flour
½ teaspoon fine sea salt
16 tablespoons (2 sticks) unsalted butter,
cut into ½-inch pieces, well chilled
4 tablespoons vegetable shortening
(preferably non-hydrogenated), cut into
½-inch pieces, well chilled
4 to 8 tablespoons ice water
Put flour and salt into the Cuisinart
®
mixing bowl.
Attach the chef’s whisk and select the MIXING
setting and the DRY INGREDIENT MIXING
program to combine the ingredients.
Distribute butter and shortening bits evenly over
flour mixture. Replace the chef’s whisk with the
mixing paddle and start mixing on Speed 4,
gradually increasing to Speed 8 until mixture
resembles coarse crumbs with some visible
pieces of butter and shortening about the size
of small peas. Scrape the entire bowl well.
Sprinkle with the minimal amount of ice water
and mix on Speed 1. Add just enough ice water,
1 tablespoon at a time, so that the dough just
begins to come together and when pressed will
hold together. Do not over-mix.
Gather the dough into a ball (2 balls for larger
recipe) and flatten into a 6-inch disk (2 disks for
larger recipe). Wrap tightly in plastic wrap and
refrigerate for one hour before continuing to allow
the gluten in the flour to rest. The dough will keep
refrigerated for up to 3 days or may be frozen
(double wrapped) for up to a month – thaw at
room temperature for an hour before using.
Roll as directed by recipe to use. To bake the
pastry blind for a single-crust filled pie or tart:
Roll out pastry
¹⁄8
inch thick to fit pan, crimp and
seal edges. Prick bottom all over with a fork.
Chill for at least 30 minutes. Preheat the oven to
400°F. Line pastry with a sheet of parchment
paper and fill with pie weights, dry rice or beans
to the top of the crust. Bake for 20 minutes, until
set. Carefully remove parchment paper and
weights, bake for another 5 to 10 minutes, until
lightly browned. Remove from oven and cool
completely in pan on a wire rack.
Nutritional analysis per serving
(based on 8 servings for one-crust pie):
Calories 203 (63% from fat) • carb. 17g • pro. 2g • fat 14g
sat. fat 9g • chol. 30mg • sod. 67mg • calc. 0mg • fiber 0g
Cookie Crumb Crust
This basic cookie crumb crust can be made
with crushed cookies or graham crackers.
It can then be used for most pies that have a
creamy or custard-based filling.
Makes one pie crust
8 ounces finely crushed cookie crumbs
(ginger snaps, chocolate cookies, vanilla
wafers or graham crackers)
2 to 3 tablespoons granulated sugar (to taste,
depending on cookies chosen)
¹⁄8 teaspoon fine sea salt
6 tablespoons (¾ stick) unsalted butter,
melted
Preheat oven to 350°F.
Put the crumbs, sugar and salt in the Cuisinart
®
mixing bowl. Attach the chef’s whisk and select
the MIXING setting and the DRY INGREDIENT
MIXING program to combine the ingredients.
When done, replace the chef’s whisk with the

35
flat mixing paddle. While mixing on Speed 3,
slowly add melted butter and mix until crumbs
are fully coated, about 2 minutes. Transfer to a
pie plate and press evenly into bottom and up
the sides of the plate. Use the bottom of a glass
or custard cup to firmly tamp down the bottom of
the crust. Bake until firm to the touch, 8 to 10
minutes.
Remove from oven and cool completely in pan
on a wire rack.
Nutritional analysis per serving (based on 8 servings):
Calories 222 (57% from fat) • carb. 23g • pro. 1g • fat 6g
sat. fat 7g • chol. 23mg • sod. 183mg • calc. 7mg • fiber 1g
Lemon Meringue Pie
An American classic, Lemon Meringue Pie has been
a favorite since the early 19th century. Our version
has a marshmallow-like meringue topping.
Makes one deep-dish pie, 8 to 12 servings
1 Flaky Pastry Dough (page 34), blind
baked and cooled
For the filling:
1½ cups granulated sugar
¼ cup, plus 3 tablespoons cornstarch
1½ cups water
¾ cup fresh lemon juice
7 large egg yolks (reserve whites for
meringue)
5 tablespoons (²⁄
³
stick) unsalted butter,
cut into 1-inch pieces
Zest of 3 lemons
Meringue topping:
7 large egg whites (reserved from eggs)
¾ cup, plus 2 tablespoons granulated
sugar, divided
2 tablespoons water
1 teaspoon cream of tartar
¹⁄8 teaspoon kosher salt
Position the oven rack in the upper third of the
oven. Set the oven to high Broil. Have the
prebaked Flaky Pastry pie crust ready to fill.
Prepare the lemon filling. Place the granulated
sugar and cornstarch in a 2½-quart saucepan
and stir together. Add the water and lemon juice
and stir until smooth. Place over medium heat
and cook until slightly thickened, about 3 to 4
minutes.
Whisk the egg yolks in a separate mixing bowl.
While whisking constantly, add about one half of
the hot liquid to the egg yolks. Stir the now
“tempered” egg yolks into the saucepan together
with the remaining liquid and place over medium
heat. Stirring or whisking constantly, cook until
quite thickened and just beginning to bubble,
about 5 to 6 minutes. Add the butter and stir until
blended. Stir in the zest until completely blended.
Cover until ready to fill pie; keep warm.
Prepare the meringue. Put the egg whites,
2 tablespoons of the granulated sugar, the
2 tablespoons water and the cream of tartar into
the Cuisinart
®
mixing bowl and stir until well
mixed (there should be no lumps of cream of
tartar). Attach the chef’s whisk and whisk on
Speed 3 for 30 seconds. Increase the speed to
Speed 12 and slowly add the remaining ¾ cup of
granulated sugar. Add the salt and whip until the
egg whites form stiff peaks, about 4 minutes.
Spread the hot lemon filling into the prepared pie
shell. Top the filling with the meringue, taking
care to spread the meringue to touch the crust all
the way around. Make decorative swirls and
peaks on the meringue as desired. This makes a
generous, meringue topping – if you prefer, use
less. Broil until lightly browned, about 5 minutes.
Remove from oven and cool on a wire rack for
one hour, then refrigerate for several hours,
uncovered, until completely chilled.
TIPS: When making a Lemon Meringue Pie, it is
important that the filling is hot when topped with
the meringue before broiling to prevent the
meringue from shrinking. This pie is best served
the day it is made.
Nutritional analysis per serving (based on 12 servings):
Calories 393 (38% from fat) • carb. 56g • pro. 5g • fat 17g
sat. fat 10g • chol. 140mg • sod. 105mg • calc. 15mg
fiber 0g
Chocolate Cream Pie
Three layers of chocolate topped with a pile of
whipped cream—what’s not to love?
Makes one 9-inch pie; 12 servings
1 recipe Cookie Crumb Crust (prepared
with chocolate cookie crumbs, page 34)
1 recipe Chocolate Glaze/Ganache
(page 43)
1 recipe Simple Chocolate Mousse
(page 43)
1 recipe Whipped Cream (page 44)
Chocolate curls for garnish

36
Prepare and bake Cookie Crumb Crust. Let cool
while preparing Chocolate Glaze/Ganache.
Pour chocolate glaze/ganache into the cookie
crumb crust and spread evenly; let set in the
refrigerator for about 30 minutes while preparing
the Simple Chocolate Mousse. Spoon chocolate
mousse over set glaze/ganache layer and
refrigerate again, at least 30 minutes or overnight.
Before serving, make Whipped Cream and spoon
over the chocolate cream pie. Sprinkle with
chocolate curls and serve immediately.
Nutritional analysis per serving (based on 12 servings):
Calories 902 (78% from fat) • carb. 44g • pro. 4g • fat 2g
sat. fat 49g • chol. 230mg • sod. 150mg • calc. 60mg
fiber 3g
CAKES AND CUPCAKES
Golden Yellow Cake
This is the basic yellow cake everyone remembers
and loves, and it is nearly as simple as making one
from a package. Pair with our Chocolate Frosting on
page 42 to make a great cake for any occasion.
Makes two 9-inch layers; 12 servings
Unsalted butter, softened, for greasing
pans
3 cups cake flour, not self-rising
1 tablespoon baking powder
2 teaspoons baking soda
½ teaspoon fine sea salt
2 large eggs, plus 2 yolks, room temperature
1¹⁄
³
cups granulated sugar
2 teaspoons pure vanilla extract
1 cup vegetable oil
1½ cups buttermilk, room temperature
Preheat oven to 350°F. Coat two 9-inch round
cake pans with the softened butter and line with
parchment paper. Reserve.
Put the flour, baking powder, baking soda, and
salt in the Cuisinart
®
mixing bowl. Attach the
chef’s whisk and select the MIXING setting and
the DRY INGREDIENT MIXING program to
combine the ingredients. Remove and reserve
in a separate bowl.
Put the eggs and sugar into the Cuisinart
®
mixing
bowl. Mix on Speed 6 until light and fluffy, about
2 minutes. Add the vanilla extract and mix until
incorporated. Decrease speed to 2 and gradually
add the oil. Increase to Speed 4 and mix until
fully incorporated, about 1 minute. Scrape entire
bowl.
Add
¹⁄
³
of the reserved dry ingredients to the bowl
containing the wet ingredients and mix until
incorporated. Add ½ of the buttermilk and mix
until incorporated. Repeat, ending with the dry
mixture. Scrape entire bowl as necessary.
Pour half of the batter into each of the prepared
pans. Bake until cakes are golden, the edges
start to pull away from the sides of the pan and a
cake tester comes out clean when inserted in the
center, about 25 to 30 minutes.
Remove from oven, cool in pans on a wire rack
until cool to touch and then transfer cakes to a
wire cooling rack to cool completely before
frosting.
Nutritional analysis per serving
(1 slice based on 12 servings):
Calories 396 (45% from fat) • carb. 51g • pro. 5g • fat 20g
sat. fat 2g • chol. 32mg • sod. 462mg • calc. 396mg
fiber 1g
Deep Chocolate
Layer Cake
Frost this rich chocolate cake with our Cream
Cheese Frosting on page 42.
Makes two 9-inch cakes; 12 servings
Unsalted butter, softened, for greasing
pans
5 ounces bittersweet chocolate, chopped
¾ cup unsweetened cocoa powder
1½ teaspoons instant espresso powder
¾ teaspoon baking soda
1 cup boiling water
2 cups unbleached, all-purpose flour
¾ cup granulated sugar
¾ cup brown sugar
½ teaspoon baking powder
½ teaspoon fine sea salt
1 cup vegetable oil
¾ cup buttermilk, room temperature
3 large eggs, room temperature
1½ teaspoons pure vanilla extract
Preheat oven to 350°F. Grease two 9-inch round
cake pans with butter and line with parchment
paper. Reserve.
Put the bittersweet chocolate, cocoa powder,
espresso powder, and baking soda into a
medium bowl and pour the boiling water over

37
the ingredients. Stir until chocolate has melted.
Cool to room temperature and reserve.
Put the flour, sugars, baking powder, and salt
together into the Cuisinart
®
mixing bowl. Attach
the chef’s whisk and select the MIXING setting
and the DRY INGREDIENT MIXING program to
combine the ingredients. Transfer to a separate
bowl and reserve.
Put the oil, buttermilk, eggs, and vanilla extract
into the mixing bowl. Add the cooled chocolate
mixture and start to mix on Speed 1, increasing
to Speed 5. Mix until very well combined, so
there are no streaks of color.
While mixing on Speed 2, slowly add the dry
ingredients. Mix until smooth, stopping as
necessary to scrape entire bowl. Divide the batter
evenly between the prepared pans. Bake in
preheated oven until a cake tester comes out
clean when inserted into the center, about 30 to
35 minutes.
Remove from oven, cool in pans on a wire rack
until cool to touch and then transfer cakes to a
wire cooling rack to cool completely before
frosting.
Nutritional analysis per serving (unfrosted):
Calories 345 (50% from fat) • carb. 41g • pro. 6g • fat 21g
sat. fat 5g • chol. 47mg • sod. 195mg • calc. 31mg
fiber 3g
Ginger-Orange
Icebox Cake
Full of winter flavors, this simple and impressive
dessert is the perfect centerpiece for any
festive table.
Makes one 9-inch cake, 12 servings
36 ginger cookies (1 recipe Ginger Cookies,
page 27)
2 cups heavy cream, cold
12 ounces Italian mascarpone cheese, cold
¾ cup granulated sugar
¼ cup milk
¼ cup orange zest
1 tablespoon orange juice
2 pinches fine sea salt
1 medium orange (to use for supreme
orange slices and candied orange peel)
4 cups water, for the candied peel
3 cups granulated sugar, for the candied
peel, divided
Prepare the ginger cookies as instructed, but
when scooping out to bake, use a large muffin
scoop instead of a traditional cookie scoop (this
is about
¹⁄
³
cup per cookie). Press down each
cookie round so it is between
¹⁄8
and ¼ inch thick.
Bake cookies for 10 minutes and allow to fully
cool prior to assembling the cake.
Prepare the filling. Put the heavy cream,
mascarpone, sugar, milk, zest, juice, and salt into
the Cuisinart
®
mixing bowl. Attach the chef’s
whisk and mix on Speeds 1 to 2 to combine and
then slowly increase to Speed 8, mixing until it
forms medium-stiff peaks, no more than 5
minutes. Be sure that there are no lumps. Press
the dial to pause mixing at any moment to scrape
down the bowl and paddle.
Assemble the cake. Arrange the cookies flat in a
9-inch springform pan, covering the bottom as
much as possible – some cookies may need to
be broken apart and then filled in to prevent too
many open spaces. Spread a quarter of the
mascarpone filling evenly over the cookies.
Place another layer of cookies on top, lying flat
and touching, followed by another quarter of the
cream. Continue layering cookies and cream until
there are 4 layers of each, ending with a layer of
cream. Smooth the top, cover with plastic wrap,
and refrigerate overnight.
While the cake is chilling, prepare the toppings.
First, supreme the orange. This means to remove
the inner fruit of the orange by cutting away all of
the peel and pith and removing it from the
membranes. To do this, take a very sharp knife
and cut the top and bottom of the orange peel off
to make both sides flat. Then, very carefully cut
all of the rind and pith away from the fruit so it
makes a nice round fruit where only the flesh
of the orange is showing. Reserve the rind.
Next, cut along each membrane of the orange
segments to remove the inner segments away
from the membranes – they should come out
rather easily. Remove the inner fruit and reserve
in a separate bowl.
Next, prepare the candied orange peel. From the
peel that was cut from the fruit, cut away the
bitter white pith. Then cut the peel into small
strips (longer ribbon-like strips come out nicely).
Put 2 cups of the water into a saucepan and
bring to a boil. Add the orange peels and boil for
10 to 15 minutes, until they are very soft, but not
falling apart. Drain, rinse, and then lay out to dry.
Put the sugar and remaining 2 cups of water into
the saucepan. Bring to a boil and cook until the

38
sugar is just dissolved. Add the dried peels and
return to a boil. Reduce the heat to bring the
liquid to a simmer and cook until the peels are
nicely coated with the sugar syrup, about 40
minutes.
While the orange peels are cooking, put a cooling
rack into a baking pan to catch any excess sugar
and dry out the peels. Put the remaining cup of
sugar into a shallow bowl.
Once the cooked peels are ready, use a small
strainer to remove from the saucepan and gently
toss in the granulated sugar. Remove and place
on the cooling rack, being sure the strips do not
touch one another. Allow to stand at room
temperature until dry.
When the cake is fully chilled, remove from the
springform pan (use a paring knife or offset
spatula to assist in separating it from the sides
of the pan). Top with the orange supremes and
candied peels.
Nutritional analysis per serving (based on 12 servings):
Calories 489 (41% from fat) • carb. 67g • pro. 5g • fat 22g
sat. fat 16g • chol. 124mg • sod. 195mg • calc. 18mg
fiber 1g
Birthday Sheet Pan
Cake with No-Fuss
Vanilla Frosting
The cake of every kid’s dreams, or possibly the
nostalgia cake for the grown-ups out there. This fun
cake will definitely make the next birthday even more
celebratory. We provide instructions on how to make
it a simple sheet cake, but it can also be made using
two 9-inch round cake pans and be made into a
traditional layer cake.
Makes 1 sheet cake (16 servings)
Cake:
2 cups cake flour, not self-rising
1 tablespoon baking powder
¾ teaspoon fine sea salt
2 large eggs, room temperature
2 large egg yolks, room temperature
1¾ cups granulated sugar
2 teaspoons pure vanilla extract
1 cup vegetable oil
1½ cups buttermilk, room temperature
½ cup rainbow sprinkles mixed with
1 tablespoon flour
Frosting:
8 tablespoons (1 stick) unsalted butter,
room temperature
4 ounces cream cheese, room temperature
4 cups confectioners’ sugar, sifted
Pinch fine sea salt
4 tablespoons whole milk, room
temperature
¼ teaspoon pure vanilla extract
¼ cup rainbow sprinkles
Coat a ½-sheet baking pan with cooking spray
and line with parchment paper. Reserve. Preheat
oven to 350°F with the rack in the middle position
Put the flour, baking powder, baking soda, and
salt in the Cuisinart
®
mixing bowl. Attach the
chef’s whisk and select the MIXING setting and
the DRY INGREDIENT MIXING program to
combine the ingredients. Remove and reserve
in a separate bowl.
Put the eggs, yolks, and sugar into the Cuisinart
®
mixing bowl. Mix on Speed 6 until light and fluffy,
about 2 minutes. Add the vanilla extract and mix
until incorporated. Decrease speed to 2 and
gradually add the oil. Increase to Speed 4 and
mix until fully incorporated, about 1 minute.
Scrape entire bowl. Add
¹⁄
³
of the reserved
dry ingredients to the bowl and mix until
incorporated. Add ½ of the buttermilk and mix
until incorporated. Repeat, ending with the dry
mixture. Scrape entire bowl as necessary.
Add the sprinkles and mix on Speed 1 until just
incorporated. Pour the batter into the prepared
pan. Bake until golden, the edges start to pull
away from the sides of the pan and the center
springs back to the touch, about 20 minutes.
Remove and cool to room temperature.
While the cake is cooling, prepare the frosting.
Be sure that the mixing bowl and paddle are
clean and dry. Put the butter and cream cheese
into the mixing bowl. Using the flat mixing
paddle, mix on Speeds 3 to 4 to soften and fully
combine, about 1 minute. Add the sugar, salt,
milk, and vanilla extract and mix, starting on
Speed 1 and gradually increasing to Speed 6
until light and fluffy. Press the dial to pause as
necessary to scrape the entire bowl and paddle.
Once the cake is cool, spread the frosting on
top and then evenly decorate with the sprinkles.
Slice and serve! If preparing the 9-inch layer
cake, then assemble as you would for a layer
cake, by spreading between the two layers, or
4 halves (dividing each cake into two layers).
Decorate as desired.

39
Nutritional analysis per serving (frosted):
Calories 324 (42% from fat) • carb. 43g • pro. 4g • fat 16g
sat. fat 2g • chol. 47mg • sod. 225mg • calc. 52mg
fiber 0g
Chocolate Chip
Cookie Cake
For those chocolate chip cookie lovers, here is a
giant, soft-in-the-middle cookie. It is best eaten the
same day, but if wrapped well, can be enjoyed up to
two days (refrigerate if topping with whipped cream).
Makes one 9-inch cookie cake, about 12 servings
Nonstick cooking spray or softened
butter for greasing the pan
2¼ cups unbleached, all-purpose flour
1 teaspoon baking soda
1 teaspoon kosher salt
½ teaspoon espresso powder
16 tablespoons (2 sticks) unsalted butter,
cut into 1-inch pieces, room temperature
1 cup packed light brown sugar
½ cup granulated sugar
2 large eggs, room temperature
1½ teaspoons pure vanilla extract
2 cups mixed chocolate chips
(semisweet, bittersweet, white chocolate)
Flake sea salt, for sprinkling
½ cup whipped cream, for decorating
2 tablespoons rainbow sprinkles,
for decorating
Coat a 9-inch round cake pan with the softened
butter or nonstick cooking spray. Line the bottom
of the pan with parchment paper. Reserve.
Put the dry ingredients into the Cuisinart
®
mixing
bowl. Attach the chef’s whisk and select the
MIXING setting and the DRY INGREDIENT
MIXING program to combine the ingredients.
Transfer to a separate bowl. Reserve.
Put the butter and sugars into the mixing bowl.
Attach the flat mixing paddle and select the
MIXING setting and the CREAMING program.
Press the dial to pause the program as necessary
to scrape the entire bowl and paddle. The mixture
should be light and fluffy by the end of the
program. It may not need the full program time,
so keep an eye on the mixture and stop when it
is nice and creamy. Once the butter and sugars
are nicely mixed, stop and scrape the bowl well.
Set to Speed 3 and add the eggs, one at a time,
and the vanilla extract, allowing each egg to fully
incorporate before adding the next. Scrape the
entire bowl. With the mixer running on Speed 2,
add the dry ingredients and mix until just
combined. Scrape the entire bowl well and then
add the chocolate chips. Increase to Speed 3
and mix just until fully incorporated.
Transfer the dough to the prepared cake pan and
press to evenly cover the pan. Wrap well and
transfer to a freezer for a minimum of 3 hours, up
to overnight.
Preheat oven to 350°F with rack in middle
position. Transfer the frozen cookie cake in the
pan to preheated oven and bake until the cookie
cake is just set (it will look dry on top, but still be
soft), about 30 minutes. Remove and sprinkle
with the flaked sea salt. Once cool remove from
pan. Decorate as desired with the whipped cream
and sprinkles.
Nutritional analysis per serving:
Calories 324 (42% from fat) • carb. 43g • pro.4g • fat 16g
sat. fat 2g • chol. 47mg • sod. 225mg • calc. 52mg
fiber 0g
Key Lime Mini
Cheesecakes
Key limes can be found in many grocery stores.
They are a smaller, sweeter, type of lime, but if they
cannot be found, substituting with traditional limes
will work, it will just be a bit more sour.
Makes 12 individual cheesecakes
Graham Cracker Crust:
½ cup graham cracker crumbs (3 full
cracker sheets)
1 tablespoon granulated sugar
Pinch ground cinnamon
Pinch fine sea salt
2 tablespoons unsalted butter, melted and
cooled slightly
Filling:
16 ounces (2 standard packages)
cream cheese, each cut into 4 pieces,
room temperature
²⁄
³
cup granulated sugar
1 tablespoon grated key lime zest
(4 key limes)
Pinch fine sea salt
2 large eggs, room temperature
½ cup sour cream, or full-fat plain
Greek yogurt, room temperature

40
1½ tablespoons key lime juice
¼ teaspoon pure vanilla extract
Preheat oven to 300°F with the rack in the middle
of the oven. Line a 12-cup muffin pan with liners
(if you are able to locate silicone reusable liners,
they work very well).
Prepare the crust. Put all of the crust ingredients
into a small bowl and stir together with a fork
(if using full graham crackers, this crust can be
prepared in a mini food processor. First grind
the graham crackers and then process in the
remaining ingredients). Divide the crumb crust
evenly into the bottom of the cupcake liners,
pressing down with your fingers or a spoon,
to make it even. Bake 5 minutes and then allow
to cool while preparing filling.
Put the cream cheese into the Cuisinart
®
mixing
bowl and fit with the paddle attachment.
Starting on Speed 3 and increasing to Speed 6,
mix until very smooth – you want to be sure there
are no lumps. Scrape the mixing bowl and paddle
often to be sure that the cream cheese is very
smooth. While mixing on Speeds 5 to 6, gradually
add the sugar, about ¼ cup at a time, the zest,
and the salt, mixing until very smooth. Add the
eggs, one at a time, mixing on Speed 4, being
sure each is fully incorporated into batter before
adding the next. Scrape down the bowl between
adding eggs. Add the sour cream, key lime juice,
and vanilla extract. Mix on Speed 2 until creamy,
about 1 minute.
Scoop batter into the cupcake liners – do not
scrape any thick bits from the sides of the bowl,
as they are not thoroughly mixed in and will
change the texture of your finished cheesecakes.
Tap the pan a few times to remove air bubbles.
Transfer the filled pan to the preheated oven and
bake for about 15 minutes. The cheesecakes will
still be jiggly at this point, but that is OK. Remove
from oven and bring to room temperature. Cover
well and refrigerate to fully chill prior to serving.
Nutritional analysis per individual cheesecake:
Calories 241 (64% from fat) • carb. 18g • pro. 4g • fat 18g
sat. fat 11g • chol. 74mg • sod. 195mg • calc. 420mg
fiber 1g
Gluten-Free Golden
Cupcakes
These cupcakes pair very nicely with our Dairy-Free
Vanilla Frosting (page 43)
Makes 12 standard cupcakes or 42 mini
cupcakes
Nonstick cooking spray
2 cups sorghum flour
1 cup potato starch
½ cup arrowroot starch
1 tablespoon baking powder
½ teaspoon baking soda
1 teaspoon xanthan gum
1 teaspoon fine sea salt
1½ cups agave nectar
½ cup olive oil
¾ cup butternut squash purée
2 tablespoons pure vanilla extract
1 teaspoon white vinegar
Lightly coat standard or mini muffin pans with
cooking spray. Cupcake liners may be used
(these may also be sprayed so that the liners
cleanly come off the cupcakes).
Put the flour, starches, baking powder, soda,
xanthan gum, and salt into the Cuisinart
®
mixing
bowl. Attach the chef’s whisk and select the
MIXING setting and the DRY INGREDIENT
MIXING program to combine the ingredients.
With the mixer running on Speed 3, add the
remaining ingredients, in the order listed, and mix
until all ingredients are incorporated. Scrape the
entire bowl to ensure all of the ingredients are
evenly incorporated.
Scoop batter into prepared muffin pans.
Bake until golden and a cake tester comes
out clean, about 30 minutes for regular-sized
muffins, 15 minutes for minis. Remove from oven,
cool in pans on a wire rack until cool to touch
and then transfer cupcakes to a wire cooling rack
to cool completely before frosting.
Nutritional analysis per standard cupcake:
Calories 396 (22% from fat) • carb. 77g • pro. 4g • fat 10g
sat. fat 1g • chol. 0mg • sod. 359mg • calc. 50mg • fiber 2g

41
Angel Food Cake
Serve with Whipped Cream (page 44) and fresh
berries for a light and delicious summer dessert.
Makes one 9-inch cake, 12 servings
1½ cups granulated sugar, divided
1¼ cups cake flour
12 large egg whites
1¼ teaspoons cream of tartar
¼ teaspoon fine sea salt
1 teaspoon pure vanilla extract
Preheat oven to 325˚F.
Sift ¾ cup of the sugar together with the cake
flour in a mixing bowl; reserve.
Put egg whites into the Cuisinart
®
mixing bowl.
Attach the chef’s whisk and begin mixing on
Speed 5. Once whites are foamy, add cream of
tartar and salt and gradually increase to Speed
12. While mixing on Speed 12, slowly add
remaining ¾ cup of granulated sugar and vanilla
extract and continue to mix until the peaks are
firm and glossy. Remove bowl from mixer.
Gradually sift the reserved flour and sugar into
the whites and carefully fold in with a large rubber
spatula. Be gentle when folding, but at the same
time make sure all ingredients are evenly
incorporated. Spoon batter into an ungreased,
9-inch tube pan. Smooth the top by evenly
spreading with a rubber spatula.
Bake for about 45 minutes, until a toothpick that
has been inserted comes out clean. Invert pan
onto the neck of an empty long-necked bottle
(such as a wine bottle) and allow to cool
completely. To remove cake from pan, remove
the pan from the neck of the bottle and slide the
tip of a long, narrow knife between the cake and
the pan. Cover the pan with a plate and invert it,
sliding the knife along the bottom of the pan until
it is free.
Nutritional analysis per serving:
Calories 167 (1% from fat) • carb. 37g • pro. 5g • fat 0g
sat. fat 0g • chol. 0mg • sod. 278mg • calc. 5mg • fiber 0g
FROSTINGS, ICINGS,
MOUSSES, AND FILLINGS
French Buttercream
The classic frosting. Temperature is key to achieving
a smooth and delicious result. Having a candy/deep
fat thermometer on hand takes out the guesswork.
Makes 4 cups
1¾ cups granulated sugar
5 tablespoons water
7 large egg yolks
24 tablespoons (3 sticks), unsalted butter,
cold and cut into ½-inch cubes
¾ teaspoon pure vanilla extract
½ teaspoon fine sea salt
Put sugar and water together into a small
saucepan and place over medium heat until
sugar is melted and the mixture reaches 235°F.
Put the yolks into the Cuisinart
®
mixing bowl.
Attach the chef’s whisk and mix on Speed 8,
gradually increasing speed from the start, until
thick and creamy, about 3 minutes. Scrape the
entire bowl and then slowly turn up to Speed 12
and continue to whip until pale yellow in color,
5 minutes.
Reduce speed to 6 and slowly pour in the sugar
mixture while the mixer is running. Once all the
sugar is added, scrape the entire bowl and slowly
turn up to Speed 12 until the bowl is completely
cool, about 10 minutes. When the bowl is cool,
turn speed down to 7 and add the butter very
slowly, a piece at a time. When half of the butter
has been added, increase speed to about 10 to
incorporate remaining. Once all of the butter has
been added, add the vanilla extract and salt,
mixing until all is incorporated.
Use immediately or store in an airtight container
in the refrigerator for up to 10 days. Bring to
room temperature after refrigeration.
TIP: If the buttercream appears curdled, beat on
Speed 12 until smooth—this occurs when the
butter is too soft or warm.
Nutritional analysis per serving (2 tablespoons):
Calories 130 (64% from fat) • carb. 11g • pro. 1g • fat 9g
sat. fat 6g • chol. 63mg • sod. 35mg • calc. 5mg • fiber 0g

42
Swiss Buttercream
Swiss buttercream, a more forgiving and stable
version, will be ready to use immediately after
making and can be used for traditional frosting
and piping.
Makes about 6 cups
8 large egg whites
1¾ cups granulated sugar
½ teaspoon fine sea salt
5 sticks (1¼ pounds) unsalted butter,
cold and cut into ½-inch cubes,
room temperature
1 tablespoon fresh lemon juice
1 teaspoon pure vanilla extract
Put egg whites, sugar and salt in the Cuisinart
®
mixing bowl. Place bowl over a pan of simmering
water and whisk the whites constantly until the
temperature reaches 140°F.
Place bowl on mixer. Attach the chef’s whisk.
Once whites come to temperature, mix on Speed
10 until cool, about 15 minutes. Once cool,
decrease speed to 3 and add the butter, piece
by piece, until each is fully incorporated before
adding the next. Scrape down the entire bowl
as necessary.
Once all the butter is added, add the lemon juice
and vanilla extract and mix until fully incorporated,
about 1 minute. Increase speed to 8 and beat
until smooth and silky, about 2 to 3 minutes.
Use immediately or store in an airtight container
in the refrigerator for up to 10 days. Bring to
room temperature after refrigeration.
TIP: If the buttercream appears curdled, beat on
Speed 12 until smooth—this occurs when the
butter is too soft or warm.
Nutritional analysis per serving (2 tablespoons):
Calories 115 (72% from fat) • carb. 7g • pro. 1g • fat 9g
sat. fat 7g • chol. 25mg • sod. 9mg • calc. 0mg • fiber 0g
Chocolate Frosting
A light and fluffy classic.
Makes about 3 cups
4 cups confectioners’ sugar, sifted
4 ounces unsweetened chocolate,
melted and cooled
2 ounces semisweet chocolate,
melted and cooled
8 tablespoons (1 stick) unsalted butter,
cut into ½-inch pieces, room temperature
2 teaspoons pure vanilla extract
¼ teaspoon fine sea salt
10 to 12
tablespoons milk or cream
Put all ingredients except the milk or cream into
the Cuisinart
®
mixing bowl. Attach the chef’s
whisk and mix on Speed 2 for 2 minutes.
Add 8 tablespoons of the milk. Increase speed
to 5 and beat until smooth and fluffy, about
4 minutes. Scrape the entire bowl as necessary.
Add remaining milk, tablespoon by tablespoon,
as needed for ease of spreading.
Nutritional analysis per serving (2 tablespoons):
Calories 158 (39% from fat) • carb. 24g • pro. 1g • fat 7g
sat. fat 5g • chol. 12mg • sod. 30mg • calc. 21mg • fiber 1g
Cream Cheese Frosting
A classic cream cheese frosting, perfect for a variety
of cakes, especially carrot and chocolate.
Makes 4 cups
1 pound (two standard 8-ounce packages)
cream cheese, room temperature
8 tablespoons (1 stick) unsalted butter,
cut into 1-inch pieces, room temperature
5½ cups confectioners’ sugar, sifted
¼ teaspoon kosher salt
2 teaspoons pure vanilla extract
Put cream cheese in the Cuisinart
®
mixing bowl.
Attach the flat mixing paddle and mix on Speed 4
until smooth, about 1½ to 2 minutes. Add butter
and beat until fully incorporated and smooth,
stopping to scrape down as necessary. Reduce
speed to 2 and, with the mixer running, slowly
add the sifted confectioners’ sugar and salt to
the bowl and mix until incorporated, about 2
minutes. Scrape the entire bowl well. Add vanilla
extract. Mix on Speed 5 until incorporated.
Refrigerate to set, at least 30 minutes.
Nutritional analysis per serving (2 tablespoons):
Calories 157 (43% from fat) • carb. 21g • pro. 1g • fat 8g •
sat. fat 5g • chol. 23mg • sod. 46mg • calc. 14mg • fiber 0g

43
Dairy-Free Vanilla Frosting
This frosting pairs very well with the Gluten-Free
Golden Cupcakes (page 40).
Makes about 2 cups
1 cup non-hydrogenated vegetable
shortening
2 cups confectioners’ sugar, sifted
1 tablespoon pure vanilla extract
¼ teaspoon fine sea salt
Put the shortening into the Cuisinart
®
mixing
bowl. Attach the chef’s whisk and begin whisking
on Speed 2, increasing up to Speed 5 to cream
and make smooth, about 30 seconds. Scrape the
entire bowl and then add the sugar. Start the
mixer on Speed 2 and then slowly increase
speed to 5 to incorporate the sugar.
Scrape the bowl again and then add the vanilla
extract and salt. Mix again, increasing up to Speed
10 until smooth and fluffy, about 30 seconds.
Nutritional analysis per serving (2 tablespoons):
Calories 182 (61% from fat) • carb. 19g • pro. 0g • fat 13g
sat. fat 6g • chol. 0mg • sod. 33mg • calc. 36mg • fiber 0g
Royal Icing
This icing is great for decorating sugar cookies
or cakes. You can add food coloring to color it
or extracts to flavor it.
Makes 1½ cups
4 cups confectioners’ sugar, sifted
1 large egg white, slightly beaten
2 tablespoons whole milk
1 teaspoon fresh lemon juice
Put the sugar into the Cuisinart
®
mixing bowl.
Attach the chef’s whisk and mix on Speed 3 and,
with the mixer running, slowly add in the egg
white until fully incorporated, about 1 minute.
While the mixer is still running, add the milk and
lemon juice and mix until fully incorporated.
Scrape the entire bowl as necessary. Continue
mixing until soft peaks form, about 2 minutes.
Use immediately or cover the bowl with a damp
cloth so the icing does not harden. If using
coloring or a flavoring extract for the icing, add it
with the milk and lemon juice.
Nutritional analysis per serving (2 tablespoons):
Calories 163 (1% from fat) • carb. 40g • pro. 0g • fat 0g •
sat. fat 0g • chol. 0mg • sod. 6mg • calc. 3mg • fiber 0g
Chocolate Glaze/Ganache
Use to frost or fill your favorite cakes.
Makes about 1 cup
6 ounces chocolate (may use bittersweet
or semisweet), chopped
¾ cup heavy cream
3 tablespoons unsalted butter, cut into
1-inch pieces
Pinch fine sea salt
Put the chopped chocolate in the Cuisinart
®
mixing bowl.
Put the heavy cream into a small saucepan and
bring to just a simmer. Pour hot cream over
chocolate. Allow to sit for 1 minute to cool
slightly.
Attach the chef’s whisk and mix on Speed 4 until
chocolate is melted and the mixture comes
together, about 2 minutes. Add butter, one cube
at a time, and whisk until fully incorporated and
shiny. Add the salt and stir to combine.
If using as a glaze, use immediately. If using
as a filling, allow to sit until slightly hardened.
Any leftovers can be refrigerated until solid, and
then scooped and shaped into truffles.
Nutritional analysis per serving (2 tablespoons):
Calories 221 (79% from fat) • carb. 11g • pro. 2g • fat 21g
sat. fat 13g • chol. 42mg • sod. 8mg • calc. 15mg • fiber 2g
Simple Chocolate Mousse
Whipping cream is effortless in the Cuisinart
®
Stand Mixer. Plus, you can fold in the chocolate on
Speed 1 without worrying about over-mixing.
Makes 5 cups
6 ounces good quality, bittersweet
chocolate, coarsely chopped
1¾ cups heavy cream, divided
1 tablespoon pure vanilla extract
Pinch fine sea salt
2 tablespoons brandy or liqueur
(optional, e.g., hazelnut, coffee or
orange)
In a double boiler set over barely simmering
water, melt the chocolate with 2 tablespoons of
the heavy cream, stirring until smooth. Remove
from the heat and let cool until lukewarm. Stir in
the vanilla extract, salt, and brandy or liqueur
(if using).

44
Add the remaining cream to the mixing bowl of
the Cuisinart
®
Stand Mixer. Attach the whisk and
select the WHISKING setting and the WHIPPING
CREAM program to combine the ingredients.
Allow to mix until soft peaks have formed, this
may happen before the end of the program.
Stir about a quarter of the whipped cream into
the cooled, melted chocolate mixture. Then fold
in the remaining whipped cream.
Cover and refrigerate the mousse for 30 minutes.*
Spoon or pipe into serving bowls or goblets.
If desired, garnish with shaved or finely chopped
chocolate and a dollop of whipped cream.
Chocolate mousse can be stored in the
refrigerator for up to 2 days
* If using the mousse to fill a pie, pour mixture
directly into cooled pie crust, as in our
Chocolate Cream Pie on page 35.
Nutritional analysis per serving (½ cup):
Calories 240 (78% from fat) • carb. 10g • pro. 1g • fat 21g
sat. fat 13g • chol. 56mg • sod. 0mg • calc. 0mg • fiber 1g
Whipped Cream
Whipped cream can over-whip very quickly. Once it
starts getting thick, check it often by lifting the head
of the mixer and looking for medium peaks.
Makes about 3½ cups
2 cups heavy cream
3 to 4 tablespoons confectioners’ sugar, sifted
1 teaspoon pure vanilla extract
Put heavy cream into the Cuisinart
®
mixing bowl.
Attach the chef’s whisk and select the WHISKING
setting and the WHIPPING CREAM program.
Once bubbles start to form, gradually add the
confectioners’ sugar and vanilla extract.
Stop the mixer once the desired stiffness of
whipped cream has been achieved.
Nutritional analysis per serving (2 tablespoons):
Calories 122 (93% from fat) • carb. 2g • pro. 0g • fat 11g
sat. fat 8g • chol. 46mg • sod. 0mg • calc. 0mg • fiber 0g
Whipped Coffee
Made from only a few ingredients, the whipping of
instant coffee, sugar, and hot water turns into an
incredible foam-like dessert, which is typically served
over a glass of ice-cold milk but also excellent either
topped on hot or iced coffee, eaten with a spoon,
or put on top of cake or ice cream.
Makes about 3½ cups
½ cup instant coffee or espresso
(fine granules are better than large)
¹⁄
³
cup granulated sugar
½ cup hot water
Pinch fine sea salt
Shaved chocolate, optional
Put all of the ingredients into the Cuisinart
®
mixing bowl. Attach the chef’s whisk and begin
mixing on Speed 3. Gradually increase to Speed
12 and continue to mix until very fluffy and foamy,
about 6 minutes.
Spoon over a glass of ice and milk, ice cream,
or cake. Top with some shaved chocolate for an
extra-sweet treat.
Nutritional analysis per serving (2 tablespoons):
Calories 122 (93% from fat) • carb. 2g • pro. 0g • fat 11g
sat. fat 8g • chol. 46mg • sod. 0mg • calc. 0mg • fiber 0g
©2022 Cuisinart
Glendale, AZ 85307
Printed in China
21CE077654
IB-14590-ESP-A
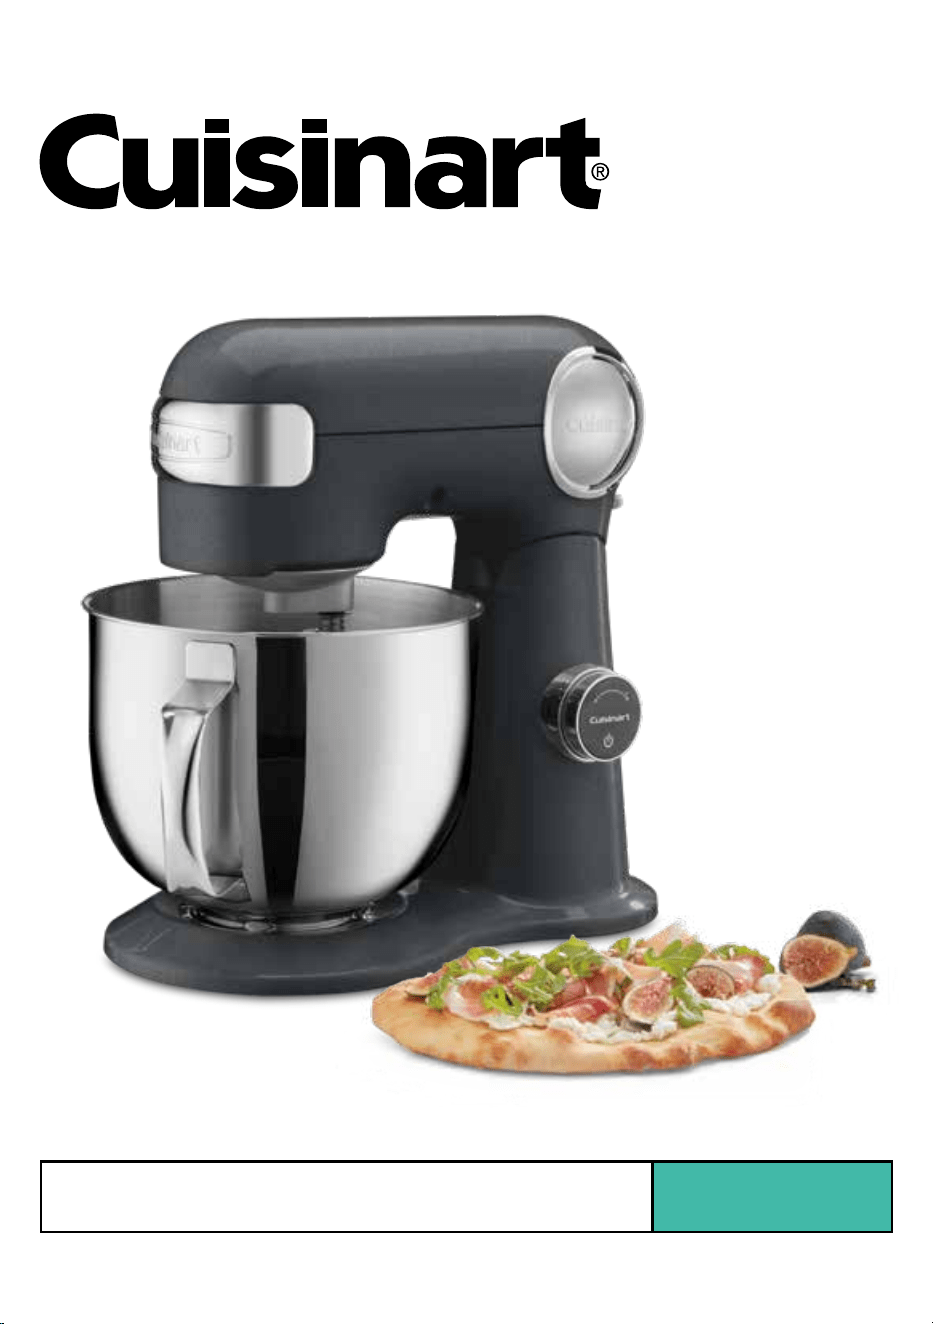
Para su seguridad y para disfrutar plenamente de este producto,
siempre lea atentamente las instrucciones antes del uso.
MANUAL DE
INSTRUCCIONES Y
LIBRO DE RECETAS
Batidora de pie digital de 5.5 cuartos
de galón (5.2 L) Precision Master
®
Pro
Serie SMD-50

2
MEDIDAS DE
SEGURIDAD
IMPORTANTES
Al usar aparatos eléctricos, siempre se deben
tomar precauciones básicas de seguridad,
entre ellas las siguientes:
1. LEA TODAS LAS INSTRUCCIONES.
2. Para apagar el aparato, mantenga
presionado el centro de la perilla de control
por 5 segundos. Desenchufe el aparato
cuando no esté en uso, antes de instalar/
sacar accesorios/aditamentos, después del
uso y antes de limpiarlo. Para desenchufar,
agarre el enchufe y jálelo de la toma de
corriente. Nunca jale el cable.
3. Los niños o las personas que carezcan
de la experiencia o de los conocimientos
necesarios para manipular el aparato,
o aquellas cuyas capacidades físicas,
sensoriales o mentales estén limitadas,
no deben usar este aparato. Supervise el
uso de este aparato con cuidado cuando
sea usado cerca de niños. No permita que
los niños jueguen con este aparato.
Cuisinart desaconseja que los niños usen
este aparato.
4. Evite el contacto con las piezas móviles.
Para evitar el riesgo de lesiones personales
o daños al aparato, mantenga los dedos,
cabello, ropa, espátulas y otros utensilios
lejos de los accesorios/aditamentos
durante el funcionamiento. Retire los
accesorios/aditamentos antes de lavarlos.
5. El uso de accesorios/aditamentos no
recomendados ni vendidos por Cuisinart
presenta un riesgo de incendio, descarga
eléctrica o lesiones.
6. No use más de un accesorio/aditamento
a la vez.
7. No exceda las capacidades máximas
indicadas en este manual de instrucciones.
8. No use el aparato si este o el cable está
dañado. En caso de daño, devuelva el
aparato a un centro de servicio autorizado
para su revisión y reparación.
9. Lea todas las instrucciones de seguridad
de cada accesorio/aditamento antes de
usarlo.
10. No lo use en exteriores.
11.
Mantenga el bol de acero inoxidable
alejado de fuentes de calor tales como
las estufas, los hornos o los hornos de
microondas
.
12.
Para reducir el riesgo de descarga
eléctrica, no coloque la del aparato, el
cable ni el enchufe en agua ni en ningún
otro líquido
.
13. Quite todos los accesorios/aditamentos
de la batidora antes de lavarlos.
14. No permita que el cable cuelgue del
borde de la mesa o de la encimera.
15. No use este aparato si el cable o el
enchufe están dañados, si no funciona
correctamente, si está dañado, o después
de una caída/caída al agua. Llame
al servicio de atención al cliente del
fabricante para obtener información sobre
cómo hacer revisar, reparar o ajustar
el aparato, o devuélvalo a un centro de
servicio autorizado para su revisión,
reparación o ajuste (eléctrico o mecánico).
16. No haga funcionar el aparato debajo
o dentro de un armario/gabinete.
Siempre desenchufe el aparato antes
de almacenarlo en un armario/gabinete.
Dejar el aparato enchufado representa
un riesgo de incendio, especialmente
si este toca las paredes o la puerta del
armario/gabinete cuando se cierra.
17. No coloque el aparato sobre o cerca
de un quemador a gas o de un hornillo
eléctrico caliente ni en un horno caliente.
GUARDE ESTAS
INSTRUCCIONES
PARA USO
DOMÉSTICO
SOLAMENTE
NOTA: La potencia nominal máxima está
basada en el accesorio/aditamento que
consume más electricidad. Otros accesorios/
aditamentos pueden usar considerablemente
menos electricidad.
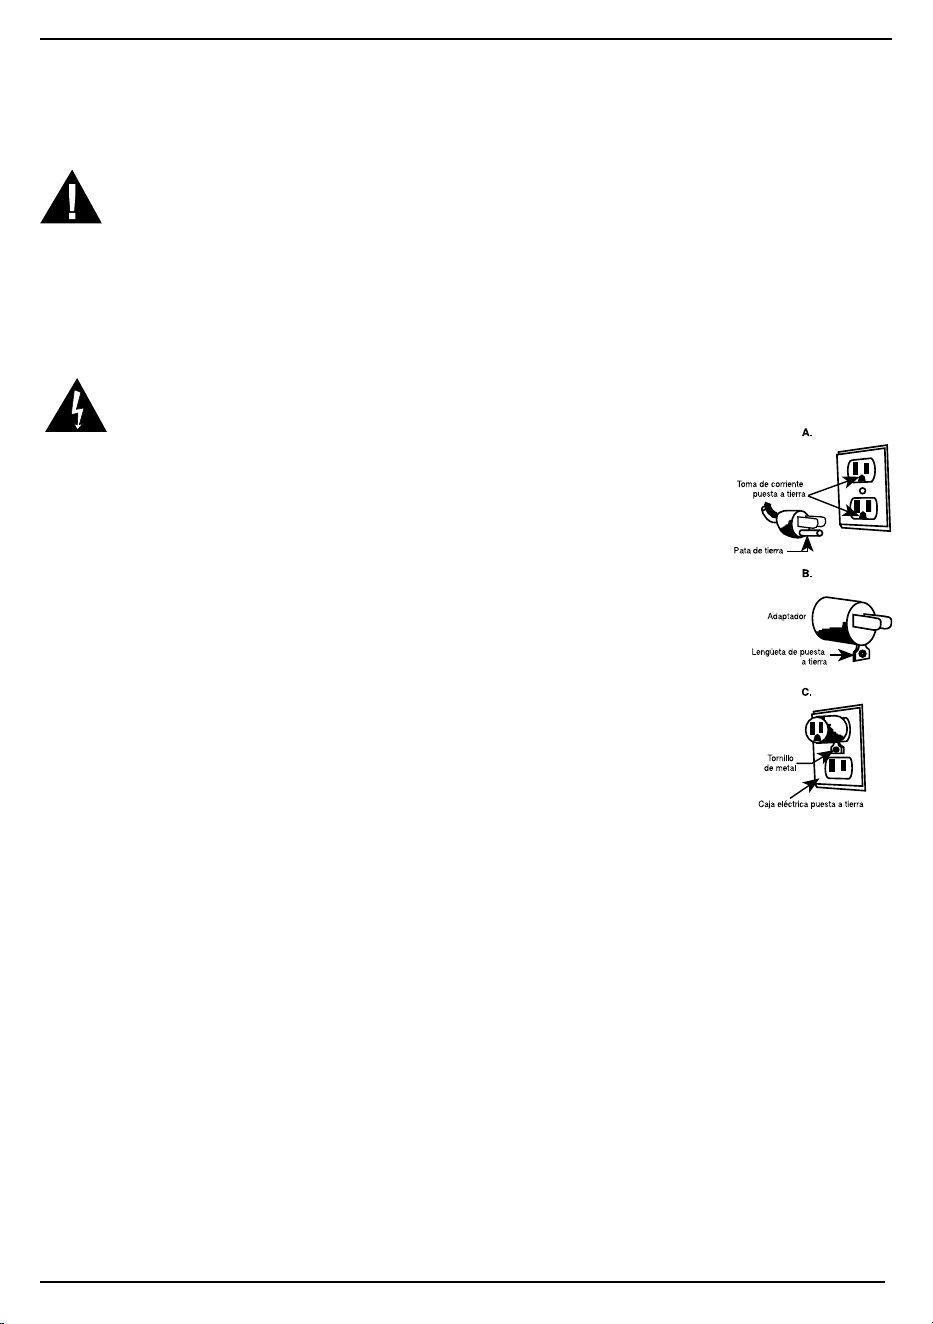
3
ADVERTENCIA: RIESGO DE
INCENDIO O DESCARGA
ELÉCTRICA
El símbolo de relámpago con punta
de flecha dentro de un triángulo
equilátero tiene como fin alertar al
usuario de la presencia de voltajes
peligrosos no aislados en el interior
del aparato, los cuales pueden
ser de suficiente magnitud para
constituir un riesgo de incendio o
descarga eléctrica.
El signo de exclamación dentro de
un triángulo equilátero tiene como
fin alertar al usuario de la presencia
de instrucciones importantes de
uso y mantenimiento (servicio) en
la documentación que acompaña
al equipo.
USO DE ALARGADORES
El cable provisto con este aparato es corto,
para reducir el riesgo de que alguien se
enganche o tropiece con un cable más largo.
Se puede usar un cable alargador/de extensión,
siempre que respete las precauciones
siguientes. La clasificación nominal del cable
alargador/de extensión debe ser por lo menos
igual a la del aparato. El cable más largo debe
ser acomodado de tal manera que no cuelgue
de la encimera/mesa, donde puede ser jalado
por niños o causar tropiezos.
INSTRUCCIONES DE
PUESTA A TIERRA
Para su protección, este aparato cuenta con
un cable de puesta a tierra equipado con un
enchufe de tierra, el cual debe ser conectado
a una toma de corriente debidamente puesta
a tierra. Si una toma de corriente puesta a
tierra no está disponible, se podrá usar un
adaptador para conectar el aparato a una
toma de corriente polarizada.
El adaptador debe ser puesto a tierra
mediante un tornillo de metal que conecte la
lengüeta del adaptador a la placa de la toma
de corriente.
PRECAUCIÓN: Antes de enchufar el adaptador,
cerciórese de que la toma de corriente está
puesta a tierra. Si no está seguro/a,
comuníquese con un electricista. Nunca use
un adaptador sin estar seguro/a de que la
toma de corriente esté puesta a tierra.
NOTA: Está prohibido usar un adaptador en
Canadá y en Europa.
Conecte el cable solamente a una toma de
corriente de 120 V; no use el aparato con un
convertidor de voltaje.
IMPORTANTE: Siempre desconecte el cable
de toma de corriente antes de ensamblar o
desensamblar el aparato.
AVISO
Este aparato está
equipado con un enchufe
con puesta a tierra.
Como medida de
seguridad, este enchufe
se podrá enchufar de
una sola manera en
las tomas de corriente
puestas a tierra. Si aun así
no entra completamente,
comuníquese con un
electricista. No intente
modificar el enchufe.
ÍNDICE
Medidas de seguridad importantes ..............2
Piezas y características .................................4
Instrucciones de ensamblaje ......................... 5
Instrucciones de uso .....................................5
Cómo pausar un programa ...........................6
Cómo reanudar un programa en pausa ........6
Cómo cancelar un programa.........................6
Limpieza y mantenimiento ........................... 8
Capacidades máximas ..................................9
Resolución de problemas ..............................9
Consejos y sugerencias ................................9
Guía de selección de la velocidad...............13
Garantía ...................................................... 14
Guías de las recetas preprogramadas ........15
Recetas .......................................................16

4
PIEZAS Y
CARACTERÍSTICAS
1. Motor de 500 vatios
Suficiente potencia para las recetas
grandes y los trabajos difíciles.
2. Cabezal inclinable
Permite instalar/retirar los aditamentos y
raspar el bol con facilidad.
3. Puerto de conexión para
aditamentos
Permite conectar el aditamento
moledor de carne, el aditamento
extrusor de pasta y otros aditamentos
(vendidos por separado) a la
batidora. Nota: El puerto de
conexión se encuentra atrás del
panel delantero. Un tornillo hace
que sea fácil instalar y asegurar
los aditamentos.
4. Puerto de conexión para accesorios
Permite conectar el batidor de alambre,
el batidor plano y el gancho amasador.
5. Bol de 5.5 cuartos de galón (5.2 L)
de acero inoxidable con asa
El asa hace que sea fácil levantar,
sostener, raspar y retirar el bol. La alta
capacidad del bol permite mezclar
cantidades más grandes.
6. Palanca de liberación del cabezal
Permite inclinar el cabezal y mantenerlo
en posición inclinada de manera segura.
1
6
3
4
5
2
7, 8
11 12
10 9
INTRODUCCIÓN
¡Presentamos la batidora de pie digital diseñada con la combinación perfecta de potencia,
precisión y velocidad! Equipada con un motor de alto rendimiento de 500 vatios, la batidora
de pie digital Precision Master
®
Pro de Cuisinart es capaz de realizar los trabajos más difíciles
en su bol de 5.5 cuartos de galón (5.2 L). Con solo girar la perilla digital LED puede elegir entre
12 velocidades, 3 funciones y 7 programas individuales. Sus accesorios de primera calidad
(un batidor de alambre, un batidor plano, un gancho amasador y una tapa antisalpicaduras
con pico vertedor) ofrecen máxima versatilidad. Cuenta con carcasa de fundición para una
durabilidad superior, y su sistema de mezcla garantiza resultados óptimos y precisos. Cuisinart
ha combinado la conveniencia digital con un potente rendimiento en esta batidora de pie que
no puede faltar en la cocina de todo chef casero de hoy en día.
Cuisinart también ofrece aditamentos opcionales (vendidos por separado). Aquellos
aditamentos (PE-50, MG-50, PRS-50 y SPI-50) se conectan a la batidora para poder hacer
pasta casera, moler su propia carne y más. ¡Inclusive puede convertir su batidora en una
máquina para hacer helado! El aditamento Cuisinart
®
Fruit Scoop
™
(IC50) le permitirá preparar
postre helados de frutas, sorbetes, helados y helados de yogur sin ningún esfuerzo.

5
También se usa para volver el cabezal a
su posición original.
7. Perilla de control digital LED
Permite ajustar la velocidad y el tiempo, y
elegir la función o el programa deseados.
8. Aro luminoso
3 colores diferentes indican cada modo:
a. BLANCO: Modo de espera; “Cuisinart”
aparece en la perilla
b. AZUL – La unidad está funcionando;
el modo seleccionado está iluminado
en el dial
c. ROJO PARPADEANTE: Apagado o
pausa; “Stop” (apagado) o “Pause”
(pausa) aparece en la perilla
9. Batidor de alambre
Incorpora aire a las mezclas. Ideal para
batir huevos, claras o crema líquida
y preparar recetas tales como pastel
de ángel, torta “chiffon”, merengue y
malvaviscos. También es perfecto para
preparar puré de papas rápidamente.
10. Batidor plano
Revuelve, mezcla y bate los ingredientes y
las mezclas. Ideal para preparar masa de
galletas, mezclas de pastel y más, además
de glaseados/coberturas. También es
perfecto para hacer fondos de tarta,
bollos/panecillos y “shortcakes”, así como
para mezclar los ingredientes del pan de
carne o de las albóndigas.
11. Gancho amasador
Usado para la mezcla y el amasado de
las masas leudadas/fermentadas (pan,
panecillos, pizza/focaccia, “coffee cakes”).
También sirve para mezclar y amasar masa
de pasta.
12. Tapa antisalpicaduras con pico vertedor
Evita las salpicaduras durante la mezcla
y al agregar ingredientes. Guía los
ingredientes hacia el tazón.
INSTRUCCIONES DE
ENSAMBLAJE
1. Incline el cabezal hacia atrás: Presione
la palanca de liberación del cabezal y
levante el cabezal hasta que se bloquee.
2. Instale el accesorio deseado: Coloque
el batidor plano, el batidor de alambre
o el gancho amasador en el puerto de
conexión para accesorios. Empuje y
gire en sentido antihorario hasta que se
bloquee. Para retirar el accesorio, empuje
y gire en sentido horario.
3. Coloque el bol sobre la base: Gire en
sentido horario para sujetarlo.
4. Baje el cabezal: Sosteniendo el cabezal
con una mano, presione nuevamente
la palanca de liberación y baje
completamente el cabezal.
5. Instale la tapa antisalpicaduras:
Después de haber conectado el
accesorio y bajado el cabezal, deslice
la tapa antisalpicaduras sobre el bol e
instale el pico vertedor introduciéndolo,
entre las patas de la tapa. Nota: La
tapa antisalpicaduras gira en ambas
direcciones, lo que permite agregar
ingredientes fácilmente.
Remoción: Primero retire el pico vertedor,
y luego deslice la tapa antisalpicaduras
fuera del bol.
INSTRUCCIONES DE USO
PARA ENCENDER EL APARATO
1. Enchufe el aparato.
2. Instale el bol en la base, girándolo en
sentido horario para sujetarlo,
3. Cuando la perilla de control se ilumine,
presiónela para seleccionar su idioma;
“Main Menu” aparecerá en la perilla.
4. Todas las veces siguientes que presione
la perilla, “Cuisinart” se iluminará.
5. Gire la perilla para elegir entre las
siguientes opciones:
• “MANUAL” (funcionamiento manual)
• “ TIMER” (funcionamiento manual con
temporizador de cuenta regresiva)
• “ DOUGH” (amasar; función
preprogramada)
• “ MIXING” (mezclar; función
preprogramada)
• “ WHISKING” (batir; función
preprogramada)
6. Seleccione el programa deseado,
presionando la perilla de control.

6
7. El programa seleccionado se iniciará.
NOTA: Después de 5 minutos de inactividad,
“Cuisinart” aparecerá en la perilla de control
y esta se apagará. Para despertar la unidad,
presione o gire la perilla de control.
Finalizado el ciclo, el aparato ingresará
al modo de espera.
MODO MANUAL
1. Gire la perilla de control hasta que
“MANUAL” se ilumine, luego presione
la perilla para confirmar. Para elegir la
velocidad, desde 1 hasta 12 (véase la
guía de velocidad en la página 12), gire
la perilla en sentido horario. Presione la
perilla para confirmar su selección y
encender el aparato; la cuenta regresiva
empezará.
2. Para cambiar la velocidad durante el
funcionamiento, gire la perrilla en sentido
horario o antihorario hasta que la
velocidad deseada aparezca en la perilla;
la velocidad se ajustará automáticamente
sin que el temporizador se detenga.
3. Para PAUSAR el aparato, presione
brevemente el centro de la perilla de
control.
4. Para PARAR el aparato, mantenga
presionado el centro de la perilla de
control hasta que el aparato emita un
pitido y que “STOP” se ilumine.
Advertencia: Evite todo contacto con
las piezas móviles mientras la luz está
parpadeando.
CÓMO PAUSAR UN PROGRAMA
1. Para pausar un programa durante el
funcionamiento, presione la perilla de
control una vez.
2. El aparato ingresará al modo de espera/
pausa.
3. El aparato también ingresará en modo
de pausa al levantar el cabezal.
Para levantar el cabezal, presione la
palanca de liberación del mismo.
NOTA: Para evitar las salpicaduras,
se recomienda presionar la perilla de
control para pausar el aparato.
CÓMO REANUDAR UN PROGRAMA
EN PAUSA
1. Si el cabezal está levantado, primero
vuelva a colocarlo en la posición de
bloqueo.
2. Mantenga presionada la perilla de control
por 2 segundos.
3. El aparato emitirá un pitido y el programa
continuará.
CÓMO CANCELAR UN PROGRAMA
1. Para cancelar un programa durante el
funcionamiento, mantenga presionada
la perilla de control hasta que el aparato
emita un pitido y que “STOP” se ilumine.
2. Suelte la perilla de control. Nota: El
programa aún no estará cancelado.
3. Presione la perilla de control para volver
al menú principal.
CÓMO USAR EL TEMPORIZADOR
1. Cuando encienda el aparato, gire la perilla
de control en sentido horario hasta que
“TIMER” (temporizador) aparezca en
la perilla. El temporizador permite hacer
funcionar el aparato a una velocidad
específica por un período de tiempo
específico.
2. Presione la perilla para confirmar que
desea ingresar al modo “temporizador”;
“01:00” se iluminará, parpadeando.
3. Gire la perilla en sentido horario o
antihorario para ajustar el tiempo, y luego
presiónela para confirmar su selección.
NOTA: El tiempo aumentará/disminuirá en
incrementos de 10 segundos. El tiempo
máximo es de 60 minutos.
4. Para ajustar la velocidad (desde 1 hasta
12), gire la perilla de control hasta que
la velocidad deseada se ilumine, luego
presiónela para confirmar su selección;
el aparato se pondrá en marcha.
Para PAUSAR la mezcla en cualquier
momento, simplemente presione la perilla
de control. Para PARAR la mezcla y volver
al menú principal, mantenga presionada la
perilla de control por 3 segundos.

7
5. El ciclo de mezcla parará automáticamente
al final del tiempo fijado, después de que
el aparato emita un pitido.
CÓMO APAGAR EL APARATO
Para apagar el aparato, mantenga presionado el
centro de la perilla de control por 5 segundos.
Después de 5 minutos de inactividad, la unidad
ingresará al modo de espera y la perilla digital
se apagará. Desenchufe el aparato cuando no
esté en uso.
CÓMO USAR LAS FUNCIONES
PREPROGRAMADAS
PROGRAMA 1: “DOUGH” (AMASAR)
Use este programa para preparar masas
fermentadas/de levadura, tales como la masa
de pan y de pizza. Siga las instrucciones a
continuación y consulte las recetas como guía.
1. Prepare los ingredientes y coloque el
líquido, el edulcorante (si lo usa) y la
levadura en el bol de la batidora.
2. Conecte el gancho amasador al aparato.
3. Gire la perilla de control en sentido
horario hasta que “DOUGH” (amasar)
se ilumine. Presione la perilla para
confirmar su selección.
4. Gire la perilla de control en sentido horario
para seleccionar el programa deseado:
“PIZZA DOUGH”(MASA DE PIZZA),
“WHITE BREAD” (PAN BLANCO), “WHOLE
WHEAT” (PAN DE TRIGO INTEGRAL).
5. Después de haber seleccionado el
programa deseado, presione la perilla
para encender el aparato.
6. Después del ciclo de amasado, el aparato
se apagará y una cuenta regresiva de
60 segundos empezará (esto es el
temporizador de fermentación de la masa).
Nota: Para la fermentación/el leudado,
se recomienda quitar el gancho amasador,
retirar la masa del bol, formar una bola de
masa suave y volver a colocar esta en el
bol. Cubra el bol con una toalla húmeda o
con papel film/plástico y deje leudar por
el tiempo indicado en la receta.
NOTA: Este programa está diseñado para
amasar masas de levadura. Puede haber
algunas recetas que requieran que el usuario
pause el programa para raspar las paredes
del bol durante el proceso de mezcla, u
otras que requieran un tiempo de amasado
adicional al final del proceso. Se puede
añadir un tiempo de amasado adicional
parando el programa “DOUGH” y usando el
modo manual (“MANUAL”) o el temporizador
(“TIMER”) para amasar. Nota: Si usa los
modos “MANUAL” o “TIMER” para amasar,
esto cancelará el programa “DOUGH” y el
temporizador de fermentación de la masa.
PROGRAMA 2: “MIXING” (MEZCLAR)
“DRY INGREDIENT MIXING”
(mezclar ingredientes secos)
Este programa está diseñado para mezclar
ingredientes secos para prácticamente
cualquier tipo de receta. Siempre use el
batidor de alambre para “tamizar” los
ingredientes secos.
1. Coloque los ingredientes secos en el bol.
2. Encienda la batidora y gire la perilla de
control para elegir la función “MIXING”
(mezclar). Presione la perilla para
confirmar su selección. Gire la perilla
de control en sentido horario hasta que
“DRY INGREDIENT MIXING” (mezclar
ingredientes secos) se ilumine. Presione la
perilla para empezar a mezclar; la batidora
se pondrá en marcha y funcionará a
velocidad 1 por 1 minuto. Se apagará
automáticamente al final del ciclo.
“CREAMING” (acremar)
Este programa está diseñado para batir sin
esfuerzo la mantequilla y el azúcar para
diferentes recetas, tales como la masa de
galletas o los glaseados. Recuerde usar la
función de pausa (“PAUSE”), presionando la
perilla de control una vez, para raspar las
paredes del bol y el batidor plano regularmente.
Si se necesita más tiempo para algunas
recetas, simplemente repita el programa.
1. Coloque los ingredientes en el bol.
2. Conecte el batidor plano o el batidor de
alambre a la batidora, dependiendo del
trabajo de mezcla.

8
3. Gire la perilla de control en sentido
horario hasta que “WHISKING” (batir)
se ilumine. Presione la perilla para
confirmar su selección.
4. Gire la perilla de control en sentido
horario hasta que “CREAMING” (acremar)
se ilumine.
5. Después de haber seleccionado el modo
deseado, presione la perilla para empezar
el proceso de mezcla.
PROGRAMA 3: “WHISKING” (BATIR)
“WHIPPING CREAM” (batir crema):
Este programa está diseñado para batir
hasta 2 tazas (475 ml) de crema líquida para
batir (“heavy cream), para conseguir aprox.
3½ tazas (830 ml) de crema batida (véase
la receta de crema batida en la página
44 del libro de recetas). La crema batida
producida tendrá picos medio-suaves. Si
desea que tenga picos más firmes, bata
la crema por más tiempo, ya se usando el
modo “MANUAL” o repitiendo el programa
“WHIPPING CREAM”.
1. Coloque la crema líquida para batir
(“heavy cream”) en el bol.
2. Conecte el batidor de alambre al cabezal.
3. Gire la perilla de control en sentido
horario hasta que “WHISKING” (batir) se
ilumine. Presione la perilla para confirmar
su selección.
4. Gire la perilla de control en sentido
horario hasta que “WHIPPING CREAM”
(batir crema) se ilumine.
5. Presione la perilla para empezar el
proceso de batido.
6. Se recomienda tamizar el azúcar glasé y
agregar cualquier saborizante después
de que la crema batida alcance picos
suaves; esto producirá un mejor sabor y
una crema batida más estable.
Programa “MASH POTATOES”
(hacer puré de papas)
Este programa está diseñado para aplastar
3 a 5 lb (1.35 a 2.25 kg) de papas cocinadas
(véase la receta de puré de papas en la
página 17 del libro de receta). Si prepara
más o menos puré, mantenga un ojo en la
consistencia para cerciorarse de que no
se está mezclando de más o de menos.
1. Coloque las papas tibias en el bol.
2. Conecte el batidor de alambre al cabezal.
3. Gire la perilla de control en sentido
horario hasta que “WHISKING” (batir)
se ilumine. Presione la perilla para
confirmar su selección.
4. Gire la perilla de control en sentido horario
hasta que las palabras “MASH POTATOES”
(hacer puré de papas) se ilumine.
5. Presione la perilla para empezar el
proceso de batido.
6. Se recomienda añadir la mantequilla,
la leche y los condimentos después de
haber machacado un poco las papas;
esto le dará más sabor al puré, sin
sobreprocesarlo.
LIMPIEZA Y
MANTENIMIENTO
Siempre apague y desenchufe el aparato
antes de limpiarlo.
Bloque-motor
Limpie la carcasa con un paño húmedo, luego
séquela bien. Nunca use limpiadores/materiales
abrasivos, ni sumerja el aparato en agua.
Bol
Lave el bol a mano y séquelo bien, o métalo
en el lavavajillas. Nunca use cepillos de metal,
lana de acero, o cloro para limpiar el bol.
Accesorios
El batidor plano y el gancho amasador son
aptos para lavavajillas (bandeja superior
solamente); también pueden lavarse a mano.
El batidor de alambre NO es apto para
lavavajillas y debe lavarse a mano.
Aditamentos
Siga las instrucciones de limpieza provistas
con cada aditamento.
Tapa antisalpicaduras con pico vertedor
Apta para lavavajillas (bandeja superior
solamente); también puede lavarse a mano.
Mantenimiento
Cualquier otro servicio debe ser realizado por
un técnico autorizado.

9
CAPACIDADES MÁXIMAS
• Masa de levadura (pan, pizza) – 6 tazas
(750 g) de harina blanca
• Masa de galletas – 5 docenas de galletas
• Crema batida – 6 tazas (1.4 L) de crema
líquida para batir (rinde el doble de crema
batida)
• Claras de huevo – 12 claras de huevo grande
RESOLUCIÓN DE
PROBLEMAS
Si la unidad se apaga de repente, esto puede
significar que el motor se ha sobrecalentado.
Su batidora de pie está equipada con un
dispositivo de protección contra sobrecarga
que apaga automáticamente el motor en
caso de sobrecalentamiento.
Solución: En caso de que esto ocurriera:
• Apague y desenchufe el aparato.
• Vacíe parcialmente el bol y permita que el
aparato descanse por unos minutos.
• Vuelva a enchufar y encender el aparato
a la velocidad deseada. Si el aparato no
se pone en marcha al activar un programa,
permita que descanse por más tiempo.
CONSEJOS Y
SUGERENCIAS
• Ponga la rejilla del horno en la posición
deseada antes de precalentar el horno.
La mayoría de las recetas requieren que la
rejilla esté en el centro del horno; las tartas
se cocinan mejor en el tercio inferior del
horno.
• Siga las instrucciones al pie de la letra,
teniendo cuidado de no mezclar la mezcla
ni de menos ni de más.
• No ponga demasiadas fuentes en el horno
a la vez y procure no abrir la puerta del
horno durante el horneado; use la luz del
horno para vigilar el horneado. Con algunas
recetas, tales como las galletas, cambie las
placas de nivel a la mitad del tiempo.
• Es imprescindible medir los ingredientes,
especialmente la harina, con precisión.
Revuelva la harina antes de medirla o
pesarla, y use una cuchara para sacarla de
la bolsa. Si usa un vaso medidor, enrase la
harina con un cuchillo o el mango de una
cuchara. No apisone ni compacte la harina.
Recuerde no medir la harina directamente
de la bolsa. A pesar de que esté tamizada,
ha sido comprimida/compactada para
caber en la bolsa. Si prepara productos
de panadería con harina que no haya sido
revuelta, estos resultarán densos y secos.
• Para la mayoría de las recetas, los alimentos
refrigerados tales como la mantequilla, la
leche y los huevos se incorporan mejor a la
mezcla si están a temperatura ambiente.
• Saque la mantequilla del refrigerador antes
de empezar a preparar la receta y córtelo
en pedazos de ½ in. (1.5 cm) para darle
tiempo de entibiarse mientras prepara el
resto de los ingredientes. No caliente la
mantequilla en el microondas; esto puede
cambiar su estructura y dar una textura
diferente al producto final.
• Separe los huevos uno a la vez, en un
recipiente pequeño. Coloque las claras en
un bol de vidrio o de acero inoxidable muy
limpio. Si cae yema en la clara, reserve el
huevo para otro uso; el mínimo rastro de yema
puede impedir que las claras se monten.
• Raspe el bol (las paredes, el fondo y el
batidor) varias veces durante la mezcla,
especialmente cuando agrega nuevos
ingredientes; esto garantiza que los
ingredientes se incorporen mejor y
produce mejores resultados. Cuanto más
frecuentemente raspa el bol, mejor.
• Antes de batir claras de huevo, compruebe
que el bol y el batidor de alambre están
impecablemente limpios y totalmente
secos. El mínimo rastro de grasa/aceite
puede impedir que se monten las claras.
• Para comprobar si los huevos están
frescos, póngalos en un bol de agua
tibia. Si flotan, esto significa que no están
frescos. Es imprescindible usar huevos
frescos para montar claras; cuanto más
frescos sean los huevos, más estables
serán las claras batidas.

10
• Derrita el chocolate a baño María, encima
de una cacerola de agua a punto de hervir.
El agua no debe hervir, ni debe tocar el
fondo del bol o de la olla para baño María;
esto podría cocinar/endurecer el chocolate,
y no lo podrá usar en la receta.
• Siempre compruebe que la levadura está
fresca antes de usarla. Rocíe un poco de
levadura en agua tibia (105 a 110 °F
[40 a 43 °C])y agregue una pizca de azúcar
o de harina de la receta. Si la levadura
no se pone espumosa dentro de 5 a 10
minutos, esto significa que está “muerta”.
Empiece de nuevo con un nuevo paquete
de levadura.
PARA HACER GALLETAS
• Use una cuchara para helado para medir
la masa de galletas; esto formará galletas
de tamaño y forma uniformes. Existen
cucharas de helado de varios tamaños.
Cualquiera (p. ej., n.°40, n.°50 o n.°60)
puede usarse para formar galletas.
Las más grandes, que miden entre ¹⁄
³
de
taza (80 ml) y ½ taza (120 ml) de mezcla,
son perfectas para las galletas gigantes.
Las cucharas de helado también son
perfectas para llenar los moldes de muffins.
Use la cuchara para helado n.°16 para
hacer “muffins” o albóndigas.
• Para que las galletas conserven su forma
durante el horneado, coloque la masa
en placas forradas con papel encerado
o papel film/plástico y refrigérela antes
de hornear; esto evitará que la masa de
galletas se extienda demasiado y producirá
lindas galletas redondas. Si extiende y
corta la masa de galletas, siempre enfríe
las galletas cortadas antes de hornearlas
para garantizar que mantengan su forma.
La mayoría de las masas de galletas puede
refrigerase por 2 a 3 días (cerciórese de
envolver bien la masa).
• La masa de galleta también puede
congelarse. Después de formar las galletas,
envuélvalas en doble capa de papel film/
plástico y congélelas por hasta 3 meses.
Descongélelas antes de hornearlas.
• Para facilitar el desmoldado y la limpieza,
forre las placas con papel sulfurizado.
• Permita que las galletas se enfríen en la
placa por 2 a 3 minutos, luego termine de
enfriarlas en una rejilla; esto evitará que
las galletas se encojan, se desmigajen o
se rompan.
• Permita que las galletas se enfríen por
completo antes de guardarlas, o se pondrán
pastosas y perderán su forma.
PARA HACER PAN
• Un paquete de ¼ oz (8 g) de levadura
equivale a 2¼ cucharaditas de levadura.
• Usar leche en vez de agua producirá una
corteza más suave.
• Para suavizar la corteza después del
horneado, restriéguela con mantequilla sin
sal inmediatamente luego de sacar el pan
del horno; esto evitará que se seque.
• Si una receta incluye un tipo especial de
harina, use la harina recomendada. Si no
tiene harina para hacer pan, puede usar
harina común, pero el pan no leudará tanto.
• No use margarina ligera o margarina
envasada para hacer pan; su estructura
hace que no producirá los mismos resultados.
• El gluten de trigo es la proteína seca que
sobra de la harina de trigo después de
haber eliminado el almidón. El gluten
de trigo es un buen acondicionador/
potenciador de masa, especialmente para
los panes integrales o los panes hechos
con harina común. Si una receta incluye
gluten de trigo, se recomienda usarlo para
conseguir resultados óptimos.
• Para hacer pan de trigo integral, use 1½
cucharaditas de gluten de trigo por taza
(120 g) de harina de trigo integral.
• Si una receta no incluye una cantidad
determinada de harina, use la cantidad
mínima recomendada, y luego añada
harina poco a poco hasta conseguir una
masa suave pero no pegajosa.
• Usar demasiado líquido o hacer pan
cuando el día está húmedo puede hacer
que el pan no se leude o que la parte
superior se encoja.

11
• Un termómetro de cocina es una
herramienta muy útil para hacer pan. Puede
usarlo para medir la temperatura del agua
que usa para disolver/fermentar la levadura
y para comprobar la temperatura interna
del pan cocinado.
• El agua usada para fermentar la levadura
debe estar entre 105°F (40°C) y 110 °F
(43°C).
• La temperatura interna del pan horneado
debe estar entre 190 °F (87 °C) y 210 °F
(98 °C).
PARA HACER PASTEL
• Todos los ingredientes y el bol deben estar
a temperatura ambiente. Los ingredientes a
temperatura ambiente se incorporan mejor
y son más fáciles de mezclar.
• Vierta la mezcla en los moldes
inmediatamente después de terminar de
mezclar los ingredientes.
• Meta los moldes al horno inmediatamente
después de llenarlos.
• Compruebe si los pasteles están listos al
final del tiempo de cocción mínimo.
• Deje los pasteles enfriar en los moldes
hasta que estén tibios, luego desmóldelos
y permita que se enfríen por completo en
una rejilla.
• Esparza el glaseado con una espátula
angulada; es más fácil que con un cuchillo
o una espátula regular.
PARA MONTAR CLARAS
• Las claras se montan mejor cuando están a
temperatura ambiente. Para llevar las claras
a temperatura ambiente de manera segura,
coloque los huevos enteros en un bol de
agua tibia por 10 a 15 minutos.
• Agregue una pequeña cantidad de crémor
tártaro, jugo de limón o vinagre a las claras;
esto las estabilizará y ayudará a conseguir
claras batidas más voluminosas y firmes.
Use
¹⁄8 cucharadita de crémor tártaro por
clara de huevo grande o 1 cucharadita de
crémor tártaro por taza (235 ml) de claras
de huevo (8 a 10 huevos grandes).
• El tiempo necesario para montar claras
depende de la temperatura/frescura de los
huevos y de la temperatura/humedad de la
cocina. Esté pendiente de estos factores.
• Cuando el tiempo está húmedo o está
lloviendo, puede que no consiga claras
batidas tan voluminosas como cuando el
tiempo está seco o más caliente.
• Ponga los huevos (a temperatura ambiente)
en bol limpio y seco. Instale el batidor
de alambre limpio y seco. Bata las
claras, empezando en la velocidad 1 y
aumentando gradualmente la velocidad
al nivel 6, hasta que estén ligeras y
espumosas. Si bate las claras demasiado
rápido al principio, su estructura no será
tan estable/resistente y no alcanzarán
su máximo volumen una vez batidas.
Tampoco bata las claras de más; esto
las separará y hará que los merengues se
desinflen.
• Cuando añada azúcar a las claras, haga
esto despacio y gradualmente, justo
cuando las claras empiecen a espumarse.
Siempre rocíe el azúcar lentamente a lo
largo del costado del bol mientras está
batiendo las claras – no añada el azúcar en
el centro del bol o directamente encima de
las claras; esto puede desinflarlas.
• Al principio, las claras se pondrán
espumosas. Después de poco tiempo, se
pondrán más firmes y empezarán a tomar
cuerpo. Luego, se formarán picos suaves
que se caen al levantar el batidor; esta es
la textura requerida para hacer “mousses”
y “soufflés”. La etapa siguiente son picos
medio-firmes (las claras parecerán secas
y brillantes, y los picos tendrán cuerpo);
esta es la textura requerida para hacer
merengues. La etapa final son picos
firmes y secos. Las claras no parecerán
uniformemente blancas , y estarán opacas.
• Use las claras batidas inmediatamente
después de batirlas. Si espera más de 5
minutos, empezarán a desinflarse y perder
volumen y estructura. Las claras batidas
con azúcar o crémor tártaro son más
estables y durarán por más tiempo.

12
CÓMO “PASTEURIZAR” LAS CLARAS
Las claras crudas pueden contener bacterias
dañinas. Si una receta incluye claras crudas,
se recomienda usar claras en polvo o
que “pasteurice” las claras de la manera
siguiente:
• Coloque las claras, 2 cucharadas del
azúcar de la receta, 2 cucharadas (30ml)
de agua y una pizca de crémor tártaro en el
bol de la batidora; revuelva hasta conseguir
una mezcla suave.
• Caliente la mezcla a baño María, revolviendo
constantemente con una espátula de
caucho impecablemente limpia, hasta que
la temperatura de la mezcla alcance 160°F
(71°C). Nota: Empiece a comprobar la
temperatura después de aprox. un minuto.
• Cuando la mezcla alcance 160 °F (71°C),
seque la parte inferior del bol y coloque
este sobre la batidora. Instale el batidor de
alambre. Continúe como se indica en la
receta.
PARA BATIR CREMA
La diferencia entre la crema líquida para
batir (“heavy cream”) y la crema para montar
(“whipping cream”) es su contenido de grasa
butírica. Cuanta más grasa butírica tenga la
crema, más estable será la crema batida.
La crema líquida para batir (“heavy cream”)
tiene más grasa butírica que la crema para
montar (“whipping cream”), por lo tanto, es
mejor para hacer crema batida. Las mejores
cremas para batir son cremas que no sean
ultrapasteurizadas.
Por lo general, la crema rinde el doble de
su volumen de crema batida. Para preparar
2 tazas (475 ml) de crema batida, coloque
1 taza (235 ml) de crema líquida para batir
(“heavy cream”) o de crema para montar
(“whipping cream”) en el bol helado. Agregue
aprox. ½ cucharadita de extracto de vainilla
u otro extracto puro y 1 a 4 cucharadas (10 a
50 g) de azúcar granulada, superfino o glasé.
Use la función “WHISKING” (batir) y el
programa “WHIPPING CREAM” (batir crema)
para conseguir picos medio-suaves. Para
conseguir picos más firmes, bata a velocidad
12 usando el modo “MANUAL”.
• Si desea endulzar la crema batida,
agregue lentamente el azúcar y los
saborizantes cuando la crema empiece
a tomar cuerpo.
• Cerciórese de tamizar el azúcar antes de
añadirlo a la crema.
• Deje de batir cuando la crema haya
alcanzado el doble de su volumen.
La crema debe estar suave, cremosa y
espesa, con picos suaves (p. ej., para
servir con postre o incorporar en postres)
o picos firmes (p. ej., para decorar
pasteles).
• A menos que haya sido estabilizada, sirva
la crema batida inmediatamente.
CREMA BATIDA ESTABILIZADA
La crema batida estabilizada se conservará
por más tiempo en el refrigerador y puede
usarse para decorar postres con una manga
pastelera. Para estabilizar la crema batida,
se necesita gelatina o un estabilizador
comercial.
Para estabilizar la crema batida: Coloque un
poco de agua en una taza medidora y rocíe
un poco gelatina en polvo. Deje reposar
por 5 minutos hasta que se suavice. Luego,
coloque la taza medidora en una cacerola
de agua hirviendo a fuego lento y revuelva
hasta que la gelatina se disuelva. Deje enfriar
ligeramente la gelatina antes de agregarla a
la crema, pero no permita que se enfríe por
completo.
• Para 1 taza (235 ml) de crema, use ½
cucharadita de gelatina remojada en 1
cucharada (15ml) de agua.
• Para 2 tazas (475 ml) de crema, use 1
cucharadita de gelatina remojada en 2
cucharadas (30ml) de agua.
• Para 8 tazas (1.9L) de crema, use 1
cucharada + 1 cucharadita de gelatina
remojada en 8 cucharadas (120ml) de agua.
Bata la crema como de costumbre,
añadiendo la gelatina después de que la
crema empiece a tomar cuerpo y empiece
a espesarse.

13
1
• Para tamizar ingredientes secos
• Para incorporar suavemente
ingredientes (p. ej., ingredientes secos)
• Para batir crema y montar claras
(aumentando gradualmente la
velocidad)
7
• Para mezclar mantequilla con harina
(para preparar masa de hojaldre)
• Para hacer puré de papas/vegetales
• Para batir crema y montar claras
(aumentando gradualmente la
velocidad)
2
• Para tamizar ingredientes secos
• Para incorporar suavemente
ingredientes (p. ej., ingredientes secos)
• Para preparar panes/bizcochos sin
levadura (“muffins”, etc.)
• Para acremar mantequilla con azúcar
• Para batir crema y montar claras
(aumentando gradualmente la
velocidad)
8
• Para mezclar mantequilla con harina
(para preparar masa de hojaldre)
• Para hacer puré de papas/vegetales
• Para batir crema y montar claras
(aumentando gradualmente la
velocidad)
3
• Para acremar mantequilla con azúcar
• Para incorporar huevos
• Para amasar masa de pan
• Para batir crema y montar claras
(aumentando gradualmente la
velocidad)
9
• Para hacer puré de papas/vegetales
• Para batir crema y montar claras
(aumentando gradualmente la
velocidad)
4
• Para acremar mantequilla con azúcar
• Para amasar masa de pan
• Para amasar masa de pasta
• Para mezclar mantequilla con harina
(para preparar masa de hojaldre)
• Para batir crema y montar claras
(aumentando gradualmente la
velocidad)
10
• Para batir puré de papas/vegetales
• Para batir crema y montar claras
(aumentando gradualmente la
velocidad)
5
• Para acremar mantequilla con azúcar
• Para mezclar mantequilla con harina
(para preparar masa de hojaldre)
• Para hacer puré de papas/vegetales
• Para batir crema y montar claras
(aumentando gradualmente la
velocidad)
11
• Para batir puré de papas/vegetales
• Para batir crema y montar claras
(aumentando gradualmente la
velocidad)
6
• Para mezclar mantequilla con harina
(para preparar masa de hojaldre)
• Para hacer puré de papas/vegetales
• Para batir crema y montar claras
(aumentando gradualmente la
velocidad)
12
• Para batir puré de papas/vegetales
• Para batir crema y montar claras
(aumentando gradualmente la
velocidad)
GUÍA DE SELECCIÓN DE LA VELOCIDAD
NOTA: No exceda la velocidad 5 para amasar masa fermentada/de levadura; esto puede dañar el aparato.

14
GARANTÍA
Garantía limitada de tres años
Esta garantía es para los consumidores que
residen en los EE.UU. solamente. Usted es
un consumidor si posee una batidora de pie
digital de 5.5 cuartos de galón (5.2 L) Cuisinart
®
Precision Master
®
Pro que fue comprada en
una tienda para uso personal, familiar o casero.
A menos que la ley aplicable exija lo contrario,
esta garantía no es para los minoristas u otros
consumidores/compradores comerciales.
Cuisinart garantiza este producto contra todo
defecto de materiales o fabricación durante 3
años después de la fecha de compra original,
siempre que el aparato haya sido usado para
uso doméstico y según las instrucciones.
Se recomienda llenar el formulario de registro
disponible en https://cuisinart.registria.com
a fin de facilitar la verificación de la fecha de
compra original de este producto Sin embargo,
no es necesario registrar el producto para
recibir servicio bajo esta garantía. En ausencia
de prueba de la fecha de compra, el período de
garantía será calculado a partir de la fecha de
fabricación del producto.
RESIDENTES DE CALIFORNIA
La ley del estado de California ofrece dos
opciones bajo el período de garantía. Los
residentes del estado de California pueden
regresar el producto defectuoso (A) a la tienda
donde lo compraron o (B) a otra tienda que
venda productos Cuisinart
®
de este tipo.
La tienda podrá, a su elección, reparar el
producto, referir el consumidor a un centro de
servicio independiente, sustituir el producto, o
reembolsar al consumidor el precio de compra
menos la cantidad directamente atribuible al
uso anterior del producto por el consumidor.
Si estas dos opciones no satisfacen al
consumidor, podrá llevar el aparato a un centro
de servicio independiente, siempre que se
pueda arreglar o reparar el aparato de manera
económica. Cuisinart (no el consumidor)
será responsable por los gastos de servicio,
reparación, sustitución o reembolso de los
productos defectuosos bajo garantía. Los
residentes de California también pueden, si
lo desean, mandar el producto defectuoso
directamente a Cuisinart para que lo reparen o
lo cambien. Para esto, se debe llamar a nuestro
servicio posventa al 1-800-726-0190.
Cuisinart será responsable por los gastos de
reparación, reemplazo, manejo y envío de los
productos defectuosos durante el período de
garantía.
GARANTÍA DE REEMPLAZO SIN
DIFICULTADES
Su máxima satisfacción es nuestra prioridad,
así que si este producto Cuisinart
®
falla
dentro del generoso período de garantía,
lo repararemos o, de ser necesario, lo
reemplazaremos, sin costo alguno para usted.
Para obtener una etiqueta de devolución,
envíenos un correo electrónico, visitando
https://www.cuisinart.com/customer-
care/product-return/product-assistance/
product-inquiry. O llame a nuestro servicio
posventa al 1-800-726-0190 para hablar con
un representante.
Este producto satisface las más altas
exigencias de fabricación y ha sido diseñado
para funcionar con 120 V, usando accesorios
y repuestos autorizados solamente. Esta
garantía excluye expresamente los defectos
o daños causados por accesorios, piezas o
reparaciones no autorizados por Cuisinart,
así como los defectos o daños causados
por el uso de un convertidor de voltaje. Esta
garantía no cubre el uso comercial o industrial
del producto, y no es válida en caso de daños
causados por mal uso, negligencia o accidente.
Esta garantía excluye todos los daños
incidentales o consecuentes. Algunos Estados
no permiten la exclusión o limitación de daños
incidentales o consecuentes, de modo que las
limitaciones mencionadas pueden no regir para
usted. Usted puede tener otros derechos que
varían de un Estado a otro.
Importante: Si debe llevar el aparato
defectuoso a un centro de servicio no
autorizado, por favor informe al personal del
centro de servicio que deben llamar al
Centro de Servicio al Cliente de Cuisinart,
al 1-800-726-0190 a fin de diagnosticar el
problema correctamente, usar las piezas
correctas para repararlo, y comprobar que
el producto aún está bajo garantía.

15
GUÍA DE RECETAS
PREPROGRAMADAS
Programa 1: “DOUGH”
(AMASAR)
“PIZZA DOUGH” (MASA DE PIZZA):
Use este programa para preparar masas
fermentadas/de levadura, tales como la masa
de pizza o de focaccia. Finalizado el ciclo de
amasado, el programa ingresará un ciclo de
fermentación/leudado de 1 hora. Nota: Para
la fermentación/el leudado, se recomienda
quitar el gancho amasador, retirar la masa del
bol, formar una bola de masa suave y volver
a colocar esta en el bol. Cubra el bol con una
toalla húmeda o con papel film/plástico y deje
fermentar/leudar por el tiempo indicado en la
receta. Después de este tiempo, retire la masa
del bol y dele la forma deseada.
“WHITE BREAD” (PAN BLANCO):
Use este programa para preparar masas de pan
que requieran harina común o harina de pan.
Finalizado el ciclo de amasado, el programa
ingresará un ciclo de fermentación/leudado de
1 hora. Nota: Para la fermentación/el leudado,
se recomienda quitar el gancho amasador,
retirar la masa del bol, formar una bola de masa
suave y volver a colocar esta en el bol. Cubra
el bol con una toalla húmeda o con papel film/
plástico y deje fermentar/leudar por el tiempo
indicado en la receta. Después de este tiempo,
retire la masa del bol y dele la forma deseada.
La mayoría de la receta requieren un segundo
o tercer ciclo de leudado después de dar forma
al pan. Esto se puede hacer en una placa para
hornear o una bandeja.
“WHOLE WHEAT” (PAN DE TRIGO
INTEGRAL):
Use este programa para preparar masas de
pan que requieran harina integral o multigrano
(o una mezcla de harina blanca e integral).
Finalizado el ciclo de amasado, el programa
ingresará un ciclo de fermentación/leudado de
1 hora. Nota: Para la fermentación/el leudado,
se recomienda quitar el gancho amasador,
retirar la masa del bol, formar una bola de masa
suave y volver a colocar esta en el bol. Cubra
el bol con una toalla húmeda o con papel
film/plástico y deje fermentar/leudar por el
tiempo indicado en la receta. Después de este
tiempo, retire la masa del bol y dele la forma
deseada. La mayoría de la receta requieren un
segundo o tercer ciclo de leudado después de
dar forma al pan. Esto se puede hacer en una
placa para hornear o una bandeja.
Programa 2: “MIXING”
(MEZCLAR)
“DRY INGREDIENT MIXING”
(MEZCLAR INGREDIENTES SECOS):
Este programa está diseñado para mezclar
ingredientes secos para prácticamente
cualquier tipo de receta. Siempre use el batidor
de alambre para “tamizar” los ingredientes
secos.
PROGRAMA “CREAMING” (ACREMAR)
Este programa está diseñado para batir
sin esfuerzo la mantequilla y el azúcar para
diferentes recetas, tales como la masa de
galletas o los glaseados. Recuerde usar la
función de pausa (“PAUSE”), presionando el
centro de la perilla de control, para raspar las
paredes del bol y el batidor plano regularmente.
Si se necesita más tiempo para algunas recetas,
simplemente repita el programa.
Programa 3: “WHISKING”
(BATIR)
“WHIPPING CREAM” (BATIR CREMA):
Este programa está diseñado para batir hasta
2 tazas (475 ml) de crema líquida para batir
(“heavy cream”), para conseguir aprox. 3½
tazas (830 ml) de crema batida. La crema batida
producida tendrá picos medio-suaves. Si desea
que tenga picos más firmes, bata la crema por
más tiempo, ya se usando el modo “MANUAL”
o repitiendo el programa “WHIPPING CREAM”
(batir crema).
“MASH POTATOES” (HACER PURÉ DE
PAPAS):
Este programa está diseñado para aplastar
3 a 5 lb (1.35 a 2.25 kg) de papas cocinadas.
Si prepara más o menos puré, mantenga un ojo
en la consistencia para cerciorarse de que no
se está mezclando de más o de menos.

16
RECETAS
ENTREMESES SALADOS Y ALIÑOS
“Gougères” (bombas de queso suizo) ...........17
Soufflé (suflé) de espinaca y queso Feta........17
Puré de papas ................................................18
Puré de coliflor ...............................................18
Masa de pasta ................................................ 19
MASAS, PANES Y PANCITOS DE
LEVADURA
Pretzels con romero y copos de sal marina ....19
Pizza de jamón de Parma (Prosciutto)
e higos con queso de cabra ........................... 20
Masa de pizza ................................................20
Masa de pizza sin gluten ................................21
Pan blanco básico .......................................... 22
Pan de trigo integral con melaza .................... 22
Pan multigrano ...............................................23
Pancitos de mantequilla .................................23
Pan Jalá (“Challah”) ........................................ 24
Pan italiano rústico .........................................25
“COFFEE CAKES”, “MUFFINS” Y
PANES SIN LEVADURA
Pastel crujiente de suero de leche con
arándanos azules ...........................................25
Pan de banana con chispas de chocolate .....26
Bizcocho de limón .......................................... 27
Pancitos de pacanas acaramelados ..............28
GALLETAS Y BARRAS
Galletas de pacanas rellenas
con mermelada ...............................................29
Galletas de jengibre ........................................30
Galletas rellenas de fresa ...............................30
Galletas de chocolate ..................................... 31
“Biscotti” de cerezas y almendras .................32
Galletas de azúcar “moca” ............................. 33
Galletas blancas y negras ..............................33
Galletas energéticas .......................................34
“Brownies” cremosos ..................................... 35
“Blondies”
(“brownies” de chocolate blanco) ..................35
Barras de pastel de queso con
arándanos azules ...........................................36
BASE DE TARTAS Y TARTAS
Masa de hojaldre básica ................................37
Fondo/Base de tarta de galletas ....................37
Tarta de limón con merengue ........................38
Tarta de crema de chocolate .........................39
PASTELES Y “CUPCAKES”
Pastel dorado ................................................ 39
Pastel de capas de chocolate ........................40
Pastel refrigerado de jengibre y naranja .........40
Pastel de cumpleaños de capas
con baño/glaseado de vainilla fácil ................41
Pastel de galleta de chispas de chocolate ......42
Mini pasteles de queso de lima “Key lime” .....43
“Cupcakes” dorados sin gluten .....................44
Pastel de ángel ...............................................44
COBERTURAS/BAÑOS, GASEADOS,
MOUSSES Y RELLENOS
Crema de mantequilla francesa .....................45
Crema de mantequilla suiza ...........................45
Baño de chocolate .........................................46
Baño de queso crema ....................................46
Baño de vainilla sin lácteos ............................47
Glaseado real .................................................47
“Ganache” de chocolate ................................47
Mousse de chocolate simple .........................47
Crema batida .................................................. 48
Café batido .....................................................48

17
ENTREMESES SALADOS
Y ALIÑOS
“Gougères”
(bombas de queso suizo)
Aunque el Gruyère es el ingrediente tradicional
de las “gougères”, puede sustituirlo con
su queso favorito.
Rinde aprox. 65 “gougères” de 1 in. (2.5 cm)
½ taza (120 ml) de agua
4 cucharadas (55 g) de mantequilla sin
sal, en pedazos
½ cucharadita de sal kosher
½ cucharadita de azúcar granulada
1 taza (125 g) de harina común
2 huevos grandes (+ hasta 2 huevos más
si es necesario)
1 taza (120 g) de Gruyère finamente
rallado
¼ cucharadita de pimienta de Cayena
¼ cucharadita de páprika
Precalentar el horno a 500°F (260°C). Forrar
dos placas para horno con papel sulfurizado.
Reservar.
Colocar el agua, la mantequilla, ¼ de
cucharadita de la sal y el azúcar en una cacerola
mediana; revolver y poner calentar a fuego
medio. Cuando la mezcla empiece a hervir,
retirar del fuego y agregar la harina. Volver al
fuego y ajustar la temperatura al nivel medio-
alto. Seguir cocinando por 1½ a 2 minutos,
revolviendo continuamente con una cuchara de
madera, hasta que se espese y que una película
gruesa y dura se forme en el fondo de la
cacerola. Retirar del fuego y verter la mezcla en
el bol de la batidora. Instalar el batidor plano y
revolver a velocidad 3 por aprox. 2 a 3 minutos
para enfriar. Una vez fría la masa, ajustar la
velocidad al nivel 4 y agregar los huevos, uno a
la vez, teniendo cuidado de incorporar cada
huevo completamente antes de añadir otro.
Raspar el bol antes de cada adición. La masa
está lista cuando adquiere un color amarillo claro
y escurre del batidor en forma lenta y regular.
Si la masa está demasiado espesa, batir los 2
huevos restantes y agregarlos, 1 cucharadita a
la vez y sin dejar de batir, hasta que la masa
adquiera la consistencia deseada. Cerciorarse
de que la masa no está demasiado aguada, o no
mantendrá su forma.
Agregar la mitad del Gruyère y los ingredientes
restantes; mezclar a velocidad 2 para incorporarlos.
Colocar la mezcla en una manga pastelera
con una boquilla redonda pequeña a mediana.
En las placas preparadas, formar bolas de 1 in.
(2.5 cm), a una distancia de ½ in. (1.5 cm)
una de otra. Esparcir cada una con una pizca
del queso reservado. Meter al horno y ajustar
inmediatamente la temperatura a 300°F
(150°C). Hornear por aprox. 20 minutos,
hasta que las “gougères” estén bien doradas
por fuera y huecas (no húmedas) por dentro.
Servir inmediatamente.
Información nutricional por “gougère”:
Calorías 29 (61 % de grasa) • Carbohidratos 1 g
Proteínas 1 g • Grasa 2 g • Grasa saturada 1 g
Colesterol 11 mg • Sodio 39 mg • Calcio 36 mg • Fibra 0 g
Soufflé (suflé) de espinaca
y queso Feta
¿Está buscando ideas de acompañamientos
divertidos y festivos? La combinación de espinaca y
queso Feta es perfecta para este sabroso “soufflé”.
Rinde 12 porciones
1 cucharada (15 g) de mantequilla sin sal,
a temperatura ambiente para engrasar
el molde
½ taza (60 g) de queso Romano
5 huevos grandes
1 clara de huevo grande
5 cucharadas (70 g) de mantequilla
sin sal, en pedazos
½ taza (60 g) de harina común
1½ tazas (355 ml) de leche entera
3 onzas (85 g) de queso Feta
¼ cucharadita de sal kosher
¼ cucharadita de pimienta negra
recién molida
¹⁄8 cucharadita de nuez moscada
recién rallada
10 onzas (285 g) de espinaca congelada,
descongelada y exprimida
¼ cucharadita de ralladura de limón
Colocar la rejilla del horno en el centro del
horno y precalentar el horno a 400°F (200°C).
Engrasar un molde de “soufflé” de 2 cuartos de
galón (1.9 L) con 1 cucharada (15 g) de mantequilla.
Rociar con ¼ de taza (30 g) de queso Romano
para cubrir el fondo y los lados del molde.
Sacudir el molde para eliminar el exceso.

18
Limpiar la orilla del molde con una toalla de papel
para quitar los residuos de mantequilla o queso;
reservar.
Romper los huevos, separando las yemas y las
claras. Colocar las claras, incluso la clara extra,
en el bol de la batidora. Romper las yemas con
un tenedor. Instalar el batidor de alambre.
Derretir la mantequilla restante (5 cucharadas/60
g) a fuego medio-bajo, en una cacerola. Una vez
derretida, agregar la harina y cocinar, revolviendo
con un batidor, por 3 a 4 minutos. Agregar
lentamente la leche, batiendo constantemente.
Después de haber añadido toda la leche, seguir
batiendo hasta conseguir una consistencia suave
y homogénea. Cuando la mezcla esté suave,
agregar el resto del queso Romano, el queso
Feta, la sal, la pimienta y la nuez moscada.
Agregar la espinaca y la ralladura; revolver.
Agregar una pequeña cantidad de la mezcla
de leche/espinaca a las yemas, batiendo
constantemente. Seguir agregando la mezcla,
un tercio a la vez.
Batir las claras, aumentando gradualmente
la velocidad al nivel 12. Seguir batiendo por
aprox. 1½ minutos, hasta que se formen picos
medio-firmes.
Incorporar suavemente un tercio de las claras
montadas a la mezcla de espinaca, usando una
espátula de caucho grande. Seguir incorporando
las claras con cuidado, en dos adiciones,
justo hasta que se combinen con el resto de la
mezcla. Verter la mezcla en el molde y suavizar
ligeramente la parte superior. Meter al horno y
ajustar inmediatamente la temperatura a 375°F
(180°C). Hornear por 45 a 50 minutos, hasta que
esté dorado.
Servir inmediatamente.
Información nutricional por porción de ½ taza (120 ml):
Calorías 207 (64 % de grasa) • Carbohidratos 9 g
Proteínas 9 g • Grasa 15g • Grasa saturada 8 g
Colesterol 152 mg • Sodio 418 mg • Calcio 175 mg • Fibra 1 g
Puré de papas
Esta receta básica es perfecta así, pero puede ser
creativo/a y añadirle hierbas frescas o queso si desea.
Rinde aprox. 9 tazas (2 L)
5 libras (2.2 kg) de papas Yukon Gold,
peladas y cortadas en pedazos de 1 in.
(2.5 cm)
5¹⁄
³
cucharadas (105 g) de mantequilla sin
sal, en pedazos de 1 in. (2.5 cm)
1 taza (235 ml) de “crème fraîche”
(crema fresca)
½ taza (120 ml) de leche
1 cucharadita de sal kosher
½ cucharadita de pimienta negra
recién molida
Colocar las papas en una olla y cubrir con agua.
Dejar hervir y cocinar hasta que estén tiernas.
Escurrir el agua y colocar las papas en el bol de
la batidora.
Conectar el batidor de alambre y elegir la función
“WHISKING” y el programa “MASH POTATOES”.
Parar para raspar el bol si es necesario. Cuando
quede aprox. 1 minuto en el programa, hacer una
pausa y agregar el resto de los ingredientes.
Raspar el bol para comprobar que todos los
ingredientes están uniformemente incorporados.
Probar y ajustar la sazón al gusto.
Información nutricional por porción de ½ taza (120 ml):
Calorías 172 (42 % de grasa) • Carbohidratos 21 g
Proteínas 3g • Grasa 8 g • Grasa saturada 5 g
Colesterol 27 mg • Sodio 155 mg • Calcio 55 mg • Fibra 3 g
Puré de coliflor
¡Una excelente alternativa saludable y sin lácteos
al puré de papa tradicional!
Rinde 6 tazas (1.4 L)
1 coliflor grande de aprox. 3¼ lb (1.5 kg)
1 libra (455 g) de papas Yukon Gold,
peladas y cortadas en pedazos de 1 in.
(2.5 cm)
¼ taza (60 ml) de aceite de oliva virgen extra
2 cucharaditas de sal kosher
½ cucharadita de pimienta negra
recién molida
Cortar la coliflor en pedazos grandes y colocar
estos y las papas en una olla grande. Cubrir con
agua fría y cocinar a fuego alto hasta que el agua
empiece a hervir. Reducir el fuego y hervir a
fuego lento por aprox. 25 minutos, hasta que los
vegetales estén tiernos.
Escurrir el agua y colocar los vegetales en el bol
de la batidora. Conectar el batidor de alambre y
elegir la función “WHISKING” y el programa
“MASH POTATOES”. Parar para raspar el bol
si es necesario.

19
Cuando quede aprox. 1 minuto en el programa,
hacer una pausa y agregar el resto de los
ingredientes.
Raspar el bol para comprobar que todos los
ingredientes están uniformemente incorporados.
Probar y ajustar la sazón al gusto.
Información nutricional por porción de ½ taza (120 ml):
Calorías 142 (56 % de grasa) • Carbohidratos 13 g
Proteínas 3 g • Grasa 10 g • Grasa saturada 1 g
Colesterol 0 mg • Sodio 394 mg • Calcio 27 mg • Fibra 3 g
Masa de pasta fresca
La combinación de harina “00” y de sémola
da a la pasta cocida la consistencia perfecta.
Rinde 1½ lb (680 g) de masa; 8 porciones
5 huevos grandes
2½ tazas (310 g) de harina “00”
²⁄
³
taza (110 g) de sémola
Colocar todos los ingredientes en el bol de la
batidora, en el orden indicado. Instalar el gancho
amasador y revolver a velocidad 5 por aprox. 1
minuto. Seguir amasando por 4 a 6 minutos,
hasta que se forme una masa. Comprobar la
textura de la masa después de 5 minutos.
Si la masa está demasiado seca, agregar agua,
una cucharada a la vez, hasta conseguir la
consistencia deseada. Si está demasiado
húmeda, agregar harina “00”, una cucharada a
la vez, hasta conseguir la consistencia deseada.
Tener presente que la masa no formará una bolsa
suave, sino pedazos grandes con pedacitos más
pequeños que se deberán amasar a mano.
Si queda harina o pedacitos secos de masa en
el fondo del bol, no incorporarlos a la masa.
Colocar la masa sobre una superficie ligeramente
enharinada y seguir amasando a mano por aprox.
2 minutos, hasta que esté suave y elástica.
Envolver en papel film/plástico y dejar reposar a
temperatura ambiente por 20 minutos o más
antes de usar. O colocar en una bolsa hermética
y refrigerar hasta el momento de usar, por hasta
3 días. Para conseguir resultados óptimos,
usar el aditamento rodillo/cortador de pasta
Cuisinart
®
; obtendrá lasañas, pappardelle, lingüini
o espaguetis perfectos.
Información nutricional por porción de 3 oz (85 g):
Calorías 218 (15 % de grasa) • Carbohidratos 35 g
Proteínas 10 g • Grasa 4 g • Grasa saturada 1 g
Colesterol 11 mg • Sodio 41 mg • Calcio 13 mg • Fibra 3 g
MASAS, PANES Y
PANCITOS DE LEVADURA
Pretzels con romero y
copos de sal marina
Preparar pretzels caseros suaves es más fáciles de
lo que cree. Su sabor característico se debe a un
lavado con bicarbonato de sodio antes de la cocción.
Rinde 12 pretzels suaves
1 taza (235 ml) de agua tibia
1 cucharada llena (10 g) de azúcar rubia
(azúcar de caña integral)
2¼ cucharaditas de levadura seca activa
3 tazas (410 g) de harina de pan o 3 tazas
(375 g) de harina común
2 cucharaditas de sal marina fina
1 taza (235 ml) de agua tibia + 1
cucharadita de bicarbonato de sodio,
batidos hasta que el bicarbonato esté
disuelto
Barniz de huevo (1 huevo grande + una
cucharadita de agua, batidos)
2 cucharadas de romero fresco picado
Copos de sal marina, para espolvorear
Colocar el agua, el azúcar y la levadura en el bol;
revolver para disolver. Dejar fermentar por 5 a 10
minutos, hasta que la mezcla se ponga espumosa.
Mientras la levadura se está fermentando,
revolver la harina y la sal en un tazón.
Cuando la mezcla de levadura se ponga
espumosa, agregar la mezcla de harina al bol e
instalar el gancho amasador. Elegir la función
“DOUGH” y el programa “WHITE BREAD”.
Finalizado el ciclo, la masa debe estar suave y
elástica. Si la masa está demasiado pegajosa,
agregar harina, 1 cuchara a la vez, y seguir
amasando hasta que esté suave. Si la masa está
demasiado seca, agregar agua, 1 cucharada a
la vez, y seguir amasando hasta conseguir la
consistencia deseada.
Finalizado el ciclo de amasado, presionar la
perilla de control para pausar el programa.
Quitar el gancho amasador y cubrir el bol con
una toalla húmeda o papel film/plástico. Dejar
leudar la masa por 60 minutos, a temperatura
ambiente de aprox. 70 °F (20 °C), hasta que
doble de volumen. Nota: Si no ha doblado de
volumen después de los 60 minutos, dejar leudar
por más tiempo.

20
Aplastar suavemente la masa para desinflar y
formar una “soga” de 16 in. (40 cm). Dividir la
masa en 12 porciones iguales. Formar una
“soga” delgada con cada porción. Retorcer la
masa en forma de pretzel, tomando los dos
extremos y cruzándolos entre sí, cerciorándose
de que los extremos cuelguen abajo; presionar
firmemente para sellar. Disponer en una placa
para horno forrada con papel sulfurizado.
Repetir con el resto de la masa, cerciorándose
de mantener los pretzels cubiertos con papel
film/plástico o una toalla húmeda. Dejar reposar
por 20 a 30 minutos.
Mientras tanto, colocar la taza (235 ml) de agua y
el bicarbonato en un tazón pequeño; revolver.
Llenar una cacerola grande con agua y ponerla a
calentar a fuego alto hasta que el agua empiece
a hervir. Precalentar el horno a 425°F (220°C).
Después del reposo, colocar con cuidado los
pretzels en el agua hirviendo, uno a la vez.
Hervir cada pretzel por 3 minutos, dándole la
vuelta a la mitad del tiempo. Dejar escurrir los
pretzels sobre una rejilla.
Mojar cada pretzel en la mezcla de agua con
bicarbonato y colocarlos en la placa preparada.
Cepillar ligeramente los pretzels con el barniz de
huevo y rociar con romero. Hornear por aprox.
10 a 12 minutos, hasta que estén bien dorados
y oscuros.
Cuando los pretzels estén listos, retirarlos del
horno, colocarlos en una rejilla para que se
enfríen y rociarlos con una generosa cantidad
de copos de sal marina.
Información nutricional por pretzel:
Calorías 118 (0 % de grasa) • Carbohidratos 25 g
Proteínas 4 g • Grasa 0 g • Grasa saturada 0 g
Colesterol 0 mg • Sodio 261 mg • Calcio 1 mg • Fibra 1 g
Pizza de jamón de Parma
(Prosciutto) e higos
con queso de cabra
Estos sabores elevan la pizza casera con
ingredientes gourmet. Se recomienda usar higos
frescos, pero si no son de temporada o no están
disponibles, la mermelada de higo es un buen
sustituto (solo hay que cerciorarse de no usar
mucho o se puede quemar).
Rinde 1 pizza
½ receta de masa de pizza (receta a
continuación)
½ diente de ajo
Aceite de oliva para cepillar o rociar
¹⁄
³
taza (65 g) de queso de cabra
desmenuzado
4 higos frescos finamente rebanado, o ¼
de taza (60 ml) de mermelada de higo)
1½ onzas (40 g) de jamón de Parma
(prosciutto), en pedacitos
½ cucharadita de hojas de tomillo fresco
1 pizca de sal marina
Colocar la rejilla del horno en el centro del mismo
y precalentar el horno a 450°F (230 °C).
Extender la masa para formar un círculo de 12 in.
(30 cm). Colocar la masa sobre una placa
espolvoreada con harina de maíz. Restregar la
parte superior de la masa con la mitad de diente
de ajo y cepillar con aceite de oliva.
Hornear por 10 minutos, hasta que esté
ligeramente dorada. Cubrir con queso. Hornear
por 5 minutos adicionales. Retirar del horno y
cubrir con las rodajas (o la mermelada) de higo, y
luego con el jamón de Parma. Hornear por 1 a 2
minutos adicionales. Rociar con hojas de tomillo,
un poco de aceite de oliva y una pizca de sal.
Dejar enfriar por unos minutos antes de cortar
y servir.
Información nutricional por porción
(basada en 12 porciones):
Calorías 114 (22 % de grasa) • Carbohidratos 22 g
Proteínas 9 g • Grasa 3 g • Grasa saturada 0 g
Colesterol 0 mg • Sodio 209 mg • Calcio 23 mg • Fibra 1 g
Masa de pizza
Puede usar esta masa para preparar otras recetas.
¿Pero a quién no le gusta la pizza casera?
Visite www.cuisinart.com para conseguir más
recetas de pizza, “calzones” y pan relleno.
Rinde 1½ lb (680 g) de masa, suficiente para dos
pizzas de 12 in. (30 cm)
1 taza (235 ml) de agua tibia
1½ cucharaditas de azúcar granulada
2¼ cucharaditas de levadura seca activa
3 tazas (405 g) de harina de pan o 3 tazas
(375 g) de harina común + un poco más
para espolvorear
1½ cucharaditas de sal kosher
1 cucharada (15 ml) de aceite de oliva
virgen extra + un poco más para cepillar
la masa

21
Colocar el agua tibia, el azúcar y la levadura en
el bol de la batidora; revolver. Instalar el gancho
amasador. Dejar reposar la mezcla por 5 a 10
minutos, hasta que se ponga espumosa.
Mientras la levadura se está fermentando,
revolver la harina y la sal en un tazón. Cuando la
mezcla de levadura esté fermentada, agregarle la
mezcla de harina. Elegir la función “DOUGH” y
el programa “PIZZA DOUGH”. Finalizado el ciclo,
la masa debe estar suave y elástica. Si la masa
está demasiado pegajosa, agregar harina, 1
cuchara a la vez, y seguir amasando hasta que
esté suave. Si la masa está demasiado seca,
agregar agua, 1 cucharada a la vez, y seguir
amasando hasta conseguir la consistencia
deseada.
Finalizado el ciclo de amasado, presionar la
perilla de control para pausar el programa. Quitar
el gancho amasador y cubrir el bol con una toalla
húmeda o papel film/plástico. Dejar leudar la
masa por 60 minutos, a temperatura ambiente de
aprox. 70 °F (20 °C), hasta que doble de
volumen. Nota: Si no ha doblado de volumen
después de los 60 minutos, dejar leudar por más
tiempo.
Colocar la masa sobre una superficie ligeramente
enharinada y estirarla.
NOTA: La masa puede prepararse el día anterior.
Conservar en el refrigerador, en una bolsa
hermética, después del leudado. Cuando esté
listo/a para preparar la pizza, aplastar la masa
para desinflarla y llevarla a temperatura ambiente
antes de usarla. También puede congelarse por
hasta 3 mes.
Información nutricional por porción
(basada en 12 porciones):
Calorías 114 (9 % de grasa) • Carbohidratos 23 g
Proteínas 3 g • Grasa 1 g • Grasa saturada 0 g
Colesterol 0 mg • Sodio 286 mg • Calcio 1 mg • Fibra 1 g
Masa de pizza sin gluten
¡Por fin! Una pizza que las personas con alergia y
sensibilidad al gluten puedan disfrutar.
Rinde aprox. 1 lb (455 g) de masa, suficiente
para dos pizzas de 10 in. (25cm)
¾ taza (95 g) de harina de tapioca
¾ taza (95 g) de harina de arroz + un poco
más para espolvorear y estirar la masa
¹⁄
³
taza (40 g) de harina de quinua
¹⁄
³
tazas (40 g) de harina de arrurruz
1 cucharadita de goma xantana
1 cucharadita de sal kosher
2 cucharaditas de azúcar granulada
½ taza (120 ml) de leche de arroz
¼ taza (60 ml) de agua
2 cucharadas (75 ml) de aceite de oliva
virgen extra
Colocar las harinas, la goma xantana, la sal y el
azúcar en el bol de la batidora. Instalar el gancho
amasador y revolver a velocidad 4 para combinar.
Colocar la leche de arroz, el agua y el aceite de
oliva en una taza medidora de líquidos; revolver.
Encender la batidora a la velocidad 3 y agregar
los ingredientes líquidos. Después de que llegue
a formarse una bola de masa, seguir amasando
a velocidad 4 por 3 a 4 minutos adicionales.
La masa debe estar suave. Si la masa está
demasiado pegajosa, agregar harina de arroz, 1
cuchara a la vez, y seguir amasando hasta que
esté suave. Si la masa está demasiado seca,
agregar agua, 1 cucharada a la vez, y seguir
amasando hasta conseguir la consistencia
deseada.
Nota: Ya que esta masa no contiene levadura, no
tiene que leudar como lo hace masa de levadura.
Puede descansar un ratito, pero si no la va a usar
inmediatamente, refrigerarla. Esta masa puede
refrigerarse por hasta 3 días, o congelarse por
hasta 3 meses. Llevarla a temperatura ambiente
antes de extenderla.
Cuando esté lista/o para estirar la masa,
espolvorear una superficie amplia con harina de
arroz. Dividir la masa en 2 porciones iguales.
Estirar la masa para formar un disco de 12 in.
(30 cm). Enharinar una pala para pizza o una
placa para horno con una buena cantidad de
harina de arroz. Trasladar la masa sobre la
superficie enharinada, agregar la cobertura
deseada y hornear.
Información nutricional por porción
(basada en 12 porciones):
Calorías 114 (22 % de grasa) • Carbohidratos 22 g
Proteínas 9 g • Grasa 3 g • Grasa saturada 0 g
Colesterol 0 mg • Sodio 209 mg • Calcio 23 mg • Fibra 1 g

22
Pan blanco
Este pan blanco básico es perfecto para preparar
sándwiches.
Rinde dos barras de aprox. 1 lb y 6 oz (635 g)
1²⁄
³
tazas (395 ml) de agua tibia
1½ cucharadas de miel
2¼ cucharaditas de levadura seca activa
5½ tazas (685 g) de harina común o
5½ tazas (745 g) de harina de pan
½ taza (50 g) de leche sin grasa/
descremada en polvo
2 cucharaditas de sal kosher
4 cucharadas (55 g) de mantequilla sin sal
temperatura ambiente, en pedacitos de
½ in. (1.5 cm)
Spray vegetal
Colocar el agua tibia, la miel y la levadura en el
bol de la batidora; revolver. Instalar el gancho
amasador. Dejar reposar la mezcla por 5 a 10
minutos, hasta que se ponga espumosa.
Durante este tiempo, mezclar la harina, la leche
en polvo y la sal en un tazón.
Cuando la mezcla de levadura esté fermentada,
agregarle la mezcla de harina y la mantequilla.
Elegir la función “DOUGH” y el programa “WHITE
BREAD”. Finalizado el ciclo, la masa debe estar
suave y elástica. Si la masa está demasiado
pegajosa, agregar harina, 1 cuchara a la vez,
y seguir amasando hasta que esté suave. Si la
masa está demasiado seca, agregar agua,
1 cucharada a la vez, y seguir amasando hasta
conseguir la consistencia deseada.
Finalizado el ciclo de amasado, presionar la
perilla de control para pausar el programa.
Quitar el gancho amasador y cubrir el bol con
una toalla húmeda o papel film/plástico. Dejar
leudar la masa por 60 minutos, a temperatura
ambiente de aprox. 70 °F (20 °C), hasta que
doble de volumen. Nota: Si no ha doblado de
volumen después de los 60 minutos, dejar leudar
por más tiempo.
Engrasar ligeramente dos moldes de barra de
9 in. (23 cm) con spray vegetal. Aplastar la masa
para desinflar y dividir en 2 porciones iguales.
Formar barras y poner estas en los moldes.
Cubrir sin apretar con papel film/plástico y dejar
leudar por 30 a 45 minutos.
Mientras tanto, precalentar el horno a 375°F
(180 °C). Cuando la masa haya doblado de
volumen, meter el pan al horno por 35 a 40
minutos, hasta que la parte superior esté dorada
y que el pan suene hueco cuando se le da
golpecitos. Sacar del horno y dejar enfriar
sobre una rejilla hasta que estén tibios; luego,
desmoldar y dejar enfriar completamente
antes de cortar.
Información nutricional por porción de 1 oz (30 g):
Calorías 64 (15 % de grasa) • Carbohidratos 12 g
Proteínas 1 g • Grasa 1 g • Grasa saturada 1 g
Colesterol 3 mg • Sodio 116 mg • Calcio 7 mg • Fibra 1 g
Pan de trigo integral
con melaza
Nutritivo pan de trigo con sutil sabor a melaza.
Rinde dos barras de aprox. 1¼ lb (570 g)
1²⁄
³
tazas (395 ml) de agua tibia
1½ cucharadas de melaza
2 cucharaditas de levadura seca activa
3¼ tazas (390 g) de harina de trigo integral
5½ tazas (685 g) de harina común o
5½ tazas (745 g) de harina de pan
¼ taza (25 g) de leche sin grasa/
descremada en polvo
2 cucharaditas de sal kosher
4 cucharadas (55 g) de mantequilla sin sal
temperatura ambiente, en pedacitos de
½ in. (1.5 cm)
Spray vegetal
Colocar el agua tibia, la melaza y la levadura en
el bol de la batidora; revolver. Instalar el gancho
amasador. Dejar reposar la mezcla por 5 a 10
minutos, hasta que se ponga espumosa.
Mientras tanto, revolver 3 tazas (360 g) de la
harina integral con 1¾ tazas (220 g) de la harina
de pan, la leche en polvo y la sal.
Cuando la mezcla de levadura esté lista,
agregarle la mezcla de harina y la mantequilla.
Elegir la función “DOUGH” y el programa
“WHEAT BREAD”. Finalizado el ciclo, la masa
debe estar suave y elástica. Si la masa está
demasiado pegajosa, agregar harina, 1 cuchara a
la vez, y seguir amasando hasta que esté suave.
Si la masa está demasiado seca, agregar agua,
1 cucharada a la vez, y seguir amasando hasta
conseguir la consistencia deseada.
Finalizado el ciclo de amasado, presionar la
perilla de control para pausar el programa. Quitar
el gancho amasador y cubrir el bol con una toalla
húmeda o papel film/plástico. Dejar leudar la
masa por 60 minutos, a temperatura ambiente de

23
aprox. 70 °F (20 °C), hasta que doble de volumen.
Nota: Si no ha doblado de volumen después de
los 60 minutos, dejar leudar por más tiempo.
Engrasar ligeramente dos moldes de barra de
9 in. (23 cm) con spray vegetal. Aplastar la masa
para desinflar y dividirla en 2 porciones iguales.
Formar barras y poner estas en los moldes.
Cubrir sin apretar con papel film/plástico y dejar
leudar al doble de su volumen por 30 a 45
minutos.
Mientras tanto, precalentar el horno a 375°F
(180 °C). Cuando la masa haya doblado de
volumen, meter el pan al horno por 35 a 40
minutos, hasta que la parte superior esté dorada
y que el pan suene hueco cuando se le da
golpecitos. Sacar del horno y dejar enfriar
sobre una rejilla hasta que estén tibios; luego,
desmoldar y dejar enfriar completamente antes
de cortar.
Información nutricional por porción de 2 oz (55 g):
Calorías 154 (16 % de grasa) • Carbohidratos 28 g
Proteínas 5 g • Grasa 3 g • Grasa saturada 2 g
Colesterol 11 mg • Sodio 224 mg • Calcio 33 mg • Fibra 3 g
Pan multigrano
Este nutritivo pan con sutil sabor a miel es excelente
para hacer sándwiches.
Rinde dos barras de aprox. 1¼ lb (570 g)
1 taza (235 ml) de agua tibia
1½ cucharadas de miel
2¼ cucharaditas de levadura seca activa
3 tazas (240 g) de harina de trigo integral
1½ tazas (185 g) de harina común o
1½ tazas (200 g) harina de pan
2 cucharadas de gluten de trigo
2 cucharaditas de sal kosher
½ taza (40 g) de copos de avena
¼ taza (50 g) de semillas de girasol
¼ taza (50 g) de semillas de linaza
2 cucharadas de germen de trigo
2 cucharadas de aceite de linaza o
aceite vegetal
Spray vegetal
Colocar el agua tibia, la miel y la levadura en el
bol de la batidora; revolver. Instalar el gancho
amasador. Dejar reposar la mezcla por 5 a 10
minutos, hasta que se ponga espumosa.
Durante este tiempo, mezclar las harinas, el
gluten, la sal, la avena, las semillas y el germen
de trigo en un tazón grande.
Cuando la mezcla de levadura esté lista, agregarle
el aceite de linaza y la mezcla de harina. Elegir la
función “DOUGH” y el programa “WHEAT BREAD”.
Finalizado el ciclo, la masa debe estar suave y
elástica. Si la masa está demasiado pegajosa,
agregar harina, 1 cuchara a la vez, y seguir
amasando hasta que esté suave. Si la masa está
demasiado seca, agregar agua, 1 cucharada a la
vez, y seguir amasando hasta conseguir la
consistencia deseada.
Finalizado el ciclo de amasado, presionar la
perilla de control para pausar el programa.
Quitar el gancho amasador y cubrir el bol con
una toalla húmeda o papel film/plástico. Dejar
leudar la masa por 60 minutos, a temperatura
ambiente de aprox. 70 °F (20 °C), hasta que
doble de volumen. Nota: Si no ha doblado de
volumen después de los 60 minutos, dejar leudar
por más tiempo.
Engrasar ligeramente dos moldes de barra de
9 in. (23 cm) con spray vegetal. Aplastar la masa
para desinflar y dividirla en 2 porciones iguales.
Formar barras y poner estas en los moldes.
Cubrir sin apretar con papel film/plástico y dejar
leudar al doble de su volumen por 30 a 45 minutos.
Mientras tanto, precalentar el horno a 375°F
(180 °C). Meter el pan al horno por 35 a 40
minutos, hasta que la parte superior esté dorada
y que el pan suene hueco cuando se le da
golpecitos. Sacar del horno y dejar enfriar
sobre una rejilla hasta que estén tibios; luego,
desmoldar y dejar enfriar completamente
antes de cortar.
Información nutricional por porción de 2 oz (55 g):
Calorías 137 (23 % de grasa) • Carbohidratos 24 g
Proteínas 1 g • Grasa 4 g • Grasa saturada 0 g
Colesterol 0 mg • Sodio 215 mg • Calcio 15 mg • Fibra 3 g
Pancitos de mantequilla
Estos sabrosos pancitos clásicos son perfectos para
las cenas de domingo o las comidas de fiesta.
Rinde 16 pancitos
¾ taza (175 ml) de leche entera
8 cucharadas (115 g) de mantequilla sin
sal, en pedazos de 1 in. (2.5 cm)
1 cucharadita de sal kosher
4 cucharadas (50 g) de azúcar granulada
¼ taza (60 ml) de agua tibia
2¼ cucharaditas de levadura seca activa
1 huevo grande

24
4 tazas (540 g) de harina de pan + un poco
más para espolvorear y estirar la masa
Mantequilla sin sal para engrasar el molde
1 cucharada (15 ml) de leche entera
1 cucharada (15 g) de mantequilla sin sal,
derretida
Escaldar la leche, calentándola hasta que
burbujas aparezcan en las orillas. Agregar la
mantequilla, la sal y 3 cucharadas (35 g) del
azúcar; revolver. Dejar entibiar.
Colocar el agua tibia, el azúcar restante y la
levadura en el bol de la batidora; revolver.
Instalar el gancho amasador. Dejar reposar la
mezcla por 5 a 10 minutos, hasta que se ponga
espumosa.
Durante este tiempo, medir la harina. Una vez
fermentada la levadura, agregarle la mezcla de
leche tibia, el huevo y la harina.
Elegir la función “DOUGH” y el programa
“WHITE BREAD”. Finalizado el ciclo, la masa
debe estar suave. Si la masa está demasiado
pegajosa, agregar harina, 1 cuchara a la vez,
y seguir amasando hasta que esté suave. Si la
masa está demasiado seca, agregar agua,
1 cucharada a la vez, y seguir amasando hasta
conseguir la consistencia deseada.
Finalizado el ciclo de amasado, presionar la
perilla de control para pausar el programa.
Quitar el gancho amasador y cubrir el bol con
una toalla húmeda o papel film/plástico. Dejar
leudar la masa por 60 minutos, a temperatura
ambiente de aprox. 70 °F (20 °C), hasta que
doble de volumen. Nota: Si no ha doblado
de volumen después de los 60 minutos, dejar
leudar por más tiempo.
Precalentar el horno a 375°F (190°C). Engrasar
ligeramente un molde redondo de 9 in. (23cm)
con mantequilla. Dividir la masa en 16 porciones
iguales. Formar bolas suaves y disponerlas en
el molde. Cubrir con papel film/plástico y dejar
leudar casi al doble de su volumen, por aprox.
30 a 45 minutos.
Mezclar el resto de la leche y de la mantequilla
y calentar la mezcla hasta que la mantequilla
esté derretida. Justo antes de meterlos al horno,
cepillar los pancitos con la mezcla de leche
con mantequilla. Hornear por 25 a 30 minutos,
hasta que la temperatura interna de los pancitos
alcance 200°F (100°C). Sacar del horno y dejar
enfriar sobre une rejilla hasta que esté tibio;
luego, desmoldar y dejar enfriar completamente
antes de cortar.
Información nutricional por pancito:
Calorías 183 (35 % de grasa) • Carbohidratos 26 g
Proteínas 4 g • Grasa 7 g • Grasa saturada 5 g
Colesterol 34 mg • Sodio 153 mg • Calcio 13 mg
Fibra 1 g
Pan Jalá (“Challah”)
Nuestro pan Jalá hace las mejores tostadas
francesas (¡suponiendo que haya sobras!)
Rinde una barra
¾ taza (175 ml) de agua tibia
2¼ cucharaditas de levadura seca activa
4 cucharadas (50 g) de azúcar granulada
8 cucharadas (115 g) de mantequilla sin
sal, derretida y enfriada a temperatura
ambiente
2 huevos grandes, a temperatura ambiente
4¹⁄
³
tazas (540 g) de harina común
2 cucharaditas de sal kosher
Spray vegetal
Barniz de huevo (1 huevo grande + una
cucharadita de agua, batidos)
Colocar el agua tibia, la levadura y 2
cucharaditas del azúcar en el bol de la batidora;
revolver. Instalar el gancho amasador. Dejar
reposar la mezcla por 5 a 10 minutos, hasta que
se ponga espumosa.
Una vez fermentada la levadura, agregarle la
mantequilla derretida, los huevos, la harina y la
sal. Elegir la función “DOUGH” y el programa
“WHITE BREAD”. Finalizado el ciclo, la masa
debe estar suave y elástica. Si la masa está
demasiado pegajosa, agregar harina, 1 cuchara a
la vez, y seguir amasando hasta que esté suave.
Si la masa está demasiado seca, agregar agua,
1 cucharada a la vez, y seguir amasando hasta
conseguir la consistencia deseada.
Finalizado el ciclo de amasado, presionar la
perilla de control para pausar el programa.
Quitar el gancho amasador y cubrir el bol con
una toalla húmeda o papel film/plástico. Dejar
leudar la masa por 60 minutos, a temperatura
ambiente de aprox. 70 °F (20 °C), hasta que doble
de volumen. Nota: Las masas enriquecidas, es
decir, las que llevan más grasa/mantequilla/
leche/azúcar, tardan más en leudar que las
masas tradicionales. Es probable que esta masa
de pan necesite unos 30 minutos más.
Colocar la masa sobre una superficie
ligeramente enharinada y aplastar para desinflar.
Dividir la masa en 3 porciones iguales.

25
Formar un cilindro de 1½ x 14 in. (4 x 35 cm) con
cada porción. Colocar los cilindros lado a lado en
la bandeja. Formar una trenza suelta. Pegar las
extremidades y meterlas debajo de la trenza.
Cubrir con papel film/plástico engrasado con
spray vegetal y dejar leudar al doble de su
volumen por aprox. 45 minutos. Colocar la rejilla
del horno en el tercio inferior del horno y
precalentar el horno a 375°F (190°C). Cepillar la
trenza con el barniz de huevo. Hornear por aprox.
30 a 40 minutos, hasta que la parte superior esté
dorada y que el pan suene hueco cuando se le
da golpecitos.
Sacar del horno y dejar enfriar sobre una rejilla.
Información nutricional por porción de 2 oz (55 g):
Calorías 119 (61 % de grasa) • Carbohidratos 18 g
Proteínas 3 g • Grasa 4 g • Grasa saturada 2 g •
Colesterol 30 mg • Sodio 202 mg • Calcio 4 mg • Fibra 0 g
Pan italiano rústico
Este pan ligero y crujiente es la prueba que
hacer pan artesanal en casa es más fácil de lo uno
que se imagina.
Rinde 1 bola
1 taza (235 ml) de agua tibia
¾ cucharadita de azúcar granulada
1¾ cucharaditas de levadura seca activa
3 tazas (410 g) de harina de pan
4¹⁄
³
tazas (40 g) de salvado de trigo
1½ cucharaditas de sal kosher
2 cucharadas de aceite de oliva virgen extra
Barniz de huevo (1 huevo grande + una
cucharadita de agua, batidos)
Colocar el agua tibia, el azúcar y la levadura en
el bol de la batidora; revolver. Instalar el gancho
amasador. Dejar reposar la mezcla por 5 a 10
minutos, hasta que se ponga espumosa.
Durante este tiempo, revolver la harina, el
salvado y la sal en un tazón.
Cuando la mezcla de levadura esté fermentada,
agregarle la mezcla de harina y el aceite de oliva.
Elegir la función “DOUGH” y el programa “WHITE
BREAD”. Finalizado el ciclo, la masa debe estar
suave y elástica. Si la masa está demasiado
pegajosa, agregar harina, 1 cuchara a la vez,
y seguir amasando hasta que esté suave. Si la
masa está demasiado seca, agregar agua,
1 cucharada a la vez, y seguir amasando hasta
conseguir la consistencia deseada.
Finalizado el ciclo de amasado, presionar la
perilla de control para pausar el programa. Quitar
el gancho amasador y cubrir el bol con una toalla
húmeda o papel film/plástico. Dejar leudar la
masa por 60 minutos, a temperatura ambiente
de aprox. 70 °F (20 °C), hasta que doble de
volumen. Nota: Si no ha doblado de volumen
después de los 60 minutos, dejar leudar por más
tiempo.
Aplastar para desinflar, volver a formar una bola,
cubrir otra vez y dejar leudar hasta doblar de
volumen otra vez (esto ayuda a desarrollar el
sabor).
Aplastar suavemente para desinflar y formar una
bola grande y compacta. Colocar la bola sobre
una placa para horno forrada con papel
sulfurizado y cubrir sin apretar con papel film/
plástico. Dejar leudar una última vez, por aprox.
30 minutos.
Mientras tanto, precalentar el horno a 400°F
(200 °C). Cuando esté listo para hornear cortar
una “X” en la parte superior de la bola con un
cuchillo afilado, cepillar con el barniz de huevo y
hornear por aprox. 30 minutos, hasta que el pan
esté bien dorado y que la temperatura interna
alcance 200°F (100°C). Sacar del horno y dejar
enfriar sobre una rejilla antes de cortar.
Información nutricional por porción de 1.5 oz (45 g):
Calorías 95 (15 % de grasa) • Carbohidratos 17 g
Proteínas 3 g • Grasa 2 g • Grasa saturada 0 g
Colesterol 12 mg • Sodio 219 mg • Calcio 2 mg • Fibra 1 g
“COFFEE CAKES”,
“MUFFINS” Y PANES SIN
LEVADURA
Pastel crujiente de
suero de leche con
arándanos azules
Este “coffee cake” siempre es un éxito.
Rinde 1 pastel (16 porciones)
Spray vegetal
Cobertura crujiente:
1¾ tazas (220 g) de harina común
¾ taza (150 g) de azúcar rubia (azúcar de
caña integral)

26
12 cucharadas (180 g) de mantequilla sin
sal temperatura ambiente, en pedazos
de 1 in. (2.5 cm)
2 cucharaditas de canela en polvo
¾ de extracto natural de vainilla
¼ cucharadita de sal kosher
Pastel de suero de leche:
2²⁄
³
tazas (335 g) de harina común
¾ cucharadita de bicarbonato de sodio
¾ cucharadita de crémor tártaro
½ cucharadita de sal kosher
10²⁄
³
cucharadas (160 g) de mantequilla sin
sal en pedazos de 1 in. (2.5 cm), a
temperatura ambiente
1¹⁄
³
tazas (265 g) de azúcar granulada
2 huevos grandes, a temperatura
ambiente
¾ cucharadita de extracto natural de
vainilla
²∕
³
taza (160 g) de suero de leche
(“buttermilk”)
3 tazas (420 g) de arándanos azules
Precalentar el horno a 350 °F (175 °C). Engrasar
un molde de 13 x 9 in. (33 x 23 cm) con spray
vegetal; reservar.
Para preparar la cobertura crujiente: Colocar los
ingredientes de la cobertura crujiente en el bol de
la batidora. Instalar el batidor plano y mezclar a
velocidad 2 para romper, raspando el bol si es
necesario. Luego, aumentar la velocidad al nivel
4 y mezclar hasta obtener una mezcla parecida a
migajas grandes, parando para raspar el bol si es
necesario. Cubrir y refrigerar hasta el momento
de usar.
Para preparar el pastel de suero de leche:
Colocar la harina, el bicarbonato, el crémor
tártaro y la sal en el bol. Instalar el batidor de
alambre y elegir la función “MIXING” y el programa
“DRY INGREDIENT MIXING”. Una vez mezclado,
reservar, en un tazón.
Colocar la mantequilla y el azúcar en el bol de la
batidora. Conectar el batidor plano y elegir la
función “MIXING” y el programa “CREAMING”.
Presionar la perilla para pausar el programa si es
necesario raspar el bol y el batidor. Finalizado el
programa, la mezcla debe estar ligera y
esponjosa. Nota: Puede que la mezcla esté lista
antes del fin del programa; parar el programa
cuando esté cremosa. Después de acremar la
mantequilla con el azúcar, parar y raspar bien el
bol. Empezar a mezclar a velocidad 3 y agregar
los huevos, uno a la vez, y luego la vainilla;
mezclar hasta que los ingredientes estén
incorporados y que la mezcla esté suave.
Raspar el bol. Agregar la mitad de los ingredientes
secos y la mitad del suero de leche. Revolver a
velocidad 1 para mezclar ligeramente.
Raspar el bol. Agregar los ingredientes secos y
el suero de leche restantes. Seguir revolviendo a
velocidad 1 hasta obtener una mezcla suave y
homogénea.
Verter la mezcla en la bandeja preparada y
suavizar la parte de encima. Esparcir los arándanos
azules por encima y presionarlos ligeramente
para hundirlos parcialmente en la mezcla. Cubrir
uniformemente con la cobertura crujiente.
Hornear por aprox. 30 a 65 minutos, hasta que
esté dorado y que un probador introducido en el
centro salga limpio. Sacar del horno y dejar
enfriar sobre una rejilla antes de cortar.
Información nutricional por porción
(basada en 16 porciones):
Calorías 381 (38 % de grasa) • Carbohidratos 55 g
Proteínas 5 g • Grasa 16 g • Grasa saturada 12 g
Colesterol 70 mg • Sodio 178 mg • Calcio 16 mg • Fibra 1 g
Pan de banana con chispas
de chocolate
El secreto detrás de este pan de banana suave es no
procesar demasiado la mezcla. Aunque la batidora
de pies es capaz de llevar a cabo los trabajos más
difíciles, tales como mezclar las masas más pesadas,
la velocidad 1 garantiza que los ingredientes
se mezclen y se incorporen suavemente.
Rinde 2 barras
Mantequilla a temperatura ambiente y
spray vegetal para engrasar el molde
2 tazas (250 g) de harina común
1 taza (120 g) de harina de trigo integral
1 cucharadita de bicarbonato de sodio
1 cucharadita de sal marina fina
½ cucharadita de canela en polvo
1 taza (150 g) de nueces tostadas, picadas
1 taza (175 g) de chispas de chocolate
3 huevos grandes
1 taza (200 g) de azúcar granulada
1¹∕
³
tazas (315 ml) de aceite vegetal
3 a 4 bananas medianas maduras, aplastadas
½ taza (125 g) de suero de leche
(“buttermilk”)
1 cucharadita de extracto natural de
vainilla

27
Colocar la rejilla del horno en el centro del mismo
y precalentar el horno a 350°F (230 °C). Engrasar
ligeramente dos moldes de barra de 9 in. (23 cm)
con mantequilla o spray vegetal.
Colocar la harina, el bicarbonato, la sal, la canela,
las nueces y las chispas de chocolate en bol.
Instalar el batidor de alambre y elegir la función
“MIXING” y el programa “DRY INGREDIENT
MIXING”. Una vez mezclado, reservar, en un tazón.
Colocar los huevos y el azúcar en el bol de la
batidora. Usando el batidor de alambre, batir,
empezando en la velocidad 1 y aumentando
gradualmente la velocidad al nivel 7. Después de
aprox. 3 minutos, cuando la mayoría del azúcar
parece disuelto, ajustar la velocidad al nivel 4.
Seguir batiendo por aprox. 2 minutos, hasta que
la mezcla esté suave y espesa. Presionar la
perilla de control para pausar el programa, y
agregar las bananas aplastadas, el suero de
leche y la vainilla; seguir mezclando a velocidad
4 hasta obtener una mezcla homogénea. Pausar
otra vez, raspar el fondo y las paredes del bol, y
luego agregar los ingredientes secos. Ajustar la
velocidad al nivel 2 y revolver brevemente para
incorporar. Mantener presionado la perilla de
control para apagar la unidad.
Verter la mezcla en los moldes preparados.
Hornear por aprox. 50 a 55 minutos, hasta que
un probador salga limpio.
Información nutricional por porción
(basada en 16 porciones):
Calorías 381 (38 % de grasa) • Carbohidratos 55 g
Proteínas 5 g • Grasa 16 g • Grasa saturada 12 g
Colesterol 70 mg • Sodio 178 mg • Calcio 16 mg • Fibra 1 g
Bizcocho de limón
Una versión moderna del clásico pastel Bundt.
El glaseado no debe ser omitido; retiene la humedad
y mantiene el sabor de este pastel fresco
durante días.
Rinde 16 porciones; un pastel Bundt de 10 in.
(25 cm)
Pastel:
Mantequilla suave y harina para
preparar el molde de rosca
3 tazas (375 g) de harina común
2 cucharaditas de polvo de hornear
1¼ cucharaditas de sal marina fina
2½ barras (285 g) de mantequilla sin sal,
a temperatura ambiente, en pedacitos
2 tazas (400 g) de azúcar granulada
¹∕
³
taza (20 g) de ralladura de limón (de
aprox. 5 limones medianos a grandes)
3 cucharadas de jugo de limón fresco
4 huevos grandes, a temperatura ambiente
2 yemas de huevo grande, a temperatura
ambiente
1¹∕
³
tazas (315 ml) de crema agria,
a temperatura ambiente
Glaseado de limón:
1 taza (120 g) de azúcar glasé, tamizado
3 cucharadas (30 ml) de crema líquida
para batir (“heavy cream”)
3 cucharadas (45 ml) de jugo de limón
fresco (sin pulpa)
Engrasar ligeramente un molde de rosca de 10 in.
(25 cm) con mantequilla suave y espolvorear
con una pequeña cantidad de harina; reservar.
Colocar la rejilla del horno en el tercio inferior del
mismo y precalentar el horno a 350°F (175 °C).
Colocar la harina, el polvo de hornear y la sal
en el bol de la batidora. Instalar el batidor de
alambre y elegir la función “MIXING” y el
programa “DRY INGREDIENT MIXING”.
Finalizado el programa, colocar la mezcla en
un tazón mediano; reservar.
Colocar la mantequilla y el azúcar en el bol.
Conectar el batidor, elegir la función “MIXING” y
el programa “CREAMING”. Presionar la perilla
para pausar el programa si es necesario raspar el
bol y el batidor. Finalizado el programa, la mezcla
debe estar ligera y esponjosa. Nota: Puede que
la mezcla esté lista antes del fin del programa;
parar el programa cuando esté cremosa.
Después de acremar la mantequilla con el azúcar,
parar y raspar bien el bol. Agregar la ralladura de
limón y mezclar a velocidad 5 por 30 segundos
adicionales. Raspar el bol y el batidor plano.
Colocar el jugo de limón, la yema, los huevos y
la crema agria en un tazón pequeño. Revolver.
Revolviendo a velocidad 2 a 3, agregar un
tercio de los ingredientes secos a la mezcla
de mantequilla/azúcar y luego la mitad de
los ingredientes líquidos; repetir hasta haber
agregado todos los ingredientes, parando
para raspar el bol cuando sea necesario.
Verter la mezcla en el molde preparado.
Suavizar las orillas y dar unos golpecitos en la
encimera para eliminar las burbujas de aire.
Hornear por aprox. 1 hora, hasta que un
probador introducido en el centro salga limpio.

28
Dejar que el pastel se enfríe (en el molde) sobre
una rejilla, hasta que el molde esté frío; luego,
desmoldar.
Mientras el bizcocho se está enfriando, preparar
el glaseado. Colocar todos los ingredientes del
glaseado en un tazón pequeño; batir hasta
conseguir una mezcla completamente suave,
agregando más azúcar tamizado o crema para
conseguir la consistencia deseada.
Después de que el bizcocho se haya enfriado,
colocarlo sobre una rejilla colocada en una
bandeja (o papel aluminio, o papel sulfurizado;
cualquier cosa que recoja el exceso de
glaseado). Rociar o esparcir el glaseado en el
bizcocho. Dejar que el glaseado se solidifique y
que el bizcocho se enfríe completamente antes
de cortar y servir.
Información nutricional por porción:
Calorías 403 (45 % de grasa) • Carbohidratos 51 g
Proteínas 5 g • Grasa 20 g • Grasa saturada 13 g
Colesterol 111 mg • Sodio 185 mg • Calcio 420 mg • Fibra 1 g
Pancitos de pacanas
acaramelados
Su batidora de pie Cuisinart
®
hace que sea
más fácil que nunca preparar grandes cantidades
de masa para preparar estos sabrosos pancitos
ligeros y pegajosos.
Rinde 18 pancitos
Masa dulce:
¹∕
³
taza (80 ml) de agua tibia
¹⁄
³
taza (65 g) de azúcar granulada
2¼ cucharaditas de levadura seca activa
½ taza (120 ml) de leche sin grasa
5¹⁄
³
cucharadas (75 g) de mantequilla sin sal
a temperatura ambiente, en pedazos de
1 in. (2.5 cm)
1 huevo grande
3½ tazas (435 g) de harina común
¾ cucharadita de sal kosher
Guarnición:
¾ taza (75 g) de pacanas, picadas
¹⁄
³
taza (65 g) de azúcar granulada
¾ cucharadita de canela en polvo
1½ cucharadas (25 g) de mantequilla sin sal,
a temperatura ambiente
½ taza (80 g) de pasas
5¹⁄
³
cucharadas (75 g) de mantequilla sin sal
a temperatura ambiente, en pedazos de
1 in. (2.5 cm)
½ taza llena (100 g) de azúcar rubia
(azúcar de caña integral)
Spray vegetal
Preparación de la masa: Colocar el agua tibia,
1 cucharadita del azúcar y la levadura en el bol
de la batidora; revolver. Dejar reposar por aprox.
5 minutos, hasta que se ponga espumosa.
Una vez fermentada la levadura, agregarle la
leche, la mantequilla y el huevo. Instalar el
batidor plano y revolver a velocidad 2 para
romper el huevo. Agregar la harina y la sal;
revolver brevemente para incorporar los
ingredientes. Quitar el batidor plano e instalar el
gancho amasador. Elegir la función “DOUGH” y
el programa “WHITE BREAD”. Finalizado el ciclo,
la masa debe estar suave y elástica. Si la masa
está demasiado pegajosa, agregar harina,
1 cuchara a la vez, y seguir amasando hasta que
esté suave. Si la masa está demasiado seca,
agregar agua, 1 cucharada a la vez, y seguir
amasando hasta conseguir la consistencia
deseada.
Finalizado el ciclo de amasado, presionar la
perilla de control para pausar el programa.
Quitar el gancho amasador y cubrir el bol con
una toalla húmeda o papel film/plástico. Dejar
leudar la masa por 60 minutos, a temperatura
ambiente de aprox. 70 °F (20 °C), hasta que
doble de volumen. Nota: Las masas enriquecidas,
es decir, las que llevan más grasa/mantequilla/
leche/azúcar, tardan más en leudar que las
masas tradicionales. Es probable que esta masa
de pan necesite unos 30 minutos más.
Preparación de la cobertura y ensamblaje de los
pancitos: Colocar la mitad de las pacanas, el
azúcar y la canela en un tazón pequeño; revolver.
Reservar. Colocar la masa sobre una superficie
ligeramente enharinada y aplastar para desinflar.
Formar un rectángulo de aprox. 20x12 in.
(50 x 30 cm). Untar con mantequilla y esparcir la
mezcla de azúcar con canela y las pasas encima.
Enrollar firmemente el rectángulo a lo ancho y
pellizcar las extremidades para sellar. Cortar el
rollo en 18 rodajas, usando un cuchillo bien
afilado. Rociar la mantequilla derretida en un
molde de 13 x 9 in. (33 x 23 cm). Esparcir el
azúcar rubio y las pacanas restantes en el fondo.
Disponer los pancitos en el molde, el lado
cortado apuntando hacia arriba. Cubrir con
papel film/plástico engrasado con spray vegetal
y dejar leudar por aprox. 40 minutos, en un lugar
templado. Precalentar el horno a 375°F (190°C).

29
Hornear por aprox. 30 minutos, hasta que la
parte superior esté bien dorada. Sacar del horno
y voltear el molde inmediatamente por encima de
un plato, dejando que la mezcla de caramelo
cubra los pancitos. Raspar el resto de la mezcla
de azúcar/nueces y cubrir los pancitos. Servir tibios.
Información nutricional por pancito:
Calorías 259 (38 % de grasa) • Carbohidratos 36 g
Proteínas 4 g • Grasa 11 g • Grasa saturada 5 g
Colesterol 32 mg • Sodio 109 mg • Fibra 1 g
GALLETAS Y BARRAS
Galletas de pacanas
rellenas con mermelada
Esta masa es perfecta para hacer galletas rellenas
con mermelada.
Rinde aprox. 45 galletas rellenas
3 tazas (375 g) de harina común + un poco
más para estirar la masa
½ cucharadita de sal marina fina
20 cucharadas (300 g) de mantequilla sin
sal temperatura ambiente, en pedazos
de 1 in. (2.5 cm)
¼ taza (30 g) de mitades de pacana
tostadas, finamente molidas
¼ taza (50 g) de azúcar granulada
1 taza (120 g) de azúcar glasé tamizado +
un poco más para espolvorear
1 cucharadita de extracto natural de
vainilla
¾ taza (175 g) de mermelada de frambuesa
Colocar la harina y la sal en un tazón pequeño;
revolver. Reservar.
Colocar la mantequilla, las pacanas molidas y
el azúcar granulada en el bol de la batidora.
Conectar el batidor plano y elegir la función
“MIXING” y el programa “CREAMING”. Presionar
la perilla para pausar el programa si es necesario
raspar el bol y el batidor. Finalizado el programa,
la mezcla debe estar ligera y esponjosa.
Nota: Puede que la mezcla esté lista antes del
fin del programa; parar el programa cuando esté
cremosa. Después de acremar la mantequilla
con el azúcar, parar y raspar bien el bol.
Ajustar la velocidad al nivel 2 y agregar el azúcar
glasé. Mezclar para combinar. Raspar el bol.
Agregar la mezcla de harina en 3 adiciones,
y luego la vainilla. Mezclar por aprox. 2 a 3
minutos, hasta conseguir una masa suave y
homogénea. Raspar el bol cuando sea necesario.
Cuando esté lista, la masa se parecerá a una
grande bola suave.
Dividir la masa en dos porciones iguales.
Formar un disco con cada porción, envolver
individualmente con papel film/plástico y
refrigerar por 2 horas o más.
Precalentar el horno a 350°F (175°C). Forrar dos
placas para horno con papel sulfurizado; Reservar.
Sacar un disco de masa del refrigerador.
Estirar la masa sobre una superficie ligeramente
enharinada hasta que tenga ¹⁄
8 in. (3 mm)
de espesor. Usando un cortador de galletas
acanalado de 2 in. (5 cm), cortar galletas
redondas y disponerlas sobre la placa forrada
con papel sulfurizado. Amasar la masa restante,
estirarla y formar más galletas, de la misma
manera. Hornear por aprox. 16 a 20 minutos,
hasta que las orillas estén muy ligeramente
doradas. Sacar del horno y dejar enfriar
completamente. Cuando la primera tanda de
galleta esté lista, sacar el segundo disco de
masa del refrigerador y cortar más galletas,
usando el mismo cortador de galletas. Luego,
hacer un hueco en el centro de cada galleta con
un cortador de galletas redondo de ¾ in. (2 cm).
Amasar la masa restante, estirarla y formar más
galletas, de la misma manera. Hornear de la
misma manera que la primera tanda
Calentar ligeramente la mermelada (en una
cacerola o en el microondas) hasta que esté
ligeramente líquida. Una vez enfriadas las
galletas, esparcir aprox. ¾ de cucharadita
de mermelada en el centro de las galletas
enteras. Colocar las galletas cortadas encima.
Espolvorear con azúcar glasé. Conservar en
un recipiente hermético, entre capas de papel
encerado.
Información nutricional por galleta:
Calorías 107 (47 % de grasa) • Carbohidratos 13 g
Proteínas 1 g • Grasa 6 g • Grasa saturada 4 g
Colesterol 13 mg • Sodio 26 mg • Calcio 1 mg • Fibra 0 g

30
Galletas de jengibre
Estas galletas suaves no son sus típicas galletas de
jengibre. Usamos jengibre picado y jengibre
cristalizado, para un toque picante interesante.
Rinde aprox. 2½ docenas de galletas
2¼ tazas (280 g) de harina común
1 cucharadita de bicarbonato de sodio
1 cucharada de Jengibre en polvo
1 cucharadita de canela en polvo
½ cucharadita de pimienta de Jamaica
en polvo
¾ cucharadita de sal marina fina
¼ taza (30 g) de jengibre cristalizado
finamente picado (omitirlo en la receta
del pastel refrigerado de jengibre y
naranja en la página 40)
12 cucharadas (180 g) de mantequilla sin
sal temperatura ambiente, en pedazos
de 1 in. (2.5 cm)
¼ taza (85 g) de melaza
¾ taza (150 g) de azúcar rubia (azúcar de
caña integral)
¼ taza (50 g) de azúcar granulada
1 huevo grande, a temperatura ambiente
1 cucharadita de extracto natural de
vainilla
¹⁄
³
taza (65 g) de azúcar turbinado,
para cubrir las galletas
Colocar la rejilla del horno en la posición superior
y precalentar el horno a 350°F (175 °C). Forrar
dos placas para horno con papel sulfurizado.
Colocar la harina, el bicarbonato, las especias,
la sal y el jengibre picado en el bol de la batidora.
Instalar el batidor de alambre y elegir la función
“MIXING” y el programa “DRY INGREDIENT
MIXING”. Retirar y reservar en un tazón por
separado.
Colocar la mantequilla y la melaza en el bol.
Conectar el batidor, elegir la función “MIXING” y
el programa “CREAMING”. Una vez mezclados,
agregar gradualmente los azucares. Nota: Raspar
las paredes del bol y agregar los azucares.
Presionar la perilla para pausar el programa
si es necesario raspar el bol y el batidor.
Finalizado el programa, la mezcla debe estar
ligera y esponjosa. Nota: Puede que la mezcla
esté lista antes del fin del programa; parar el
programa cuando esté cremosa. Cuando la
mantequilla, la melaza y los azucares estén bien
mezclados, parar y raspar bien el bol.
Ajustar la velocidad al nivel 3 y agregar el huevo
y la vainilla. Para la máquina para raspar el bol y,
a continuación, agregar los ingredientes secos;
mezclar brevemente a velocidad 2 para combinar.
Colocar el azúcar turbinado en un cuenco poco
profundo o una bandeja de hornear.
Recoger la masa en bolas del tamaño de
pelotas de golf. Rodar las bolas en el azúcar
turbinado y colocarlas en las placas preparadas.
Presionar suavemente cada bola con el fondo
de un vaso limpio.
Hornear por aprox. 12 a 15 minutos, hasta que
las orillas estén firmes pero que el centro siga
suave. Dejar enfriar las bandejas antes de
hornear más galletas.
Información nutricional por galleta:
Calorías 96 (23 % de grasa) • Carbohidratos 18 g
Proteínas 1 g • Grasa 2 g • Grasa saturada 2 g
Colesterol 12 mg • Sodio 99 mg • Calcio 10 mg • Fibra 0 g
Galletas rellenas de fresa
Lo mejor de estas galletas es que permiten disfrutar
del sabor de esta fruta de verano en cualquier
momento del año, gracias al intenso sabor de las
fresas liofilizadas. Ajuste la cantidad de fresa en el
relleno si desea para un sabor aún más rico.
Rinde aprox. 2 docenas de galletas rellenas
Masa de galletas:
1¾ tazas (220 g) de harina común
½ cucharadita de sal marina fina
16 cucharadas (225 g) de mantequilla sin
sal a temperatura ambiente, en
pedacitos
¹⁄
³
taza (65 g) de azúcar granulada
¼ taza (30 g) de azúcar glasé, tamizado
½ cucharadita de extracto natural de
vainilla
1 taza (150 g) de fresas liofilizadas,
finamente molidas y tamizadas*
2 yemas de huevo grande, a temperatura
ambiente
Relleno de fresa:
4 cucharadas (55 g) de mantequilla sin sal,
a temperatura ambiente
2 onzas (225 g) de queso crema, a
temperatura ambiente
2 tazas (240 g) de azúcar glasé, tamizado
1 pizca de sal marina fina
2 cucharadas (60 ml) de leche entera,
a temperatura ambiente

31
¼ cucharadita de extracto natural de
vainilla
½ taza (75 g) de fresas liofilizadas,
finamente molidas y tamizadas*
Preparar la masa: Colocar la harina y la sal en el
bol de la batidora. Instalar el batidor de alambre
y elegir la función “MIXING” y el programa “DRY
INGREDIENT MIXING”. Reservar, en un tazón
mediano.
Colocar la mantequilla en el bol. Conectar el
batidor, elegir la función “MIXING” y el programa
“CREAMING”. Cuando la mantequilla esté suave,
agregar gradualmente los azucares y la vainilla.
Presionar la perilla para pausar el programa si es
necesario raspar el bol y el batidor. Finalizado el
programa, la mezcla debe estar ligera y esponjosa.
Nota: Puede que la mezcla esté lista antes del fin
del programa; parar el programa cuando esté
cremosa. Después de acremar la mantequilla con
el azúcar, parar y raspar bien el bol.
Ajustar la velocidad al nivel 2 y agregar las yemas;
mezclar para combinar. Agregar los ingredientes
secos y mezclar a velocidad 2 hasta que esté bien
mezclado. Agregar las fresas molidas y mezclar a
velocidad 2 para combinar bien.
Dividir la masa en dos porciones iguales y formar
un disco con cada porción. Envolver en papel
encerado o papel sulfurizado, y luego en papel
film/plástico. Refrigerar por una noche.
Sacar la masa del refrigerador para que se
ablande un poco. Colocar una de las rejillas del
horno en la posición inferior, y la otra en el
medio, y precalentar el horno a 350°F (175 °C).
Forrar dos placas para horno con bordes con
papel sulfurizado.
Estirar la masa con rodillo hasta que tenga ¼ in.
(0.5 cm) de espesor y cortar discos pequeños
usando un cortador de galletas de 1½ in. (4 cm).
Colocar en las placas y refrigerar por aprox. 10
minutos.
Después de este tiempo, hornear las galletas
por aprox. 12 minutos, (cambiar las placas de
nivel si es necesario), sin permitir que se doren.
Dejar enfriar completamente.
Mientras las galletas se están enfriando, preparar
el relleno. Comprobar que el bol y el batidor
plano están limpios y secos. Colocar la mantequilla
y el queso crema en el bol. Instalar el batidor
plano mezclar a velocidad 3 a 4 por aprox. 1
minuto para suavizar y combinar. Agregar el
azúcar, la sal, la leche y la vainilla; mezclar,
empezando en la velocidad 1 y aumentando
progresivamente hasta el nivel 6, hasta conseguir
una mezcla ligera y espumosa. Presionar la
perilla para pausar el programa si es necesario
raspar el bol y el batidor. Agregar las fresas
molidas y mezclar a velocidad 3 para combinar.
Una vez que las galletas estén completamente
frías, colocar aprox. 1 cucharada del relleno en la
parte inferior de una galleta, y luego cubrir con
otra galleta para hacer un “sándwich”.
Repetir con el resto de las galletas. NOTA: Esta
receta rinde más relleno de lo que necesita.
Puede usar el relleno extra para bañar/glasear
“cupcakes” o pasteles, o congelarlo por hasta 2
meses para hacer más galletas luego.
* La mejor forma de hacer esto es con un molinillo
de especias o de café.
Información nutricional galleta rellena:
Calorías 201 (47 % de grasa) • Carbohidratos 25 g
Proteínas 1 g • Grasa 10 g • Grasa saturada 7 g
Colesterol 43 mg • Sodio 57 mg • Calcio 8 mg • Fibra 1 g
Galletas de chocolate
Estas galletas con tres tipos de chocolate son
absolutamente exquisitas.
Rinde aprox. 48 galletas
3 tazas (375 g) de harina común
1 cucharadita de bicarbonato de sodio
½ cucharadita de sal kosher
16 cucharadas (225 g) de mantequilla sin
sal temperatura ambiente, en pedazos
de 1 in. (2.5 cm)
1 taza llena (200 g) de azúcar rubia
(azúcar de caña integral)
½ taza (100 g) de azúcar granulada
2 huevos grandes, a temperatura ambiente
1½ cucharaditas de extracto natural de
vainilla
4 onzas (115 g) de chocolate semiamargo,
en pedacitos de ½ in. (1.5 cm), o de
chispas de chocolate semiamargo
4 onzas (115 g) de chocolate semidulce,
en pedacitos de ½ in. (1.5 cm), o de
chispas de chocolate semidulce
4 onzas (115 g) de chocolate con leche,
en pedacitos de ½ in. (1.5 cm), o de
chispas de chocolate con leche
Forrar dos placas para horno con papel
sulfurizado; reservar.

32
Colocar la harina, el polvo de hornear y la sal
en el bol de la batidora. Instalar el batidor
de alambre y elegir la función “MIXING” y el
programa “DRY INGREDIENT MIXING”.
Retirar y reservar en un tazón.
Colocar la mantequilla y los azucares en el bol.
Conectar el batidor plano y elegir la función
“MIXING” y el programa “CREAMING ”. Presionar
la perilla para pausar el programa si es necesario
raspar el bol y el batidor. Finalizado el programa,
la mezcla debe estar ligera y esponjosa.
Nota: Puede que la mezcla esté lista antes del fin
del programa; parar el programa cuando esté
cremosa. Después de acremar la mantequilla con
el azúcar, parar y raspar bien el bol.
Ajustar la velocidad al nivel 3 y agregar los
huevos, uno a la vez, y luego la vainilla, batiendo
entre cada adición para incorporar cada huevo
antes de agregar el siguiente. Raspar el bol.
Ajustar la velocidad al nivel 2 y agregar los
ingredientes secos; revolver brevemente para
incorporar, raspando el bol después de cada
adición. Raspar el bol y agregar el chocolate.
Fijar la velocidad al nivel 3 y revolver para
incorporar.
Formar bolas de masa de 1½ cucharadas de
mezcla (también puede usar una cuchara para
helado n.° 40) y disponerlas en las placas
preparadas. Cubrir con papel film/plástico y
refrigerar por un mínimo de 2 horas.
Cuando esté listo/a para hornear, precalentar
el horno a 350°F (175 °C). Hornear por aprox.
12 a 16 minutos, hasta que las orillas estén bien
doradas pero que el centro siga suave. Sacar del
horno. Dejar enfriar en la placa por unos minutos,
y luego terminar de enfriar sobre una rejilla.
CONSEJO: Para que las galletas sean
uniformemente cocinadas, cambiar las placas
de nivel a la mitad del tiempo.
Información nutricional por galleta:
Calorías 170 (47 % de grasa) • Carbohidratos 22 g
Proteínas 2 g • Grasa 9 g • Grasa saturada 4 g
Colesterol 22 mg • Sodio 151 mg • Calcio 5 mg • Fibra 1 g
“Biscotti” de cerezas y
almendras
Estas crujientes galletas son perfectas para
mojar en leche, café o té.
Rinde aprox. 96 “biscotti”
2¾ tazas (345 g) de harina común + un poco
más para estirar la masa
2 tazas (400 g) de azúcar granulada
1 cucharadita de polvo de hornear
1 pizca de sal marina fina
3 huevos grandes
2 yemas de huevo grande
½ taza (60 g) de cerezas secas agrias
½ taza (30 g) de almendras tostadas,
picadas grueso
Precalentar el horno a 350°F (175°C). Forrar dos
placas para horno con papel sulfurizado; Reservar.
Colocar la harina, el azúcar, el polvo de hornear
y la sal en el bol de la batidora. Instalar el batidor
de alambre y elegir la función “MIXING” y el
programa “DRY INGREDIENT MIXING”.
Remplazar el batidor de alambre por el batidor
plano. Agregar los huevos y las yemas, uno a la
vez, batiendo a velocidad 3 después de cada
adición para incorporar completamente cada
huevo antes de agregar el siguiente. Raspar el
bol. Agregar las cerezas y las almendras
picadas; revolver brevemente para incorporar.
Nota: Puede que la masa esté pegajosa; esto
es normal.
Colocar la masa sobre una superficie enharinada
y dividirla en cuatro porciones iguales. Formar
una barra de 12 x 1½ x 1½ in. (30 x 4 x 4 cm)
con cada porción. Disponer dos barras en cada
una de las placas preparadas. Hornear por aprox.
35 minutos, hasta que estén doradas. Sacar del
horno, dejar que se entibie, y luego cortar cada
barra en aprox. 25 rebanadas de ½ in. (1.5 cm).
Hornear por aprox. 30 minutos, hasta que estén
doradas. Sacar del horno. Dejar enfriar en la
placa por unos minutos, luego terminar de enfriar
sobre una rejilla. Conservar en un recipiente
hermético.
Información nutricional por “biscotti”:
Calorías 82 (66% de grasa) • Carbohidratos 3 g • Proteínas
4 g • Grasa 7 g • Grasa saturada 4 g • Colesterol 19 mg
Sodio 97 mg • Calcio 116 mg • Fibra 0 g

33
Galletas de azúcar “moca”
Estas sabrosas galletas de azúcar tienen un sabor
a moca intenso.
Rinde aprox. 45 galletas
3 tazas (375 g) de harina común
2 cucharadas de cacao amargo en polvo
1½ cucharaditas de polvo de hornear
¾ cucharadita de sal kosher
½ cucharadita de bicarbonato de sodio
2 cucharadas (30 ml) de leche regular o
baja en grasa
2 cucharadas de café expreso en polvo
2 cucharadas de extracto natural de vainilla
24 cucharadas (225 g) de mantequilla sin
sal a temperatura ambiente, en
pedacitos de ½ in. (1.5 cm)
1½ tazas (300 g) de azúcar granulada
1 huevo grande
1 yema de huevo grande
½ taza (100 g) de azúcar turbinado (puede
sustituirle con azúcar granulada)
Precalentar el horno a 350°F (175°C). Forrar dos
placas para horno con papel sulfurizado; reservar.
Colocar la harina, el cacao, el polvo de hornear,
la sal y el bicarbonato en el bol. Instalar el batidor
de alambre y elegir la función “MIXING” y el
programa “DRY INGREDIENT MIXING”. Retirar y
reservar, en un tazón.
Colocar la leche, el café expreso en polvo y la
vainilla en un tazón pequeño. Revolver para
mezclar; reservar.
Colocar la mantequilla y el azúcar en el bol.
Conectar el batidor plano y elegir la función
“MIXING” y el programa “CREAMING ”. Presionar
la perilla para pausar el programa si es necesario
raspar el bol y el batidor. Finalizado el programa,
la mezcla debe estar ligera y esponjosa. Nota:
Puede que la mezcla esté lista antes del fin del
programa; parar el programa cuando esté
cremosa. Después de acremar la mantequilla con
el azúcar, parar y raspar bien el bol.
Ajustar la velocidad al nivel 3; agregar los huevos
y la yema, uno a la vez, batiendo entre cada
adición para incorporar completamente cada
huevo antes de agregar el siguiente. Agregar la
mezcla de leche y mezclar justo hasta incorporar
los ingredientes. Parar cuantas veces sea
necesario para raspar bien el bol. Ajustar la
velocidad al nivel 2. Agregar los ingredientes
secos y mezclar brevemente para incorporar.
Formar bolas de 1½ cucharadas de masa
(también puede usar una cuchara para helado
de 1½ n.° 40) y cubrirlas con azúcar turbinado.
Disponer las galletas en las placas preparadas,
a una distancia de 1 in. (2.5 cm) una de otra.
Hornear por aprox. 12 minutos, hasta que estén
ligeramente firmes. Sacar del horno. Dejar enfriar
en la placa por unos minutos, luego terminar de
enfriar sobre una rejilla.
Información nutricional por galleta:
Calorías 119 (46 % de grasa) • Carbohidratos 15 g
Proteínas 1 g • Grasa 6 g • Grasa saturada 4 g
Colesterol 25 mg • Sodio 67 mg • Calcio 5 mg • Fibra 0 g
Galletas blancas y negras
Estas irresistibles galletas sin duda se volverán
sus favoritas.
Rinde aprox. 45 galletas
Galletas:
1½ tazas (185 g) de harina común
1½ tazas (200 g) de harina de repostería sin
levadura
1 cucharadita de bicarbonato de sodio
1 cucharadita de sal marina fina
½ cucharadita de ralladura de limón
1 taza (245 g) de suero de leche
(“buttermilk”)
1 cucharadita de extracto natural de
vainilla
12 cucharadas (180 g) de mantequilla sin
sal, derretida y enfriada
1¹⁄
³
tazas (265 g) de azúcar granulada
2 huevos grandes, a temperatura ambiente
Glaseado:
3 tazas (360 g) de azúcar glasé, tamizado
3 cucharadas de jarabe de maíz claro
¾ cucharadita de extracto natural de vainilla
¼ taza (60 ml) de agua + unas cucharadas
más si es necesario
4 onzas (115 g) de chocolate semiamargo,
derretido y llevado a temperatura
ambiente
Colocar las harinas, el polvo de hornear, la sal y
la ralladura en el bol de la batidora. Instalar el
batidor de alambre y elegir la función “MIXING” y
el programa “DRY INGREDIENT MIXING”. Retirar
y reservar, en un tazón.
Colocar el suero de leche y la vainilla en una taza
medidora para líquidos; revolver y reservar.

34
Colocar la mantequilla en el bol. Instalar el
batidor plano y batir a velocidad 5 por aprox. 1
minuto, agregando gradualmente el azúcar.
Ajustar la velocidad al nivel 8 y batir por aprox. 2
minutos, hasta obtener una mezcla ligera. Raspar
el bol. Sin dejar de mezclar, agregar los huevos,
uno a la vez. Mezclar por aprox. 2 minutos para
incorporarlos. Raspar el bol. Ajustar la velocidad
al nivel 1 y agregar un tercio de los ingredientes
secos. Cuando los ingredientes estén casi
completamente incorporados, agregar la mitad
del suero de leche. Repetir, alternando los
ingredientes secos y los ingredientes líquidos,
raspando el bol si es necesario. Terminar con el
último tercio de ingredientes secos. Refrigerar
por un mínimo de 1 hora.
Precalentar el horno a 350°F (175°C). Forrar dos
placas para horno con papel sulfurizado; reservar.
Formar bolas de 1½ cucharadas de masa
(también puede usar una cuchara para helado
n.° 40) y disponerlas sobre las bandejas, a una
distancia de 2 in. (5 cm) una de otra. Hornear por
10 a 15 minutos, hasta que las galletas estén
ligeramente doradas.
Mientras las galletas se están horneando,
preparar los glaseados: Colocar el azúcar glasé
tamizado, 2 cucharadas del jarabe de maíz, la
vainilla y ¼ de taza (60 ml) de agua en el bol de
la batidora. Instalar el batidor de alambre. Batir,
aumentando gradualmente la velocidad al nivel 5,
hasta conseguir una mezcla suave y homogénea.
Glasear la mitad de cada galleta con el glaseado
de vainilla, usando una pequeña espátula
angulada. Agregar el chocolate, 1 cucharada de
jarabe de maíz y 1 cucharada de agua al
glaseado restante. Batir a velocidad 5. De ser
necesario, agregar agua, 1 cucharada a la vez,
hasta que la mezcla esté suave. Glasear la
otra mitad de las galletas con el glaseado de
chocolate. Permitir que el glaseado se fije
antes de servir.
Información nutricional por galleta:
Calorías 157 (28 % de grasa) • Carbohidratos 27 g
Proteínas 2 g • Grasa 5 g • Grasa saturada 3 g
Colesterol 20 mg • Sodio 105 mg • Calcio 12 mg • Fibra 0 g
Galletas energéticas
Puede comer estas sabrosas galletas sin gluten,
lácteos ni azúcar/sal añadidas sin sentimiento
de culpabilidad.
Rinde 28 galletas
1 banana mediana, en trozos de 1 in.
(2.5 cm)
2 cucharadas de semillas de chía
¹⁄
³
taza (35 g) de mantequilla de almendra
1 cucharadita de extracto natural de
vainilla
2 tazas (160 g) de copos de avena
½ taza (50 g) de almendras picadas
½ taza (60 g) de cerezas secas agrias
½ taza (40 g) de chispas de algarrobo
(“carob”)
Precalentar el horno a 350°F (175°C). Forrar dos
placas para horno con papel sulfurizado;
reservar. Colocar los trozos de banana en el bol
de la batidora. Instalar el batidor plano y batir
a velocidad 2 por aprox. 20 segundos para
suavizar. Ajustar la velocidad al nivel 6 y batir
por aprox. 1 minuto.
Agregar las semillas de chía; mezclar por 30
segundos. Agregar la mantequilla de almendra y
la vainilla; mezclar por aprox. 30 segundos.
Ajustar la velocidad al nivel 2 y agregar la avena,
en varias adiciones. Luego, agregar las
almendras picadas, las cerezas secas y las
chispas de algarrobo, en varias adiciones;
revolver para incorporar.
Formar galletas pequeñas de 1½ in. (4 cm)
(también puede usar una cuchara para helado
n.° 40) y disponerlas en las bandejas preparadas.
Presionar suavemente con un tenedor para
aplastar. Hornear por aprox. 12 minutos,
hasta que estén doradas y ligeramente firmes.
Sacar del horno. Dejar enfriar en la placa por
unos minutos, luego terminar de enfriar sobre
una rejilla.
Información nutricional por galleta:
Calorías 93 (42 % de grasa) • Carbohidratos 12 g
Proteínas 3 g • Grasa 5 g • Grasa saturada 1 g
Colesterol 0 mg • Sodio 4 mg • Calcio 29 mg • Fibra 2g

35
“Brownies” cremosos
Estos suculentos “brownies” son para los
verdaderos amantes del chocolate.
Rinde 24 “brownies”
Spray vegetal
16 cucharadas (225 g) de mantequilla sin
sal, en pedazos
6 onzas (170 g) de chocolate amargo,
picado
2 onzas (55 g) de chocolate semiamargo,
picado
1 cucharada (5 g) de cacao en polvo
4 huevos grandes, a temperatura ambiente
1 yema de huevo grande, a temperatura
ambiente
2 tazas (400 g) de azúcar granulada
1 taza llena (200 g) de azúcar rubia
(azúcar de caña integral)
2 cucharaditas de café expreso en polvo
2 cucharaditas de extracto natural de
vainilla
¾ taza (95 g) de harina común
¼ taza (35 g) de harina de repostería sin
levadura
1 cucharadita de sal kosher
¾ taza (130 g) de chispas de chocolate
semiamargo
Precalentar el horno a 375°F (190°C). Engrasar
una bandeja de 13 x 9 in. (33 x 23 cm) con spray
vegetal y forrar con papel sulfurizado o papel de
aluminio, dejando un borde extra de 1 in. (2.5 cm)
en cada lado.
Derretir la mantequilla y los chocolates picados a
baño María. Una vez derretidos, agregar el cacao
en polvo y llevar a temperatura ambiente. Reservar.
Colocar los huevos y la yema en el bol de la
batidora. Instalar el batidor plano y batir a
velocidad 3 por aprox. 30 segundos para romper.
Agregar el azúcar granulado y el azúcar rubio, y
batir a velocidad 4 por aprox. 1 minuto, hasta
conseguir una mezcla ligera y espesa. Raspar el
bol cuando sea necesario. Agregar el café y la
vainilla; batir. Mezclar la harina con la sal; agregar
a la mezcla de chocolate/mantequilla. Ajustar la
velocidad al nivel 2 y agregar la mezcla de
harina/chocolate al bol. Revolver por aprox. 45
segundos para mezclar. Raspar el bol. Ajustar la
velocidad al nivel 1 y agregar las chispas de
chocolate.
Verter la mezcla en el molde preparado.
Hornear por 45 a 50 minutos, hasta que las
orillas estén secas. Los brownies seguirán
estando un poco húmedos por dentro y eso es
lo que se quiere para crear un brownie de textura
agradable. Sacar del horno y dejar enfriar
ligeramente en la bandeja. Luego, levantar el
“brownie” (agarrándolo por el papel sulfurizado/
de aluminio sobrante) y colocarlo sobre una rejilla
para que termine de enfriarse. Cortar y servir tibio
si desea. Conservar los “brownies” restantes en
un recipiente hermético.
Información nutricional por “brownie”:
Calorías 269 (48 % de grasa) • Carbohidratos 35 g
Proteínas 3 g • Grasa 15 g • Grasa saturada 9 g
Colesterol 59 mg • Sodio 102 mg • Calcio 15 mg • Fibra 2 g
“Blondies” (“brownies” de
chocolate blanco)
Es difícil resistir a estos “blondies” repletos de la
cantidad perfecta de dulzura y una combinación de
chocolate y chocolate blanco.
Rinde 24 “blondies”
Spray vegetal
2 tazas (250 g) de harina común
1½ cucharaditas de sal kosher
½ cucharadita de canela en polvo
16 cucharadas (225 g) de mantequilla sin
sal temperatura ambiente, en pedacitos
½ taza (100 g) de azúcar granulada
1 taza llena (200 g) de azúcar rubia
(azúcar de caña integral)
3 huevos grandes, a temperatura ambiente
1 cucharada (15 ml) de extracto natural de
vainilla
1½ tazas (260 g) de chocolate semiamargo,
picado
1 taza (175 g) de chispas de chocolate
blanco
1 taza (100 g) de mitades de nueces
Precalentar el horno a 350°F (175°C). Engrasar
una bandeja de 13 x 9 in. (33 x 23 cm) con spray
vegetal y forrar con papel sulfurizado o papel de
aluminio, dejando un borde extra de 1 in. (2.5 cm)
en cada lado. Reservar.
Colocar la harina, la sal y la canela en un tazón
pequeño; revolver. Reservar.
Colocar la mantequilla y los azúcares en el bol de
la batidora. Conectar el batidor plano y elegir la

36
función “MIXING” y el programa “CREAMING”.
Presionar la perilla para pausar el programa si es
necesario raspar el bol y el batidor. Finalizado el
programa,, la mezcla debe estar ligera y esponjosa.
Nota: Puede que la mezcla esté lista antes del
fin del programa; parar el programa cuando esté
cremosa. Después de acremar la mantequilla con
el azúcar, parar y raspar bien el bol.
Ajustar la velocidad al nivel 3 y agregar los
huevos, uno a la vez, y luego la vainilla, batiendo
entre cada adición para incorporar cada huevo
antes de agregar el siguiente. Raspar el bol
cuando sea necesario. Ajustar la velocidad al
nivel 1 y agregar lentamente los ingredientes
secos. Cuando los ingredientes estén casi
incorporados, agregar el chocolate y las nueces.
Revolver y echar en la bandeja.
Hornear por 30 a 35 minutos, hasta que la parte
superior empiece a agrietarse. Sacar del horno
y dejar enfriar ligeramente en la bandeja. Luego,
levantar el “blondie” (agarrándolo por el papel
sulfurizado/de aluminio) y colocarlo sobre una
rejilla para que termine de enfriarse. Cortar y
servir tibio si desea. Conservar los “blondies”
restantes en un recipiente hermético.
Información nutricional por “blondie”:
Calorías 317 (48 % de grasa) • Carbohidratos 39 g
Proteínas 3g • Grasa 18 g • Grasa saturada 10 g
Colesterol 44 mg • Sodio 153 mg • Calcio 317 mg • Fibra 1g
Barras de pastel de queso
con arándanos azules
Rinde 16 porciones
Mantequilla sin sal para engrasar
el molde
Corteza/base de galletas Graham:
1 taza (50 g) de galletas “Graham” molidas
(aprox. 8 a 9 hojas de galletas)
2 cucharadas (25 g) de azúcar granulada
1 pizca de canela en polvo
1 pizca de sal marina fina
4 cucharadas (55 g) de mantequilla sin sal,
derretida y ligeramente enfriada
Relleno:
16 onzas (465 g) de queso crema bajo
en grasa a temperatura ambiente,
en 4 pedazos
²⁄
³
taza (135 g) de azúcar granulada
Ralladura y jugo de 1 limón
½ cucharadita de sal marina fina
2 huevos grandes, a temperatura ambiente
½ taza (120 ml) de crema agria o de yogur
griego natural
½ cucharadita de extracto natural de
vainilla
¼ taza (60 ml) de mermelada de arándanos
azules, preferiblemente suave
1 taza (140 g) de arándanos azules frescos
Colocar la rejilla del horno en el centro del mismo
y precalentar el horno a 300°F (150°C). Engrasar
ligeramente un molde de 9 x 9 in. (23 x 23 cm)
con spray vegetal, y forrarlo con papel
sulfurizado.
Preparar la corteza/base: Colocar todos los
ingredientes de la corteza/base en un tazón
pequeño y revolver con un tenedor, aplastando
las galletas. (Nota: También puede hacer esto en
una mini-procesadora de alimentos. Moler
finamente las galletas “Graham” primero, agregar
los ingredientes restantes y procesar.) Colocar
las galletas molidas en el fondo del molde y
apisonar con los dedos o una cuchara para
formar una base uniforme. Hornear por 10
minutos, y luego dejar enfriar mientras prepara
el relleno.
Colocar el queso crema en el bol de la batidora.
Conectar el batidor plano y elegir la función
“MIXING” y el programa “CREAMING”.
Mezclar hasta que el queso esté muy suave
(absolutamente no grumos), pausando para
raspar el bol y el batidor planos cuantas veces
sea necesario. Cuando el queso crema esté
suave, y antes de que el programa “CREAMING”
se termine, agregar gradualmente el azúcar,
aprox. ¼ de taza (50 g) a la vez, la ralladura y la
sal; mezclar hasta conseguir una mezcla muy
suave. Finalizado el programa, raspar el bol y el
batidor plano y seguir batiendo a velocidad 6 por
más tiempo si es necesario.
Ajustar la velocidad al nivel 4 y agregar los
huevos, uno a la vez; mezclar para incorporar
completamente cada huevo antes de agregar
el siguiente. Raspar el bol después de cada
adición. Agregar la crema agria, el jugo de lima
y el extracto de vainilla. Mezclar a velocidad 1
por aprox. 1 minuto, hasta obtener una mezcla
cremosa. Verter la mezcla sobre la corteza
enfriada, teniendo cuidado de no raspar ningún
grumo grueso de los costados del bol (esto
cambiaría la textura del pastel). Dar unos
golpecitos en la encimera varias veces para
eliminar las burbujas de aire en la mezcla.
Verter la mermelada de arándanos azules sobre

37
la mezcla de queso crema y, con la punta de
un cuchillo o un palillo chino, hacer un dibujo
decorativo en forma de espiral. Cubrir con los
arándanos azules frescos y hundirlos ligeramente
en la mezcla.
Meter la bandeja al horno y hornear por aprox. 20
a 25 minutos, hasta que las orillas estén firmes,
pero que el centro siga suave. Sacar del horno y
dejar enfriar a temperatura ambiente. Cubrir bien
y refrigerar para enfriar completamente antes de
cortar y servir.
Información nutricional por porción:
Calorías 201 (60 % de grasa) • Carbohidratos 18g
Proteínas 2 g • Grasa 13g Grasa saturada 8g
Colesterol 36 mg • Sodio 191 mg • Calcio 282 mg • Fibra 1 g
BASE DE TARTAS Y
TARTAS
Masa de hojaldre básica
Esta receta incluye proporciones para preparar
dos fondos/bases de tarta de 9 a 10 in. (23 a 25 cm)
o un fondo/una base de tarta de 11 a 12 in.
(28 a 30 cm).
Ingredientes para un fondo/una base de tarta:
1½ tazas (185 g) de harina común
¼ cucharadita de sal marina fina
8 cucharadas (115 g) de mantequilla sin
sal helada, en pedacitos de ½ in. (1.5 cm)
2 cucharadas (30 g) de manteca vegetal
(preferiblemente no hidrogenada) fría,
en pedacitos de ½ in. (1.5 cm)
2 a 4 cucharadas de agua helada
Ingredientes para dos fondos de tarta:
3 tazas (375 g) de harina común
½ cucharadita de sal marina fina
16 cucharadas (225 g) de mantequilla sin
sal helada, en pedacitos de ½ in. (1.5 cm)
4 cucharadas (30 g) de manteca vegetal
(preferiblemente no hidrogenada) fría,
en pedacitos de ½ in. (1.5 cm)
4 a 8 cucharadas de agua helada
Colocar la harina y la sal en el bol de la batidora.
Instalar el batidor de alambre y elegir la función
MIXING” y el programa “DRY INGREDIENT
MIXING”.
Esparcir los pedazos de mantequilla y de manteca
por encima de la harina. Revolver, empezando en
el nivel 4 y aumentando gradualmente la velocidad
al nivel 8, hasta que la mezcla adquiera la
consistencia de migajas gruesas con pedacitos
de mantequilla/manteca del tamaño de pequeñas
arvejas. Raspar el bol. Rociar con la cantidad
mínima de agua helada y mezclar a velocidad 1.
Agregar agua, 1 cucharada a la vez, hasta que
empiece a formarse una masa homogénea al
apretarse entre los dedos. No mezclar demasiado.
Formar una bola de masa (2 bolas con la receta
doble y aplastar para formar un disco de 6 in.
(15 cm) (2 discos con la receta doble). Envolver
en papel film/plástico y refrigerar por 1 hora
antes de continuar. La masa se conservará en el
refrigerador por hasta 3 días o en el congelador
(envuelta en doble capa de papel film/plástico)
por hasta un mes; sacarla del congelador una
hora antes del uso.
Estirar la masa. Para hornear en blanco (precocinar)
el fondo/la base de tarta: Extender la masa hasta
obtener un fondo/una base de tarta de
1
/
8
in.
(3 mm) de espesor; forrar un molde con la masa,
acanalando y sellando los bordes. Pinchar el
fondo varias veces con un tenedor. Refrigerar por
30 minutos o más. Precalentar el horno a 400 °F
(200 °C). Cubrir la masa con una hoja de papel
sulfurizado y llenar con arroz crudo o frijoles
secos. Hornear por 20 minutos, hasta que esté
firme. Retirar cuidadosamente los frijoles/el arroz
y el papel sulfurizado, y hornear por 5 a 10
minutos adicionales, hasta dorarse ligeramente.
Sacar del horno y dejar enfriar sobre una rejilla.
Información nutricional por porción
(basada en 8 porciones/1 fondo/ base de tarta):
Calorías 203 (63 % de grasa) • Carbohidratos 17 g
Proteínas 2 g • Grasa 14 g • Grasa saturada 9 g
Colesterol 30 mg • Sodio 67 mg • Calcio 40mg • Fibra 0g
Fondo/Base de tarta
de galletas
Este fondo/base de tarta/torta de galletas puede
hacerse con prácticamente cualquier tipo de galletas
molidas. Es perfecto para la mayoría de las
tartas/tortas con relleno cremoso o de natilla.
Rinde un fondo/una base de tarta/torta
8 onzas (225 g) de galletas finamente
picadas (p. ej., galletas de jengibre,
galletas de chocolate, barquillos de
vainilla o galletas Graham)
2 a 3 cucharadas (25 a 35 g) de azúcar
granulada (al gusto, dependiendo de las
galletas usadas)

38
¹⁄8 cucharadita de sal marina fina
6 cucharadas (85 g) de mantequilla sin sal,
derretida
Precalentar el horno a 350°F (175°C).
Colocar las galletas picadas, el azúcar y la sal en
el bol de la batidora. Instalar el batidor de alambre
y elegir la función MIXING” y el programa “DRY
INGREDIENT MIXING”. Finalizado el programa,
reemplazar el batidor de alambre por el batidor
plano. Encender la máquina a velocidad 3, agregar
lentamente la mantequilla derretida y mezclar por
aprox. 2 minutos, hasta que las migajas estén
completamente cubiertas con mantequilla.
Comprimir la mezcla en el fondo y en las paredes
de un molde de tarta, usando el fondo de un vaso
para apisonar la mezcla. Hornear por 8 a 10
minutos, hasta que esté firme al tacto.
Sacar del horno y dejar enfriar sobre una rejilla.
Información nutricional por porción
(basada en 8 porciones):
Calorías 222 (57 % de grasa) • Carbohidratos 23 g
Proteínas 1 g • Grasa 6 g • Grasa saturada 7 g
Colesterol 23 mg • Sodio 183 mg • Calcio 7 mg • Fibra 1g
Tarta de limón con
merengue
Esta receta clásica es un favorito americano desde
principios de siglo XIX. Nuestra versión tiene un
merengue de malvavisco.
Rinde 8 a 12 porciones; una tarta)
1 fondo/base de tarta de masa hojaldre
(receta en la página 37), precocinada
Relleno:
1½ tazas (300 g) de azúcar granulada
¼ taza + 3 cucharadas (45 g) de maicena
1½ tazas (355 ml) de agua
¾ taza (175 ml) de jugo de limón fresco
7 yemas de huevo grande (reservar las
claras para el merengue)
5 cucharadas (70 g) de mantequilla sin sal,
en pedazos de 1 in. (2.5 cm)
Ralladura de 3 limones
Merengue:
7 claras de huevo grande
¾ taza + 2 cucharadas (175 g) de azúcar
granulada
2 cucharadas (30 ml) de agua
1 cucharadita de crémor tártaro
¹⁄8 cucharadita de sal kosher
Colocar la rejilla del horno en el tercio superior
del mismo. Fijar la temperatura del horno en
“BROIL” (dorar/gratinar). Alistar el fondo/la base
de tarta precocinado.
Preparar el relleno de limón: Colocar el azúcar
granulada y la maicena en una cacerola mediana;
revolver. Agregar el agua y el jugo de limón;
revolver hasta conseguir una mezcla suave.
Cocinar a fuego medio por aprox. 3 a 4 minutos,
hasta que se espese ligeramente.
Colocar las claras en un tazón; batir. Agregar la
mitad del líquido caliente a las yemas, sin dejar
de batir. Volver a colocar la mezcla en la cacerola
y seguir calentando a fuego medio. Seguir
calentando por aprox. 5 a 6 minutos, revolviendo
o batiendo constantemente, hasta que la mezcla
esté espesa y empiece a burbujear. Agregar la
mantequilla y revolver para mezclar. Agregar la
ralladura y revolver hasta conseguir una mezcla
homogénea. Tapar y mantener tibio hasta el
momento rellenar la tarta.
Preparar el merengue: Colocar las claras,
2 cucharadas (25 g) del azúcar granulado,
2 cucharadas (30ml) de agua y una pizca de
crémor tártaro en el bol de la batidora. Batir
hasta conseguir una mezcla muy suave (no debe
quedar grumos). Instalar el batidor de alambre y
batir a velocidad 3 por 30 segundos. Ajustar la
velocidad al nivel 12 y agregar lentamente el
azúcar restante. Agregar la sal y seguir batiendo
por aprox. 4 minutos, hasta que se formen picos
firmes.
Verter el relleno de limón sobre el fondo/la base
de tarta, esparciéndolo con una espátula. Cubrir
con el merengue, cerciorándose de esparcir este
hasta las orillas. Formar picos decorativos en el
merengue si desea. Nota: No tiene que usar todo
el merengue. Gratinar por aprox. 5 minutos,
hasta que esté ligeramente dorado. Sacar del
horno y dejar enfriar sobre una rejilla. Luego,
refrigerar por varias horas, hasta que esté helado.
CONSEJOS: Es importante que el relleno esté
caliente cuando lo cubra con el merengue. De no
ser así, el merengue se encogerá. Esta tarta está
mejor servida el mismo día que se hace.
Información nutricional por porción
(basada en 12 porciones):
Calorías 393 (38 % de grasa) • Carbohidratos 56 g
Proteínas 5 g • Grasa 17 g • Grasa saturada 10 g
Colesterol 140 mg • Sodio 105 mg • Calcio 15 mg • Fibra 0 g

39
Tarta de crema de
chocolate
Tres capas de chocolate cubiertas con crema batida.
¿A quién no le va a encantar?
Rinde 12 porciones; una tarta de 9 in. (23 cm)
1 receta de fondo/base de tarta de
galletas (página 37)
1 receta de “ganache de chocolate
(página 47)
1 receta de “mousse” de chocolate simple
(página 47)
1 receta de crema batida (página 48)
Virutas de chocolate para decorar
Preparar y hornear el fondo/la base de tarta de
galletas. Dejar que se enfríe mientras prepara
la “ganache” de chocolate Verter la “ganache”
de chocolate sobre el fondo/la base de tarta y
esparcirlo uniformemente. Refrigerar por aprox.
30 minutos mientras prepara la “mousse” de
chocolate. Verter la “mousse” encima de la
“ganache” y esparcirla uniformemente. Refrigerar
por un mínimo de 30 minutos, o por una noche
entera.
Justo antes de servir, preparar la crema batida y
cubrir la tarta. Decorar con virutas de chocolate y
servir inmediatamente.
Información nutricional por porción
(basada en 12 porciones):
Calorías 902 (78 % de grasa) • Carbohidratos 44 g
Proteínas 4 g • Grasa 2 g • Grasa saturada 49 g
Colesterol 230 mg • Sodio 150 mg • Calcio 60 mg • Fibra 3 g
PASTELES Y “CUPCAKES”
Pastel dorado
Este pastel clásico les encanta a todos y es casi
tan fácil de hacer que con una mezcla preparada.
Bañado en chocolate (receta en la página 46),
es perfecto para cualquier ocasión.
Rinde 12 porciones; dos capas de 9 in. (23 cm)
Mantequilla sin sal, para engrasar
los moldes
3 tazas (405 g) de harina de repostería
sin levadura
1 cucharada de polvo de hornear
2 cucharaditas de bicarbonato de sodio
½ cucharadita de sal marina fina
2 huevos grandes + 2 yemas,
a temperatura ambiente
1¹⁄
³
tazas (265 g) de azúcar granulada
2 cucharaditas de extracto natural de
vainilla
1 taza (235 ml) de aceite vegetal
1½ tazas (365 g) de suero de leche
(“buttermilk”), a temperatura ambiente
Precalentar el horno a 350°F (175°C).
Engrasar dos moldes redondos de 9 in. (23 cm)
con mantequilla suave y forrarlos con papel
sulfurizado; Reservar.
Colocar la harina, el polvo de hornear, el
bicarbonato y la sal en el bol de la batidora.
Instalar el batidor de alambre y elegir la función
“MIXING” y el programa “DRY INGREDIENT
MIXING”. Retirar y reservar, en un tazón.
Colocar los huevos y el azúcar en el bol de la
batidora. Batir a velocidad 6 por aprox. 2 minutos,
hasta obtener una mezcla suave y ligera.
Agregar la vainilla y revolver brevemente para
mezclar. Ajustar la velocidad al nivel 2 y agregar
gradualmente el aceite. Ajustar la velocidad al
nivel 4 y batir por aprox. 1 minuto, hasta obtener
una mezcla homogénea. Raspar el bol.
Agregar
¹⁄
³
de los ingredientes secos al bol;
revolver brevemente para incorporar. Agregar la
mitad del suero de leche; revolver brevemente
para mezclar. Repetir, terminando con los
ingredientes secos. Raspar el bol si es necesario.
Verter la mezcla en los moldes preparados.
Hornear por aprox. 25 a 30 minutos, hasta que
los pasteles estén dorados, que las orillas
empiecen a despegarse de los costados del
molde, y que un probador introducido en el
centro salga limpio.
Sacar del horno y dejar enfriar (en los moldes)
sobre una rejilla hasta que estén tibios. Luego,
desmoldar y terminar de enfriar sobre una rejilla.
Información nutricional por porción
(basada en 12 porciones):
Calorías 396 (45 % de grasa) • Carbohidratos 51 g
Proteínas 5 g • Grasa 20 g • Grasa saturada 2 g
Colesterol 32 mg • Sodio 462 mg • Calcio 396 mg • Fibra 1g

40
Pastel de capas
de chocolate
Bañe este suculento pastel de chocolate con nuestro
baño de queso crema (receta en la página 46).
Rinde 12 porciones; dos tortas de 9 in. (23 cm)
Mantequilla sin sal, para engrasar
los moldes
5 onzas (140 g) de chocolate semiamargo,
picado
¾ taza (90 g) de cacao amargo en polvo
1½ cucharaditas de café expreso en polvo
¾ cucharadita de bicarbonato de sodio
1 taza (235 ml) de agua hirviente
2 tazas (250 g) de harina común
¾ taza (150 g) de azúcar granulada
¾ taza (150 g) de azúcar moreno
½ cucharadita de polvo de hornear
½ cucharadita de sal marina fina
1 taza (235 ml) de aceite vegetal
¾ taza (185 g) de suero de leche
(“buttermilk”), a temperatura ambiente
3 huevos grandes, a temperatura
ambiente
1½ cucharaditas de extracto natural de
vainilla
Precalentar el horno a 350°F (175°C).
Engrasar dos moldes redondos de 9 in. (23 cm)
con mantequilla y forrarlos con papel sulfurizado;
Reservar.
Colocar el chocolate semiamargo, el cacao,
el expreso y el bicarbonato en un bol mediano;
cubrir con el agua hirviente. Revolver hasta que
el chocolate esté derretido. Dejar enfriar a
temperatura ambiente, y reservar.
Colocar la harina, los azucares, el polvo de
hornear y la sal en el bol de la batidora. Instalar
el batidor de alambre y elegir la función “MIXING”
y el programa “DRY INGREDIENT MIXING”.
Reservar, en un tazón mediano.
Colocar el aceite, los huevos, el suero de leche
y la vainilla en el bol de la batidora. Agregar la
mezcla de chocolate enfriada y mezclar,
empezando en la velocidad 1 y aumentando
gradualmente hasta el nivel 5. Mezclar hasta que
esté muy bien combinado y que no queden
estrías de color.
Ajustar la velocidad al nivel 2 y agregar
lentamente los ingredientes secos. Mezclar hasta
conseguir una mezcla suave, parando para
raspar el bol cuando sea necesario.
Dividir la mezcla uniformemente entre los moldes
preparados. Hornear por aprox. 30 a 35 minutos,
hasta que un probador introducido en el centro
salga limpio.
Sacar del horno y dejar enfriar (en los moldes)
sobre una rejilla hasta que estén tibios. Luego,
desmoldar y terminar de enfriar sobre una rejilla.
Información nutricional por porción (sin cobertura):
Calorías 345 (50 % de grasa) • Carbohidratos 41 g
Proteínas 6 g • Grasa 21 g • Grasa saturada 5 g
Colesterol 47 mg • Sodio 195 mg • Calcio 31 mg • Fibra 3 g
Pastel refrigerado
de jengibre y naranja
Lleno de sabores invernales, este sencillo e
impresionante postre es el centro perfecto para
cualquier mesa de fiesta.
Rinde un pastel de 9 in. (23 cm); 12 porciones
36 galletas de jengibre (receta en la
página 30)
2 tazas (475 ml) de crema líquida para
batir (“heavy cream”) helada
12 onzas (340 g) de queso mascarpone
italiano, helado
¾ taza (150 g) de azúcar granulada
¼ taza (60 ml) de leche
¼ cucharadita de ralladura de naranja
1 cucharada (15 ml) de jugo de naranja
2 pizcas de sal marina fina
1 naranja mediana (para los pedazos de
naranja cortada a lo vivo y la cáscara
de naranja confitada)
4 tazas (945 ml) de agua (para preparar
la piel de naranja confitada)
3 tazas (600 g) de azúcar granulada
(para la piel de naranja confitada)
Preparar las galletas de jengibre como se
describe en la receta, pero formando galletas
grandes de
¹⁄
³
de taza en vez de galletas
pequeñas. Presione cada galleta para que tenga
entre
¹⁄8
in. (3 mm) y ¼ (6 mm) de espesor.
Hornear las galletas por 10 minutos y permitir
que se enfríen antes de armar el pastel.
Preparar el relleno: Colocar la crema líquida,
el queso mascarpone, el azúcar, la leche, la
ralladura y la sal en el bol de la batidora. Instalar
el batidor de alambre. y mezclara a velocidad 1 a
2 para combinar. Luego, ajustar la velocidad al
nivel 8 y batir (no más de 5 minutos), hasta que
se formen picos medio-firmes.

41
Cerciorarse que no quedan grumos. Presionar la
perilla para pausar cuando sea necesario raspar
el bol y el batidor.
Armar el pastel: Colocar las galletas de forma
plana en un molde desmontable de 9 in. (23 cm),
cubriendo el fondo tanto como sea posible
(puede ser necesario separar algunas galletas
y luego rellenar los huecos para evitar que
queden demasiados espacios abiertos).
Distribuir uniformemente un cuarto del relleno
de mascarpone sobre las galletas. Agregar otra
capa de galletas encima, acostadas y tocándose,
seguida de otro cuarto de la crema. Continuar
formando capas de galletas y crema hasta que
haya 4 capas de cada una, terminando con una
capa de crema. Suavizar la parte superior, cubrir
con papel film/plástico, y refrigerar por una noche.
Mientras el pastel se está enfriando, preparar las
coberturas. Primero, “cortar a lo vivo” la naranja
(esto significa extraer la parte interior de la
naranja, quitando la cáscara, el albedo (la piel
blanca amarga) y las membranas internas).
Para hacer esto, cortar la parte superior e inferior
de la piel de la naranja con un cuchillo muy
afilado para que ambos lados queden planos.
A continuación, cortar con mucho cuidado toda
la piel (junto con el albedo/la piel blanca) de la
naranja para que quede una bonita fruta redonda
en la que solo se vea la pulpa (reservar la piel).
Reservar la cáscara. Luego, cortar a lo largo de
la membrana de cada segmento para separar
los segmentos de naranja de su membrana
(deberían salir con bastante facilidad). Reservar la
naranja cortada a lo vivo en un tazón.
A continuación, preparar la piel de naranja
confitada: Quitar el albedo (la piel blanca amarga)
de la cáscara. Luego, cortar a lo largo la cáscara
en tiras delgadas. Colocar 2 tazas (475 ml) del
agua en una cacerola y calentar hasta que
empiece a hervir. Agregar la cáscara de naranja y
dejar hervir por 10 a 15 minutos, hasta que esté
muy suave, pero que no se deshaga. Escurrir,
enjuagar y colocar sobre un papel absorbente
para que se sequen. Colocar el azúcar y las 2
tazas (475 ml) de agua restantes en la cacerola.
Poner a hervir y cocinar hasta que el azúcar se
haya disuelto. Agregar la cáscara de naranja y
dejar hervir. Cuando la mezcla empiece a hervir,
bajar el fuego y hervir a fuego lento por aprox. 40
minutos, hasta que la cáscara esté suave/lisa y
cubierta con azúcar.
Mientras la cáscara de la naranja se está
cocinando, colocar una rejilla en una bandeja.
Colocar el azúcar restante en un bol poco
profundo.
Cuando la cáscara de naranja confitada esté
lista, retirarla de la cacerola usando un colador
pequeño y revolverla suavemente en el azúcar
granulada. Colocar las tiras de cáscara sobre
la rejilla preparada, sin que se toquen. Deje
descansar a temperatura ambiente hasta que
estén secas.
Una vez que el pastel se haya enfriado por
completo, retírelo del molde (usar un cuchillo
mondador o una espátula angulada para
separarlo de las paredes del molde). Cubrir el
pastel con pedazos de naranja cortada a lo vivo
y cáscara de naranja confitada.
Información nutricional por porción
(basada en 12 porciones):
Calorías 489 (41 % de grasa) • Carbohidratos 67 g
Proteínas 5 g • Grasa 22 g • Grasa saturada 16 g
Colesterol 124 mg • Sodio 195 mg • Calcio 18 mg • Fibra 1 g
Pastel de cumpleaños de
capas con baño/glaseado
de vainilla fácil
El pastel de ensueño de cualquier niño, y
posiblemente un momento de nostalgia para los
adultos. Este divertido pastel hará que el próximo
cumpleaños sea aún más festivo. Proporcionamos
instrucciones sobre cómo hacer un simple pastel de
capas, pero también se puede preparar usando dos
moldes redondos de 9 in. (23 cm) y convertirlo en un
pastel de capas tradicional.
Rinde un pastel de capas; 16 porciones
Pastel:
2 tazas (270 g) de harina de repostería
sin levadura
1 cucharada de polvo de hornear
¾ cucharadita de sal marina fina
2 huevos grandes, a temperatura ambiente
2 yemas de huevo grande, a temperatura
ambiente
1¾ tazas (350 g) de azúcar granulada
2 cucharaditas de extracto natural de
vainilla
1 taza (235 ml) de aceite vegetal
1½ tazas (365 g) de suero de leche
(“buttermilk”), a temperatura ambiente
½ taza (45 g) de “confeti” de azúcar
multicolor revueltos con 1 cucharada
(5 g) de harina

42
Cobertura/Baño:
8 cucharadas (115 g) de mantequilla sin
sal, a temperatura ambiente
4 onzas (115 g) de queso crema,
a temperatura ambiente
4 tazas (480 g) de azúcar glasé, tamizado
1 pizca de sal marina fina
4 cucharadas (60 ml) de leche entera,
a temperatura ambiente
¼ cucharadita de extracto natural de
vainilla
¼ taza (20 g) de “confeti” de azúcar
multicolor
Engrasar una bandeja de 18 x 13 in. (46 x 33 cm)
con spray vegetal y forrarlo con papel sulfurizado;
Reservar. Colocar la rejilla del horno en el centro
del mismo y precalentar el horno a 350 °F (175 °C).
Colocar la harina, el polvo de hornear, el
bicarbonato y la sal en el bol de la batidora.
Instalar el batidor de alambre y elegir la función
“MIXING” y el programa “DRY INGREDIENT
MIXING”. Retirar y reservar, en un tazón.
Colocar los huevos, las yemas y el azúcar en el
bol de la batidora. Batir a velocidad 6 por aprox.
2 minutos, hasta obtener una mezcla suave y
ligera. Agregar la vainilla y revolver brevemente
para mezclar. Ajustar la velocidad al nivel 2 y
agregar gradualmente el aceite. Ajustar la
velocidad al nivel 4 y batir por aprox. 1 minuto,
hasta obtener una mezcla homogénea. Raspar el
bol. Agregar un tercio de los ingredientes secos
al bol; revolver para incorporar. Agregar la mitad
del suero de leche; revolver brevemente para
mezclar. Repetir, terminando con los ingredientes
secos. Raspar el bol si es necesario. Agregar los
“confeti” de azúcar y mezclar brevemente a
velocidad 1 para incorporar. Verter la mezcla en
la bandeja preparada. Hornear por aprox. 20
minutos, hasta que las orillas empiecen a
despegarse de la bandeja pero que el centro
siga suave. Sacar del horno y dejar enfriar a
temperatura ambiente.
Mientras el pastel se está enfriando, preparar la
cobertura/baño. Comprobar que el bol y el
batidor plano están limpios y secos. Colocar la
mantequilla y el queso crema en el bol. Instalar el
batidor plano y mezclar a velocidad 3 a 4 por
aprox. 1 minuto para suavizar y combinar bien.
Agregar el azúcar, la sal, la leche y la vainilla;
mezclar, empezando en la velocidad 1 y
aumentando progresivamente hasta el nivel 6,
hasta conseguir una mezcla ligera y espumosa.
Presionar la perilla para pausar si es necesario
raspar el bol y el batidor.
Cuando el pastel esté frío, bañarlo con la
cobertura y decorarlo uniformemente con los
“confeti” de azúcar. ¡Cortar y servir! Si se prepara
un pastel de capas de 9 in. (23 cm), montar
este como se haría con un pastel de capas,
agregando cobertura entre las dos capas, o 4
mitades (dividiendo cada pastel en dos capas).
Decorar como desea.
Información nutricional por porción (con cobertura):
Calorías 324 (42 % de grasa) • Carbohidratos 43 g
Proteínas 4 g • Grasa 16g • Grasa saturada 2 g
Colesterol 47 mg • Sodio 225 mg • Calcio 52 mg • Fibra 0 g
Pastel de galleta de
chispas de chocolate
Aquí hay una galleta gigante y suave en el centro
para los amantes de las galletas de chocolate.
Es mejor comerlo el mismo día, pero si se envuelve
bien , puede disfrutarse hasta dos días
(refrigerarlo si se cubre con crema batida).
Rinde un pastel de 9 in. (23 cm); 12 porciones
Spray vegetal o mantequilla suave para
engrasar el molde
2¼ tazas (280 g) de harina común
1 cucharadita de bicarbonato de sodio
1 cucharadita de sal kosher
½ cucharadita de café expreso en polvo
16 cucharadas (225 g) de mantequilla sin
sal temperatura ambiente, en pedazos
de 1 in. (2.5 cm)
1 taza (200 g) de azúcar rubia (azúcar de
caña integral)
½ taza (100 g) de azúcar granulada
2 huevos grandes, a temperatura
ambiente
1½ cucharaditas de extracto natural de
vainilla
2 tazas (350 g) de chispas de chocolate
semidulce, semiamargo y blanco
Copos de sal marina, para espolvorear
½ taza (120 ml) de crema batida, para
decorar
2 cucharadas de “confeti” de azúcar
multicolor, para decorar
Engrasar un molde redondo de 9 in. (23 cm)
con mantequilla suave o spray vegetal. Forrar el
fondo con papel sulfurizado. Reservar.

43
Colocar todos los ingredientes secos en el bol
de la batidora. Instalar el batidor de alambre
y elegir la función MIXING” y el programa
“DRY INGREDIENT MIXING”. Pasar la mezcla
a un tazón. Reservar.
Colocar la mantequilla y los azucares en el bol.
Conectar el batidor plano y elegir la función
“MIXING” y el programa “CREAMING ”. Presionar
la perilla para pausar el programa si es necesario
raspar el bol y el batidor. Finalizado el programa,
la mezcla debe estar ligera y esponjosa. Nota:
Puede que la mezcla esté lista antes del fin del
programa; parar el programa cuando esté
cremosa. Después de acremar la mantequilla con
el azúcar, parar y raspar bien el bol.
Ajustar la velocidad al nivel 3 y agregar los
huevos, uno a la vez, y luego la vainilla, batiendo
entre cada adición para incorporar cada huevo
antes de agregar el siguiente. Raspar el bol.
Ajustar la velocidad al nivel 2 y agregar los
ingredientes secos; revolver brevemente para
incorporar, raspando el bol después de cada
adición. Raspar el bol y agregar las chispas de
chocolate. Fijar la velocidad al nivel 3 y revolver
para incorporar.
Pasar la masa al molde preparado y apisonar
para cubrir completamente el fondo. Envolver
bien y refrigerar por un mínimo de 3 horas, hasta
un máximo de una noche.
Colocar la rejilla del horno en el centro del horno
y precalentar el horno a 350 °F (175°C). Meter el
pastel de galletas congelado al horno y hornear
por aprox. 30 minutos, hasta que la parte
superior parezca seca, pero siga suave. Retirar
del horno y rociar con copos de sal marina. Una
vez enfriado, desmoldar. Decorar como desea
con crema batida y “confeti” de color.
Información nutricional por porción:
Calorías 324 (42 % de grasa) • Carbohidratos 43g
Grasa 16g • Grasa saturada 2g • Colesterol 47 mg
Sodio 225 mg • Calcio 52 mg • Fibra 0 g
Mini pasteles de queso
de lima “Key lime”
Las limas “Key limes” se pueden encontrar en
muchas tiendas de alimentación. Son un tipo de lima
más pequeña y dulce, pero si no se encuentran,
se pueden sustituir por limas tradicionales, solo que
serán un poco más ácidas.
Rinde 12 mini pasteles de queso individuales
Corteza/base de galletas Graham:
1 taza (50 g) de galletas “Graham” molidas
(3 hojas de galletas)
1 cucharada de azúcar granulada
1 pizca de canela en polvo
1 pizca de sal marina fina
2 cucharadas (55 g) de mantequilla sin sal,
derretida y ligeramente enfriada
Relleno:
16 onzas (455 g) de queso a temperatura
ambiente, en 4 pedazos
²⁄
³
taza (135 g) de azúcar granulada
1 cucharada de ralladura de lima
(tipo “Key lime”), aprox. 4 limas
1 pizca de sal marina fina
2 huevos grandes, a temperatura ambiente
½ taza (120 ml) de crema agria o de yogur
griego natural a temperatura ambiente
1½ cucharadas de jugo de lima (tipo “Key
lime”) fresco
¼ cucharadita de extracto natural de
vainilla
Colocar la rejilla del horno en el centro del mismo
y precalentar el horno a 300°F (175°C). Forrar
cada “tacita” de un molde para 12 “muffins” con
pirotines (moldecitos de papel). Nota: Moldecitos
de silicona también son perfectos para esto.
Preparar la corteza/base: Colocar todos los
ingredientes de la corteza/base en un tazón
pequeño y revolver con un tenedor, aplastando
las galletas. (Nota: También puede hacer esto en
una mini-procesadora de alimentos. Moler
finamente las galletas “Graham” primero, agregar
los ingredientes restantes y procesar.) Colocar la
corteza/base en el fondo de cada moldecito y
apisonar con los dedos o una cuchara para
formar una base uniforme. Hornear 5 minutos, y
luego dejar enfriar mientras prepara el relleno.
Colocar el queso crema en el bol de la batidora
e instalar el batidor plano. Batir, empezando
en la velocidad 3 y aumentando la velocidad al
nivel 6, hasta que esté muy suave.

44
Raspar el bol y el batidor plano a menudo para
cerciorarse de conseguir una mezcla sin grumos.
Con la batidora encendida entre la velocidad 5 y
6, agregar el azúcar, aprox. ¼ de taza (50 g) a la
vez, la ralladura y la sal; mezclar hasta conseguir
una mezcla muy suave. Agregar los huevos,
uno a la vez, mezclando a velocidad 4 y teniendo
cuidado de incorporar completamente cada
huevo a la mezcla antes de añadir el siguiente.
Raspar el bol después de cada adición. Agregar
la crema agria, el jugo de lima y el extracto de
vainilla. Mezclar a velocidad 1 por aprox. 1
minuto, hasta obtener una mezcla cremosa.
Dividir la mezcla entre los moldecitos, teniendo
cuidado de no raspar ningún grumo grueso de
los costados del bol (esto cambiaría la textura
de los mini pasteles). Dar unos golpecitos
en la encimera varias veces para eliminar las
burbujas de aire en la mezcla. Hornear por
aprox. 15 minutos. El pastel no estará firme;
esto es normal. Sacar del horno y dejar enfriar
a temperatura ambiente. Cubrir bien y refrigerar
para enfriar completamente antes de servir.
Información nutricional por porción:
Calorías 241 (64 % de grasa) • Carbohidratos 18 g
Proteínas 4 g • Grasa 18 g • Grasa saturada 11 g
Colesterol 74 mg • Sodio 195 mg • Calcio 420 mg • Fibra 1 g
“Cupcakes” dorados
sin gluten
Estos “cupcakes” y nuestro baño de vainilla
sin lácteos (receta en la página 47) son una
deliciosa combinación.
Rinde 12 “cupcakes” o 42 mini “cupcakes”
Spray vegetal
2 tazas (240 g) de harina de sorgo
1 taza (125 g) de fécula/almidón de papa
½ taza (60 g) de fécula/almidón de arrurruz
1 cucharada de polvo de hornear
½ cucharadita de bicarbonato de sodio
1 cucharadita de goma xantana
1 cucharadita de sal marina fina
1½ tazas (355 ml) de néctar de agave
½ taza (120 ml) de aceite de oliva
¾ taza (165 g) de puré de calabaza
moscada (“butternut squash”)
2 cucharadas de extracto natural de
vainilla
1 cucharadita de vinagre blanco
Engrasar ligeramente molde para “muffins”
(reggulares o mini) con spray vegetal. Forrar los
moldes con pirotines/moldecitos de papel si
desea.
Colocar la harina, las féculas, el bicarbonato,
la goma xantana y la sal en el bol de la batidora.
Instalar el batidor de alambre y elegir la función
MIXING” y el programa “DRY INGREDIENT
MIXING”.
Sin apagar la máquina, agregar los ingredientes
restantes, en el orden indicado, y mezclar a
velocidad 3 hasta obtener una mezcla
homogénea. Raspar el bol para comprobar que
todos los ingredientes estén uniformemente
incorporados.
Verter cucharadas de la mezcla en los moldes
preparados. Hornear por aprox. 30 minutos
(o 15 minutos para mini “cupcakes”), hasta que
estén dorados y que un probador introducido en
el centro salga limpio. Sacar del horno y dejar
enfriar (en los moldes) sobre una rejilla hasta que
estén tibios. Luego, desmoldar y terminar de
enfriar sobre una rejilla.
Información nutricional por “cupcake”:
Calorías 396 (22 % de grasa) • Carbohidratos 77 g
Proteínas 4 g • Grasa 10 g • Grasa saturada 1 g
Colesterol 0 mg • Sodio 359 mg • Calcio 50 mg • Fibra 2 g
Pastel de ángel
Sírvalo con crema batida (receta en la página 48)
y frutas del bosque frescas para un ligero y
delicioso postre de verano.
Rinde un pastel de 9 in. (23 cm); 12 porciones
1½ tazas (300 g) de azúcar granulada
1¼ tazas (165 g) de harina de repostería
12 claras de huevo grande
1¼ cucharaditas de crémor tártaro
¼ cucharadita de sal marina fina
1 cucharadita de extracto natural de
vainilla
Precalentar el horno a 325 °F (165 °C).
Tamizar la harina y ¾ de taza (150 g) del azúcar
en un tazón; reservar.
Colocar las claras en el bol de la batidora.
Instalar el batidor de alambre y batir a velocidad
5. Cuando estén espumosas, agregar el crémor
tártaro y la sal y aumentar progresivamente la
velocidad al nivel 12. Sin dejar de batir, agregar
el azúcar restante y la vainilla; seguir batiendo

45
hasta obtener picos firmes y brillantes. Retirar el
bol de la base.
Agregar, tamizándola, la mezcla de harina/azúcar
a las claras e incorporarla delicadamente con una
espátula de caucho grande. Tener cuidado de
incorporar los ingredientes suavemente, pero al
mismo tiempo, cerciorarse de que todos los
ingredientes están uniformemente incorporados.
Verter cucharadas de la mezcla en un molde de
rosca de 9 in. (23 cm) no engrasado. Suavizar la
parte de encima con una espátula de caucho.
Hornear por aprox. 45 minutos, hasta que un
probador salga limpio. Sacar del horno, voltear y
dejar enfriar sobre el cuello de una botella de
vino. Para desmoldar, retirar el molde de la
botella e introducir la punta de un cuchillo largo y
delgado entre el pastel y el molde. Cubrir el
molde con un plato y voltearlo, pasando la punta
del cuchillo alrededor del molde hasta que el
pastel se despegue.
Información nutricional por porción:
Calorías 167 (1 % de grasa) • Carbohidratos 37 g
Proteínas 5 g • Grasa 0 g • Grasa saturada 0 g
Colesterol 0 mg • Sodio 278 mg • Calcio 5 mg • Fibra 0 g
COBERTURAS/BAÑOS,
GLASEADOS, MOUSSES Y
RELLENOS
Crema de mantequilla
francesa
Cobertura de pastel clásica. El elemento clave para
conseguir resultados suaves y deliciosos es la
temperatura. Use un termómetro de cocina para
eliminar las conjeturas.
Rinde 4 tazas (945 ml)
1¾ tazas (350 g) de azúcar granulada
5 cucharadas (75 ml) de agua
7 yemas de huevo grande
24 cucharadas (360 g) de mantequilla sin
sal fría, en cubitos de ½ in. (1.5 cm)
¾ cucharadita de extracto natural de
vainilla
½ cucharadita de sal marina fina
Colocar el azúcar y el agua en una cacerola
pequeña y calentar a fuego medio hasta que el
azúcar se haya disuelto y que la mezcla alcance
235°F (113°C).
Colocar las yemas en el bol de la batidora.
Instalar el batidor de alambre y batir a velocidad
8 (aumentando gradualmente la velocidad) por
aprox. 3 minutos, hasta conseguir una mezcla
espesa y cremosa. Raspar el bol y seguir mezclando
a velocidad 12 (aumentando gradualmente la
velocidad) por 5 minutos, hasta que la mezcla
adquiera un color amarillo claro.
Ajustar la velocidad al nivel 6 y agregar lentamente
el jarabe. Después de haber agregado todo el
jarabe, raspar el bol y seguir batiendo a velocidad
12 por aprox. 10 minutos, hasta que la mezcla
se hay enfriado por completo. Luego, ajustar la
velocidad al nivel 7 y agregar la mantequilla muy
lentamente, un pedazo a la vez. Después de
haber añadido la mitad de la mantequilla, ajustar
la velocidad al nivel 10 y agregar el resto de la
mantequilla. Después de haber agregado toda la
mantequilla, añadir la vainilla y la sal; revolver
para incorporar.
Usar inmediatamente o colocar en un recipiente
hermético y refrigerar (hasta 10 días). Llevar a
temperatura ambiente antes de asar.
CONSEJO: Si la crema de mantequilla parece
cuajada (esto puede ocurrir si la mantequilla está
muy suave o caliente), batirla a velocidad 12
hasta que esté suave.
Información nutricional por porción (2 cucharadas):
Calorías 130 (64 % de grasa) • Carbohidratos 11 g
Proteínas 1 g • Grasa 9g • Grasa saturada 6 g
Colesterol 63 mg • Sodio 35 mg • Calcio 5 mg • Fibra 0 g
Crema de mantequilla
suiza
La crema de mantequilla suiza es más “indulgente”
y estable que la crema de mantequilla francesa.
Puede usarse para bañar o decorar pasteles.
Rinde aprox. 6 tazas (1.4 L)
8 claras de huevo grande
1¾ tazas (350 g) de azúcar granulada
½ cucharadita de sal marina fina
1¼ libras (570 g) de mantequilla sin sal fría,
en cubos de ½ in. (1.5 cm),
a temperatura ambiente
1 cucharada de jugo de limón fresco
1 cucharadita de extracto natural de
vainilla
Colocar las claras, el azúcar y la sal en el bol
de la batidora.

46
Poner el bol a calentar baño María, batiendo
constantemente, hasta que la temperatura de la
mezcla alcance 140°F (60°C).
Volver a instalar el bol sobre la batidora. Instalar
el batidor de alambre. Batir a velocidad 10 por
aprox. 15 minutos, hasta que la mezcla se enfríe.
Una vez fría la mezcla, ajustar la velocidad al
nivel 3 y agregar la mantequilla, un pedazo a la
vez, cerciorándose de que cada pedazo se
incorpore antes de añadir más. Parar cuantas
veces sea necesario para raspar bien el bol.
Después de haber agregado la mantequilla,
agregar el jugo de limón y la vainilla; revolver
por aprox. 1 minuto para mezclar. Ajustar la
velocidad al nivel 8 y batir por aprox. 2 a 3
minutos, hasta obtener una mezcla muy suave.
Usar inmediatamente o colocar en un recipiente
hermético y refrigerar (hasta 10 días). Llevar a
temperatura ambiente antes de asar.
CONSEJO: Si la crema de mantequilla parece
cuajada (esto puede ocurrir si la mantequilla está
muy suave o caliente), batirla a velocidad 12
hasta que esté suave.
Información nutricional por porción (2 cucharadas):
Calorías 115 (72 % de grasa) • Carbohidratos 7 g
Proteínas 1 g • Grasa 9 g • Grasa saturada 7g
Colesterol 25 mg • Sodio 9 mg • Calcio 40mg • Fibra 0g
Baño de chocolate
Ligera cobertura de pastel clásica.
Rinde aprox. 3 tazas (710 ml)
4 tazas (480 g) de azúcar glasé, tamizado
4 onzas (115 g) de chocolate amargo,
derretido y ligeramente enfriado
2 onzas (55 g) de chocolate semidulce,
derretido y ligeramente enfriado
8 cucharadas (115 g) de mantequilla sin
sal a temperatura ambiente,
en pedacitos de ½ in. (1.5 cm)
2 cucharaditas de extracto natural de
vainilla
¼ cucharadita de sal marina fina
10 a 12
cucharadas (150 a 180 ml) de leche
o crema
Colocar todos los ingredientes excepto la
leche/crema en el bol de la batidora. Instalar el
batidor de alambre y revolver a velocidad 2 por
2 minutos. Agregar 8 cucharadas (120 ml) de la
leche/crema.
Ajustar la velocidad al nivel 5 y batir por aprox. 4
minutos, hasta obtener una mezcla suave y
esponjosa. Raspar el bol cuando sea necesario.
Agregar la leche/crema restante,
una cucharada a la vez, hasta conseguir la
consistencia deseada.
Información nutricional por porción (2 cucharadas):
Calorías 158 (39 % de grasa) • Carbohidratos 24 g
Proteínas 1 g • Grasa 7 g • Grasa saturada 5 g
Colesterol 12 mg • Sodio 30 mg • Calcio 21 mg • Fibra 1 g
Baño de queso crema
Esta cobertura clásica es perfecta para una variedad
de pasteles, pero es especialmente deliciosa con
pastel de zanahoria y pastel de chocolate.
Rinde 4 tazas (945 ml)
1 libra (455 g) de queso crema, a
temperatura ambiente
8 cucharadas (115 g) de mantequilla sin
sal en pedazos de 1 in. (2.5 cm),
a temperatura ambiente
5½ tazas (660 g) de azúcar glasé, tamizado
¼ cucharadita de sal kosher
2 cucharaditas de extracto natural de
vainilla
Colocar el queso crema en el bol de la batidora.
Instalar el batidor plano y revolver a velocidad 4
por aprox. 1½ a 2 minutos, hasta que esté suave.
Agregar la mantequilla y batir hasta obtener una
mezcla suave y homogénea, parando para raspar
el bol de vez en cuando si es necesario. Ajustar
la velocidad al nivel 2 y agregar lentamente el
azúcar glasé tamizado y la sal; revolver por
aprox. 2 minutos para incorporar. Raspar el bol.
Agregar la vainilla Revolver a velocidad 5 para
incorporar.
Refrigerar la mezcla por 30 minutos o más antes
de usar.
Información nutricional por porción (2 cucharadas):
Calorías 157 (43 % de grasa) • Carbohidratos 21 g
Proteínas 1 g • Grasa 8 g • Grasa saturada 5 g
Colesterol 23 mg • Sodio 46 mg • Calcio 14 mg • Fibra 0 g

47
Baño de vainilla sin lácteos
Este baño y nuestros “cupcakes” dorados sin gluten
(página 44) son una deliciosa combinación.
Rinde aprox. 2 tazas (475 ml)
1 taza (250 g) de manteca vegetal no
hidrogenada
2 tazas (240 g) de azúcar glasé, tamizado
1 cucharada (15 ml) de extracto natural de
vainilla
¼ cucharadita de sal marina fina
Colocar la manteca en el bol de la batidora.
Instalar el batidor de alambre y batir por aprox. 30
segundos, empezando en el nivel 2 y aumentando
gradualmente la velocidad al nivel 5, para acremar
y suavizar. Raspar el bol y agregar el azúcar.
Mezclar, empezando en el nivel 2 y aumentando
gradualmente la velocidad al nivel 5.
Raspar el bol y agregar la vainilla y la sal.
Batir otra vez, aumentando gradualmente la
velocidad al nivel 10, por aprox. 30 segundos,
hasta conseguir una mezcla suave y esponjosa.
Información nutricional por porción (2 cucharadas):
Calorías 182 (61 % de grasa) • Carbohidratos 19 g
Proteínas 0 g • Grasa 13 g • Grasa saturada 6 g
Colesterol 0 mg • Sodio 33 mg • Calcio 36 mg • Fibra 0 g
Glaseado real
Perfecto para decorar galletas o pasteles/tortas.
Puede usar extractos para perfumarlo o colorante
alimentario para darle el color deseado.
Rinde 1½ tazas (355 ml)
4 tazas (480 g) de azúcar glasé, tamizado
1 clara de huevo grande, ligeramente batida
2 cucharadas (30 ml) de leche entera
1 cucharadita de jugo de limón fresco
Colocar el azúcar en el bol de la batidora.
Instalar el batidor de alambre. Ajustar la velocidad
al nivel 3 y agregar lentamente la clara; revolver
por aprox. 1 minuto para mezclar.
Sin apagar la máquina, agregar la leche y el jugo
de limón; seguir revolviendo para mezclar. Raspar
el bol cuando sea necesario. Seguir mezclando por
aprox. 2 minutos, hasta que se formen picos suaves.
Usar inmediatamente o cubrir con un paño húmedo
para evitar que se seque. Nota: Si desea usar
colorante alimentario o extractos, añadir estos al
mismo tiempo que la leche y el jugo de limón.
Información nutricional por porción (2 cucharadas):
Calorías 163 (1 % de grasa) • Carbohidratos 40 g
Proteínas 0 g • Grasa 0 g • Grasa saturada 0 g
Colesterol 0 mg • Sodio 6 mg • Calcio 3 mg • Fibra 0 g
“Ganache” de chocolate
Perfecta para bañar o rellenar sus pasteles favoritos.
Rinde aprox. 1 taza (235 ml)
6 onzas (170 g) de chocolate semiamargo
o semidulce, picado
¾ taza (175 ml) de crema líquida para batir
(“heavy cream”)
3 cucharadas (45 g) de mantequilla sin sal,
en pedazos de 1 in. (2.5 cm)
1 pizca de sal marina fina
Colocar el chocolate picado en el bol de la
batidora.
Colocar la crema en una cacerola pequeña
y calentar justo hasta que empiece a hervir.
Verter la crema caliente sobre el chocolate.
Dejar reposar por 1 minuto.
Instalar el batidor de alambre y batir a velocidad
4 por aprox. 2 minutos, hasta que el chocolate
esté completamente derretido. Agregar la
mantequilla, un pedazo a la vez, y batir hasta
conseguir una mezcla homogénea y brillante.
Agregar la sal y revolver para combinar.
Usar inmediatamente para glasear o dejar enfriar
hasta que se solidifique parcialmente para
rellenar. Las sobras pueden refrigerarse y usarse
para hacer trufas de “ganache”.
Información nutricional por porción (2 cucharadas):
Calorías 221 (79 % de grasa) • Carbohidratos 11 g
Proteínas 2 g • Grasa 21 g • Grasa saturada 13 g
Colesterol 42 mg • Sodio 8 mg • Calcio 15 mg • Fibra 2 g
Mousse de chocolate
simple
La batidora de pie Cuisinart
®
permite hacer crema
batida sin ningún esfuerzo Además, la velocidad 1
permite incorporar el chocolate sin miedo de
mezclar de más.
Rinde 5 tazas (1.2 L)
6 onzas (170 g) de chocolate semiamargo
de buena calidad, picado grueso
1¾ tazas (220 ml) de crema líquida para
batir (“heavy cream”)

48
1 cucharada (15 ml) de extracto natural
de vainilla
1 pizca de sal marina fina
2 cucharadas (30 ml) de brandy/coñac
o licor (p.ej., avellana, café o naranja)
(opcional)
Calentar el chocolate y 2 cucharadas (30 ml)
de la crema a baño María, revolviendo hasta
conseguir una mezcla suave. Retirar del fuego
y dejar entibiar. Agregar la vainilla, la sal y el
licor (opcional); revolver.
Colocar el resto de la crema en el bol de la
batidora. Instalar el batidor de alambre y elegir la
función “WHISKING” y el programa “WHIPPING
CREAM”. Batir hasta que se formen picos suaves
(esto puede suceder antes del final del programa).
Incorporar un cuarto de la crema batida a la
mezcla de chocolate. Luego, incorporar con
cuidado el resto de la crema batida.
Cubrir y refrigerar por 30 minutos*. Colocar la
“mousse” en boles/copas, usando una cuchara
o una manga pastelera. Decorar con virutas de
chocolate o chocolate finamente picado y una
cucharada de crema batida si desea.
La “mousse” de chocolate se podrá conservar en
el refrigerador por hasta 2 días
* Si usa la “mousse” para rellenar una tarta, verter
la mezcla directamente en el fondo/la base de
tarta enfriado (ver la receta de tarta de crema de
chocolate en la página 39).
Información nutricional por porción de ½ taza (120 ml):
Calorías 240 (78 % de grasa) • Carbohidratos 10 g
Proteínas 1 g • Grasa 21 g • Grasa saturada 13 g
Colesterol 56 mg • Sodio 0 mg • Calcio 0 mg • Fibra 1 g
Crema batida
Es fácil pasarse cuando uno bate crema. Cuando la
crema empiece a espesarse, compruebe la textura
a menudo, levantando el cabezal de la batidora.
Cuando consiga picos medio-firmes, deje de batir.
Rinde aprox. 3½ tazas (830 ml)
2 tazas (475 ml) de crema líquida para
batir (“heavy cream”)
2 a 4 cucharadas (10 a 20 g) de azúcar glasé,
tamizado
1 cucharadita de extracto natural de vainilla
Colocar la crema en el bol de la batidora.
Conectar el batidor de alambre y elegir la función
“WHISKING” y el programa “WHIPPING CREAM”.
Cuando empiecen a formarse burbujas, agregar
gradualmente el azúcar glasé y la vainilla.
Batir hasta conseguir la consistencia deseada.
Información nutricional por porción (2 cucharadas):
Calorías 122 (93 % de grasa) • Carbohidratos 2 g
Proteínas 0 g • Grasa 11 g • Grasa saturada 8 g
Colesterol 46 mg • Sodio 0 mg • Calcio 40mg • Fibra 0g
Café batido
Elaborado con solo unos pocos ingredientes,
el batido de café instantáneo, azúcar y agua caliente
se convierte en un increíble postre espumoso,
que suele servirse sobre un vaso de leche helada,
pero que también es excelente para cubrir el café
caliente o helado, comerlo con una cuchara o
ponerlo encima de un pastel o un helado.
Rinde aprox. 3½ tazas (830 ml)
½ taza (120 ml) de café regular o expreso
instantáneo (preferiblemente de
gránulos finos)
¹⁄
³
taza (65 g) de azúcar granulada
½ taza (120 ml) de agua caliente
1 pizca de sal marina fina
Virutas de chocolate (opcional)
Colocar todos los ingredientes en el bol de la
batidora. Instalar el batidor de alambre y batir a
velocidad 3. Aumentar gradualmente la velocidad
al nivel 12 y seguir batiendo por aprox. 6 minutos,
hasta obtener una mezcla ligera y esponjosa.
Servir sobre un vaso de leche con hielo, helado o
pastel. Decorar con virutas de chocolate para un
sabor más dulce.
Información nutricional por porción (2 cucharadas):
Calorías 122 (93 % de grasa) • Carbohidratos 2 g
Proteínas 0 g • Grasa 11 g • Grasa saturada 8 g
Colesterol 46 mg • Sodio 0 mg • Calcio 40mg • Fibra 0g
©2022 Cuisinart
Glendale, AZ 85307
Impreso en China
21CE077654
IB-14590-ESP-A