ASSEMBLY INSTRUCTIONS
Accessory Pack Contents
SOCCER LEG part # 11902101 4
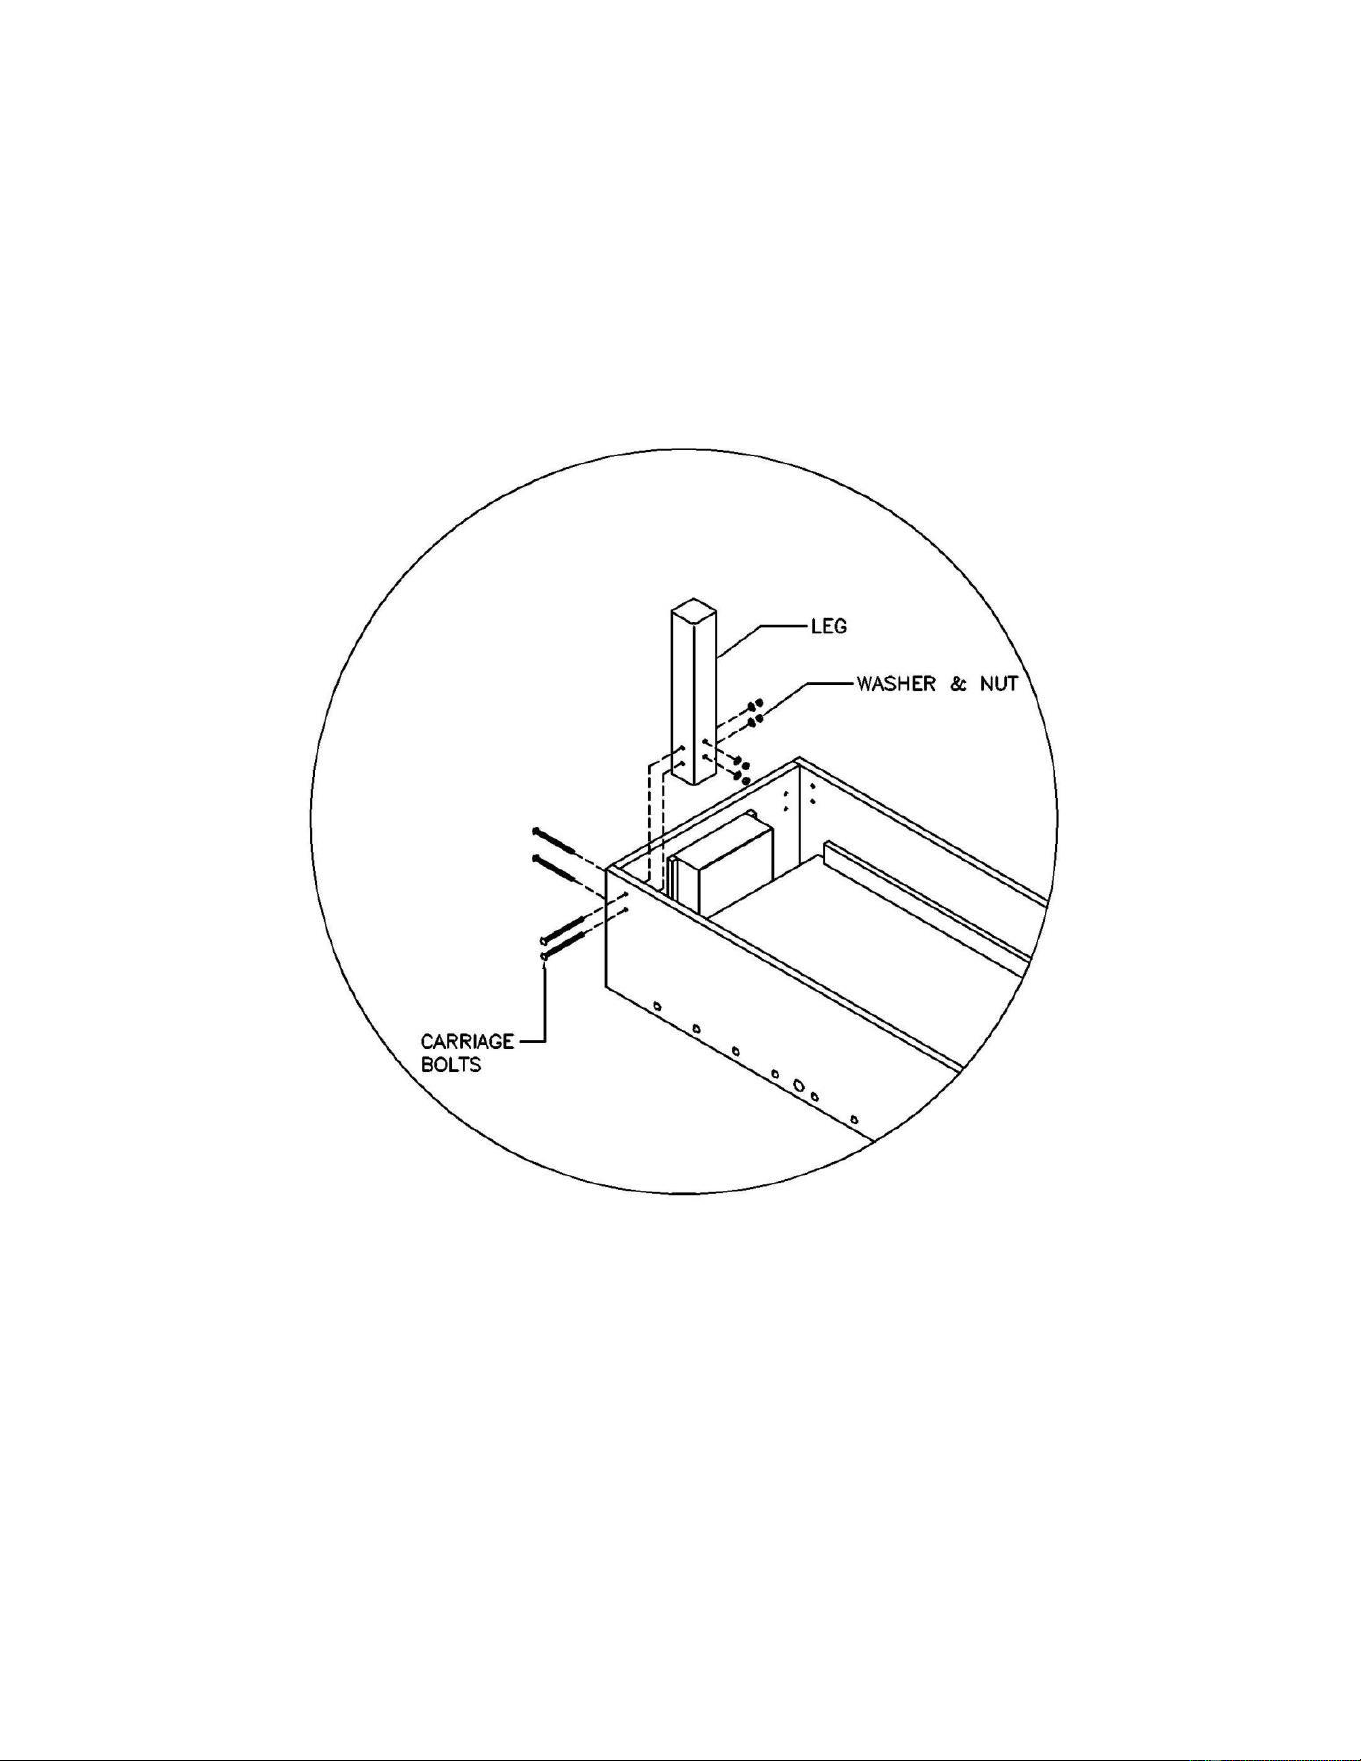
LEG BOLT part # 870010421 16
LEG NUT part # 20300900 16
WASHER part # 20401080 16
LEG BOOT part # 20701070 4
LEG SHIMS 10
BLACK PLASTIC PLAYER without WEIGHT part # 20515001 13
YELLOW PLASTIC PLAYER without WEIGHT part # 20515011 13
TWO MAN ROD part # 20606861 2
THREE MAN ROD (43⅜” long) part # 20606871 2
GOALIE ROD (41½”- shorter than 3 man) part # 20606881 2
FIVE MAN ROD part # 20606891 2
BLACK RUBBER HANDLE (on rods) part # 900100205 8
ROD SUPPORT BLOCK (2 ¾” x 2 ¾”) 1
SOCCER BALLS part # 20515170 3
SCORE POST part # 20515181 4
#12 x 2½” SCORE POST SCREWS part # 20102490 4
BLONDE SCORE DISK part # 21706640 5
BLACK SCORE DISK part # 21706650 5
SCORE POST ROD - 6⅛” part # 20607500 2
ROLL PIN PUNCH part # 21706670 1
ROLL PIN part # 21706690 26
BUMPER part # 20701060 16
RULE BOOKLET part # 21706621 1
SILICONE IN 2 oz. BOTTLE part # 988000125 1
Tools Required:
SMALL HAMMER
PHILLIPS SCREWDRIVER
9/16” BOX-END OR SOCKET WRENCH
ALL-PURPOSE CLEANER
(Fantastik, Formula 409, Windex or equivalent)
CLEAN CLOTH
1. Remove all parts and accessories from parts box and check against the enclosed list.
2. Turn the table upside down, taking care not to scratch the top (assemble on carpet or
cardboard).
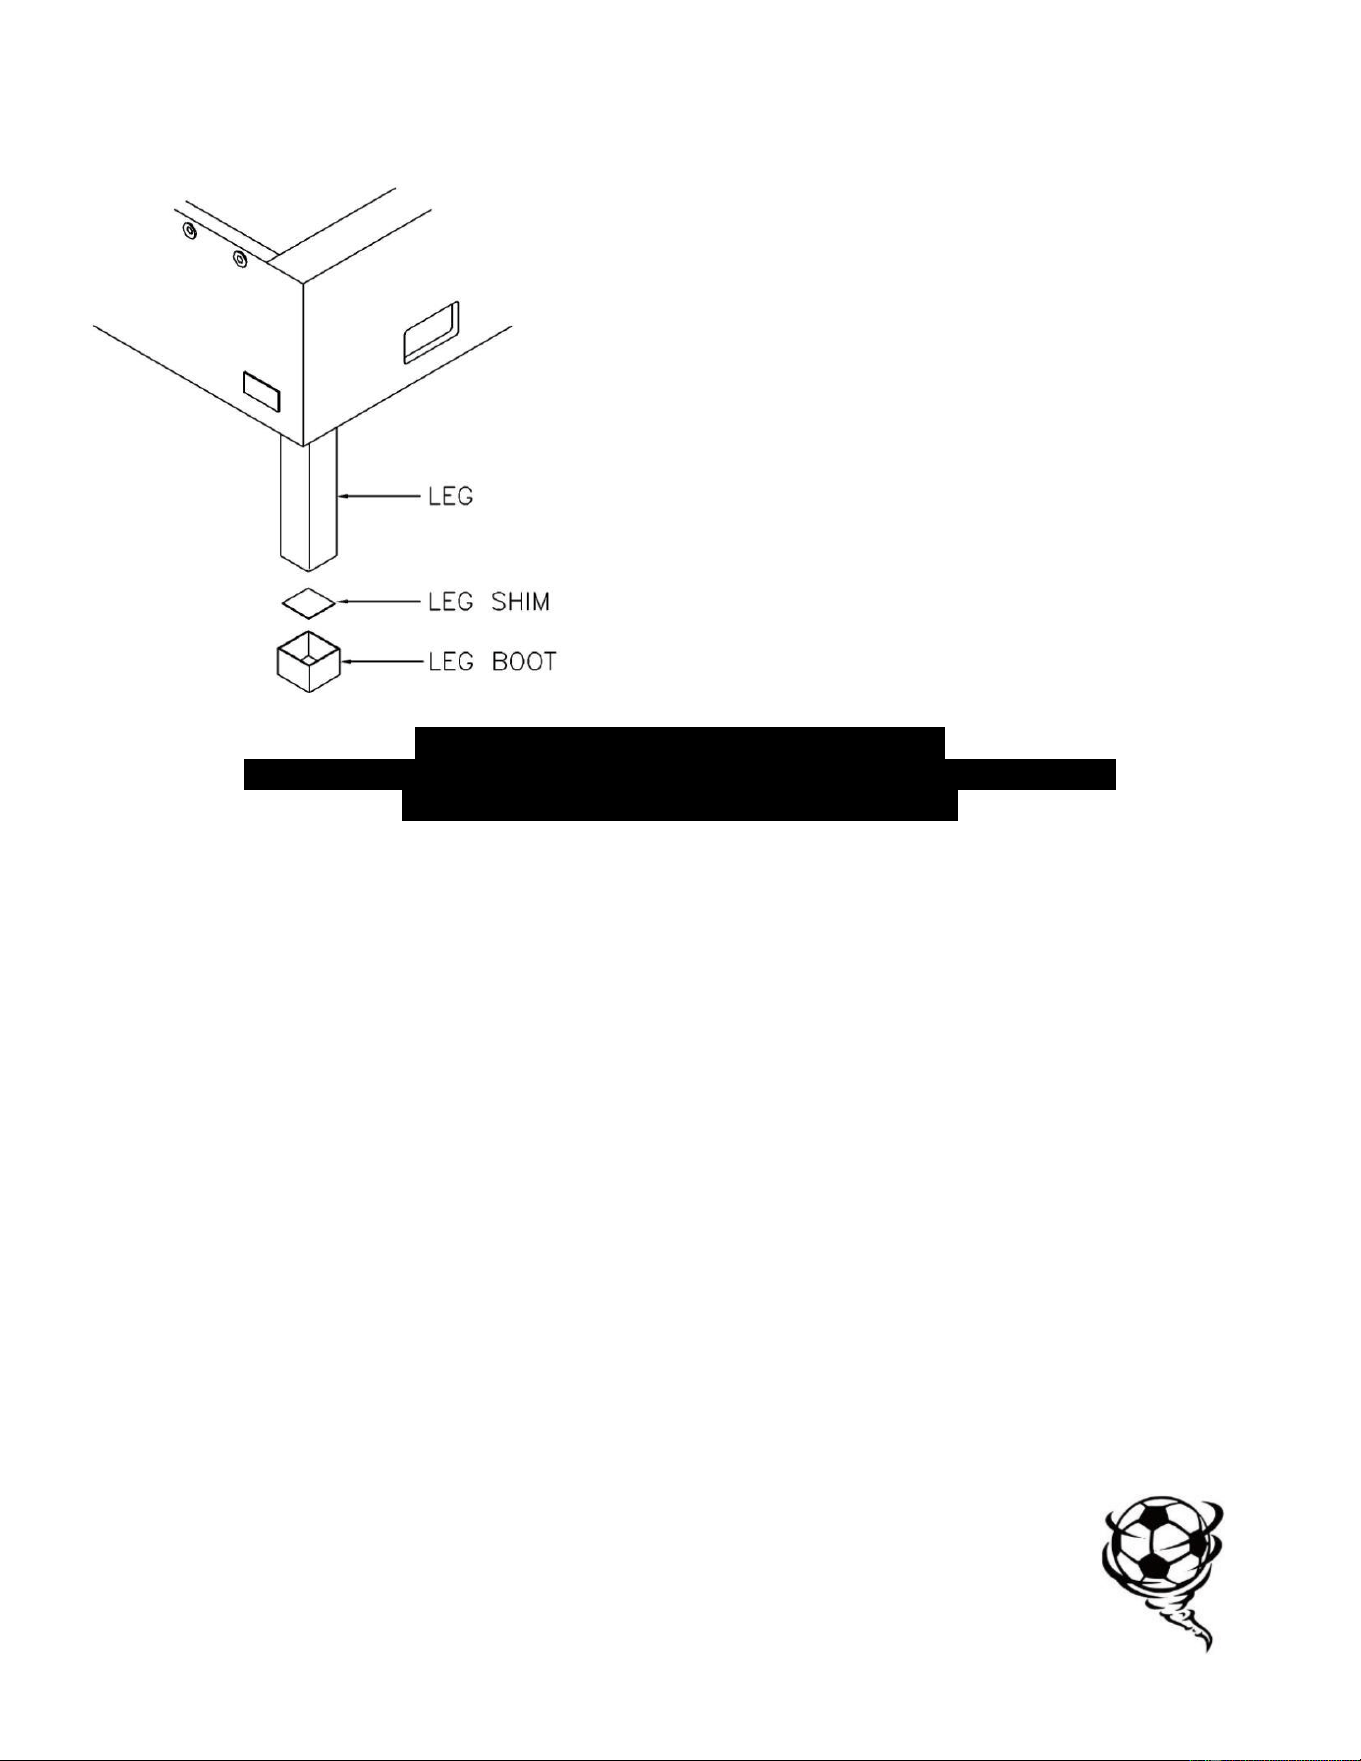
3. The legs may be assembled in two positions depending on the holes used. Installing
them to the higher position places the table at regulation height. The lower position
makes it easier for children to enjoy the game.
4. Using two people set the table upright and wipe it off with a damp cloth.
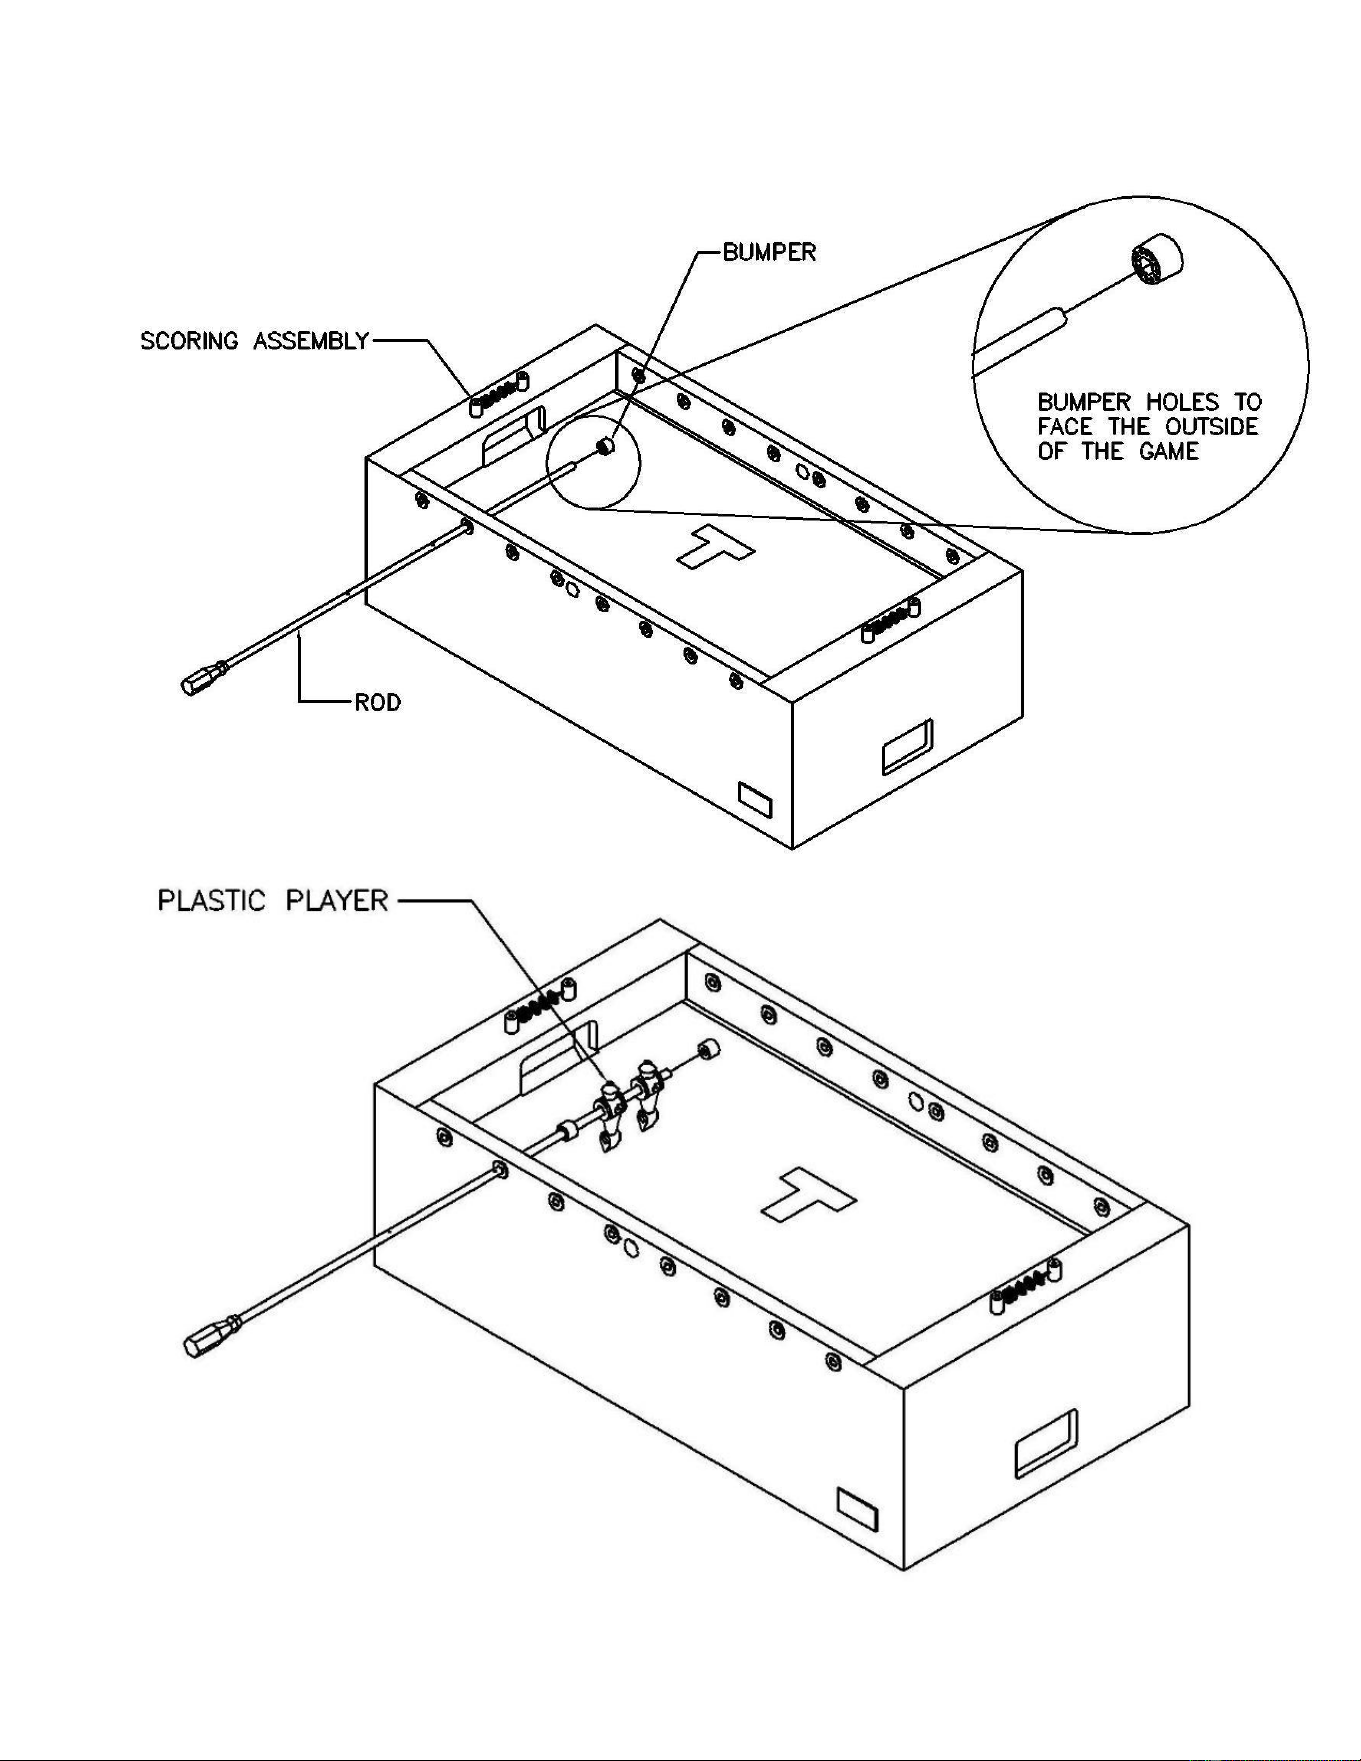
5. Thread the appropriate rods through the corresponding bearing hole (be careful,
there are four 3-holed rods and the two shortest of these four rods are the goalie
rods). Thread the rod through one side of the cabinet and wipe a thin coating of
silicone on the rod using a cloth or paper towel. Thread one black rubber bumper
onto the rod (make sure that the side of the bumper with the holes always faces the
cabinet wall).
6. Thread the appropriate number of men onto each rod (smiling face of black men
facing yellow goal and smiling face of yellow men facing black goal), followed by
another rubber bumper on the far end. Slide the end of the rod into the bearing hole
in the opposite cabinet wall.
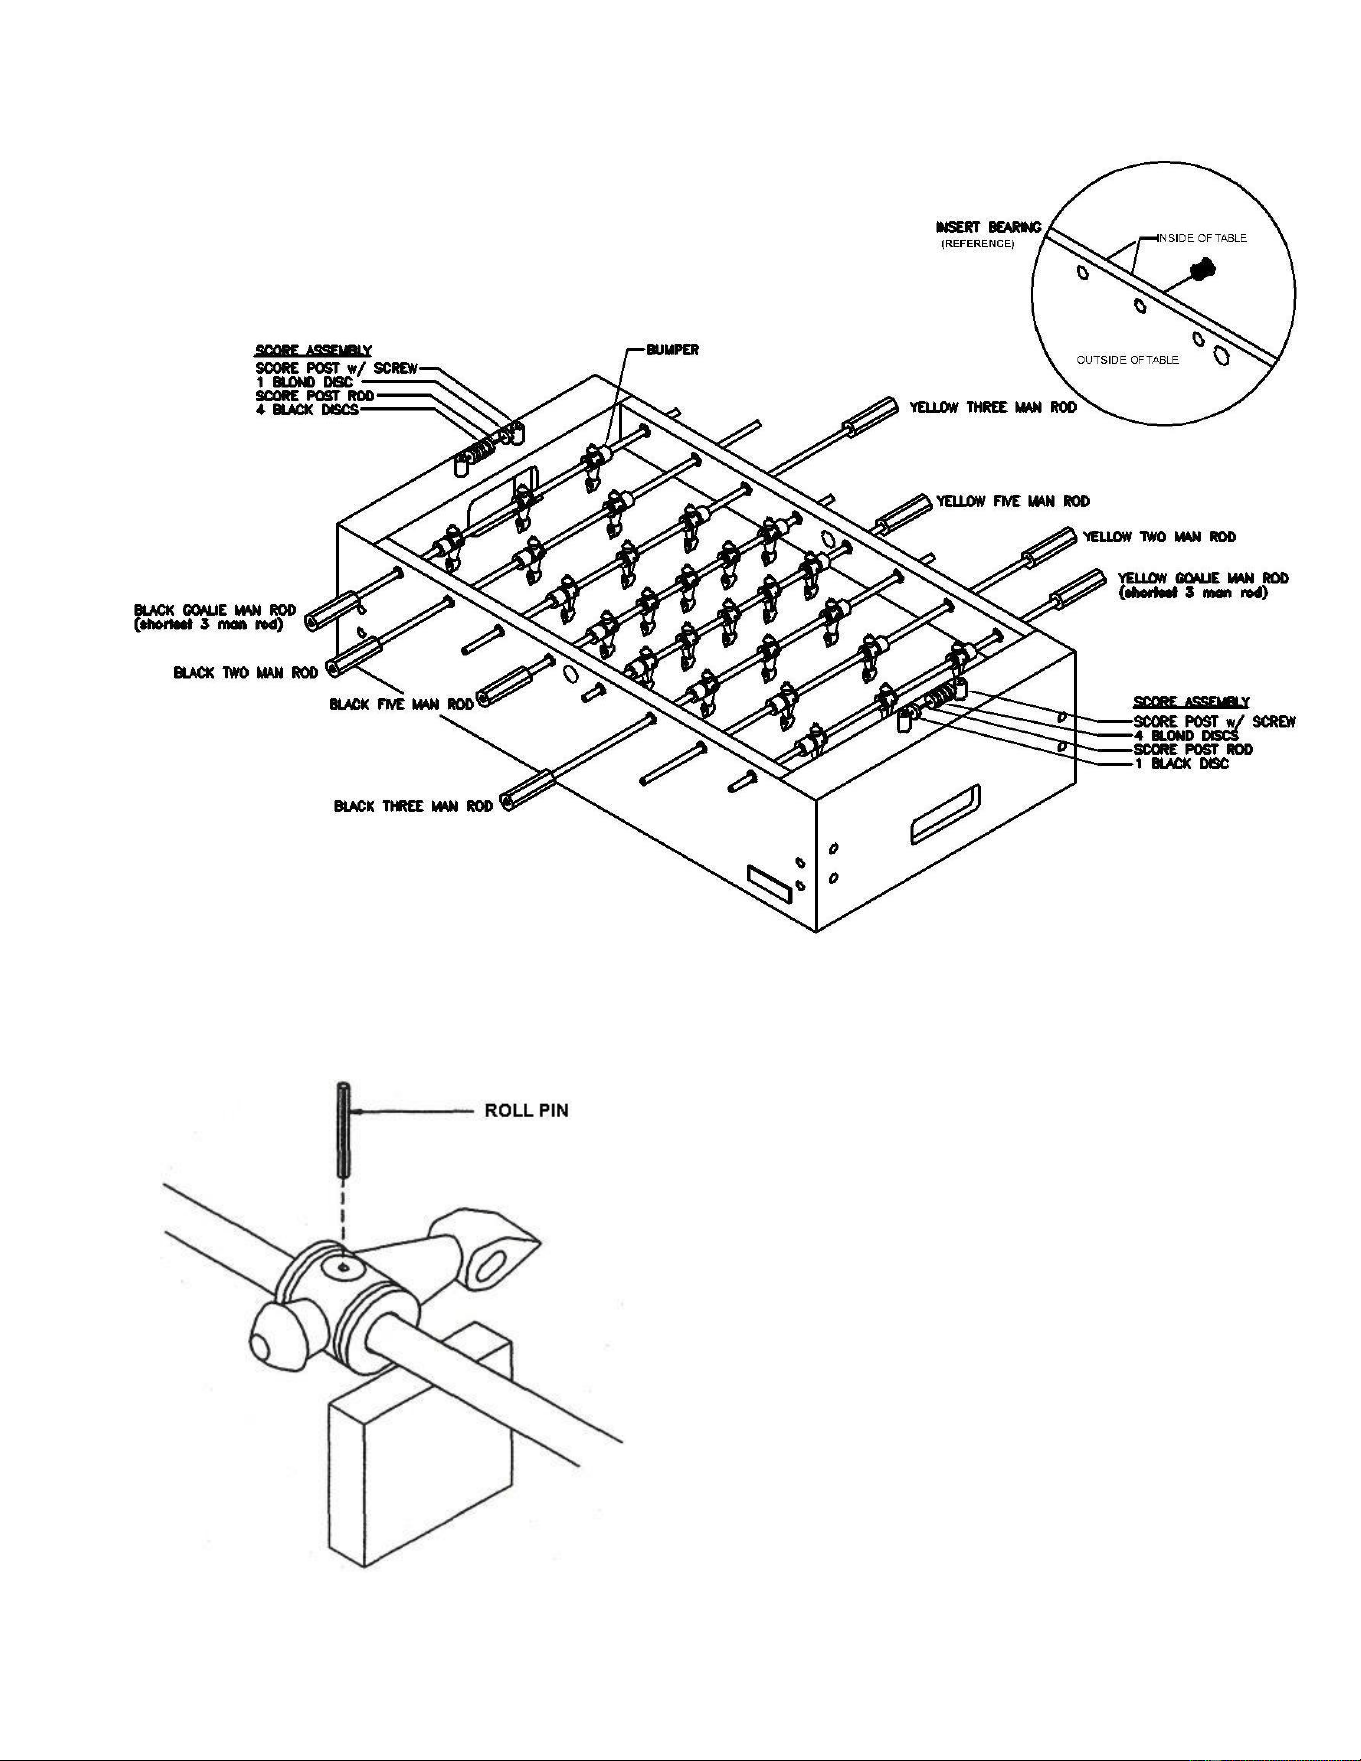
7. To secure the men, align the holes in each man with the holes in the rod. Using the rod
support block under the rod near the man, place the roll pin in the man hole (slot in
the roll pin down toward the foot) and tap it through the man with a hammer, until it is
flush on both sides
8. To remove the men, place the pointed end
of the included roll pin punch into the roll pin
and drive it out. The roll pins are reusable.
9. Mount the score assemblies at each end of the
table.
10. Level the table by inserting the included shims
into the leg where required.
11. Lubricate the game at least once a month.
Wipe each rod with a clean dry cloth.
Pull the handle end of each rod out towards you
Apply one drop of silicone to the top of the rod,
approximately one inch from the outside of the game.
Continuously spin the rod while pushing it in and
pulling it out of the game.
Remove any excess silicone with a clean soft cloth.
VISIT WWW.VALLEYDYNAMOPARTS.COM
FOR WARRANTY REGISTRATION AND REPLACEMENT PARTS ORDERS.
ENJOY YOUR NEW TORNADO SPORT TABLE.