
I worked really hard
on this manual -
so please read it...
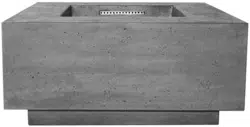
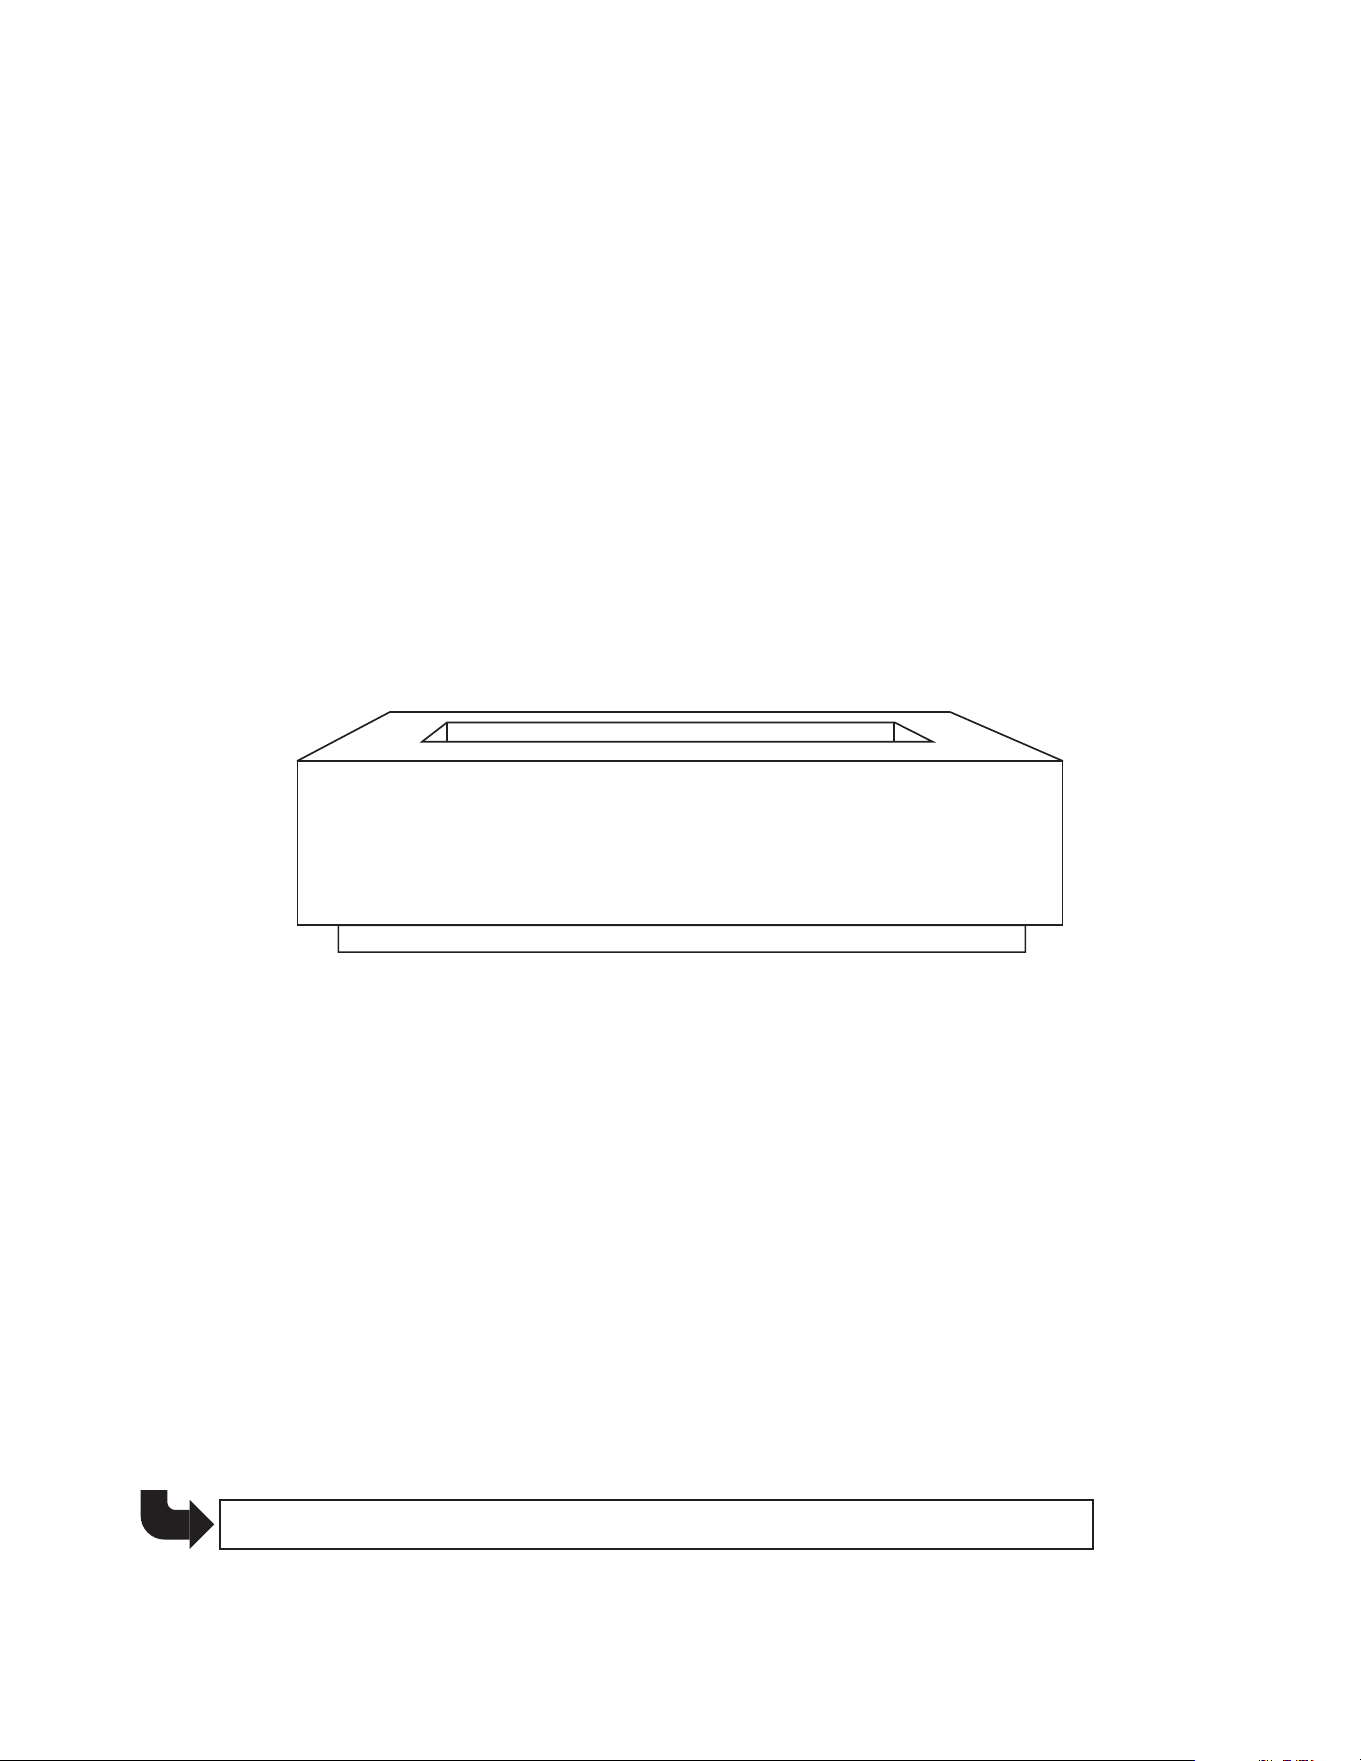
FIRE CENTERPIECE
2
OUTDOOR LIVING
When buying any XO appliance
you can be confident you have chosen a
high quality, innovative and stylish product
from a company that cares about you!
If you require service or have questions,
Help is only a phone call away -
call: 973-403-8900
Talk to one of our appliance experts.
CONGRATULATIONS
on purchasing your XO.
Before you proceed, take just
a moment to register your XO at:
Ensuring warranty coverage should you need service
Providing ownership verification for insurance purposes
Let’s XO notify you in the event of product changes or recalls.
www.xoappliance.com/register-your-product/
REGISTRATION HELPS YOU BY -

SAFETY FIRST
Converting for use with propane
Gas safety - propane
Assembly Drawing
Cleaning & Maintenance 17
Parts List
Trouble Shooting
Warranty
5 - 9
Set Up and Installation
10
16
18
19
20
3
where things are
please read and follow
all safety instructions
It’s for your
own good...
Honest.
General safety instructions
Gas safety - natural gas
Dimensions and Specifications
11 - 15
4
XOFBWL39GR
XOFPOT24GR
XORRND36GR
XOFSQR3636GR
XOFREC6032GR
2
these are the models
covered in this
book
take a minute to circle your model above
and record your serial number
here in case you need it later
FIRE CENTERPIECE
Natural Gas Standard
LP Conversion Kit Included
Please read through completely before using your O nit
5
your safety matters
A NING
any other appliance.
A NING FO O TDOO SE ON Y
A NING POTENTIA CA ON ONO IDE A A D
space can kill you. Never use this appliance in an enclosed space such as a camper, tent,
car, or home.
A NING
replaced by a trained, service professional using only factory original parts following
manufacturer’s guidelines. Failure to follow these guidelines may result in property damage,
Your fire pit is configured to burn natural gas, it may be converted by a trained professional
back side of burner. Never use any other alternative fuel sources.
C
A TION
Do not use charcoal or other solid fuel in gas burning appliances. Do not use your fire table
for cooking. Do not heat any unopened glass or metal container of food in the fire table.
Pressure may build up and cause the container to burst, possibly resulting in serious personal
injury or damage to the fire table. Never use the fire table in windy conditions. If used in a
consistently windy area a windbreak will be required.
Always adhere to the specified clearances listed in this manual.
Never allow clothing or other flammable materials to contact any hot surface until it has fully
cooled. Never wear loose fitting or hanging garments while using your fire table. Fabric may
ignite and result in personal injury. When handling propane gas line and connectors, do not
allow them to contact any metal surfaces. Do not drop propane connectors.
NEVER use your fire pit as an incinerator to burn other materials.
GAS SAFETY
1. Turn the ON/OFF valve located on the side of the fire table completely to the ON position.
2. Make sure fuel supply (LP or NG) is properly connected and turned on at the source. This
will be either the LP tank or the NG valve.
3. When you hear gas flowing, use either a long stem wooden match or a butane fireplace
lighter to place a flame near the burner.
4. If the burner does not light, does not stay lit, or the flame is very low, shut o the gas supply
and wait five minutes to allow all fumes to clear. Start again from Step 1, making sure all gas
valves are completely opened.
| LIGHTING THE UNIT
6
Serious injury, fire or death...
Okay -
your safety matters cont.
BURN HAZARD
Never leave children without supervision. This appliance will reach high temperatures which
will cause burns. Never leave any fire unattended when not in use. When using the
appliance never touch the rock or glass used in the appliance. These areas get very hot and
will cause injury. Do not reach over the fire feature when in use. Do not stand on any part of
this appliance. Never allow children to sit on or near the appliance, this could cause
personal injury. The rock bed and other portions of the appliance will remain hot enough to
cause injury for some time after the flame is turned
Do not leave the appliance
unattended until it has had an opportunity to cool completely.
S
AFETY
Inspections of this appliance should be done prior to installation and on an annual basis by a
certified technician. Frequent cleaning may be required depending on the level of usage. It
is important that the airflow inside the unit not be obstructed. It is the installers
responsibility to review all safe operating and safety procedures with the end user. All
manuals and product information sheet much be left with end user .
TURNING OFF GAS:
Propane Units, turn the Key Gas Valve to the OFF position, then close the ON/OFF valve on the
propane cylinder.
FOR YOUR SAFETY, READ BEFORE LIGHTING
Before lighting, check around the appliance area for the smell of gas. Propane is heavier than
air and will settle close to the ground. Use only your hand to turn gas control valves.
Never use tools. If the valve will not turn by hand, do not try to repair it. Call a qualified service
technician. Force or attempted repair may result in a fire or explosion.
NOTE: The propane tank regulator in this appliance is equipped with a low flow protection
device. Unless the propane cylinder valve is slowly opened before the Key Gas Valve, the
gas flow will be restricted resulting in a small flame.
This product can expose you to Chromium, which is known to the state of
California to cause cancer and birth defects or other reproductive harm.
(For more information, go to www.p65warnings.ca.gov)
!
CALIFORNIA PROPOSITION 65 WARNING
!
GAS SAFETY
If the burner goes out, turn the gas to the position and allow at least 5 minutes for any
gas to dissipate before attempting to re-light.
Once the gas has dissipated, light the unit
following the manufacturer’s recommendations.
Propane must always have a regulator. Do not operate if regulator has been removed.
Never leave the gas key in the valve when not in use.
| RE-LIGHTING
7
gas safety | natural gas
CONT.
N
A URAL A
R UIR M N
U L R UR
MINIMUM: 4.0" W.C.
MAXIMUM: 6.0" W.C.
R UR IN
Use a recommended 3/4” ID supply line.
ALL CONNECTIONS REGARDLESS OF FUEL TYPE MUST BE LEAK TESTED PRIOR TO USE.
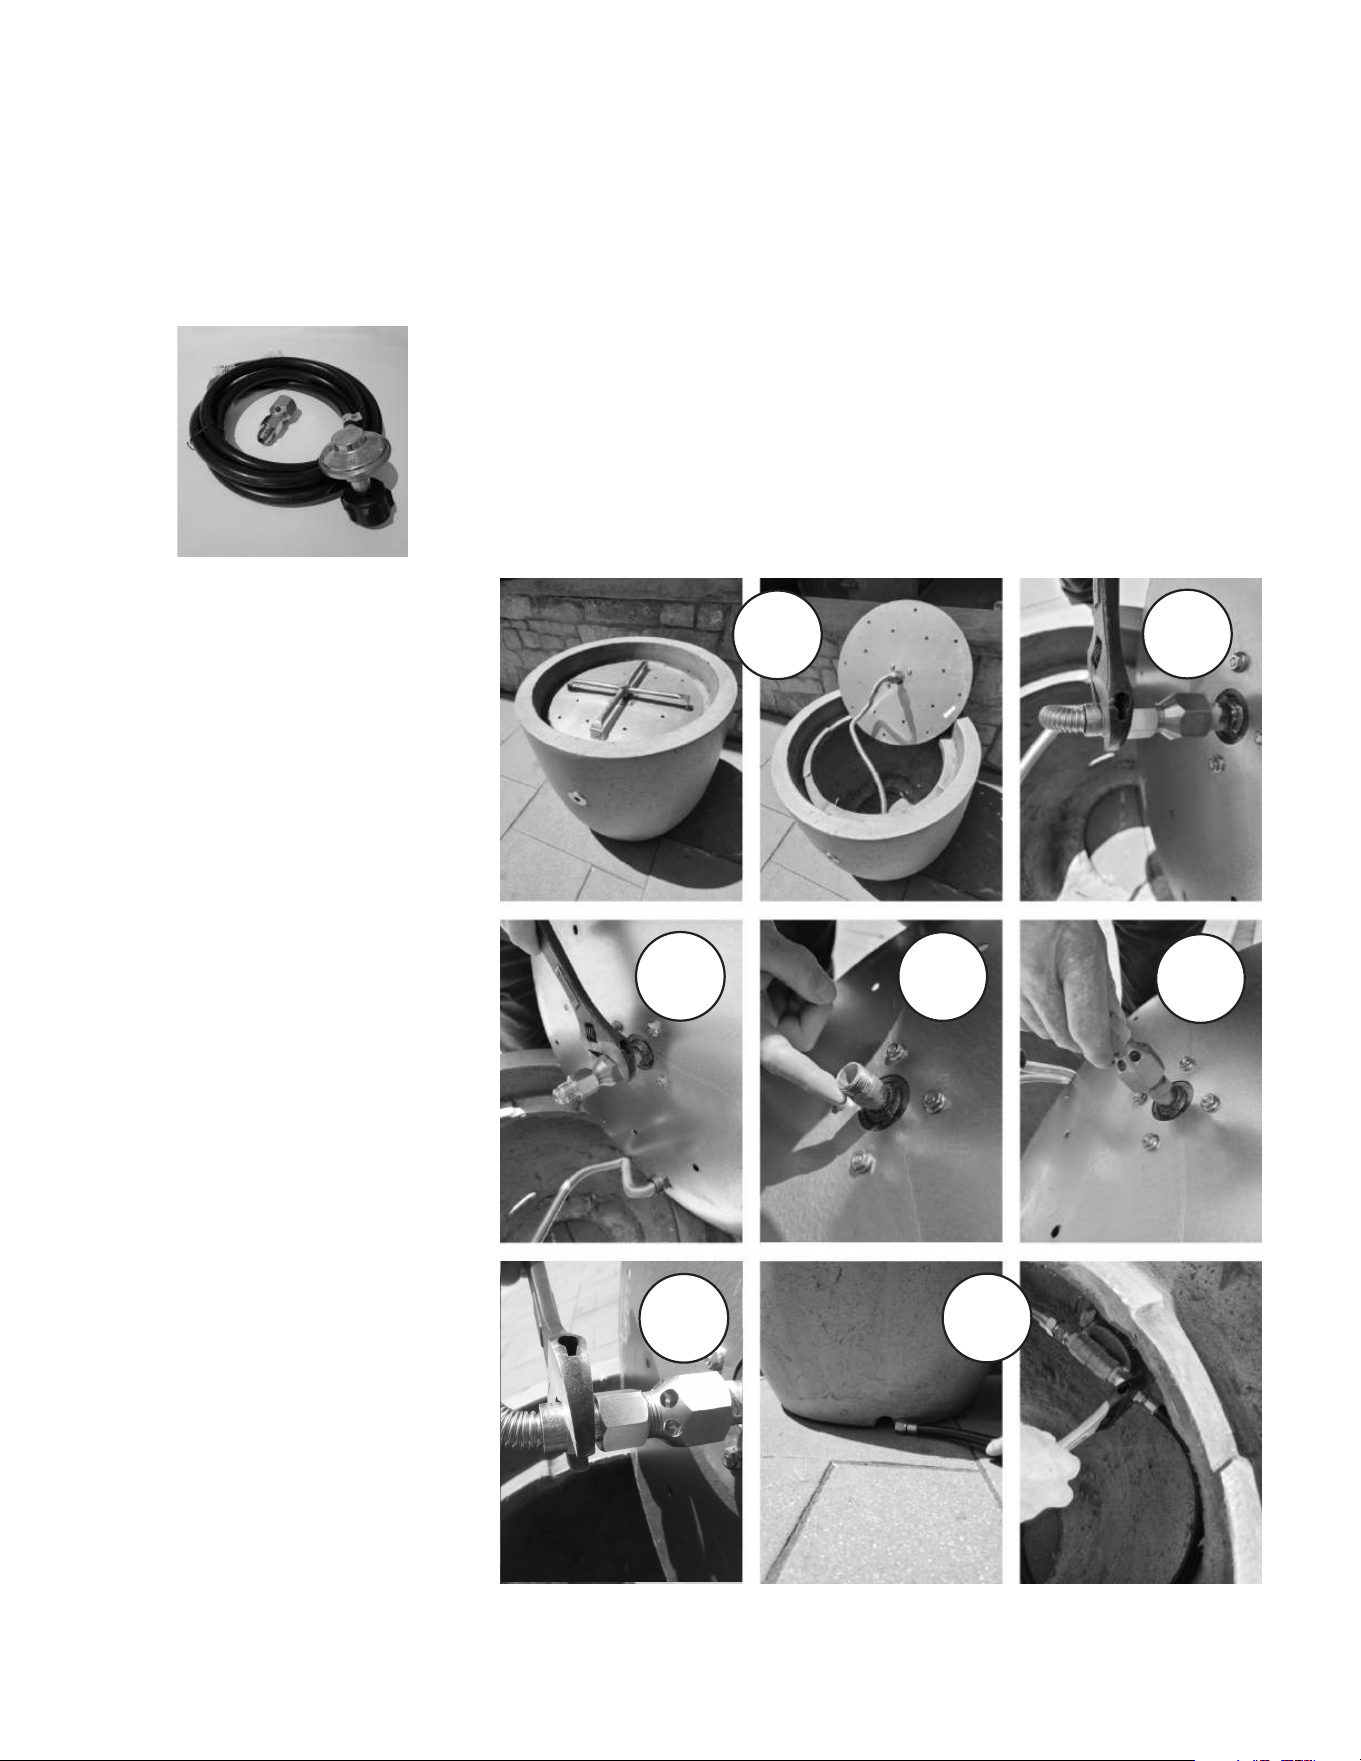
CONVERSION TO BURN PROPANE
Converting the unit to use propane as a fuel requires exchanging the burner oriface, which
can only be done by a trained, qualified technician.
After changing the oriface on page 8 - follow the propane connection instruction on page 9.
notes:
converting natural gas to propane
Before beginning, the unit must be completely disconnected from any gas supply.
You will need: One (1) XOFLPKIT, conversion kit, included*
Adjustable wrench
Pipe Dope
So
* Kit packed inside fire pit
apy water solution to test for leaks
1. Tilt the burner plate up
to reveal the gas connections
2. Disconnect the flare fitting
below the brass orifice from
from the flex tube.
3. Unscrew the brass orifice
from the pipe going up to the
burner.
4. Apply a thin layer of pipe
dope to the threads -
Be careful not to get pipe
dope inside the pipe.
5. Thread on the new brass
orifice supplied with the
XOFLPKIT onto the pipe nipple
and tighten with the wrench.
6. Attach the flex tube removed
in step 2 to the flare fitting and
tighten with the wrench.
(DO NOT USE PIPE DOPE on
flare fittings)
7. Feed the 10’ regulator hose
from the LP tank through the
hole provided in the base of the
unit and connect the flair fitting
to the gas valve tightening it
with the wrench.
Before replacing the burner plate the
system must be checked to ensure all fittings are leak tight.
1
2
3
4
5
7
8
6
THIS CONVERSION CAN ONLY BE COMPLETED BY A LICENCED, INDUSTRY PROFESSIONAL

9
LIQUI PROPANE
following specifications for purchasing your propane tank.
SPECIFICATIONS
MANIFOL PRESSURE
SUPPL PRESSURE
PRESSURE REGULATOR
The unit must be used with the supplied gas pressure regulator and hose assembly. The
regulator will control and maintain a uniform gas pressure in the manifold. The burner orifice
regulator and hose assemblies must be those specified in the instructions.
C
LIN ER SPECIFICATION
cylinder valve outlet during transport and when the cylinder in not connected to the fire
valve.
FILLER AL E
purchase one at your local hardware store, otherwise you will not be able to refill the
propane tank at the refill station.
STORAGE OF CYLINDERS
Store propane cylinders with the dust caps tightly installed outdoors in a well ventilated area
out of reach of children.
T
RANSPORTING GAS C LIN ER
ALL CONNECTIONS REGARDLESS OF FUEL TYPE MUST BE LEAK TESTED PRIOR TO USE.
gas safety | propane
10
set-up and installation
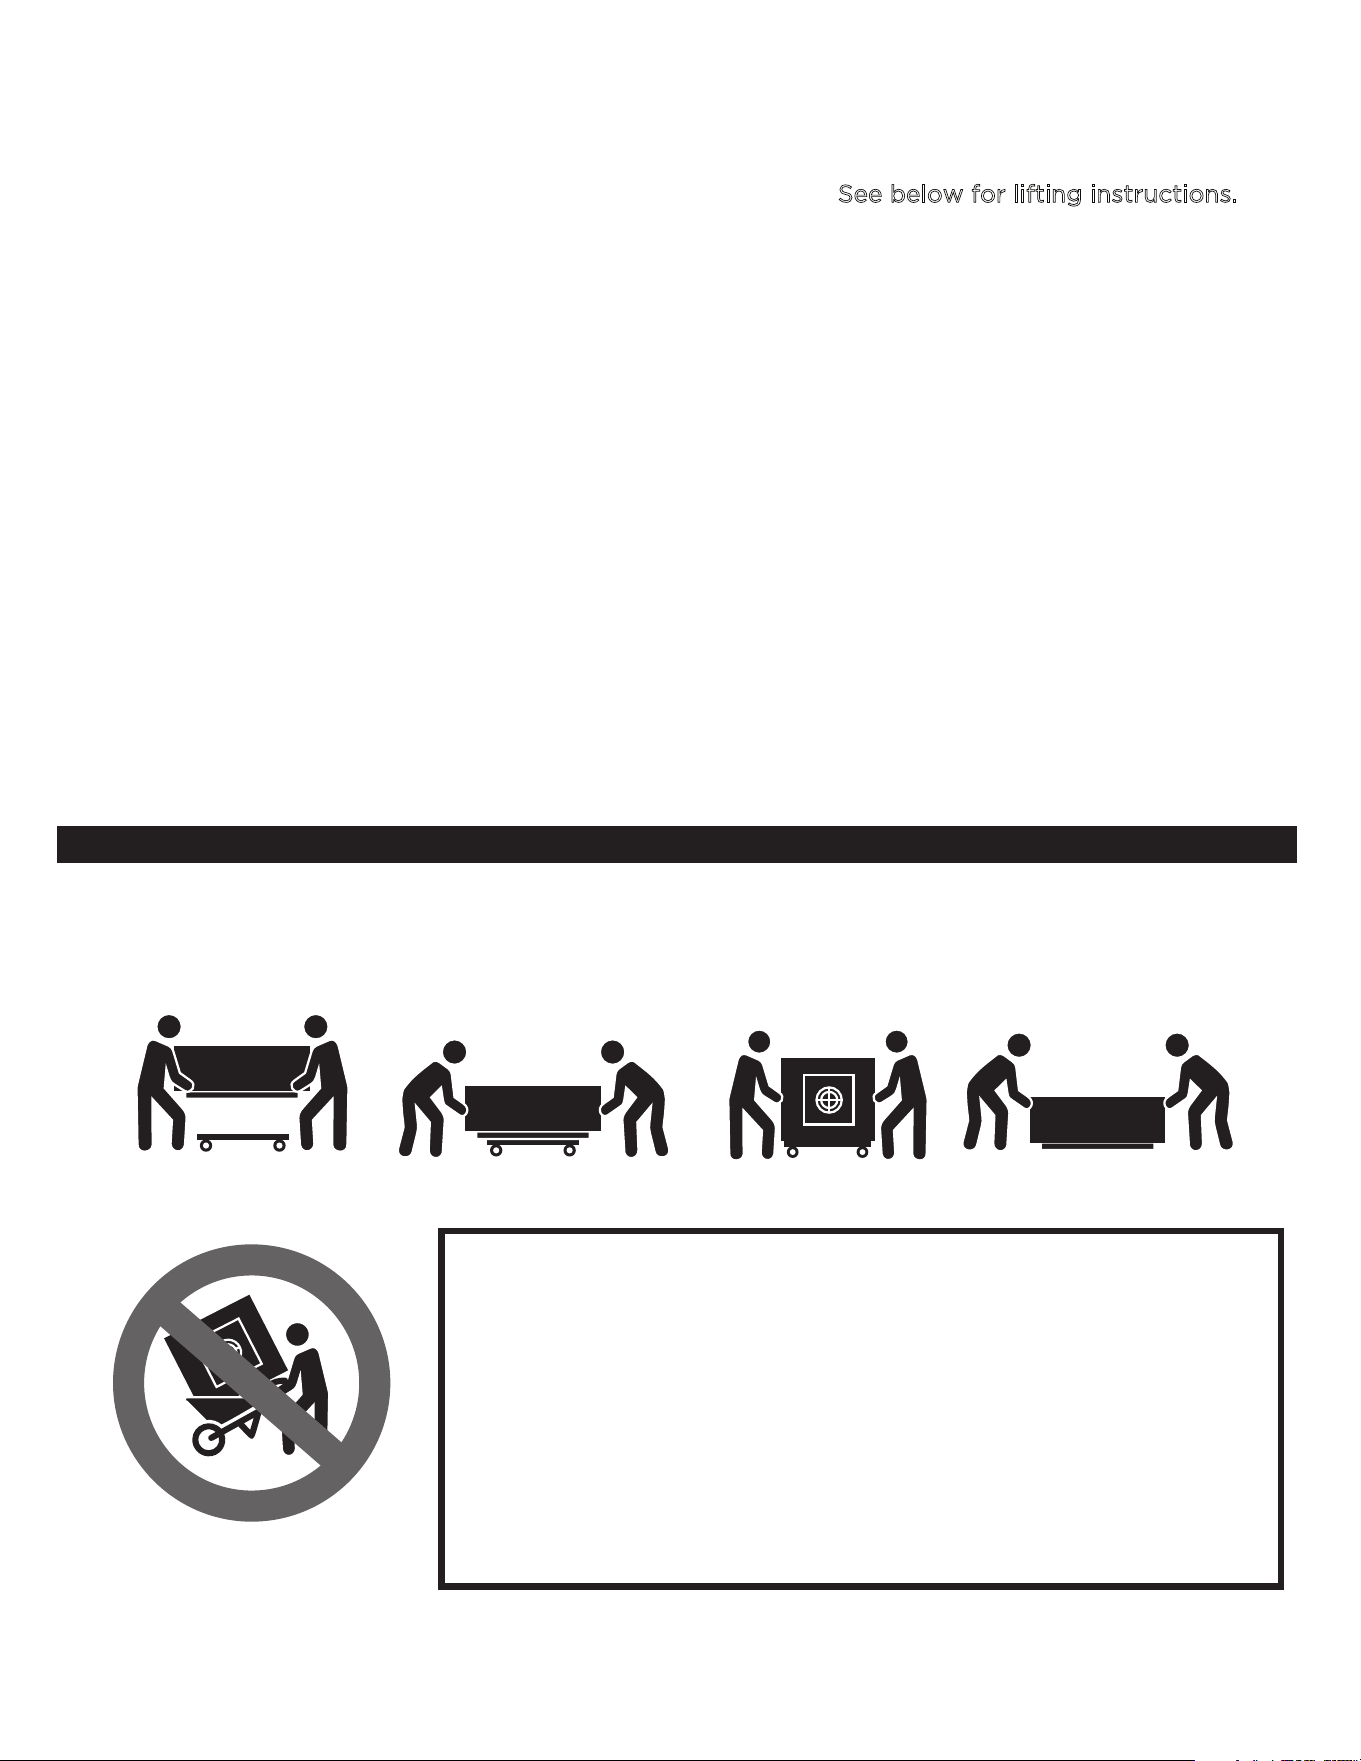
1. Carefully place the fire pit in the final designated area. S
ee below for lifting instructions.
2. Your fire pit will arrive with the burner and burner plate set in the unit. You will need to
lift up the plate to access the gas inlet.
Natural Gas Installation
a. The gas line between the burner and the gas valve located on the side of the fire bowl
has already been connected at the factory.
b. You will then connect the flex line hose from the plumbed gas line to open gas valve.
Propane Installation
a. The gas line between the burner and the gas valve located on the side of the fire bowl
has already been connected at the factory.
b. Then connect the propane hose from the gas valve to the propane tank.
3. After all gas connections have been secured and checked by a licensed plumber or
contractor, place burner pan in final locations on top of concrete ring that sits in the fire bowl.
4. Test burner unit before adding lava stone or glass in unit.
5. After you have completed all the plumbing installation, fill the fire bowl with the lava rock
provided. You can place the lava rock on the burner, but not more than 1" thick.
Excessive filler material can impede gas flow causing gas build-up and a potential explosive hazard.
CAUTION: The product is EXTREMELY HEAVY, TEAM LIFT and use equipment dollies to transport.
Transport the unit BASE DOWN or resting on it’s side. DO NOT use wheelbarrows or handtrucks.
Gently place the unit in it’s final position.
DO NOT use
wheelbarrows
or handtrucks.
LOCATING YOUR UNIT:
In placing your fire pit - consider prevailing wind patterns.
If used in a consistently windy area a windbreak will be required.
Always adhere to the specified clearances listed in this manual.
Sides & Back.........................36 inches (122 cm)
Top.........................................84 inches (305 cm)
These units generate tremendous heat - keep the area clear of
materials which may ignite, melt or be deformed by heat.
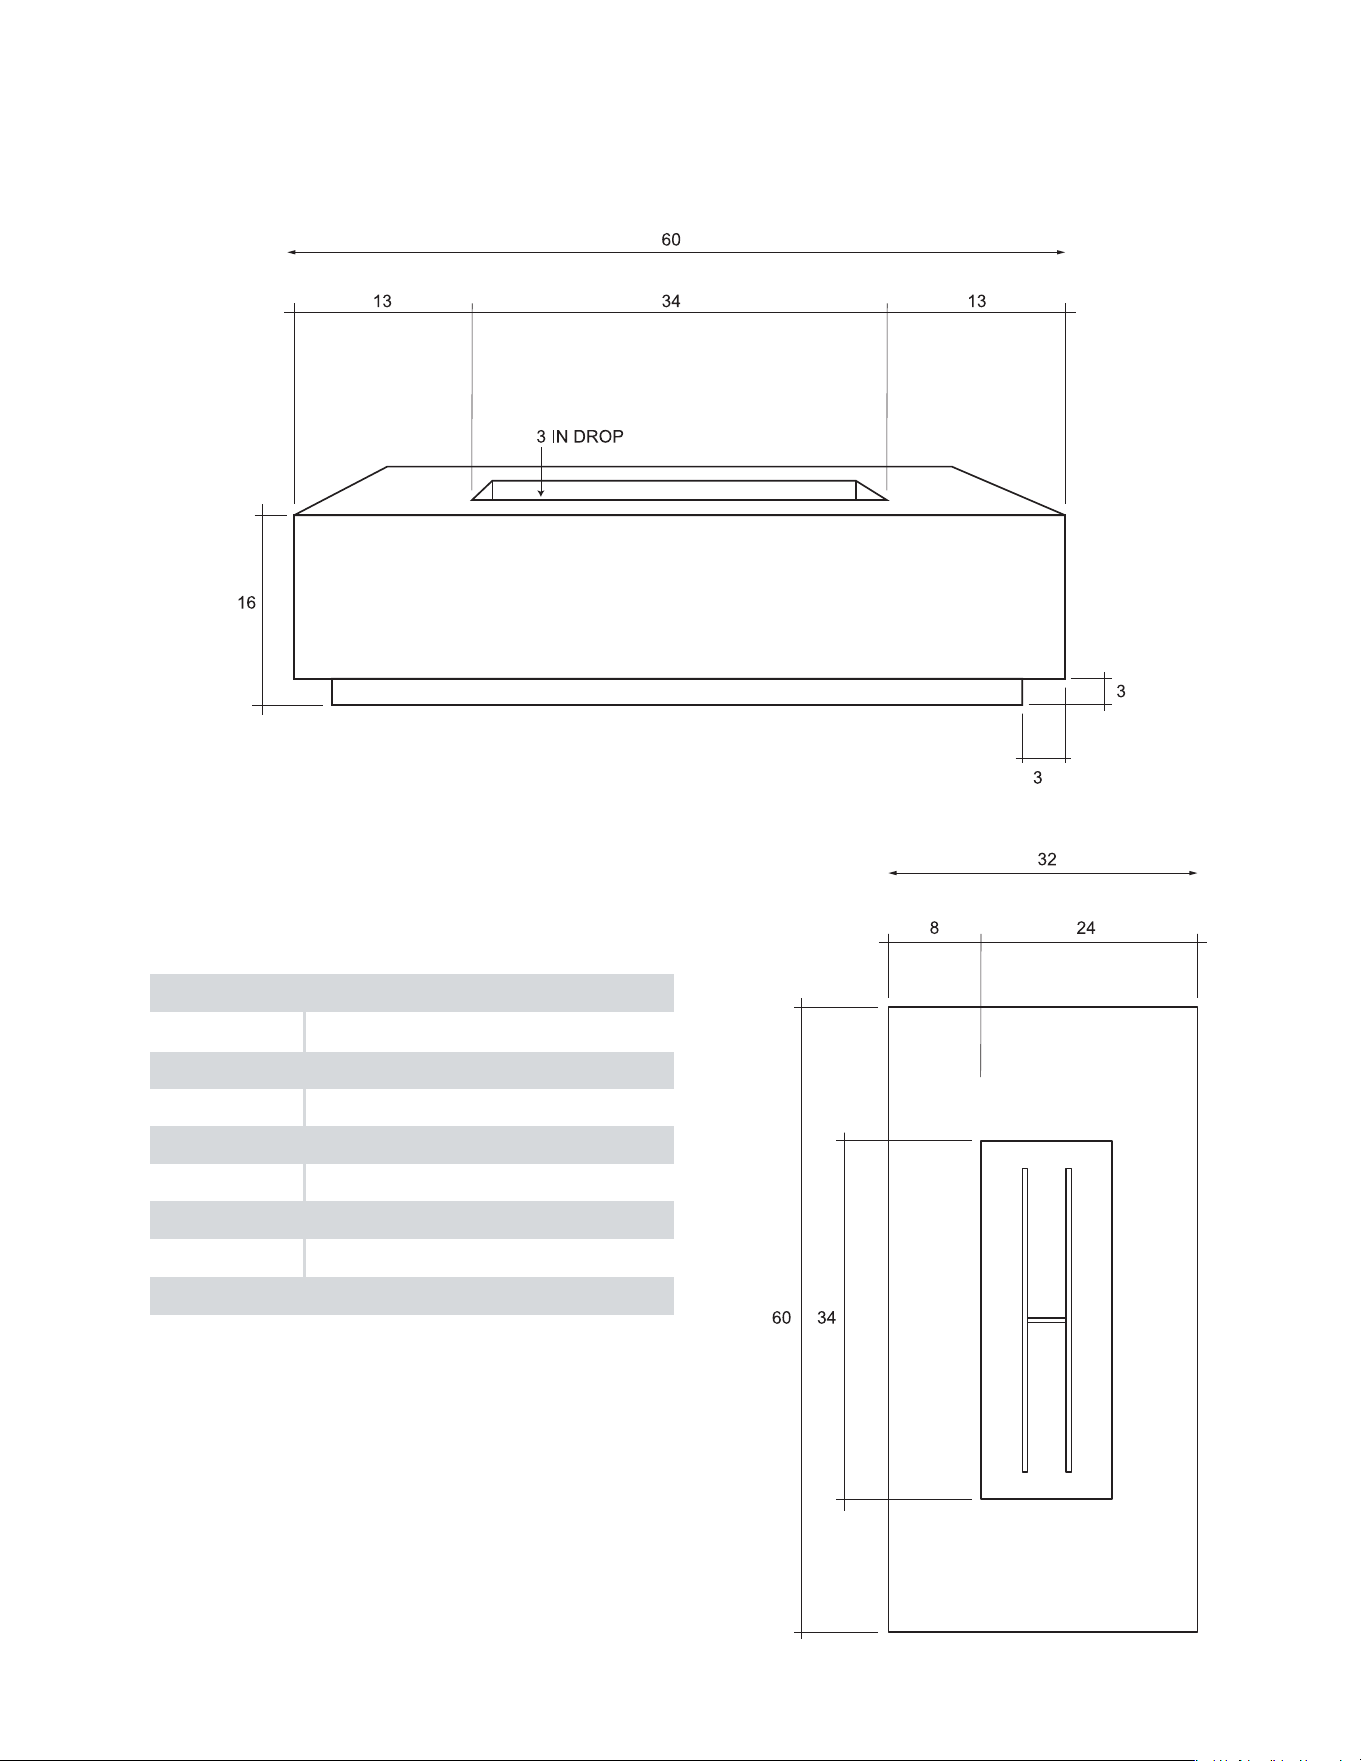
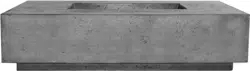
dimensions xofrec6032gr
11
SPECIFICATIONS
Width 32”
Length 60”
Height 16”
Burner Output 65,000 BTUs
Weight 320 lbs
Fuel NG Standard (incl LP conversion kit)
Ignition Manual (w Key Valve)
Material GFRC - Glass Fiber Reinforced Cement
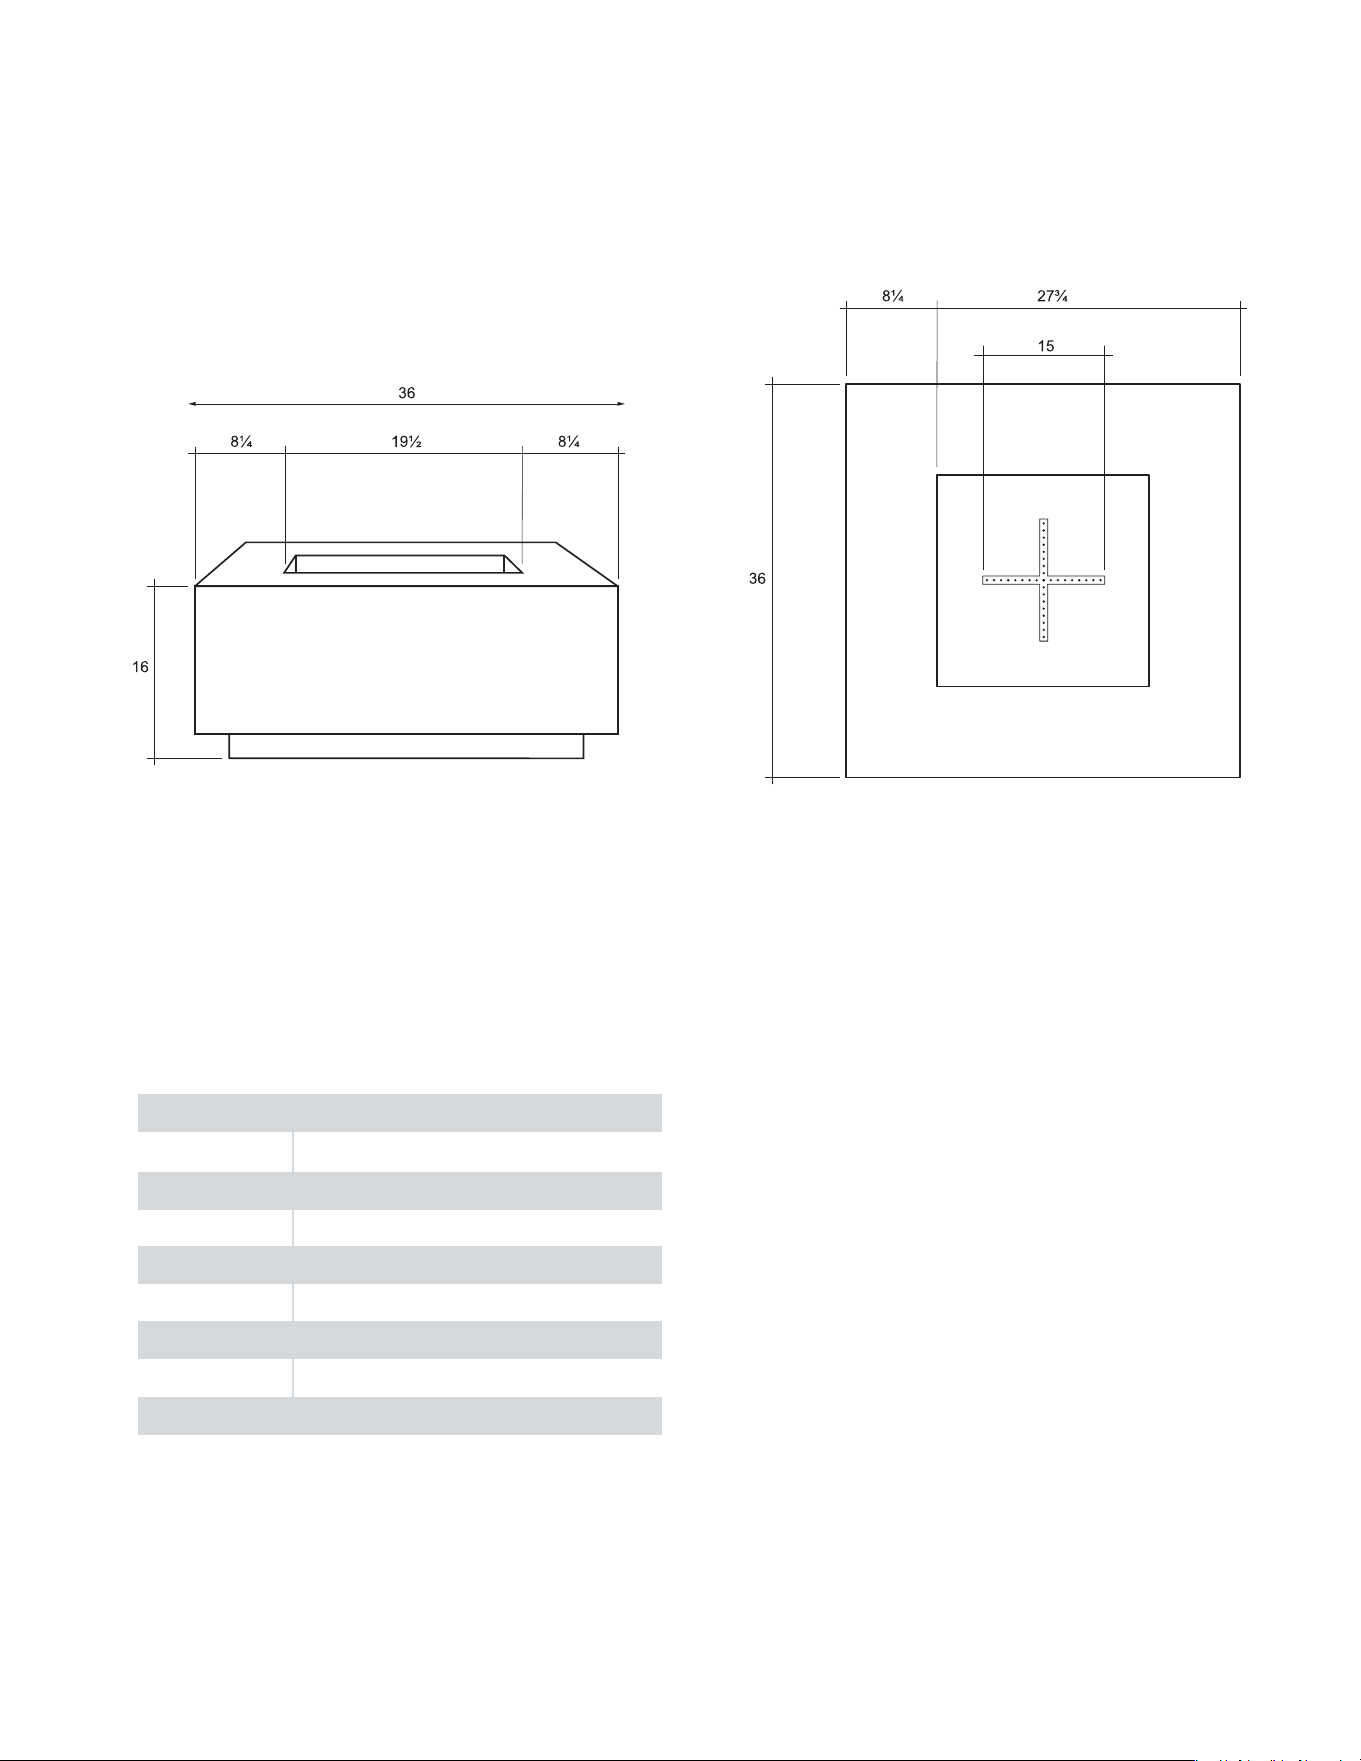
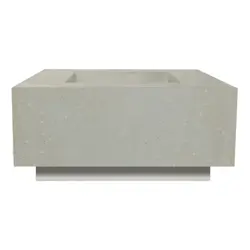
dimensions xofsqr3636gr
12
SPECIFICATIONS
Width 36”
Length 36”
Height 16”
Burner Output 65,000 BTUs
Weight 240 lbs
Fuel NG Standard (incl LP conversion kit)
Ignition Manual (w Key Valve)
Material GFRC - Glass Fiber Reinforced Cement

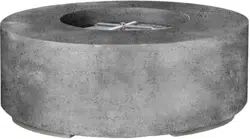
dimensions xofrnd36gr
13
SPECIFICATIONS
Width 36”
Length 36”
Height 18”
Burner Output 65,000 BTUs
Weight 240 lbs
Fuel NG Standard (incl LP conversion kit)
Ignition Manual (w Key Valve)
Material GFRC - Glass Fiber Reinforced Cement
6 3/8 23 1/4 6 3/8
18
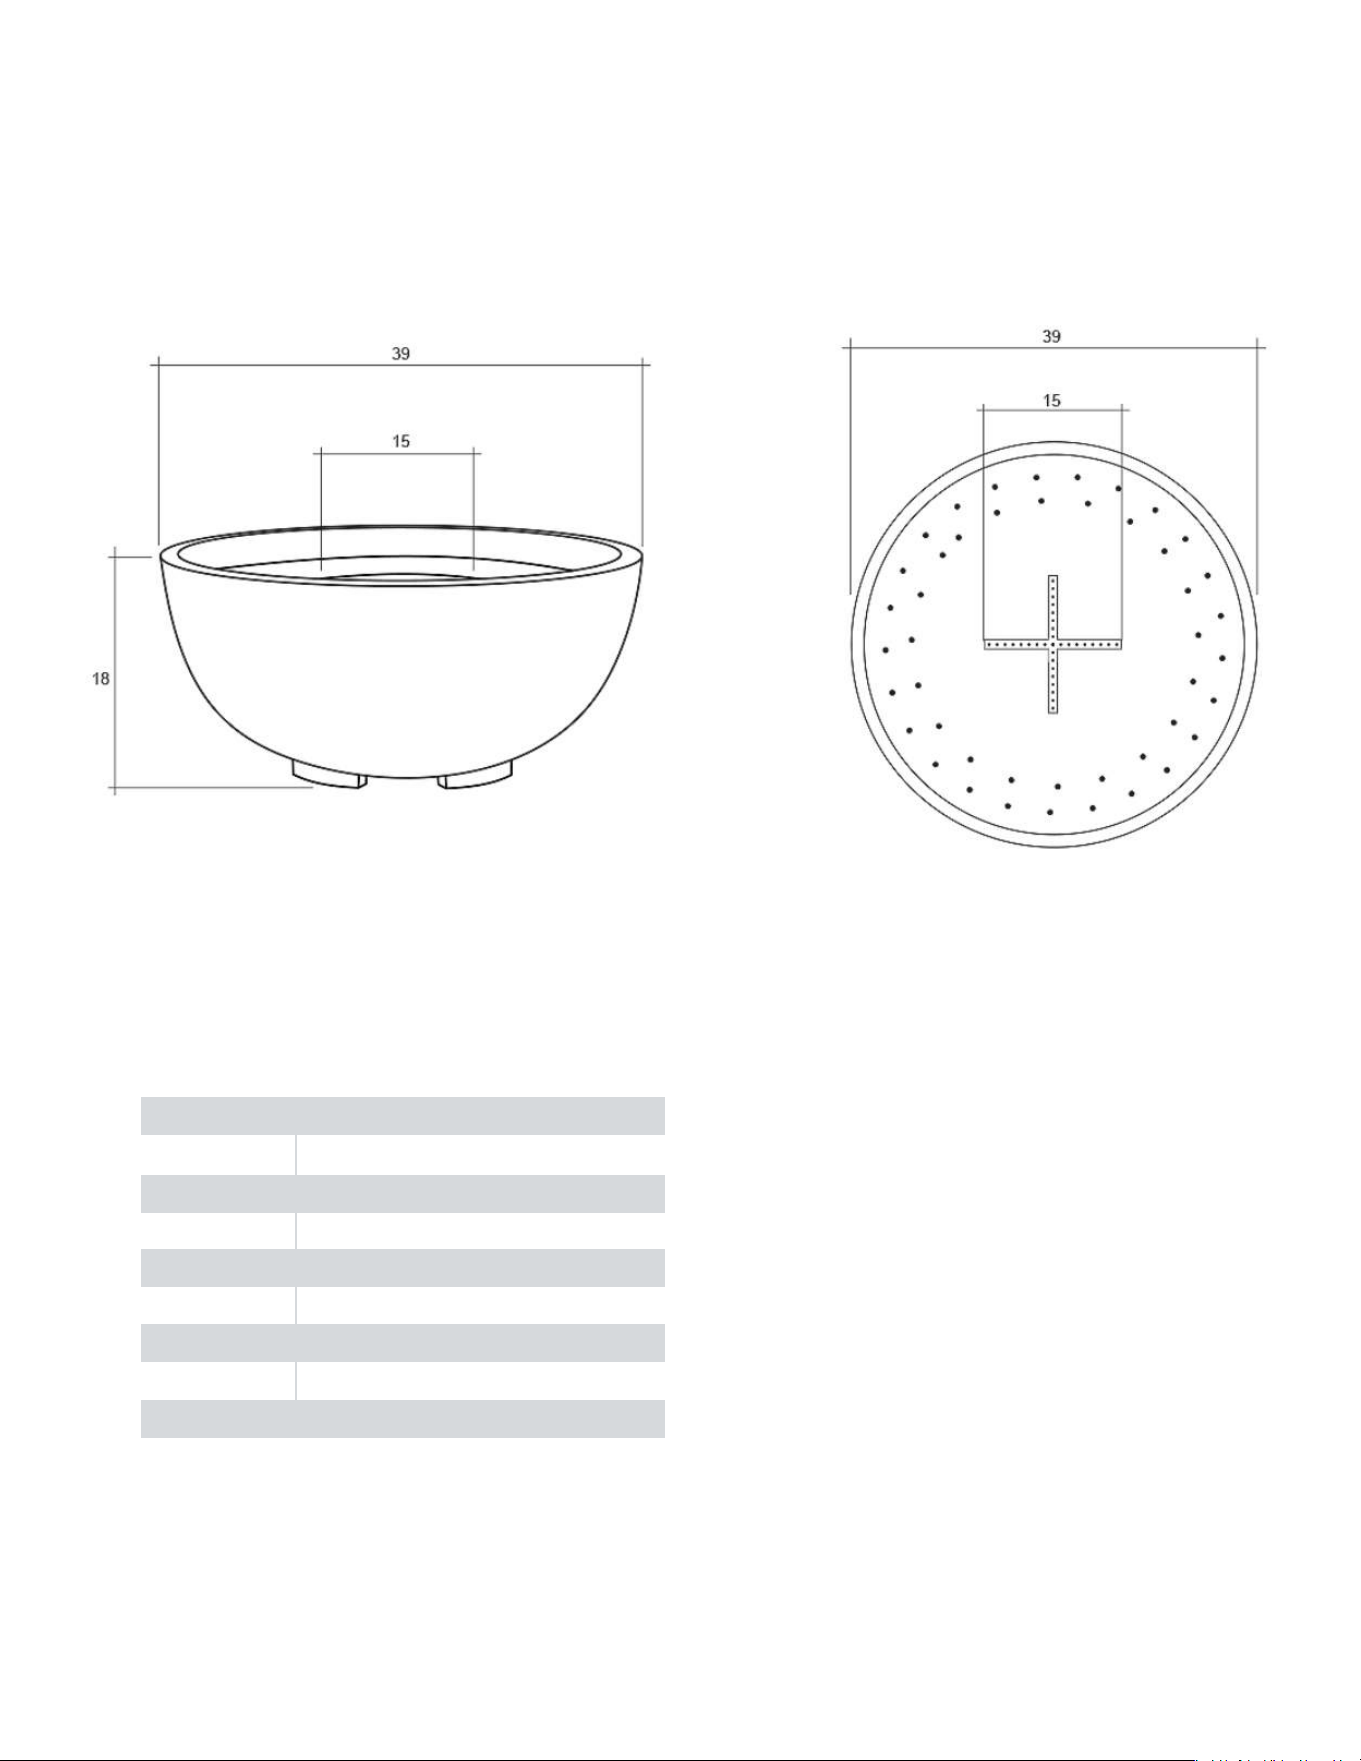
dimensions xofbwl39gr
14
SPECIFICATIONS
Width 39”
Length 39”
Height 18”
Burner Output 65,000 BTUs
Weight 210 lbs
Fuel NG Standard (incl LP conversion kit)
Ignition Manual (w Key Valve)
Material GFRC - Glass Fiber Reinforced Cement
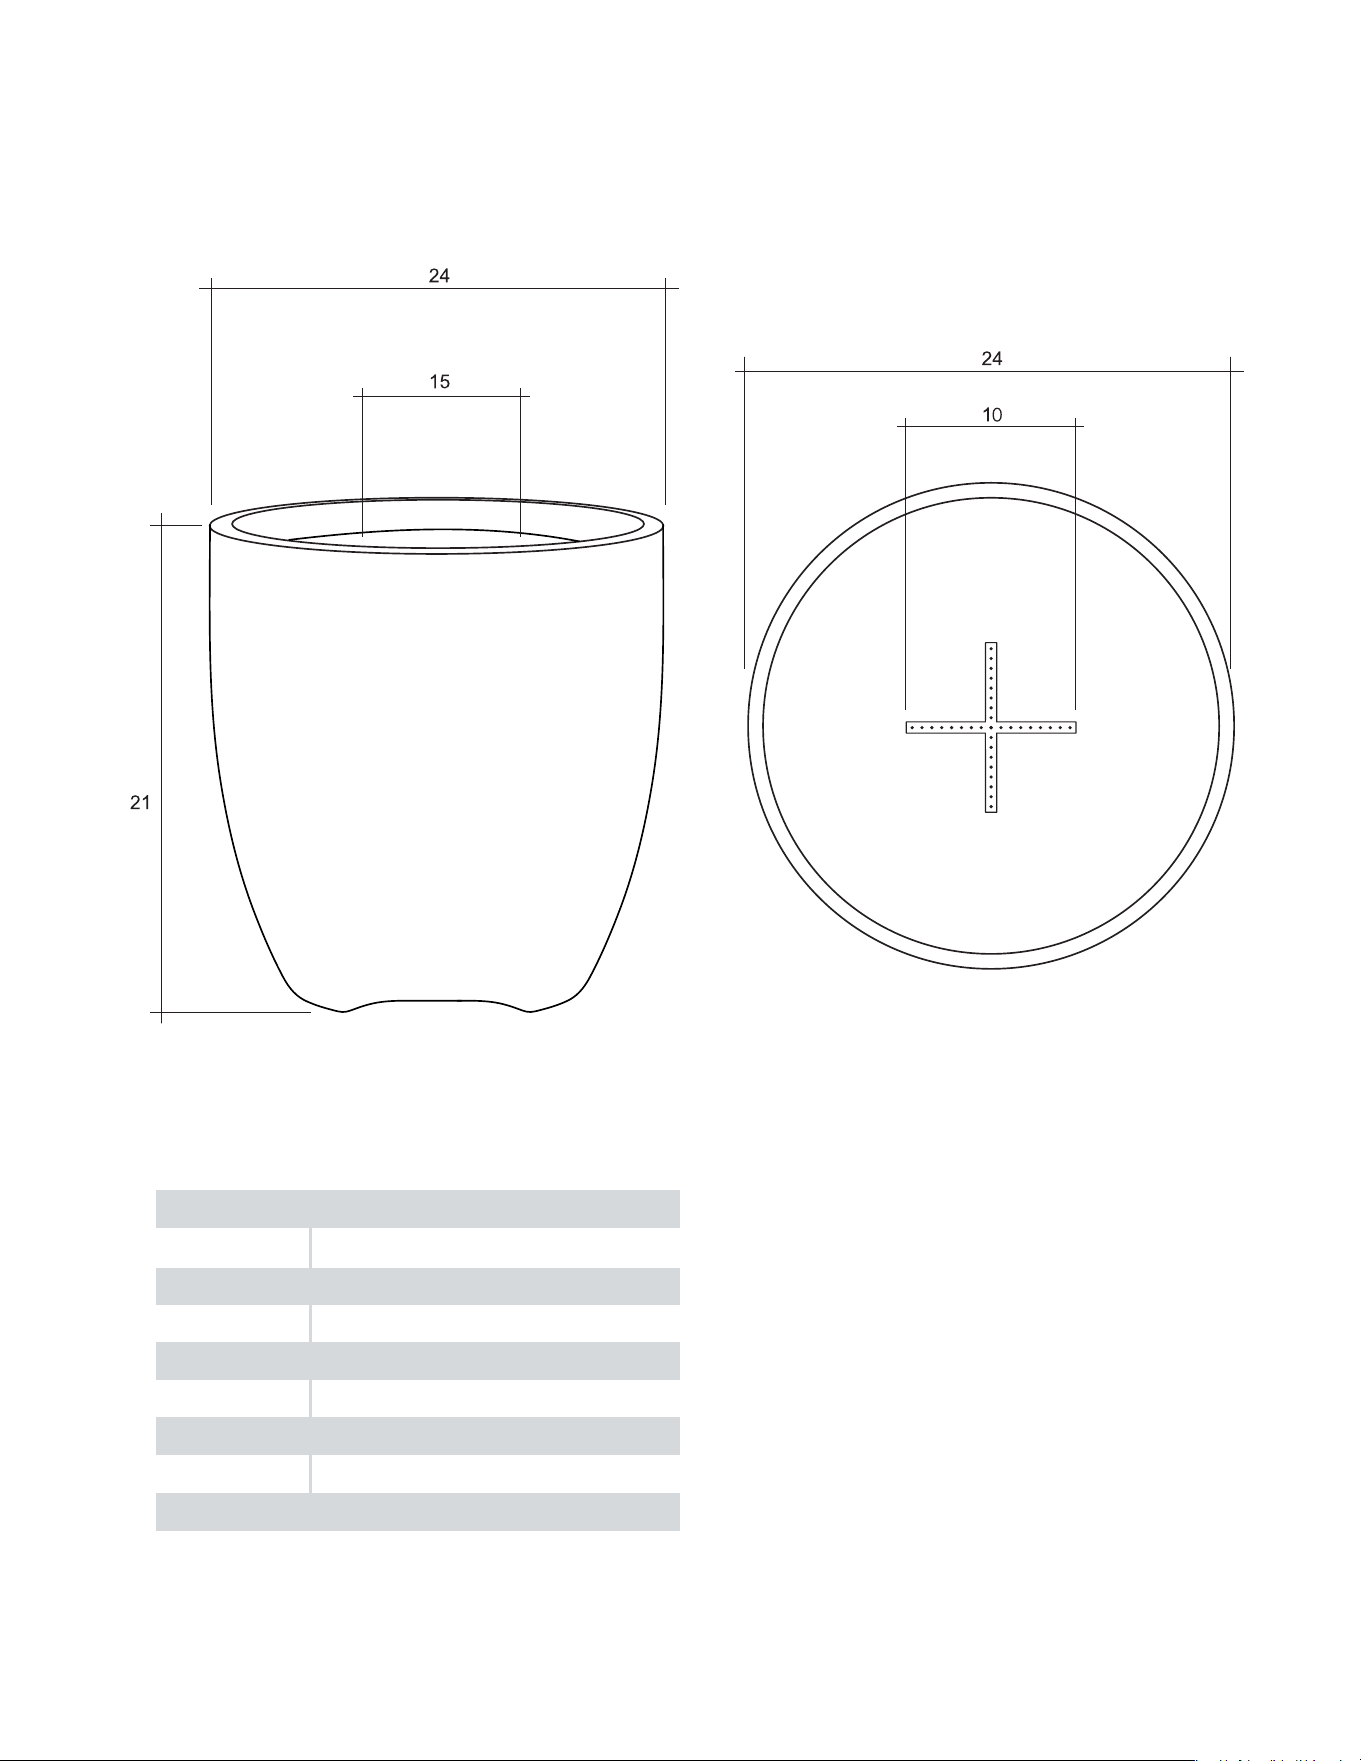
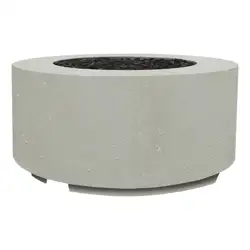
dimensions xofpot24gr
15
SPECIFICATIONS
Width 24”
Length 24”
Height 21”
Burner Output 65,000 BTUs
Weight 125 lbs
Fuel NG Standard (incl LP conversion kit)
Ignition Manual (w Key Valve)
Material GFRC - Glass Fiber Reinforced Cement
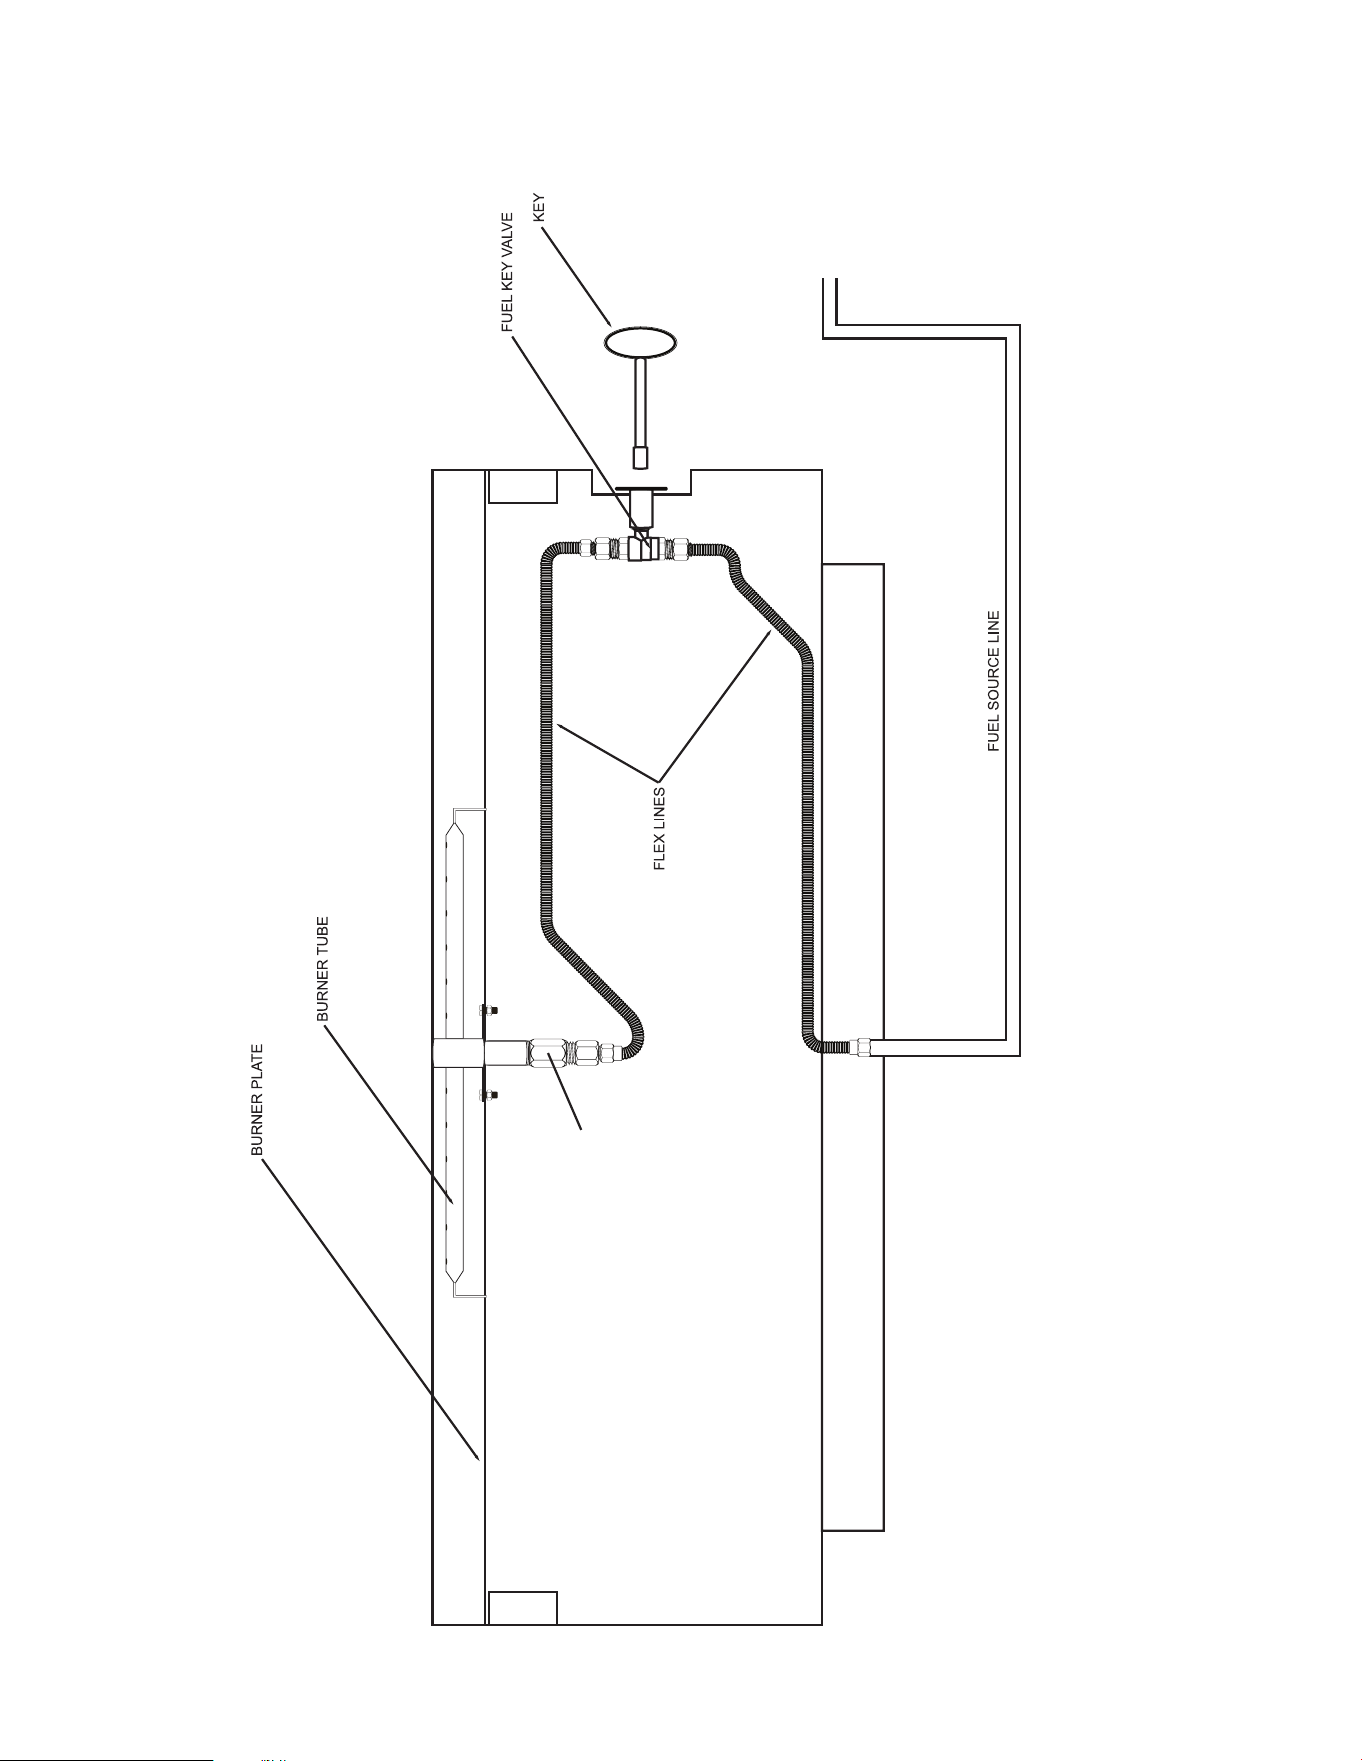
16
assembly diagram
ORIFACE
CLEANING
Inspect the appliance before initial use. Clean the appliance at least annually and have it
inspected by a qualified field service person. Periodically examine the burner. If the burner
is dirty, clean it with a soft wire brush. The easiest way to clean the fire table burner is to let
the burner. For routine cleaning of the fire table, wipe down with a damp cloth or sponge.
Avoid cleaners which may contain chemicals that could cause discoloration. To remove stains,
use a Marble or Granite stain remover available at any home center. More frequent cleaning
may be required as necessary. It is imperative the burner and ventilation passages of the unit
be kept clean and unobstructed. When not in use
and after cooling, cover your fire table with
completely and the gas lines have been disconnected. Install the cover and secure it tightly
MAINTENANCE
Periodically check the hose connecting the propane gas cylinder to ensure it is not cracked
or damaged in any way. All natural gas hook-ups should be inspected and serviced by qualified
installers only.
BURNER CLEANING
Once a year or if flames exhibit any abnormal shapes or behavior, or if the burner fails to ignite
properly, the burner holes may require cleaning. The appliance can be cleaned by carefully
removing the media to allow access to burner. Use a br
ush to carefully remove dust, webs,
and loose particles from base, stones, and the burner. If there are signs of damage, the burner
must be replaced with factory original parts as specified by the manufacturer. Spiders and
insects can nest in the burners blocking gas and airflow to the burner ports. This creates a
dangerous condition that can result in a fire. Inspect and clean the burners periodically. Any
parts removed for servicing must be properly replaced prior to operating the appliance. If there
is excessive abrasion or wear of any of the components, if the fuel supply hose is cut or cracked,
it must be replaced before operating the appliance. Inspect the fuel supply connection for signs
of leakage (including the hose for propane models) before each use of the appliance. Repair or
replacement of any part of your fire table must be done by a qualified technician perform all
service. Any repairs made by unauthorized service technicians will void your warranty.
STORAGE
only if they have been disconnected from their fuel supply. Store propane cylinders outdoors in
a well-ventilated area out of reach of children. Disconnected cylinders must have threaded valve
plugs tightly installed and must not be stored in a building, garage, or any other enclosed area.
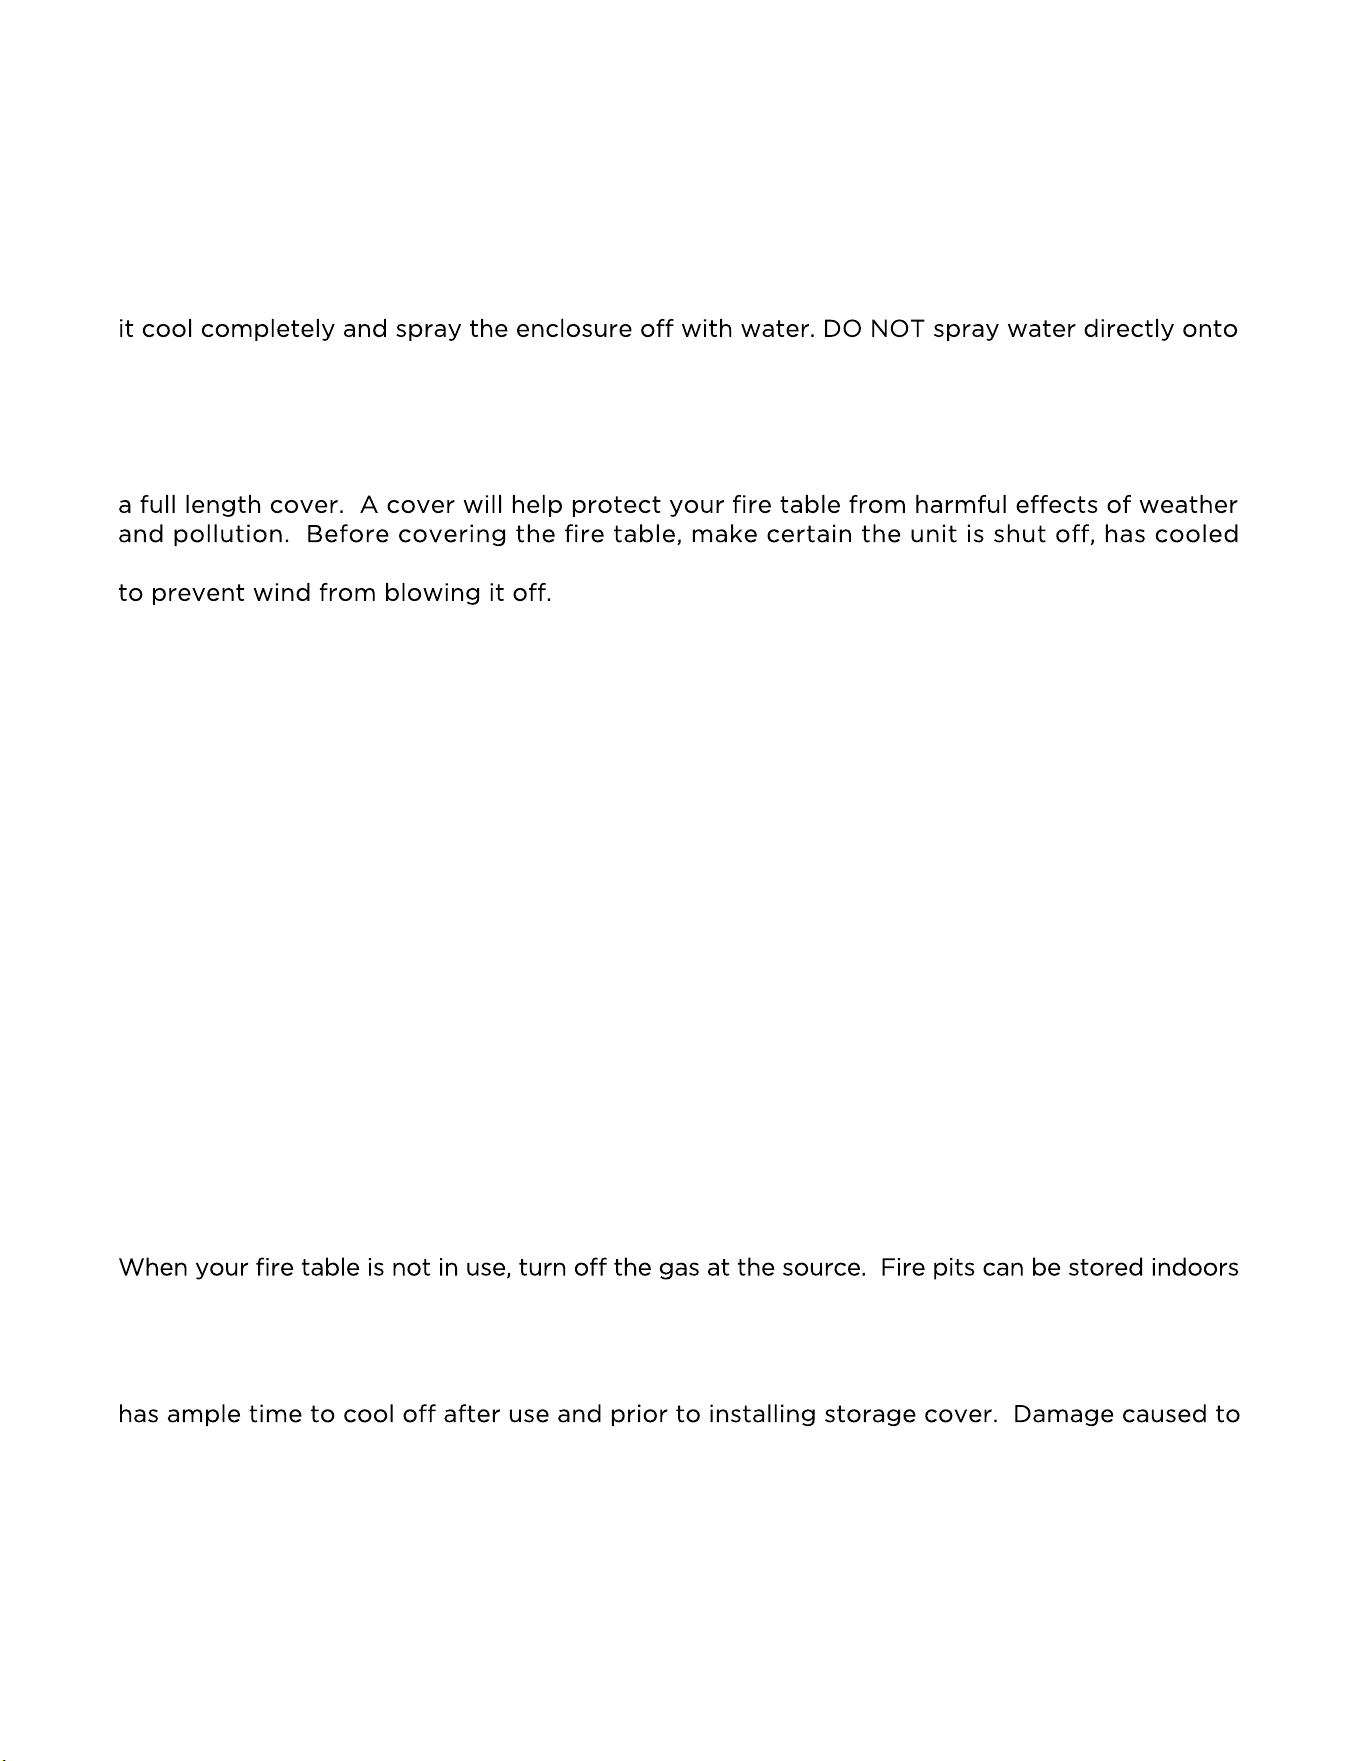
To extend the life of your fire table, protect and cover it when not in use. Ensure the appliance
storage cover due to heat or burns are not covered by warranty. We suggest that our products
be serviced by a professional certified in the US by the National Fireplace Institute (NFI) as NFI
Gas Specialists
It is the installer’s responsibility to ensure a safe installation and to educate the end user as to
proper operation of the burner unit. Installer must leave the owner’s manual, metal plate with
operating instructions, and valve key with the end user.
17
cleaning & maintenance

18
troubleshooting
ISSUE POSSIBLE CAUSES REMEDY
Will not light Air in gas line New installations may require
several starts to clear the lines
Debris in gas line Confirm line is clear
Incorrect gas pressure Confirm proper pressure
Will not stay lit Incorrect gas pressure Confirm proper pressure
Media blocking burner Review operation instructions
regarding lava rock/media placement
No
ise Restricted air/gas flow Remove any tight bends or kinks in
the gas supply line
Excessive gas pressure Check and reset gas pressure regulator
as necessary
Smoking Poor fuel quality Contact local gas company
Media impeding gas flow Separate media to improve
gas passage
Improper gas/air mixture Remove any foreign material from the
flame pattern | check oriface size
Flame
too high or low Incorrect gas supply or pressure Confirm proper pressure
Blocked burner orifice or ports Remove any debris or
blockage
Incorrect orifice size Verify correct orifice size
Odor Gas leak Check for and seal all leaks
19
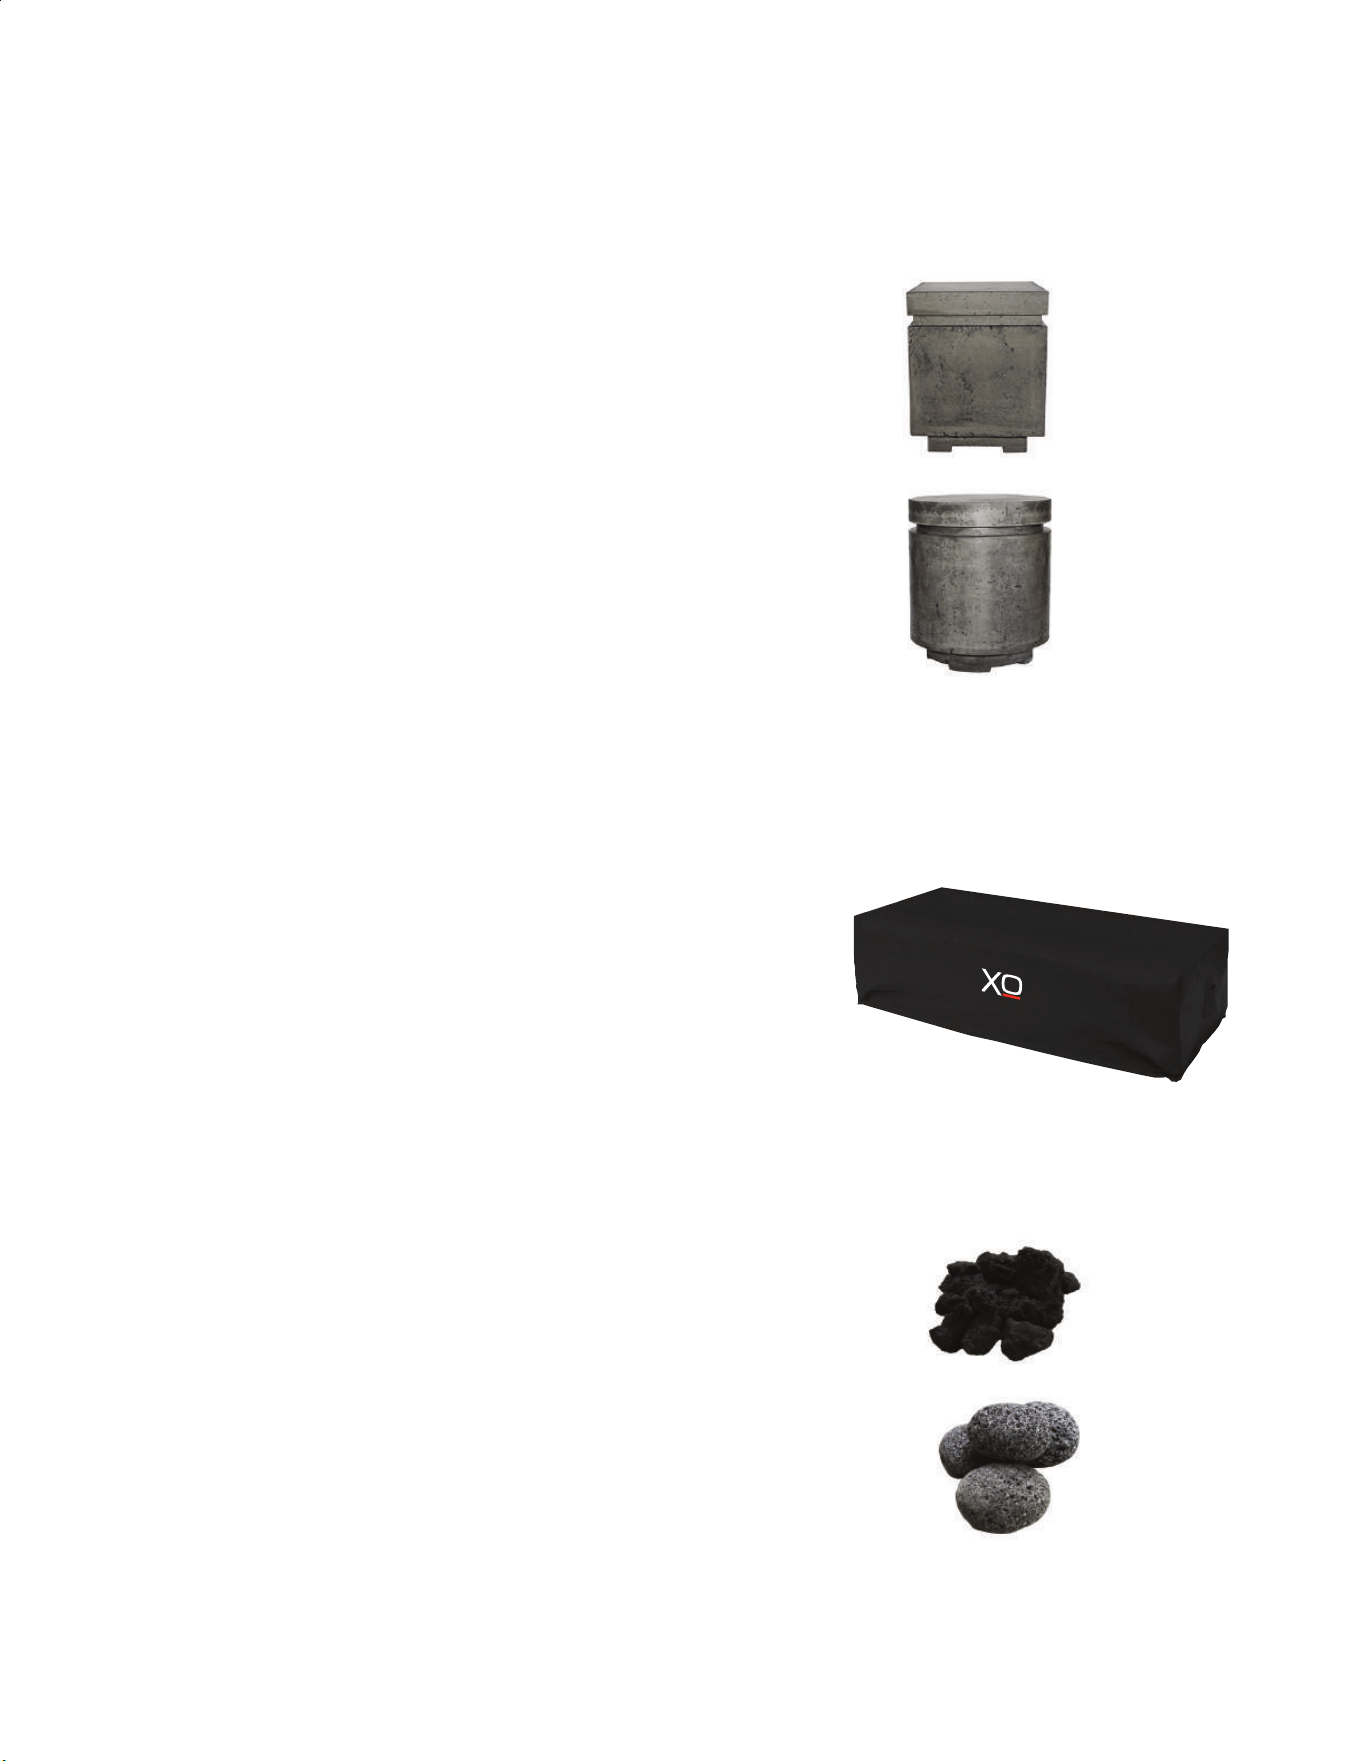
popular accessories
PROPANE TANK ENCLOSURES
XOFSQRENC20GR Square
XOFRNDENC20GR Round
ALL WEATHER COVERS
XOFCOVERBWL39 Fire Bowl 39in Cover
XOFCOVERPOT24 Fire Pot 24in Cover
XOFCOVERREC60 Fire Pit 60in x 32in Cover
XOFCOVERRND36 Fire Cylinder 36in Cover
XOFCOVERSQR36 Fire Square 36in Cover
FIRE MEDIA
XOFLAVA50LBS Cracked Lava Rock 50lbs
XOFROCK50LBS Tumbled Rock 50 lbs

YEAR
WARRANTY
To obtain service:
we’ve got your back
2
PARTS + LABOR
Call 973-403-8900 |email [email protected] | or submit a request on our website
www.xoappliance.com
TWO YEAR
thereof, to be free from structural defects in material or workmanship under normal and proper use and maintenance as specified by XO
and upon proper installation and start-up in accordance with the instruction packet supplied with each XO unit. XO’s obligation under this
warranty is limited to a period of two (2) years from the date of original purchase.
PARTS & LABOR LIMITED WARRANTY. XO warrants to the original purchaser of every new XO Fire Pit unit and all parts
TERMS APPLICABLE TO EACH WARRANTY. Any part covered under the above warranties that is determined by XO to have been
defective within the time frame is limited to the repair or replacement, including labor charges, of defective parts or assemblies. The
labor warranty shall include standard straight time labor charges only and reasonable travel time, as determined by XO.
WARRANTY CLAIMS. All claims for labor or parts must be made directly through XO. All claims should include: model number and
serial number of cabinet, proof of purchase, and date of installation. In case of warranted compressor, the compressor model tag must
be returned to XO along with the above listed information.
WHAT IS NOT COVERED BY THIS WARRANTY. XO’s sole obligation under this warranty is limited to either repair or replacement of
parts, subject to the additional limitations below. This warranty neither assumes nor authorizes any person to assume obligations other
than those expressly covered by this warrant
or obscured serial numbers and commercial applications are excluded from these warranties. Consumer shall be responsible for labor
and transportation costs where noted above.
y. Open box, factory seconds, scratch and dent, floor models, models with missing, altered
NO CONSEQUENTIAL DAMAGES. XO is not responsible for economic loss, profit loss; or special, indirect or consequential damages,
including without limitation, losses or damages arising from product failure.
WARRANTY IS NOT TRANSFERABLE. This warranty is not assignable and applies only in favor of the original purchaser/user at the
original installation location. Any such assignment or transfer shall void the warranties herein made and shall void all warranties,
express or implied, including any warranty or merchantability or fitness for a particular purpose.
IMPROPER USAGE. XO assumes no liability for parts or labor coverage for component failure or other damages resulting from
improper usage or installation or failure to clean and/or maintain product as set forth in the warranty packet provided with the unit.
ALTERATION OR NEGLECT. XO is not responsible for the repair or replacement of any parts that XO determines have been subjected
after the date of manufacture to alteration, neglect, abuse, misuse, accident, damage during transit, improper installation, lack of scheduled
maintenance as outlined in this manual, fire, flood, or act of God.
SERVICE CONNECTIONS.
insufficient utility service connections.
XO is not responsible for the repair or replacement of failed or damaged components due to improper or
YOUR RIGHTS UNDER STATE LAW. This warranty gives you specific legal rights and you may have other rights that vary from state to
state. Some states do not allow the exclusion or limitation of consequential damages or a limitation on how long an implied warranty lasts,
so the above exclusion or limitation may not apply to you.
OUTSIDE U.S. This warranty does not apply to, and XO is not responsible for, any warranty claims made on products sold or used outside
the 48 continental United States.
20
The original purchaser acknowledges and agrees that this product is a handmade, hand-finished product.
Each piece is unique. Any samples provided are typical of texture, finish, individual characteristics, and color
but they should not be considered exact representations of the final product. There can be a variation in color
and texture from piece to piece. The texture created by entrapped air ranges from smooth to randomly indented.
Minor chipping, water staining, and non-structural hairline cracks are also traditional characteristics of this product.
As with natural stone, color will vary on individual orders and among individual pieces in the same order. As with
natural stone, excessive heat exposure may cause discoloration. As fire tables age, color may lighten or darken
according to specific field or storage conditions such as humidity, temperature, and exposure to sunlight.
IMPORTANT NOTE: EACH FIRE PIT IS UNIQUELY HAND FINISHED: