x 1x 1
x 3
AA
1
2
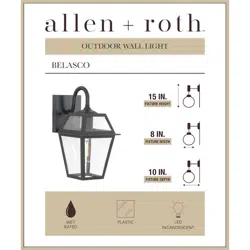
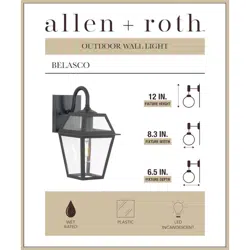
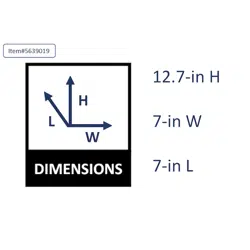
ITEM/ARTÍCULO #5639019
MODEL/MODELO #
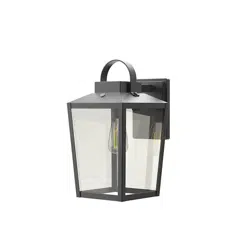
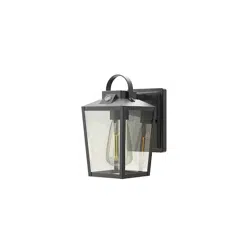
HANGING EXTERIOR LANTERN
8700981344-01
TROUBLESHOOTING / SOLUCIÓN DE PROBLEMAS
SAVE IMPORTANT SAFETY INSTRUCTIONS/GUARDE LAS INSTRUCCIONES IMPORTANTES DE SEGURIDAD
PREPARATION / PREPARACIÓN
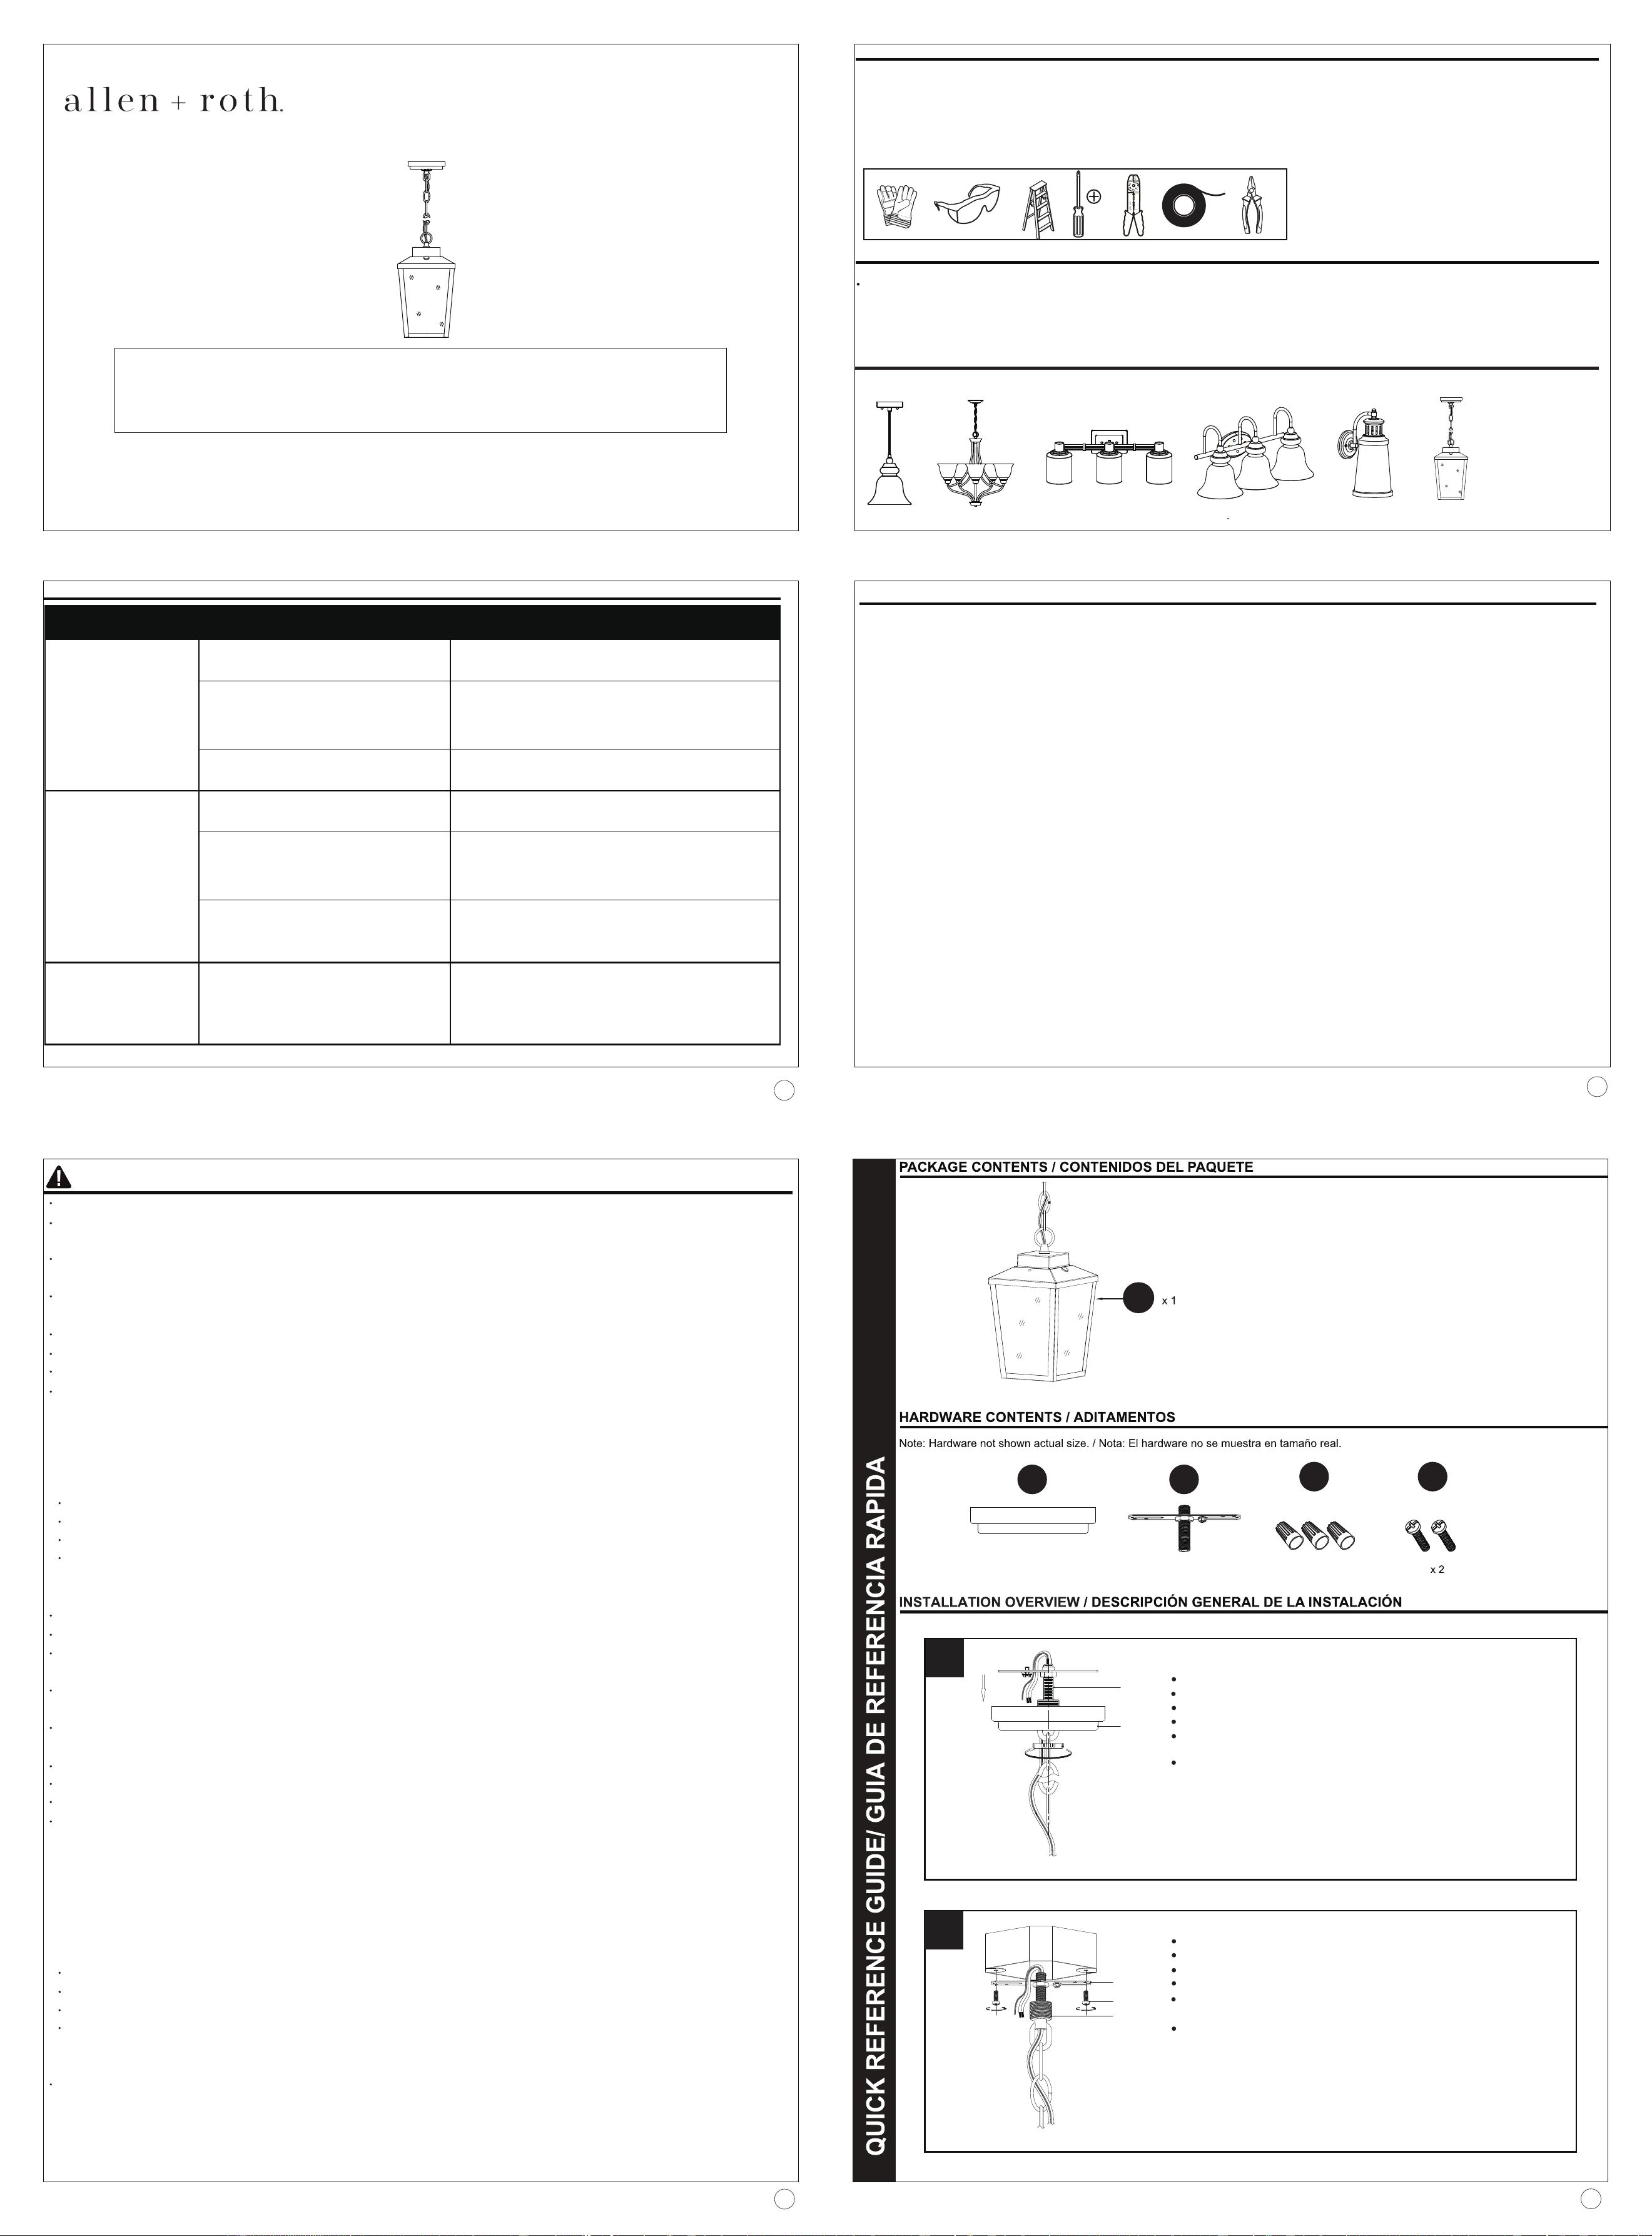
• Before beginning assembly of product, make sure all parts are present. Compare parts with package contents list and hardware contents list.
If any part is missing or damaged, do not attempt to assemble the product.
• Antes de comenzar a ensamblar el producto, asegúrese de que todas las piezas estén presentes. Compare las piezas con la lista del contenido
del paquete y la lista del contenido del hardware. Si alguna pieza falta o está dañada, no intente ensamblar el producto.
Estimated Assembly Time: 30 ~ 45 minutes.
Tiempo estimado de montaje: 30 ~ 45 minutos.
TOOLS REQUIRED (NOT INCLUDED)/HERRAMIENTAS NECESARIAS (NO SE INCLUYEN)
WARRANTY / GARANTÍA
• The manufacturer warrants this lighting fixture against defects in materials and workmanship for a period of one (1) year from the date of purchase.
If within this period the product is found to be defective in material or workmanship, the product must be returned, with a copy of the bill of sale as proof
of purchase, to the original place of purchase. The manufacturer will, at its option, repair, replace, or refund the purchase price to the original purchaser
or consumer. This warranty does not cover light bulbs or the fixture becoming damaged due to misuse, accidental damage, improper handling and/or
installation, and specifically excludes liability for direct, incidental, or consequential damages. As some states do not allow exclusions or limitations on
an implied warranty, so the above exclusions and limitations may not apply. This warranty gives you specific rights and you may also have other rights
that vary from state to state.
• El fabricante garantiza este artefacto de iluminación contra defectos de materiales y mano de obra por un período de un (1) año a partir de la fecha
de compra. Si dentro de este período se encuentra que el producto tiene defectos de materiales o mano de obra, el producto debe devolverse, con una
copia de la factura de venta como prueba de compra, al lugar original de compra. El fabricante, a su criterio, reparará, reemplazará o reembolsará el
precio de compra al comprador o consumidor original. Esta garantía no cubre las bombillas o el artefacto que se dañe debido al mal uso, daño
accidental, manejo y / o instalación inadecuados, y específicamente excluye la responsabilidad por daños directos, incidentales o consecuentes. Como
algunos estados no permiten exclusiones o limitaciones en una garantía implícita, es posible que las exclusiones y limitaciones anteriores no se
apliquen. Esta garantía le otorga derechos específicos y también puede tener otros derechos que varían de un estado a otro.
CARE AND MAINTENANCE / CUIDADO Y MANTENIMIENTO
• Before attempting to clean the fixture, disconnect the power to the fixture by turning off the circuit breaker or by removing the fuse at the fuse box.
• DO NOT use any cleaners with chemicals, solvents or harsh abrasives as damage to the fixture may occur.
• Antes de intentar limpiar el dispositivo, desconecte la alimentación del dispositivo apagando el disyuntor o quitando el fusible de la caja de fusibles.
• Para limpiar la lámpara, use un paño limpio seco o levemente húmedo.
• NO utilice limpiadores con químicos, solventes ni abrasivos fuertes ya que pueden dañar la lámpara.
Printed in China
Impreso en China
FEELING CONFIDENT? START YOUR NEXT PROJECT/SE SIENTE CONFIADO? INICIE SU PRÓXIMO PROYECTO
• Visit www.lowes.com for more information./Visite www.lowes.com para obtener más información.
To clean the fixture, use a dry or slightly dampened clean cloth.
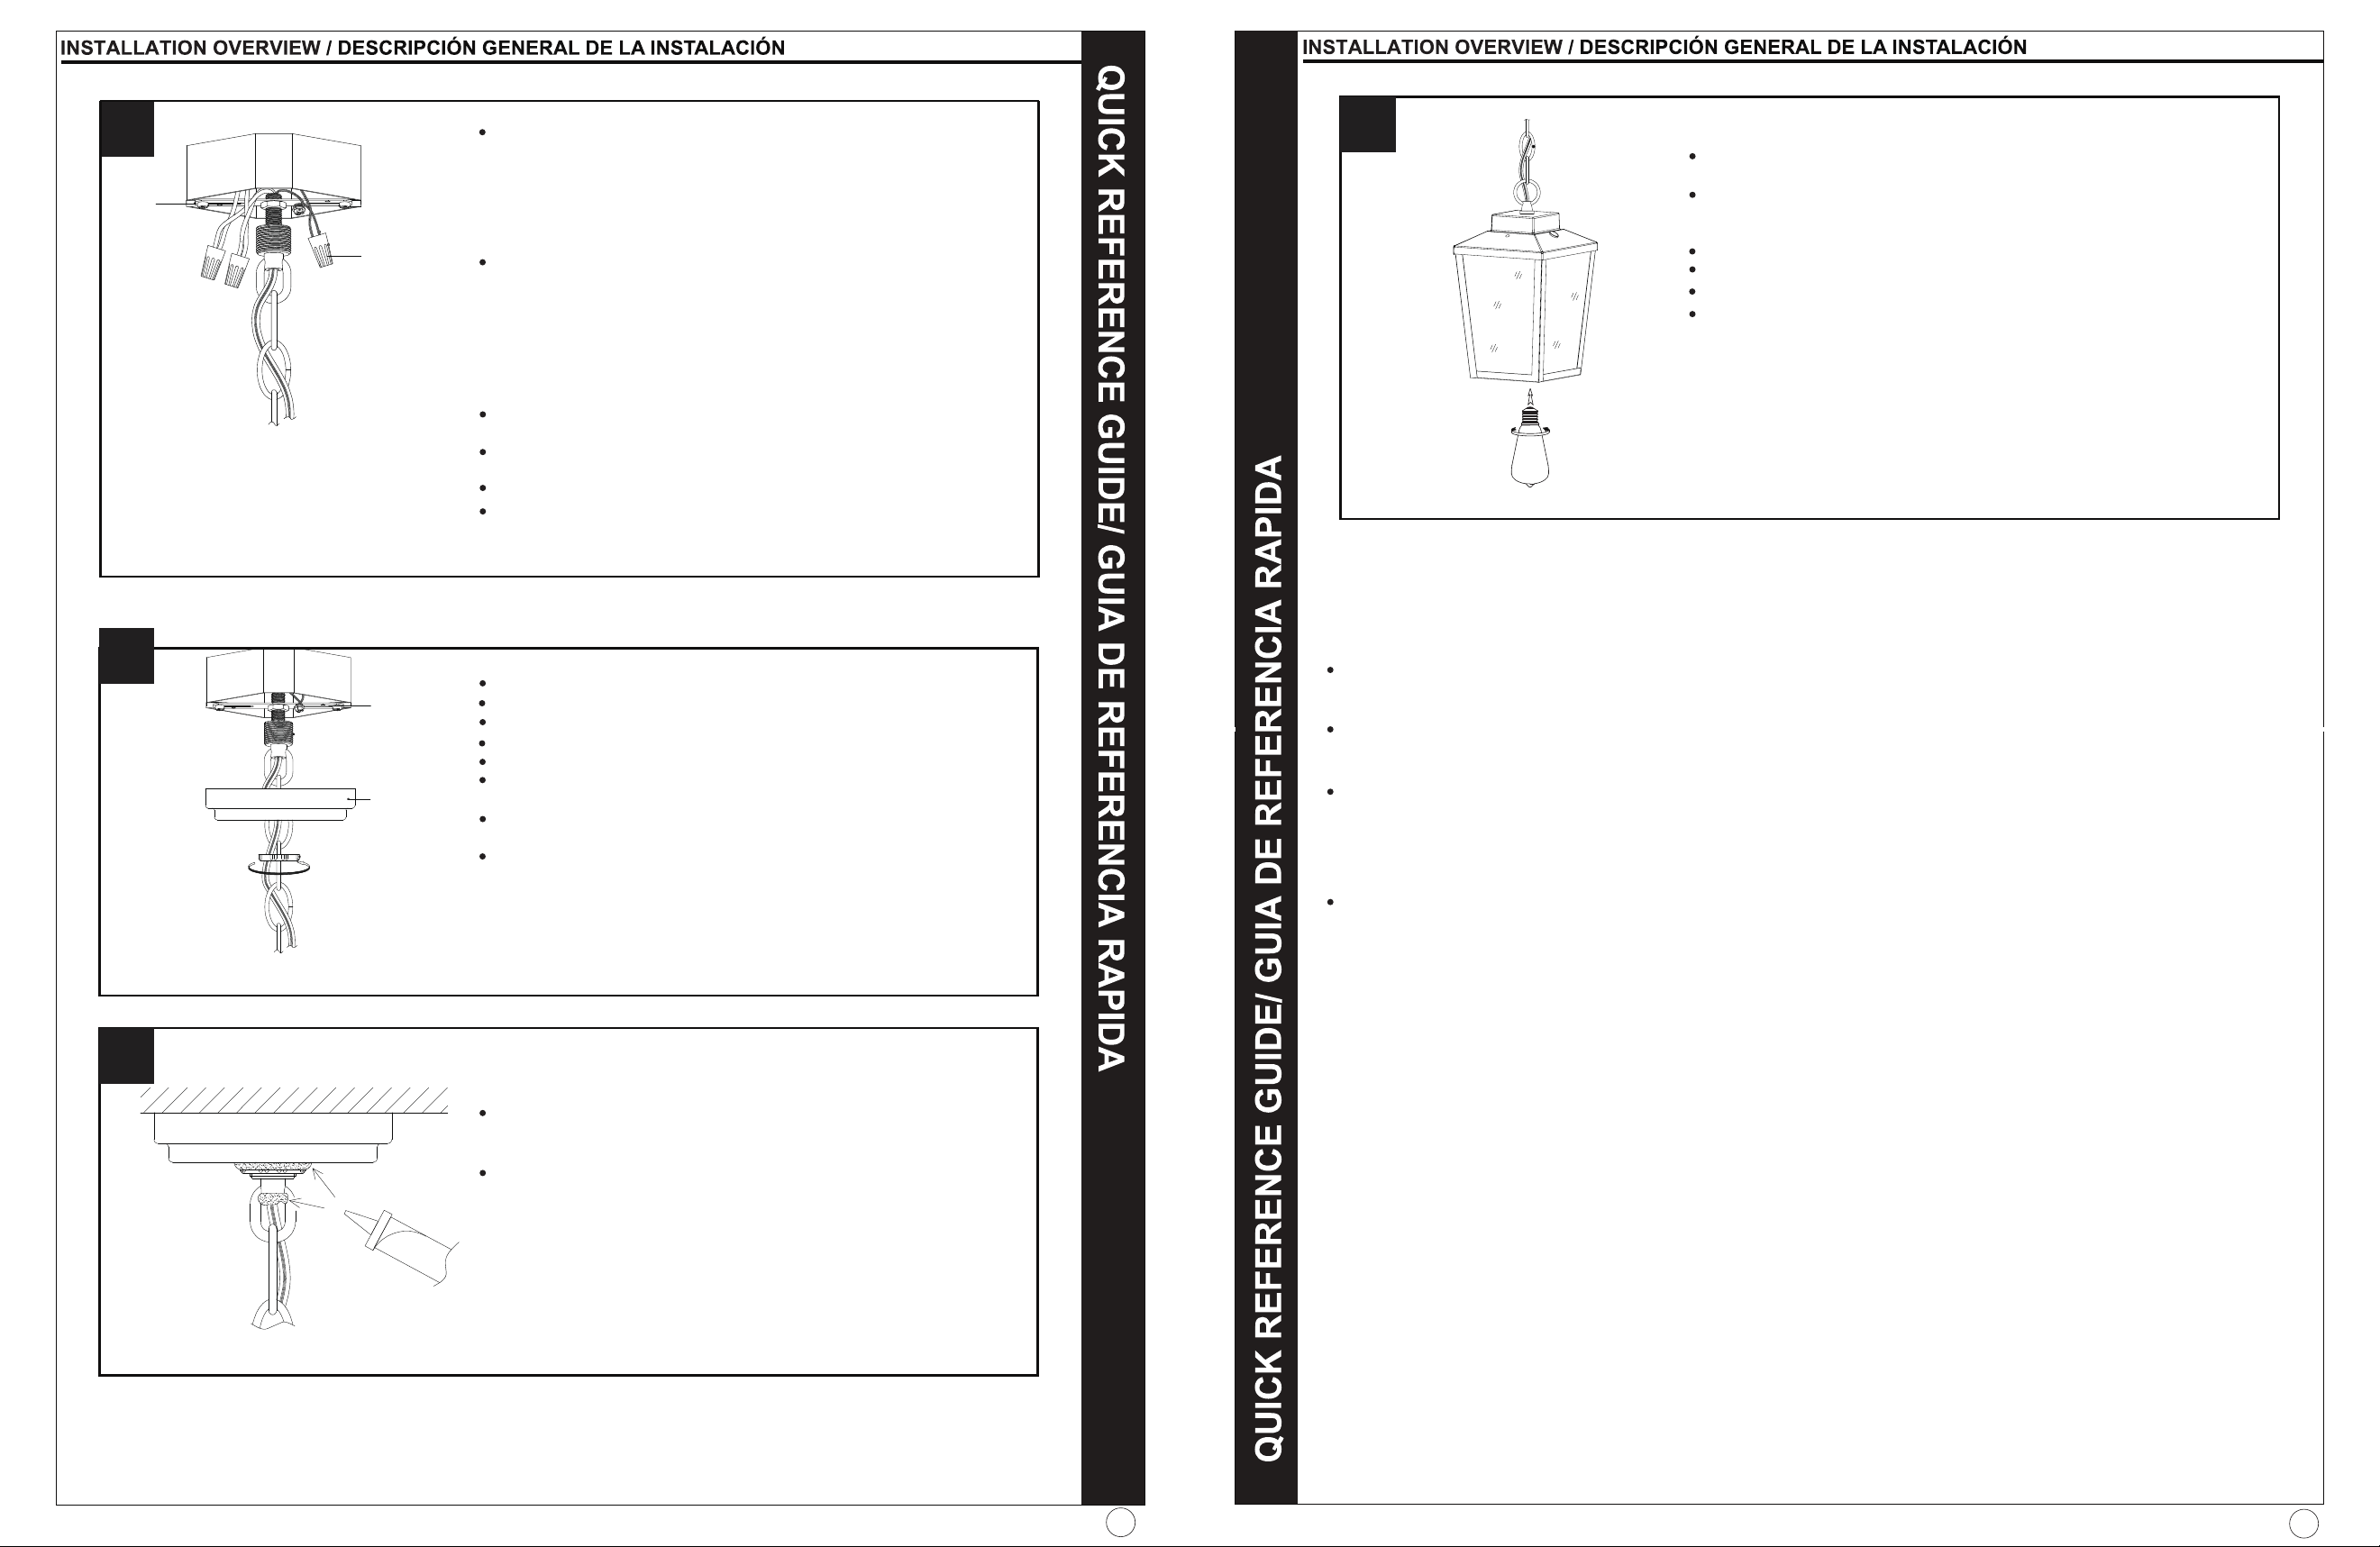
Make sure the power is off.
Pull the supply wires down out of the outlet box.
Attach the mounting bracket assembly (CC) to the existing outlet box
Loosen and remove the ring from the canopy loop.
Slide the canopy (DD) over the canopy loop and chain.
Screw the mounting bracket assembly (CC) through to the
canopy loop and adjust the length with the hex nut.
with the outlet box screws (AA) provided.
A
CC
DD
BB
PROBLEM
PROBLEMA
POSSIBLE CAUSE
CAUSA POSIBLE
CORRECTIVE
ACCIÓN CORRECTIVA
The Light will not
illuminate.
The light does not
automatically turn off
during daylight hours.
Light cycles or flashes on
and off.
The power is off.
Make sure the power supply is on
There is a faulty wire connection.
There is a faulty switch.
Test or replace switch.
Check the wiring, Contact a qualified electrician if you are not
comfortable troubleshooting wiring issues.
The photocell is covered.
Remove the cover from the photocell or clean the photocell.
The photocell is in a dark or shaded area and
does not have adequate sunlight.
Make sure there is adequate sunlight to operate the photocell.
The dusk to dawn feature was bypassed. Follow the operation steps to reset the dusk to dawn feature.
The photocell is detecting extraneous,
intermittent or reflected light nearby.
Reposition the fixture so external light does not affect the
photocell.
Póngase en contacto con un electricista calificado si no se siente
Read all instructions prior to beginning the installation process.
Make sure the power is turned off at the electrical panel box before beginning installation. Turning the power off at the wall switch is not
sufficient to prevent electrical shock.
All electrical connections must be in accordance with local codes and the National Electrical Code. If you are unfamiliar with methods of
installing electrical wiring, secure the services of a qualified licensed electrician.
DO NOT install this fixture unless it is installed using the proper electrical box. This fixture is intended to be mounted to a 4 in. x 4 in. x
2-1/8 in. deep outlet box. This box must be directly supported by the building structure.
Keep lamp away from combustible materials that may burn.
WARNING: This light fixture is suitable for DAMP locations.
CAUTION: Turn off/unplug the light and allow it to cool before replacing the bulb.
This equipment has been tested and found to comply with the limits for a Class B digital device pursuant to Part 15 of the FCC Rules.
These limits are designed to provide reasonable protection against harmful interference in a residential installation.This equipment
generates, uses and can radiate radio frequency energy and, if not installed and used in accordance with the instructions, may cause
harmful interference to radio communications. However, there is no guarantee that interference will not occur in a particular installation.
If this equipment does cause harmful interference to radio or television reception, which can be determined by turning the equipment off
and on, the user is encouraged to try to correct the interference by one or more of the following measures:
Reorient or relocate the receiving antenna.
Increase the separation between the equipment and receiver.
Connect the equipment into an outlet on a circuit different from that to which the receiver is connected.
Consult the dealer or an experienced radio/TV technician for help
Please note that changes or modifications not expressly approved by the party responsible for compliance could void the user’s authority
to operate the equipment.
FCC responsible party: Lowe's Home Centers LLC., 1000 Lowe's Blvd. Mooresville, NC 28117. / Tel: 866-439-9800 .
Lea todas las instrucciones antes de comenzar el proceso de instalación.
Asegúrese de que la energia esté apagada en la caja del panel eléctrico antes de comenzar la instalación. Apagar la alimentación en
el interruptor de pared no es suficiente para evitar descargas eléctricas.
Todas las conexiones eléctricas deben estar de acuerdo con los códigos locales y el Código Eléctrico Nacional. Si no está
familiarizadocon los métodos de instalación de cableado eléctrico, contrate los servicios de un electricista autorizado y calificado.
NO instale este ensamble a menos que se instale con la caja eléctrica correcta. Este ensamb
le está diseñado para el montaje en la
caja de salida de 10,16 cm x 10,16 cm x 5,4 cm de profundidad. Esta caja debe estar fijada directamente a la estructura del edificio.
Mantenga la lámpara alejada de materiales combustibles que puedan prenderse.
ADVERTENCIA: esta lámpara es apta para utilizarse en lugares HÚMEDOS.
PRECAUCIÓN: apague/desenchufe la lámpara y permita que se enfríe antes de reemplazar la bombilla.
Este equipo ha sido probado y cumple con los limites para un dispositivo digital de Clase B de acuerdo con la Parte 15 de las Reglas
de la FCC.
Estos límites están diseñados para brindar una protección razonable contra interferencias dañinas en una instalación residencial. Este
equipo genera, usa y puede irradiar energía de radiofrecuencia y, si no se instala y usa de acuerdo con las instrucciones, puede causar
interferencia dañina a las comunicaciones de radio. Sin embargo, no hay garantía de que no se produzcan interferencias en una
instalación en particular. Si este equipo causa interferencia dañina en la recepción de radio o televisión, lo cual se puede determinar
encendiendo y apagando el equipo, se recomienda al usuario que intente corregir la interferencia mediante una o más de las siguientes
medidas:
Reorientar o reubicar la antena receptora.
Aumente la separación entre el equipo y el receptor.
Conecte el equipo a una toma de corriente en un circuito diferente al que está conectado el receptor.
Consulte con el distribuidor o con un técnico experimentado en radio / TV para obtener ayuda.
Tenga en cuenta que los cambios o modificaciones no aprobados expresamente por la parte responsable del cumplimiento podrían
anular la autoridad del usuario para operar el equipo.
Parte responsable de la FCC: Lowe's Home Centers LLC., 1000 Lowe's Blvd. Mooresville, NC 28117. / Tel: 866-439-9800 .
cómodo al solucionar problemas de cableado.
La lámpara no
ilumina.
La luz no se apaga
automáticamente
durante el día.
La luz se enciende y se apaga
de forma intermitente.
La conexión de los conductores no es la correcta.
El interruptor está defectuoso.
No hay alimentación.
Asegúrese de que haya suministro de electricidad.
Pruebe o reemplace el interruptor.
La fotocélula está cubierta.
La función del crepúsculo al amanecer se omitió.
La fotocélula se encuentra en una zona oscura
o a la sombra y no recibe suficiente luz solar.
La fotocélula detecta luz extraña, intermitente
o reflejada en las proximidades.
Retire la cubierta de la fotocélula o limpie la fotocélula.
Asegúrese de que haya luz solar adecuada para el
funcionamiento de la fotocélula.
Siga los pasos de operación para restablecer la función del
crepúsculo al amanecer.
Vuelva a posicionar la lámpara de forma que la luz exterior no
afecte a la fotocélula.
ALLEN + ROTH and logo design are trademarks or registered
trademarks of LF, LLC. All rights reserved.
ALLEN + ROTH y el diseño del logotipo son marcas comerciales
o marcas registradas de LF. LLC.Todos los derechos reservados.
Questions, problems or missing parts?
Before returning, contact us on:
866-439-9800, 8 a.m. - 8 p.m., EST Monday - Sunday or [email protected].
¿Preguntas, problemas o piezas faltantes?
Antes de volver a la tienda, póngase en contacto al:
866-439-9800, de lunes a domingo, de 8 a.m. a 8 p.m., hora estándar del Este, o al correo electrónico [email protected].
Thank you tor purchasing this ALLEN+ROTH product. We've created these easy-to-tollow instructions to ensure you spend your time enjoying the product
instead of putting it together But, if you need more information than what is provided here, please visit Lowes com, search the item number and refer to the
Guides & Documents tab on the product's page
Gracias por comprar este producto ALLEN+ROTH. Hemos creado estas instrucciones fáciles de seguir para garantizar que pase su tiempo disfrutando el
producto en lugar de armándolo. No obstante, si necesita más información que la entregada aquí, visite Lowes.com, busque el número de artículo y
consulte la pestaña "Guides & Documents" (Guías y documentos) en la página del producto.
CC
DD
CC
AA
SG24239
1
FAROL EXTERIOR COLGANTE
3
4
2
Afloje y retire el anillo del enganche de la cubierta.
Deslice la cubierta (DD) sobre el enganche y la cadena de la cubierta.
Enrosque el ensamble del soporte de montaje (CC) a través del enganche
de la cadena y ajuste la longitud con la tuerca hexagonal.
Asegúrese de desconectar la alimentación.
Jale los conductores del suministro hacia abajo de la caja de salida.
Fije el ensamble del soporte de montaje (CC) a una caja de salida existente
con los tornillos para la caja de salida (AA) provistos.
3
4
5
Install a 60W MAX E26 based light bulb (sold separately)
in the direction of the arrow (clockwise).
Instale una bombilla de base E26 de 60 W como máximo
(se vende por separado) en la dirección de la flecha
(en dirección de las manecillas del reloj).
Turn on the power at fuse or circuit box.
Turn on the light switch.
6
To prevent water or moisture from entering the fixture between the canopy
and mounting surface, waterproof silicon, caulk or gel should be applied to
Raise the canopy (DD) up to the outlet box.
Secure the canopy (DD) to the canopy loop by using the ring provided.
Push all excess wire and wire connections back into the outlet box.
Adjust the length of the mounting bracket assembly (CC) studs and hex
Attach the ground wire from the outlet box to the ground screw
on the mounting bracket (CC), which is green and marked "GND".
Connect the negative wires (raised ribs without writing) from the
fixture to the negative wires from the supply circuit, the positive
wires (smooth with writing) from the fixture to the positive wires
from the supply circuit, and the ground wire (bare) from the fixture
to the groud wire from the supply circuit using the wire connectors (BB).
Wrap electrical tape (not included) around the wire connectors (BB),
and ensure they are secure.
Push all excess wire and wire connections back into the outlet box.
nuts if necessary.
seal any gaps around the junction point.
BB
CC
DD
CC
Caution/Precaucion
When installing during the daylight hours, cover the photocell with a piece of electrical tape. Upon completion of the install, turn the light
switch on and the light should illuminate after a slight delay. You can test the dusk to dawn feature by using the flashlight to trigger the
sensor to shut off and cover the photocell to turn it on.
Operating the light fixture with or without the dusk to dawn mode:
This fixture contains a photocell that can turn the light on at dusk and off at dawn.
To disable the dusk-to-dawn photocell, cover the dusk-to-dawn photocell with a piece of electrical tape. This will prevent the dusk-to-dawn
photocell from controlling the ON/OFF function and will allow the ON/OFF function to be controlled by a wall switch.To re-activate the
dusk-to-dawn photocell, remove the electrical tape from the photocell and make sure it gets direct sunlight. Eaves, overhangs and
obstructions may affect when the light fixture turns on and off.
Si la instalación se realiza durante el día, cubra la fotocélula con un trozo de cinta aislante. Una vez finalizada la instalación, encienda el
interruptor de la luz y esta debería iluminarse tras un ligero retardo. Puede probar la función del crepúsculo al amanecer mediante el uso
de la linterna para activar el sensor con el fin de apagar la lámpara y cubrir la fotocélula para encenderla.
Funcionamiento de la lámpara con o sin el modo del crepúsculo al amanecer:
Esta lámpara contiene una fotocélula que puede encender la luz al anochecer y apagarla al amanecer.Para desactivar la fotocélula del
crepúsculo al amanecer, cúbrala con un trozo de cinta aislante.Esto evitará que la fotocélula del crep
úsculo al amanecer
controle la función de encendido apagado, y le permitirá al interruptor de pared controlar esta función. Para volver a activar la
fotocélula del crepúsculo al amanecer, retire la cinta aislante de la fotocélula y asegúrese de que recibe luz solar directa. Los aleros, los
salientes y las obstrucciones pueden afectar al momento en que la lámpara se enciende y se apaga.
5
6
Conecte el conductor de tierra de la caja de salida al tornillo de tierra en
el soporte de montaje (CC), que es verde y está marcado como "GND".
Conecte los conductores negativos (nervaduras elevadas sin escritura) de
la lámpara a los conductores negativos del circuito de alimentación, los
conductores positivos (lisos con escritura) de la lámpara a los conductores
positivos del circuito de alimentación y el conductor de tierra (desnudo) de
la lámpara al conductor de tierra del circuito de suministro usando los
conectores de alambres (BB).
Cubra con cinta aislante (no se incluye) los conectores de alambres (BB) y
asegúrese de que estén seguros.
Oculte todo el cable y las conexiones del cableado sobrantes en la caja de
salida.
Eleve la cubierta (DD) arriba de la caja de salida.
Asegure la cubierta (DD) al enganche de la cubierta con el anillo (I) provisto.
Oculte todo el cable y las conexiones del cableado sobrantes en la caja de
salida.
Si es necesario, ajuste la longitud de los pernos y las tuercas hexagonales
del conjunto del soporte de montaje (CC).
Para evitar que el agua o la humedad ingresen al ensamble entre la base
y la superficie de montaje, se debe aplicar silicona impermeable, masilla
de calafateo o gel a fin de sellar cualquier espacio alrededor del punto de
unión.
Conecte la alimentación en la caja de fusibles o de circuito.
Encienda el interruptor de luz.