
CAT-33000
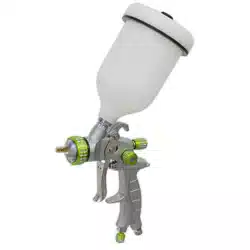
GRAVITY FEED LVLP SPRAY GUN
OWNER'S MANUAL
WWW.CALIFORNIAAIRTOOLS.COM Customer Support 1-866-409-4581
LVLP GUN FEATURES:
Reduced air consumption - less strain on compressor.
Increased transfer efficiency: >68% reduction in paint
use.
Stainless steel fluid nozzle and needle allow for use of
waterborne coatings.
Less paint waste as compared to HVLP guns
LVLP GUN SPECIFICATIONS:
Fluid orifice: 1.3mm
Max working air pressure (at the
gun): 22psi
Working air pressure (at the air cap):
9.6 psi
Air consumption: 4.3 cfm
Air connection: 1/4" NPS
CALIFORNIA AIR TOOLS CUSTOMER
SERVICE:
Phone: 1-866-409-4581 Ext. 1
Online: WWW.CALIFORNIAAIRTOOLS.COM
Do not return your item for service or parts to the
store/dealer where the item was purchased.
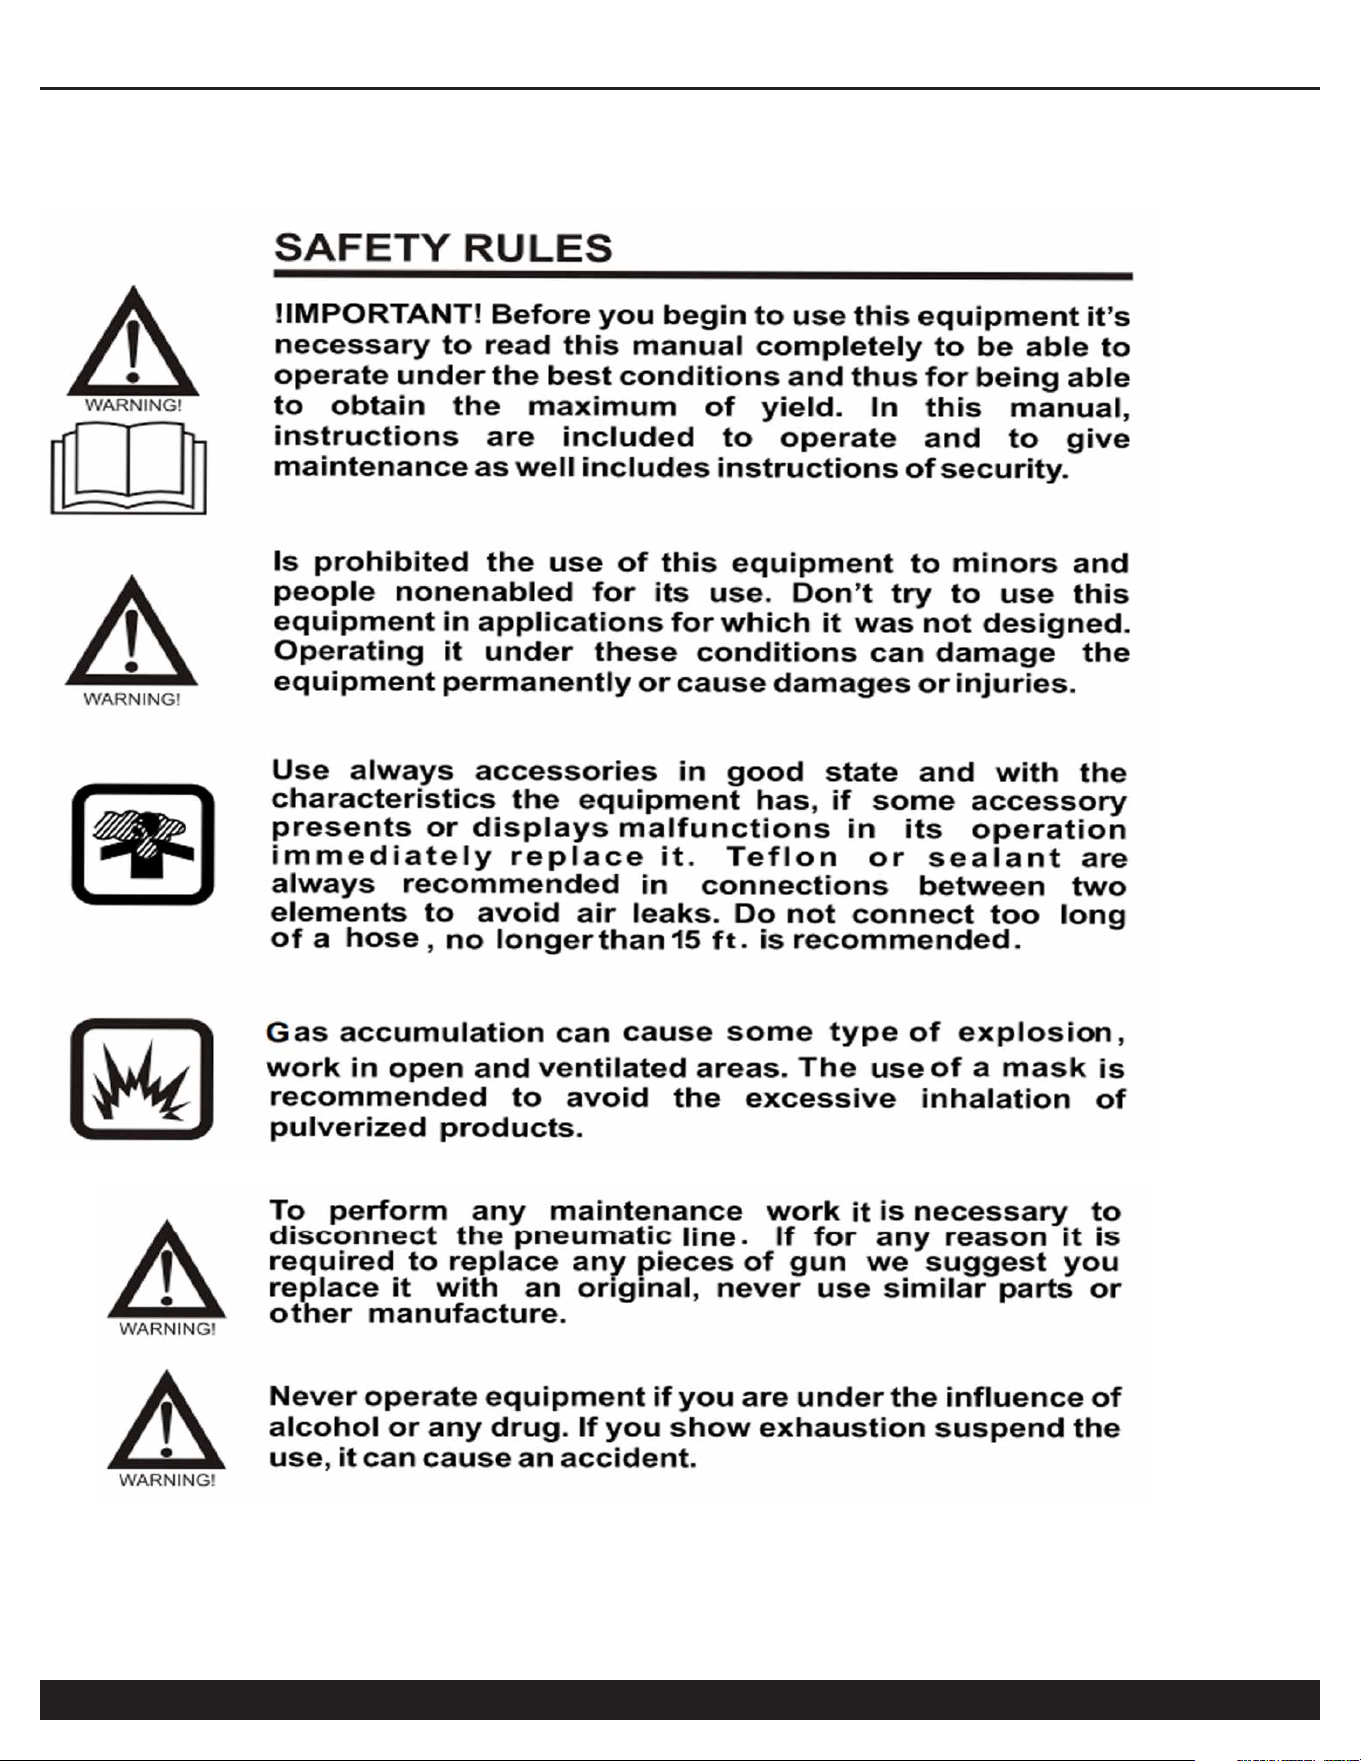
IMPORTANT INSTRUCTIONS
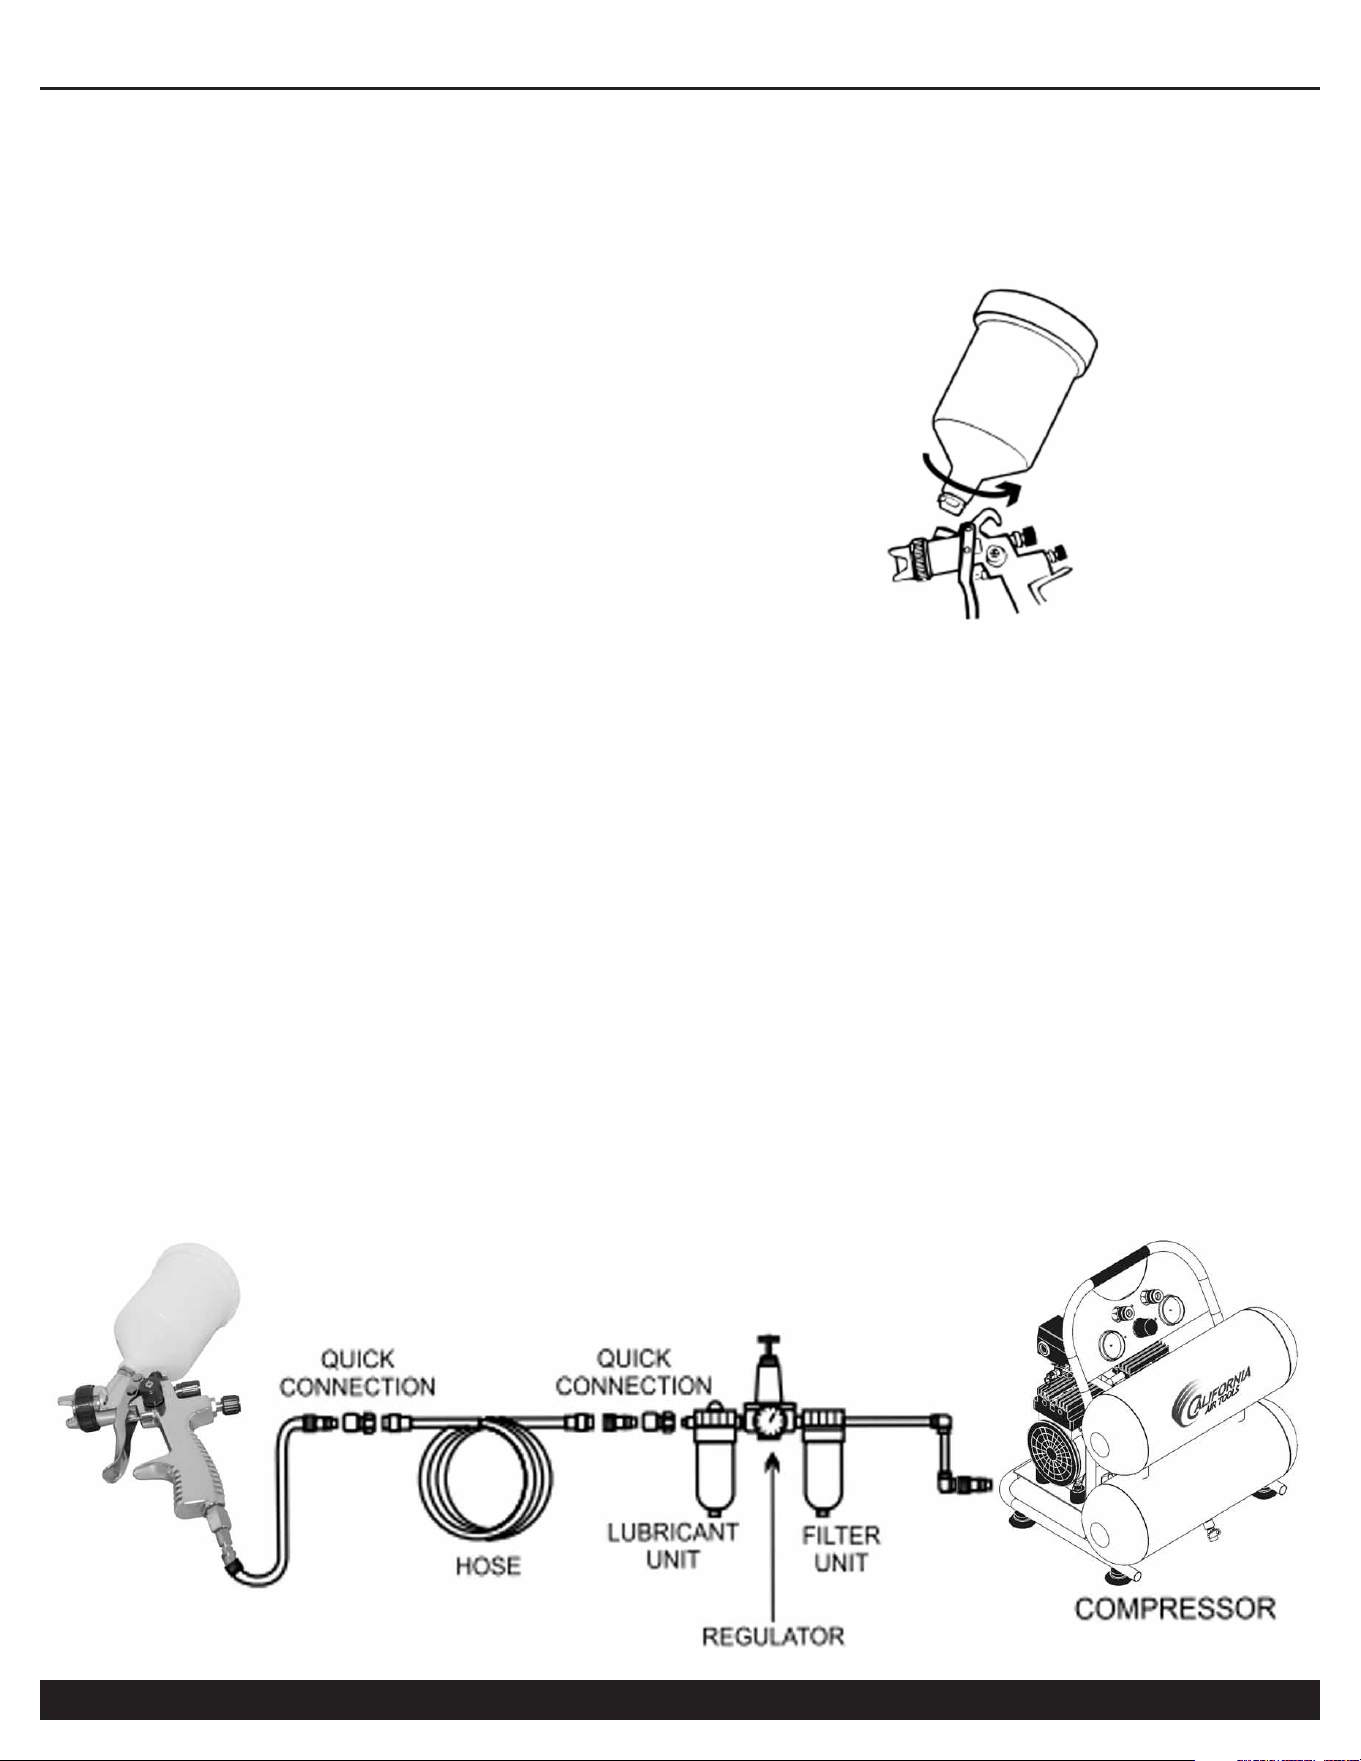
Before you start work with a spray gun, be
sure to have clean air and no moisture
particles of water/oil in order to achieve
satisfactory results. Addition of a water
filter or inline dessicant filter is suggested.
Attached Cup by gently screwing on clockwise hand tight.
Hose connection is 1/4”; a hose of the same size
will need to be attached to the Air Inlet Joint.
1) Initially perform the following actions:
a. Use the spanner wrench to tighten the fluid
nozzle.
b. Install and tighten the paint cup.
c. Check air lines and fittings to ensure that they
are clean and damage free before connecting to
gun.
d. Flush gun thoroughly with cleaning fluid
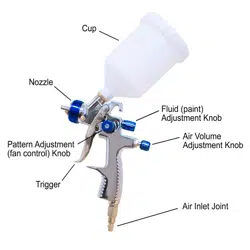
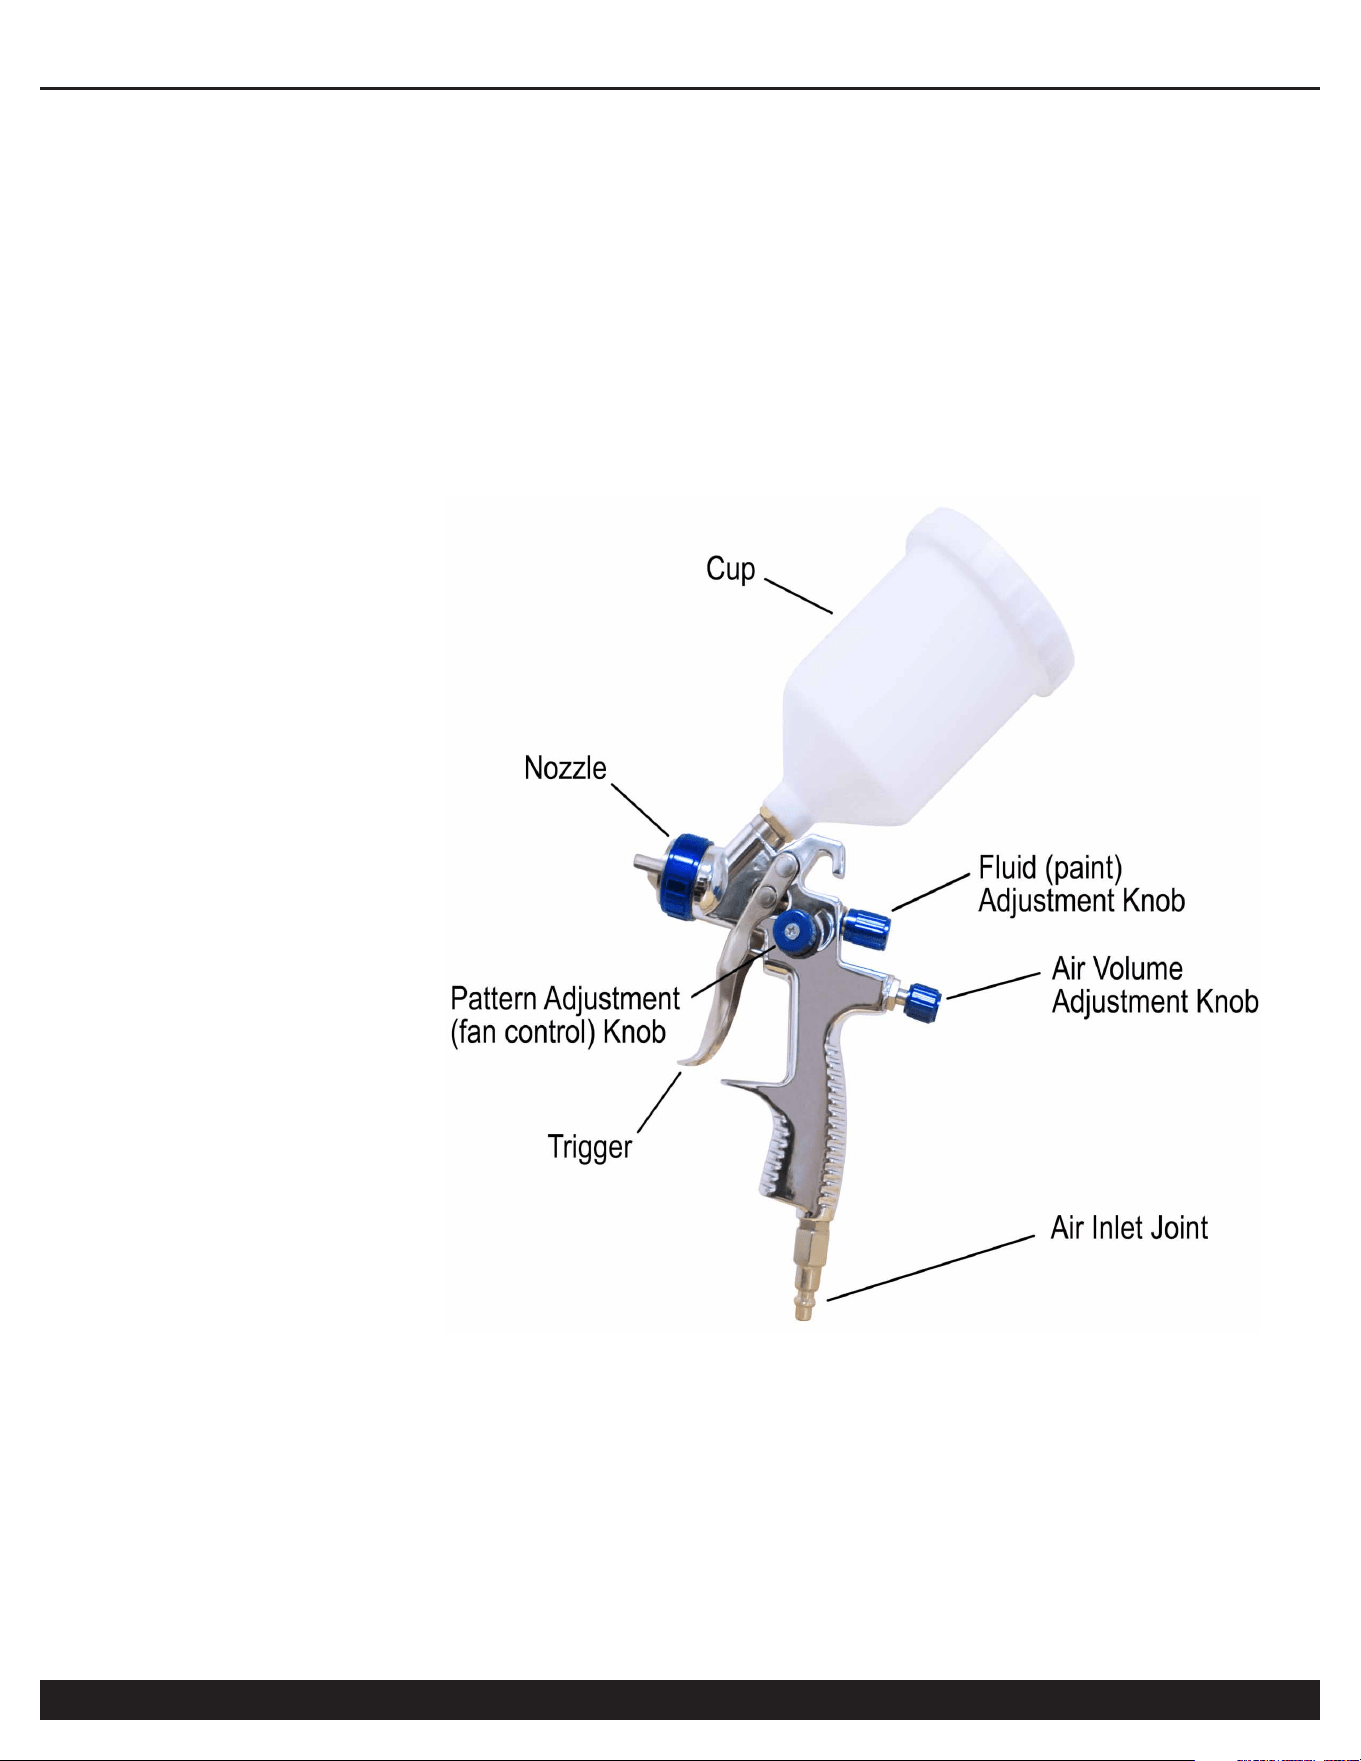
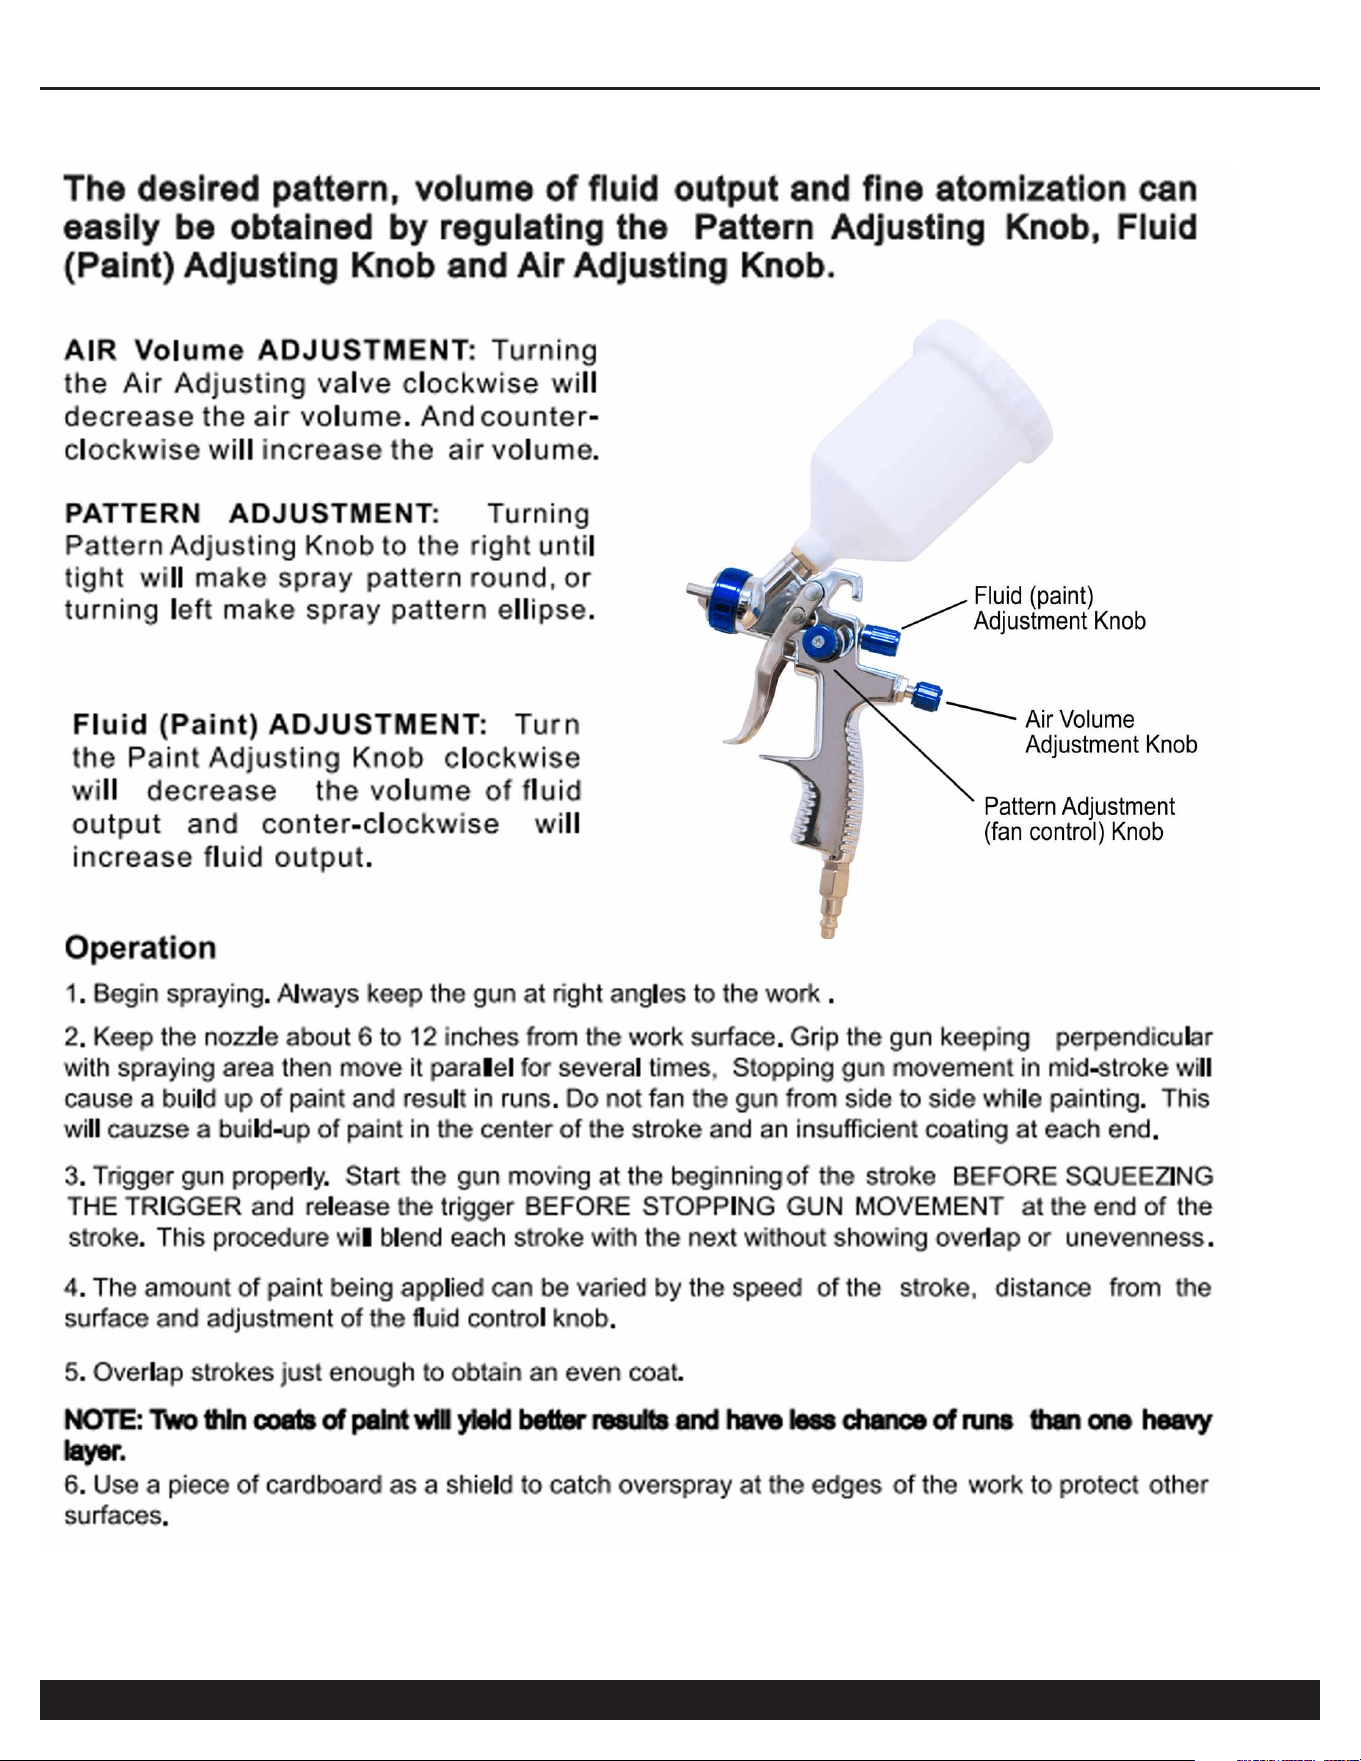
2) Pattern Adjustment
Use the pattern (fan) adjustment knob on the left
side of the gun to obtain the desired fan pattern.
3) Air Volume Adjustment
Use the air volume adjustment knob to obtain the
desired fluid flow volume.
4) Fluid (paint) adjustment
Use the fluid control knob to obtain the desired
fluid flow volume.
ASSEMBLY
ADJUSTMENT
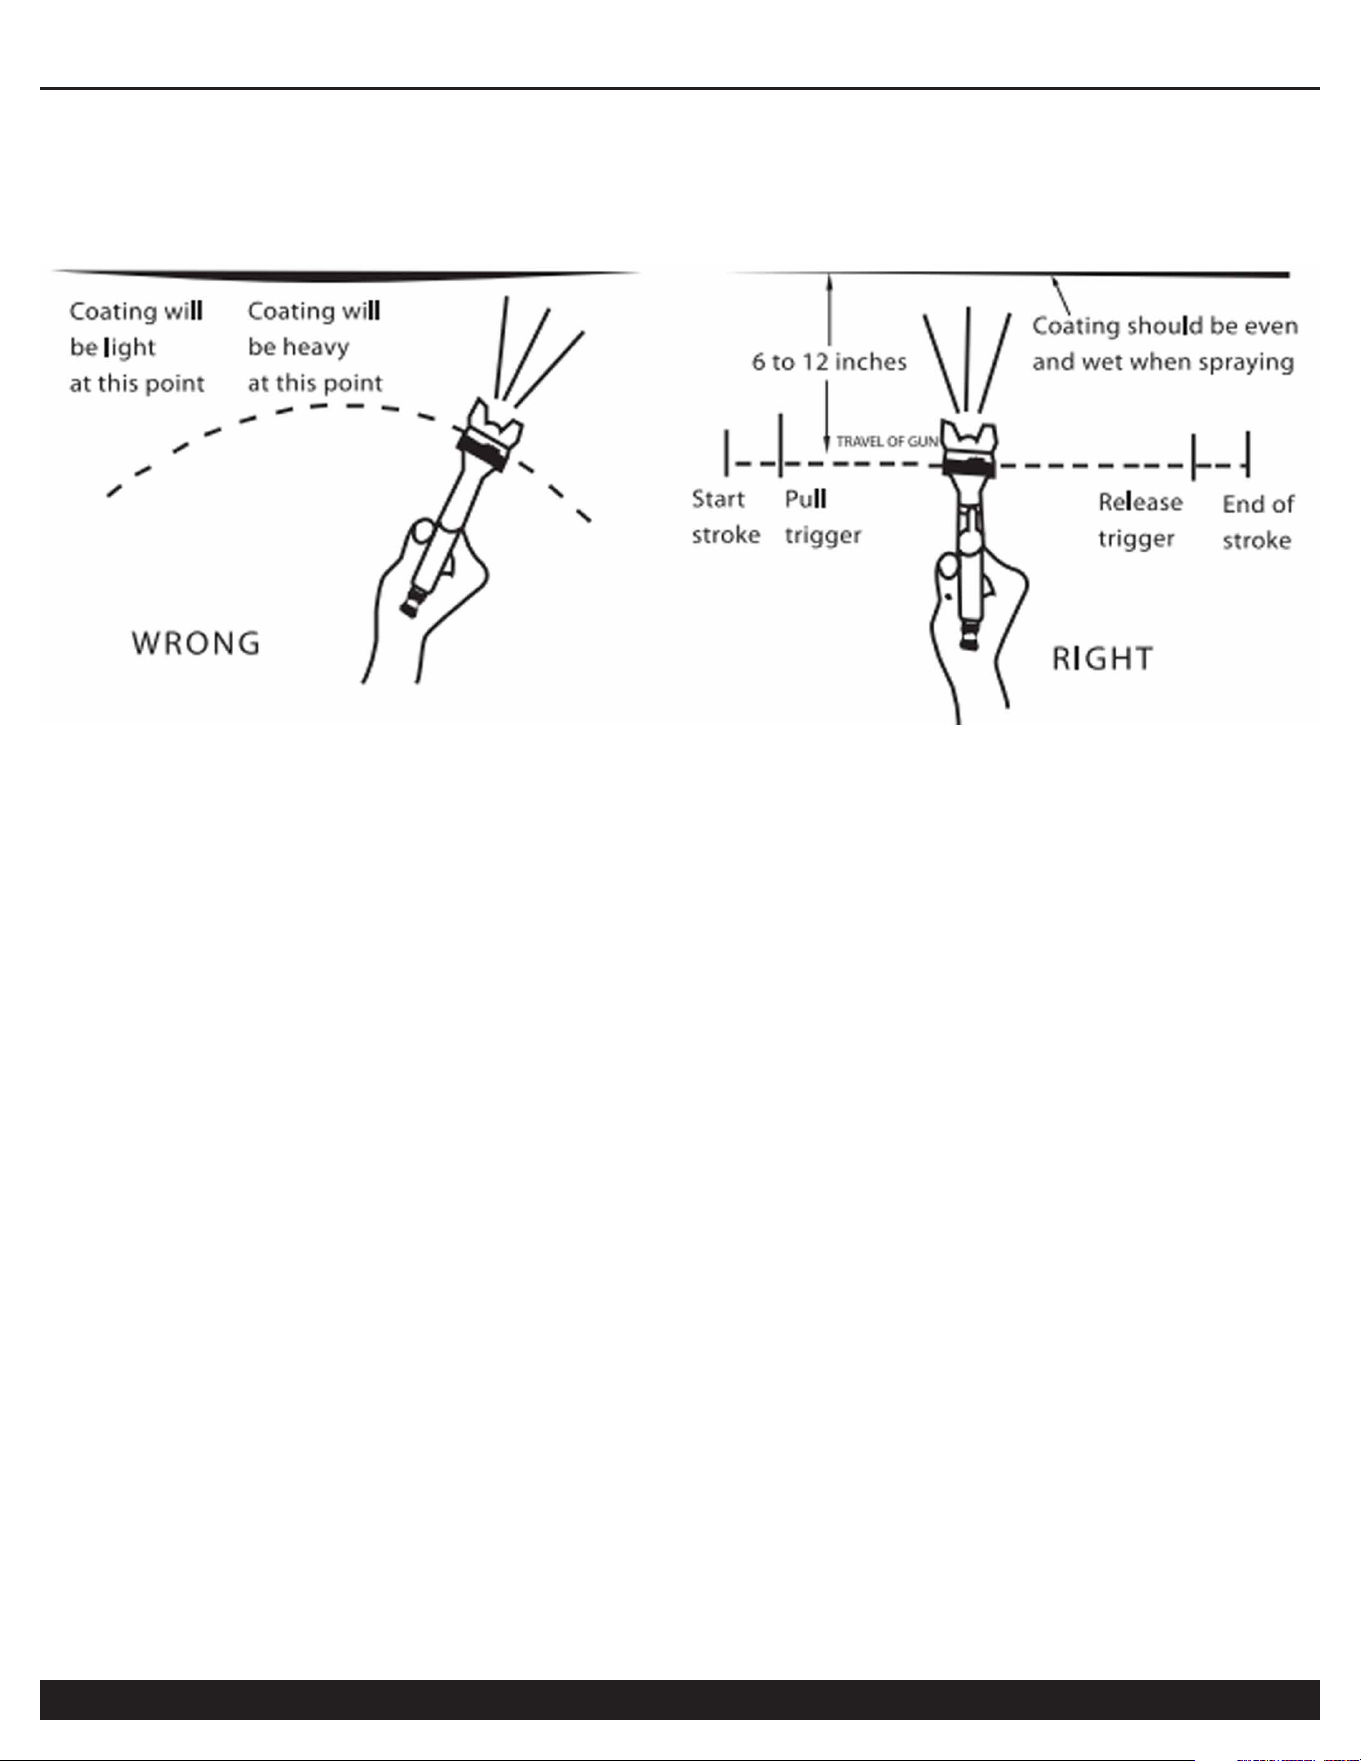
TIP#1:
Always keep gun at right angles of work; always move gun first, then trigger.
OPERATION
TIP #2
Accurately adjusting your spray gun inlet pressure using a pressure regulator at the
spray gun
1)"open" the air adjustment valve on the gun.
2) With your gun trigger depressed half way (air only) adjust your air inlet pressure
regulator to the desired inlet pressure to obtain the desired air cap pressure based on the
table to the right.
3) Spray a test pass on a piece of masking paper, cardboard, etc. to check for proper
atomization and desired spray ability.
4) Fine tune using the air adjustment valve on on the gun.
MAINTENANCE
Changing of air cap: To ensure proper function and operation always change the fluid
nozzle and needle as a matched set.
Changing of needle packing: The needle is sealed using a Teflon packing. To change the
packing remove the fluid needle, fluid nozzle and the packing nut.
Cleaning and gun care
a) After using immediately flush with solvent to remove all coatings.
b) Clean the air cap with the brush provided.

MAINTENANCE
TROUBLESHOOTING
c) Lightly lube all moving parts with a non-petroleum based lubricant.
Note: never use improper cleaning instruments as they may damage the part and
adversely affect gun performance. Never immerse the gun in solvent.
Problem: Gun is leaking from fluid nozzle.
Causes: Fluid nozzle is loose, foreign particles or dried paint is keeping needle from
seating properly.
Remedy: Tighten nozzle of remove and clean nozzle.
Problem: Gun is leaking from needle sealing area.
Causes: Teflon packing is damaged of missing.
Remedy: Replace Teflon packing
Problem: Gun sprays ‘sickle shaped’ patterns to the left or right )(
Causes: Air holes clogged on air cap of air cap is damaged.
Remedy: Clean air holes of replace air cap.
Problem: Tear drop or oval shaped pattern appears
Causes: Air cap clogged at fluid needle orifice.
Remedy: Remove and clean air cap and fluid nozzle.
Problem: Paint sputters from gun.
Causes: Insufficient material in cup, material not filtered, fluid nozzle loose, needle Teflon
damaged, needle and/or nozzle is dirty.
Remedy: Refill cup. filer material, tighten loose parts, replace Teflon packing, clean
needle and nozzle.
Problem: Incorrect atomization of spray pattern.
Causes: Inlet air pressure to low or material too thick; pressure too high or material too
thin.
Remedy: Adjust air pressure and/or product viscosity.
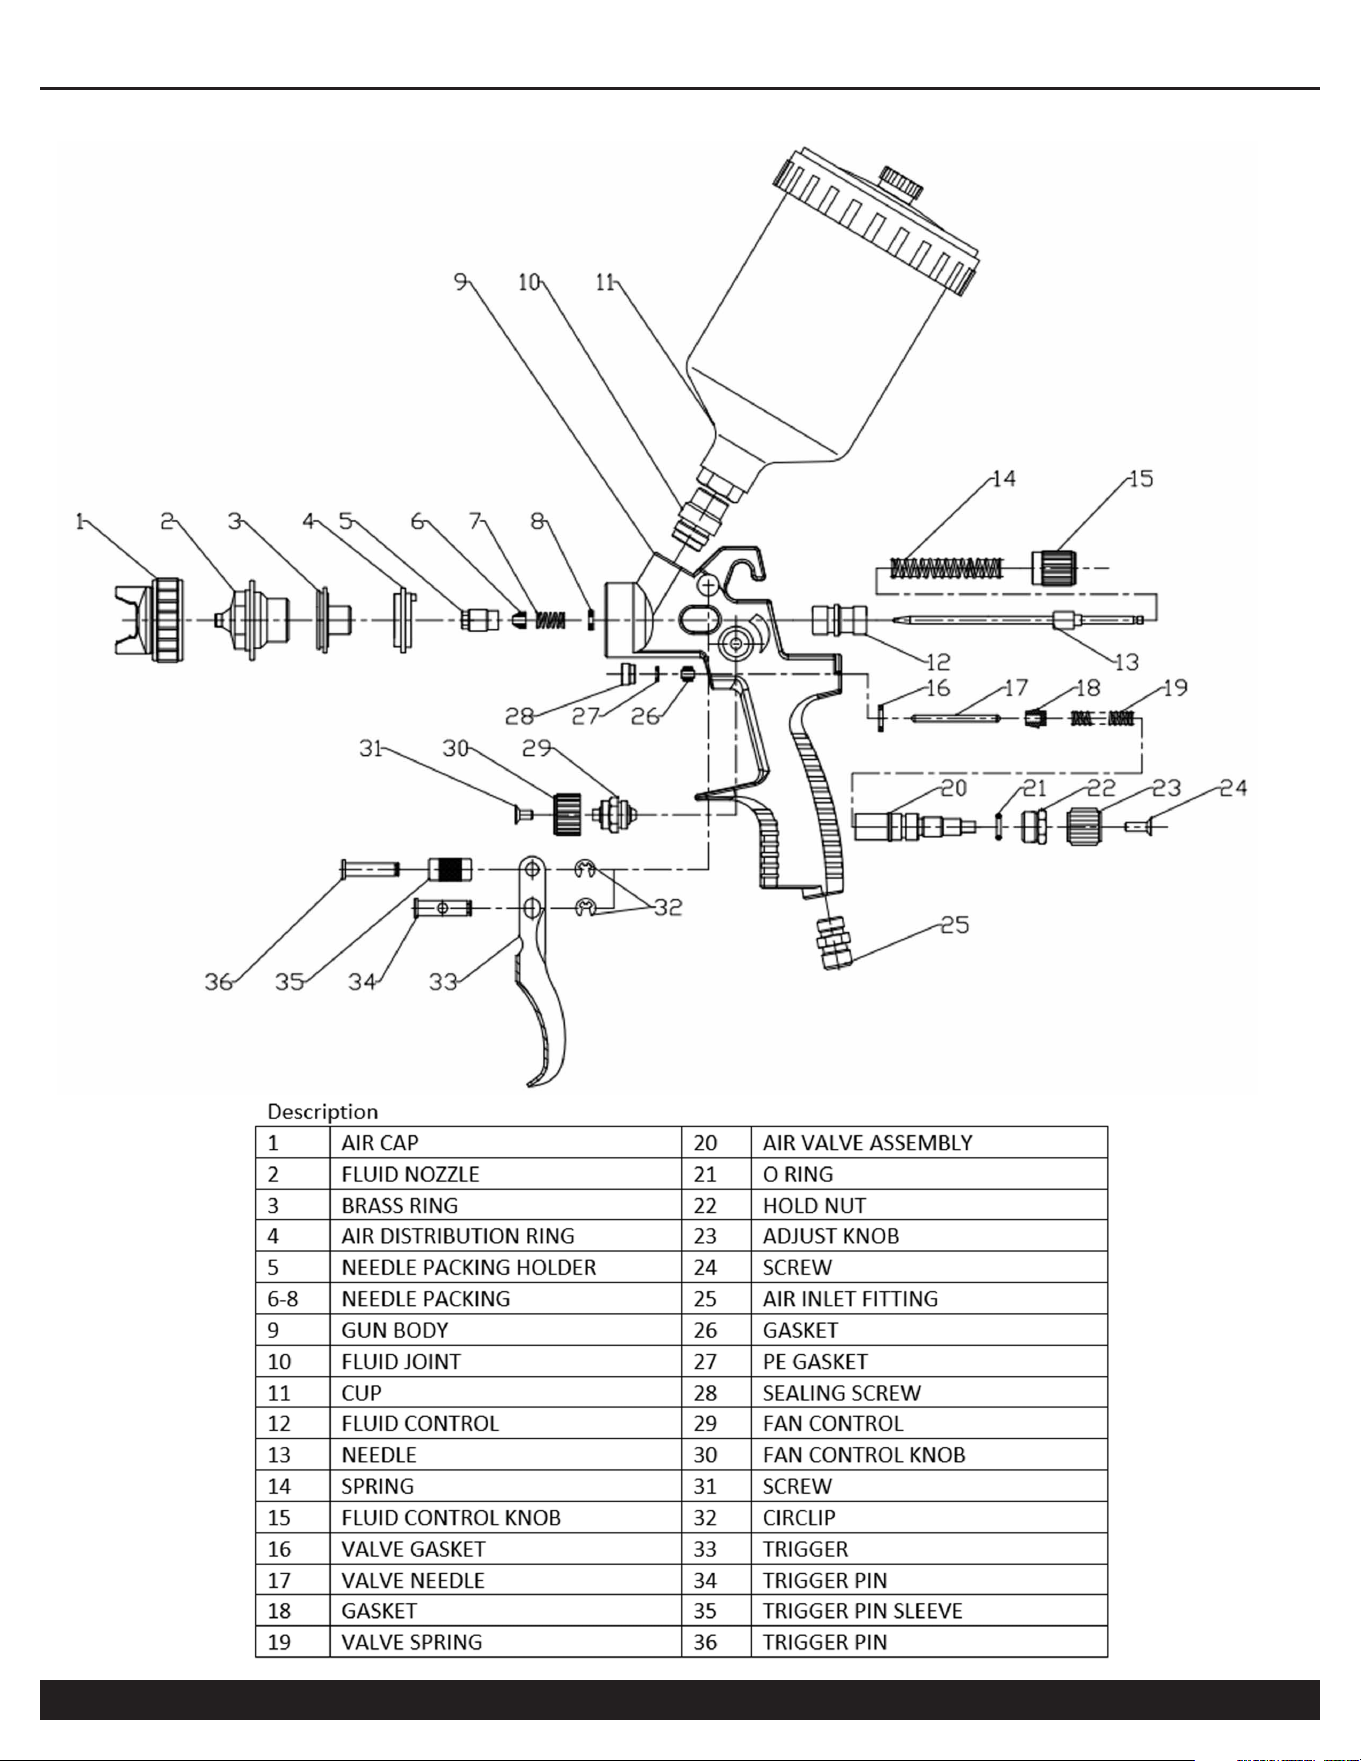
PARTS LIST
NOTE: Only Needle Kits are available for
purchase. All other parts shown are for
reference/maintenance only!

CALIFORNIA AIR TOOLS INC. LIMITED WARRANTY
This warranty is limited to products distributed by:
California Air Tools, Inc.
8560 Siempre Viva Road
San Diego, CA 92154
1-866-409-4581 Ext. 1
Limited Warranty
California Air Tools Inc. will repair or replace, free of charge, to the original retail customer who purchased a California Air Tools, Inc.
product from an authorized dealer, distributor or distributor’s dealer in North America.
This warranty does not transfer to subsequent owners.
California Air Tools Inc. will repair or replace, at its option, any parts that are proven by an authorized service center to be defective in
material or workmanship under normal use during the applicable warranty time period as stated below. This limited warranty covers the
cost of the replacement parts and labor for all defects when installed by an authorized service center.
Transportation charges are the responsibility of the customer. Any part replaced under warranty becomes the property of California Air
Tools Inc.
All parts replaced under warranty will be considered as part of original product, and any warranty on those parts will expire coincident with
the original product warranty.
Limited Warranty Periods
Non-commercial / Non-rental (personal use by a retail customer): 1 year parts and labor
The limited warranty period begins on the date of retail purchase by the original purchaser.
The orignal receipt or invoice is required for warranty claims.
Disclaimers, Limitations of Remedies & Exclusions
This warranty gives you specific legal rights, and you may also have other rights which may vary from state to state.
Disclaimer of Other Warranties
To the fullest extent permitted by applicable law, this limited warranty is exclusive and expressly in lieu of any and all other warranties,
including, without limitation, any implied warranties of merchantability or fitness for a particular purpose or any other implied warranties
that may arise from the course of dealing or usage of the trade. California Air Tools Inc. hereby declaims and excludes all other
warranties. To the extent that California Air Tools Inc. products are consumer products under applicable federal and state law with respect
to any customer, the duration of any implied warranties (including but not limited to implied warranties of merchantability or fitness for a
particular purpose) are limited to the shortest duration permitted by applicable law or the Limited Warranty period provided herein,
whichever is longer.
Limitations of Remedies
California Air Tools Inc. shall not be liable to customer, or anyone claiming under customer, for any other obligations or liabilities, including
but not limited to, obligations or liabilities airing out of breach of contract or warranty, negligence or other tort or any theory of strict liability,
with respect to the product or California Air Tools Inc. acts or omissions or otherwise. To the fullest extent permitted by applicable law,
California Air Tools Inc. shall not in any event be liable for incidental, compensatory, punitive, consequential, indirect, special or other
damages, including but not limited to loss of use, loss of income, loss of time, loss of sales, injury to personal property, or liability
customer incurs with respect to any other person, or any other type or form of consequential damage or economic loss.