TechnicalSupport and E-Warranty Certificate www.vevor.com/support
CABINET ACCESS DOOR
We continue to be committed to provide you tools with competitive price.
"Save Half", "Half Price" or any other similar expressions used by us only represents an
estimate of savings you might benefit from buying certain tools with us compared to the major
top brands and doses not necessarily mean to cover all categories of tools offered by us. You
are kindly reminded to verify carefully when you are placing an order with us if you are
actually saving half in comparison with the top major brands.

1
Tip: The picture is for reference only, please refer to the
corresponding model in the manual for details!
Have product questions? Need technical support? Please feel free to
contact us:
Technical Support and E-Warranty Certificate
www.vevor.com/support
NEED HELP? CONTACT US!
This is the original instruction, please read all manual instructions
carefully before operating. VEVOR reserves a clear interpretation of our
user manual. The appearance of the product shall be subject to the
product you received. Please forgive us that we won't inform you again if
there are any technology or software updates on our product.
CABINET ACCESS DOOR

2
Warning-To reduce the risk of injury, user must read
instructions manual carefully.
SAFETY INSTRUCTIONS
Thank you for using this product. Please read all of the instructions before
using it.The information will help you achieve the best possible results.
WARNING:
Please read this manual carefully before using the product. Failure to do so
may result in serious injury.
ASSEMBLY PRECAUTIONS
1. Assemble needs to follow these instructions. Incorrect assembly can be
a hazard.
2. Wear safety goggles and heavy-duty work gloves during assembly.
3. Do not assemble when tired or under the influence of alcohol, drugs or
medication.
4. Weight capacity and other product capabilities only apply to a wholly and
correctly assembled product.
5. Keep the assembly area clean and well-lit.
6. Keep bystanders out of the area during assembly.
7. The weight of plate is heavy; pay attention to the installation to avoid hurting it,
and if necessary, find someone to assist with the installation.
8.Assembly should be done by adults only.
9. WARNING: This product contains small parts. If swallowed, it will pose a
choking hazard. Keep these small parts away from children when
assembling!
10.Before using the appliance for the first time, peel off any promotional
materials and packaging materials.

3
ATTENTION!
WARNING! Keep children and pets away.
WARNING!Remove all packaging materials and keep them
for future use.Packaging materials are not a toy.
WARNING!Don't let children play with the packaging materials. If they
swallow the packaging materials, they will suffocate!
SAVE THESE INSTRUCTIONS
USE PRECAUTIONS
WARNING:TO PREVENT SERIOUS INJURY AND DEATH FROM
TIPPING:
1.To avoid accidents or sharp edges injuries please assemble and use
carefully.
2. Use as intended only. Do not sit or stand on the product.
3. Inspect before every use. Do not use it if parts are loose or damaged.
4.If any parts are missing, broken, damaged, or worn, stop using this item
until repairs are made and replacement parts are installed.
5.Check the installation size of the corresponding model of the access hole,
and select the access door consistent with or close to the installation size
for Installation.
4
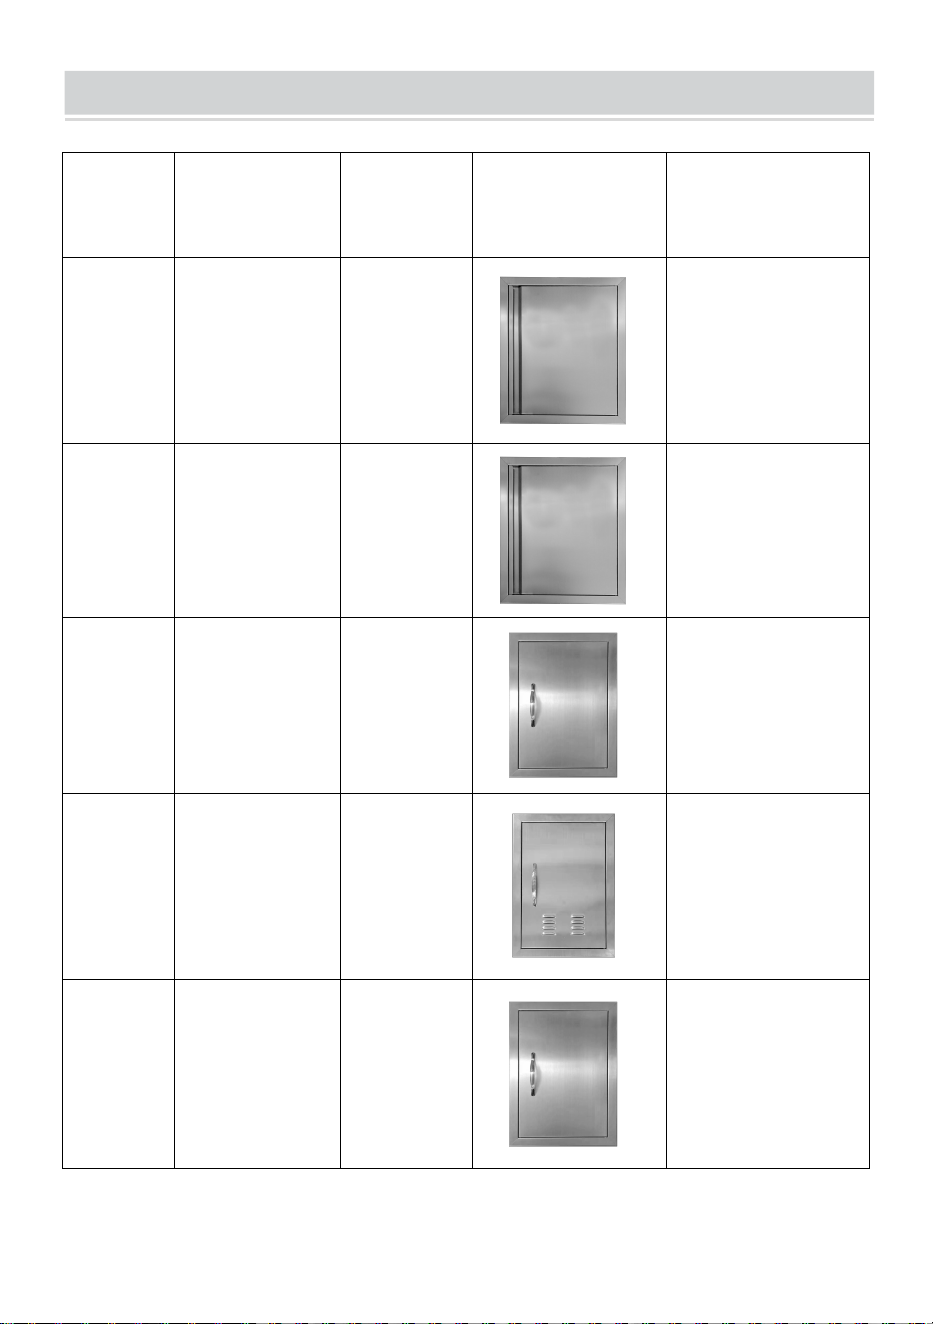
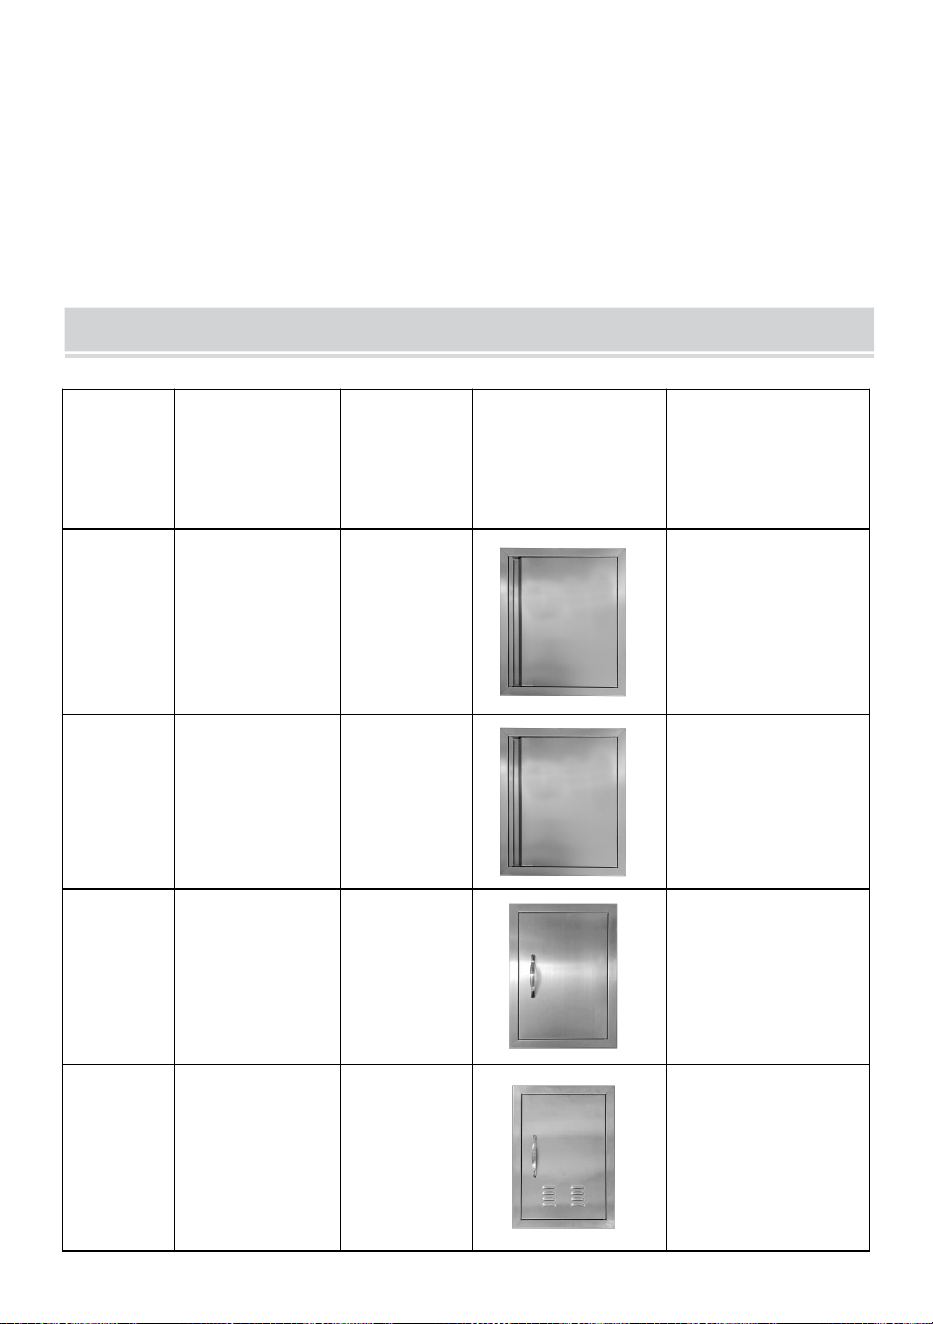
PRODUCT PARAMETERS
Model
ProductSize/
mm
Installation
opening
size/mm
Illustration
Accessory
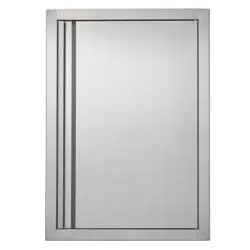
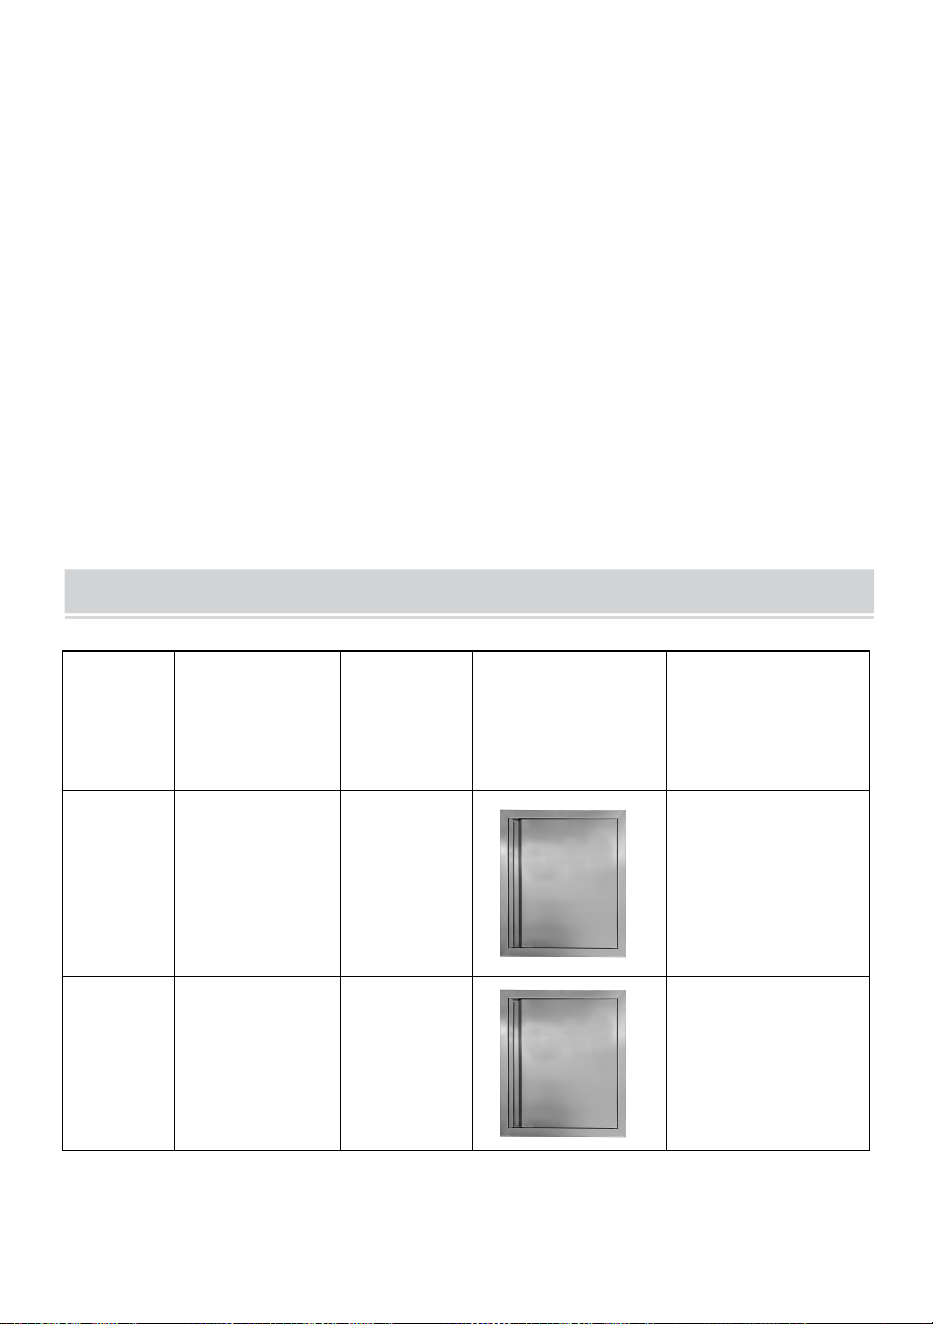
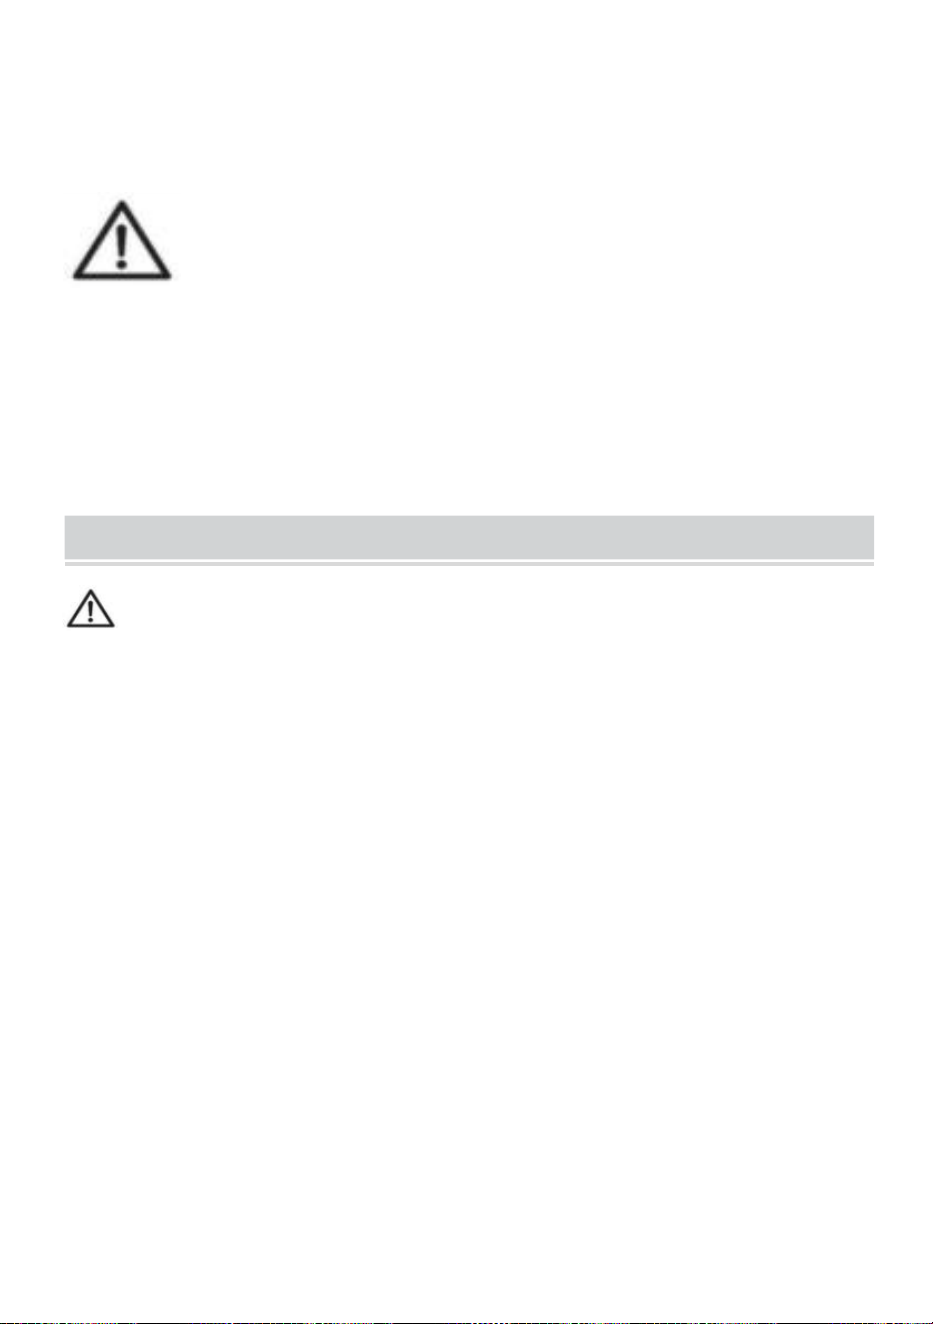
B012D
432x610x46
347x525
1 x Cleaning Pad
B013D
457x533x46
372x448
1 x Cleaning Pad
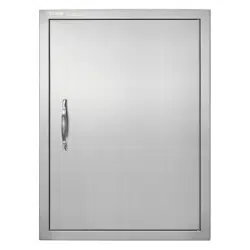
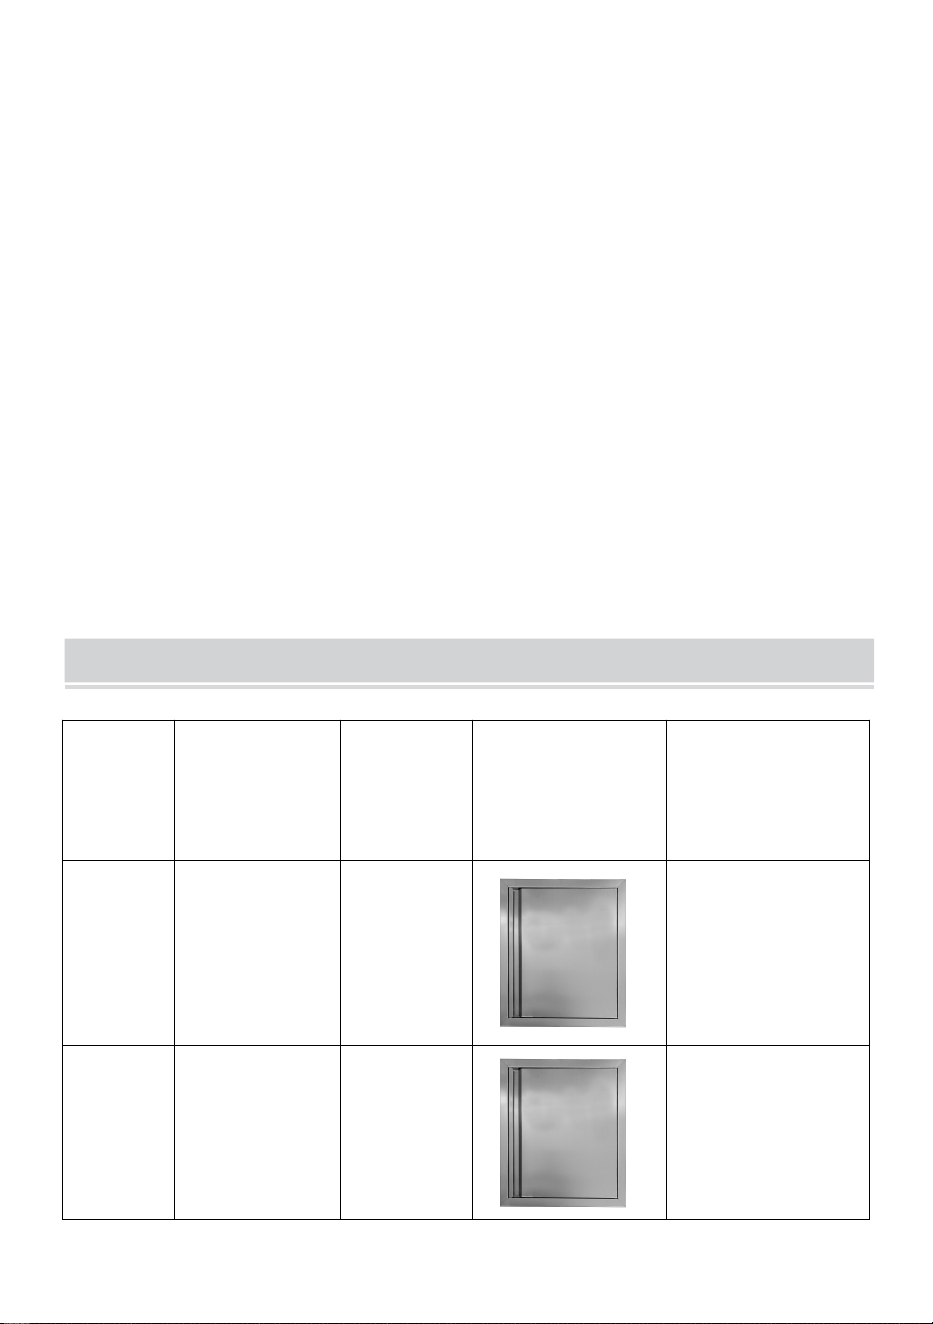
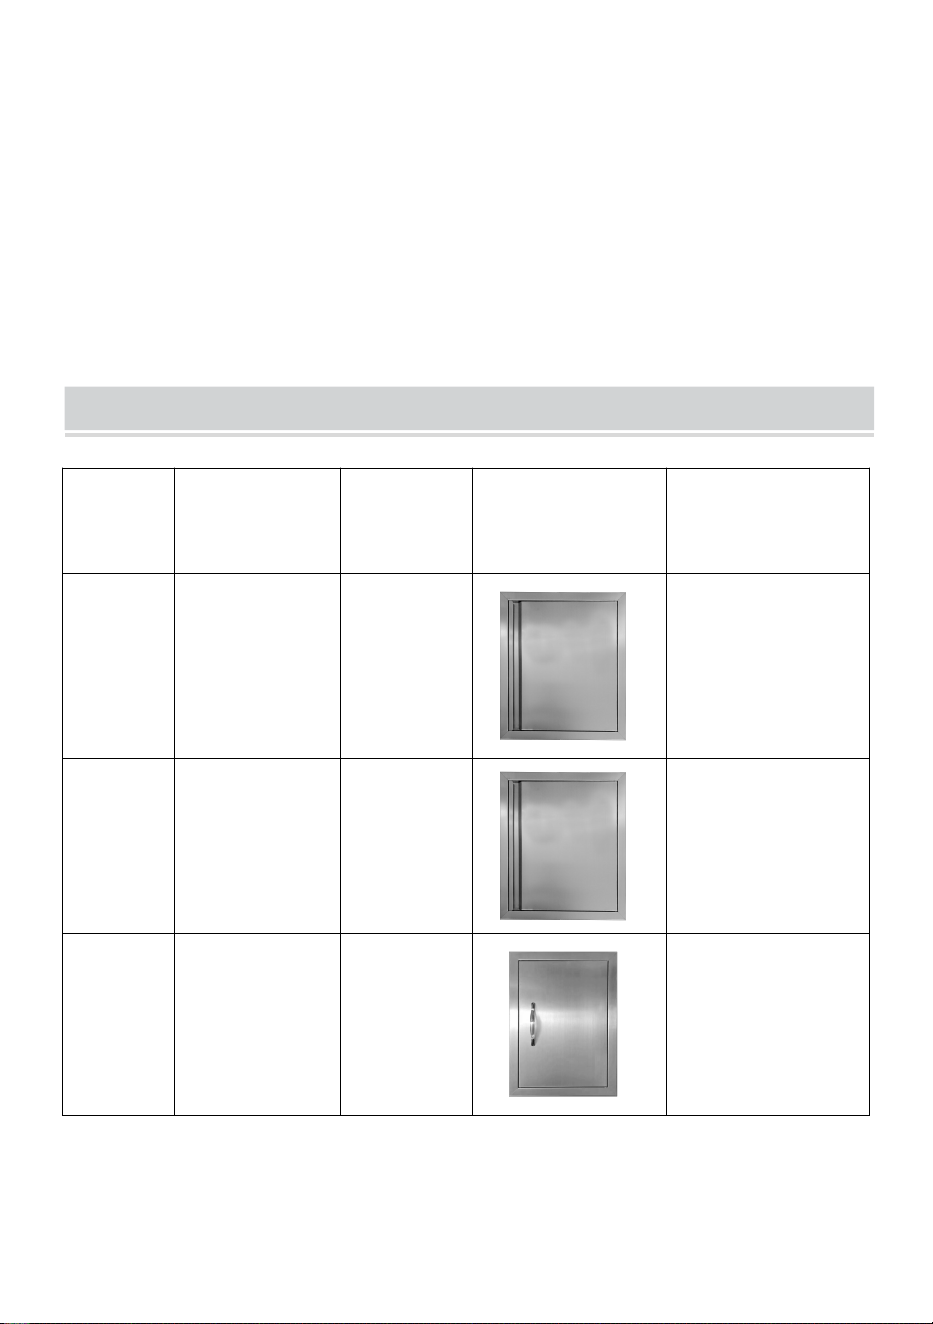
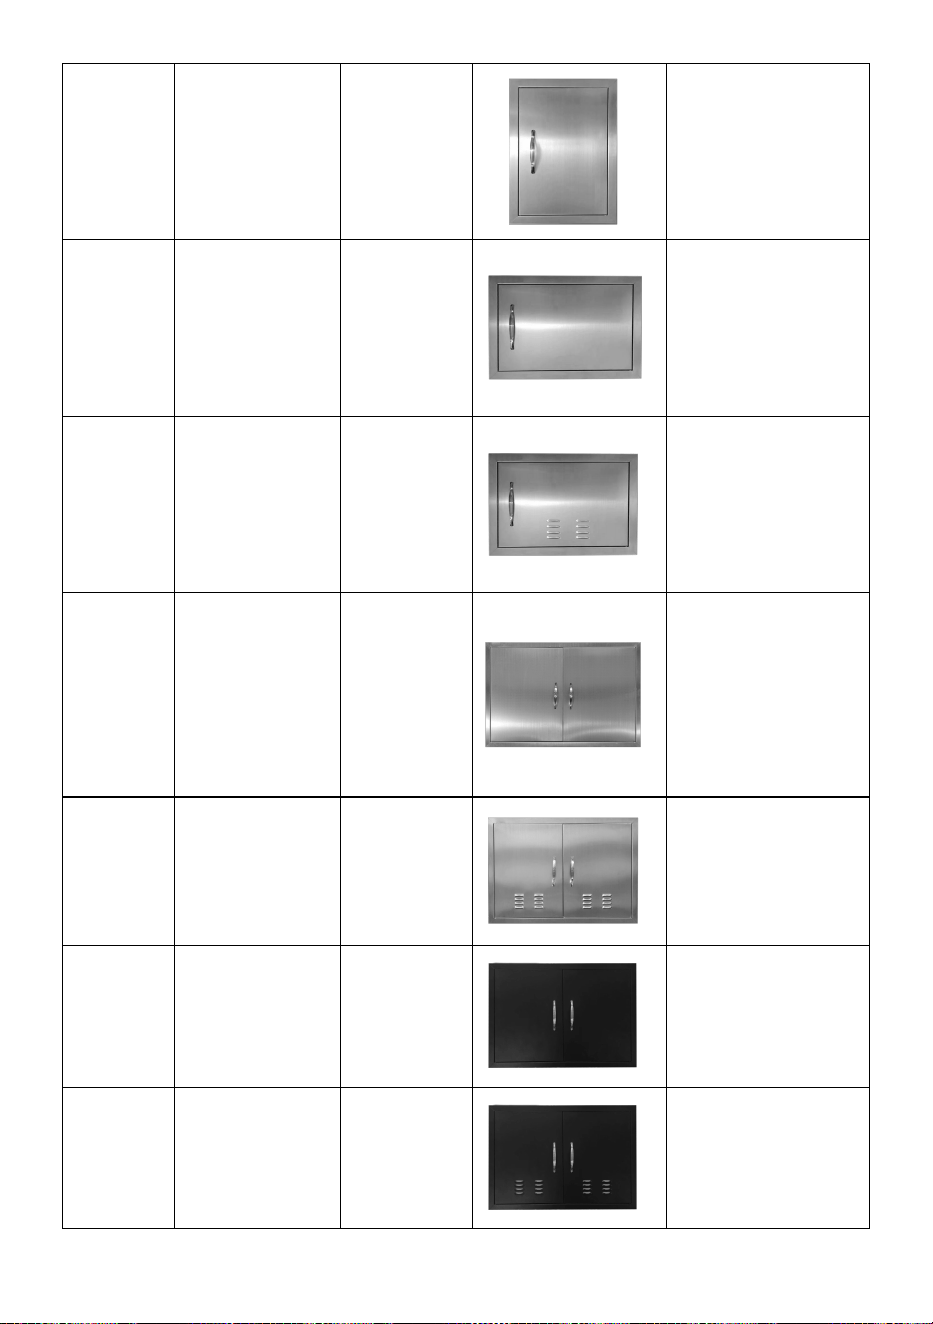
B001D
355x508x46
271x424
1 x Cleaning Pad
1 x Handle
2 x Screws
1 x Screwdriver
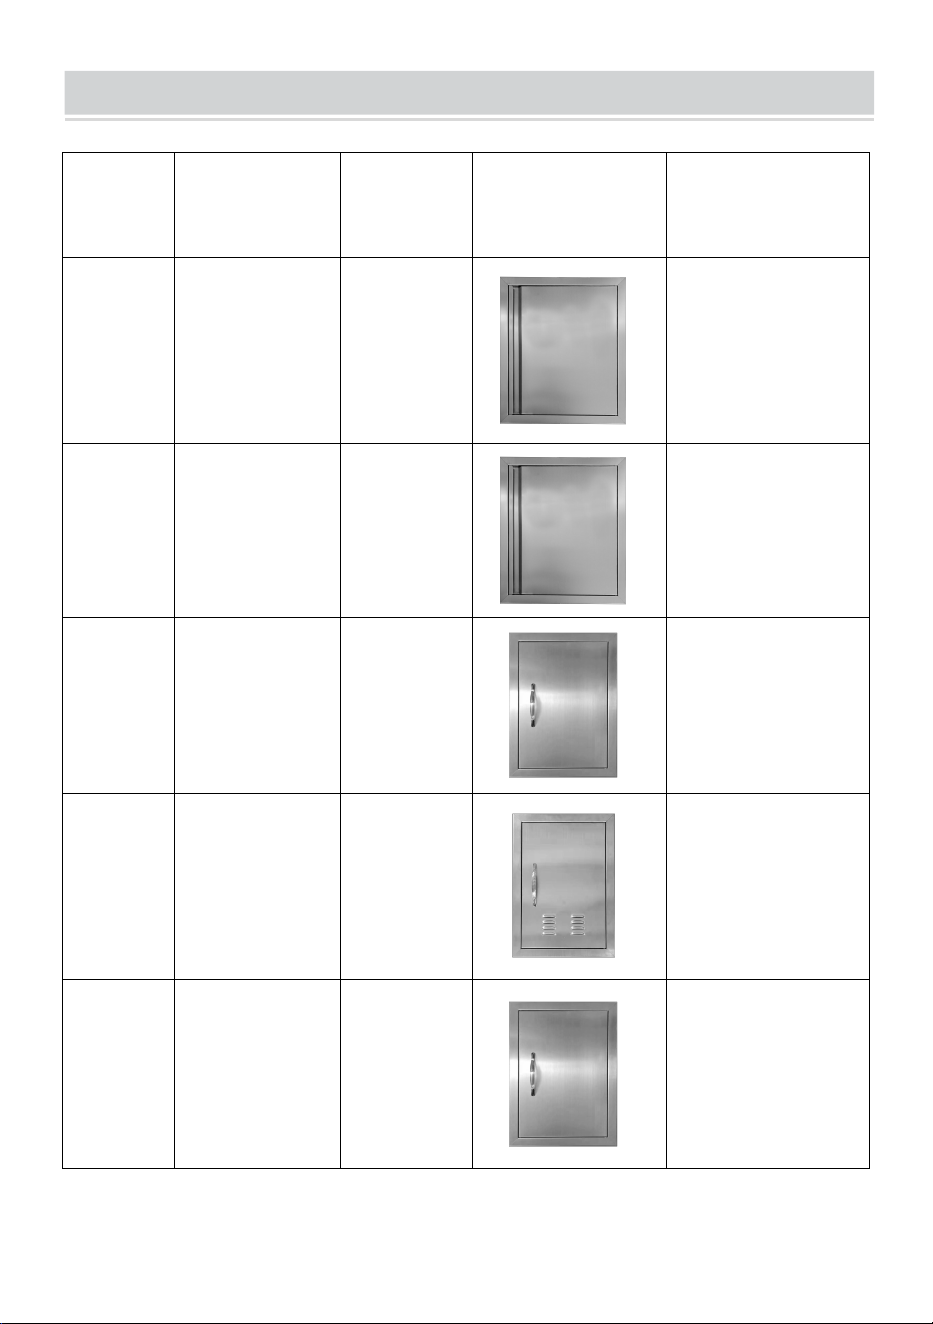
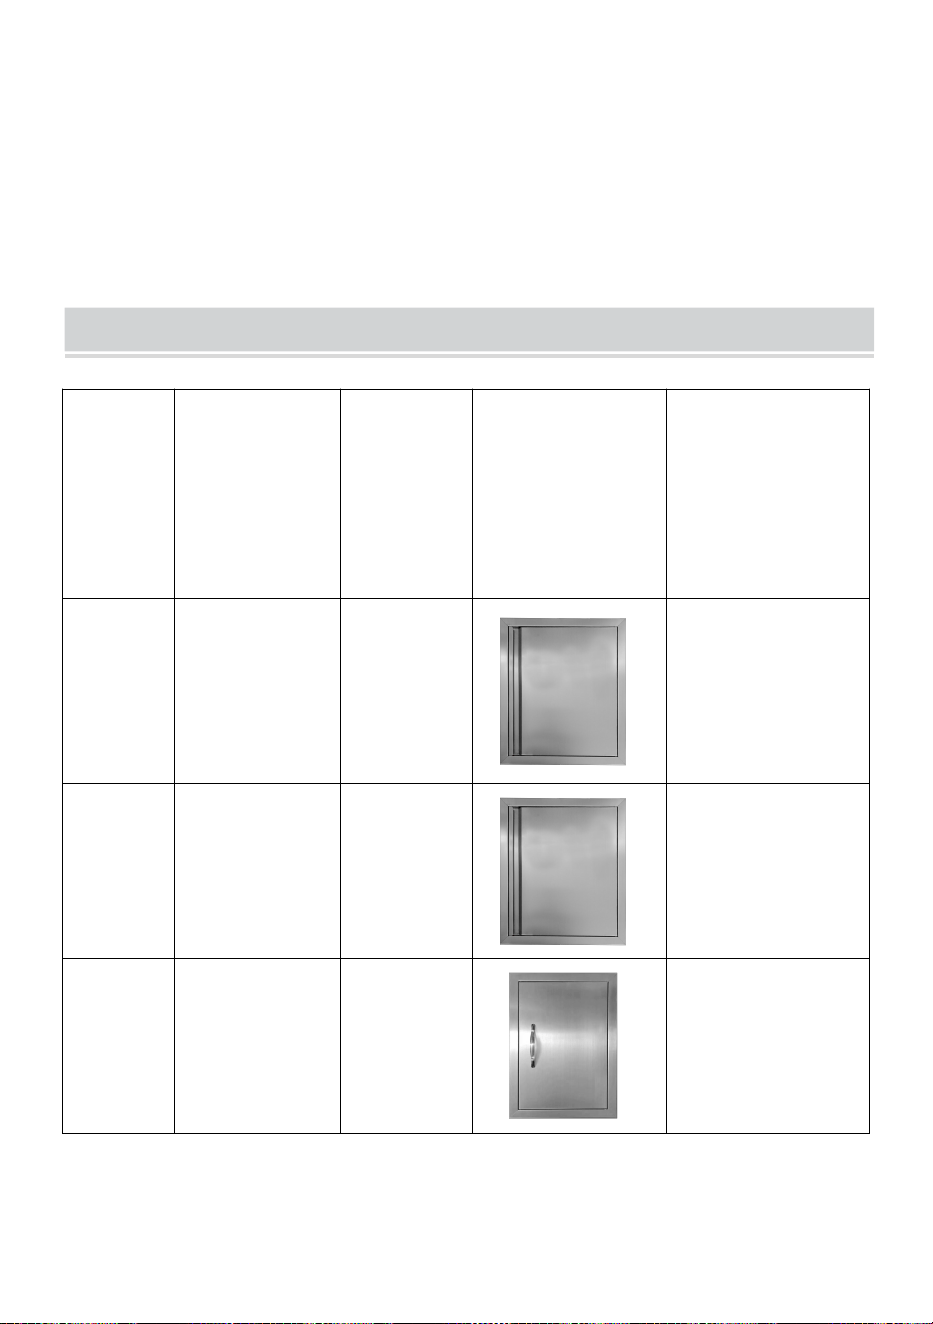
B014D
356x508x46
271x423
1 x Cleaning Pad
1 x Handle
2 x Screws
1 x Screwdriver
B015D
407x559x46
321x474
1 x Cleaning Pad
1 x Handle
2 x Screws
1 x Screwdriver
5
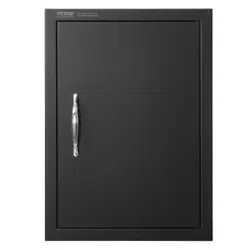
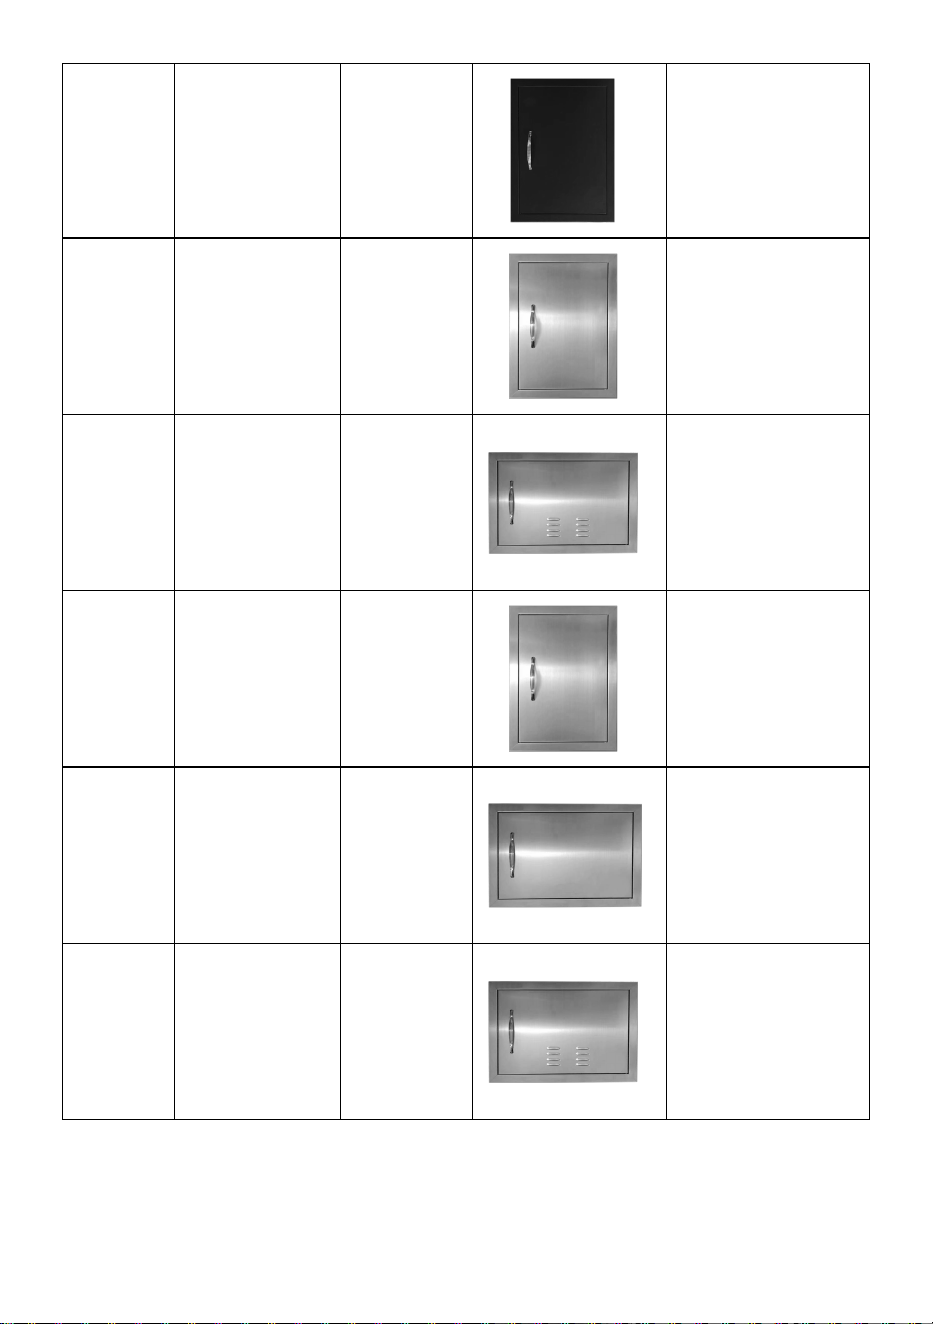
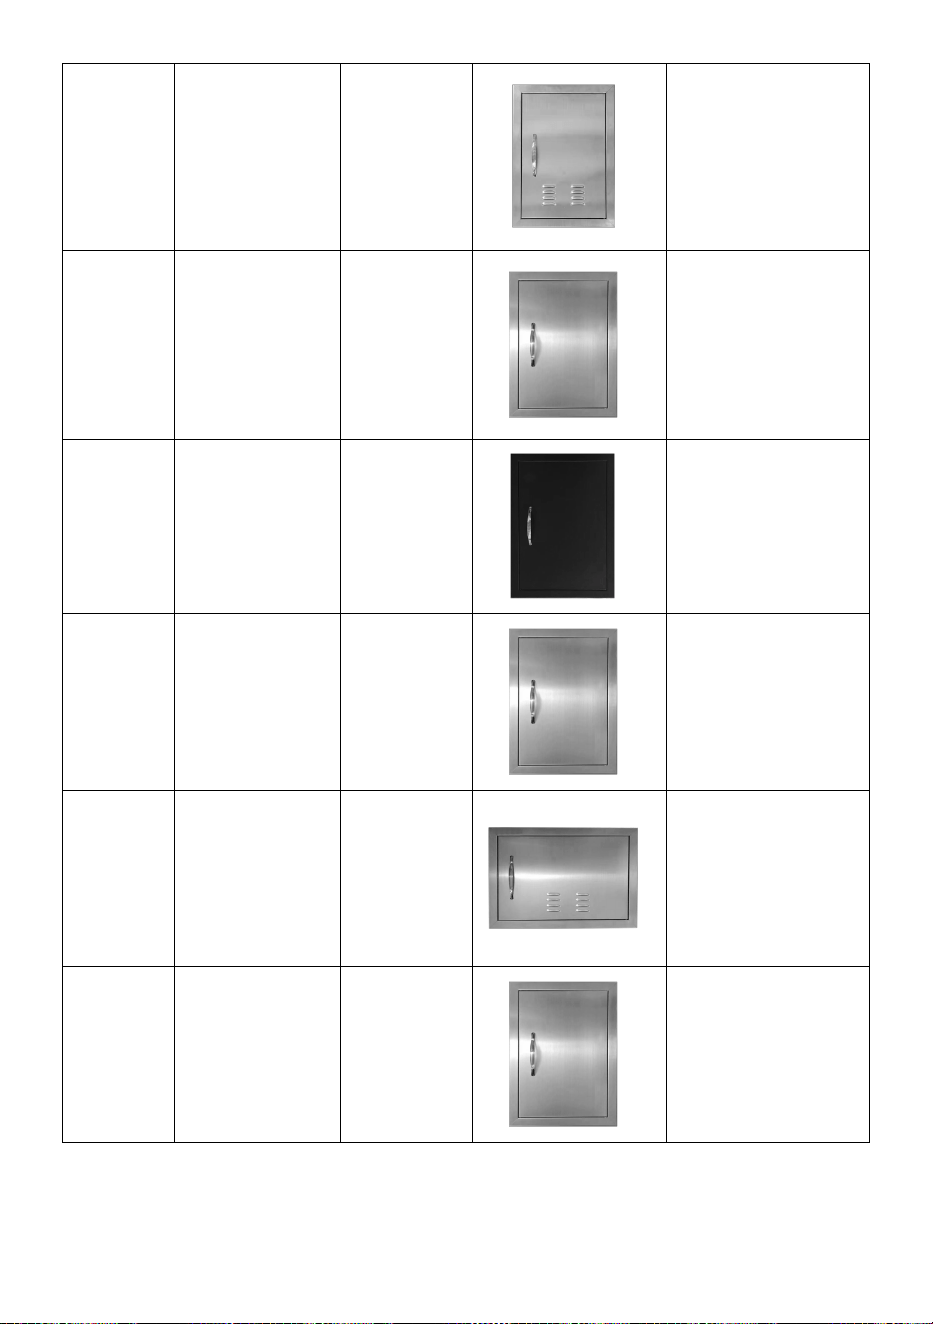
B016D
415x570x46
330x485
1 x Handle
2 x Screws
1 x Screwdriver
B017D
432x610x46
347x525
1 x Cleaning Pad
1 x Handle
2 x Screws
1 x Screwdriver
B018D
508x356x46
423x270
1 x Cleaning Pad
1 x Handle
2 x Screws
1 x Screwdriver
B019D
508x686x46
423x601
1 x Cleaning Pad
1 x Handle
2 x Screws
1 x Screwdriver
B020D
610x432x46
525x347
1 x Cleaning Pad
1 x Handle
2 x Screws
1 x Screwdriver
B021D
610x432x46
524x347
1 x Cleaning Pad
1 x Handle
2 x Screws
1 x Screwdriver
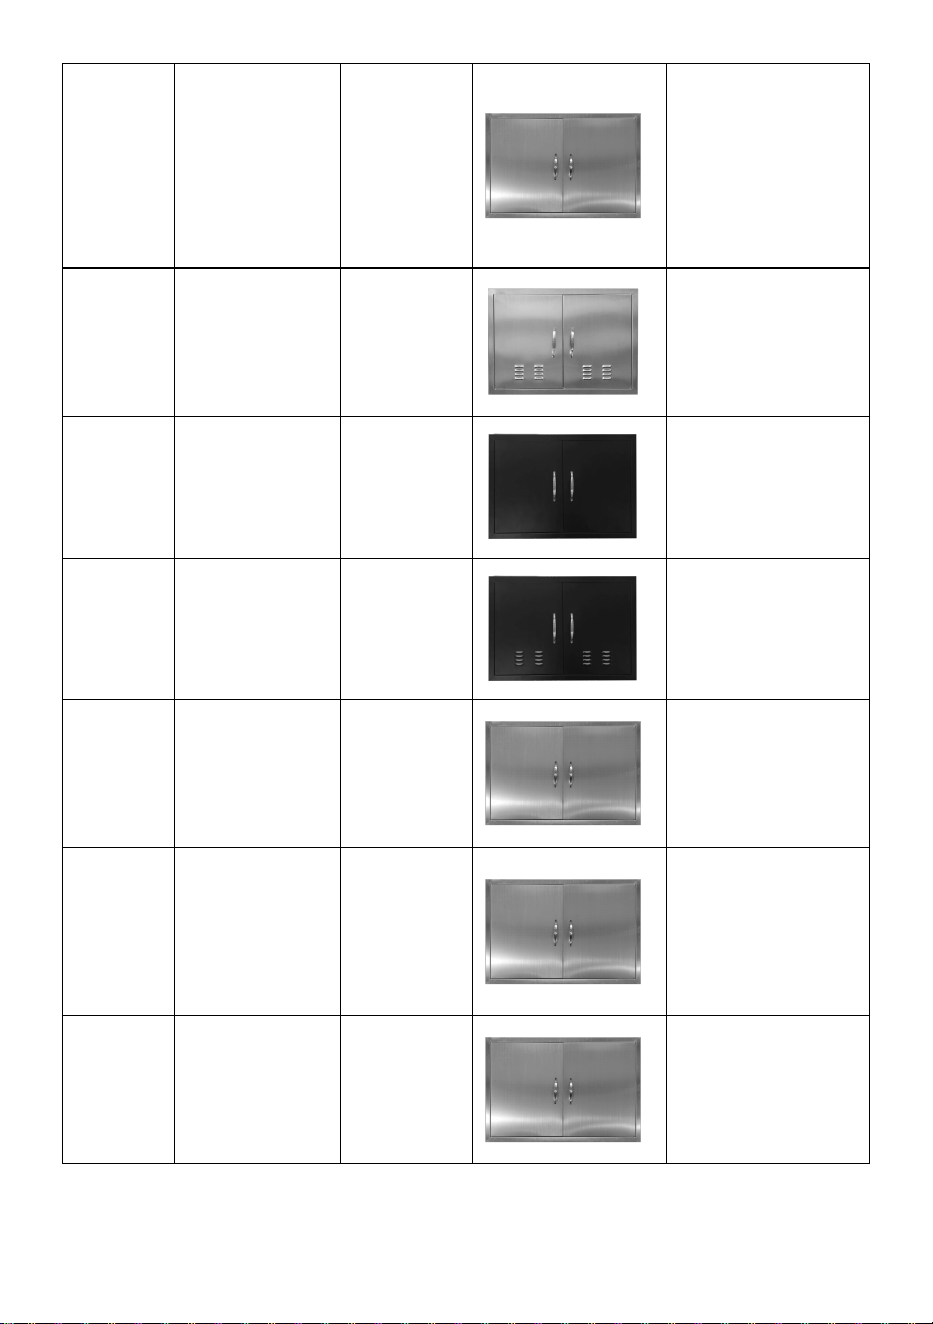
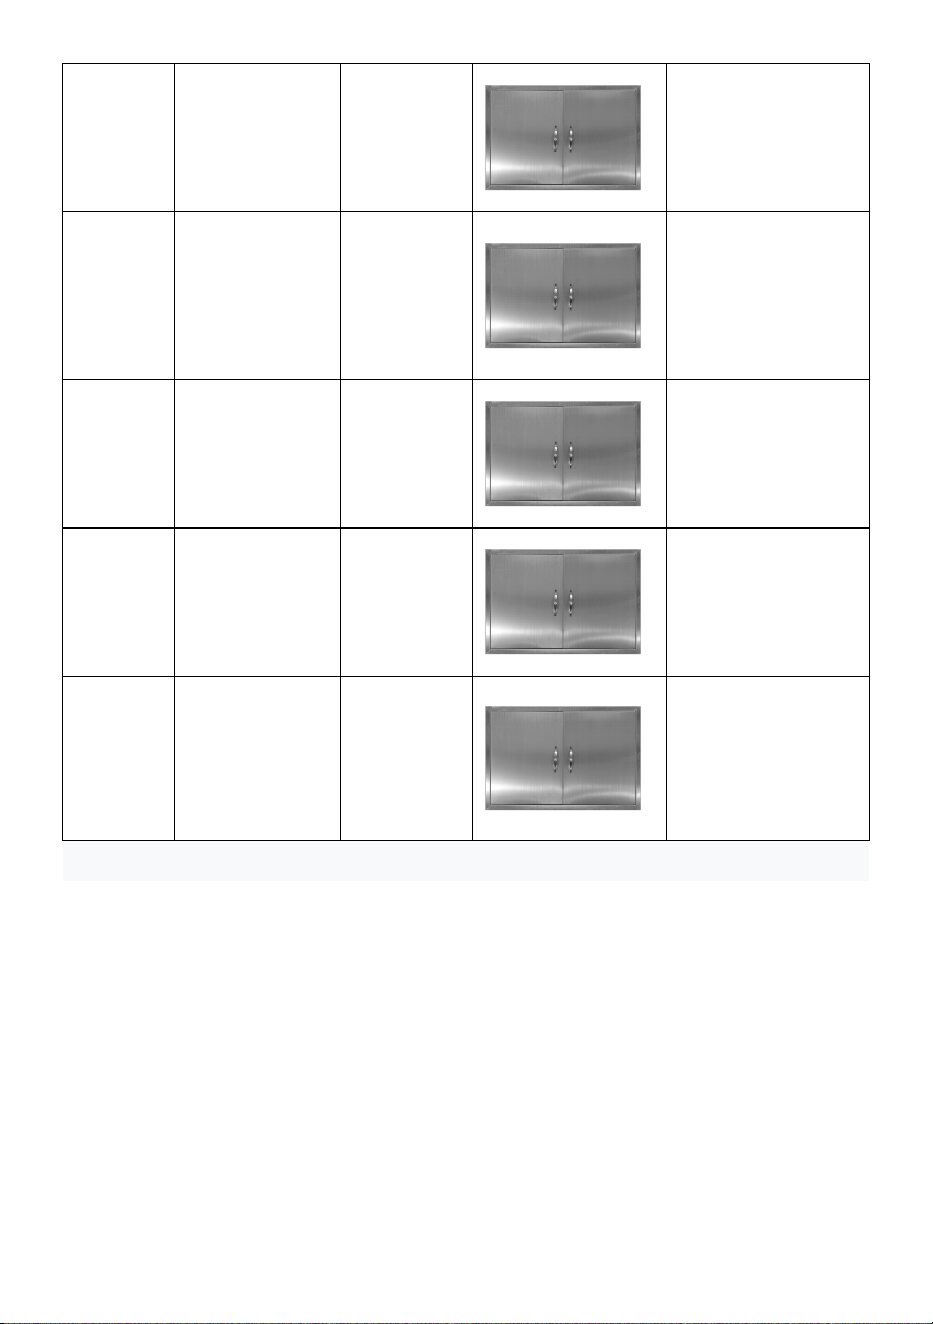
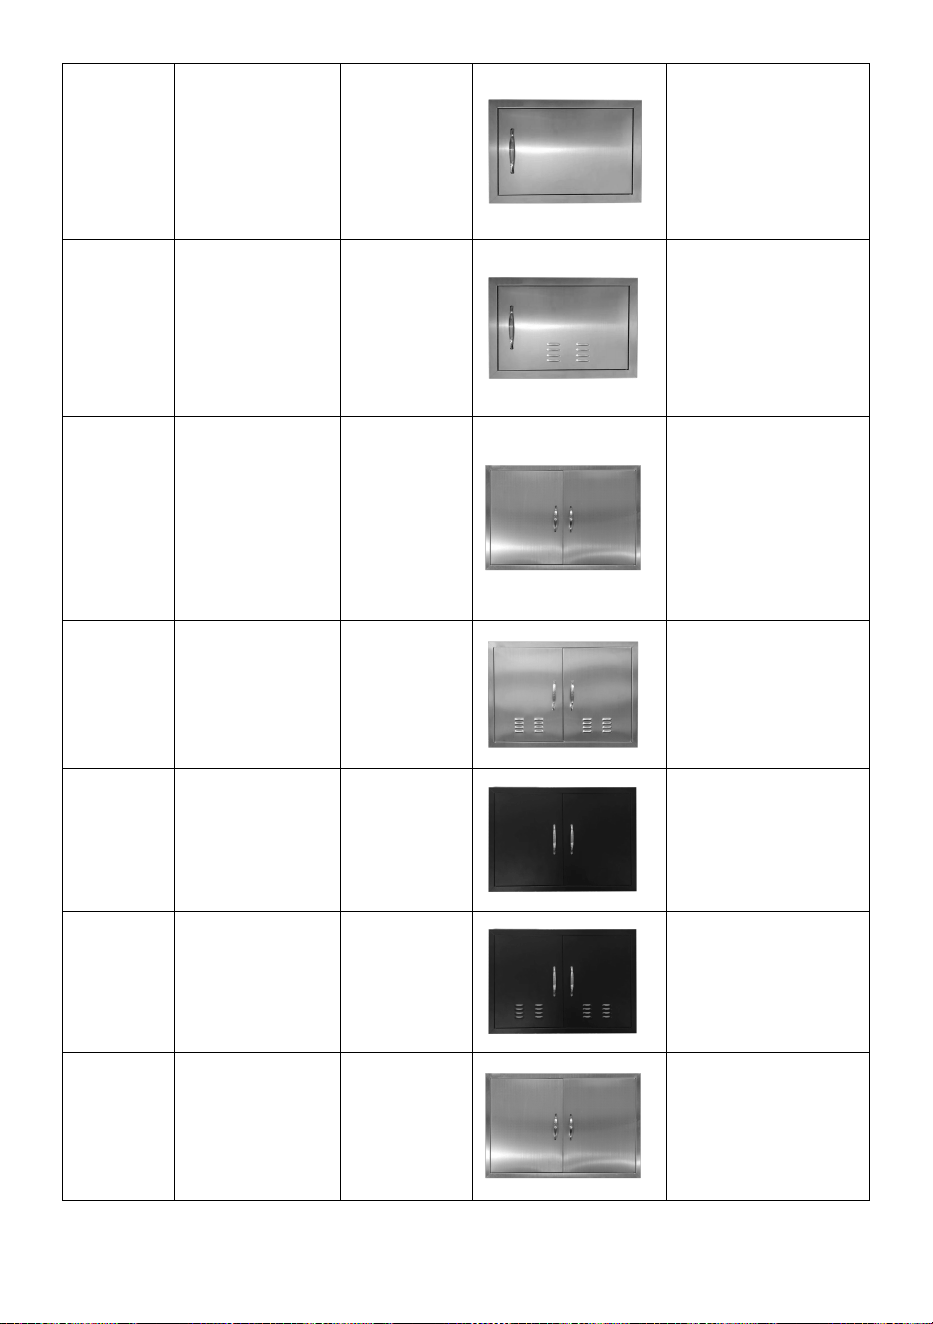
B011S
610x610x48
525x525
1 x Cleaning Pad
2 x Handle
4 x Screws
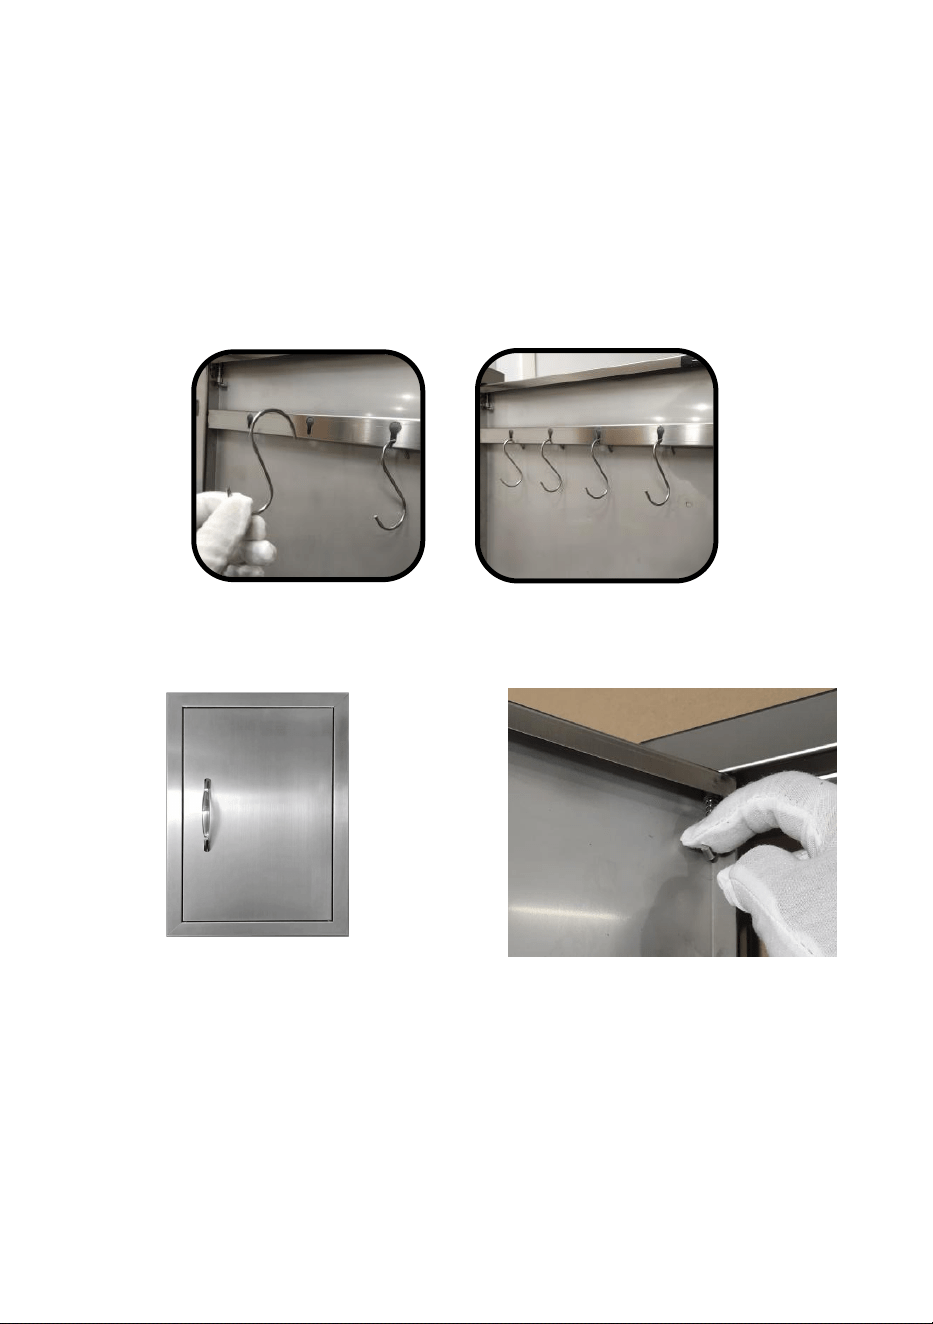
8 x Hooks
1 x Screwdriver
6
B010S
762x533x46
677x448
1 x Cleaning Pad
2 x Handle
4 x Screws
1 x Screwdriver
B009S
788x610x46
703x525
2 x Handle
4 x Screws
1 x Screwdriver
B008S
762x533x46
677x448
2 x Handle
4 x Screws
1 x Screwdriver
B007S
838x558x46
753x473
1 x Cleaning Pad
2 x Handle
4 x Screws
1 x Screwdriver
B006S
863x482x46
778x397
1 x Cleaning Pad
2 x Handle
4 x Screws
1 x Screwdriver
B005S
915x533x46
830x448
1 x Cleaning Pad
2 x Handle
4 x Screws
1 x Screwdriver
B004S
915x610x46
830x525
1 x Cleaning Pad
2 x Handle
4 x Screws
1 x Screwdriver
7
Remark:
1、Product size refers to the outermost length, width and height dimensions,
and the manufacturing tolerance is approximately ±2mm.
2、The installation opening size refers to the size of the fixed position on the
product when it is installed. The manufacturing tolerance is about ±2mm.
3.When installing, the user needs to measure the Installation opening size
of the product to make grooves to avoid being too small for installation or
too large for unstable installation.The recommended size is within 2-5mm
of the actual measured dimensions
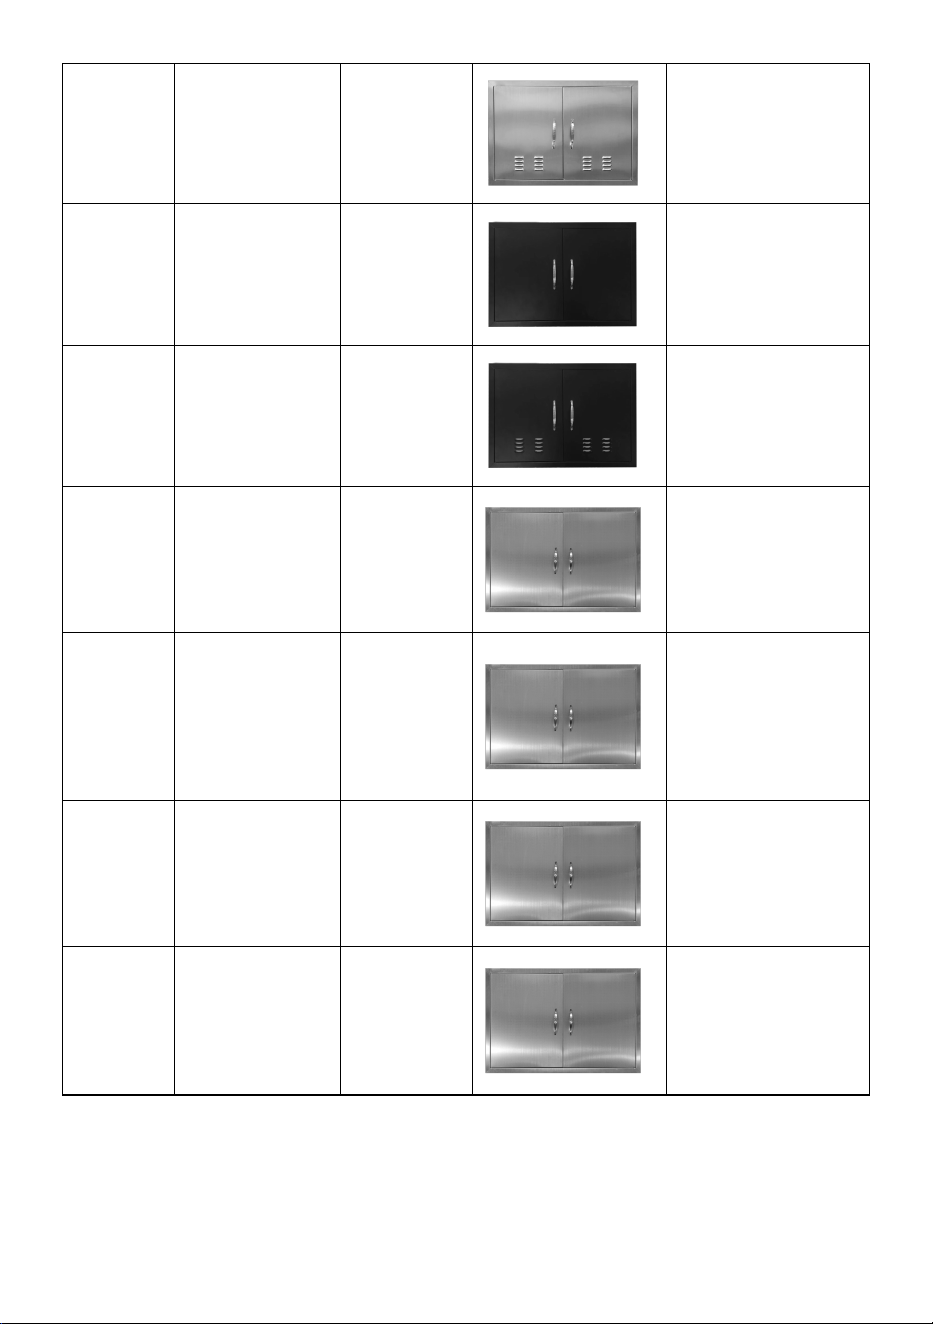
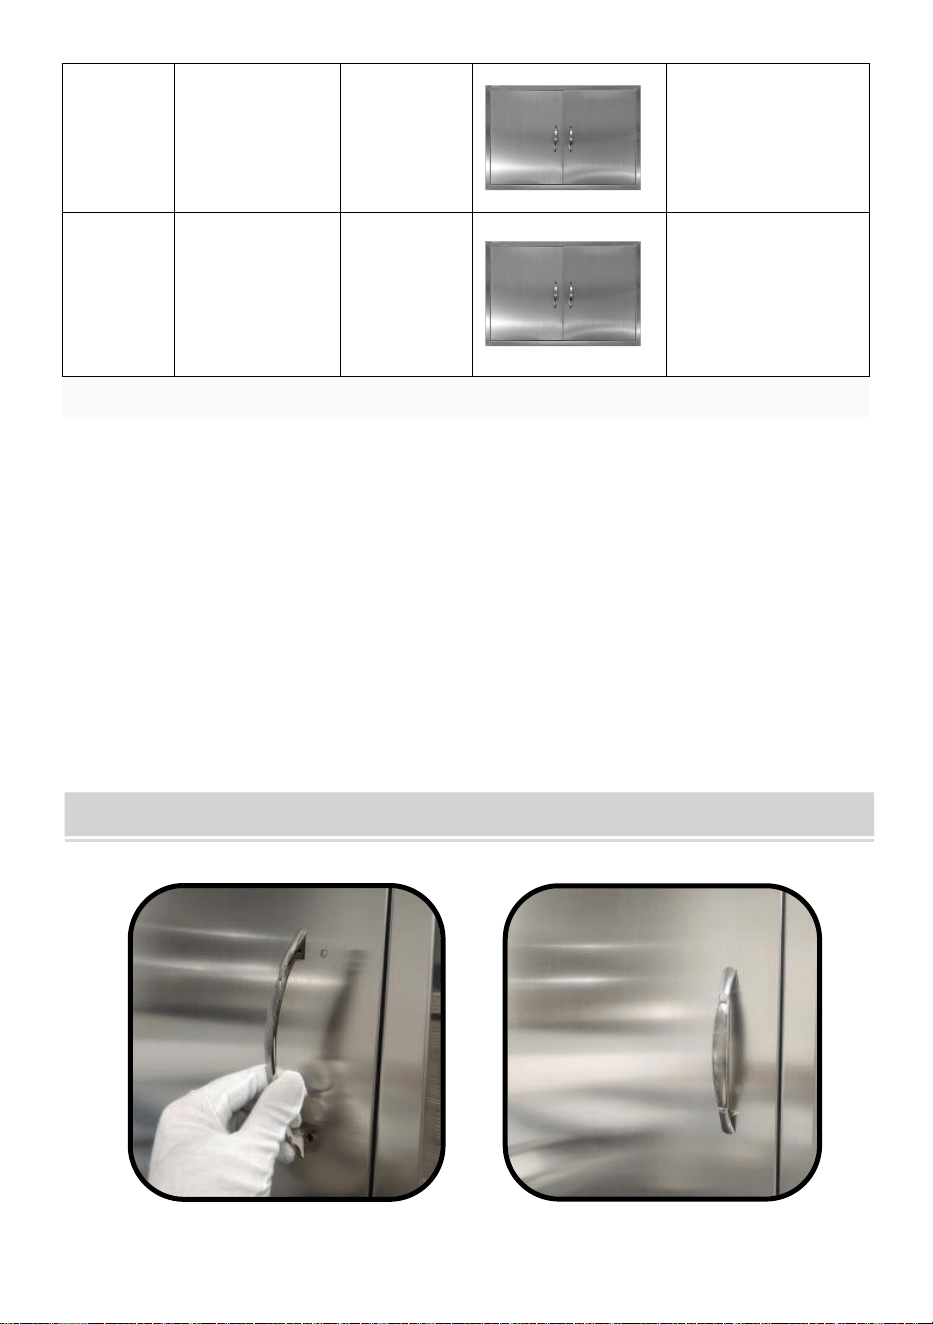
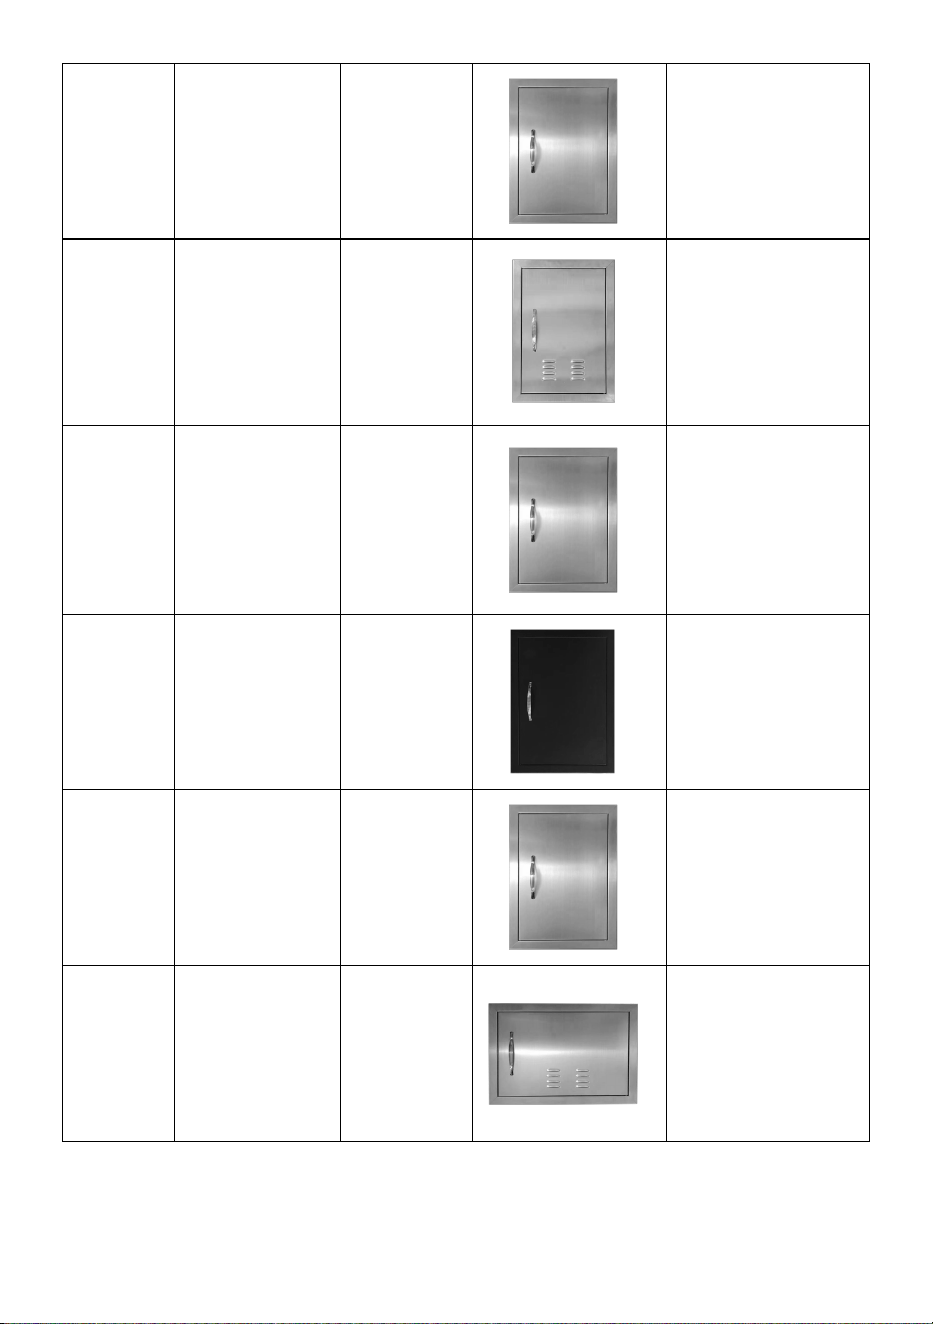
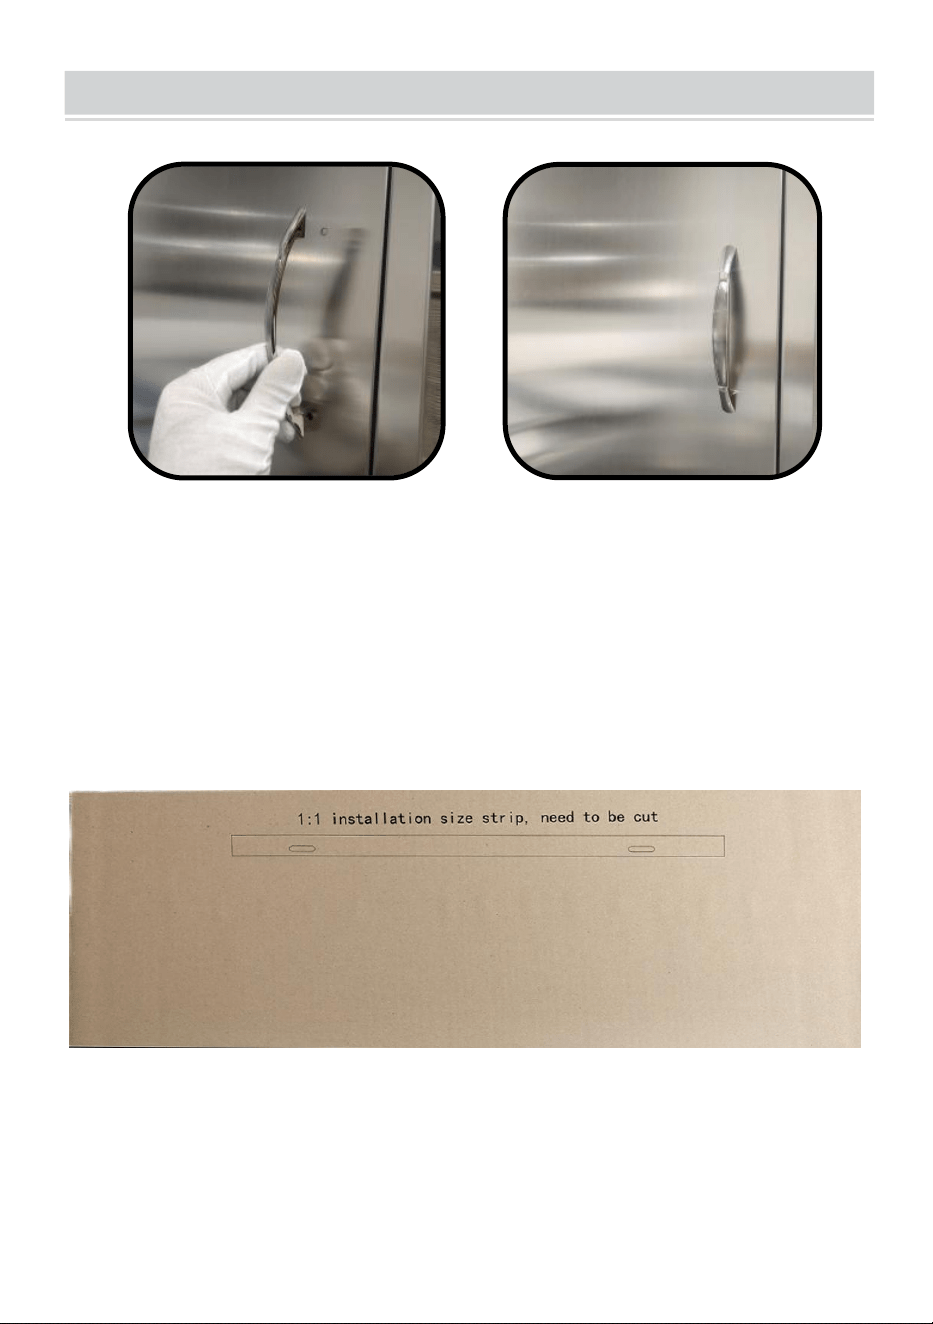
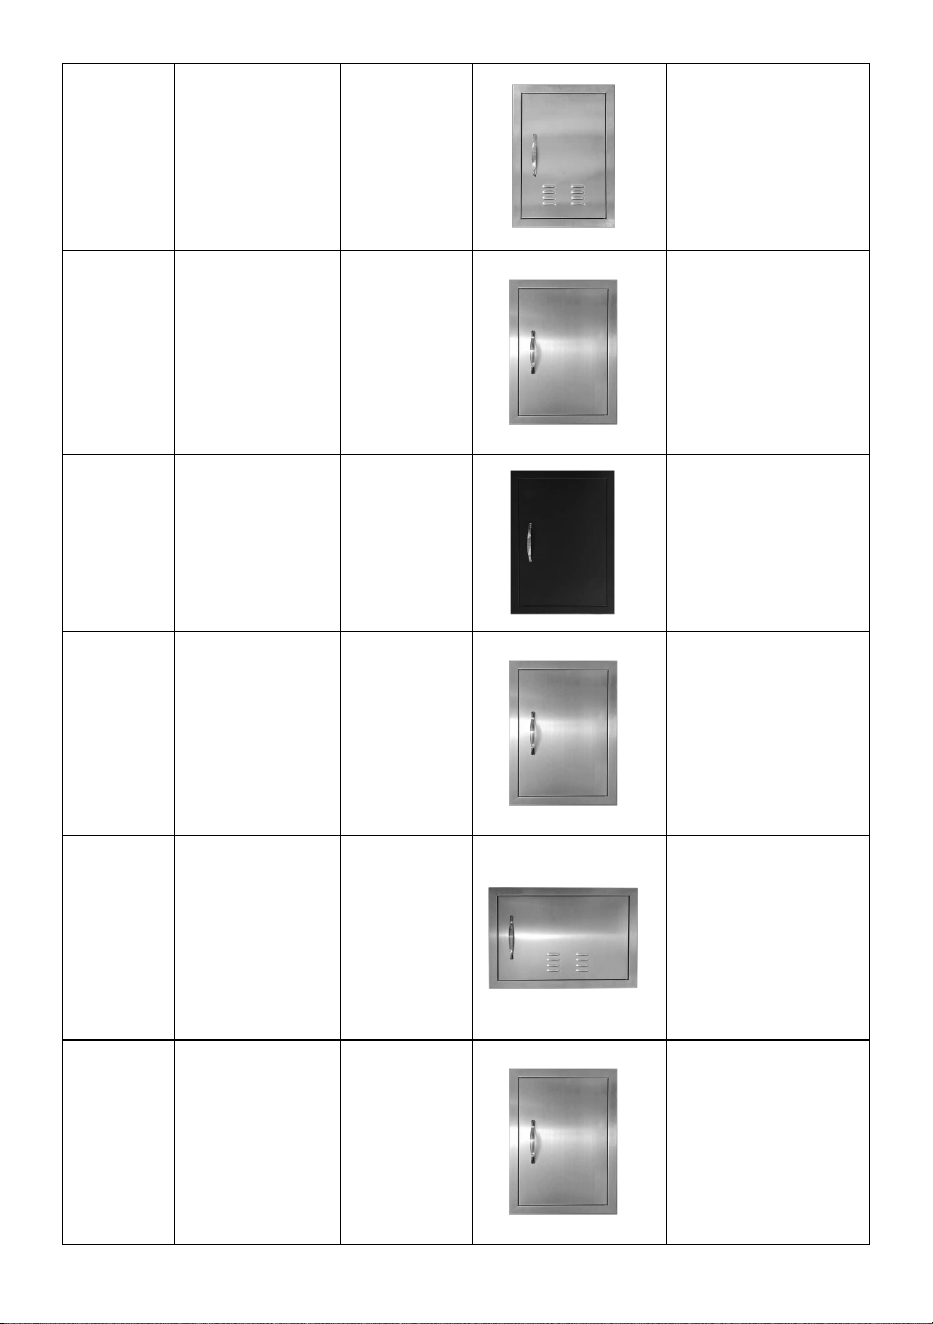
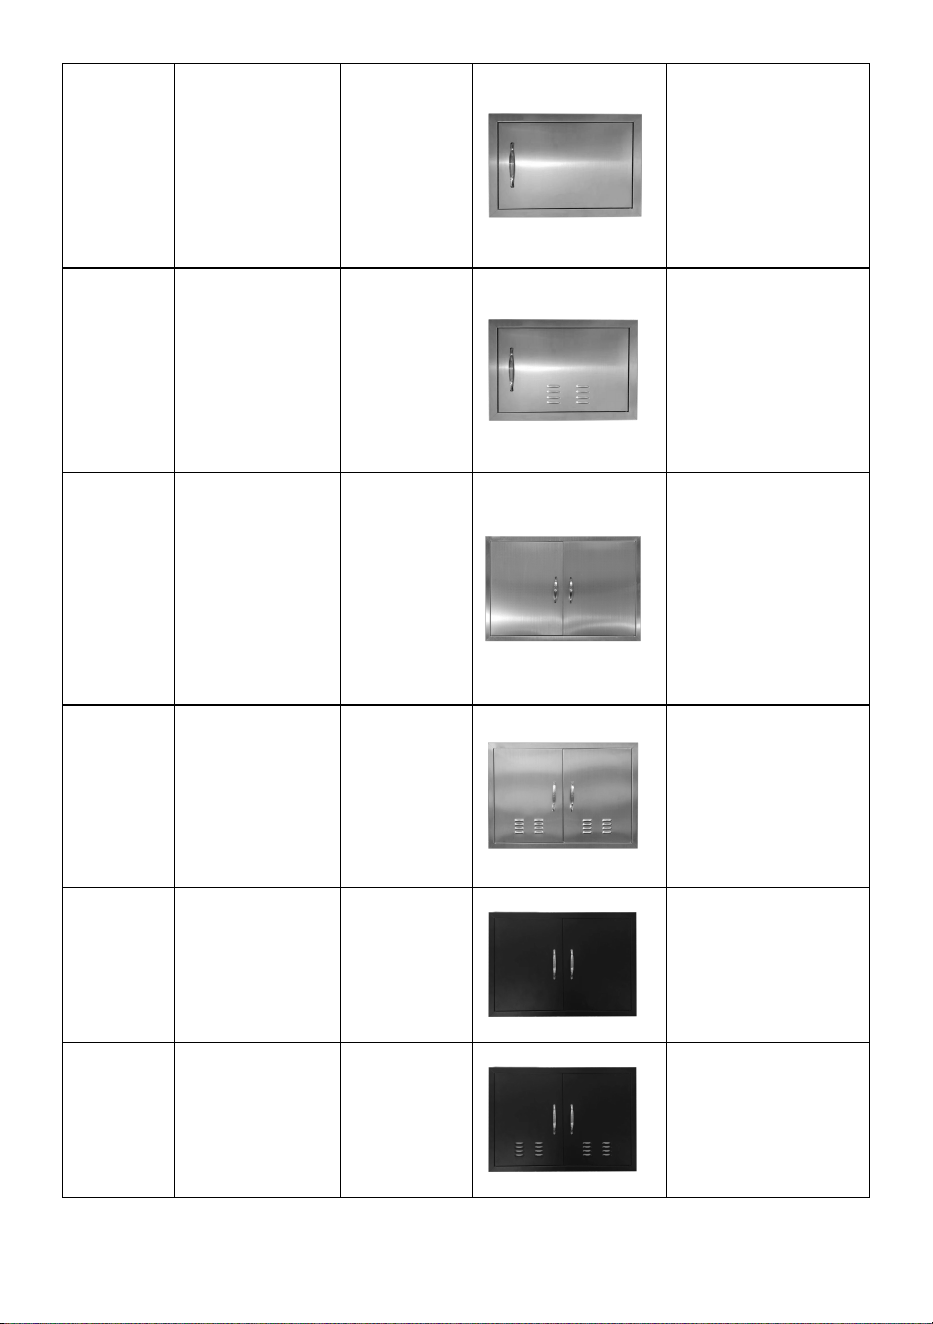
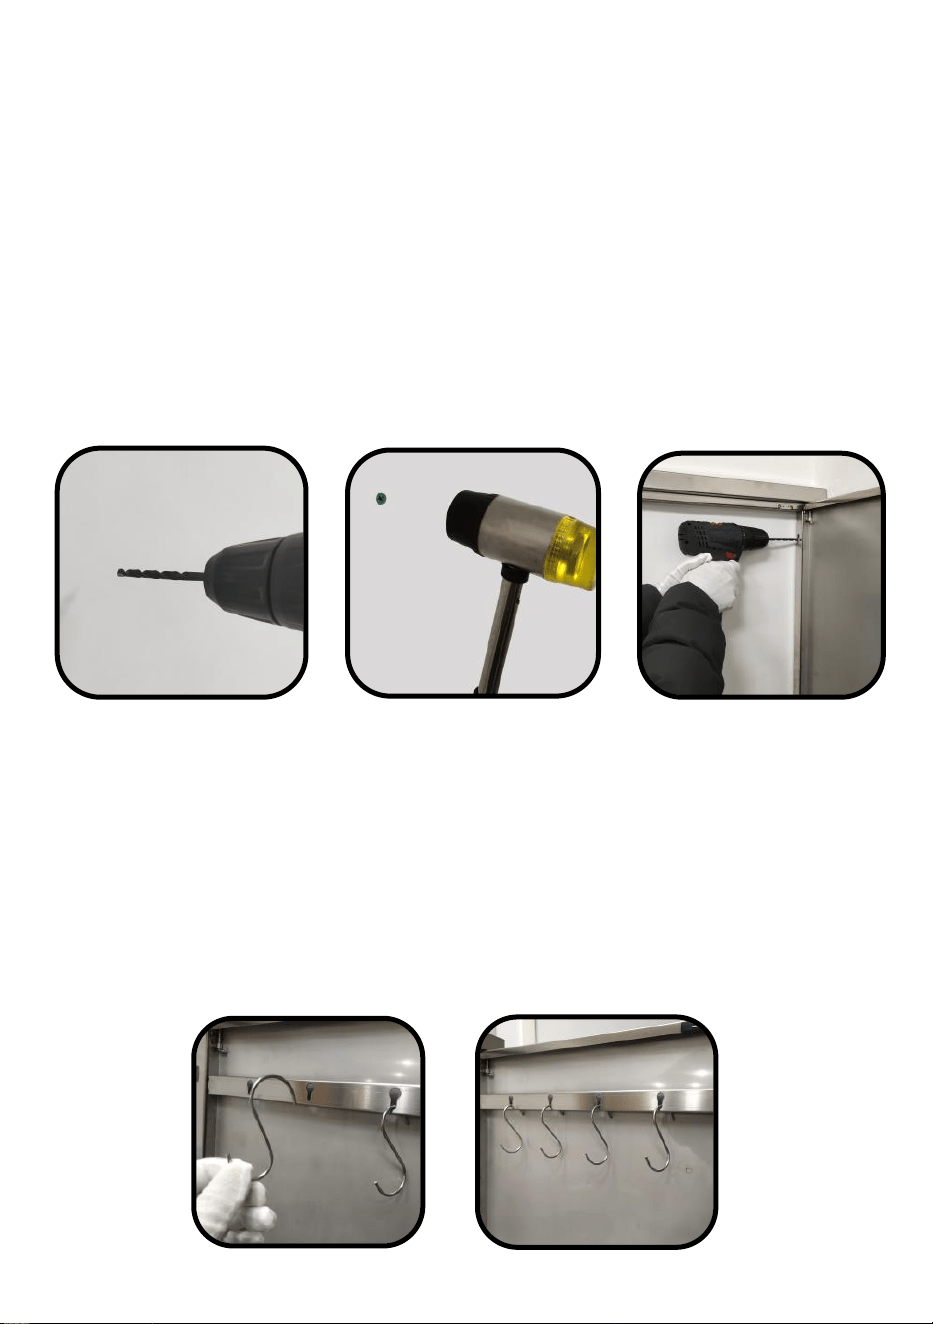
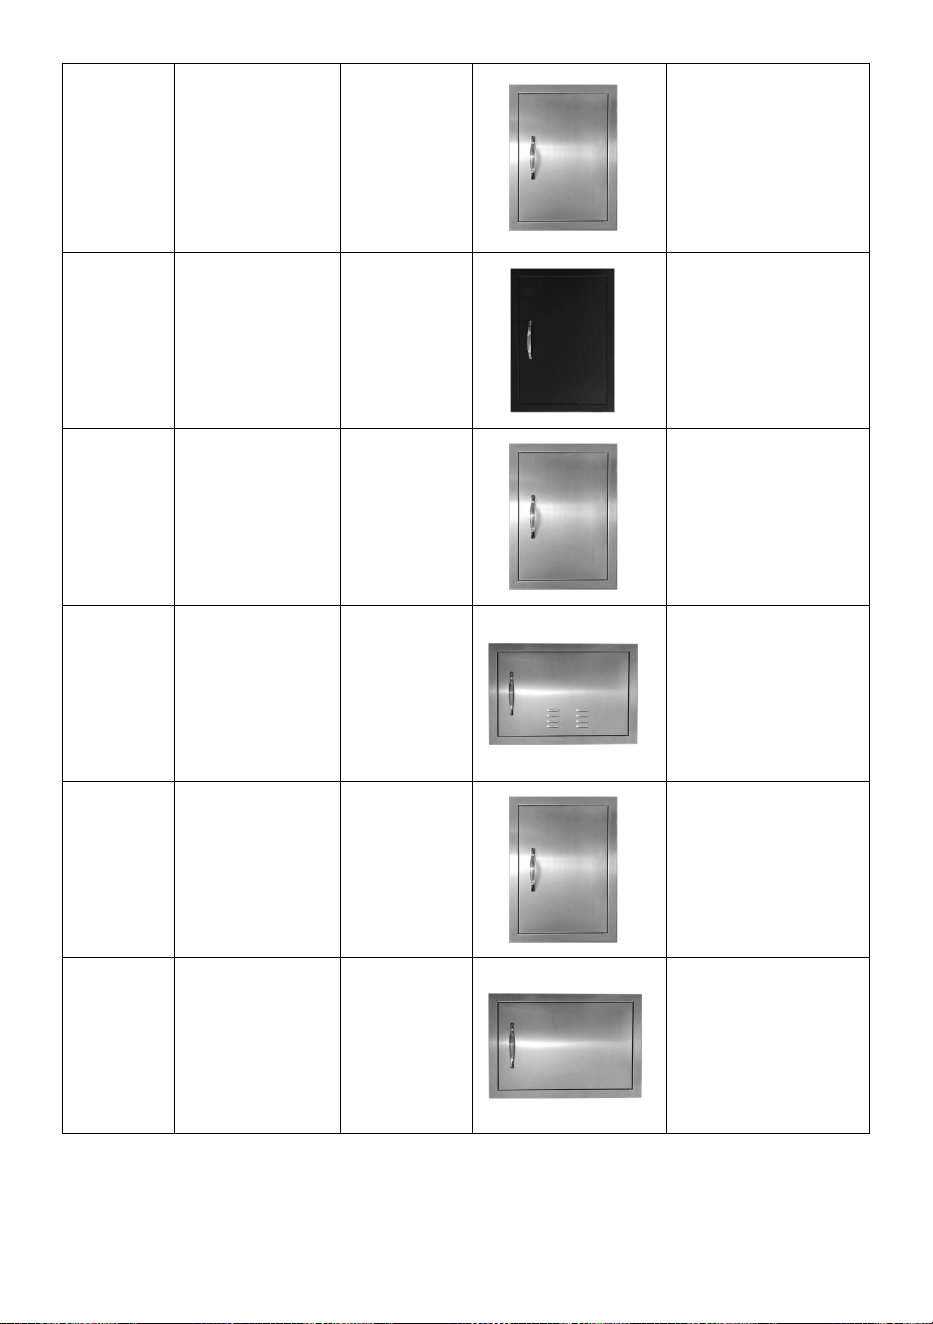
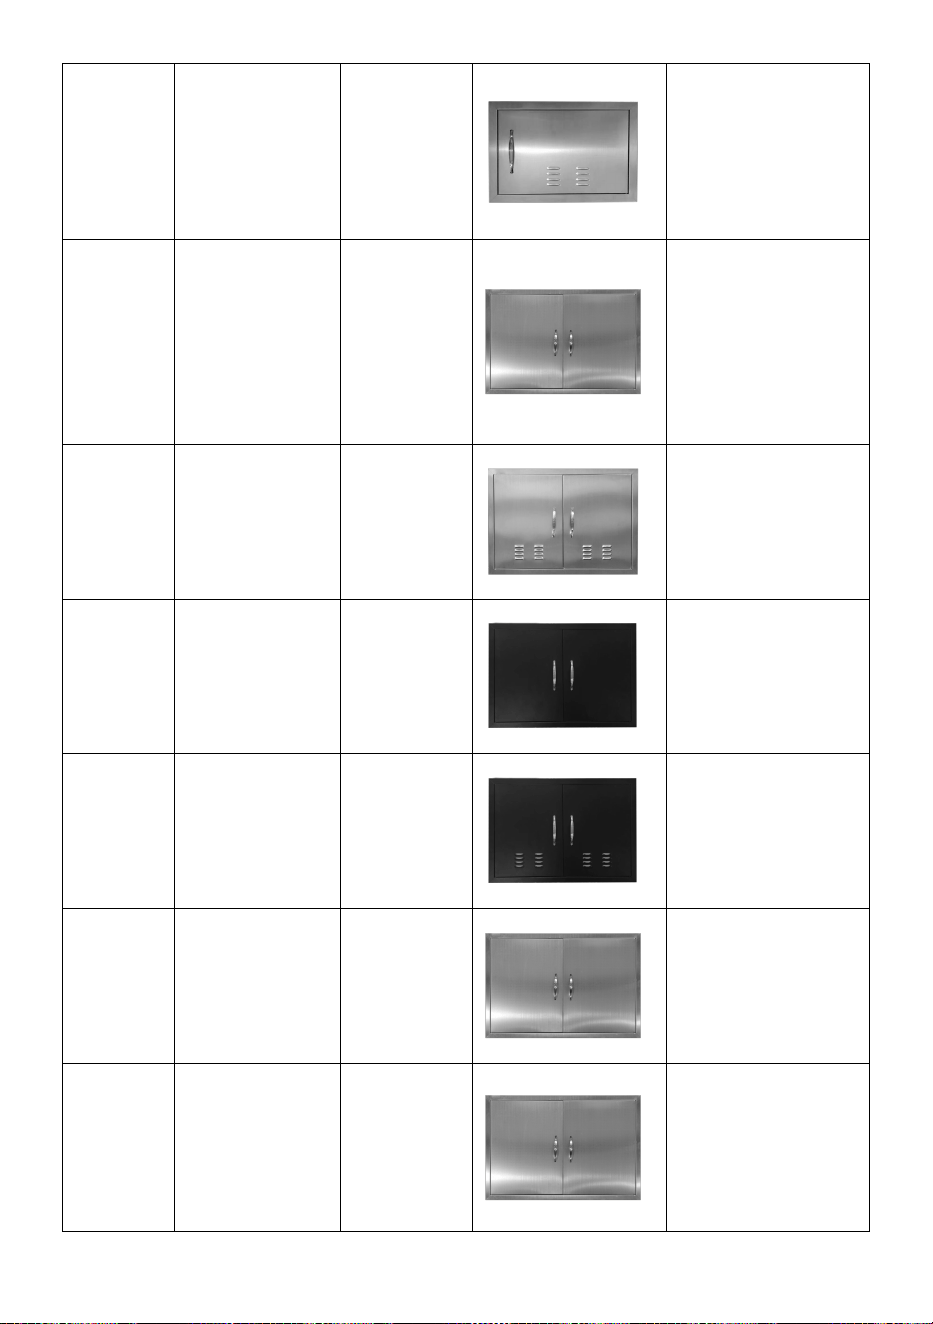
ASSEMBLY STEPS
Take out the handles and screws, and then screw them in the cabinet door
with the screwdriver.
NOTE:(This is only for models with open handles)
B003S
790x790x46
705x705
1 x Cleaning Pad
2 x Handle
4 x Screws
1 x Screwdriver

8
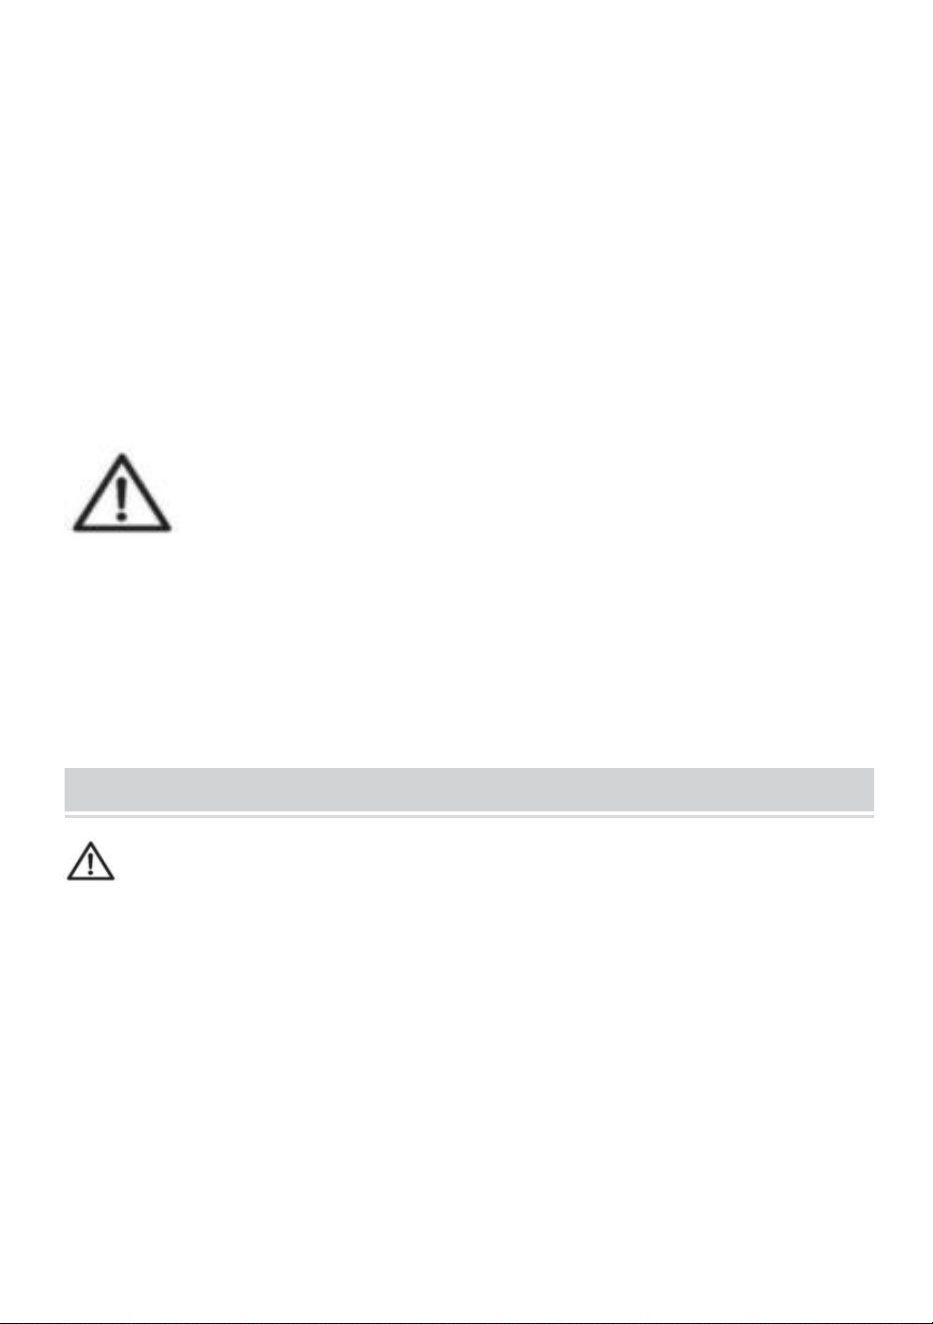
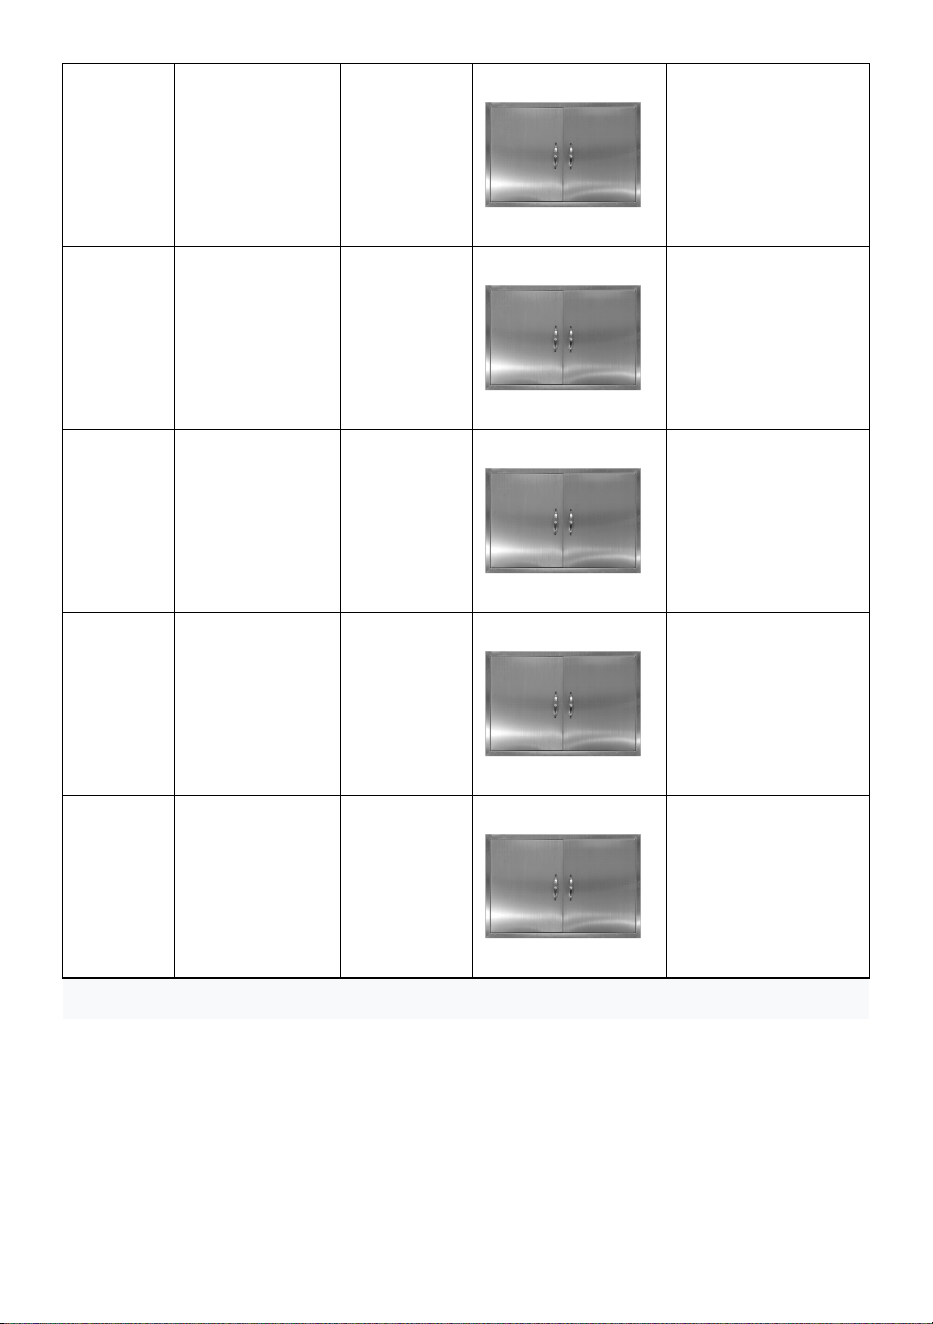
As shown in the figure, there is a 1:1 line diagram printed on the upper and
lower folds of the carton, which can assist installation. It needs to be cut
down and the track circle is hollowed out and placed at the installation
position to draw dots.
NOTE:Users can also choose the installation method according to their
own installation habits, such as measuring the size of the actual object or
comparing the actual object with the actual object after drilling the
installation holes, or other more convenient installation techniques, it
depends on you.
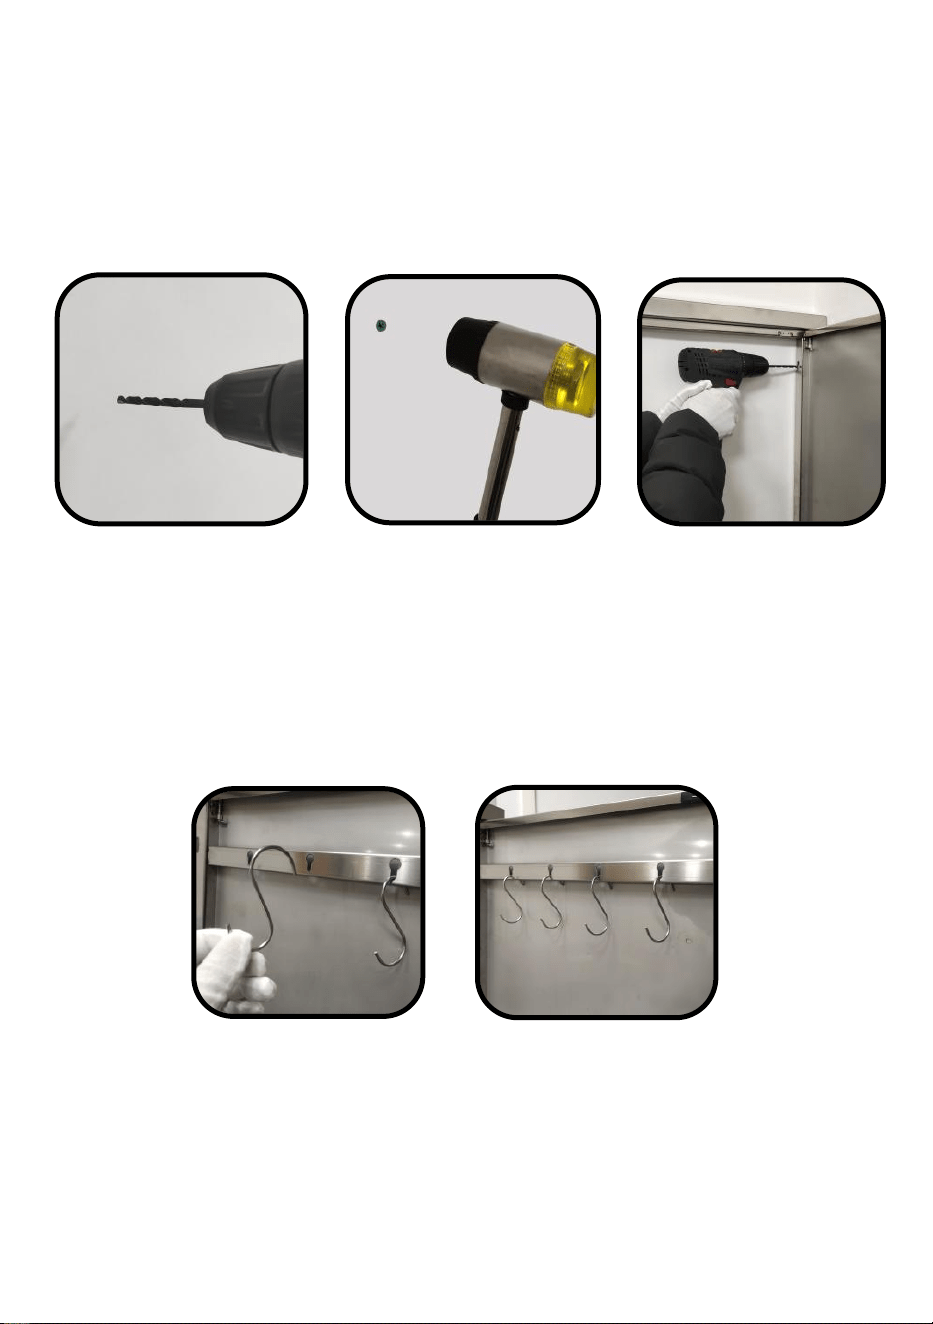
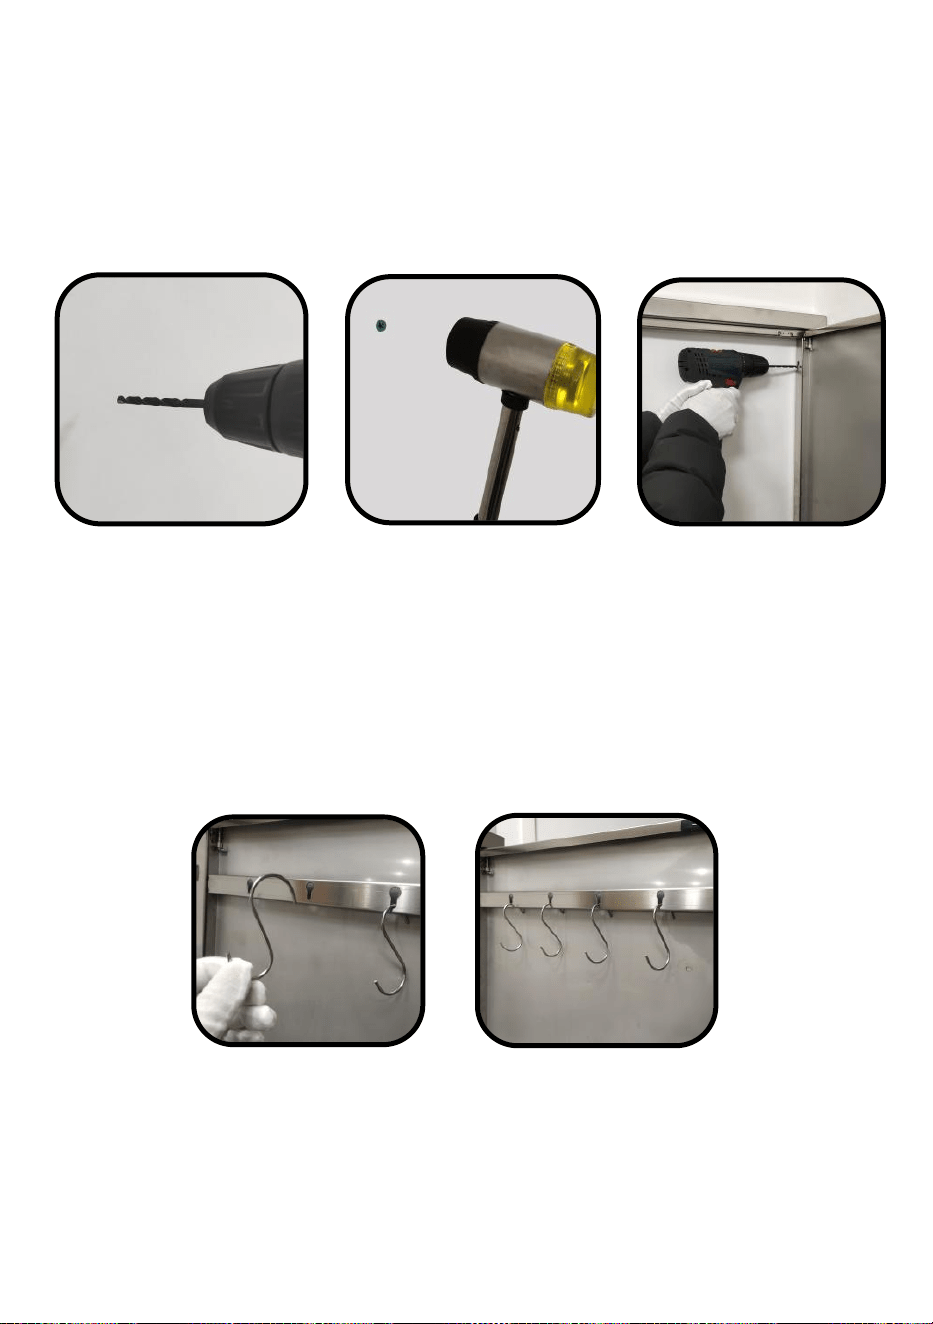
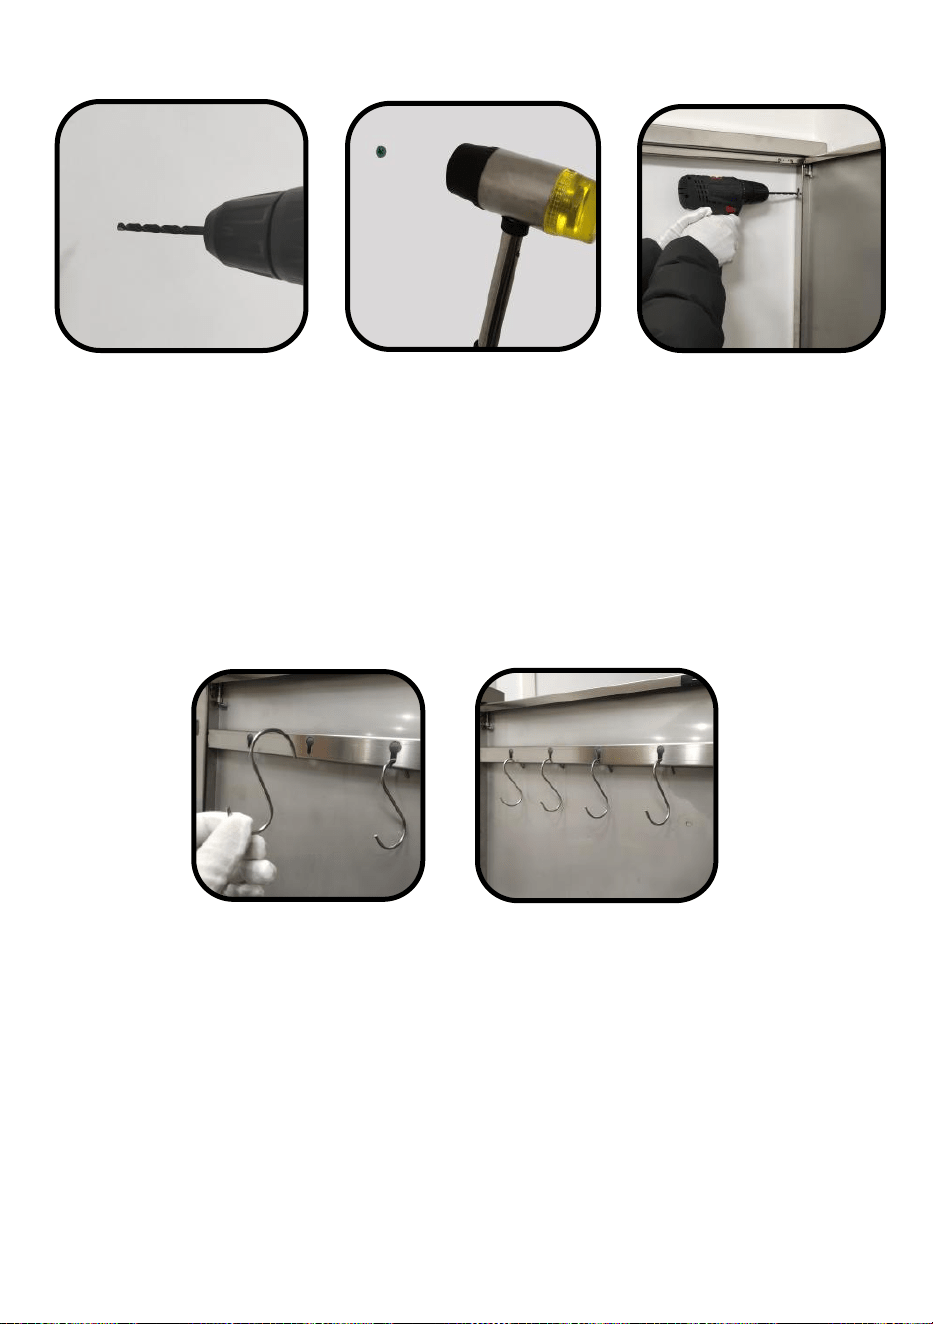
Drill 2 holes on each side of pre-drilled frame holes. Tap the plastic plugs
into the holes. Install the cabinet door,screw into the plastic plugs of the
pre-drilled holes.
Remark:plastic plugs、self-tapping screws need to be purchased
9
by user,these parts are not included.
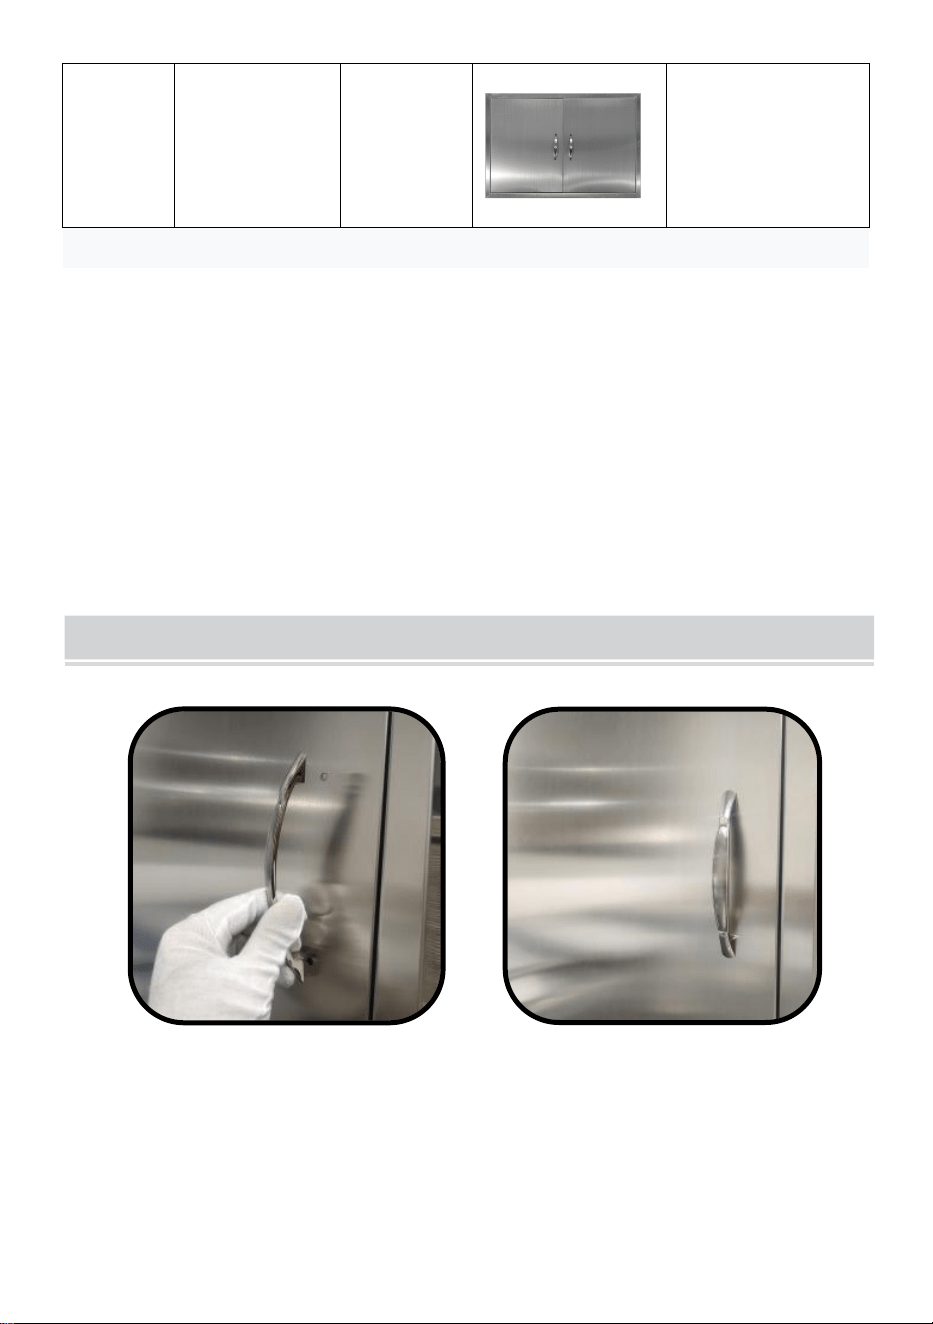
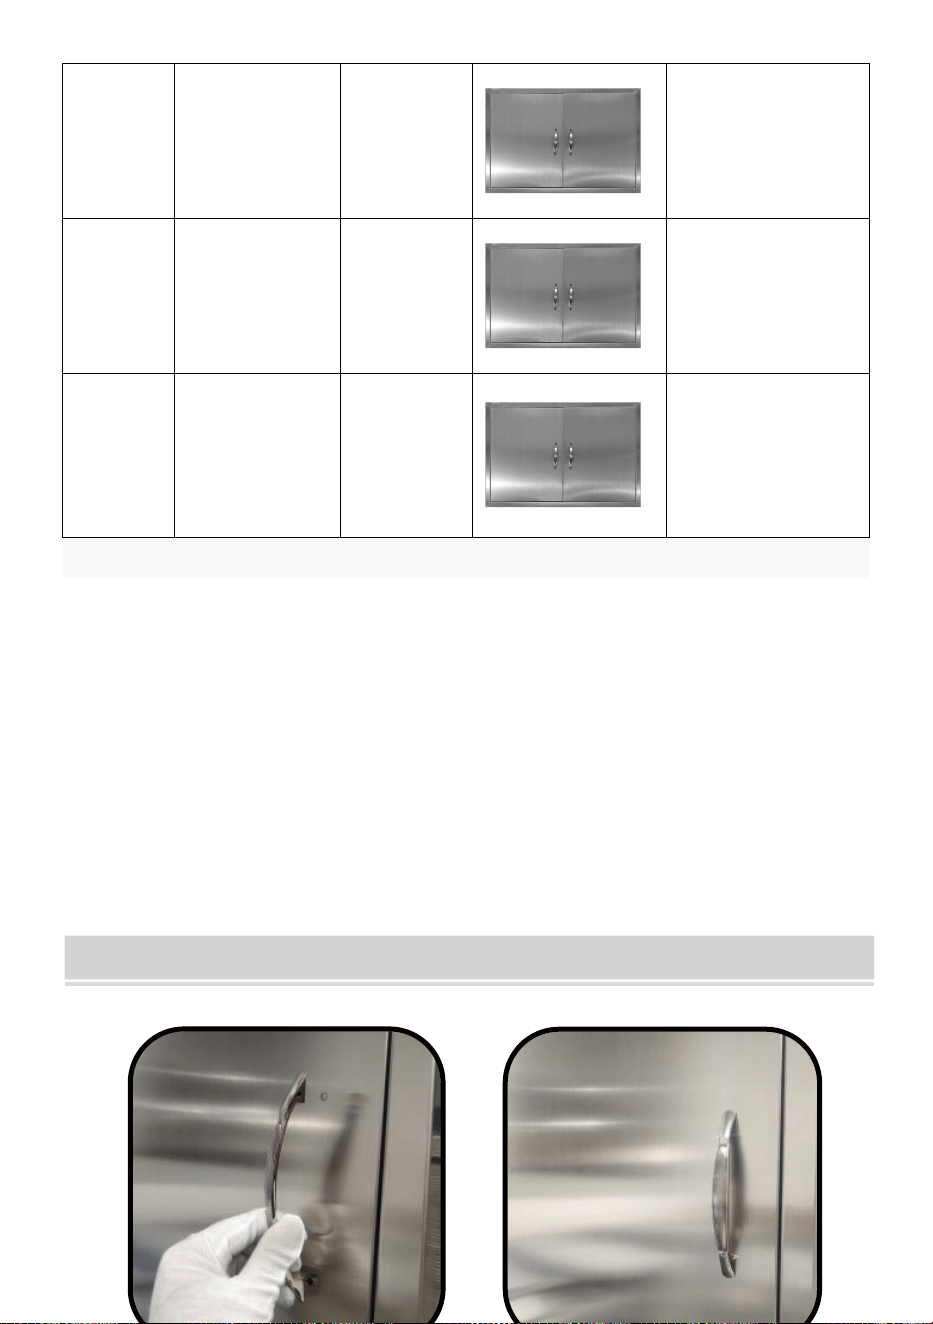
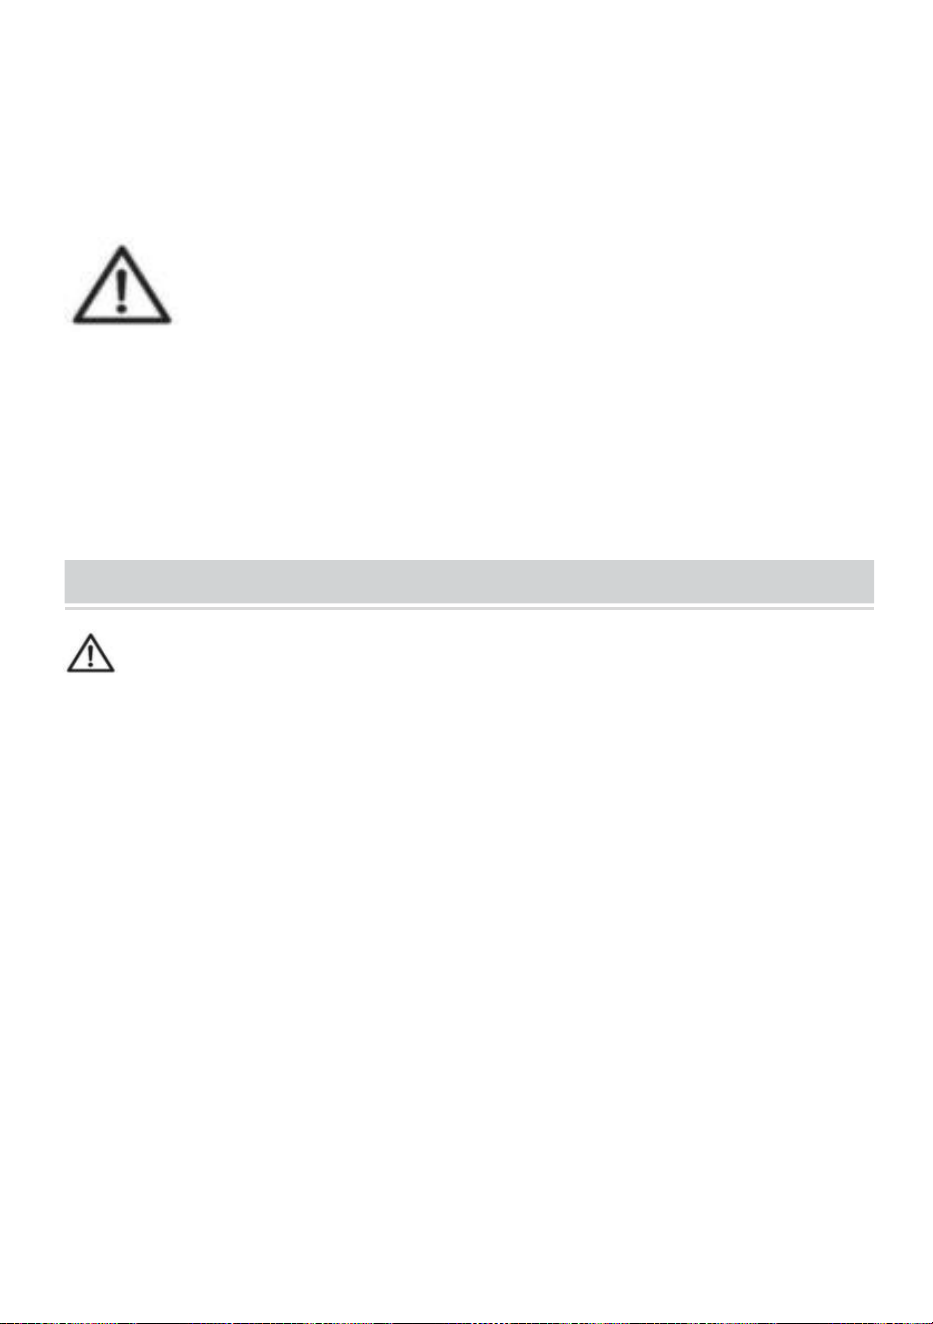
As shown in the figure, install the hook
NOTE:( Only available on models with internal crossbar and comes with
hooks)
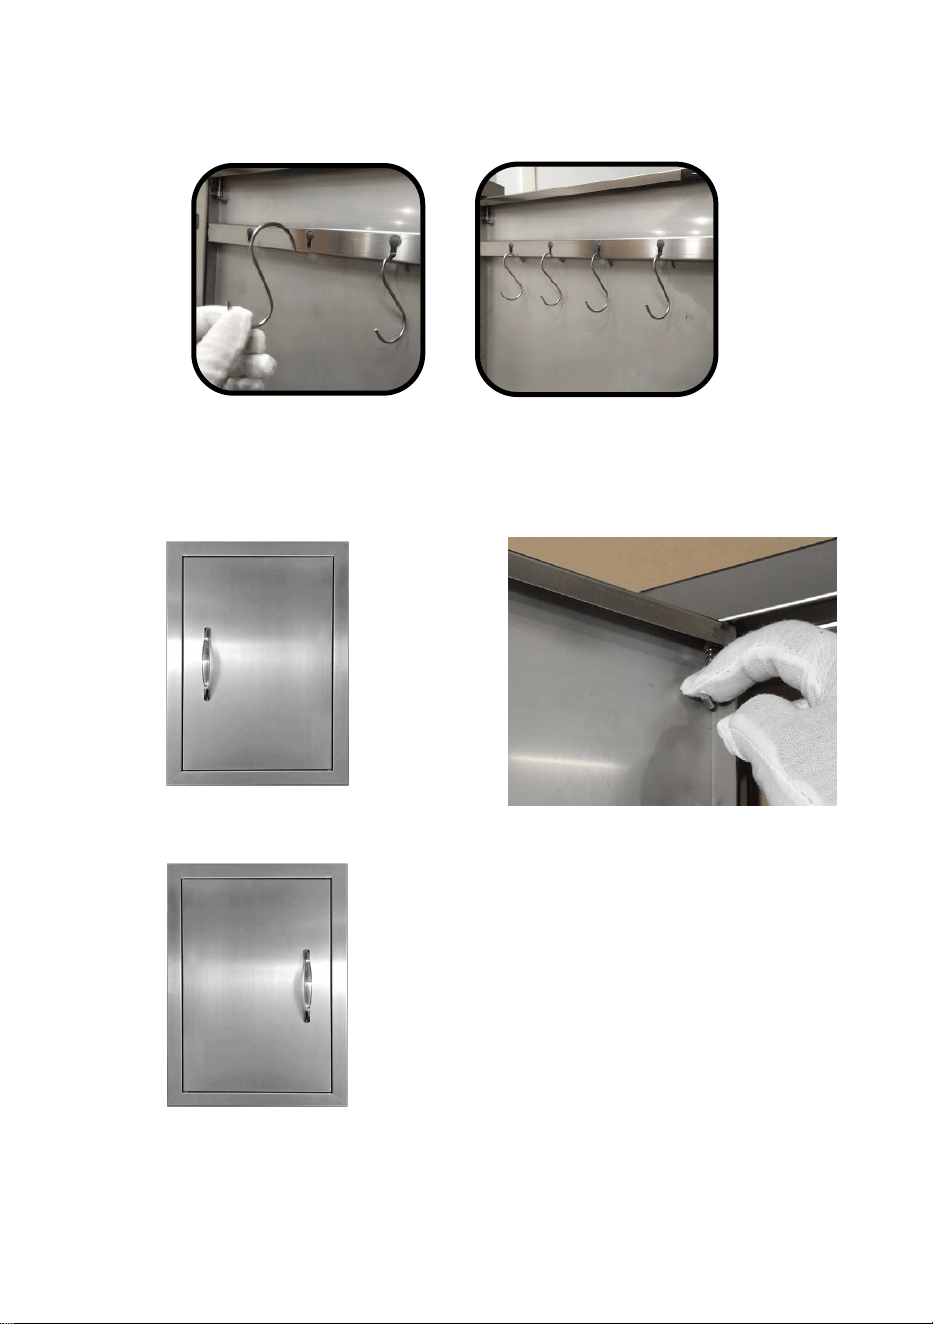
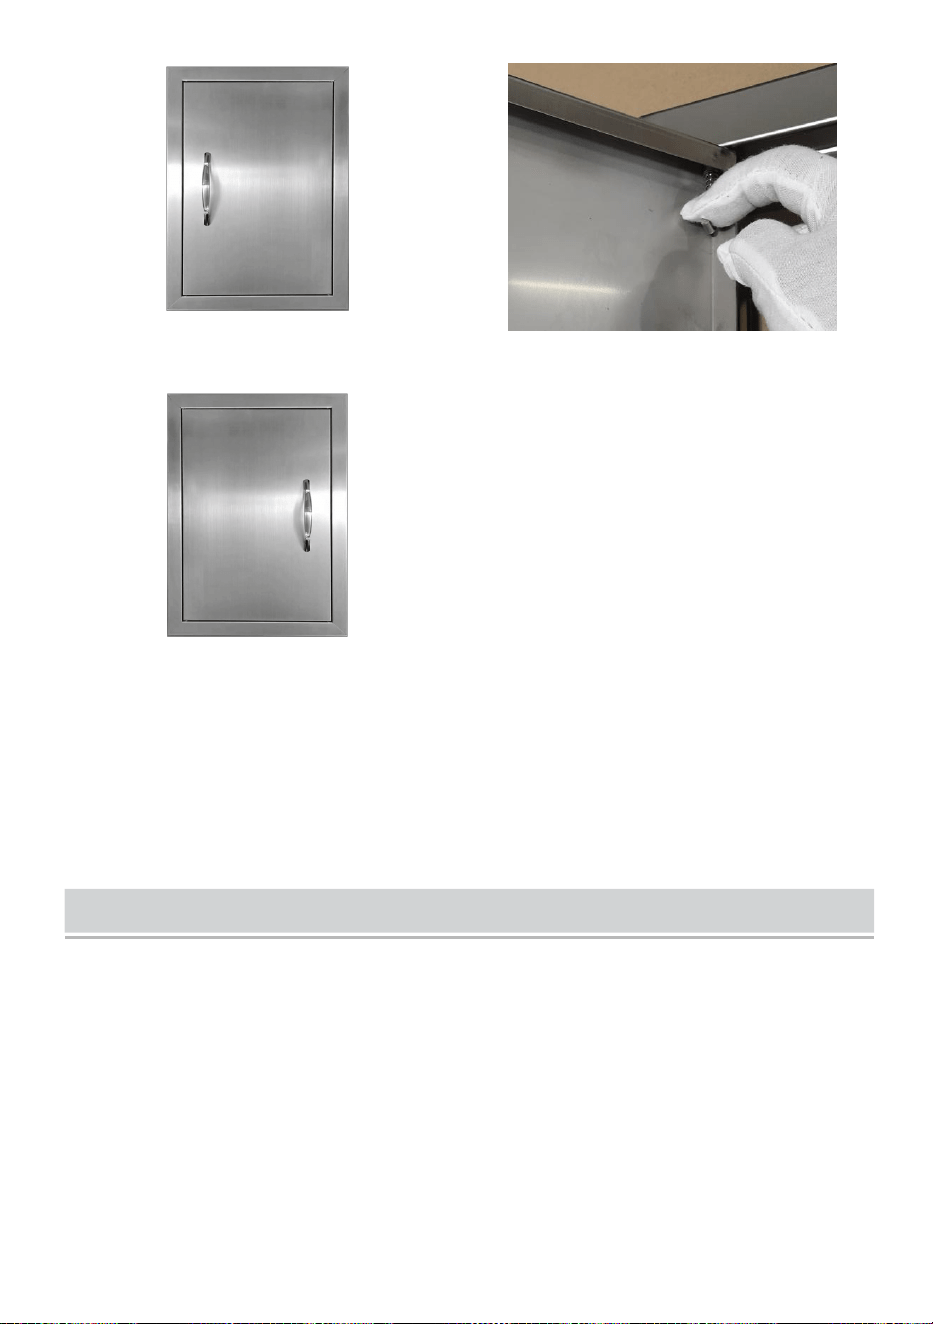
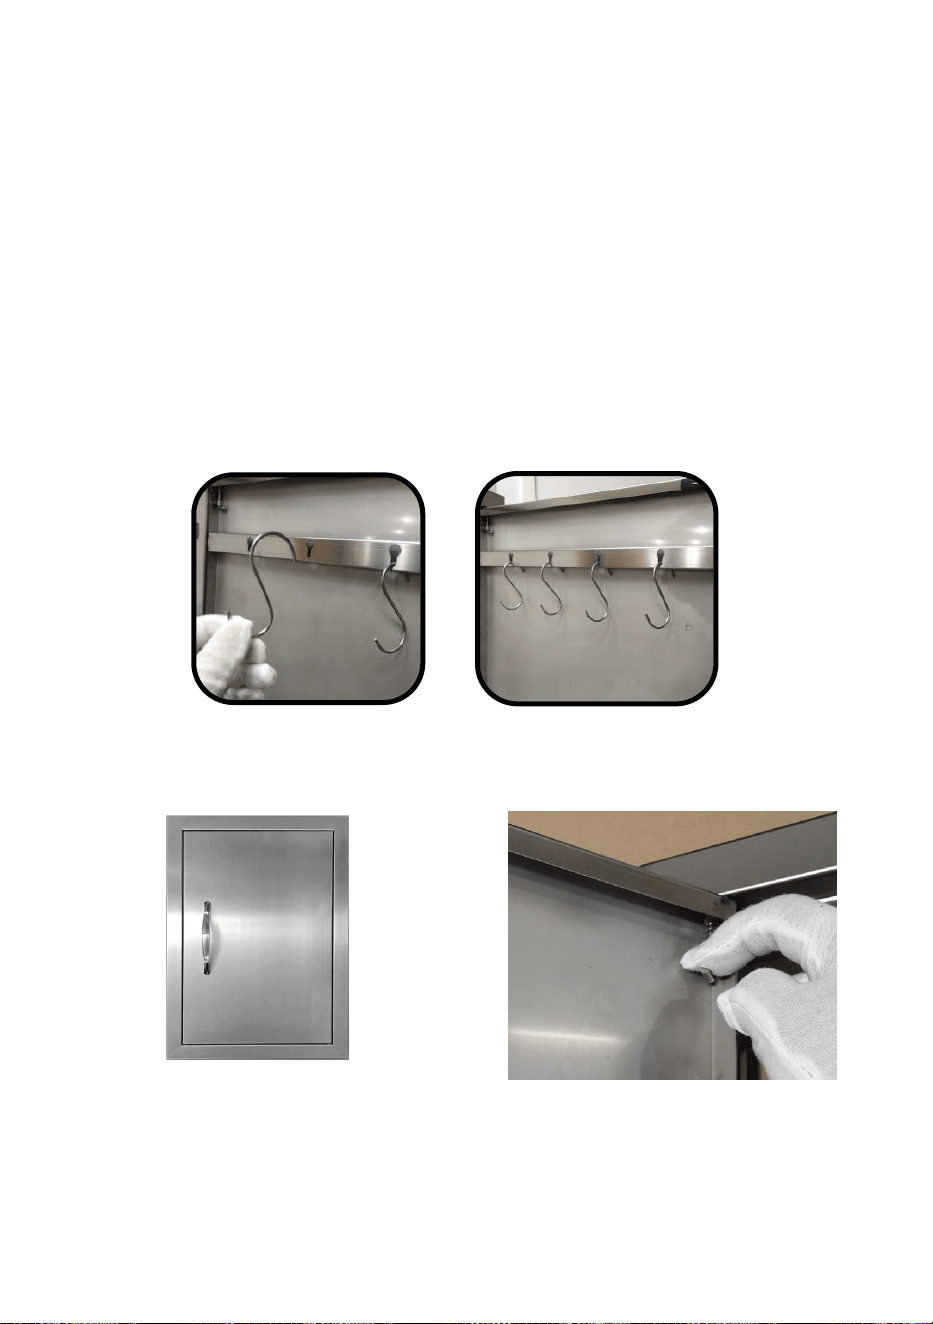
Before the exchange
Pull out the active plug, as shown
After the swap
The single-door model provides left and right interchangeable functions,
which is convenient for users when there is limited installation space to

10
open the door or for users who are left- or right-handed.
CLEAING MAINTENANCE AND STORAGE
1. For cleaning, wipe the surface with a damp (not wet) cloth or equipped
with a scouring pads cloth to wipe.
2. Store the appliance in a dry and clean area.
Manufacturer: Shanghaimuxinmuyeyouxiangongsi
Address: Baoshanqu Shuangchenglu 803long 11hao 1602A-1609shi
Shanghai
Imported to AUS: SIHAO PTY LTD. 1 ROKEVA STREETEASTWOOD
NSW 2122 Australia
Imported to USA: Sanven Technology Ltd.
Suite 250,9166 Anaheim Place, Rancho Cucamonga, CA 91730
Made in China
REP
EC
SHUNSHUN GmbH
Römeräcker 9 Z2021,76351
Linkenheim-Hochstetten,Germany
euvertreter@gmail.com
+49 1727041930
REP
UK
Pooledas Group Ltd
Unit 5 Albert Edward House, The
Pavilions Preston, United Kingdom
pooledas12[email protected]
Tel: 01772418127


Teknisk support och e-garanticertifikat www.vevor.com/support
TILLGÅNGSDÖRR TILL SKÅP
We continue to be committed to provide you tools with competitive price.
"Save Half", "Half Price" or any other similar expressions used by us only represents an
estimate of savings you might benefit from buying certain tools with us compared to the major
top brands and doses not necessarily mean to cover all categories of tools offered by us. You
are kindly reminded to verify carefully when you are placing an order with us if you are
actually saving half in comparison with the top major brands.

1
Tips: Bilden är endast för referens, se motsvarande modell i
manualen för detaljer!
Have product questions? Need technical support? Please feel free to
contact us:
Technical Support and E-Warranty Certificate
www.vevor.com/support
NEED HELP? CONTACT US!
This is the original instruction, please read all manual instructions
carefully before operating. VEVOR reserves a clear interpretation of our
user manual. The appearance of the product shall be subject to the
product you received. Please forgive us that we won't inform you again if
there are any technology or software updates on our product.
CABINET ACCESS DOOR

2
Varning - För att minska risken för skada måste användaren
läsa instruktionerna noggrant.
SAFETY INSTRUCTIONS
Tack för att du använder den här produkten. Läs alla instruktioner innan du
använder den. Informationen hjälper dig att uppnå bästa möjliga resultat.
VARNING:
Läs denna bruksanvisning noggrant innan du använder produkten.
Underlåtenhet att göra det kan leda till allvarliga skador.
ASSEMBLY PRECAUTIONS
1. Montering måste följa dessa instruktioner. Felaktig montering kan vara
en fara.
2. Använd skyddsglasögon och kraftiga arbetshandskar vid montering.
3. Sätt dig inte ihop när du är trött eller påverkad av alkohol, droger eller
medicin.
4. Viktkapacitet och andra produktegenskaper gäller endast för en helt och korrekt
monterad produkt.
5. Håll monteringsområdet rent och väl upplyst.
6. Håll åskådare borta från området under monteringen.
7. Vikten på plattan är tung; Var uppmärksam på installationen för att undvika att
skada den, och vid behov, hitta någon som kan hjälpa till med installationen.
8. Montering bör endast utföras av vuxna.
9 . VARNING: Denna produkt innehåller små delar. Om den sväljs kommer
den att utgöra en kvävningsrisk. Håll dessa små delar borta från barn när
du monterar dem!
10. Innan du använder apparaten för första gången, skala av allt
reklammaterial och förpackningsmaterial .

3
UPPMÄRKSAMHET!
VARNING! Håll barn och husdjur borta.
VARNING! Ta bort allt förpackningsmaterial och behåll det för
framtida bruk. Förpackningsmaterial är ingen leksak.
VARNING! Låt inte barn leka med förpackningsmaterialet. Om de sväljer
förpackningsmaterialet kommer de att kvävas!
SPARA DESSA INSTRUKTIONER
USE PRECAUTIONS
VARNING: FÖR ATT FÖRHINDRA ALLVARLIGA SKADA OCH
DÖDSFALL VID VÄTTNING:
1. För att undvika olyckor eller vassa kanter, vänligen montera och använd
försiktigt.
2. Använd endast på avsett sätt. Sitt eller stå inte på produkten.
3. Inspektera före varje användning. Använd den inte om delar är lösa eller
skadade.
4. Om några delar saknas, är trasiga, skadade eller slitna, sluta använda
denna artikel tills reparationer är gjorda och reservdelar har installerats.
5.Kontrollera installationsstorleken för motsvarande modell av
åtkomsthålet och välj åtkomstdörren som överensstämmer med eller nära
installationsstorleken för installation.
4
PRODUCT PARAMETERS
Modell
Produktstorle
k/ mm
Installation
söppnings
storlek/mm
Illustration
Tillbehör
B012D
432 x 610 x
46
347 x 525
1 x
rengöringsdyna
B013D
457 x 533 x
46
372 x 448
1 x
rengöringsdyna
B001D
355 x 508 x
46
271 x 42 4
1 x
rengöringsdyna
1 x handtag
2 x skruvar
1 x skruvmejsel
B014D
35 6 x 508 x
46
271 x 423
1 x
rengöringsdyna
1 x handtag
2 x skruvar
1 x skruvmejsel
B015D
407 x 559 x
46
321 x 474
1 x
rengöringsdyna
1 x handtag
2 x skruvar
1 x skruvmejsel
5
B016D
415 x 570 x
46
330 x 485
1 x handtag
2 x skruvar
1 x skruvmejsel
B017D
432 x 610 x
46
347 x 525
1 x
rengöringsdyna
1 x handtag
2 x skruvar
1 x skruvmejsel
B01 8 D
508 x 356 x
46
423 x 27 0
1 x
rengöringsdyna
1 x handtag
2 x skruvar
1 x skruvmejsel
B019D
508 x 686 x
46
423 x 601
1 x
rengöringsdyna
1 x handtag
2 x skruvar
1 x skruvmejsel
B020D
610 x 432 x
46
525 x 347
1 x
rengöringsdyna
1 x handtag
2 x skruvar
1 x skruvmejsel
B021D
610 x 432 x
46
52 4 x 347
1 x
rengöringsdyna
1 x handtag
2 x skruvar
1 x skruvmejsel
6
B011S
610 x 610 x 4
8
525 x 525
1 x
rengöringsdyna
2 x Handtag
4 x skruvar
8 x krokar
1 x skruvmejsel
B010S
762 x 533 x
46
677 x 448
1 x
rengöringsdyna
2 x Handtag
4 x skruvar
1 x skruvmejsel
B009S
788 x 610 x
46
703 x 525
2 x Handtag
4 x skruvar
1 x skruvmejsel
B008S
762 x 533 x
46
677 x 448
2 x Handtag
4 x skruvar
1 x skruvmejsel
B007S
838 x 558 x
46
753 x 473
1 x
rengöringsdyna
2 x Handtag
4 x skruvar
1 x skruvmejsel
B006S
863 x 482 x
46
778 x 397
1 x
rengöringsdyna
2 x Handtag
4 x skruvar
1 x skruvmejsel
B005S
915 x 533 x
46
830 x 448
1 x
rengöringsdyna
2 x Handtag
4 x skruvar
1 x skruvmejsel
7
Anmärkning:
1 、 Produktstorlek hänvisar till yttersta längd, bredd och höjddimensioner,
och tillverkningstoleransen är cirka ±2 mm.
2 、 Installationsöppningens storlek hänvisar till storleken på den fasta
positionen på produkten när den är installerad. Tillverkningstoleransen är
cirka ± 2 mm. 3. Vid installation måste användaren mäta storleken på
produktens installationsöppning för att göra spår för att undvika att den blir
för liten för installation eller för stor för instabil installation. Den
rekommenderade storleken är inom 2-5 mm från de faktiska uppmätta
måtten
ASSEMBLY STEPS
B004S
915 x 610 x
46
830 x 525
1 x
rengöringsdyna
2 x Handtag
4 x skruvar
1 x skruvmejsel
B00 3S
790 x 790 x
46
705 x 705
1 x
rengöringsdyna
2 x Handtag
4 x skruvar
1 x skruvmejsel

8
Ta ut handtagen och skruvarna och skruva sedan fast dem i skåpdörren
med skruvmejseln.
OBS: (Detta är endast för modeller med öppna handtag)
Som visas i figuren finns ett 1:1 linjediagram tryckt på kartongens övre och
nedre veck, vilket kan underlätta installationen. Den måste skäras ner och
spårcirkeln urholkas och placeras i installationspositionen för att rita
prickar.
OBS: Användare kan också välja installationsmetod enligt sina egna
installationsvanor, såsom att mäta storleken på det faktiska objektet eller
jämföra det faktiska objektet med det faktiska objektet efter att ha borrat
installationshålen, eller andra mer bekväma installationstekniker, det beror
på du.
9
Borra 2 hål på varje sida av förborrade ramhål. Knacka in plastpluggarna i
hålen. Montera skåpdörren, skruva fast i plastpluggarna på de förborrade
hålen.
Anmärkning: plastpluggar 、 självgängande skruvar måste köpas
av användare, dessa delar ingår inte .
Som visas i bilden, installera kroken
OBS: (Endast tillgängligt på modeller med invändig tvärstång och
levereras med krokar)
Innan bytet
Dra ut den aktiva kontakten enligt
bilden

10
Efter bytet
Enkeldörrsmodellen har utbytbara funktioner för vänster och höger, vilket
är bekvämt för användare när det finns begränsat installationsutrymme för
att öppna dörren eller för användare som är vänster- eller högerhänta.
CLEAING MAINTENANCE AND STORAGE
1. För rengöring, torka av ytan med en fuktig (inte våt) trasa eller utrustad
med en trasa med skursvampar för att torka av.
2. Förvara apparaten på ett torrt och rent utrymme.
Tillverkare: Shanghaimuxinmuyeyouxiangongsi
Adress: Baoshanqu Shuangchenglu 803long 11hao 1602A-1609shi
Shanghai
Importerad till AUS: SIHAO PTY LTD. 1 ROKEVA STREETEASTWOOD
NSW 2122 Australien
Importerad till USA: Sanven Technology Ltd.
Suite 250 , 9166 Anaheim Place, Rancho Cucamonga, CA 91730
REP
EC
SHUNSHUN GmbH
Römeräcker 9 Z2021,76351
Linkenheim-Hochstetten,Germany
euvertreter@gmail.com
+49 1727041930

11
Tillverkad i Kina
REP
UK
Pooledas Group Ltd
Unit 5 Albert Edward House, The
Pavilions Preston, United Kingdom
pooledas12[email protected]
Tel: 01772418127


Certyfikat wsparcia technicznego i e-gwarancji www.vevor.com/support
DRZWI DOSTĘPOWE DO SZAFKI
We continue to be committed to provide you tools with competitive price.
"Save Half", "Half Price" or any other similar expressions used by us only represents an
estimate of savings you might benefit from buying certain tools with us compared to the major
top brands and doses not necessarily mean to cover all categories of tools offered by us. You
are kindly reminded to verify carefully when you are placing an order with us if you are
actually saving half in comparison with the top major brands.

1
Wskazówka: zdjęcie ma wyłącznie charakter poglądowy. Aby uzyskać
szczegółowe informacje, zapoznaj się z odpowiednim modelem w
instrukcji!
Have product questions? Need technical support? Please feel free to
contact us:
Technical Support and E-Warranty Certificate
www.vevor.com/support
NEED HELP? CONTACT US!
CABINET ACCESS DOOR

2
This is the original instruction, please read all manual instructions
carefully before operating. VEVOR reserves a clear interpretation of our
user manual. The appearance of the product shall be subject to the
product you received. Please forgive us that we won't inform you again if
there are any technology or software updates on our product.
Ostrzeżenie — aby zmniejszyć ryzyko obrażeń, użytkownik
musi uważnie przeczytać instrukcję obsługi.
SAFETY INSTRUCTIONS
Dziękujemy za skorzystanie z tego produktu. Przed użyciem przeczytaj
całą instrukcję. Informacje te pomogą Ci osiągnąć najlepsze możliwe
rezultaty.
OSTRZEŻENIE:
Przed użyciem produktu prosimy o dokładne zapoznanie się z niniejszą
instrukcją. Niezastosowanie się do tego może spowodować poważne
obrażenia.
ASSEMBLY PRECAUTIONS
1. Montaż musi przebiegać zgodnie z poniższymi instrukcjami.
Nieprawidłowy montaż może stanowić zagrożenie.
2. Podczas montażu należy nosić okulary ochronne i wytrzymałe rękawice
robocze.
3. Nie montuj będąc zmęczonym, pod wpływem alkoholu, narkotyków lub
leków.
4. Nośność i inne możliwości produktu dotyczą wyłącznie całkowicie i prawidłowo
zmontowanego produktu.
5. Utrzymuj miejsce zbiórki w czystości i dobrze oświetlone.
6. Podczas montażu trzymaj osoby postronne z dala od obszaru.
7. Ciężar talerza jest duży; zwróć uwagę na instalację, aby jej nie uszkodzić, a
jeśli to konieczne, znajdź kogoś, kto pomoże w instalacji.
3
8.Montażu powinny dokonywać wyłącznie osoby dorosłe.
9 . OSTRZEŻENIE: Ten produkt zawiera małe części. W przypadku
połknięcia istnieje ryzyko zadławienia. Podczas montażu trzymaj te małe
części z dala od dzieci!
10. Przed pierwszym użyciem urządzenia należy odkleić wszelkie
materiały promocyjne i opakowania .
UWAGA!
OSTRZEŻENIE! Trzymaj dzieci i zwierzęta z daleka.
OSTRZEŻENIE! Usuń wszystkie materiały opakowaniowe i
zachowaj je do wykorzystania w przyszłości. Materiały opakowaniowe nie
są zabawką.
OSTRZEŻENIE! Nie pozwalaj dzieciom bawić się materiałami
opakowaniowymi. Jeśli połkną materiały opakowaniowe, uduszą się!
ZACHOWAJ TE INSTRUKCJE
USE PRECAUTIONS
OSTRZEŻENIE: ABY ZAPOBIEC POWAŻNYM OBRAŻeniom LUB
ŚMIERCI NA WYWROCIE:
1. Aby uniknąć wypadków lub zranie ń ostrymi krawędziami, należy
składać i używać ostrożnie.
2. Używaj wyłącznie zgodnie z przeznaczeniem. Nie siadaj ani nie stawaj
na produkcie.
3. Sprawdź przed każdym użyciem. Nie używaj go, jeśli części są luźne lub
uszkodzone.
4. Jeśli brakuje jakichkolwiek części, są one uszkodzone, uszkodzone lub
4
zużyte, zaprzesta ń używania tego przedmiotu do czasu naprawy i
zainstalowania części zamiennych.
5. Sprawdź rozmiar montażowy odpowiedniego modelu otworu
dostępowego i wybierz drzwi dostępowe zgodne lub zbliżone do rozmiaru
instalacyjnego do instalacji.
PRODUCT PARAMETERS
Model
Rozmiar
produktu/ mm
Rozmiar
otworu
montażow
ego/mm
Ilustracja
Akcesorium
B012D
432x610x46 _
_ _ _
347 x 525
1 x podkładka
czyszcząca
B013D
457x533x46 _
_ _ _
372 x 448
1 x podkładka
czyszcząca
5
B001D
355x508x46 _
_ _ _
271 x 42 4
1 x podkładka
czyszcząca
1 x uchwyt
2 x śruby
1 x śrubokręt
B014D
35 6x508x46
_ _ _ _
271 x 423
1 x podkładka
czyszcząca
1 x uchwyt
2 x śruby
1 x śrubokręt
B015D
407x559x46 _
_ _ _
321 x 474
1 x podkładka
czyszcząca
1 x uchwyt
2 x śruby
1 x śrubokręt
B016D
415x570x46 _
_ _ _
330 x 485
1 x uchwyt
2 x śruby
1 x śrubokręt
B017D
432x610x46 _
_ _ _
347 x 525
1 x podkładka
czyszcząca
1 x uchwyt
2 x śruby
1 x śrubokręt
B01 8 D
508x356x46 _
_ _ _
423 x 27 0
1 x podkładka
czyszcząca
1 x uchwyt
2 x śruby
1 x śrubokręt

6
B019D
508x686x46 _
_ _ _
423 x 601
1 x podkładka
czyszcząca
1 x uchwyt
2 x śruby
1 x śrubokręt
B020D
610x432x46 _
_ _ _
525 x 347
1 x podkładka
czyszcząca
1 x uchwyt
2 x śruby
1 x śrubokręt
B021D
610x432x46 _
_ _ _
52 4x347 _
_
1 x podkładka
czyszcząca
1 x uchwyt
2 x śruby
1 x śrubokręt
B011S
610 x 610 x 4
8
525 x 525
1 x podkładka
czyszcząca
2 x uchwyt
4 x śruby
8 x haczyki
1 x śrubokręt
B010S
762 x 533 x
46
677 x 448
1 x podkładka
czyszcząca
2 x uchwyt
4 x śruby
1 x śrubokręt
B009S
788x610x46 _
_ _ _
703 x 525
2 x uchwyt
4 x śruby
1 x śrubokręt
B008S
762 x 533 x
46
677 x 448
2 x uchwyt
4 x śruby
1 x śrubokręt
7
Uwaga:
1 、 Rozmiar produktu odnosi się do najbardziej zewnętrznych wymiarów
długości, szerokości i wysokości, a tolerancja produkcyjna wynosi około ±
2 mm.
2. Rozmiar otworu montażowego odnosi się do rozmiaru stałej pozycji
produktu po jego zainstalowaniu. Tolerancja produkcyjna wynosi około ±
2 mm. 3. Podczas instalacji użytkownik musi zmierzyć rozmiar otworu
instalacyjnego produktu, aby wykonać rowki, aby uniknąć zbyt małego
rozmiaru do instalacji lub zbyt dużego w przypadku niestabilnej instalacji.
Zalecany rozmiar mieści się w granicach 2-5 mm od faktycznie
zmierzonych wymiarów
B007S
838x558x46 _
_ _ _
753 x 473
1 x podkładka
czyszcząca
2 x uchwyt
4 x śruby
1 x śrubokręt
B006S
863 x 482 x
46
778 x 397
1 x podkładka
czyszcząca
2 x uchwyt
4 x śruby
1 x śrubokręt
B005S
915x533x46 _
_ _ _
830 x 448
1 x podkładka
czyszcząca
2 x uchwyt
4 x śruby
1 x śrubokręt
B004S
915x610x46 _
_ _ _
830 x 525
1 x podkładka
czyszcząca
2 x uchwyt
4 x śruby
1 x śrubokręt
B00 3S
790x790x46 _
_ _ _
705 x 705
1 x podkładka
czyszcząca
2 x uchwyt
4 x śruby
1 x śrubokręt
8
ASSEMBLY STEPS
Wyjmij uchwyty i śruby, a następnie przykręć je śrubokrętem do drzwi
szafy.
UWAGA: (Dotyczy to tylko modeli z otwartymi uchwytami)
Jak pokazano na rysunku, na górnej i dolnej krawędzi kartonu
wydrukowany jest schemat liniowy w skali 1:1, który może ułatwić montaż.
Należy go wyciąć, a okrąg toru wydrążyć i umieścić w pozycji montażowej,
aby narysować kropki.
9
UWAGA: Użytkownicy mogą również wybrać metodę instalacji zgodnie z
własnymi przyzwyczajeniami instalacyjnymi, takimi jak pomiar rozmiaru
rzeczywistego obiektu lub porównanie rzeczywistego obiektu z
rzeczywistym obiektem po wywierceniu otworów montażowych lub inne,
wygodniejsze techniki instalacji, w zależności od Ty.
Wywierć 2 otwory po każdej stronie wstępnie wywierconych otworów w
ramie. Włóż plastikowe zatyczki w otwory. Zamontuj drzwi szafki, wkręć
plastikowe zatyczki do wstępnie wywierconych otworów.
Uwaga: należy zakupić plastikowe zatyczki , wkręty samogwintujące
przez użytkownika, te części nie są uwzględnione .
Jak pokazano na rysunku, zamontuj hak
UWAGA: (dostępne tylko w modelach z wewnętrzną poprzeczką i
haczykami)

10
Przed wymianą
Wyciągnij aktywną wtyczkę, jak
pokazano
Po wymianie
Model jednodrzwiowy zapewnia wymienne funkcje lewe i prawe, co jest
wygodne dla użytkowników, gdy przestrzeń montażowa jest ograniczona
do otwarcia drzwi lub dla użytkowników lewo- lub praworęcznych.
CLEAING MAINTENANCE AND STORAGE
1. Do czyszczenia należy przetrzeć powierzchnię wilgotną (nie mokrą)
szmatką lub zaopatrzoną w ściereczkę do szorowania.
2. Przechowuj urządzenie w suchym i czystym miejscu.
Producent: Shanghaimuxinmuyeyouxiangongsi

11
Adres: Baoshanqu Shuangchenglu 803long 11hao 1602A-1609shi
Szanghaj
Import do AUS: SIHAO PTY LTD. 1 ROKEVA STREETEASTWOOD NSW
2122 Australia
Import do USA: Sanven Technology Ltd.
Apartament 250 , 9166 Anaheim Place, Rancho Cucamonga, Kalifornia
91730
Wyprodukowano w Chinach
REP
EC
SHUNSHUN GmbH
Römeräcker 9 Z2021,76351
Linkenheim-Hochstetten,Germany
euvertreter@gmail.com
+49 1727041930
REP
UK
Pooledas Group Ltd
Unit 5 Albert Edward House, The
Pavilions Preston, United Kingdom
pooledas12[email protected]
Tel: 01772418127


Technischer Support und E-Garantiezertifikat www.vevor.com/support
SCHRANKZUGANGSTÜR
We continue to be committed to provide you tools with competitive price.
"Save Half", "Half Price" or any other similar expressions used by us only represents an
estimate of savings you might benefit from buying certain tools with us compared to the major
top brands and doses not necessarily mean to cover all categories of tools offered by us. You
are kindly reminded to verify carefully when you are placing an order with us if you are
actually saving half in comparison with the top major brands.

1
Tipp: Das Bild dient nur als Referenz. Einzelheiten entnehmen Sie
bitte dem entsprechenden Modell im Handbuch!
Have product questions? Need technical support? Please feel free to
contact us:
Technical Support and E-Warranty Certificate
www.vevor.com/support
NEED HELP? CONTACT US!
This is the original instruction, please read all manual instructions
carefully before operating. VEVOR reserves a clear interpretation of our
user manual. The appearance of the product shall be subject to the
product you received. Please forgive us that we won't inform you again if
there are any technology or software updates on our product.
CABINET ACCESS DOOR

2
Warnung: Um das Verletzungsrisiko zu verringern, muss der
Benutzer die Bedienungsanleitung sorgfältig lesen.
SAFETY INSTRUCTIONS
Vielen Dank, dass Sie dieses Produkt verwenden. Bitte lesen Sie vor der
Anwendung alle Anweisungen durch. Die Informationen helfen Ihnen dabei,
die bestmöglichen Ergebnisse zu erzielen.
WARNUNG:
Bitte lesen Sie dieses Handbuch sorgfältig durch, bevor Sie das Produkt
verwenden. Andernfalls kann es zu schweren Verletzungen kommen.
ASSEMBLY PRECAUTIONS
1. Beim Zusammenbau müssen diese Anweisungen befolgt werden. Eine
falsche Montage kann eine Gefahr darstellen.
2. Tragen Sie bei der Montage eine Schutzbrille und strapazierfähige
Arbeitshandschuhe.
3. Montieren Sie das Gerät nicht, wenn Sie müde sind oder unter dem
Einfluss von Alkohol, Drogen oder Medikamenten stehen.
4. Belastbarkeit und andere Produkteigenschaften gelten nur für ein vollständig
und korrekt montiertes Produkt.
5. Halten Sie den Montagebereich sauber und gut beleuchtet.
6. Halten Sie während der Montage unbeteiligte Personen aus dem
Bereich fern.
7. Das Gewicht der Platte ist hoch; Achten Sie auf die Installation, um
Verletzungen zu vermeiden, und suchen Sie bei Bedarf jemanden, der Sie bei
der Installation unterstützt.
8. Der Zusammenbau sollte nur von Erwachsenen durchgeführt werden.
9 . WARNUNG: Dieses Produkt enthält Kleinteile. Bei Verschlucken
besteht Erstickungsgefahr. Halten Sie diese Kleinteile beim Zusammenbau
von Kindern fern!
10. Entfernen Sie vor dem ersten Gebrauch des Geräts alle

3
Werbematerialien und Verpackungsmaterialien .
AUFMERKSAMKEIT!
WARNUNG! Halten Sie Kinder und Haustiere fern.
WARNUNG! Entfernen Sie alle Verpackungsmaterialien und
bewahren Sie sie für eine spätere Verwendung auf.
Verpackungsmaterialien sind kein Spielzeug.
WARNUNG! Lassen Sie Kinder nicht mit den Verpackungsmaterialien
spielen. Wenn sie das Verpackungsmaterial verschlucken, ersticken sie!
ANLEITUNG AUFBEWAHREN
USE PRECAUTIONS
WARNUNG: UM SCHWERE VERLETZUNGEN UND TOD DURCH
UMKIPPEN ZU VERMEIDEN:
1. Um Unfälle oder Verletzungen durch scharfe Kanten zu vermeiden,
montieren und verwenden Sie das Gerät bitte vorsichtig.
2. Nur bestimmungsgemäß verwenden. Setzen oder stehen Sie nicht auf
dem Produkt.
3. Vor jedem Gebrauch prüfen. Benutzen Sie es nicht, wenn Teile lose oder
beschädigt sind.
4. Wenn Teile fehlen, kaputt, beschädigt oder abgenutzt sind, verwenden
Sie diesen Artikel nicht mehr, bis die Reparaturen durchgeführt und
Ersatzteile installiert wurden.
5. Überprüfen Sie die Installationsgröße des entsprechenden Modells der
Zugangsöffnung und wählen Sie für die Installation die Zugangstür aus, die
der Installationsgröße entspricht oder dieser nahe kommt.
4
PRODUCT PARAMETERS
Modell
Produktgröße
/ mm
Einbauöffn
ungsgröße
/mm
Illustration
Zubehörteil
B012D
432 x 610 x
46
347 x 525
1 x
Reinigungspad
B013D
457 x 533 x
46
372 x 448
1 x
Reinigungspad
B001D
355 x 508 x
46
271 x 42 4
1 x
Reinigungspad
1 x Griff
2 x Schrauben
1 x
Schraubendreher
5
B014D
35 6 x 508 x
46
271 x 423
1 x
Reinigungspad
1 x Griff
2 x Schrauben
1 x
Schraubendreher
B015D
407 x 559 x
46
321 x 474
1 x
Reinigungspad
1 x Griff
2 x Schrauben
1 x
Schraubendreher
B016D
415 x 570 x
46
330 x 485
1 x Griff
2 x Schrauben
1 x
Schraubendreher
B017D
432 x 610 x
46
347 x 525
1 x
Reinigungspad
1 x Griff
2 x Schrauben
1 x
Schraubendreher
B01 8 D
508 x 356 x
46
423 x 27 0
1 x
Reinigungspad
1 x Griff
2 x Schrauben
1 x
Schraubendreher
B019D
508 x 686 x
46
423 x 601
1 x
Reinigungspad
1 x Griff
2 x Schrauben
1 x
Schraubendreher
6
B020D
610 x 432 x
46
525 x 347
1 x
Reinigungspad
1 x Griff
2 x Schrauben
1 x
Schraubendreher
B021D
610 x 432 x
46
52 4 x 347
1 x
Reinigungspad
1 x Griff
2 x Schrauben
1 x
Schraubendreher
B011S
610 x 610 x 4
8
525 x 525
1 x
Reinigungspad
2 x Griff
4 x Schrauben
8 x Haken
1 x
Schraubendreher
B010S
762 x 533 x
46
677 x 448
1 x
Reinigungspad
2 x Griff
4 x Schrauben
1 x
Schraubendreher
B009S
788 x 610 x
46
703 x 525
2 x Griff
4 x Schrauben
1 x
Schraubendreher
B008S
762 x 533 x
46
677 x 448
2 x Griff
4 x Schrauben
1 x
Schraubendreher
7
Anmerkung:
1 、 Die Produktgröße bezieht sich auf die äußersten Längen-, Breiten-
und Höhenabmessungen und die Herstellungstoleranz beträgt ca. ± 2
mm.
2、Die Größe der Installationsöffnung bezieht sich auf die Größe der festen
Position am Produkt, wenn es installiert wird. Die Fertigungstoleranz
beträgt ca. ± 2mm. 3. Bei der Installation muss der Benutzer die Größe
B007S
838 x 558 x
46
753 x 473
1 x
Reinigungspad
2 x Griff
4 x Schrauben
1 x
Schraubendreher
B006S
863 x 482 x
46
778 x 397
1 x
Reinigungspad
2 x Griff
4 x Schrauben
1 x
Schraubendreher
B005S
915 x 533 x
46
830 x 448
1 x
Reinigungspad
2 x Griff
4 x Schrauben
1 x
Schraubendreher
B004S
915 x 610 x
46
830 x 525
1 x
Reinigungspad
2 x Griff
4 x Schrauben
1 x
Schraubendreher
B00 3S
790 x 790 x
46
705 x 705
1 x
Reinigungspad
2 x Griff
4 x Schrauben
1 x
Schraubendreher
8
der Installationsöffnung des Produkts messen, um Rillen zu erzeugen,
damit es nicht zu klein für die Installation oder zu groß für eine instabile
Installation ist. Die empfohlene Größe liegt innerhalb von 2 – 5 mm der
tatsächlich gemessenen Abmessungen
ASSEMBLY STEPS
Nehmen Sie die Griffe und Schrauben heraus und schrauben Sie sie dann
mit dem Schraubendreher in die Schranktür.
HINWEIS: (Dies gilt nur für Modelle mit offenen Griffen.)
9
Wie in der Abbildung dargestellt, ist auf der oberen und unteren Falte des
Kartons ein 1:1-Liniendiagramm aufgedruckt, das die Installation
erleichtern kann. Es muss abgeschnitten und der Gleiskreis ausgehöhlt
und an der Installationsposition platziert werden, um Punkte zu zeichnen.
HINWEIS: Benutzer können die Installationsmethode auch entsprechend
ihren eigenen Installationsgewohnheiten auswählen, z. B. Messen der
Größe des tatsächlichen Objekts oder Vergleichen des tatsächlichen
Objekts mit dem tatsächlichen Objekt nach dem Bohren der
Installationslöcher oder andere bequemere Installationstechniken, je
nachdem Du.
Bohren Sie zwei Löcher auf jeder Seite der vorgebohrten Rahmenlöcher.
Klopfen Sie die Kunststoffstopfen in die Löcher. Installieren Sie die
Schranktür und schrauben Sie sie in die Kunststoffstopfen der
vorgebohrten Löcher.
Anmerkung: Kunststoffstopfen und selbstschneidende Schrauben müssen
gekauft werden
Diese Teile sind vom Benutzer nicht im Lieferumfang enthalten .

10
Montieren Sie den Haken wie in der Abbildung gezeigt
HINWEIS: (Nur bei Modellen mit interner Querstange verfügbar und mit
Haken ausgestattet.)
Vor dem Austausch
Ziehen Sie den Aktivstecker wie
abgebildet heraus
Nach dem Tausch
Das eintürige Modell bietet links und rechts austauschbare Funktionen,
was für Benutzer praktisch ist, wenn nur begrenzter Installationsraum zum
Öffnen der Tür vorhanden ist, oder für Benutzer, die Links- oder
Rechtshänder sind.
CLEAING MAINTENANCE AND STORAGE
1. Wischen Sie die Oberfläche zum Reinigen mit einem feuchten (nicht
nassen) Tuch ab oder wischen Sie sie mit einem Scheuerschwamm ab.
2. Bewahren Sie das Gerät an einem trockenen und sauberen Ort auf.

11
Hersteller: Shanghaimuxinmuyeyouxiangongsi
Adresse: Baoshanqu Shuangchenglu 803long 11hao 1602A-1609shi
Shanghai
Importiert nach AUS: SIHAO PTY LTD. 1 ROKEVA STREETEASTWOOD
NSW 2122 Australien
Importiert in die USA: Sanven Technology Ltd.
Suite 250 , 9166 Anaheim Place, Rancho Cucamonga, CA 91730
In China hergestellt
REP
EC
SHUNSHUN GmbH
Römeräcker 9 Z2021,76351
Linkenheim-Hochstetten,Germany
euvertreter@gmail.com
+49 1727041930
REP
UK
Pooledas Group Ltd
Unit 5 Albert Edward House, The
Pavilions Preston, United Kingdom
pooledas12[email protected]
Tel: 01772418127


Assistance technique et certificat de garantie électronique www.vevor.com/support
PORTE D'ACCÈS À L'ARMOIRE
We continue to be committed to provide you tools with competitive price.
"Save Half", "Half Price" or any other similar expressions used by us only represents an
estimate of savings you might benefit from buying certain tools with us compared to the major
top brands and doses not necessarily mean to cover all categories of tools offered by us. You
are kindly reminded to verify carefully when you are placing an order with us if you are
actually saving half in comparison with the top major brands.

1
Astuce : L'image est à titre de référence uniquement, veuillez vous
référer au modèle correspondant dans le manuel pour plus de
détails !
Have product questions? Need technical support? Please feel free to
contact us:
Technical Support and E-Warranty Certificate
www.vevor.com/support
NEED HELP? CONTACT US!
CABINET ACCESS DOOR

2
This is the original instruction, please read all manual instructions
carefully before operating. VEVOR reserves a clear interpretation of our
user manual. The appearance of the product shall be subject to the
product you received. Please forgive us that we won't inform you again if
there are any technology or software updates on our product.
Avertissement : Pour réduire le risque de blessure, l'utilisateur
doit lire attentivement le manuel d'instructions.
SAFETY INSTRUCTIONS
Merci d'avoir utilisé ce produit. Veuillez lire toutes les instructions avant de
l'utiliser. Les informations vous aideront à obtenir les meilleurs résultats
possibles.
AVERTISSEMENT:
Veuillez lire attentivement ce manuel avant d'utiliser le produit. Ne pas le
faire pourrait entraîner des blessures graves.
ASSEMBLY PRECAUTIONS
1. L'assemblage doit suivre ces instructions. Un montage incorrect peut
constituer un danger.
2. Portez des lunettes de sécurité et des gants de travail robustes pendant
l'assemblage.
3. Ne vous rassemblez pas lorsque vous êtes fatigué ou sous l'influence
de l'alcool, de drogues ou de médicaments.
4. La capacité de poids et les autres capacités du produit s'appliquent uniquement
à un produit entièrement et correctement assemblé.
5. Gardez la zone de montage propre et bien éclairée.
6. Gardez les spectateurs hors de la zone pendant l'assemblage.
7. Le poids de la plaque est lourd ; faites attention à l'installation pour éviter de
l'endommager et, si nécessaire, trouvez quelqu'un pour vous aider à
l'installation.
3
8.L'assemblage doit être effectué uniquement par des adultes.
9 . AVERTISSEMENT : ce produit contient de petites pièces. En cas
d'ingestion, il présente un risque d'étouffement. Gardez ces petites pièces
hors de portée des enfants lors du montage !
10. Avant d'utiliser l'appareil pour la première fois, décollez tout matériel
promotionnel et tout matériel d'emballage .
ATTENTION!
AVERTISSEMENT! Éloignez les enfants et les animaux
domestiques.
AVERTISSEMENT! Retirez tous les matériaux d’emballage et
conservez-les pour une utilisation future. Les matériaux d’emballage ne
sont pas des jouets.
AVERTISSEMENT! Ne laissez pas les enfants jouer avec les matériaux
d'emballage. S’ils avalent les matériaux d’emballage, ils vont s’étouffer !
CONSERVEZ CES INSTRUCTIONS
USE PRECAUTIONS
AVERTISSEMENT : POUR ÉVITER DES BLESSURES GRAVES
ET LA MORT PAR BASCULEMENT :
1. Pour éviter les accidents ou les blessures aux bords tranchants, veuillez
assembler et utiliser avec soin.
2. Utiliser uniquement comme prévu. Ne vous asseyez pas et ne vous
tenez pas debout sur le produit.
3. Inspectez avant chaque utilisation. Ne l'utilisez pas si les pièces sont
desserrées ou endommagées.
4. Si des pièces sont manquantes, cassées, endommagées ou usées,
arrêtez d'utiliser cet article jusqu'à ce que les réparations soient effectuées
4
et que les pièces de rechange soient installées.
5. Vérifiez la taille d'installation du modèle correspondant du trou d'accès
et sélectionnez la porte d'accès conforme ou proche de la taille
d'installation pour l'installation.
PRODUCT PARAMETERS
Modèle
Taille du
produit/ mm
Taille de
l'ouverture
d'installati
on/mm
Illustration
Accessoire
B012D
432 x 610 x
46
347 x 525
1 x tampon de
nettoyage
B013D
457 x 533 x
46
372 x 448
1 x tampon de
nettoyage

5
B001D
355x508x46 _
_ _ _
271 x 42 4
1 x tampon de
nettoyage
1 x poignée
2 vis
1 x Tournevis
B014D
35 6x508x46
_ _ _ _
271 x 423
1 x tampon de
nettoyage
1 x poignée
2 vis
1 x Tournevis
B015D
407 x 559 x
46
321 x 474
1 x tampon de
nettoyage
1 x poignée
2 vis
1 x Tournevis
B016D
415 x 570 x
46
330 x 485
1 x poignée
2 vis
1 x Tournevis
B017D
432 x 610 x
46
347 x 525
1 x tampon de
nettoyage
1 x poignée
2 vis
1 x Tournevis
B01 8D
_
508 x 356 x
46
423 x 27 0
1 x tampon de
nettoyage
1 x poignée
2 vis
1 x Tournevis
6
B019D
508 x 686 x
46
423 x 601
1 x tampon de
nettoyage
1 x poignée
2 vis
1 x Tournevis
B020D
610 x 432 x
46
525 x 347
1 x tampon de
nettoyage
1 x poignée
2 vis
1 x Tournevis
B021D
610 x 432 x
46
52 4x347 _
_
1 x tampon de
nettoyage
1 x poignée
2 vis
1 x Tournevis
B011S
610 x 610 x 4
8
525 x 525
1 x tampon de
nettoyage
2 x Poignée
4 x Vis
8 x Crochets
1 x Tournevis
B010S
762 x 533 x
46
677 x 448
1 x tampon de
nettoyage
2 x Poignée
4 x Vis
1 x Tournevis
B009S
788 x 610 x
46
703 x 525
2 x Poignée
4 x Vis
1 x Tournevis
B008S
762 x 533 x
46
677 x 448
2 x Poignée
4 x Vis
1 x Tournevis

7
Remarque:
1. La taille du produit fait référence aux dimensions extérieures de
longueur, de largeur et de hauteur, et la tolérance de fabrication est
d'environ ± 2 mm.
2. La taille de l'ouverture d'installation fait référence à la taille de la position
fixe sur le produit lors de son installation. La tolérance de fabrication est
d'environ ±2 mm. 3. Lors de l'installation, l'utilisateur doit mesurer la taille
de l'ouverture d'installation du produit pour créer des rainures afin d'éviter
qu'il soit trop petit pour l'installation ou trop grand pour une installation
instable. La taille recommandée est comprise entre 2 et 5 mm des
dimensions réelles mesurées.
B007S
838 x 558 x
46
753 x 473
1 x tampon de
nettoyage
2 x Poignée
4 x Vis
1 x Tournevis
B006S
863 x 482 x
46
778 x 397
1 x tampon de
nettoyage
2 x Poignée
4 x Vis
1 x Tournevis
B005S
915 x 533 x
46
830 x 448
1 x tampon de
nettoyage
2 x Poignée
4 x Vis
1 x Tournevis
B004S
915 x 610 x
46
830 x 525
1 x tampon de
nettoyage
2 x Poignée
4 x Vis
1 x Tournevis
B00 3S
790 x 790 x
46
705 x 705
1 x tampon de
nettoyage
2 x Poignée
4 x Vis
1 x Tournevis

8
ASSEMBLY STEPS
Retirez les poignées et les vis, puis vissez-les dans la porte de l'armoire
avec le tournevis.
REMARQUE : (Ceci concerne uniquement les modèles avec poignées
ouvertes)
Comme le montre la figure, un diagramme linéaire 1:1 est imprimé sur les
plis supérieur et inférieur du carton, ce qui peut faciliter l'installation. Il doit
être coupé et le cercle de piste est creusé et placé à la position
d'installation pour dessiner des points.
9
REMARQUE : Les utilisateurs peuvent également choisir la méthode
d'installation en fonction de leurs propres habitudes d'installation, comme
mesurer la taille de l'objet réel ou comparer l'objet réel avec l'objet réel
après avoir percé les trous d'installation, ou d'autres techniques
d'installation plus pratiques, cela dépend de toi.
Percez 2 trous de chaque côté des trous de cadre pré-percés. Enfoncez
les bouchons en plastique dans les trous. Installez la porte de l'armoire,
vissez les bouchons en plastique des trous pré-percés.
Remarque : des bouchons en plastique , des vis autotaraudeuses doivent
être achetées
par l'utilisateur, ces pièces ne sont pas incluses .
Comme indiqué sur la figure, installez le crochet
REMARQUE : (Uniquement disponible sur les modèles avec barre
transversale interne et livré avec crochets)
10
Avant l'échange
Retirez la fiche active, comme
indiqué
Après l'échange
Le modèle à porte unique offre des fonctions interchangeables gauche et
droite, ce qui est pratique pour les utilisateurs lorsque l'espace
d'installation est limité pour ouvrir la porte ou pour les utilisateurs gauchers
ou droitiers.
CLEAING MAINTENANCE AND STORAGE
1. Pour le nettoyage, essuyez la surface avec un chiffon humide (non
mouillé) ou équipé d'un chiffon à récurer pour essuyer.
2. Rangez l'appareil dans un endroit sec et propre.
Fabricant : Shanghaimuxinmuyeyouxiangongsi

11
Adresse : Baoshanqu Shuangchenglu 803long 11hao 1602A-1609shi
Shanghai
Importé en Australie : SIHAO PTY LTD. 1 ROKEVA STREETASTWOOD
NSW 2122 Australie
Importé aux États-Unis : Sanven Technology Ltd.
Suite 250 , 9166 Anaheim Place, Rancho Cucamonga, CA 91730
Fabriqué en Chine
REP
EC
SHUNSHUN GmbH
Römeräcker 9 Z2021,76351
Linkenheim-Hochstetten,Germany
euvertreter@gmail.com
+49 1727041930
REP
UK
Pooledas Group Ltd
Unit 5 Albert Edward House, The
Pavilions Preston, United Kingdom
pooledas12[email protected]
Tel: 01772418127


Technische ondersteuning en e-garantiecertificaat www.vevor.com/support
TOEGANGSDEUR KAST
We continue to be committed to provide you tools with competitive price.
"Save Half", "Half Price" or any other similar expressions used by us only represents an
estimate of savings you might benefit from buying certain tools with us compared to the major
top brands and doses not necessarily mean to cover all categories of tools offered by us. You
are kindly reminded to verify carefully when you are placing an order with us if you are
actually saving half in comparison with the top major brands.
1
Tip: De afbeelding is alleen ter referentie, raadpleeg het
overeenkomstige model in de handleiding voor meer informatie!
Have product questions? Need technical support? Please feel free to
contact us:
Technical Support and E-Warranty Certificate
www.vevor.com/support
NEED HELP? CONTACT US!
This is the original instruction, please read all manual instructions
carefully before operating. VEVOR reserves a clear interpretation of our
user manual. The appearance of the product shall be subject to the
product you received. Please forgive us that we won't inform you again if
there are any technology or software updates on our product.
CABINET ACCESS DOOR

2
Waarschuwing-Om het risico op letsel te verminderen, moet
de gebruiker de handleiding zorgvuldig lezen.
SAFETY INSTRUCTIONS
Bedankt voor het gebruik van dit product. Lees alle instructies voordat u
het gebruikt. De informatie zal u helpen de best mogelijke resultaten te
bereiken.
WAARSCHUWING:
Lees deze handleiding zorgvuldig door voordat u het product gebruikt. Als
u dit niet doet, kan dit leiden tot ernstig letsel.
ASSEMBLY PRECAUTIONS
1. Bij het monteren moeten deze instructies worden gevolgd. Een onjuiste
montage kan een gevaar vormen.
2. Draag tijdens de montage een veiligheidsbril en stevige
werkhandschoenen.
3. Niet monteren als u moe bent of onder invloed bent van alcohol, drugs of
medicijnen.
4. Gewichtscapaciteit en andere productmogelijkheden zijn alleen van toepassing
op een geheel en correct gemonteerd product.
5. Houd de verzamelplaats schoon en goed verlicht.
6. Houd omstanders tijdens de montage uit de buurt.
7. Het gewicht van de plaat is zwaar; let op de installatie om te voorkomen dat
deze beschadigd raakt, en zoek indien nodig iemand om te helpen bij de
installatie.
8.De montage mag alleen door volwassenen worden gedaan.
9 . WAARSCHUWING: Dit product bevat kleine onderdelen. Bij inslikken
kan er sprake zijn van verstikkingsgevaar. Houd deze kleine onderdelen
tijdens de montage uit de buurt van kinderen!
10. Verwijder al het promotiemateriaal en verpakkingsmateriaal voordat u
het apparaat voor de eerste keer gebruikt .

3
AANDACHT!
WAARSCHUWING! Houd kinderen en huisdieren uit de
buurt.
WAARSCHUWING! Verwijder alle verpakkingsmaterialen en bewaar ze
voor toekomstig gebruik.Verpakkingsmaterialen zijn geen speelgoed.
WAARSCHUWING! Laat kinderen niet met het verpakkingsmateriaal
spelen. Als ze het verpakkingsmateriaal inslikken, stikken ze!
BEWAAR DEZE INSTRUCTIES
USE PRECAUTIONS
WAARSCHUWING: OM ERNSTIG LETSEL EN DE DOOD DOOR
KANTELEN TE VOORKOMEN:
1. Om ongelukken of verwondingen aan scherpe randen te voorkomen,
dient u zorgvuldig te monteren en te gebruiken.
2. Alleen gebruiken zoals bedoeld. Ga niet op het product zitten of staan.
3. Inspecteer vóór elk gebruik. Gebruik het niet als onderdelen loszitten of
beschadigd zijn.
4. Als er onderdelen ontbreken, kapot, beschadigd of versleten zijn, stop
dan met het gebruik van dit item totdat reparaties zijn uitgevoerd en
vervangende onderdelen zijn geïnstalleerd.
5. Controleer de installatiegrootte van het overeenkomstige model van het
toegangsgat en selecteer de toegangsdeur die overeenkomt met of dichtbij
de installatiegrootte voor installatie.
4
PRODUCT PARAMETERS
Model
Productgroott
e/ mm
Grootte
installatieo
pening/m
m
Illustratie
Accessoire
B012D
432 x 610 x
46
347 x 525
1 x reinigingspad
B013D
457 x 533 x
46
372 x 448
1 x reinigingspad
B001D
355 x 508 x
46
271 x 42 4
1 x reinigingspad
1 x handvat
2 x schroeven
1 x
schroevendraaier
B014D
35 6x508x46
_ _ _ _
271 x 423
1 x reinigingspad
1 x handvat
2 x schroeven
1 x
schroevendraaier
5
B015D
407 x 559 x
46
321 x 474
1 x reinigingspad
1 x handvat
2 x schroeven
1 x
schroevendraaier
B016D
415 x 570 x
46
330 x 485
1 x handvat
2 x schroeven
1 x
schroevendraaier
B017D
432 x 610 x
46
347 x 525
1 x reinigingspad
1 x handvat
2 x schroeven
1 x
schroevendraaier
B01 8 D
508 x 356 x
46
423 x 27 0
1 x reinigingspad
1 x handvat
2 x schroeven
1 x
schroevendraaier
B019D
508 x 686 x
46
423 x 601
1 x reinigingspad
1 x handvat
2 x schroeven
1 x
schroevendraaier
B020D
610 x 432 x
46
525 x 347
1 x reinigingspad
1 x handvat
2 x schroeven
1 x
schroevendraaier
6
B021D
610 x 432 x
46
52 4 x 347
1 x reinigingspad
1 x handvat
2 x schroeven
1 x
schroevendraaier
B011S
610 x 610 x 4
8
525 x 525
1 x reinigingspad
2 x handvat
4 x schroeven
8x Haken
1 x
schroevendraaier
B010S
762 x 533 x
46
677 x 448
1 x reinigingspad
2 x handvat
4 x schroeven
1 x
schroevendraaier
B009S
788 x 610 x
46
703 x 525
2 x handvat
4 x schroeven
1 x
schroevendraaier
B008S
762 x 533 x
46
677 x 448
2 x handvat
4 x schroeven
1 x
schroevendraaier
B007S
838 x 558 x
46
753 x 473
1 x reinigingspad
2 x handvat
4 x schroeven
1 x
schroevendraaier
B006S
863 x 482 x
46
778 x 397
1 x reinigingspad
2 x handvat
4 x schroeven
1 x
schroevendraaier
7
Opmerking:
1 、 Productgrootte verwijst naar de buitenste lengte-, breedte- en
hoogte-afmetingen, en de productietolerantie bedraagt ongeveer ±2 mm.
2. De grootte van de installatieopening verwijst naar de grootte van de
vaste positie op het product wanneer het wordt geïnstalleerd. De
productietolerantie bedraagt ongeveer ± 2 mm. 3. Bij de installatie moet
de gebruiker de grootte van de installatieopening van het product meten
om groeven te maken om te voorkomen dat deze te klein is voor installatie
of te groot voor onstabiele installatie. De aanbevolen maat ligt binnen 2-5
mm van de werkelijk gemeten afmetingen
ASSEMBLY STEPS
B005S
915 x 533 x
46
830 x 448
1 x reinigingspad
2 x handvat
4 x schroeven
1 x
schroevendraaier
B004S
915 x 610 x
46
830 x 525
1 x reinigingspad
2 x handvat
4 x schroeven
1 x
schroevendraaier
B00 3S
790 x 790 x
46
705 x 705
1 x reinigingspad
2 x handvat
4 x schroeven
1 x
schroevendraaier

8
Haal de handgrepen en schroeven eruit en schroef ze vervolgens met de
schroevendraaier in de kastdeur.
OPMERKING: (Dit is alleen voor modellen met open handgrepen)
Zoals weergegeven in de afbeelding, is er een 1:1 lijndiagram gedrukt op
de bovenste en onderste vouwen van de doos, wat de installatie kan
vergemakkelijken. Het moet worden ingekort en de spoorcirkel wordt
uitgehold en op de installatiepositie geplaatst om stippen te tekenen.
OPMERKING: Gebruikers kunnen de installatiemethode ook kiezen op
basis van hun eigen installatiegewoonten, zoals het meten van de grootte
van het werkelijke object of het vergelijken van het werkelijke object met
het werkelijke object na het boren van de installatiegaten, of andere
handigere installatietechnieken, afhankelijk van Jij.
9
Boor 2 gaten aan elke kant van de voorgeboorde gaten in het frame. Tik de
plastic pluggen in de gaten. Installeer de kastdeur en schroef deze in de
plastic pluggen van de voorgeboorde gaten.
Opmerking: plastic pluggen , zelftappende schroeven moeten worden
aangeschaft
door gebruiker, deze onderdelen zijn niet inbegrepen .
Installeer de haak zoals weergegeven in de afbeelding
OPMERKING:(Alleen beschikbaar op modellen met interne dwarsbalk en
geleverd met haken)
Vóór de uitwisseling
Trek de actieve stekker eruit, zoals
afgebeeld

10
Na de ruil
Het model met één deur biedt links en rechts uitwisselbare functies, wat
handig is voor gebruikers als er weinig installatieruimte is om de deur te
openen of voor gebruikers die links- of rechtshandig zijn.
CLEAING MAINTENANCE AND STORAGE
1. Voor het reinigen het oppervlak afnemen met een vochtige (niet natte)
doek of voorzien van een schuursponsje.
2. Bewaar het apparaat op een droge en schone plaats.
Fabrikant: Shanghaimuxinmuyeyouxiangongsi
Adres: Baoshanqu Shuangchenglu 803long 11hao 1602A-1609shi
Shanghai
Geïmporteerd naar AUS: SIHAO PTY LTD. 1 ROKEVA
STREETEASTWOOD NSW 2122 Australië
Geïmporteerd naar de VS: Sanven Technology Ltd.
Suite 250 , 9166 Anaheim Place, Rancho Cucamonga, CA 91730
REP
EC
SHUNSHUN GmbH
Römeräcker 9 Z2021,76351
Linkenheim-Hochstetten,Germany
euvertreter@gmail.com
+49 1727041930

11
Gemaakt in China
REP
UK
Pooledas Group Ltd
Unit 5 Albert Edward House, The
Pavilions Preston, United Kingdom
pooledas12[email protected]
Tel: 01772418127


Certificado de soporte técnico y garantía electrónica www.vevor.com/support
PUERTA DE ACCESO AL GABINETE
We continue to be committed to provide you tools with competitive price.
"Save Half", "Half Price" or any other similar expressions used by us only represents an
estimate of savings you might benefit from buying certain tools with us compared to the major
top brands and doses not necessarily mean to cover all categories of tools offered by us. You
are kindly reminded to verify carefully when you are placing an order with us if you are
actually saving half in comparison with the top major brands.

1
Consejo: La imagen es solo de referencia; consulte el modelo
correspondiente en el manual para obtener más detalles.
Have product questions? Need technical support? Please feel free to
contact us:
Technical Support and E-Warranty Certificate
www.vevor.com/support
NEED HELP? CONTACT US!
This is the original instruction, please read all manual instructions
carefully before operating. VEVOR reserves a clear interpretation of our
user manual. The appearance of the product shall be subject to the
product you received. Please forgive us that we won't inform you again if
there are any technology or software updates on our product.
CABINET ACCESS DOOR

2
Advertencia: para reducir el riesgo de lesiones, el usuario
debe leer atentamente el manual de instrucciones.
SAFETY INSTRUCTIONS
Gracias por usar este producto. Lea todas las instrucciones antes de
usarlo. La información le ayudará a lograr los mejores resultados posibles.
ADVERTENCIA:
Lea atentamente este manual antes de utilizar el producto. De lo contrario,
podrían producirse lesiones graves.
ASSEMBLY PRECAUTIONS
1. El montaje debe seguir estas instrucciones. El montaje incorrecto puede
ser un peligro.
2. Utilice gafas de seguridad y guantes de trabajo resistentes durante el
montaje.
3. No reunirse cuando esté cansado o bajo la influencia de alcohol, drogas
o medicamentos.
4. La capacidad de peso y otras capacidades del producto solo se aplican a un
producto ensamblado total y correctamente.
5. Mantenga el área de montaje limpia y bien iluminada.
6. Mantenga a las personas transeúntes fuera del área durante el montaje.
7. El peso de la placa es elevado; preste atención a la instalación para evitar
dañarla y, si es necesario, busque a alguien que le ayude con la
instalación.
8. El montaje debe ser realizado únicamente por adultos.
9 . ADVERTENCIA: Este producto contiene piezas pequeñas. Si se ingiere,
representará un peligro de asfixia. ¡Mantenga estas piezas pequeñas
fuera del alcance de los niños durante el montaje!
10. Antes de utilizar el aparato por primera vez, retire todos los materiales
promocionales y de embalaje .
3
¡ATENCIÓN!
¡ADVERTENCIA! Mantenga alejados a los niños y las
mascotas.
¡ADVERTENCIA! Retire todos los materiales de embalaje y guárdelos
para uso futuro. Los materiales de embalaje no son un juguete.
¡ADVERTENCIA! No permita que los niños jueguen con los materiales de
embalaje. ¡Si se tragan los materiales de embalaje, se asfixiarán!
GUARDA ESTAS INSTRUCCIONES
USE PRECAUTIONS
ADVERTENCIA: PARA EVITAR LESIONES GRAVES Y LA
MUERTE POR VUELCO:
1. Para evitar accidentes o lesiones con bordes afilados, monte y utilice
con cuidado.
2. Úselo únicamente según lo previsto. No se siente ni se pare sobre el
producto.
3. Inspeccione antes de cada uso. No lo utilice si las piezas están sueltas o
dañadas.
4. Si falta alguna pieza, está rota, dañada o desgastada, deje de usar este
artículo hasta que se realicen las reparaciones y se instalen las piezas de
repuesto.
5.Verifique el tamaño de instalación del modelo correspondiente del orificio
de acceso y seleccione la puerta de acceso que coincida o se acerque al
tamaño de instalación para la instalación.
4
PRODUCT PARAMETERS
Modelo
ProductoTam
año/ mm
Tamaño
de
apertura
de
instalación
/mm
Ilustración
Accesorio
B012D
432x610x46 _
_ _ _
347 x 525
1 almohadilla de
limpieza.
B013D
457 x 533 x
46
372 x 448
1 almohadilla de
limpieza.
B001D
355x508x46 _
_ _ _
271 x 42 4
1 almohadilla de
limpieza.
1 mango.
2 tornillos.
1 destornillador.
5
B014D
35 6 x 508 x
46
271 x 423
1 almohadilla de
limpieza.
1 mango.
2 tornillos.
1 destornillador.
B015D
407 x 559 x
46
321 x 474
1 almohadilla de
limpieza.
1 mango.
2 tornillos.
1 destornillador.
B016D
415x570x46 _
_ _ _
330 x 485
1 mango.
2 tornillos.
1 destornillador.
B017D
432x610x46 _
_ _ _
347 x 525
1 almohadilla de
limpieza.
1 mango.
2 tornillos.
1 destornillador.
B01 8D
_
508x356x46 _
_ _ _
423 x 27 0
1 almohadilla de
limpieza.
1 mango.
2 tornillos.
1 destornillador.
B019D
508x686x46 _
_ _ _
423 x 601
1 almohadilla de
limpieza.
1 mango.
2 tornillos.
1 destornillador.
6
B020D
610x432x46 _
_ _ _
525 x 347
1 almohadilla de
limpieza.
1 mango.
2 tornillos.
1 destornillador.
B021D
610x432x46 _
_ _ _
52 4 x 347
1 almohadilla de
limpieza.
1 mango.
2 tornillos.
1 destornillador.
B011S
610 x 610 x 4
8
525 x 525
1 almohadilla de
limpieza.
2 mangos.
4 tornillos.
8 ganchos.
1 destornillador.
B010S
762x533x46 _
_ _ _
677 x 448
1 almohadilla de
limpieza.
2 mangos.
4 tornillos.
1 destornillador.
B009S
788x610x46 _
_ _ _
703 x 525
2 mangos.
4 tornillos.
1 destornillador.
B008S
762x533x46 _
_ _ _
677 x 448
2 mangos.
4 tornillos.
1 destornillador.
B007S
838x558x46 _
_ _ _
753 x 473
1 almohadilla de
limpieza.
2 mangos.
4 tornillos.
1 destornillador.
7
Observación:
1. El tamaño del producto se refiere a las dimensiones exteriores de largo,
ancho y alto, y la tolerancia de fabricación es de aproximadamente ± 2
mm.
2. El tamaño de la abertura de instalación se refiere al tamaño de la
posición fija en el producto cuando está instalado. La tolerancia de
fabricación es de aproximadamente ±2 mm. 3. Al realizar la instalación,
el usuario debe medir el tamaño de la abertura de instalación del producto
para hacer ranuras y evitar que sea demasiado pequeño para la
instalación o demasiado grande para una instalación inestable. El tamaño
recomendado está entre 2 y 5 mm de las dimensiones reales medidas.
ASSEMBLY STEPS
B006S
863 x 482 x
46
778 x 397
1 almohadilla de
limpieza.
2 mangos.
4 tornillos.
1 destornillador.
B005S
915x533x46 _
_ _ _
830 x 448
1 almohadilla de
limpieza.
2 mangos.
4 tornillos.
1 destornillador.
B004S
915x610x46 _
_ _ _
830 x 525
1 almohadilla de
limpieza.
2 mangos.
4 tornillos.
1 destornillador.
B00 3S
790x790x46 _
_ _ _
705 x 705
1 almohadilla de
limpieza.
2 mangos.
4 tornillos.
1 destornillador.

8
Saque las manijas y los tornillos y luego atorníllelos en la puerta del
gabinete con el destornillador.
NOTA: (Esto es solo para modelos con manijas abiertas)
Como se muestra en la figura, hay un diagrama de líneas 1:1 impreso en
los pliegues superior e inferior de la caja, que puede ayudar en la
instalación. Es necesario cortarlo y ahuecar el círculo de seguimiento y
colocarlo en la posición de instalación para dibujar puntos.
NOTA: Los usuarios también pueden elegir el método de instalación de
acuerdo con sus propios hábitos de instalación, como medir el tamaño del
objeto real o comparar el objeto real con el objeto real después de perforar
los orificios de instalación, u otras técnicas de instalación más
convenientes, depende de tú.
9
Taladre 2 orificios a cada lado de los orificios del marco previamente
perforados. Introduzca los tapones de plástico en los agujeros. Instale la
puerta del gabinete, atorníllela en los tapones de plástico de los orificios
previamente perforados.
Observación: es necesario comprar tapones de plástico y tornillos
autorroscantes.
Por usuario, estas piezas no están incluidas .
Como se muestra en la figura, instale el gancho
NOTA: (Solo disponible en modelos con barra transversal interna y viene
con ganchos)

10
antes del intercambio
Retire el enchufe activo, como se
muestra
después del intercambio
El modelo de una sola puerta proporciona funciones intercambiables
izquierda y derecha, lo cual es conveniente para los usuarios cuando hay
un espacio de instalación limitado para abrir la puerta o para usuarios
zurdos o diestros.
CLEAING MAINTENANCE AND STORAGE
1. Para la limpieza, limpie la superficie con un paño húmedo (no mojado)
o con un paño estropajo para limpiar.
2. Guarde el aparato en un lugar seco y limpio.
Fabricante: Shanghaimuxinmuyeyouxiangongsi

11
Dirección: Baoshanqu Shuangchenglu 803long 11hao 1602A-1609shi
Shanghai
Importado a AUS: SIHAO PTY LTD. 1 ROKEVA STREET ASTWOOD
NSW 2122 Australia
Importado a EE. UU.: Sanven Technology Ltd.
Suite 250 , 9166 Anaheim Place, Rancho Cucamonga, CA 91730
Hecho en china
REP
EC
SHUNSHUN GmbH
Römeräcker 9 Z2021,76351
Linkenheim-Hochstetten,Germany
euvertreter@gmail.com
+49 1727041930
REP
UK
Pooledas Group Ltd
Unit 5 Albert Edward House, The
Pavilions Preston, United Kingdom
pooledas12[email protected]
Tel: 01772418127


Supporto tecnico e certificato di garanzia elettronica www.vevor.com/support
PORTA DI ACCESSO ALL'ARMADIO
We continue to be committed to provide you tools with competitive price.
"Save Half", "Half Price" or any other similar expressions used by us only represents an
estimate of savings you might benefit from buying certain tools with us compared to the major
top brands and doses not necessarily mean to cover all categories of tools offered by us. You
are kindly reminded to verify carefully when you are placing an order with us if you are
actually saving half in comparison with the top major brands.

1
Suggerimento: l'immagine è solo di riferimento, per i dettagli fare
riferimento al modello corrispondente nel manuale!
Have product questions? Need technical support? Please feel free to
contact us:
Technical Support and E-Warranty Certificate
www.vevor.com/support
NEED HELP? CONTACT US!
This is the original instruction, please read all manual instructions
carefully before operating. VEVOR reserves a clear interpretation of our
user manual. The appearance of the product shall be subject to the
product you received. Please forgive us that we won't inform you again if
there are any technology or software updates on our product.
CABINET ACCESS DOOR

2
Avvertenza: per ridurre il rischio di lesioni, l'utente deve
leggere attentamente il manuale di istruzioni.
SAFETY INSTRUCTIONS
Grazie per aver utilizzato questo prodotto. Si prega di leggere tutte le
istruzioni prima di utilizzarlo. Le informazioni ti aiuteranno a ottenere i
migliori risultati possibili.
AVVERTIMENTO:
Si prega di leggere attentamente questo manuale prima di utilizzare il
prodotto. In caso contrario, si potrebbero causare lesioni gravi.
ASSEMBLY PRECAUTIONS
1. Il montaggio deve seguire queste istruzioni. Un montaggio errato può
rappresentare un pericolo.
2. Indossare occhiali protettivi e guanti da lavoro pesanti durante il
montaggio.
3. Non montare in caso di stanchezza o sotto l'effetto di alcol, droghe o
farmaci.
4. La capacità di peso e altre caratteristiche del prodotto si applicano solo a un
prodotto interamente e correttamente assemblato.
5. Mantenere l'area di assemblaggio pulita e ben illuminata.
6. Tenere gli astanti lontani dall'area durante l'assemblaggio.
7. Il peso della piastra è elevato; prestare attenzione all'installazione per evitare di
danneggiarlo e, se necessario, trovare qualcuno che lo assista
nell'installazione.
8.Il montaggio deve essere effettuato solo da adulti.
9 . ATTENZIONE: questo prodotto contiene piccole parti. Se ingerito,
rappresenterà un pericolo di soffocamento. Tenere queste piccole parti
lontano dalla portata dei bambini durante il montaggio!
10. Prima di utilizzare l'apparecchio per la prima volta, rimuovere eventuali
materiali promozionali e materiali di imballaggio .
3
ATTENZIONE!
AVVERTIMENTO! Tenere lontani i bambini e gli animali
domestici.
AVVERTIMENTO! Rimuovere tutti i materiali di imballaggio e conservarli
per un uso futuro. I materiali di imballaggio non sono un giocattolo.
AVVERTIMENTO! Non lasciare che i bambini giochino con i materiali di
imballaggio. Se ingeriscono i materiali di imballaggio, soffocheranno!
CONSERVA QUESTE ISTRUZIONI
USE PRECAUTIONS
AVVERTENZA: PER EVITARE LESIONI GRAVI E MORTE
DOVUTE AL RIBALTAMENTO:
1. Per evitare incidenti o lesioni da spigoli vivi, assemblare e utilizzare con
attenzione.
2. Utilizzare solo come previsto. Non sedersi o stare in piedi sul prodotto.
3. Ispezionare prima di ogni utilizzo. Non utilizzarlo se le parti sono
allentate o danneggiate.
4.Se qualche parte risulta mancante, rotta, danneggiata o usurata,
interrompere l'utilizzo dell'articolo fino a quando non vengono effettuate le
riparazioni e installate le parti di ricambio.
5.Verificare la dimensione di installazione del modello corrispondente del
foro di accesso e selezionare la porta di accesso coerente o vicina alla
dimensione di installazione per Installazione.

4
PRODUCT PARAMETERS
Modello
Dimensioni
del prodotto/
mm
Dimension
i apertura
di
installazio
ne/mm
Illustrazione
Accessorio
B012D
432
×
610
×
46
347
×
525
1 tampone per la
pulizia
B013D
457
×
533
×
46
372
×
448
1 tampone per la
pulizia
B001D
355 × 508
× 46
271 x 42 4
1 tampone per la
pulizia
1 maniglia
2 viti
1 cacciavite

5
B014D
356 × 508
× 46 _
271 x 423
1 tampone per la
pulizia
1 maniglia
2 viti
1 cacciavite
B015D
407
×
559
×
46
321
×
474
1 tampone per la
pulizia
1 maniglia
2 viti
1 cacciavite
B016D
415 × 570
× 46
330 ×
485
1 maniglia
2 viti
1 cacciavite
B017D
432 × 610
× 46
347 ×
525
1 tampone per la
pulizia
1 maniglia
2 viti
1 cacciavite
B018D _
_
508
×
356
×
46
423 x 27 0
1 tampone per la
pulizia
1 maniglia
2 viti
1 cacciavite
B019D
508 × 686
× 46
423 ×
601
1 tampone per la
pulizia
1 maniglia
2 viti
1 cacciavite

6
B020D
610
×
432
×
46
525 x 347
1 tampone per la
pulizia
1 maniglia
2 viti
1 cacciavite
B021D
610 × 432
× 46
524 ×
347 _
1 tampone per la
pulizia
1 maniglia
2 viti
1 cacciavite
B011S
610x610x48 _
_ _ _ _
525 ×
525
1 tampone per la
pulizia
2 maniglie
4 viti
8 ganci
1 cacciavite
B010S
762 × 533
× 46
677 ×
448
1 tampone per la
pulizia
2 maniglie
4 viti
1 cacciavite
B009S
788 × 610
× 46
703 ×
525
2 maniglie
4 viti
1 cacciavite
B008S
762
×
533
×
46
677
×
448
2 maniglie
4 viti
1 cacciavite
B007S
838
×
558
×
46
753
×
473
1 tampone per la
pulizia
2 maniglie
4 viti
1 cacciavite
7
Nota:
1 , le dimensioni del prodotto si riferiscono alle dimensioni più esterne di
lunghezza, larghezza e altezza e la tolleranza di produzione è di circa ±2
mm.
2、 La dimensione dell'apertura di installazione si riferisce alla dimensione
della posizione fissa sul prodotto quando è installato. La tolleranza di
produzione è di circa ± 2 mm. 3. Durante l'installazione, l'utente deve
misurare le dimensioni dell'apertura di installazione del prodotto per creare
scanalature ed evitare che sia troppo piccolo per l'installazione o troppo
grande per un'installazione instabile. La dimensione consigliata è entro 2-5
mm dalle dimensioni effettive misurate
ASSEMBLY STEPS
B006S
863 × 482
× 46
778 x 397
1 tampone per la
pulizia
2 maniglie
4 viti
1 cacciavite
B005S
915
×
533
×
46
830
×
448
1 tampone per la
pulizia
2 maniglie
4 viti
1 cacciavite
B004S
915 × 610
× 46
830 x 525
1 tampone per la
pulizia
2 maniglie
4 viti
1 cacciavite
B003S _
790 × 790
× 46
705 ×
705
1 tampone per la
pulizia
2 maniglie
4 viti
1 cacciavite

8
Estrarre le maniglie e le viti, quindi avvitarle nella porta dell'armadio con il
cacciavite.
NOTA: (Solo per i modelli con maniglie aperte)
Come mostrato nella figura, sulle pieghe superiore e inferiore del cartone è
stampato un diagramma di linee 1:1 che può facilitare l'installazione. È
necessario tagliarlo e scavare il cerchio della pista e posizionarlo nella
posizione di installazione per disegnare i punti.
NOTA: gli utenti possono anche scegliere il metodo di installazione in base
alle proprie abitudini di installazione, come misurare le dimensioni
dell'oggetto reale o confrontare l'oggetto reale con l'oggetto reale dopo
aver praticato i fori di installazione o altre tecniche di installazione più
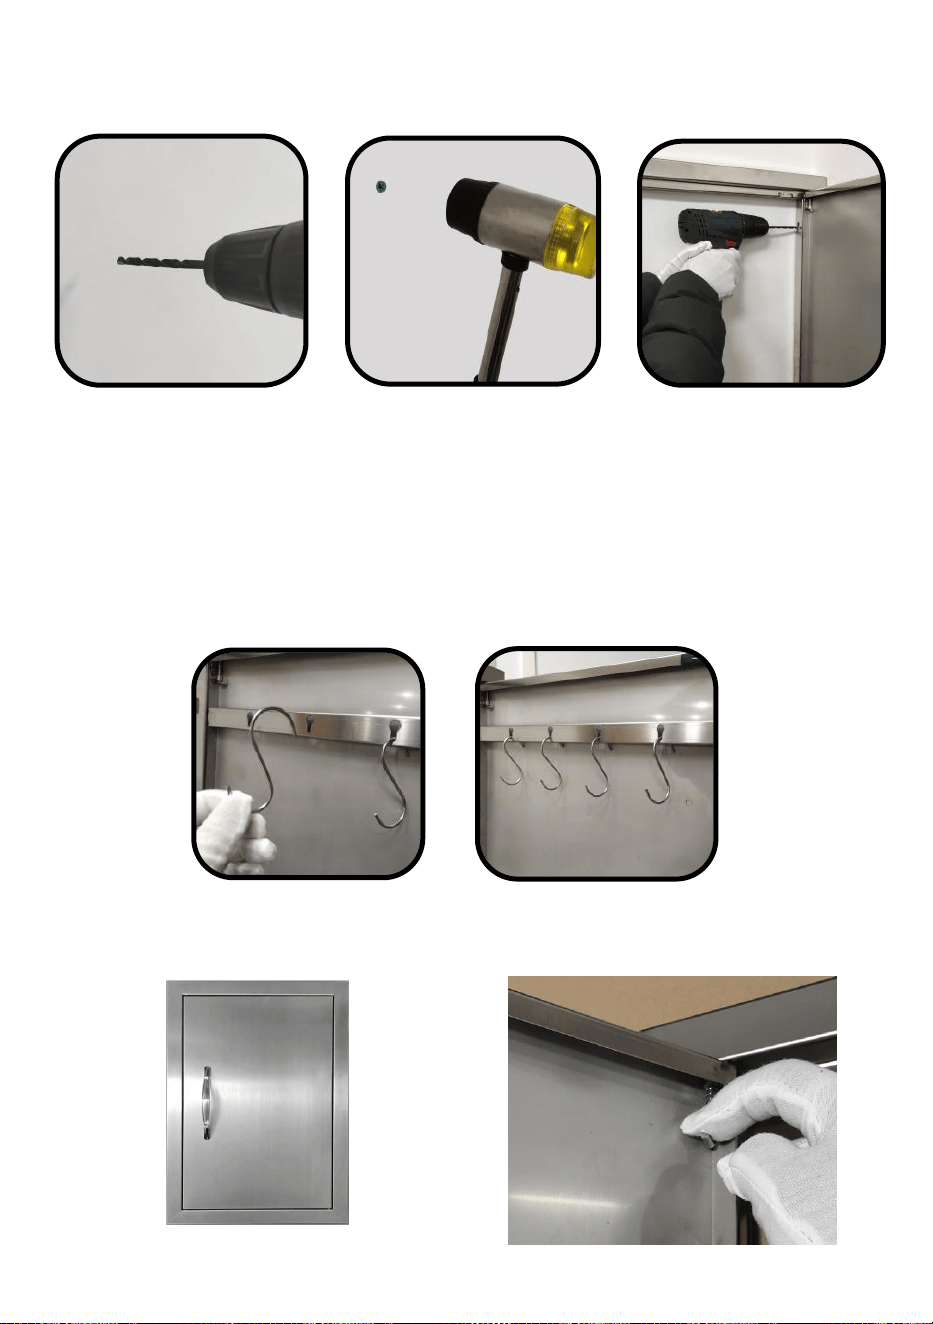
9
convenienti, a seconda di Voi.
Praticare 2 fori su ciascun lato dei fori del telaio preforati. Inserisci i tappi di
plastica nei fori. Installare la porta dell'armadio, avvitare i tappi di plastica
dei fori preforati.
Nota: è necessario acquistare tappi di plastica , viti autofilettanti
dall'utente, queste parti non sono incluse .
Come mostrato nella figura, installare il gancio
NOTA:(Disponibile solo sui modelli con traversa interna e dotato di ganci)

10
Prima dello scambio
Estrarre la spina attiva, come
mostrato
Dopo lo scambio
Il modello a porta singola offre funzioni intercambiabili sinistra e destra, il
che è comodo per gli utenti quando lo spazio di installazione per aprire la
porta è limitato o per gli utenti mancini o destrimani.
CLEAING MAINTENANCE AND STORAGE
1. Per la pulizia, passare la superficie con un panno umido (non bagnato)
o muniti di paglietta per pulire.
2. Conservare l'apparecchio in un luogo asciutto e pulito.
Produttore: Shanghaimuxinmuyeyouxiangongsi
Indirizzo: Baoshanqu Shuangchenglu 803long 11hao 1602A-1609shi
Shanghai
Importato in AUS: SIHAO PTY LTD. 1 ROKEVA STREETEASTWOOD
NSW 2122 Australia
Importato negli Stati Uniti: Sanven Technology Ltd.
Suite 250 , 9166 Anaheim Place, Rancho Cucamonga, CA 91730

11
Made in China
REP
EC
SHUNSHUN GmbH
Römeräcker 9 Z2021,76351
Linkenheim-Hochstetten,Germany
euvertreter@gmail.com
+49 1727041930
REP
UK
Pooledas Group Ltd
Unit 5 Albert Edward House, The
Pavilions Preston, United Kingdom
pooledas12[email protected]
Tel: 01772418127