USER MANUAL
Before using, please read the operating instructions carefully to
ensure proper application and achieve satisfactory results.
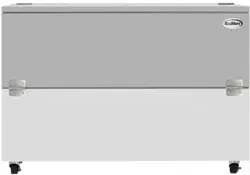
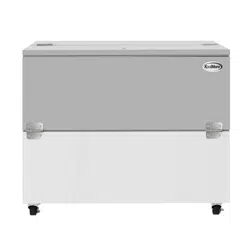
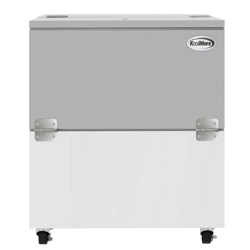
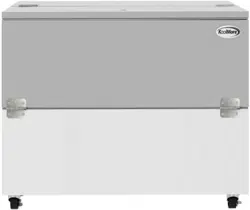
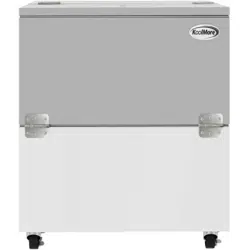
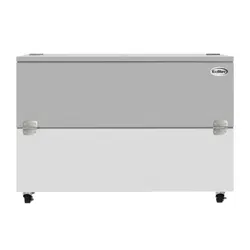
KoolMore Commercial Milk Cooler
For School and Cafeteria
Models: KM-MC34-HDC, KM-MC49-HDC, KM-MC58-HDC
MILK COOLER

2
Stay informed with the latest information for your
KoolMore Cooler.
If you need any assistance or have questions, our customer support
team is here to help.

3
Contents
Installation ............................................................ 4
Operation ............................................................... 5
Maintenance ........................................................ 5
Troubleshooting ................................................. 6
Warranty .............................................................. 7

4
INSTALLATION
INSPECTION
When your equipment arrives, check all items against the shipping list to ensure everything was
delivered. Inspect the equipment immediately for any damage. If you nd damage, contact customer
service right away for assistance.
INSTALLATION
General Instructions
Carefully remove the skid to avoid damaging the cooler. Do not tilt the cabinet when installing casters
or legs. Make sure the casters or legs are securely attached.
Location Requirements
The refrigeration system at the bottom of the cabinet needs proper airow. Keep at least four inches
of space between the sides of the cabinet and any walls. Make sure the cooler is level to ensure prop-
er drainage and operation.
Electrical Guidelines
Plug the unit into a standard 110-volt outlet. Do not use an extension cord. All electrical connections
must comply with local and national electrical codes. For details, check the serial tag on the equip-
ment.

5
OPERATION
GENERAL OPERATION
The milk coolers are cooled entirely by convection using copper coils that completely encircle the
perimeter of the storage compartment. During the refrigeration process, heat is removed through the
evaporator tubing and expelled through the condensing unit. It is important that airow through the
side louvers is not restricted to ensure the condensing unit operates properly.
Under normal operating conditions, any frost that accumulates on the walls during the “on” cycle of
the condensing unit may melt during the “off” cycle. Drains are installed in all milk coolers to handle
melting frost.
The refrigeration system uses a thermostat that senses the cut-in and cut-out temperatures of the
cold wall evaporator coil. The temperature can be adjusted using the thermostat control knob, which
is located behind the louvered side panel.
GENERAL MAINTENANCE
Periodic Cleaning
From the initial installation, the interior surfaces of the cabinet should be periodically wiped down
with a solution of warm water and baking soda to remove odors caused by spills. The exterior should
also be cleaned regularly with a commercial glass cleaner or mild soap and water. Do not use abra-
sive cleaners or alkaline solutions.
Monthly, clean the condenser to improve heat transfer and maintain system eciency. To do this, re-
move the louvered panel and use a wire brush to loosen dirt on the ns. Once the dirt is loosened, use
a vacuum cleaner to remove it.

6
Troubleshooting
Issue Possible Cause Solution
Compressor will not start, no
hum
1. Service cord unplugged 1. Plug in service cord
2. Fuse blown or removed 2. Replace fuse
3. Overload tripped 3. Determine reason and correct
4. Control stuck open 4. Repair or replace
5. Wiring incorrect 5. Check wiring against the diagram
Compressor will not start, hums
but trips on overload protector
1. Improperly wired 1. Check wiring against the diagram
2. Low voltage to unit 2. Determine reason and correct
3. Starting capacitor defective 3. Determine reason and replace
4. Relay failing to close 4. Determine reason, correct, or replace
Compressor starts and runs
but short cycles on overload
protector
1. Low voltage to unit 1. Determine reason and correct
2. Overload defective protector 2. Check current, replace overload protector
3. Excessive head pressure 3. Check ventilation or restriction in the system
4. Compressor hot-return gas hot 4. Check refrigerant charge, x leak if needed
Compressor operates long or
continuously
1. Short of refrigerant 1. Fix leak, add charge
2. Control contact stuck 2. Repair or replace
3. Evaporator coil iced 3. Defrost manually and nd cause
4. Restriction in refrigeration system 4. Find and remove restriction
5. Dirty condenser 5. Clean condenser
Compressor runs ne but short
cycles
1. Overload protector 1. Check wiring diagram
2. Cold control 2. Widen dierential
3. Overcharge 3. Reduce charge
4. Air in system 4. Purge and recharge
5. Undercharge 5. Fix leak, add refrigerant
Starting capacitor open, shorted,
or blown
1. Relay contacts stuck 1. Clean contacts or replace relay
2. Low voltage to unit 2. Determine reason and correct
3. Improper relay 3. Replace
Relay defective or burned out 1. Incorrect relay 1. Check and replace
2. Voltage too high or too low 2. Determine reason and correct
Refrigerated space too warm 1. Control setting too high 1. Reset control
2. Refrigerant overcharge 2. Purge refrigerant
3. Dirty condenser 3. Clean condenser
4. Evaporator coil iced 4. Determine reason and defrost
5. Not operating 5. Replace if necessary
Standard temperature system
freezes the product
1. Control setting is too low 1. Reset the control
2. Control points stuck 2. Replace the control
Objectionable noise 1. Fan blade hitting fan shroud 1. Reform or cut away a small section of the shroud
2. Tubing rattle 2. Locate and reform
3. Vibrating fan blade 3. Replace fan blade
4. Condenser fan motor rattles 4. Check motor bracket mounting, tighten
5. General vibration 5. Loosen compressor suspension bolts if applicable
6. Worn fan motor bearings 6. Replace fan motor
Pan area 1. No cooling 1. Make sure the switch is in the "on" position
2. Too cold 2. Adjust temperature control – see instructions
under pan area
3. Too warm 3. Adjust temperature control – see instructions
under pan area
7
WARRANTY
LIMITED WARRANTY
Koolmore Supply, Inc. extends a limited warranty to the original purchaser, guaranteeing that this Koolmore
product is free from manufacturing defects in material or workmanship for one year from the date of
purchase.
Should you discover any such defect within the warranty period, Koolmore Supply, Inc., reserves the right to
repair or replace the product without charge, or to cover the cost of replacement parts and repair labor needed
to correct defects present at the time of purchase or resulting from regular usage, when the appliance has been
installed, operated, and maintained as per the instructions provided.
At its sole discretion, Koolmore Supply Inc. may decide to replace the product. In such an event, your replace-
ment appliance will carry the warranty for the remaining term of the original unit's warranty period.
This warranty is valid exclusively to the original purchaser of the product and only applicable within the United
States. The warranty commences from the date of original consumer purchase. Proof of the original purchase
date will be required to obtain service under this warranty.
Under this limited warranty, your sole and exclusive remedy will be product repair, as outlined above. All
services must be provided by a Koolmore-designated service company.
To claim warranty or request repair service:
Email support@koolmore.com. Please include your name, address, phone number, warranty repair request,
and a copy of your proof of purchase receipt. Alternatively, visit koolmore.com and use the contact us page. A
Koolmore customer service representative will promptly arrange service for your appliance.
We thank you for choosing Koolmore.
WARRANTY EXCLUSIONS
This limited warranty will not cover:
1. Failure of the product to perform during power failures or interruptions,
or due to inadequate electrical service.
2. Damage incurred during transportation or handling.
3. Damage caused by accidents, vermin, lightning, winds, re, oods, or acts of God.
4. Damage resulting from accidents, alterations, misuse, abuse, improper installation, repair, or maintenance.
This includes using any external device that alters or converts the voltage or frequency of
electricity.
5. Unauthorized product modications, repairs by unauthorized centers, or use of non-approved
replacement parts.
6. Abnormal cleaning and maintenance not aligned with the user's manual.
7. Use of incompatible accessories or components.
8. Any costs associated with repairs or replacements under these excluded circumstances shall be the
responsibility of the consumer.