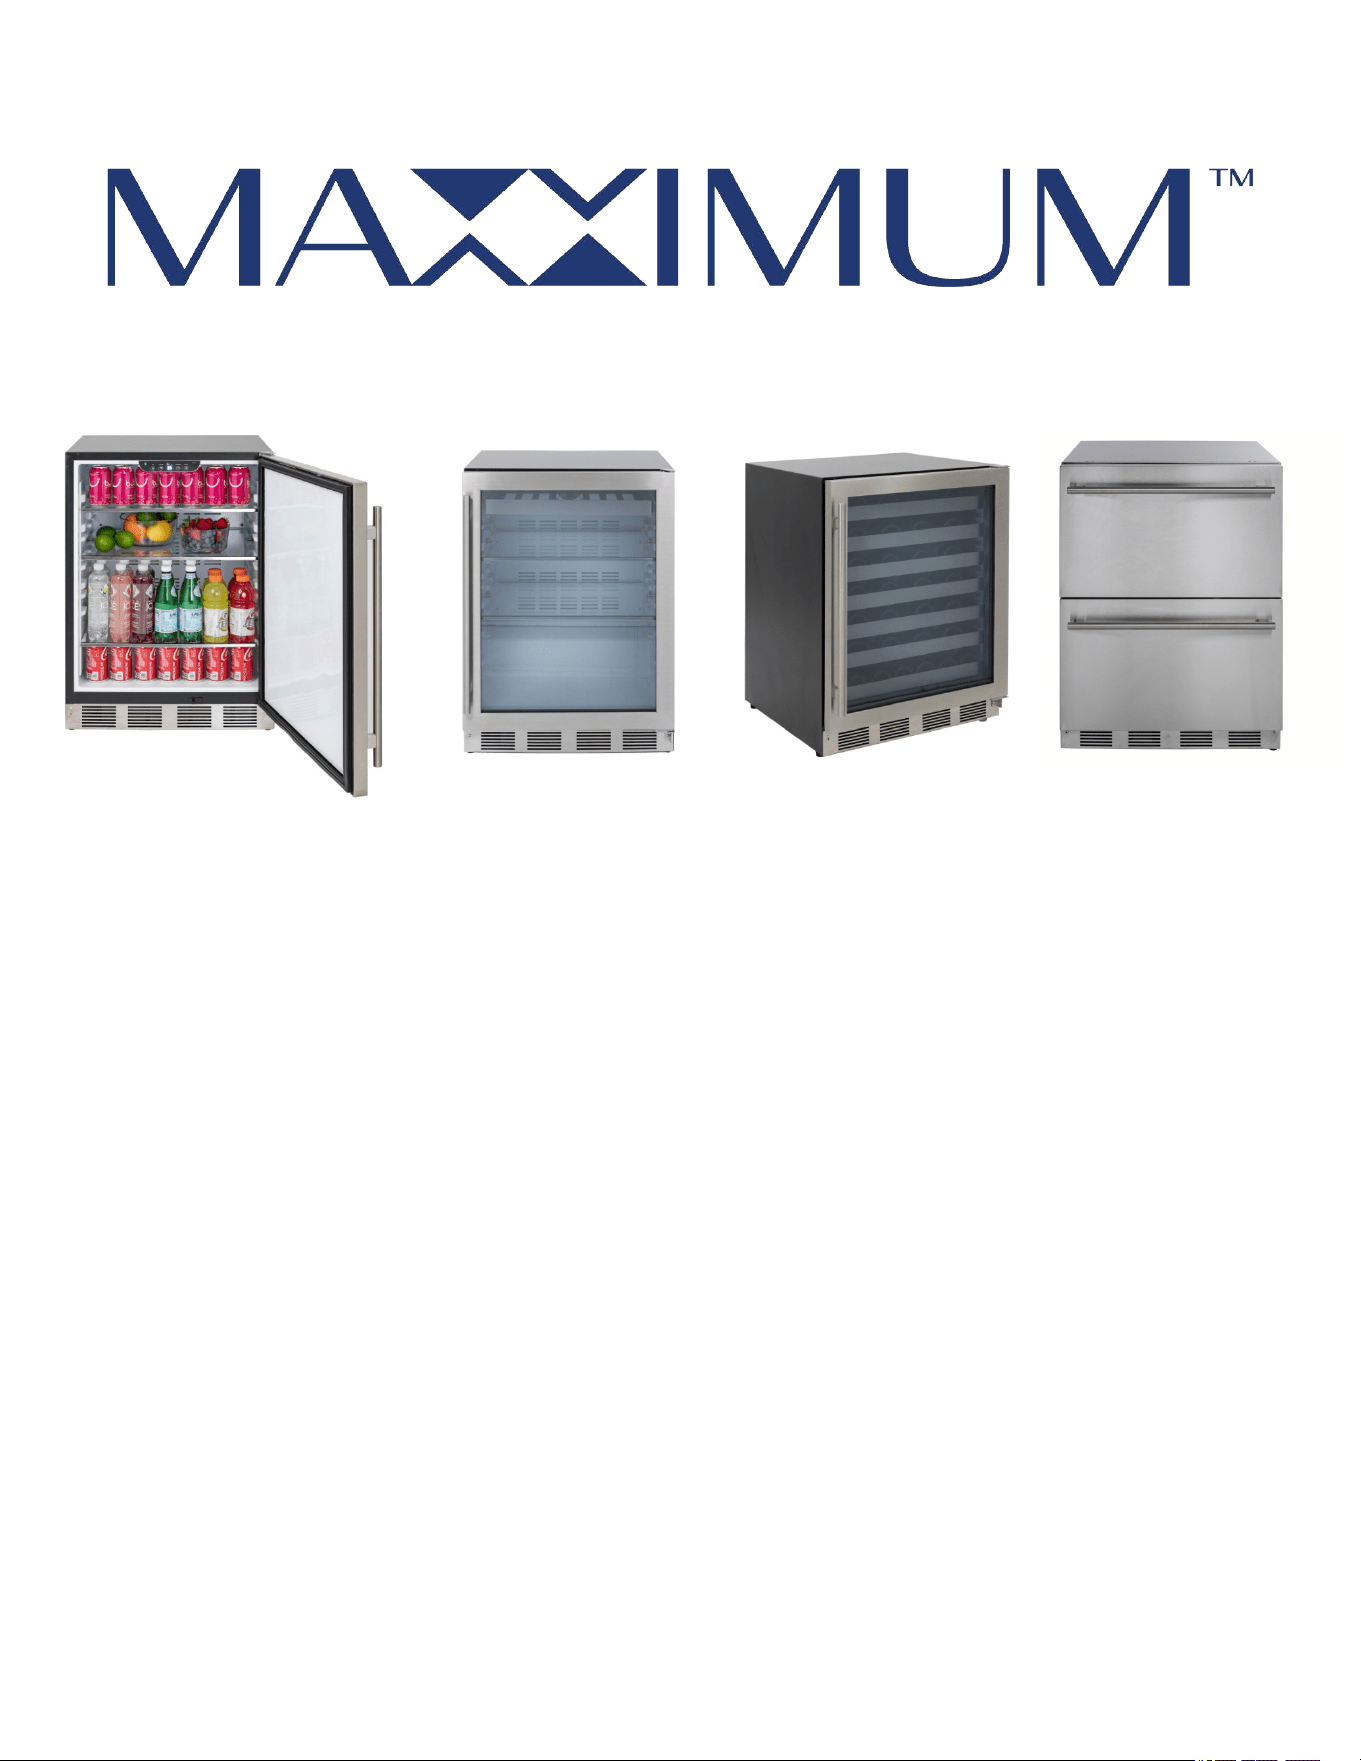
Maxximum
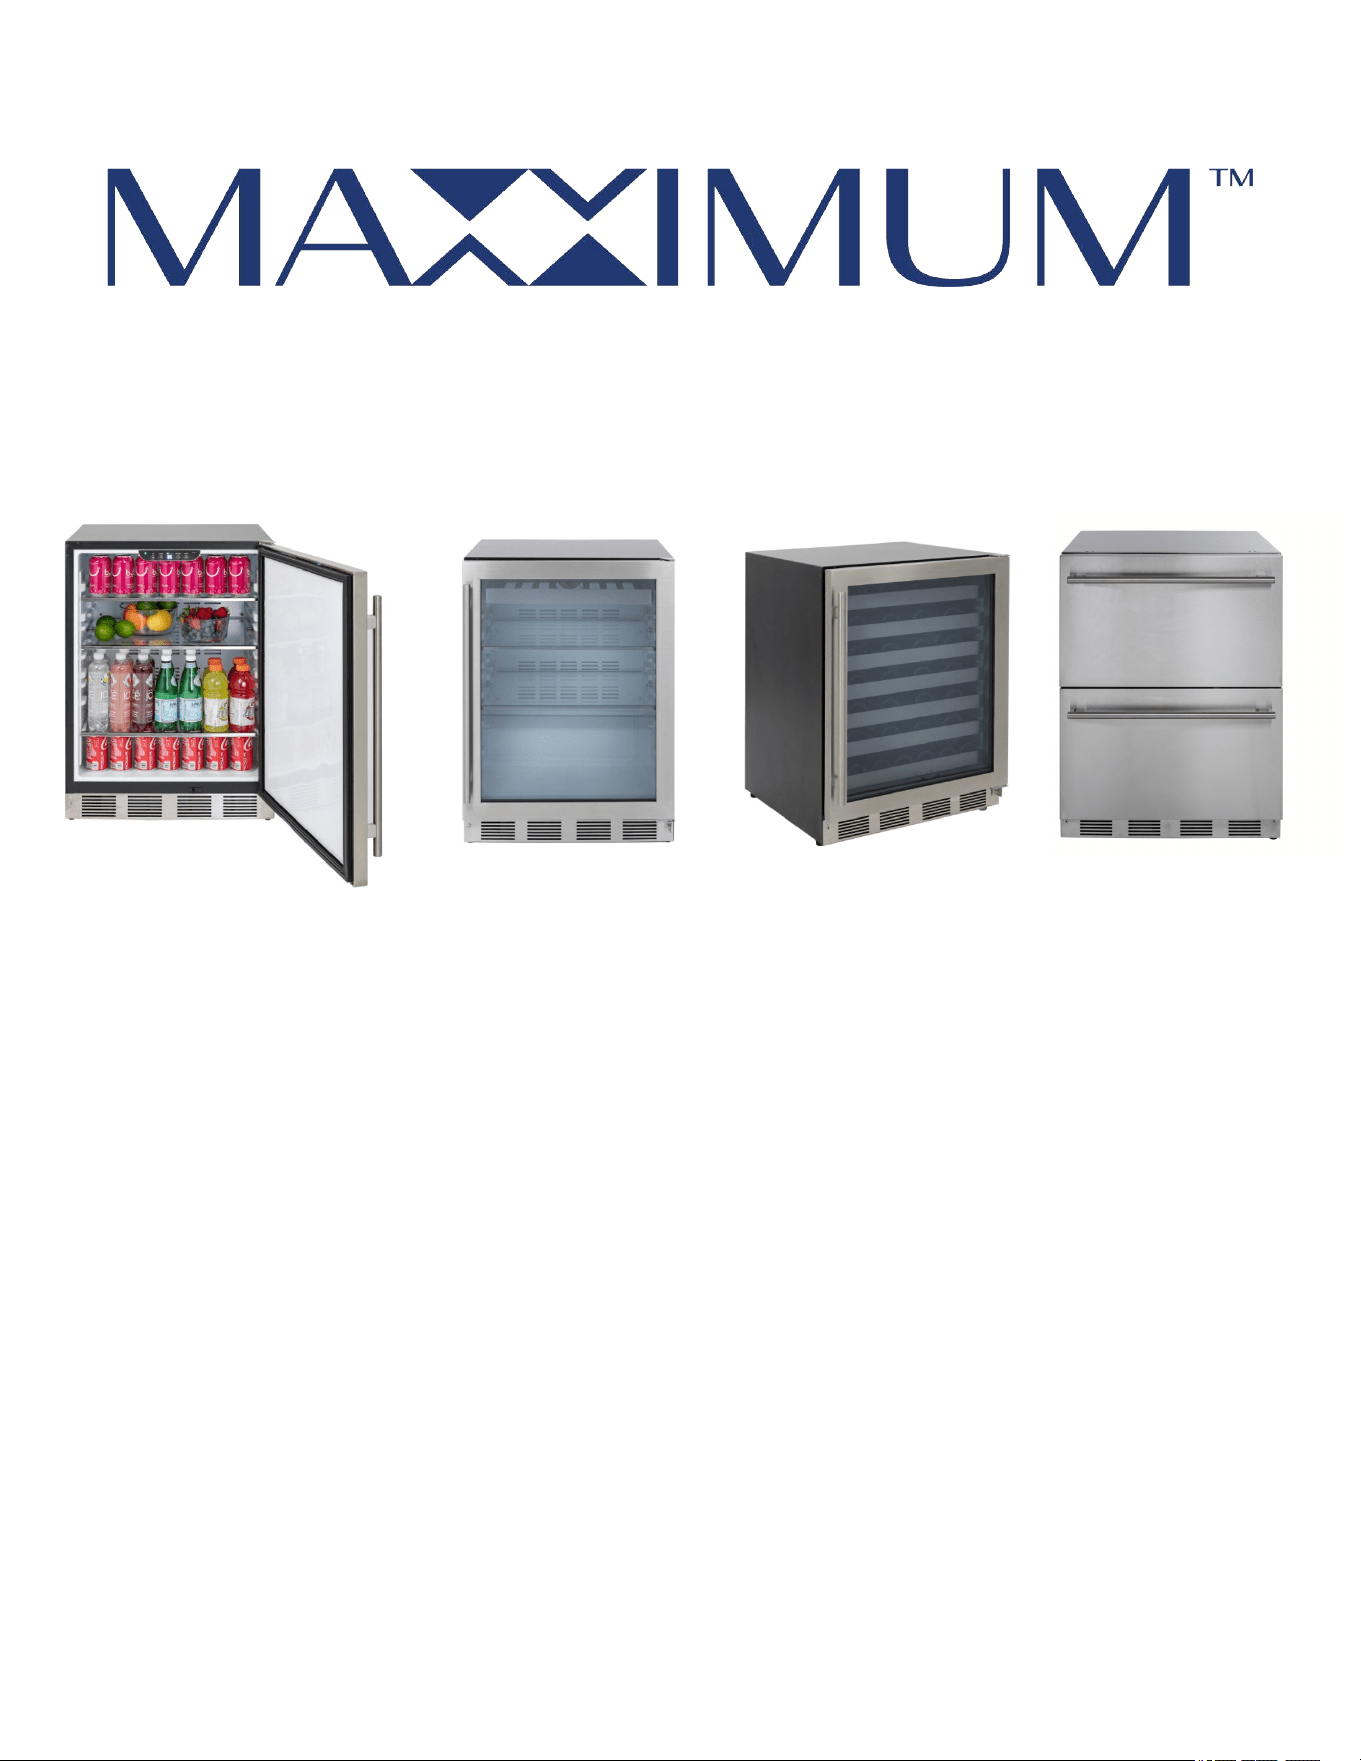
24" Solid Door Refrigerator
24" Beverage Center
24" Wine Cellar
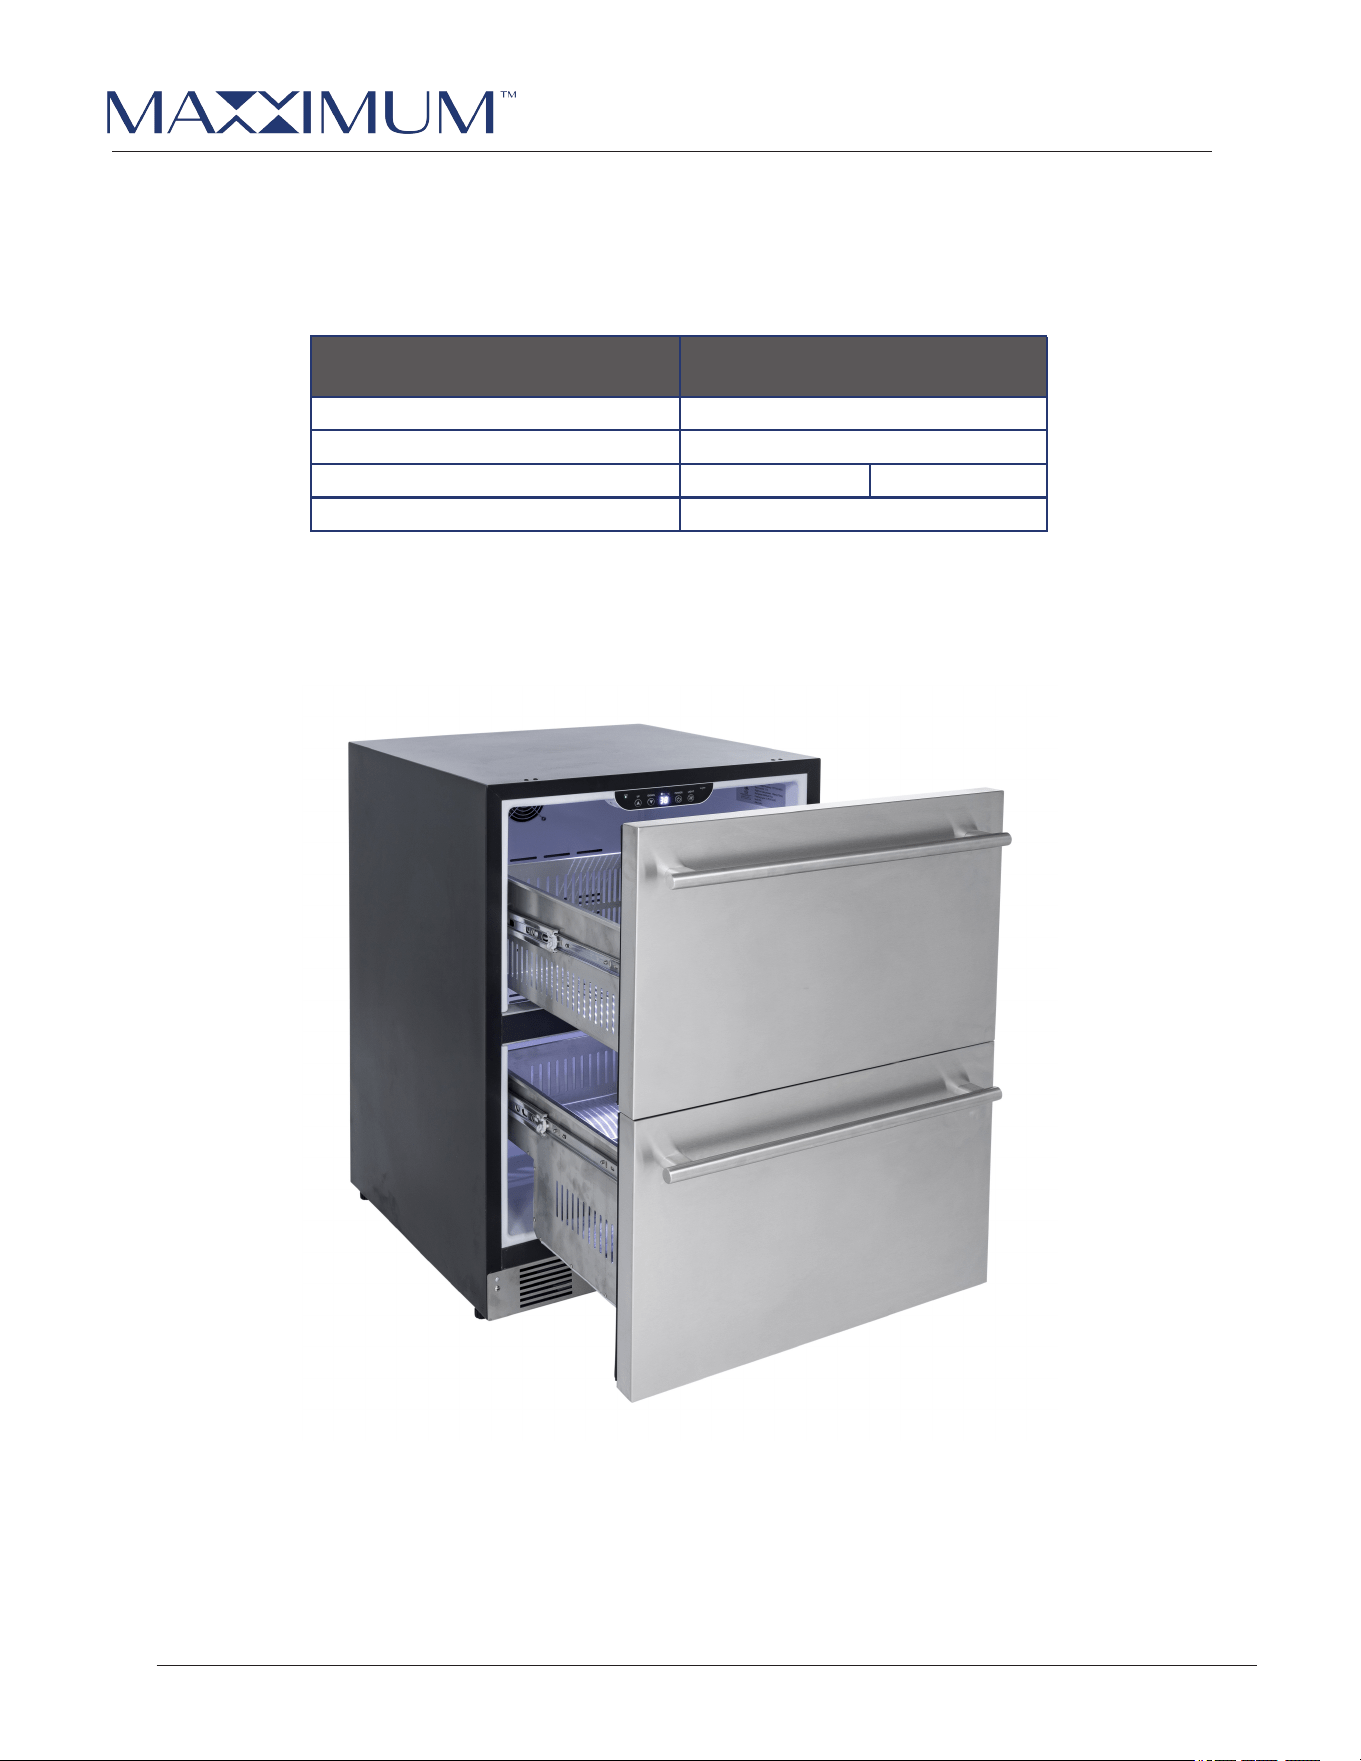
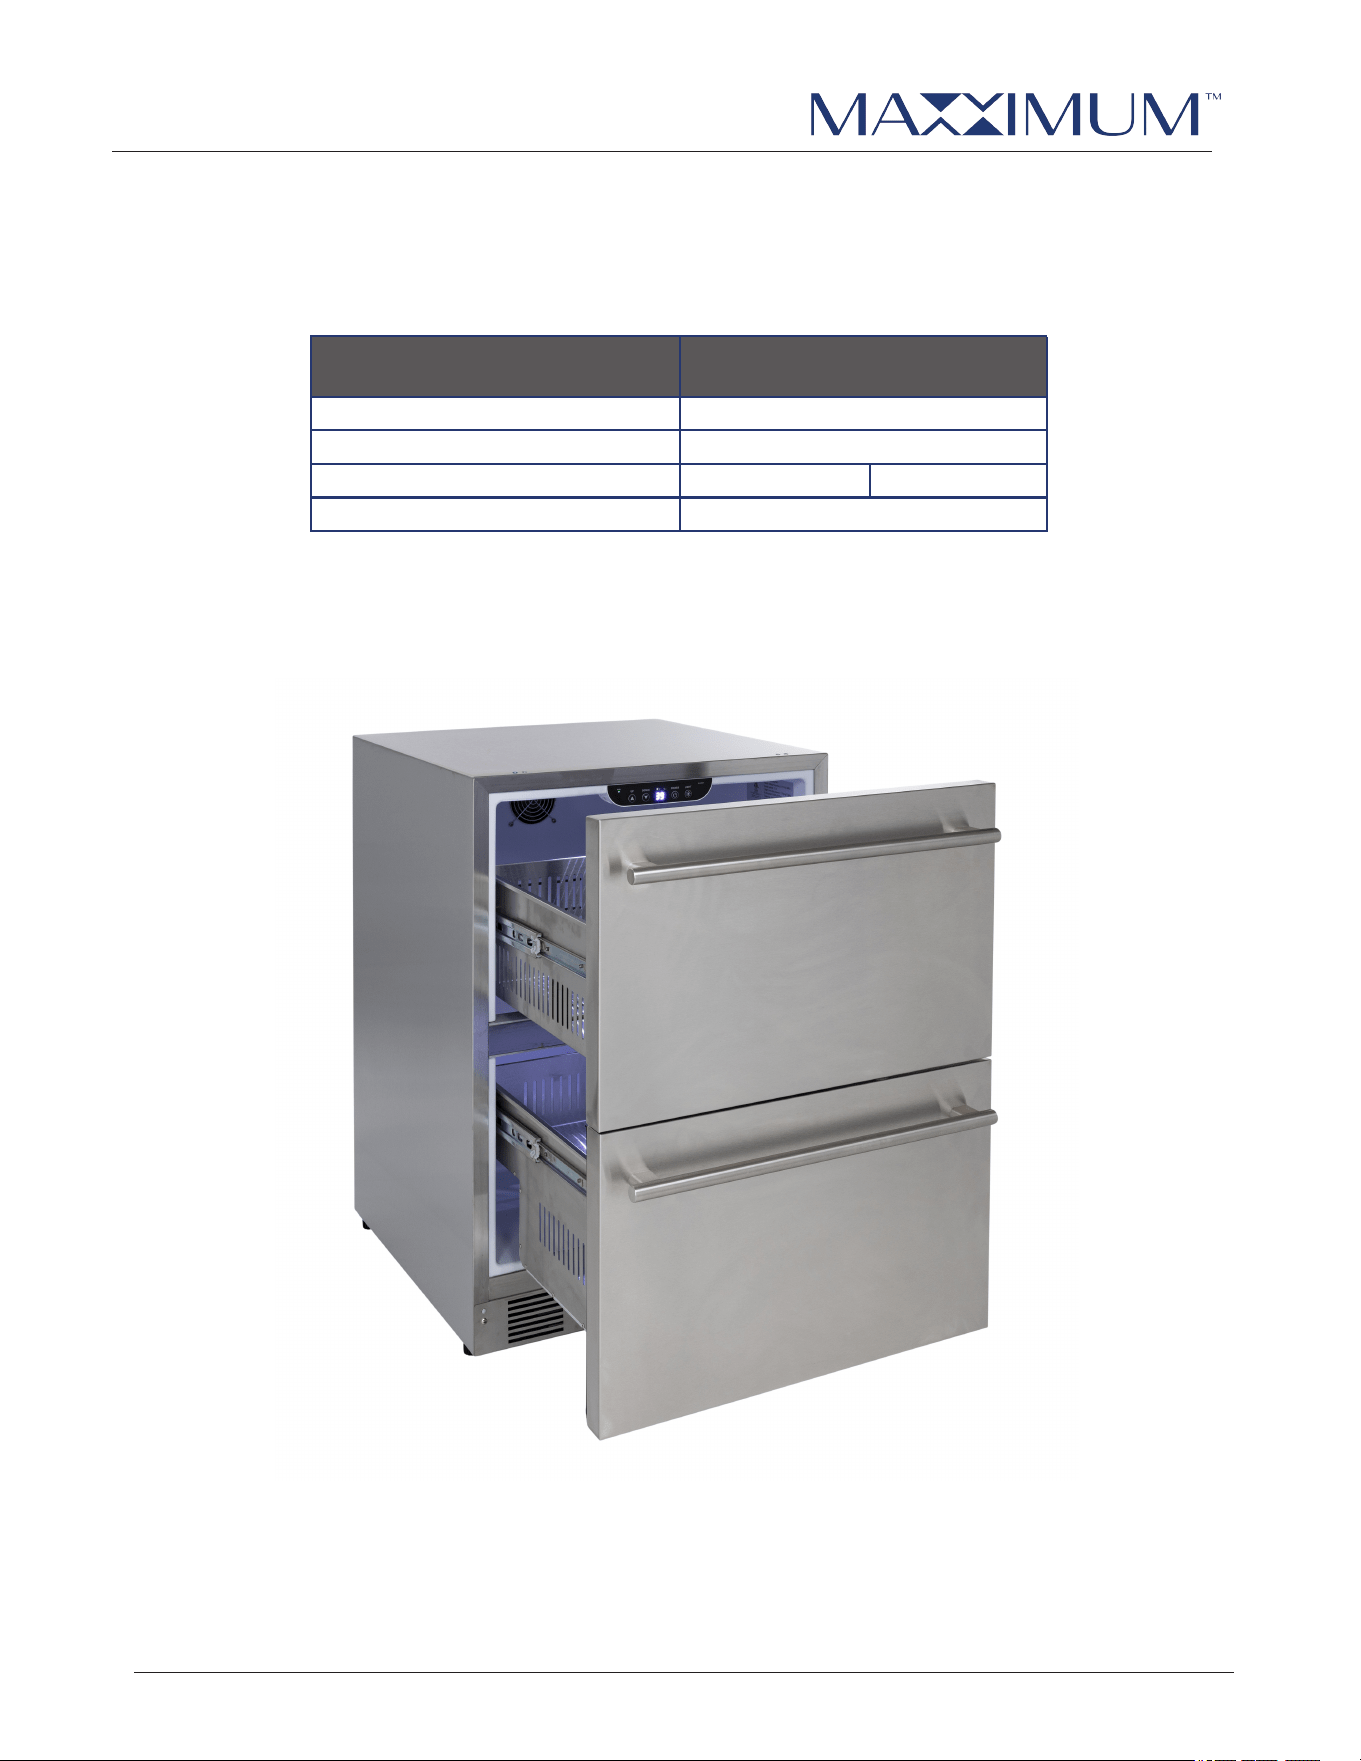
15'' & 24'' Drawer Refrigerator
Operator’s Manual
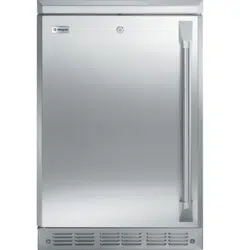
MAXR24SS / MAXBC24SS Indoor Model
MAXR24OD / MAXBC24OD Outdoor Model
MAXWC24SS Indoor Model
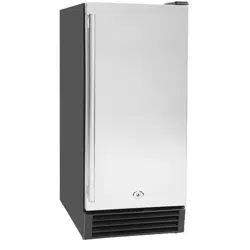
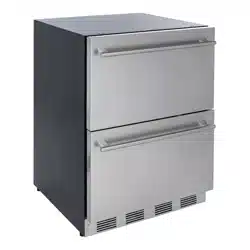
MAXRD15SS / MAXRD24SS Indoor Model
MAXRD15O / MAXRD24O Outdoor Model
TheLegacyCompanies.com 1.866.754.6672

Congratulations on your new MAXXIMUM Refrigerator.
T
o ensure proper operation, please read
this Operator’s Manual carefully before using this product. Keep this manual in a safe place for
future reference.
!
WARNING
California Proposition 65
Certain components in this product and its related accessories contain chemicals
known to the state of California to cause cancer, birth defects or other reproductive harm.
PRODUCT REGISTRATION INFORMATION
Please record your model’s information. You will need to know this information whenever you call to request information or ser-
vice. The model’s information appears on a serial number plate.
Model Number:
Serial Number:
You can register your appliance at:
TheLegacyCompanies.com
Or
Fill out the provided Warranty Registration Card and mail in.
Your Serial Tag is located on the top, inside of your Maxximum
appliance. We recommend using your cellphone to take a picture of
the Serial Tag so you can record the Model and Serial numbers
here and for any future reference.
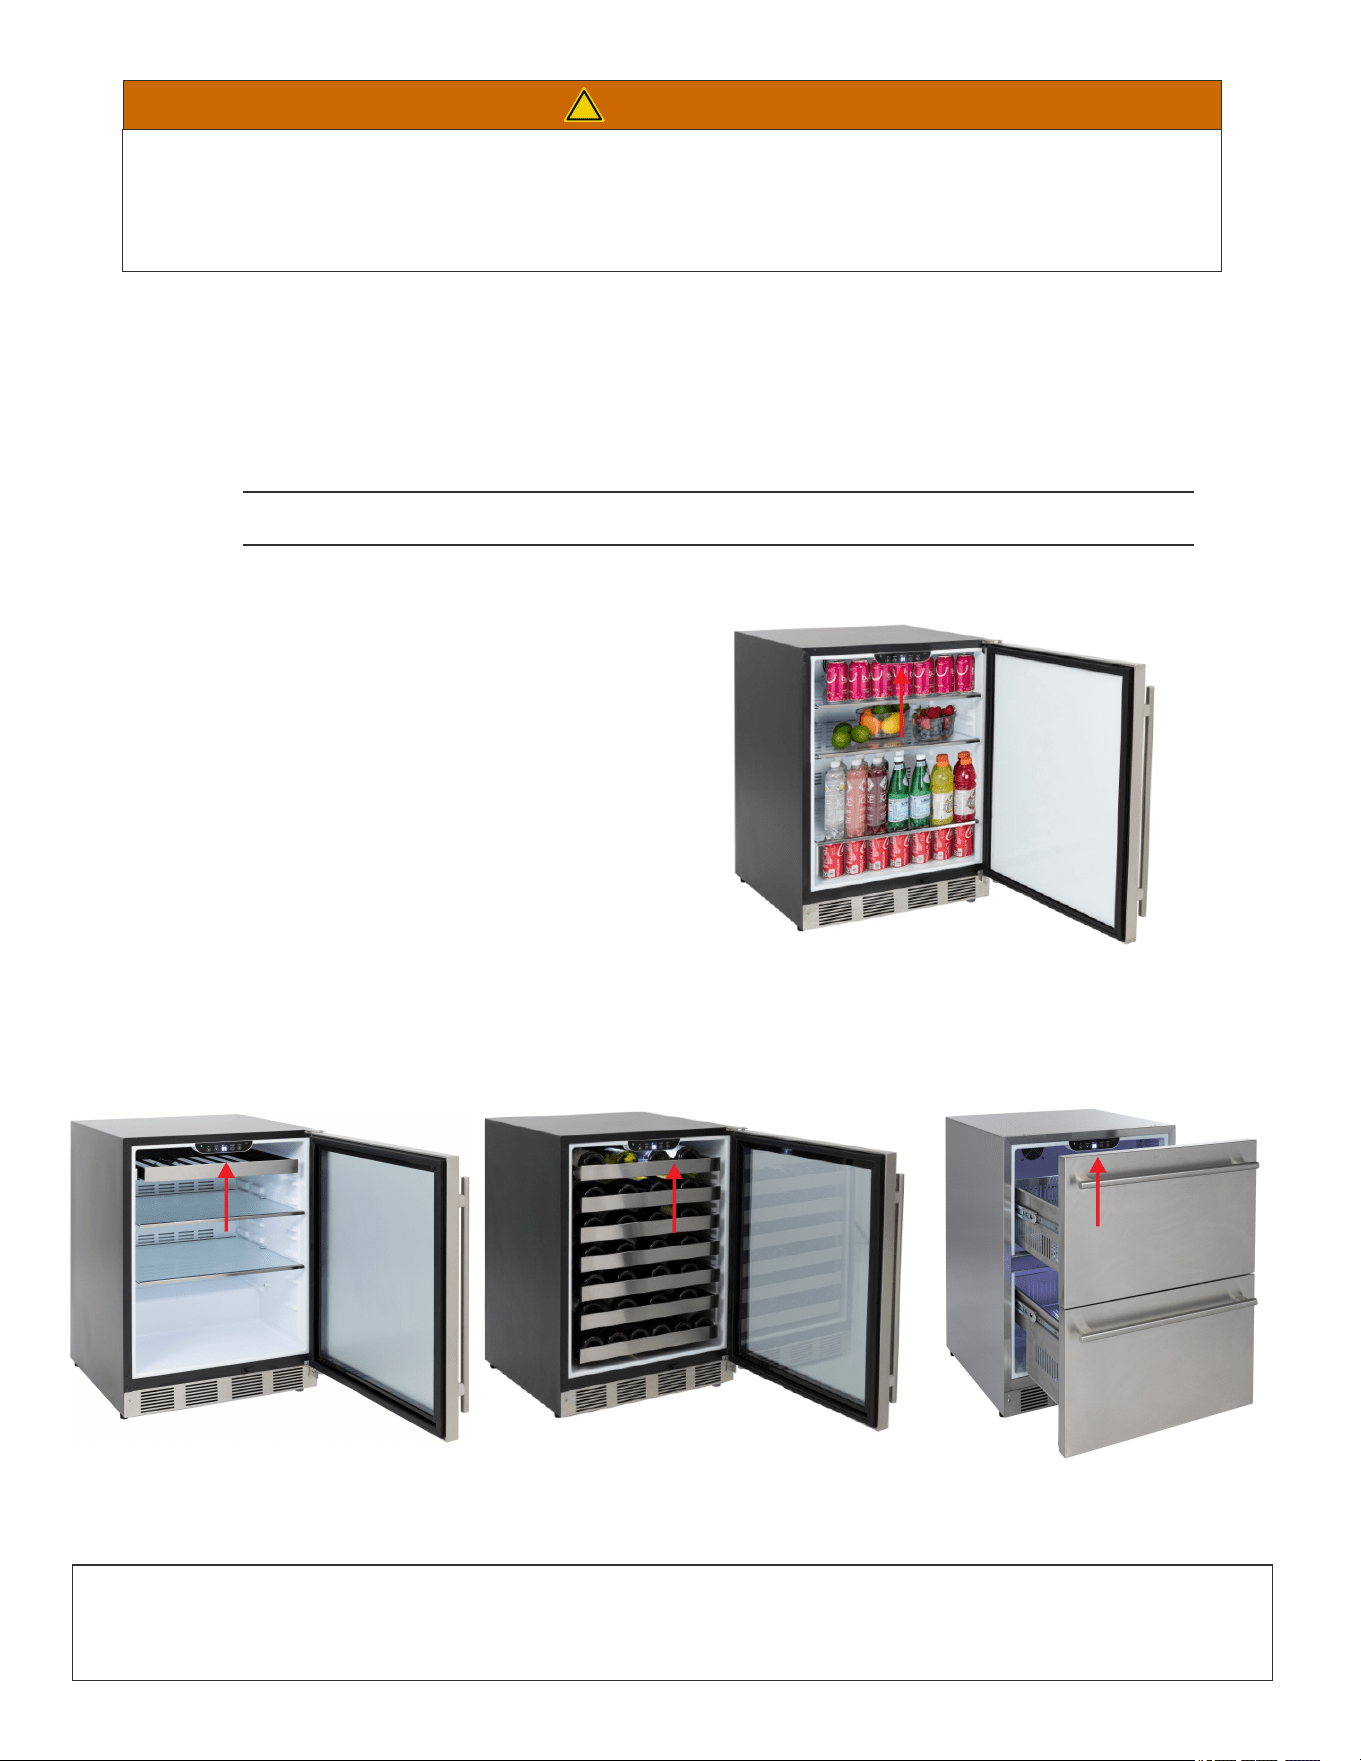
Refrigerator
Beverage Center
Wine Cellar
Drawer Refrigerator

1
© 2024 MAXXIMUM
TABLE OF CONTENTS
MAXXIMUM Refrigeration Operator’s Manual
SAFETY ...............................................................................................................................................3
SAFETY DEFINITIONS .................................................................................................................................3
SAFETY PRECAUTIONS ..............................................................................................................................4
SPECIFICATIONS ..............................................................................................................................6
24-INCH INDOOR/ OUTDOOR REFRIGERATOR ........................................................................................6
INSTALLING THE UNIT ...................................................................................................................11
REQUIRED CABINET OPENING ................................................................................................................13
BUILT-IN CABINET DIMENSIONS .............................................................................................................13
15/24
-INCH INDOOR CABINET DIMENSIONS ...........................................................................................13
ELECTRICAL CONNECTION ...................................................................................................................... 16
AVOIDING USE OF EXTENSION CORDS ..................................................................................................16
LEVELING THE UNIT ...................................................................................................................................14
REVERSING THE DOOR ............................................................................................................................17
OPERATING THE UNIT ................................................................................................................... 19
USING THE CONTROLS .............................................................................................................................19
TURNING THE UNIT ON ...............................................................................................................................20
TURNING THE UNIT OFF ...........................................................................................................................20
SETTING THE TEMPERATURE ................................................................................................................20
CHANGING TEMPERATURE UNITS ........................................................................................................ 21
TEMPERATURE DISPLAY MODE ............................................................................................................ 21
LIGHTING CONTROL ................................................................................................................................22
24-INCH INDOOR/ OUTDOOR BEVERAGE CENTER/ REFRIGERATOR ....................................................7
24-INCH INDOOR/ OUTDOOR WINE REFRIGERATOR ...............................................................................8
FAST/ QUICK COOLING MODE ................................................................................................................21
15/24-INCH INDOOR DRAWER REFRIGERATOR ........................................................................................9
15/24-INCH OUTDOOR DRAWER REFRIGERATOR ..................................................................................10
ANTI-TIP SYSTEM FOR DRAWER REFRIGERATOR. ...............................................................................14
© 2024 MAXXIMUM
MAXXIMUM Refrigeration Operator’s Manual
TABLE OF CONTENTS
2
DOOR OPEN ALERT .............................................................................................................................. 23
SENSOR ERROR ALERT ....................................................................................................................... 23
HIGH TEMPERATURE ALERT . ............................................................................................................... 24
LOW TEMPERATURE ALERT ................................................................................................................ 24
EXPECTING NORMAL SOUNDS ........................................................................................................... 25
DEALING WITH POWER FAILURE ........................................................................................................ 25
CARE AND MAINTENANCE ........................................................................................................ 26
CLEANING AND MAINTAINING THE UNIT ............................................................................................ 26
CLEANING THE UNIT’S EXTERIOR ........................................................................................................26
CLEANING THE UNIT’S INTERIOR ......................................................................................................... 26
CLEANING THE CONDENSER ................................................................................................................ 28
TROUBLESHOOTING ....................................................................................................................29
DISPOSING THE UNIT ...................................................................................................................30
WARRANTY ............................................................................................................................................31
SABBATH MODE ................................................................................................................................... 22
AUTO DEFROST MODE ........................................................................................................................ 22
START- UP AFTER LONG-TERM STORAGE.......................................................................................... 27
LONG-TERM STORAGE / WINTERIZING............................................................................................ 27
© 2024 MAXXIMUM
MAXXIMUM Refrigeration Operator’s Manual
3
SAFETY
1
SAFETY DEFINITIONS
The words DANGER, WARNING, CAUTION and NOTICE are used throughout this manual to highlight important
information. Be certain that the meanings of these alerts are known to all who operate and install the appliance.
!
DANGER
Indicates a hazardous situation that, if not avoided, will result in death or serious injury.
!
WARNING
Indicates a hazardous situation that, if not avoided, could result in death or serious injury.
!
CAUTION
Indicates a hazardous situation that, if not avoided, could result in minor or moderate injury.
NOTICE
Indicates a situation that can cause damage to the appliance and/or the environment, or cause the appliance
to operate improperly.
© 2024 MAXXIMUM
MAXXIMUM Refrigeration Operator’s Manual
SAFETY
4
• Do not use the appliance if the power cord is damaged. If the power cord is damaged, have a qualified
electrician replace the power cord.
• Never lift, carry or drag the appliance by the power cord.
• Do not connect or disconnect the electric plug when your hands are wet.
• Never unplug the appliance by pulling on the power cord. Always grip the plug firmly and pull straight
out from the outlet.
DANGER – Risk Of Fire Or Explosion. FLAMMABLE REFRIGERANT
Used. Do Not Use Mechanical Devices To Defrost Refrigerator. Do Not
Puncture Refrigerant Tubing.
DANGER – Risk Of Fire Or Explosion. FLAMMABLE REFRIGERANT
Used. To Be Repaired Only By Trained Service Personnel. Do Not
Puncture Refrigerant Tubing.
CAUTION – Risk Of Fire Or Explosion. FLAMMABLE REFRIGERANT Used. Consult Repair
Manual/Owner’s Guide Before Attempting To Service This Product. All Safety Precautions
Must be Followed.
CAUTION – Risk Of Fire Or Explosion. Dispose Of Properly In Accordance With The
Applicable Federal Or Local Regulations. FLAMMABLE REFRIGERANT Used.
CAUTION – Risk Of Fire Or Explosion Due To Puncture Of Refrigerant Tubing; Follow
Handling Instructions Carefully. FLAMMABLE REFRIGERANT Used.
WARNING: Keep ventilation openings, in the appliance enclosure or in the built-in structure, clear of
obstruction.
WARNING: Do not use mechanical devices or other means to accelerate the defrosting process, other than
those recommended by the manufacturer.
WARNING: Do not damage the refrigerant circuit.
WARNING: Do not use electrical appliances inside the food storage compartments of the appliance, unless
they are of the type recommended by the manufacturer.
SAFETY PRECAUTIONS
POWER CORD PRECAUTIONS
INSTALLING PRECAUTIONS
• Keep ventilation openings, in the appliance enclosure or in the built-in structure, clear of obstruction.
• To avoid a hazard due to instability of the appliance, the appliance must be installed in accordance with
the instructions.
MOVING PRECAUTIONS
• When moving the appliance, do not turn it upside-down and do not unlevel it more than 45 degrees.
• Do not move the appliance without emptying it and securing the door in the closed position.
© 2024 MAXXIMUM
MAXXIMUM Refrigeration Operator’s Manual
SAFETY
5
THE MANUFACTURER DISCLAIMS ANY RESPONSIBILITY IF THE ABOVE INSTRUCTIONS ARE NOT
FOLLOWED.
CLEANING AND MAINTENANCE PRECAUTIONS
• Never clean the appliance parts with flammable fluids. Do not store or use gasoline or other flammable
vapors and liquids in the vicinity of this appliance or any other appliances. The fumes can create a fire
hazard or explosion.
• Do not use solvent-based cleaning agents or abrasives on the interior. These cleaners may transmit
taste to the food, or damage or discolor the interior.
• If the appliance will not be used for a long time, thoroughly clean it before the next use. Carefully follow
any instructions provided for cleaning or the use of sanitizing solution. Do not leave any solution inside
the appliance after cleaning.
• Do not use mechanical devices or other means to accelerate the defrosting process, other than those
recommended by the manufacturer.
• Do not damage the refrigerant circuit.
OTHER PRECAUTIONS
• To ensure proper ventilation for the appliance, keep obstructions away from the front of the unit.
• Keep fingers out of the “pinch point” areas. Clearance between the door and cabinet are necessarily
small. Be careful closing the door when children are in the area.
• Do not touch the evaporator with your hand when the appliance is operating.
• Do not attempt to repair or replace any part of your appliance unless this manual specifically
recommends it. Have a qualified technician perform all other service on the unit.
• Children 8 years of age and older and people with reduced physical, sensory or mental capabilities or
lack of experience and knowledge can use this appliance if they have been given supervision or
instruction concerning use of the appliance in a safe way and they understand the hazards involved.
• Never allow children to operate, play with or crawl inside the appliance.
• Never allow children to clean and maintain the appliance without supervision.
• Do not use the appliance other than for its intended purpose.
• Do not touch the condenser surfaces. They are sharp and can be easily damaged.
• Do not use electrical appliances inside the food storage compartments of the appliance, unless they are
of the type recommended by the manufacturer.
© 2024 MAXXIMUM
MAXXIMUM Refrigeration Operator’s Manual
INDOOR & OUTDOOR
6
SPECIFICATIONS
2
MAXXIMUM 24-INCH
PREMIUM REFRIGERATOR
FEATURES
24-INCH INDOOR&OUTDOOR
REFRIGERATOR
Electrical Requirement 115V/60Hz
Maximum Amp Fuse
15 amp
Net Capacity
5.5 cu-ft (156 L)
Temperature Setting 34°- 65°F (1°- 18°C)
© 2024 MAXXIMUM
MAXXIMUM Refrigeration Operator’s Manual
7
MAXXIMUM 24-INCH INDOOR&OUTDOOR
PREMIUM BEVERAGE CENTER/REFRIGERATOR
FEATURES
24-INCH INDOOR&OUTDOOR
BEVERAGE CENTER/REFRIGERATOR
Electrical Requirement 115V/60Hz
Maximum Amp Fuse 15 amp
Net Capacity
5.5 cu-ft (156 L)
Temperature Setting 34°- 65°F (1°- 18°C)
SPECIFICATIONS
© 2024 MAXXIMUM
MAXXIMUM Refrigeration Operator’s Manual
8
MAXXIMUM 24-INCH INDOOR PREMIUM
SINGLE ZONE WINE REFRIGERATOR
FEATURES
24-INCH INDOOR SINGLE ZONE
WINE REFRIGERATOR
Electrical Requirement 115V/60Hz
Maximum Amp Fuse 15 amp
Net Capacity
5.5 cu-ft (156 L)
Temperature Setting
38°- 65°F (3°- 18°C)
SPECIFICATIONS
MAXXIMUM 15/24-INCH INDOOR PREMIUM
DRAWER REFRIGERATOR
SPECIFICATIONS
FEATURES
15/24-INCH INDOOR DRAWER
REFRIGERATOR
Electrical Requirement 115V/60Hz
Maximum Amp Fuse 15 amp
Net Capacity
5.5 cu-ft (156 L)
Temperature Setting
38°- 65°F (3°- 18°C)
2.9 cu-ft (82 L)
© 2024 MAXXIMUM
MAXXIMUM Refrigeration Operator’s Manual
9
MAXXIMUM 15/24-INCH OUTDOOR PREMIUM
DRAWER REFRIGERATOR
SPECIFICATIONS
FEATURES
15/24-INCH OUTDOOR
DRAWER REFRIGERATOR
Electrical Requirement 115V/60Hz
Maximum Amp Fuse 15 amp
Net Capacity
5.5 cu-ft (156 L)
Temperature Setting
38°- 65°F (3°- 18°C)
2.9 cu-ft (82 L)
© 2024 MAXXIMUM
MAXXIMUM Refrigeration Operator’s Manual
10
© 2024 MAXXIMUM
MAXXIMUM Refrigeration Operator’s Manual
11
INSTALLING
THE UNIT
3
!
WARNING
Fire/Explosion Hazard
DO NOT install in spaces containing gasoline engines, fuel tanks or fuel line fi ttings. This device
does not meet federal requirement for ignition protection.
IMPORTANT:
Electrical Tips
• This appliance must be installed with all electrical connections in accordance with state and local codes.
• This unit requires a standard electrical supply properly grounded in accordance with National Electrical
Code and local codes and ordinances.
• The fuse (or circuit breaker) size should be 15 amperes for 110V.
• The manufacturer recommends that you provide a separate circuit that services only your appliance. Use
receptacles that cannot be turned off by a switch or pull chain.
• Plug the appliance into a grounded three-prong outlet. Do not remove the grounding prong, do not use an
adapter, and do not use an extension cord.
• Do not kink, pinch or damage the power supply cord between the appliance and wall or cabinet.
• Before connecting the appliance to the power source, let it stand upright for approximately 4 hours.
Following this step will reduce the possibility of a malfunction in the cooling system brought on by
handling during transportation.
• Make sure to install the unit on a level surface.
Tips on Moving and Setting up the Unit
!
CAUTION
Tip Hazard
Be sure to use caution when working around an uninstalled unit. The unit is capable of tipping
over if it is not installed and properly anchored.
• Use two or more people to move and install the appliance. Failure to do so can result in back or other
injury.
• Remove the packing materials and clean the appliance before using it.
© 2024 MAXXIMUM
MAXXIMUM Refrigeration Operator’s Manual
INSTALLING THE UNIT
12
• Never keep the appliance next to ovens, grills or other high-heat resources.
• Keep the appliance on a hard, level surface that can support the unit when the unit is full. Keep the
appliance level to help ensure it works properly. You may need to make several adjustments to level the
unit. If necessary, adjust the height of the appliance by turning the feet. See “Leveling the Unit” on page
14.
• To ensure proper service access and ventilation, all MAXXIMUM units should not have the grill openings
covered. There are no additional requirements for venting at the top, side or rear of the unit.
• These units are to be installed under a counter. Follow the recommended spacing dimensions listed in
this manual. Place the electrical supply in the recommended location.
Factors affecting the Unit
© 2024 MAXXIMUM
MAXXIMUM Refrigeration Operator’s Manual
INSTALLING THE UNIT
13
REQUIRED CABINET OPENING
!
WARNING
Fire/Explosion Hazard
DO NOT install in spaces containing gasoline engines, fuel tanks or fuel line fi ttings. This
device does not meet federal requirement for ignition protection. Failure to comply could
result in injury or death.
A built-in installation will allow you to install the appliance under a counter or in a kitchen cabinet if you
respect the required clearance space around the appliance. The appliance must be located to allow
clearance for the electrical connection in the rear of the unit.
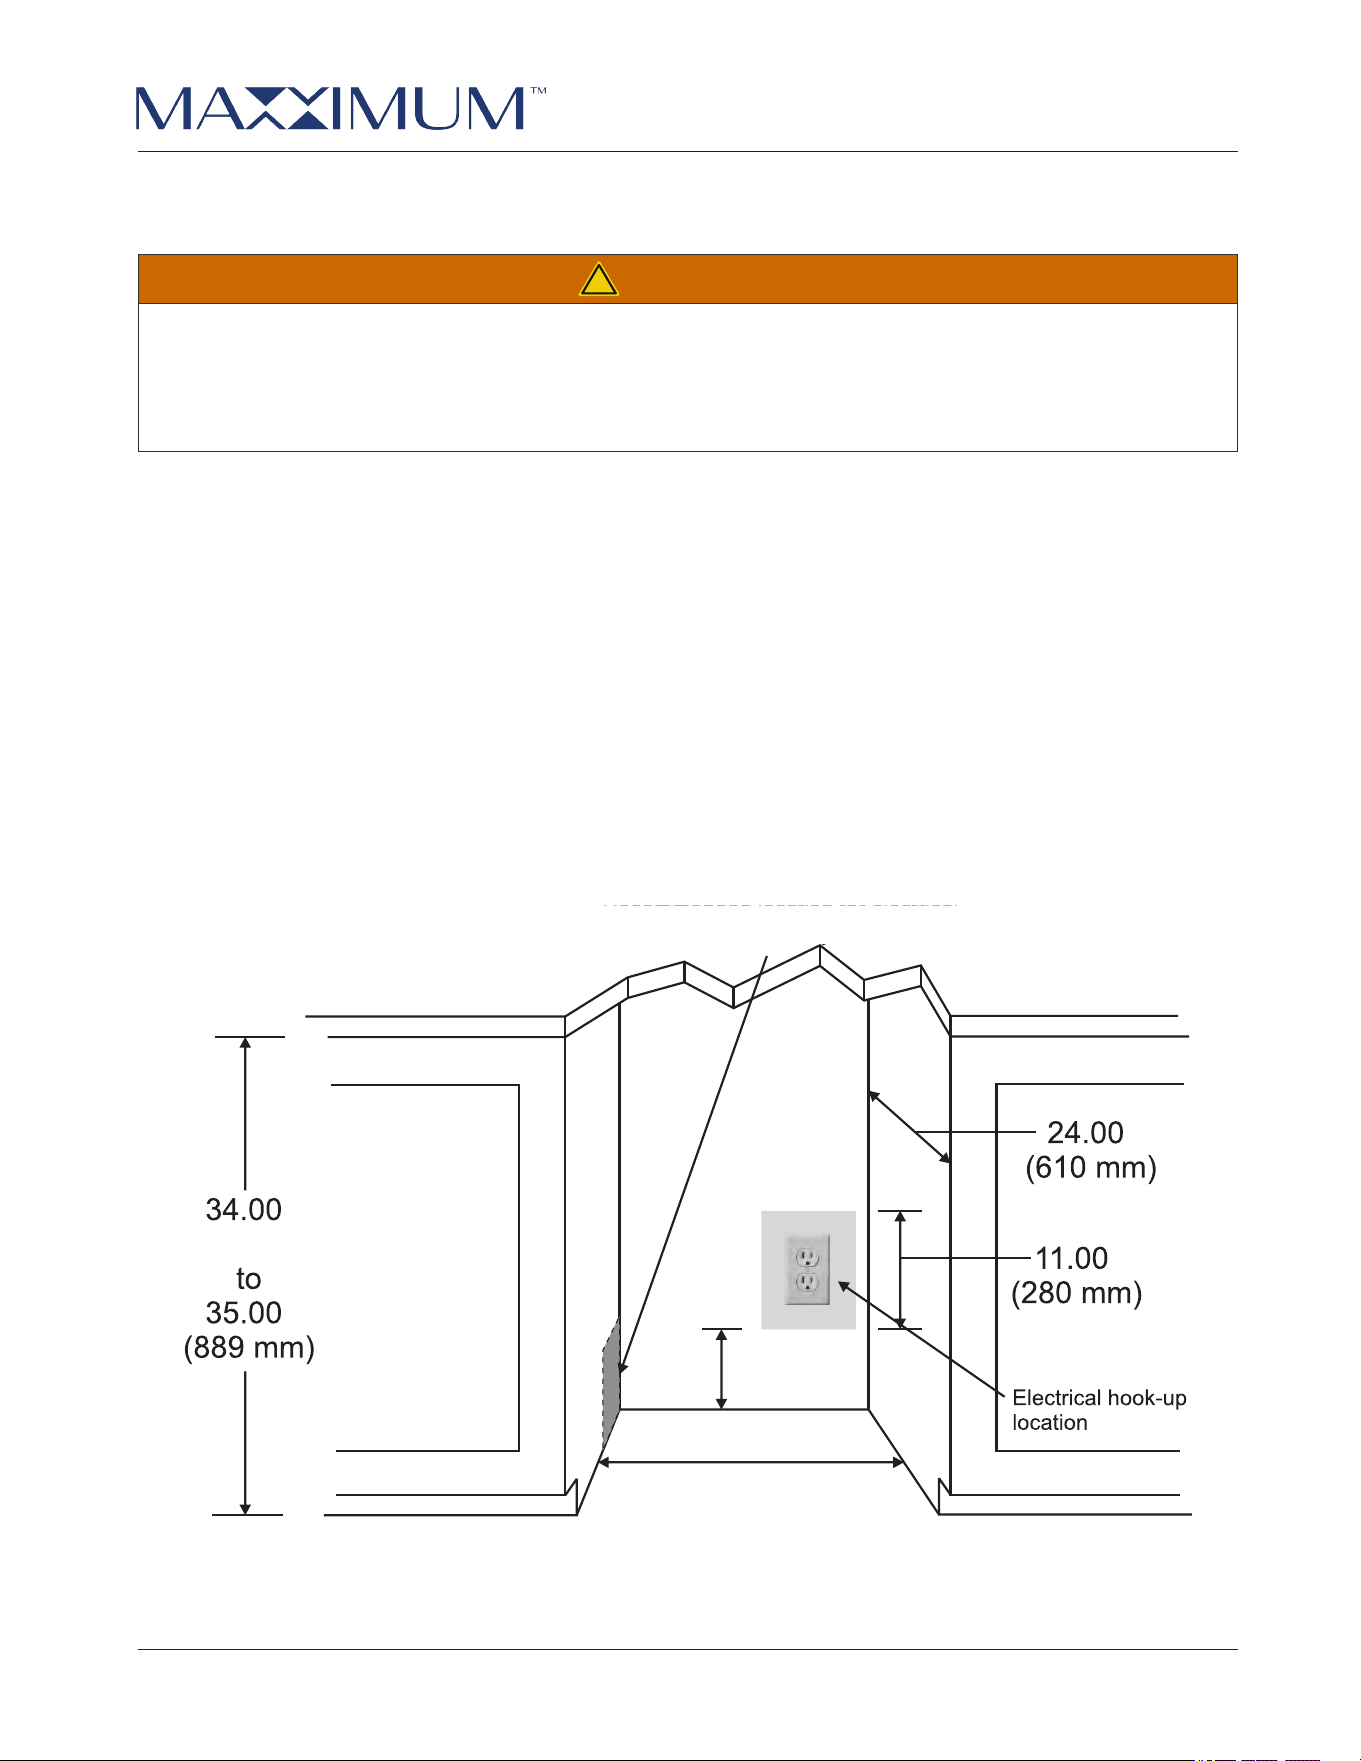
BUILT-IN CABINET DIMENSIONS
A built-in unit is designed for zero clearance at the top and each side of the unit. The unit uses fan-forced
condenser cooling, which requires air circulation through the lower section of the unit.
NOTE: To ensure proper service access and ventilation, all MAXXIMUM units should not have the grill openin
g
covered. There are no additional requirements for venting at the top, side or rear of the unit.
MAXXIMUM 24-INCH INDOOR CABINET DIMENSIONS
Recommended location for electrical connection in either adjacent cabinet.
24.00"
(610 mm)
7.00"
(177 mm)
(864 mm)
"
"
"
"
* For 15-Inch model MAXRD15SS & MAXRD15O, the cabinet width is
15'' 381(mm), height is 33-5/8''855(mm)to 34-5/8''880(mm).
Height
Width
Depth
© 2024 MAXXIMUM
MAXXIMUM Refrigeration Operator’s Manual
INSTALLING THE UNIT
14
LEVELING THE UNIT
The appliance requires leveling before it can work properly. If necessary, raise or lower the unit by
turning the four leveling feet on the bottom. The manufacturer recommends using a carpenter’s level to
check the appliance.
NOTICE
It is extremely important that the appliance is level for optimum performance.
Adjust all four leveling feet evenly so that the top of the appliance is at the desired installation height and
is level.
1. On a level surface, place a carpenter’s level on top of the appliance to see if it is level from front to
back and side to side.
2. Adjust the height of the leveling feet as follows:
• Turn the leveling feet to the right to lower that side of the appliance.
• Turn the leveling feet to the left to raise that side of the appliance.
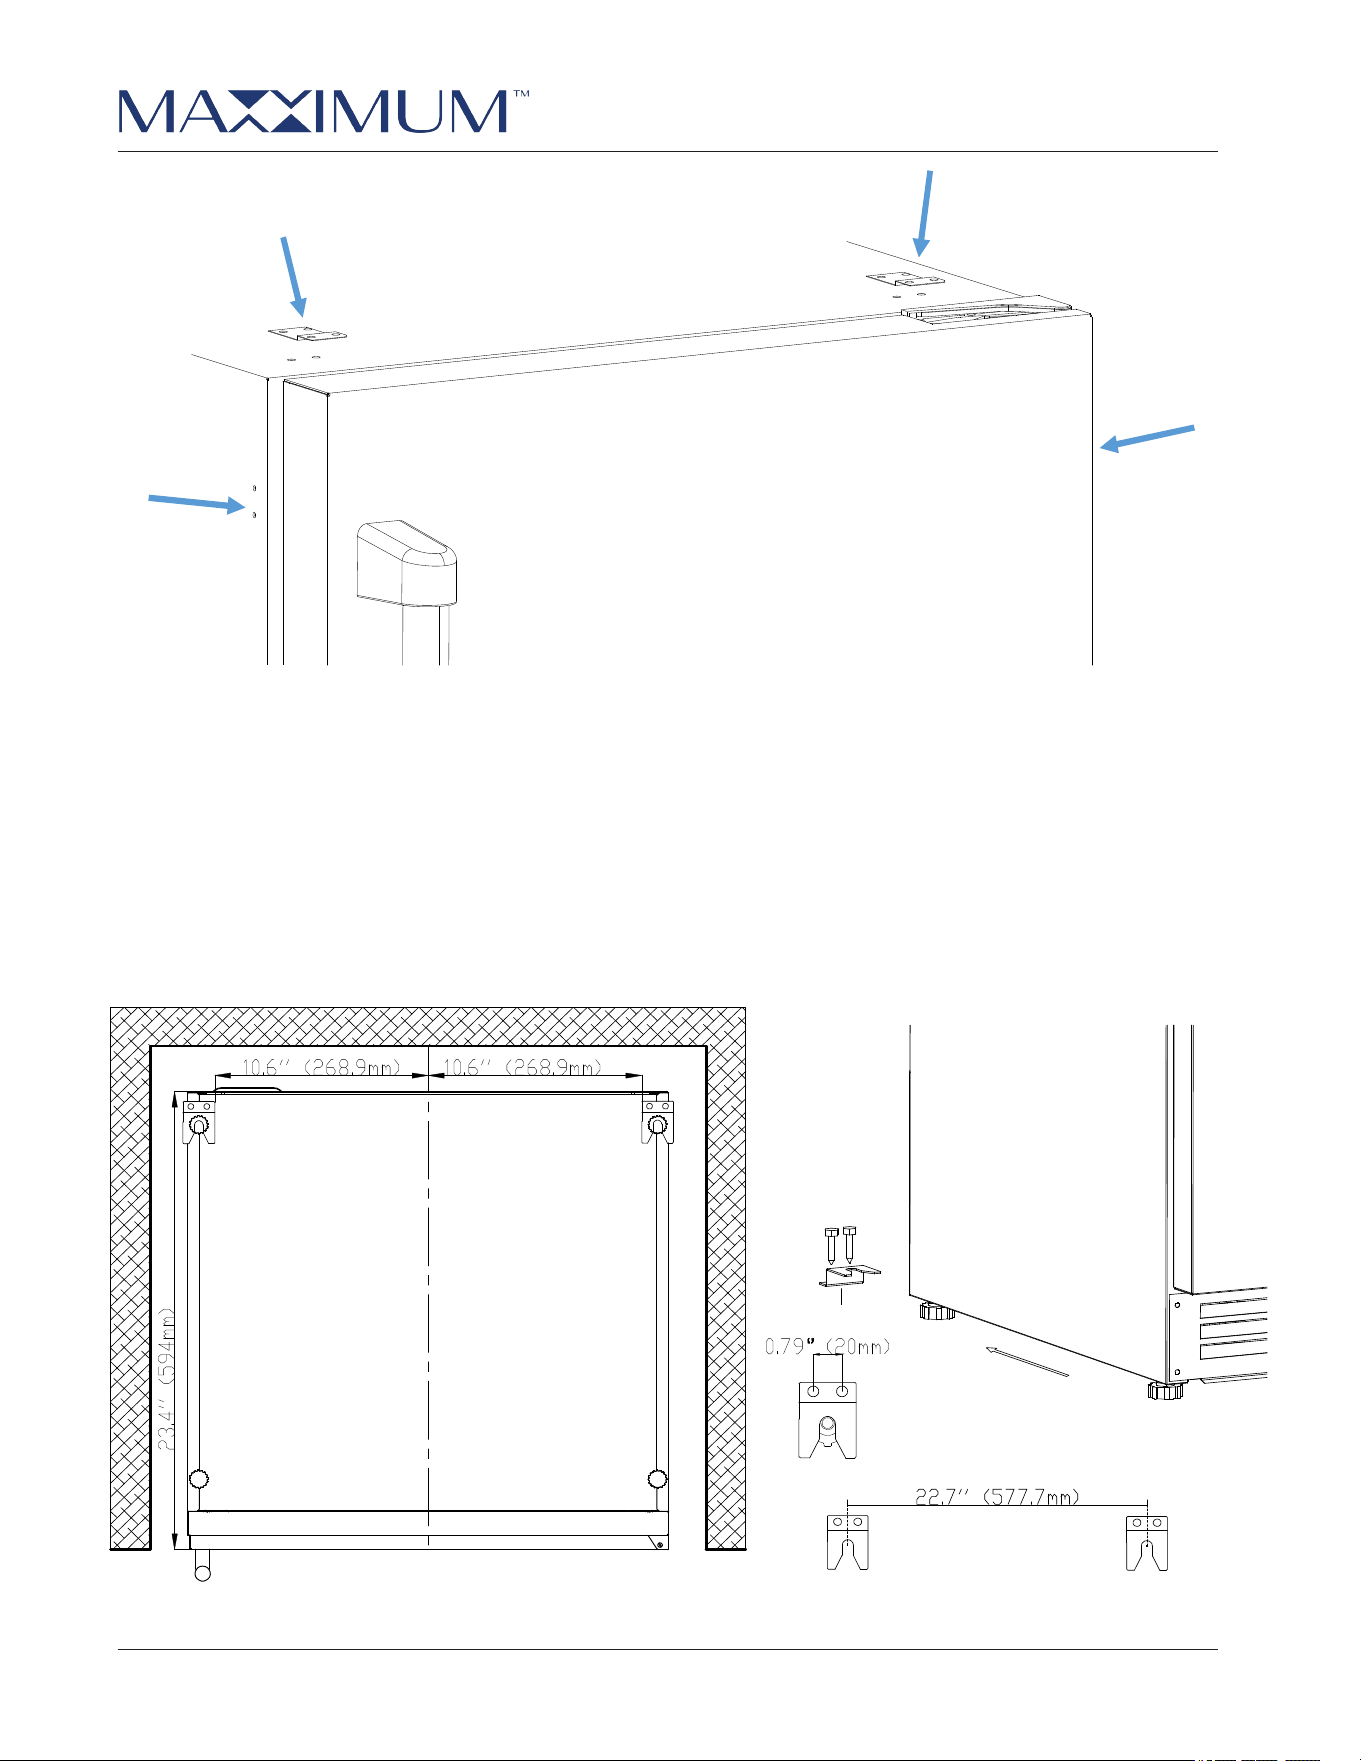
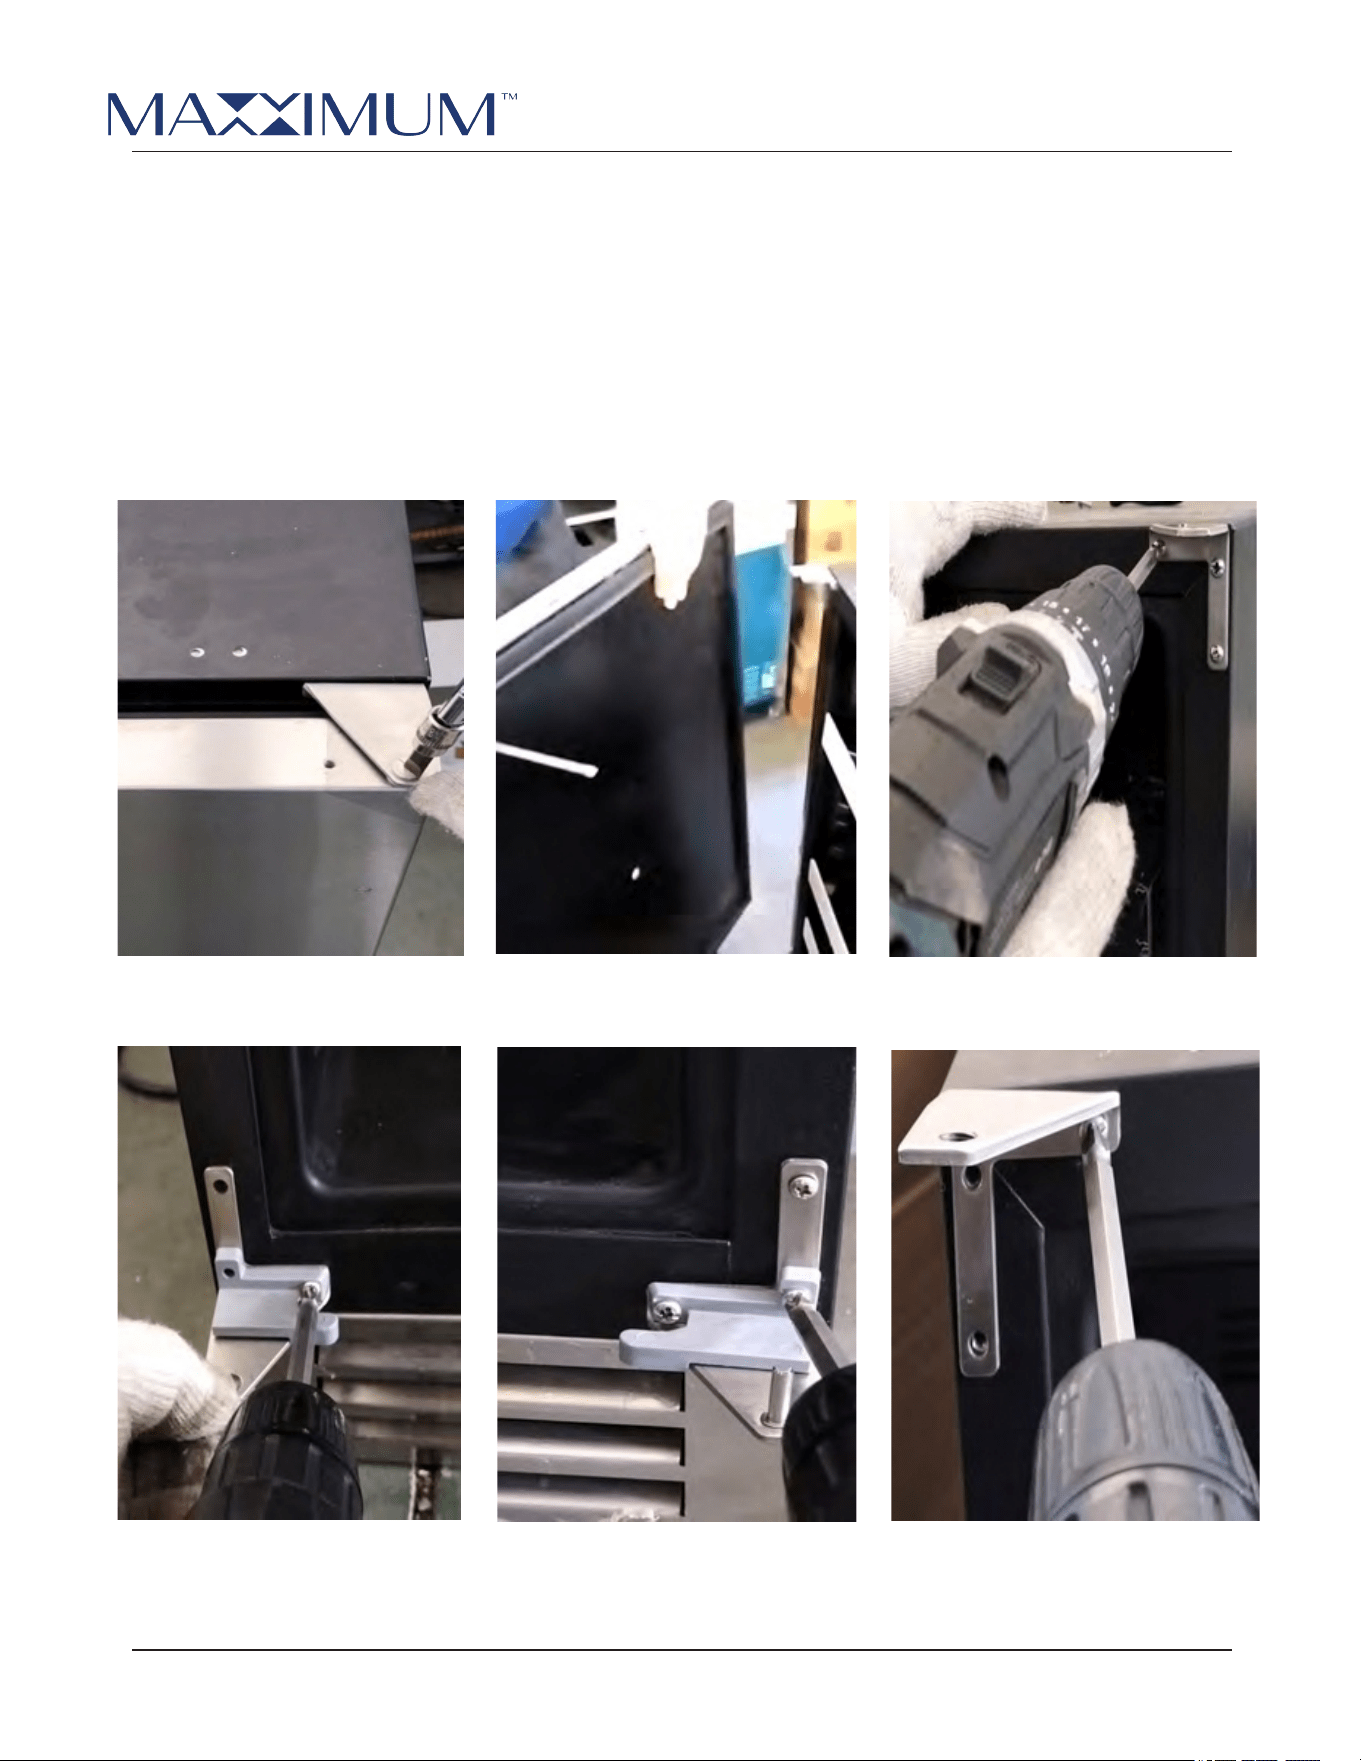
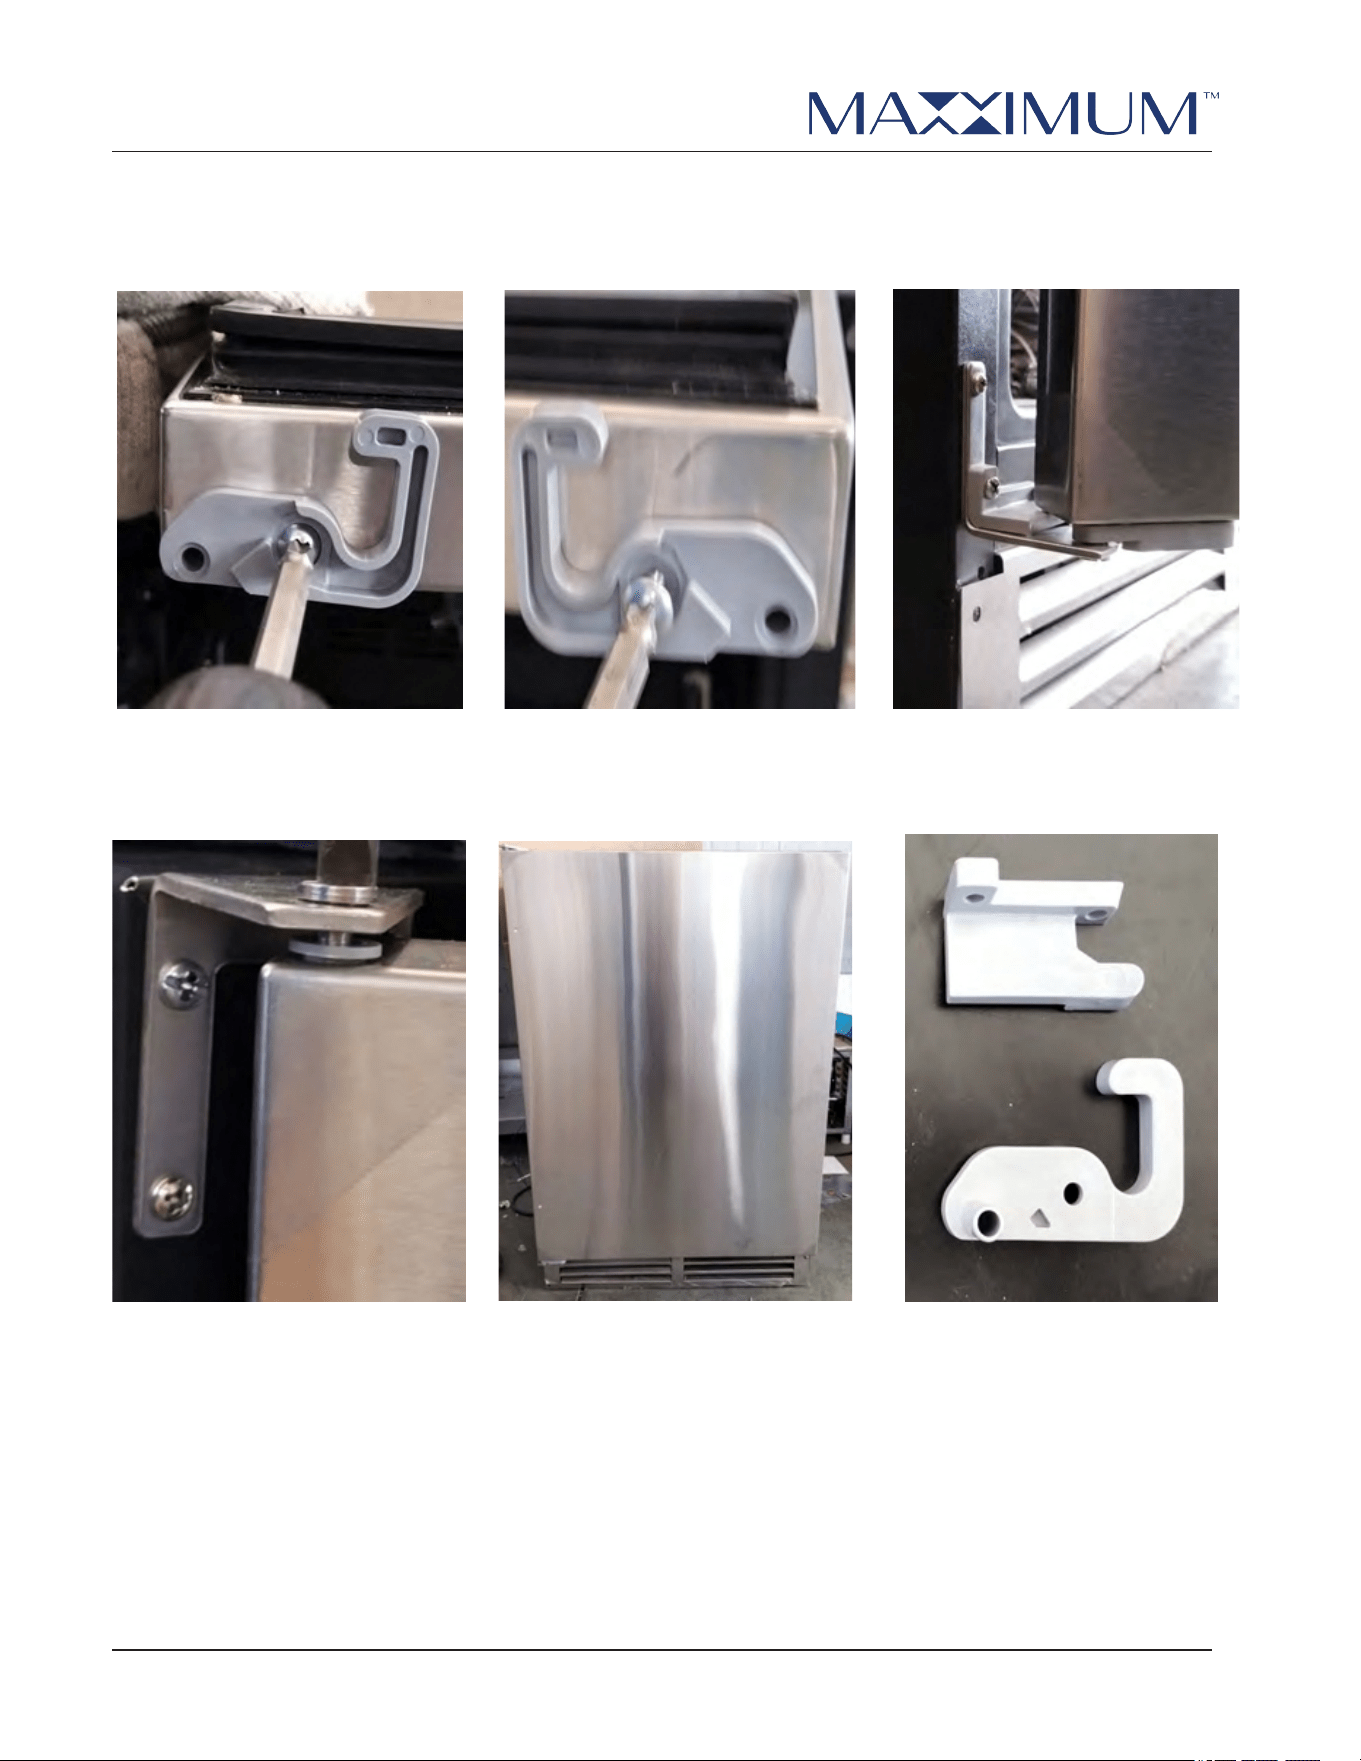
ANTI-TIP SYSTEM FOR 24-INCH DRAWER REFRIGERATOR
To reduce the risk of tipping the unit by abnormal usage or improper loading, the appliance must be
secured by properly installing one of the anti-tip devices packed with the appliance. The anti-tip
devices allow for securing the unit from the top, sides, or floor.
For Top or Side Mounting
• Once the appliance is in place and leveled, secure the two anti-tip brackets underneath the
counter-top using the two provided screws.
• If the brackets for the anti-tip system cannot be secured above the appliance and no wood is
available, relocate the brackets for the anti-tip system to the side of the appliance for securing
into an adjacent cabinet.
Note:
Top mounting bracket is for
i
ndoor model MAXRD24SS only.
© 2024 MAXXIMUM
MAXXIMUM Refrigeration Operator’s Manual
INSTALLING THE UNIT
15
For Bottom Mounting
• Place the anti-tip bracket on the floor as shown in the figure on the right. An anti-tip bracket
must be installed at both sides.
• Mark the locations of the 4 holes of the anti-tip bracket on the floor, refer to the location
drawing on the left.
• Use a masonry drill bit to drill pilot holes, and install plastic anchors.
• Secure bracket to floor using screws.
• Slide appliance into position and make sure the leg engages the anti-tip bracket.

© 2024 MAXXIMUM
MAXXIMUM Refrigeration Operator’s Manual
INSTALLING THE UNIT
16
ELECTRICAL CONNECTION
Do not, under any circumstance, cut or remove the third (ground) prong from the power cord.
For personal safety, you must properly ground this appliance. The power cord of this appliance features
a three-prong grounding plug that mates with a standard three-prong grounding wall outlet to minimize
the possibility of electric shock hazard from the appliance. Have a qualified electrician check the wall
outlet and circuit to make sure the outlet is properly grounded. It is your responsibility and obligation to
have a standard two-prong wall outlet replaced with a properly grounded three-prong wall outlet.
Always plug the appliance into its own individual electrical outlet. The
voltage rating of the outlet must
match the rating label on the appliance. This match provides the best performance and also prevents
overloading the electrical circuits, which could cause a fire hazard from overheated wires.
Never unplug your appliance by pulling on the power cord. Always grip the plug firmly and pull straight
out from the outlet.
Repair or replace immediately all power cords that have become frayed or damaged. Do not use a cord
that shows cracks or abrasion damage along its length or at either end.
When moving the appliance, take care not to damage the power cord.
If the supply cord suff ers damage, have the manufacturer, its service agent, or similarly qualified
persons replace the supply cord to avoid a hazard.
AVOIDING USE OF EXTENSION CORDS
Because of potential safety hazards under certain conditions, the manufacturer strongly recommends
that you do not use an extension cord with this appliance.
© 2024 MAXXIMUM
MAXXIMUM Refrigeration Operator’s Manual
17
REVERSING THE DOOR
This appliance has the capability of the door opening from either the left or right side. The appliance is
delivered to you with the door opening from the left side. Follow these instructions should you desire to
reverse the opening direction:
1. Check that the power cord is unplugged
2. Unscrew the hinge axis
3. Remove the door 4. Unscrew the top left hinge
5. Install it to the bottom right.
6.Unscrew the bottom left hinge
7. Install it to the top right
INSTALLING THE UNIT
© 2024 MAXXIMUM
MAXXIMUM Refrigeration Operator’s Manual
INSTALLING THE UNIT
18
8.Unscrew the door limiter from
the bottom of the door
9.Rotate the door, install the
limiter to the bottom (used to be
top)
10. Insert the door to the bottom
hinge
11. Recover the top hinge
12. Completed
Accessories: door close assist
mechanism

LIGHT
POWERDOWN
°F
°C
UP
RUN
ALARM
LIGHT
POWERDOWN
°F
°C
UP
RUN
ALARM
© 2024 MAXXIMUM
MAXXIMUM Refrigeration Operator’s Manual
19
OPERATING
THE UNIT
4
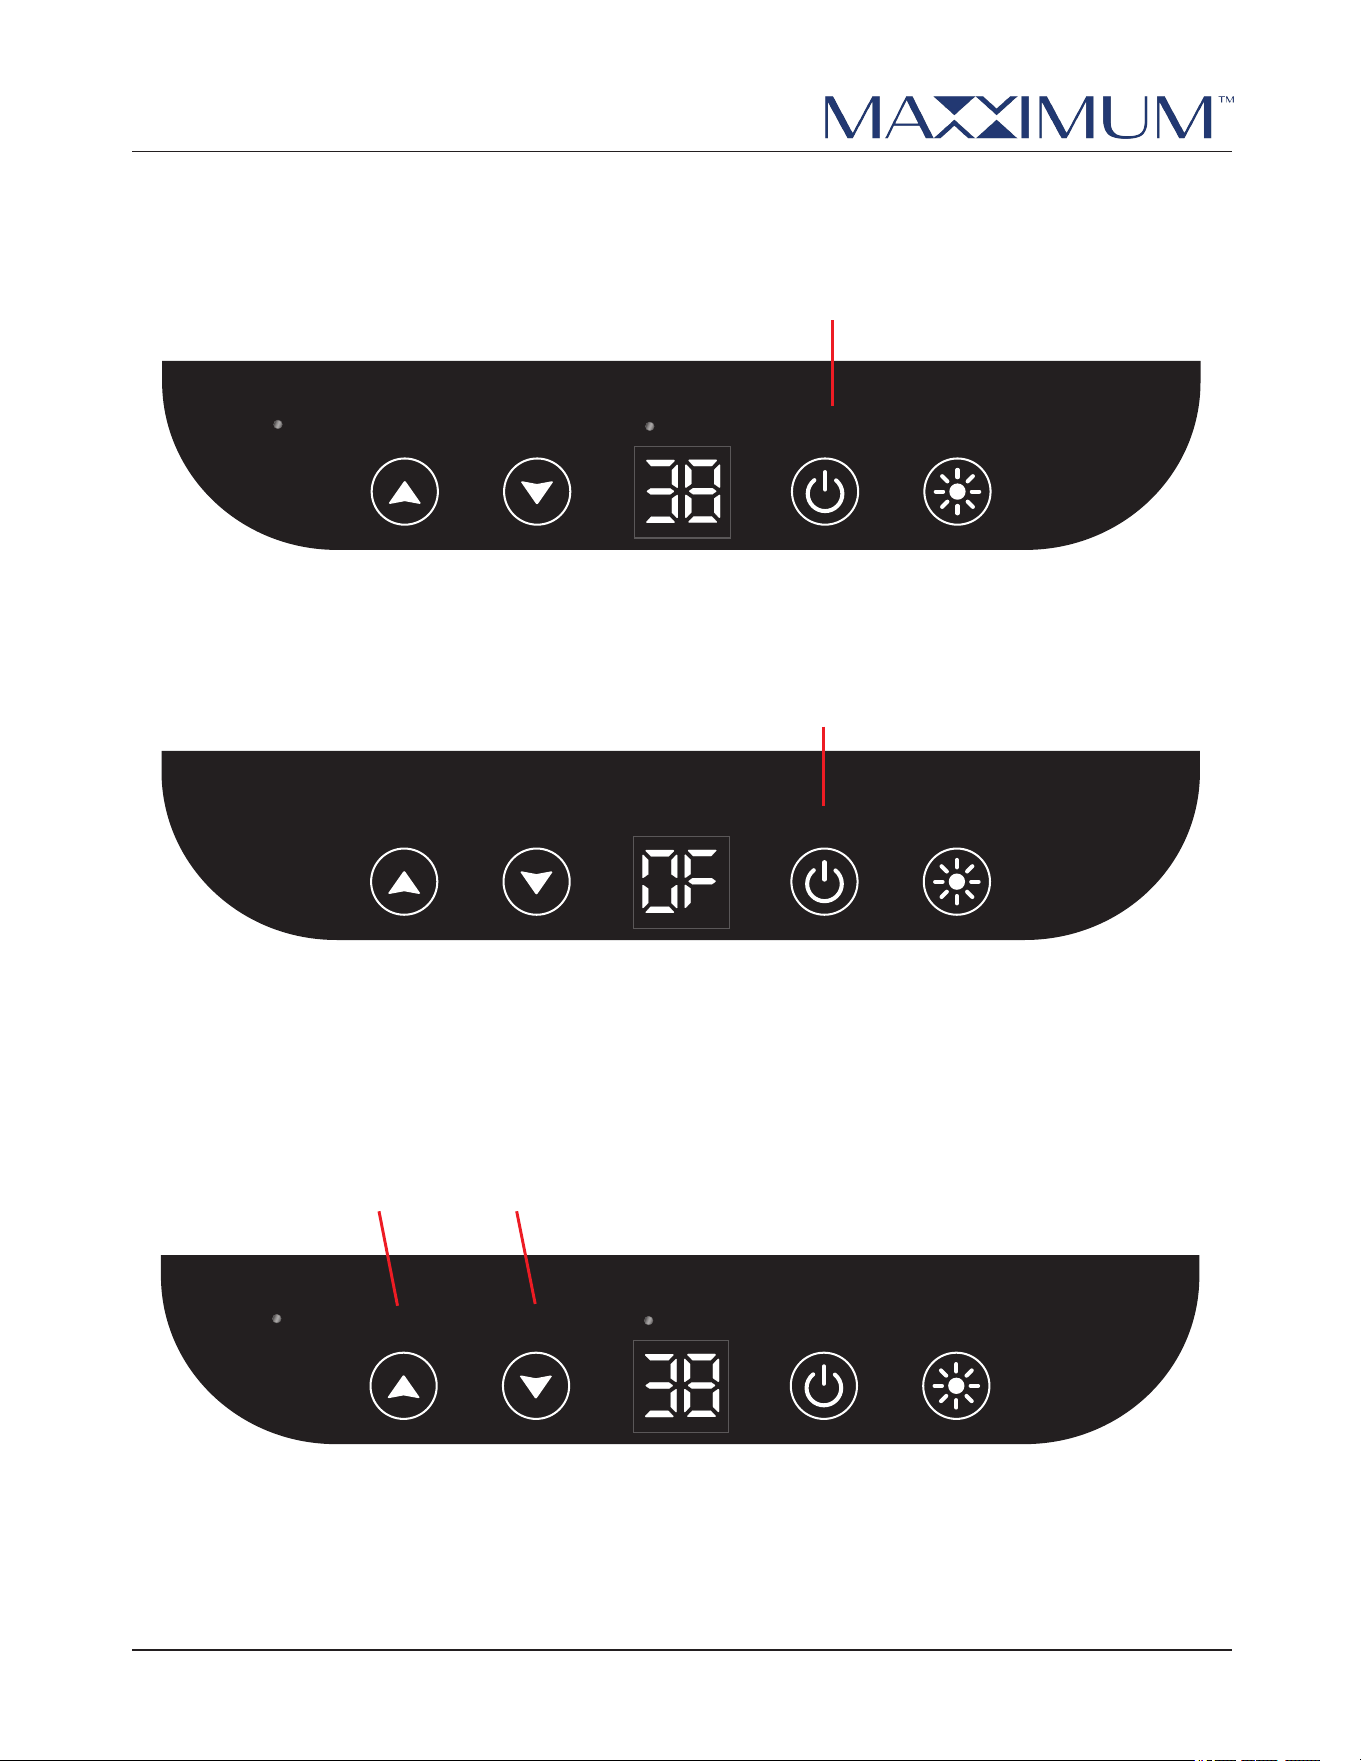
USING THE CONTROLS
The control panel is located at the top of the appliance.
NOTE: You have 10 seconds to make a control change before the display reverts to the
default screen.
power on/off
display
to
set temperature
lights switch
Control Details - Buttons/Display
temperature units
Control Details - Backlit Features
compressor running
unit alarm
OPERATING THE UNIT
LIGHT
POWERDOWN
°F
°C
UP
RUN
ALARM
LIGHT
POWERDOWN
°F
°C
UP
RUN
ALARM
TURNING THE UNIT ON
Press the ON/OFF button
OPERATING THE UNIT
20
Press the POWER button once
TURNING THE UNIT OFF
Press and hold the ON/OFF button for 3 seconds
Press and hold the POWER button for 3
seconds
SETTING THE TEMPERATURE
Press the UP or DOWN arrow and the temperature will start flashing, then press the UP or DOWN arrow
again to increase or decrease the temperature setting. The desired temperature will be auto saved after
10 seconds.
© 2024 MAXXIMUM
MAXXIMUM Refrigeration Operator’s Manual
Press the UP or DOWN arrow to set the temperature
LIGHT
POWERDOWN
°F
°C
UP
RUN
ALARM

LIGHT
POWERDOWN
°F
°
C
UP
RUN
ALARM
LIGHT
POWERDOWN
°F
°C
UP
RUN
ALARM
LIGHT
POWERDOWN
°F
°C
UP
RUN
ALARM
© 2024 MAXXIMUM
MAXXIMUM Refrigeration Operator’s Manual
OPERATING THE UNIT
21
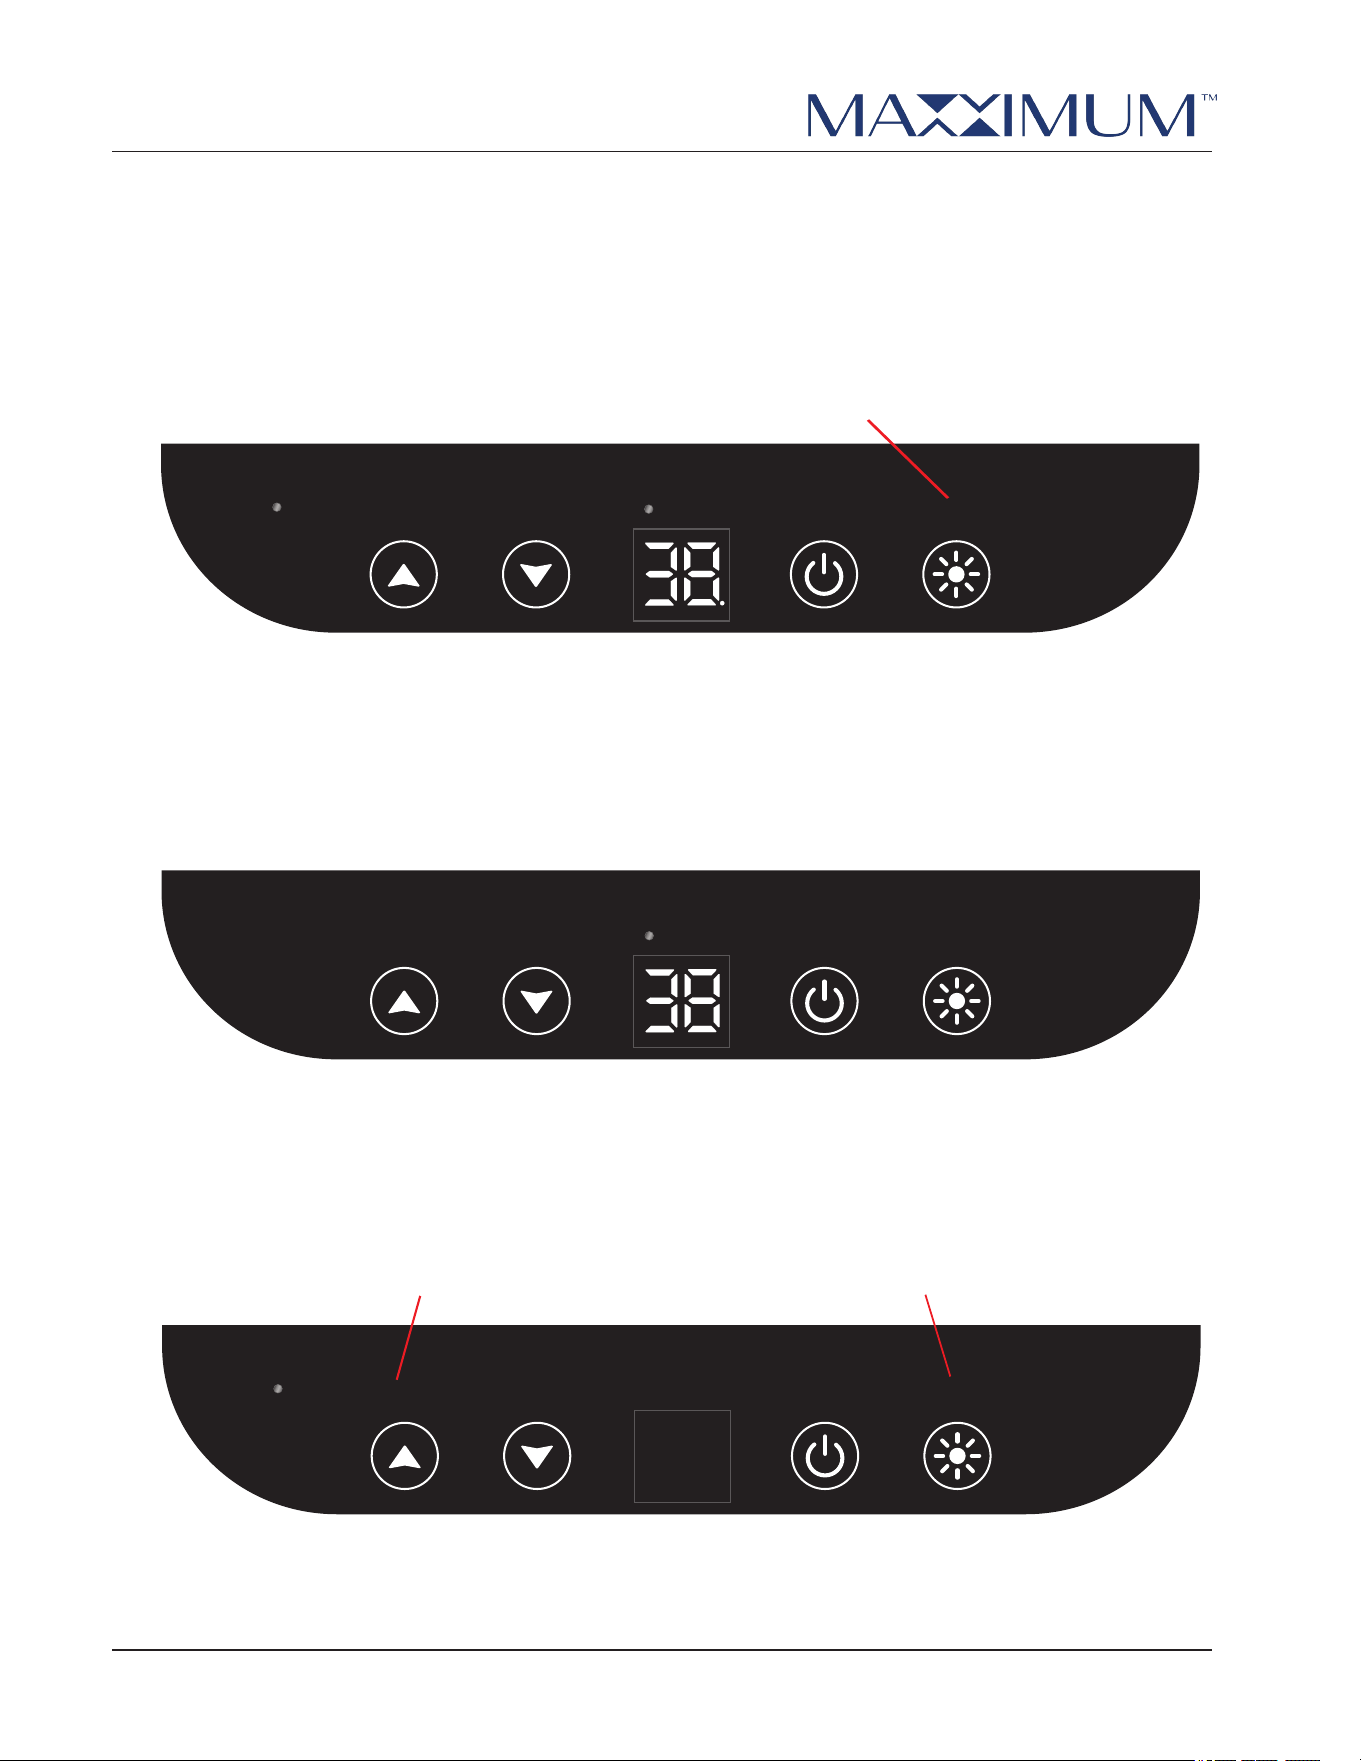
CHANGING TEMPERATURE UNITS
Press and hold the UP and DOWN arrows for at least 3 seconds to change the displaying temperature
units between Fahrenheit and Celsius. When the temperature units convert, the Celsius and Fahrenheit
indicator will switch accordingly.
TEMPERATURE DISPLAY MODE
Press and hold the UP Or DOWN arrows for at least 6 seconds to switch the Panel Display Temperature from
the setting temp to the Real Time Temperature of the cabinet. The refresh rate of the real time temperature is
1 minute.
FAST/QUICK COOLING MODE
Fast/Quick cooling mode. This mode will ignore the defrosting stop and auto-exit after pull down the
cabinet temperature, maximum duration 12 hours. The dot in the right bottom corner of the
temperature digital will light up. Press and hold UP and POWER button again to turn FAST COOLING
off.
Press and hold the UP and DOWN arrows for at least 3 seconds
Press and hold the UP or DOWN arrows for at least 6 seconds
Press and hold the UP arrow and POWER button for 3 seconds
LIGHT
POWERDOWN
°F
°C
UP
RUN
ALARM
LIGHT
POWERDOWN
°F
°C
UP
RUN
ALARM
© 2024 MAXXIMUM
MAXXIMUM Refrigeration Operator’s Manual
OPERATING THE UNIT
22
LIGHTING CONTROL
Press the LIGHT button to toggle the lights from white, blue, and amber. Press and hold the LIGHT button for
over 6 seconds to start the LIGHT ON mode. Press the LIGHT button again to end the LIGHT ON function. In
LIGHT ON mode, the light will keep lit for 6 hours, with or without door open. The dot in the right bottom
corner of the temperature digital will light up.
AUTO DEFROST MODE
Auto Defrost is automatic and requires no user interaction. The compressor will stop for a while to save
energy when the cabinet reach the setting temperature.
Press and hold the LIGHT button for at least 6 seconds
No user interaction is required
SABBATH MODE
Sabbath will shut off the screen display, the operating sounds, and the light will remain off while the unit
still running automaticly according to the previous setting.
Press and hold the UP arrow and the LIGHT BUTTON for 6 seconds to toggle SABBATH ON/OFF
LIGHT
POWERDOWN
°F
°C
UP
RUN
ALARM
© 2024 MAXXIMUM
MAXXIMUM Refrigeration Operator’s Manual
OPERATING THE UNIT
23
DOOR OPEN ALERT
Display will show dr with 1Hz alarm sounds. The threshold of the door opening check is 5 minutes. Press
any button or close the door to temporarily stop the alarm.
SENSOR ERROR ALERT
Self-diagnosis fInds the Temperature Sensor Error. The Error will display and flash with 3 alarm sounds
every 30 seconds, meanwhile the system will running intermittently. Press any button or close the door to
stop the alarm.
Press any button to stop the alarm
Press any button to stop the alarm
LIGHT
POWERDOWN
°F
°C
UP
RUN
ALARM
LIGHT
POWERDOWN
°F
°C
UP
RUN
ALARM
SHOWROOM MODE
Press and hold the DOWN arrow and LIGHT button for at least 6 seconds to enter and also to exit
SHOWROOM MODE. it's for dealers to display the unit. during showroom mode, the light, evaporator fan,
the panel display and all functions can be set but the compressor won't actually work, the dot in the right
bottom corner of the temperature digital will light up.
LIGHT
POWERDOWN
°F
°C
UP
RUN
ALARM
Press and hold the DOWN arrow and LIGHT button for at least 6 seconds
© 2024 MAXXIMUM
MAXXIMUM Refrigeration Operator’s Manual
OPERATING THE UNIT
24
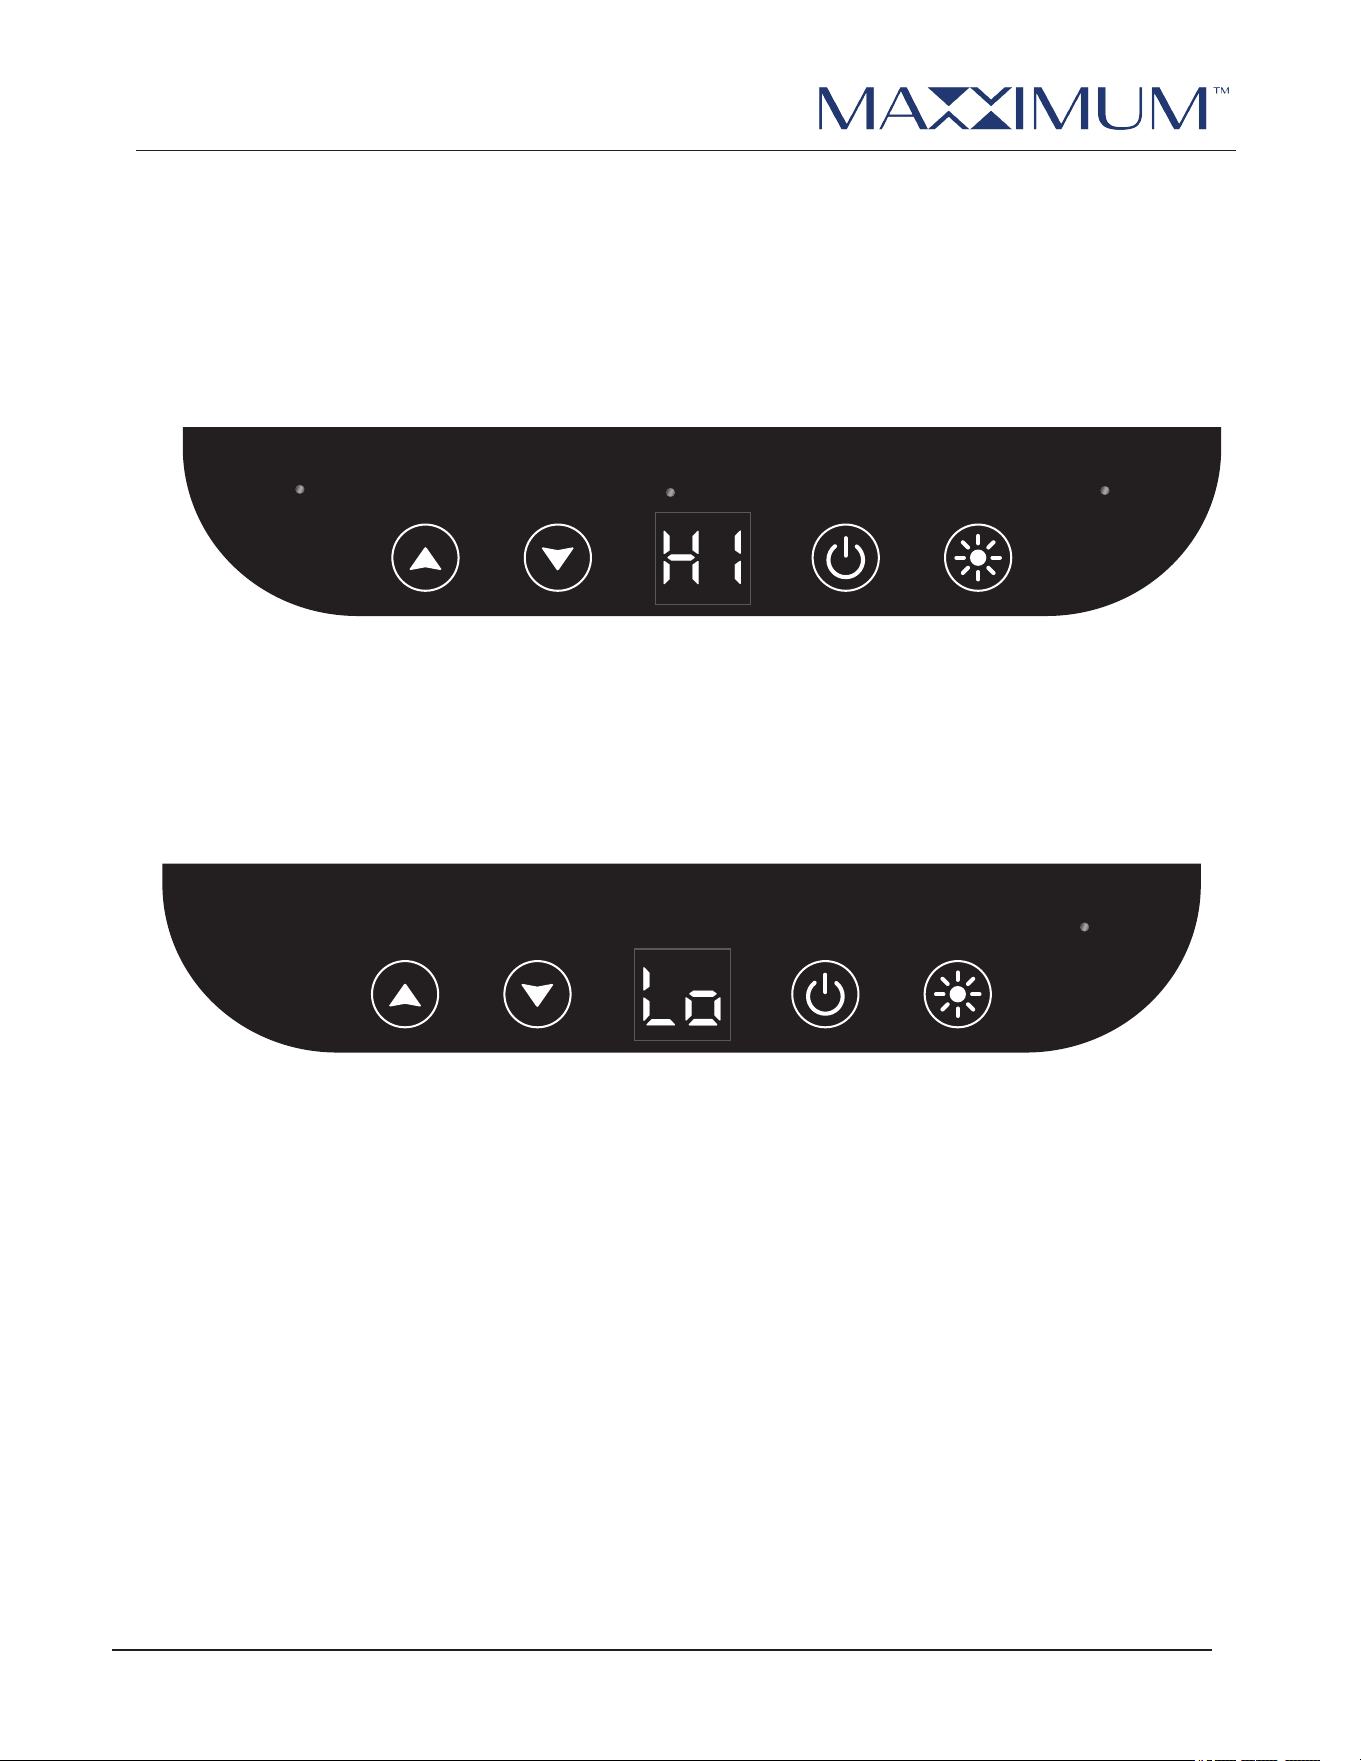
LOW TEMPERATURE ALERT
When the system detects the temperature lower than 25℉ over a fixed time, the LOW TEMPERATURE
ALERT will activate. The system will stop running in this stage. Press any button or close the door to
stop the alarm.
Press any button to stop the alarm
LIGHT
POWERDOWN
°F
°C
UP
RUN
ALARM
HIGH TEMPERATURE ALERT
When the actual temperature is higher than the setting temperature, for a certain value over a fixed time,
the alarm will sound and display the HI error code. The system will continue running in this stage. Press
any button or close the door to stop the alarm.
Press any button to stop the alarm
LIGHT
POWERDOWN
°F
°C
UP
RUN
ALARM
© 2024 MAXXIMUM
MAXXIMUM Refrigeration Operator’s Manual
OPE
RATI
N
G TH
E UN
I
T
25
EXPECTING NORMAL SOUNDS
Your new appliance may make sounds that are not familiar to you. Hard surfaces like the floor and walls can make
the sounds seem louder than they actually are. The following describes the kinds of sounds that might be new to
you and the source of those sounds:
• Rattling noises may come from the flow of the refrigerant. Items stored on top of the appliance can also make
noises.
• The high-efficiency compressor may make a pulsating or high-pitched sound.
• You may hear the sound of the condenser fan forcing air over the condenser.
DEALING WITH POWER FAILURE
Most power failures are corrected within a few hours and should not aff ect the temperature of your appliance if
you minimize the number of times you open the appliance door. If the power is going to be off for a longer period
of time, take the proper steps to disconnect your appliance.
!
WARNING
Failure to unplug the appliance could result in electrical shock or personal injury.
NOTE: When the appliance is operating, the evaporator is the only component that is cold.
© 2024 MAXXIMUM
MAXXIMUM Refrigeration Operator’s Manual
26
CARE AND MAINTENANCE
5
!
WARNING
Electrical Shock Hazard
Always disconnect power at the source before working on the unit. Failure to unplug the appliance
could result in electrical shock or personal injury.
• Do not touch the power plug when your hands are wet.
• Never unplug the unit by pulling on the cord. Grasp the plug and pull it out firmly.
CLEANING AND MAINTAINING THE UNIT
Perform periodic cleaning and proper maintenance to ensure efficiency top performance and long life. The
maintenance intervals listed in this manual are based on normal conditions. You may want to shorten the
intervals if you have pets or other special considerations.
Periodically vacuum dust and dirt from the condenser, which is located behind the grill at the bottom front of the
unit.
CLEANING THE UNIT’S EXTERIOR
Clean the door and cabinet with a mild detergent and warm-water solution, such as 1 oz. (28 g) of dish-washing
liquid mixed with 2 gallons of warm water. Do not use solvent-based or abrasive cleaners. Use a soft sponge and
rinse the unit with clean water. Wipe the unit with a soft, clean towel to prevent water spotting.
Clean stainless steel with a mild detergent, a warm-water solution and a damp cloth. Never use an abrasive
cleaning agent.
CLEANING THE UNIT’S INTERIOR
When necessary, thoroughly clean the inside of the unit with mild soap and water. Do not use electrical heating
devices or sharp or pointed tools when defrosting the unit.
When cleaning, leave the unit turned off and leave the door open. Leaving the door open allows air to dry the
inside of the cabinet, reducing the chance for mildew and damage to the mold mechanism’s components.
© 2024 MAXXIMUM
MAXXIMUM Refrigeration Operator’s Manual
CARE AND MAINTENANCE
27
EXTENDED PERIODS OF NON-USE
!
WARNING
Electrical Shock Hazard
Always disconnect power at the source before working on the unit.
LONG-TERM STORAGE / WINTERIZING
If the outdoor refrigerator will be exposed to temperatures of 38°F (3.3°C) or less, perform below steps to
winterize your refrigerator that will keep it in good condition while facing the winter elements. It is important to
clean and dry this appliance to prevent severe mold and mildew growth from engulfing the fridge's interior.
NOTICE
Never pull on the power cord to unplug the appliance from the electrical outlet. Grasp the plug of the power
cord and pull it out fi rmly.
Start-Up After Long-Term Storage:
1. If stored outside, it is recommended that the unit again be thoroughly inspected per the storage
instructions above to address any dirt or debris from the weather and/or animals/insects.
2. Connect the unit to electrical power.
3. Turn unit on and confirm your desired control settings.
4. Allow 24-hrs for the unit to stabilize before loading contents.
1. Turn the unit OFF by pressing the POWER button on the controller.
2. Remove all food and drink contents from the refrigerator.
3. Unplug the unit from the power outlet. It is also recommended that the power to the outlet be turned-off if
the circuit is not required for other items during the Winter season.
4. Place all cords in a small bag or tie them together with a piece of scrap cloth.
5. If necessary, move the unit so you can gain access to the rear of the product.
6. Remove the front toe kick, and use a brush and vacuum to clean dirt and debris from beneath the unit.
Thoroughly clean the toe kick and re-install on the unit.
7. Remove the rear access cover, and use a brush and vacuum to clean dirt and debris from the machine
compartment.
8. Check if the plastic defrost drain pan located upon the compressor contains water, use a sponge to remove
as much water as possible.
9. Thoroughly clean the rear access cover and re-install on the unit.
10. Clean the exterior and interior of refrigerator thoroughly. Wipe down and dry the refrigerator with rags or
paper towels after it has been cleaned. Ensure all water has been removed from the unit.
11. Leave the refrigerator door open to prevent formation of mold and mildew. Open door a minimum of 2" (50
mm) to provide the necessary ventilation.
12. Kindly advise no cover on the unit, as this can trap condensation. If you are concerned about exposure to
the elements, use a synthetic cover that will not hold moisture to protect the appliance, though the door
should remain open as much as possible.
13. After completion of the above, you may choose to store the unit indoors, although this is not required.

© 2024 MAXXIMUM
MAXXIMUM Refrigeration Operator’s Manual
CARE AND MAINTENANCE
28
CLEANING THE CONDENSER
!
WARNING
Electrical Shock Hazard
Always disconnect the power at the source before working on the unit.
!
CAUTION
Sharp Object Hazard
DO NOT touch the condenser surface. The condenser has sharp edges and can be easily damaged.
A dirty or clogged condenser prevents proper air flow and causes higher-than-recommended operating
temperatures that may lead to component failure. Clean the condenser or have it cleaned at least once every six
months.
1. Unplug the appliance or disconnect power.
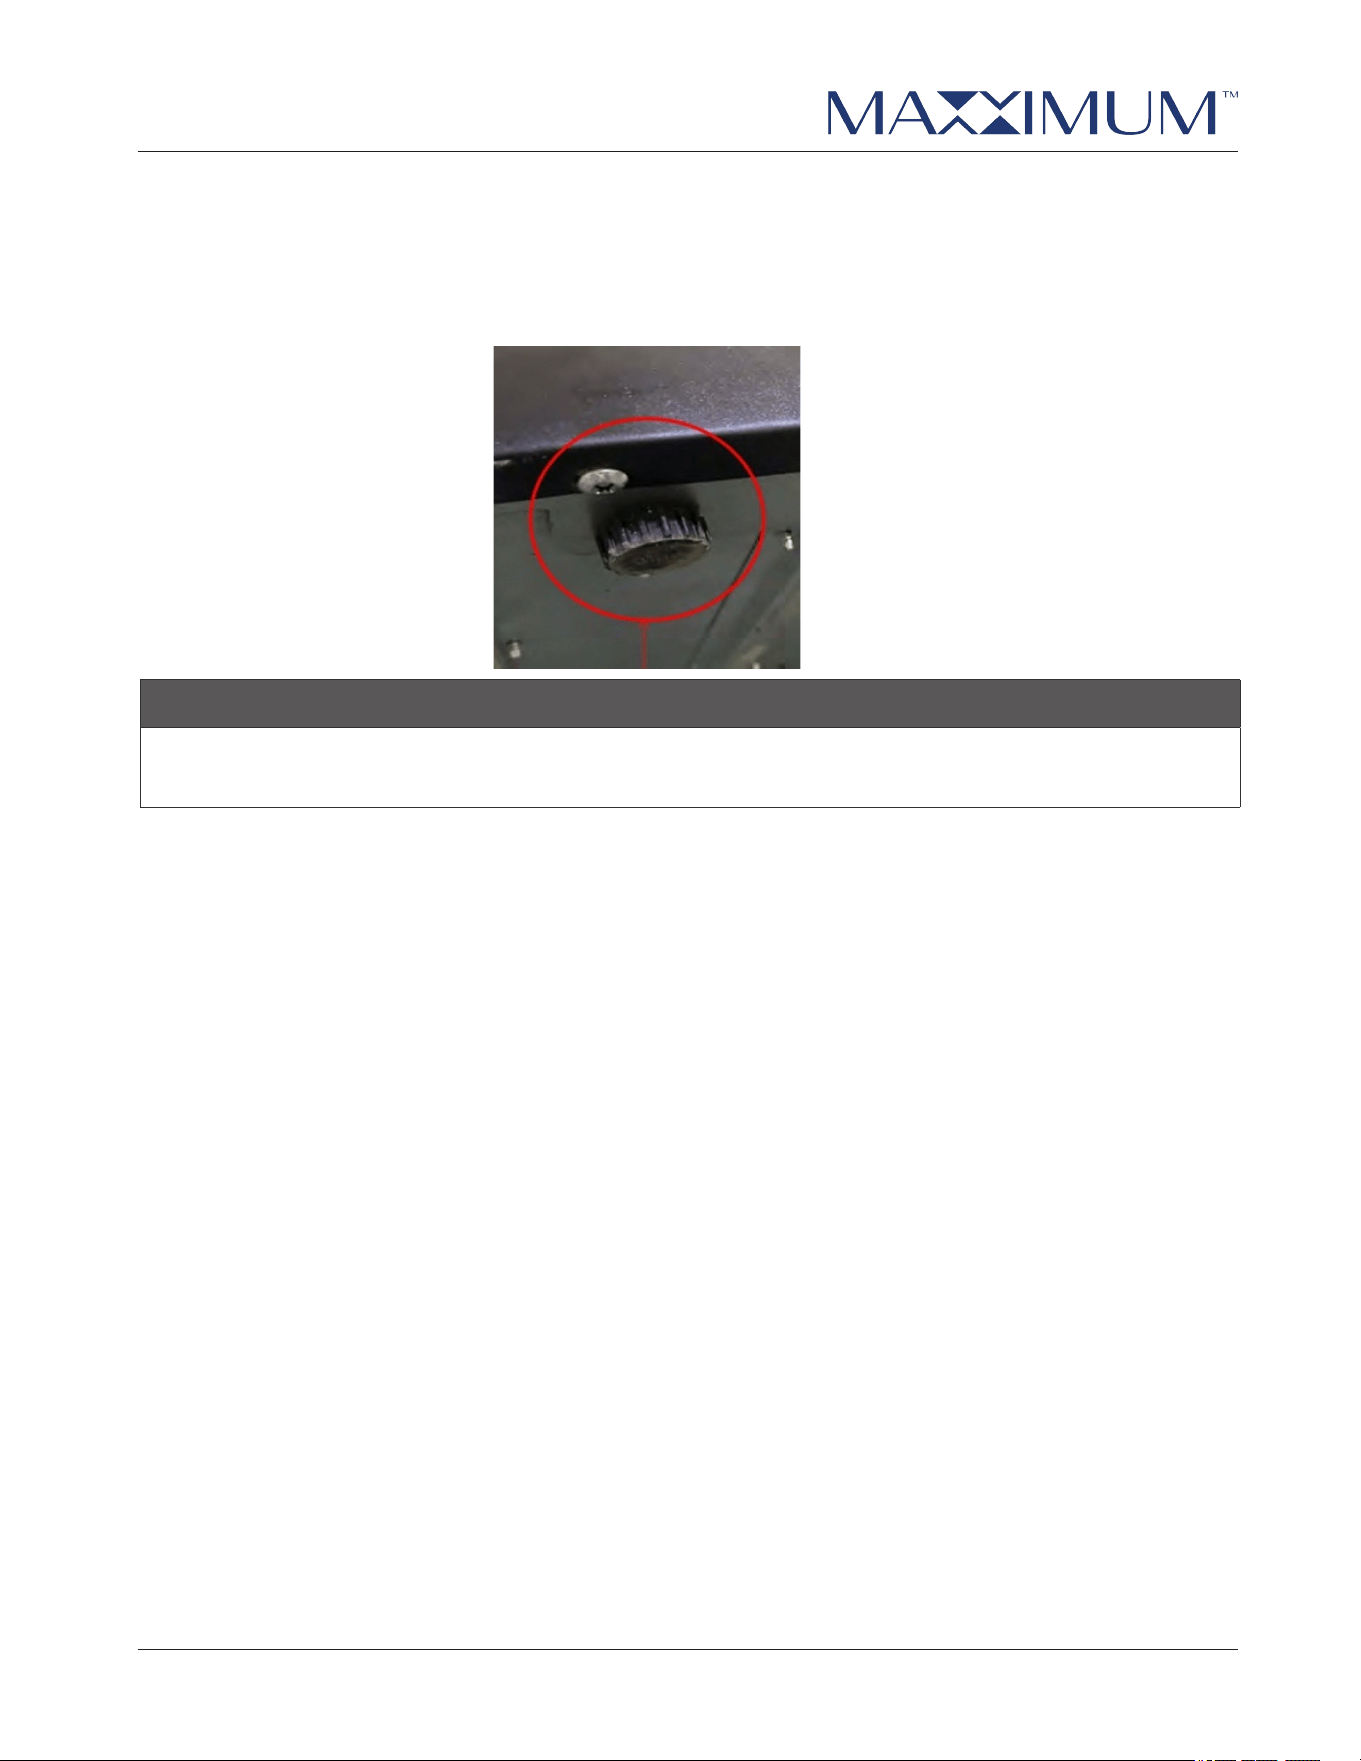
2. Remove the two screws under the front of the unit. Gently pull on the grill and remove it.
3. Remove dirt and lint from the condenser and the unit compartment with the brush attachment of a vacuum
cleaner.
4. Position the grill on the unit and secure it with two screws.
5. Plug in the appliance or reconnect power.
© 2024 MAXXIMUM
MAXXIMUM Refrigeration Operator’s Manual
29
TROUBLESHOOTING
6
PROBLEM POSSIBLE CAUSES SOLUTIONS
• The appliance does not operate. • Power failure.
• Appliance not plugged in.
• House fuse blown or circuit
breaker tripped.
• Plug in the appliance.
• Replace blown fuse or reset circuit
breaker.
• The appliance is not cold enough. • Door is opened too often.
• Door does not close completely.
• Door seal does not seal properly.
• Front bottom grill does not have
suffi cient ventilation.
• Appliance too close to a heat
source.
• Do not open door too frequently.
• See “The Door Does Not Close
Properly” below.
• Be sure door seal is properly
seated in groove.
• Grills must be completely
unobstructed.
• Keep appliance away from heat
sources.
• The appliance turns on and off
frequently.
• Large amount of contents has
been added.
• Door is open too often.
• Door does not close completely.
• Door seal not sealing properly.
• Reduce amount of content added
at a time.
• Do not open door too frequently.
• See “The Door Does Not Close
Properly” below.
• Be sure door seal is properly
seated in groove.
• The door does not close properly. • Appliance not level.
• Door was reversed and not
properly installed.
• The shelves are out of position.
• Be sure appliance is installed on
hard level surface.
• Verify door is properly installed.
• Verify shelves are properly
installed.
• Noise during operation. • Feet are not leveled.
• Certain sounds are normal.
• Level the feet. See “Leveling the
Unit” on page 14.
• See “Expecting Normal Sounds”
on page 25.
• The compressor works abnormally
with a buzzing noise.
• The voltage is lower than
recommended.
• Stop the appliance and do not
restart until the voltage is normal.
PN:1866836802
© 2024 MAXXIMUM
MAXXIMUM Refrigeration Operator’s Manual
30
DISPOSING
THE UNIT
7
This symbol on the product or its packaging indicates that you cannot treat this product as normal domestic
trash; you must hand it in to a collection point for recycling electric and electronic appliances. Your
contribution to the correct disposal of this product protects the environment.
Contact your local municipal authority if you need more information about recycling this product.
!
DANGER
Always remove the door and keep the shelves in place when discarding this appliance so children
may not become entrapped.

© 2024 MAXXIMUM
MAXXIMUM Refrigeration Operator’s Manual
31
WARRANTY
LIMITED WARRANTY COVERAGE
The Legacy Companies, warrants to the original purchaser of its MAXXIMUM products that they will be free
from defects in materials and workmanship for the following time periods from the date of purchase shown
on the sales receipt:
Two (2) year Parts & On-site Labor
Five (5) years Compressor Warranty (Parts only)
WARRANTY EXCLUSIONS
NO CONSEQUENTIAL DAMAGES: MAXXIMUM and The Legacy Companies are not responsible for any
economic loss or special, indirect or consequential damages including without limitation; loss of revenue
and loss or damage arising from food or product spoilage claims.
WARRANTY IS NOT TRANSFERABLE: This warranty is not transferable or assignable and applies only to
the original verifi ed purchaser.
NO IMPLIED WARRANTY OF MERCHANTABILITY OR FITNESS FOR PARTICULAR SERVICE: There
are no other warranties statutory, express, or implied. This Limited Warranty is the exclusive warranty and
made in lieu of all other warranties including any implied warranties or any warranties of merchantability or
fitness for a particular purpose.
FILING WARRANTY CLAIMS: All warranty claims for MAXXIMUM products must be made directly through
The Legacy Company’s Technical Service Department. All claims should include: model and serial number,
proof of purchase, date of installation, location purchased, and all pertinent information supporting the
existence of the claim.
IMPROPER ELECTRICAL AND WATER CONNECTIONS: MAXXIMUM and The Legacy Companies are
not responsible for the repair or replacement of any failed or damaged components resulting from electrical
power failure, the use of extension cords, low voltage or voltage spikes to the unit. Likewise, repair or
replacement attributable to low water pressure, high water pressure or contaminated water are not covered
by this Limited Warranty.
IMPROPER USAGE: Neither MAXXIMUM nor The Legacy Companies assumes liability for parts or labor
coverage for component failure or other damages resulting from improper usage or installation or failure to
clean and/or maintain the product as set forth in the Owner’s Manual provided with each unit.
© 2024 MAXXIMUM
MAXXIMUM Refrigeration Operator’s Manual
WARRANTY
32
CONSUMABLES: This warranty does not include consumable parts such as water filters and light bulbs.
ADJUSTMENTS & CALIBRATIONS: Adjustments including calibrations, leveling, tightening of fasteners,
or utility connections normally associated with the original installation are the responsibility of the dealer,
installer or the end user and not the responsibility of MAXXIMUM or The Legacy Companies and will not be
considered warranty issues for this Limited Warranty.
CONSEQUENTIAL DAMAGES: This warranty does not cover any defect due to, or resulting from, ordinary
wear and tear, handling, abuse, misuse, or harsh chemical action, nor shall it extend to any product from
which the serial number has been removed or altered, or modifications made by unauthorized service
personnel or damage by flood, fire, earthquake or other Acts of God.
OUTSIDE U.S. & CANADA: This warranty does not apply to, and MAXXIMUM and The Legacy Companies
are not responsible for any warranty claims made on products sold or used outside of the United States
and Canada or any territories of the United States of America.
ALL REPAIRS AND SERVICE MUST BE MADE BY A MAXXIMUM AUTHORIZED TECHNICIAN.
Customer Service: 1.866.754.6672
The Legacy Companies
3355 Enterprise Avenue, Suite 160, Weston, FL 33331
TheLegacyCompanies.com 1.866.754.6672
© 2024 MAXXIMUM