Loading ...
Loading ...
Loading ...
WARNING – SERVICING TO BE CARRIED OUT ONLY BY AN AUTHORISED PERSON
Disconnect from electricity and gas before servicing. Check appliance is safe when you have nished.
38
ArtNo.320-0005 Oven door rubber seal
ArtNo.270-0033 - 90 Prof+ FX - Removing the oven inner door panel
5. Doors
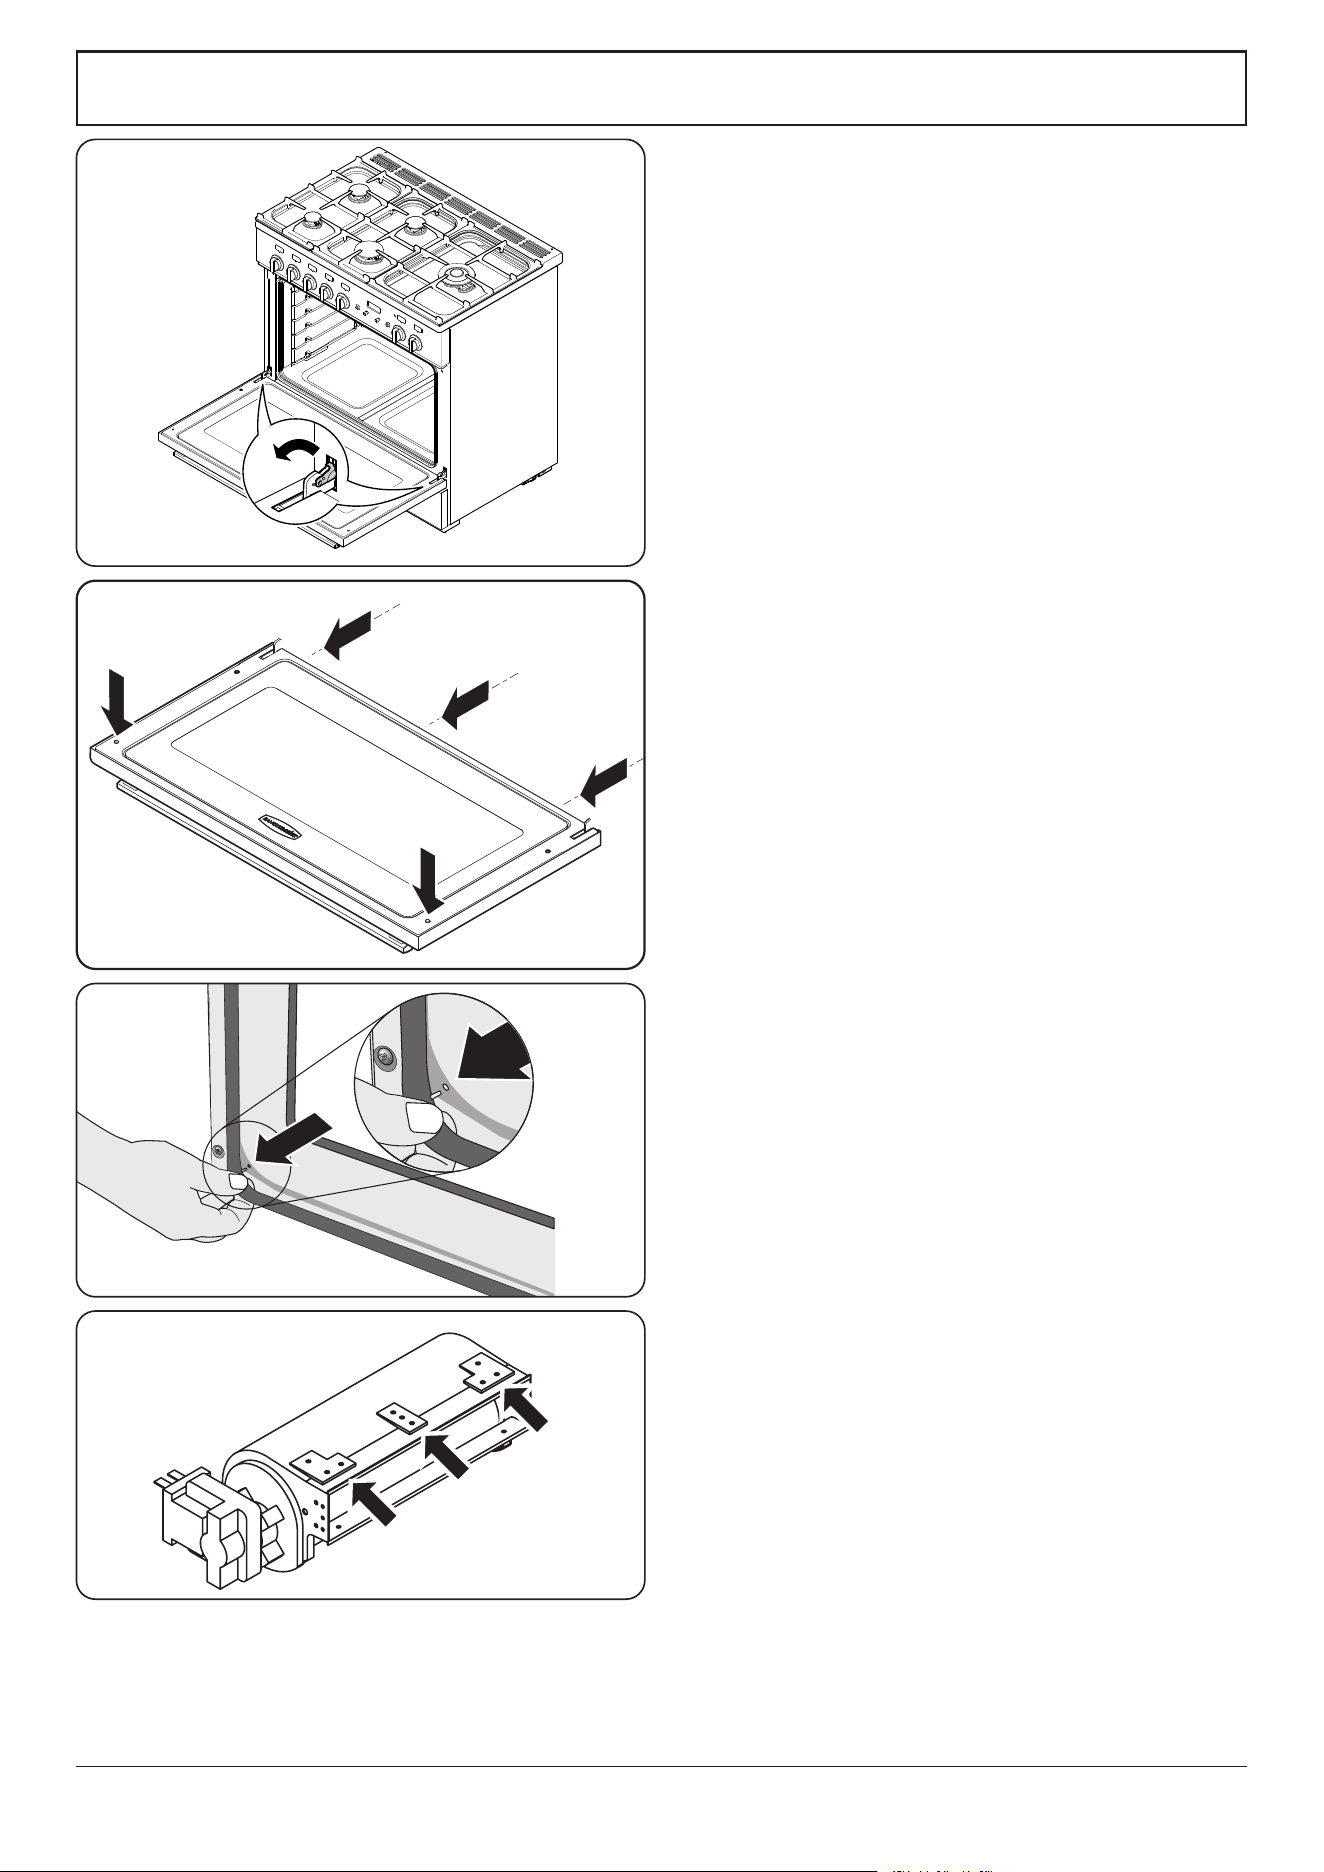
1. Removing the oven door
To remove the oven door, open the door fully. Swivel the
locking ‘U’ clips forward to the locking position (Fig. 12.11).
Grip the sides of the door, lift upwards and then slide the
door forwards.
2. To replace a door inner glass panel
Remove the oven door (see 1. Removing the oven door)
Carefully place the door, outer side up, on a clean level
surface. Remove the 2 hexagon headed screws from the
inside face and the 3 hexagon headed screws on the bottom
edge (Fig. 12.12).
Remove the corner brackets, and then lift o the inner door
panel. Take care not to damage the inner glass.
Reassemble in reverse order.
3. To replace an over door hinge
Remove the door and door inner panel (see 1. Removing the
oven door & 2. To replace a door inner glass panel).
Undo the screws securing the hinge in place. Remove the
hinge. Replace the hinge and rebuild the door in reverse
order.
4. To remove the oven door seal
Open the oven door. The seal is held in place by small hooks
to the cooker front. At the corner, pull the seal diagonally
away from the door centre until that hook is released (Fig.
12.13).
Proceed to the next hook and release it in a similar way, and
so on. Use force if the hooks are sti, as the old seal will be
discarded.
When tting the new seal, position the seal join at the
bottom. Hook the new seal in one of the corner holes of the
door, and proceed round the door snapping in each hook in
turn.
6. Ancillaries
1. To change the cooling fan
Remove the hotplate (see 1. To remove the hotplate).
Remove the screws that hold the cooling fan to the duct (Fig.
12.14), and then lift out the fan.
Reassemble in reverse order.
ArtNo.062-0001 - 90 Prof+ FX - Removing the door
Fig. 12.11
Fig. 12.12
Fig. 12.13
Fig. 12.14
Loading ...
Loading ...
Loading ...