Loading ...
Loading ...
Loading ...
4. Complete the Installation
Test Run the Heated Surface
Operate the user keypad to test the temperature settings.
For additional information on heated surface operation, see the ″Operating Instructions - Heated
Surface″ section.
Test Run the Whirlpool
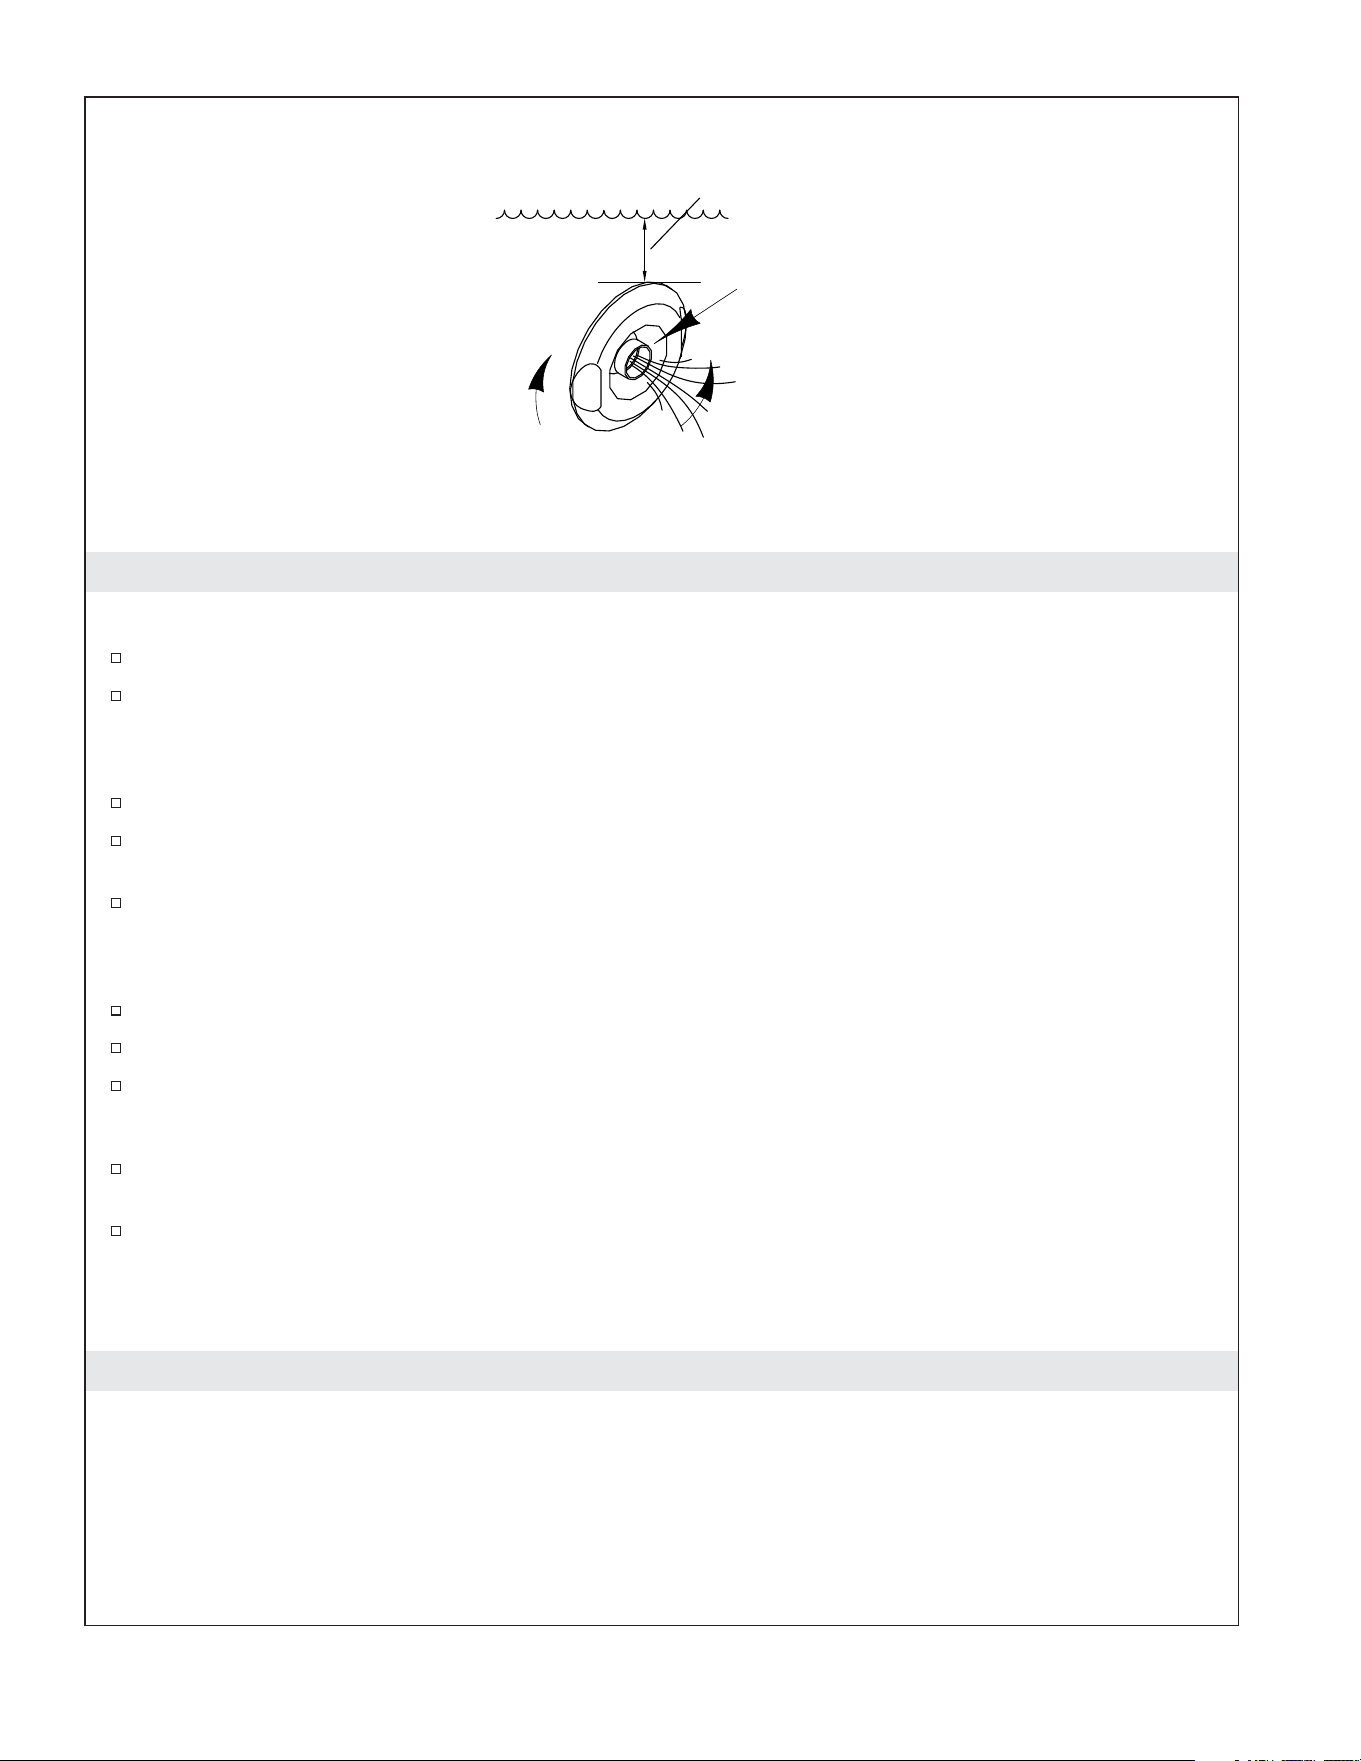
Fill the whirlpool to a level at least 2″ (51 mm) above the top of the highest jet.
Operate the whirlpool for 5 minutes and check all whirlpool piping connections for leaks. Check for
leakage along the front, sides, and back of the whirlpool.
For additional information on whirlpool operation, see the ″Operating Instructions - Whirlpool″
section.
Finish the Installation
Install water-resistant wallboard and all finished wall, deck, and floor materials.
Apply silicone sealant to seal all areas where the whirlpool and finished wall or deck meet.
Install the faucet trim.
Clean-up After Installation
When cleaning up after installation, do not use abrasive cleansers, as they may scratch and dull the
whirlpool surface. Use warm water and a liquid detergent to clean the surface of the whirlpool.
Remove stubborn stains or paint with turpentine or paint thinner. Do not allow cleaners containing
petroleum distillates to remain in contact with any whirlpool surface for long periods of time.
Remove plaster by carefully scraping with a wood edge. Do not use metal scrapers, wire brushes, or
other metal tools. Use a powder-type detergent on a damp cloth to provide mild abrasive action to
any residual plaster.
Important Safety Instructions
READ AND FOLLOW ALL INSTRUCTIONS
SAVE THESE INSTRUCTIONS
INSTRUCTIONS PERTAINING TO A RISK OF FIRE, ELECTRIC SHOCK, OR INJURY TO PERSONS
Fill with water at least 2" (51 mm)
above the highest jet.
Turn the jet trim ring
clockwise to
decrease the flow.
Position the jet
nozzles to direct
the water flow as
desired.
Turn the jet trim ring counterclockwise
to increase the flow.
1204118-2-D 8 Kohler Co.
Loading ...
Loading ...
Loading ...