
Loading ...
Loading ...
Loading ...
10 11
The horizontal work clamp secures the workpiece to the
fence to provide more stability and keeps the workpiece
from creeping toward the saw blade. Depending on the
cutting operation and the size of the workpiece, it may be
preferable to use a C-clamp instead of the work clamp
to secure the workpiece to the mitre table prior to making
the cut.
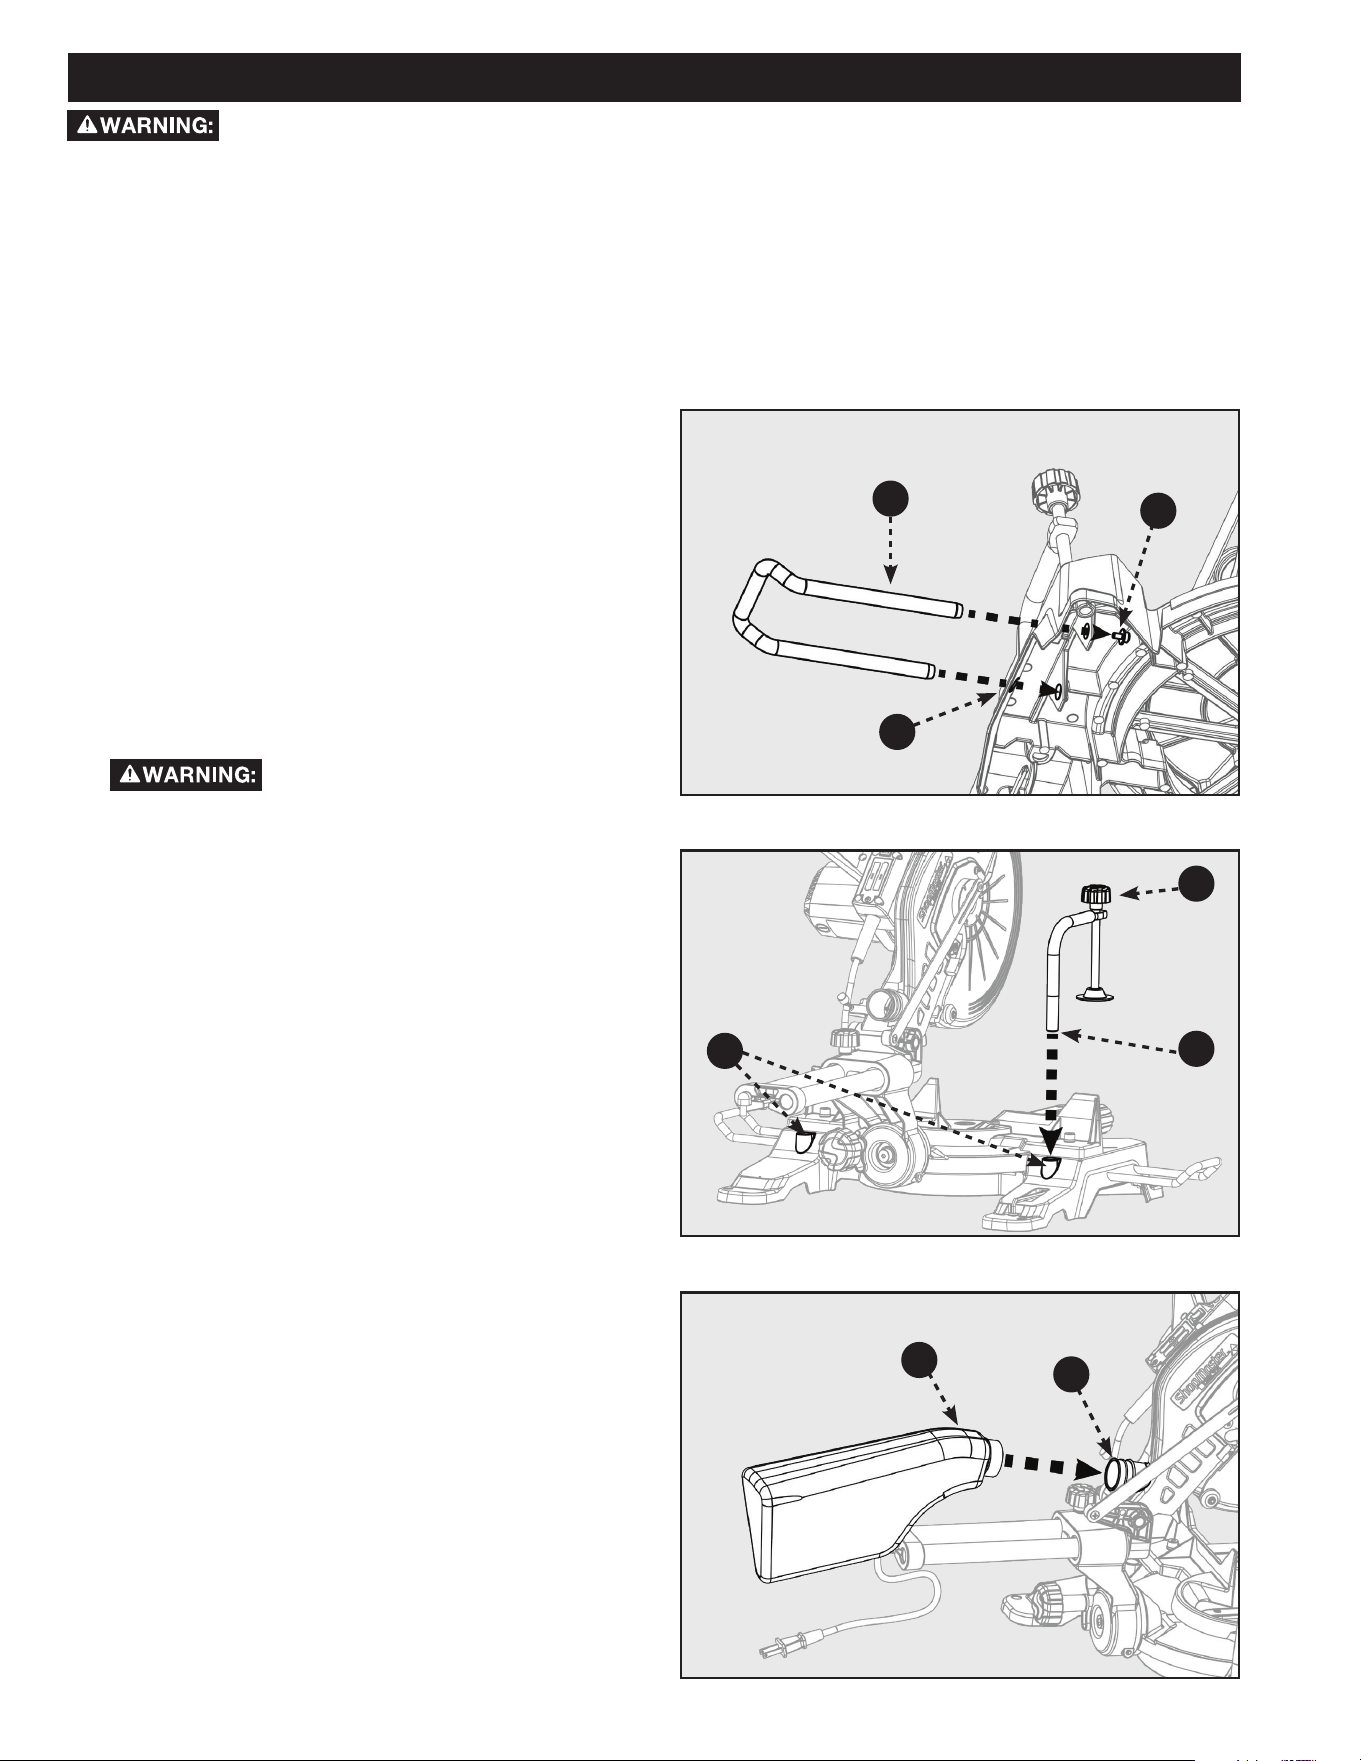
To install the horizontal work clamp, see Figure 7 and do
the following:
1. Place the clamp shaft (D) in either hole (E) on the
mitre table base.
2. Rotate the knob (F) on the clamp clockwise to move
it in or counter clockwise to move it out as needed.
The tool includes a dust collection bag that attached over
the exhaust port on the upper blade guard. To install,
slide the plastic collar (G) of the dust bag onto the dust
port (H). See Figure 8.
NOTE: To remove the dust bag for emptying, simply
reverse the above procedure.
ATTACHING WORK CLAMP
INSTALL DUST COLLECTION BAG
FIGURE 7
F
E
D
FIGURE 8
G
H
ASSEMBLY
• Do not attempt to modify this tool or create accessories not recommended for use with this tool. Any such alteration
or modification is misuse and could result in a hazardous condition.
• Do not connect to power supply until assembly is complete. Failure to comply could result in accidental starting.
• Do not start the mitre saw without checking for interference between the blade and the mitre fence. Damage could
result to the blade if it strikes the mitre fence during operation of the saw.
• The saw can tip over if the saw head is released suddenly and the saw is not secured to a work surface. ALWAYS
secure this saw to a stable work surface before any use.
• If any parts are damaged or missing do not operate this tool until the parts are replaced. Please call Customer Care
Center at 800-223-7278, for instructions.
See Figure 6.
Table extensions have been provided for both the left and
right side of the saw.
To install table extensions:
• Insert the ends of extension (A) into holes in the sides
of the base (B).
• Thread Hex-Socket Cap Screw (C) into the end of
extension (A). Tighten screw.
• Repeat for other extension.
•
Always fix and use workpiece
support extensions during operation.
SUPPORT EXTENSIONS
FIGURE 6
A
B
C
Loading ...
Loading ...
Loading ...