Loading ...
Loading ...
Loading ...
8
Understanding the Table Saw
Before adjusting or operating the saw, have a basic
understanding of table saw use and terminology.
The upper portion of the blade projects up through the
table and is surrounded by an insert called the throat
plate. The height of the blade is set with a wheel on
the front of the cabinet. The rip fence is used to posi-
tion work for lengthwise cuts. A rip fence scale on the
front rail shows the distance between the rip fence
and the blade. It is very important to use the riving
knife with blade guard and anti-kickback pawls for
all through-sawing operations. Use the miter gauge
for all cross-cut operations.
Detailed instructions are provided in this manual
for making adjustments and basic cuts: cross cuts,
miter cuts, bevel cuts, and compound cuts. This table
saw is designed to cut wood and wood composition
products only. Do not cut metal. Do not cut plastics.
Understand these instructions before continuing.
Selecting, Installing, and Changing Blades
WARNING
Do not use blades rated less than
the speed of this tool. Failure to
heed this warning could result in personal injury.
Use the appropriate saw blade for the riving knife.
Match kerf width of blade (>1.8 mm) and blade
body thickness (<1.55 mm) with the marking on
the riving knife to reduce the risk of kickback.
Failure to heed this warning could result in
personal injury.
Blades are sharp. Wear work gloves when
handling blades.
NOTICE
To work properly, the saw blade teeth
must point down toward the front of the
saw. Failure to heed this warning could cause
damage to the saw blade, the saw, or the work-
piece.
Always use clean, sharp blades. Dull blades tend to
overload the tool, bind, and cause pinching. Use only
8-1/4" table saw blades rated at least 6300 RPM.
The blade provided with the saw is a high-quality
combination blade suitable for ripping and cross cut
operations.
Blade kerf width and blade body thickness must be
within the limits stamped on the riving knife. Do not
use metal-cutting blades. Do not cut plastics.
The blade wrench should be stored on the table
saw frame (see "Functional Description" for storage
location).
NOTE: To replace the blade with an accessory blade,
follow the instructions provided with the accessory.
To change the saw blade:
1. Remove the battery pack.
2. Set the blade angle (bevel) to 0° and lock it in
place.
3. Raise the blade by turning the height adjusting
wheel clockwise.
4. Remove the riving knife.
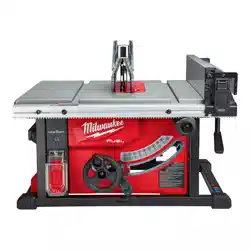
5. Remove the throat plate.
6. Press in the spindle lock and rotate the spindle/
blade until the lock engages.
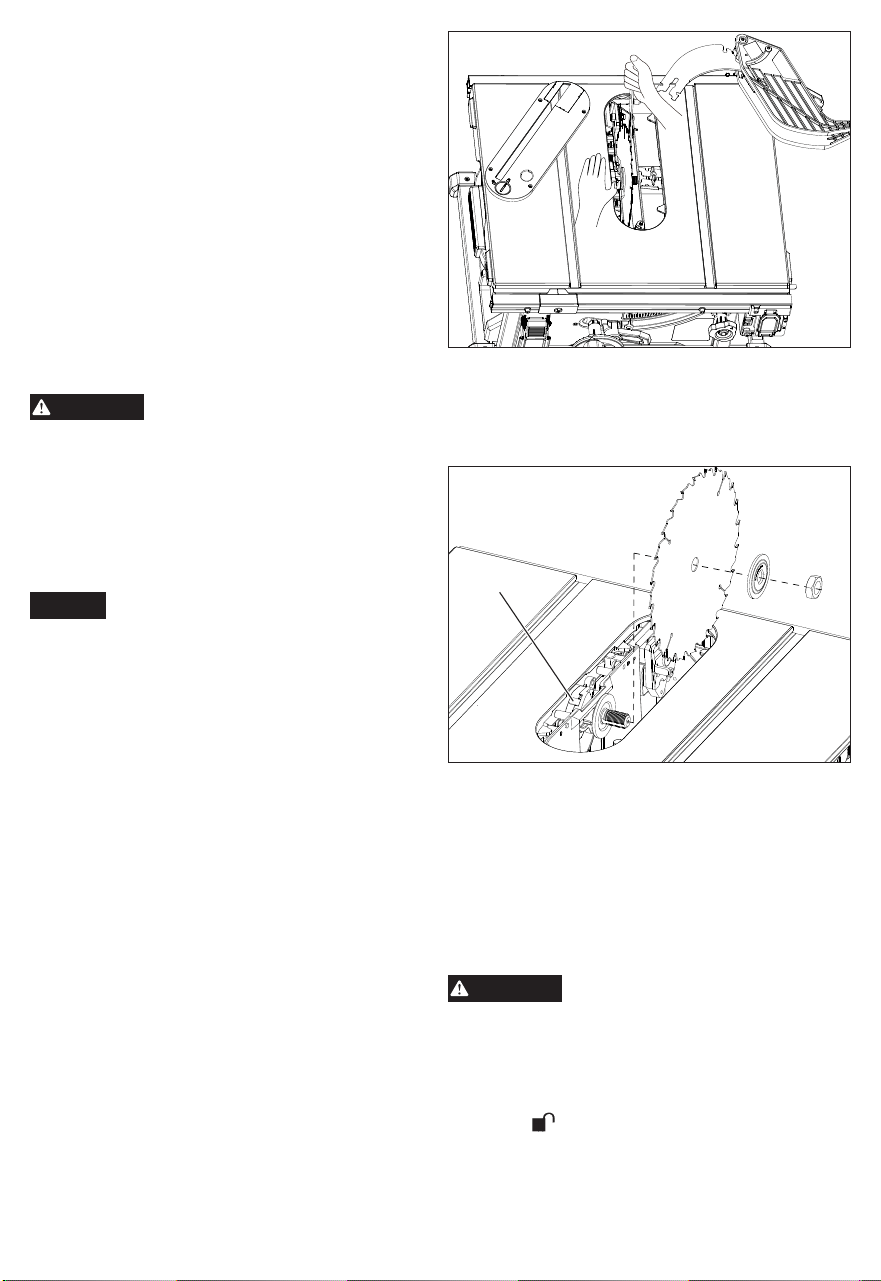
7. Use the blade wrench to loosen the blade bolt
counterclockwise. Carefully remove the blade
bolt and blade ange by hand. Remove the blade.
Wipe the blade bolt, anges and spindle to remove
dust and debris. Inspect the parts for damage.
Replace if needed.
8. Match the arrow direction on the replacement saw
blade with the arrow direction on the riving knife.
The teeth should point toward the front of the table
saw. Slide the blade onto the spindle.
9. Install the outer blade ange. The at side of the
ange must rest against the blade.
Spindle lock
10. Hand-thread the blade bolt. Once the spindle
starts to spin, press in the spindle lock and rotate
the blade until the lock engages. Securely tighten
clockwise with the blade wrench.
11. Reinstall the appropriate throat plate, riving knife,
and anti-kickback pawls for the application.
12. Check blade guard and anti-kickback pawls move
freely before starting the saw. Ensure the blade
teeth match the direction of rotation indicated on
the riving knife.
Changing the Throat Plate
WARNING
Always use the appropriate throat
plate for the operation. Dierent
blades may require dierent throat plates. Never
operate the saw without a throat plate in place.
1. Remove the battery pack.
2. Lower the blade by turning the height adjusting
wheel counterclockwise.
3. To remove a throat plate, turn the throat plate
latch to
unlocked.
Loading ...
Loading ...
Loading ...