Mixmaster
®
Hand Mixer
User Guide
JMP2000BK
JMP2000_20EM1 (ANZ).indd 1JMP2000_20EM1 (ANZ).indd 1 5/19/20 11:085/19/20 11:08

1
Contents
Sunbeam’s Safety Precautions 1
Features of your Mixmaster Hand Mixer 2
Features of your Mixmaster Hand Mixer 3
Using your Mixmaster Hand Mixer 4
Mixing Tips 5
Speed Guide for Hand Mixer 5
Care and Cleaning 5
Recipes 6
Important Instructions - retain for future use
Sunbeam is very safety conscious when designing
and manufacturing consumer products, but it is
essential that the product user also exercise care
when using an electrical appliance. Listed below
are precautions which are essential for the safe
use of an electrical appliance:
• Read carefully and save all the instructions
provided with an appliance.
• Always turn the power off at the power outlet
before you insert or remove a plug. Remove by
grasping the plug - do not pull on the cord.
• Turn the power off and remove the plug when the
appliance is not in use and before cleaning.
• Do not use your appliance with an extension cord
unless this cord has been checked and tested by a
qualified technician or service person.
• Always use your appliance from a power outlet of
the voltage (A.C. only) marked on the appliance.
• This appliance is not intended for use by young
children or infirm persons unless they have been
adequately supervised by a responsible adult to
ensure that they can use the appliance safely.
• Young children should be supervised to ensure
that they do not play with the appliance.
• Never leave an appliance unattended while in use.
• Appliances are not intended to be operated by
means of an external timer or separate remote
control system.
• Do not use an appliance for any purpose other
than its intended use. Misuse can cause injuries.
• Do not place an appliance on or near a hot gas
flame, electric element or on a heated oven.
Do not place on top of any other appliance.
• Do not let the power cord of an appliance hang
over the edge of a table or bench top or touch any
hot surface.
• Do not operate any electrical appliance with a
damaged cord or after the appliance has been
damaged in any manner. If damage is suspected,
return the appliance to the nearest Sunbeam
Appointed Service Centre for examination, repair
or adjustment to avoid a hazzard.
• For additional protection, the appliance should
be supplied through a residual current device
(RCD) with a tripping current not exceeding 30mA
in the electrical circuit supplying power to your
appliances.
• Do not immerse the appliance in water or any
other liquid unless recommended.
• This appliance is intended to be used in household
and similar applications such as: staff kitchen
areas in shops, offices and other working
environments; farm houses; by clients in hotels,
motels and other residential type environments;
bed and breakfast type environments.
SAFETY PRECAUTIONS FOR YOUR SUNBEAM
MIXMASTER HAND MIXER.
• Never eject beaters, whisk or dough hooks when
the appliance is in operation.
• Ensure fingers are kept well away from moving
beater, whisk or dough hook.
• When mixing extremely heavy loads the
appliance should not be operated for more than
1 minute 30 seconds.
• IMPORTANT: In the case of the mixer overheating
due to excessive load, the safety cutout will
activate, preventing the mixer from operating.
Should this occur, switch the mixer off at the
power outlet and allow the mixer to cool for 5
minutes before switching back on.
If you have any concerns regarding the performance and use of your appliance,
please visit www.sunbeam.com.au or contact the Sunbeam Consumer Service Line.
Ensure the above safety precautions are understood.
Sunbeam’s Safety Precautions
JMP2000_20EM1 (ANZ).indd 2-1JMP2000_20EM1 (ANZ).indd 2-1 5/19/20 11:085/19/20 11:08

32
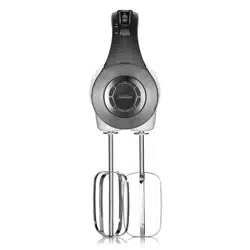
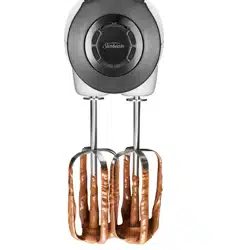
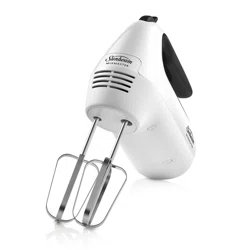
Features Of Your Mixmaster Hand Mixer
Storage Case
Dough Hooks Beaters
Super Aerator
Whisk
Features Of Your Mixmaster Hand Mixer
Burst Of Power Feature
Provides an extra speed boost and burst of
power for those extra tough mixing tasks.
Beater Eject
To effortlessly release the beaters or dough
hooks or whisk for easy cleaning. Move
to the off position (0) and press the speed
control button downwards to eject.
CAUTION: Make sure hand mixer is
unplugged before removing or inserting any
attachments.
Beaters
The beater design allows for thorough, fast
mixing results for all types of batters. The
stainless steel beaters are dishwasher safe.
Super Aerator Whisk
The unique whisk design draws in
maximum air for 30% faster whipping* and
create stiff peaks and fluffy meringues fast.
The stainless steel whisk is dishwasher
safe.
Dough Hooks
Use these hooks to knead bread dough,
pizza dough or other heavy batters and
doughs. Use at lower speeds for best
results. The stainless steel dough hooks are
dishwasher safe.
Storage Case
Lets you store your hand mixer, accessories
and power cord conveniently together for
easy access and tidy storage.
7 Speed Control Switch
Beater Eject
Burst Of Power
Ergonomic
Handle
*30% faster claim based on whipping cream vs. 2 x beaters.
JMP2000_20EM1 (ANZ).indd 2-3JMP2000_20EM1 (ANZ).indd 2-3 5/19/20 11:085/19/20 11:08

32
Features Of Your Mixmaster Hand Mixer
Storage Case
Dough Hooks Beaters
Super Aerator
Whisk
Features Of Your Mixmaster Hand Mixer
Burst Of Power Feature
Provides an extra speed boost and burst of
power for those extra tough mixing tasks.
Beater Eject
To effortlessly release the beaters or dough
hooks or whisk for easy cleaning. Move
to the off position (0) and press the speed
control button downwards to eject.
CAUTION: Make sure hand mixer is
unplugged before removing or inserting any
attachments.
Beaters
The beater design allows for thorough, fast
mixing results for all types of batters. The
stainless steel beaters are dishwasher safe.
Super Aerator Whisk
The unique whisk design draws in
maximum air for 30% faster whipping* and
create stiff peaks and fluffy meringues fast.
The stainless steel whisk is dishwasher
safe.
Dough Hooks
Use these hooks to knead bread dough,
pizza dough or other heavy batters and
doughs. Use at lower speeds for best
results. The stainless steel dough hooks are
dishwasher safe.
Storage Case
Lets you store your hand mixer, accessories
and power cord conveniently together for
easy access and tidy storage.
7 Speed Control Switch
Beater Eject
Burst Of Power
Ergonomic
Handle
*30% faster claim based on whipping cream vs. 2 x beaters.
JMP2000_20EM1 (ANZ).indd 2-3JMP2000_20EM1 (ANZ).indd 2-3 5/19/20 11:085/19/20 11:08
54
Using your Mixmaster Hand Mixer
Prepping your Mixer
Before using your mixer for the first time,
wash the beaters, whisk and dough hooks.
Rinse and dry. Ensure the speed control is
"0 (OFF)" and the unit is unplugged.
Using Beaters
Insert beaters one at a time, by placing the
stem end of the beater into the opening
drive holes on the bottom of the mixer. Turn
beater slightly and push in until beater
clicks into position.
Note that the beaters are interchangeable
between drive holes.
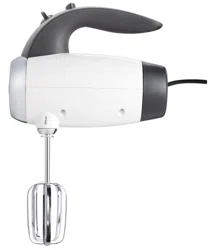
Using Super Aerator Whisk
Insert the whisk into the larger opening
drive hole on the bottom of the mixer.
Note that the whisk will only fit the larger
drive hole.
Using Dough Hooks
Insert the dough hook with the collar on the
stem (see page 2) into the larger drive hole
on the mixer. Insert the dough hook without
the collar into the smaller drive hole.
Note that the dough hooks will only fit into
the drive holes one way round. If dough
hooks do not click into place, reverse and
try again.
Using your Mixer
1. With the speed control switch in the
'OFF' position, plug the power cord into a
230-240V AC power outlet.
2. Place the beaters or dough hooks into
the bowl of ingredients to be mixed and
using the speed control switch, select
the desired mixing speed. Clearly marked
instructions for each type of mixture are
shown in the mixing guide on page 5.
NOTE: Always start mixing at slow speeds
and increase the speed gradually to
prevent ingredients splashing out of the
mixing bowl. When adding dry ingredients,
particularly flour, lower the speed to prevent
the 'snow storm' effect.
3. Once you have finished mixing, turn the
speed switch to the 'OFF' position and
unplug the cord from the power outlet.
4. To remove the beaters/dough hooks,
place fingers loosely around the spindles
and press the speed control switch to
eject.
NOTE: Never eject the beaters or dough
hooks when the Mixmaster hand mixer is in
operation.
NOTE: The hand mixer should not be
operated continuously for more than 5
minutes. After this time, let it cool for at
least 5 minutes before using again.
Please keep in mind that the various mixing tasks and related speeds, listed in the table
below, may vary slightly from recipe to recipe. Please refer to it regularly as you develop
your understanding of how different ingredients interact when mixing.
Hints & Tips
For most recipes, it is better to begin
your mixing on a slower speed until the
ingredients begin combining, then move
to the appropriate speed range for the
particular task.
Generally, there is not one set speed for
an entire recipe. You will need to change
the speed of the mixer depending on what
stage of the recipe you are working on.
When mixing larger quantities you may
need to increase the mixer speed due to the
amount of mixing required and the larger
load on the machine.
When building up a recipe that requires
the addition of dry ingredients, such as
flour, slow the speed down whilst these
ingredients are being added to avoid a
snow storm effect. Once the additional
ingredients begin combining then slowly
increase to the appropriate speed for the
particular mixing task.
Mixing Tips
Speed Guide for Hand Mixer
Mixing Task
Recommended Speed(s)
Kneading, Folding & Blending 1 - 2 (low)
Light Mixing 2 - 3 (low/med)
Creaming & Beating 4 - 5 (med/high)
Whipping & Aerating 5 - 7 (high)
CAUTION: Turn off and unplug appliance
and eject any accessories before cleaning.
1. Before cleaning any part of the mixer, set
the speed control switch to the “0 (OFF)”
position to turn off. Then unplug the cord
from the outlet and eject the beaters.
2. The beaters, whisk and dough hooks may
be washed in hot, soapy water or in a
dishwasher.
CAUTION: Do not immerse mixer in water
while cleaning. This may cause electric
shock, injury, or damage to the product.
3. To remove stubborn spots on the hand
mixer, wipe surfaces with a piece of cloth,
slightly dampened in soapy water or a
mild, non-abrasive cleaner.
4. Do not use any abrasive cleaner or
material to clean any part of the hand
mixer, any part of the hand mixer or
storage case as it can scratch the
product.
Care and Cleaning
JMP2000_20EM1 (ANZ).indd 4-5JMP2000_20EM1 (ANZ).indd 4-5 5/19/20 11:085/19/20 11:08
54
Using your Mixmaster Hand Mixer
Prepping your Mixer
Before using your mixer for the first time,
wash the beaters, whisk and dough hooks.
Rinse and dry. Ensure the speed control is
"0 (OFF)" and the unit is unplugged.
Using Beaters
Insert beaters one at a time, by placing the
stem end of the beater into the opening
drive holes on the bottom of the mixer. Turn
beater slightly and push in until beater
clicks into position.
Note that the beaters are interchangeable
between drive holes.
Using Super Aerator Whisk
Insert the whisk into the larger opening
drive hole on the bottom of the mixer.
Note that the whisk will only fit the larger
drive hole.
Using Dough Hooks
Insert the dough hook with the collar on the
stem (see page 2) into the larger drive hole
on the mixer. Insert the dough hook without
the collar into the smaller drive hole.
Note that the dough hooks will only fit into
the drive holes one way round. If dough
hooks do not click into place, reverse and
try again.
Using your Mixer
1. With the speed control switch in the
'OFF' position, plug the power cord into a
230-240V AC power outlet.
2. Place the beaters or dough hooks into
the bowl of ingredients to be mixed and
using the speed control switch, select
the desired mixing speed. Clearly marked
instructions for each type of mixture are
shown in the mixing guide on page 5.
NOTE: Always start mixing at slow speeds
and increase the speed gradually to
prevent ingredients splashing out of the
mixing bowl. When adding dry ingredients,
particularly flour, lower the speed to prevent
the 'snow storm' effect.
3. Once you have finished mixing, turn the
speed switch to the 'OFF' position and
unplug the cord from the power outlet.
4. To remove the beaters/dough hooks,
place fingers loosely around the spindles
and press the speed control switch to
eject.
NOTE: Never eject the beaters or dough
hooks when the Mixmaster hand mixer is in
operation.
NOTE: The hand mixer should not be
operated continuously for more than 5
minutes. After this time, let it cool for at
least 5 minutes before using again.
Please keep in mind that the various mixing tasks and related speeds, listed in the table
below, may vary slightly from recipe to recipe. Please refer to it regularly as you develop
your understanding of how different ingredients interact when mixing.
Hints & Tips
For most recipes, it is better to begin
your mixing on a slower speed until the
ingredients begin combining, then move
to the appropriate speed range for the
particular task.
Generally, there is not one set speed for
an entire recipe. You will need to change
the speed of the mixer depending on what
stage of the recipe you are working on.
When mixing larger quantities you may
need to increase the mixer speed due to the
amount of mixing required and the larger
load on the machine.
When building up a recipe that requires
the addition of dry ingredients, such as
flour, slow the speed down whilst these
ingredients are being added to avoid a
snow storm effect. Once the additional
ingredients begin combining then slowly
increase to the appropriate speed for the
particular mixing task.
Mixing Tips
Speed Guide for Hand Mixer
Mixing Task
Recommended Speed(s)
Kneading, Folding & Blending 1 - 2 (low)
Light Mixing 2 - 3 (low/med)
Creaming & Beating 4 - 5 (med/high)
Whipping & Aerating 5 - 7 (high)
CAUTION: Turn off and unplug appliance
and eject any accessories before cleaning.
1. Before cleaning any part of the mixer, set
the speed control switch to the “0 (OFF)”
position to turn off. Then unplug the cord
from the outlet and eject the beaters.
2. The beaters, whisk and dough hooks may
be washed in hot, soapy water or in a
dishwasher.
CAUTION: Do not immerse mixer in water
while cleaning. This may cause electric
shock, injury, or damage to the product.
3. To remove stubborn spots on the hand
mixer, wipe surfaces with a piece of cloth,
slightly dampened in soapy water or a
mild, non-abrasive cleaner.
4. Do not use any abrasive cleaner or
material to clean any part of the hand
mixer, any part of the hand mixer or
storage case as it can scratch the
product.
Care and Cleaning
JMP2000_20EM1 (ANZ).indd 4-5JMP2000_20EM1 (ANZ).indd 4-5 5/19/20 11:085/19/20 11:08

76
RecipesRecipes
88
Recipes
Butter Cake
3ERVES
0REPARATIONMINUTES
#OOKINGHOUR
GBUTTERSOFTENED
TEASPOONVANILLAEXTRACT
1 cup caster sugar
EGGS
2 ¼ cups self-raising flour
¾ cup milk
0REHEATOVENTOMODERATE##
FANFORCED'REASEANDLINEACMROUND
cake pan.
0LACEALLINGREDIENTSINALARGEBOWL
5SINGTHEBEATERSBEATON,OWSPEED
UNTILCOMBINED)NCREASESPEEDTO-EDIUM
(IGHANDBEATFORABOUTMINUTEOR
until smooth.
0OURMIXTUREINTOPREPAREDPAN
"AKEFORABOUTHOURORUNTILASKEWER
inserted into the centre comes out clean.
3TANDCAKEFORMINUTESTHENTURNONTOA
wire rack to cool.
Serving suggestion: Ice and decorate your
cake with fluffy butter frosting (recipe on
PAGE
Variations:
Cupcakes
Line a 12-hole muffin pan with patty cases.
3POONCUPMIXTUREINTOEACHCASE"AKE
FORABOUTMINUTESORUNTILSKEWER
inserted into the centre comes out clean.
Lemon or Orange Cake
2EPLACETHEVANILLAEXTRACTWITHTHEFINELY
grated rind of 1 lemon or orange.
Marble Cake
$IVIDEBATTERINTOPORTIONSLEAVEONEPLAIN
and add pink food colour to the second
PORTION$ROPSPOONFULSOFALTERNATECOLOURS
INTOPREPAREDPAN5SEASKEWERORKNIFETO
swirl slightly and create a marbled effect.
Berry Cake
&OLDCUPOFFRESHORFROZENMIXEDBERRIES
through the cake batter.
Buttermilk Pikelets
-AKES
0REPARATIONMINUTES
#OOKINGMINUTES
1 egg
¼ cup caster sugar
1 cup self-raising flour, sifted
pinch salt
½ teaspoon bicarbonate of soda
¾ cup buttermilk
GBUTTERMELTED
Cooking oil spray
,EMONJUICEANDSUGARTOSERVE
0LACEEGGANDSUGARINASMALLBOWL5SING
THEEHDWHUV, BEATON-EDIUM(IGH
UNTILLIGHTANDCREAMY
!DDFLOURSALTBICARBONATEOFSODA
BUTTERMILKANDBUTTERANDBEATON-EDIUM
(IGHSPEEDUNTILSMOOTH
(EATAFRYPANOVERMEDIUMHEAT3PRAY
WITHCOOKINGOILSPRAY!DDTABLESPOONSOF
MIXTUREANDCOOKFORABOUTMINUTES
each side or until golden.
3ERVEPIKELETSWARMORCOLDWITHLEMON
JUICEANDSPRINKLEWITHSUGAR
99
Recipes continued
Chocolate Chip Cookies
-AKESABOUT
0REPARATIONMINUTES
#OOKINGMINUTESPERBATCH
GBUTTERSOFTENED
½ cup firmly packed brown sugar
½ cup caster sugar
TEASPOONVANILLAEXTRACT
1 egg
1 ¾ cup self raising flour
1 cup choc chips
0REHEATOVENTOMODERATE#
FANFORCED'REASEANDLINEBAKINGTRAYS
with baking paper.
0LACEBUTTERSUGARSANDVANILLAINABOWL
5SINGTHEBEATERSBEATON,OWSPEED
UNTILCOMBINED)NCREASESPEEDTO
-EDIUM(IGHANDBEATUNTILLIGHTAND
creamy.
!DDEGGANDBEATUNTILCOMBINED2EDUCE
SPEEDTO,OW!DDFLOURAND
CHOCOLATECHIPS"EATUNTILCOMBINED
2OLLTABLESPOONSOFMIXTUREINTOBALLSAND
PLACEONTOPREPAREDTRAYS0RESSLIGHTLY
with the back of a fork. Ensure that
the cookies are well spaced to allow for
spreading.
"AKECOOKIESINBATCHESFORABOUT
minutes or until golden. Cool on trays.
Meringue kisses
-AKESABOUT
0REPARATIONMINUTES
#OOKINGMINUTES
1 egg white
¼ cup caster sugar
½ teaspoon white vinegar
2 teaspoons icing sugar
7HIPPEDCREAMTOSERVE
0REHEATOVENTOVERYSLOW##
FANFORCED'REASEBAKINGTRAYSANDDUST
WITHCORNFLOUR3HAKEOFFEXCESS
0LACEEGGWHITEINASMALLBOWL5SINGTHE
BALLOONWHISKSBEATON(IGHSPEED
until soft peaks form. Gradually add the
caster sugar and vinegar. Continue beating
UNTILSUGARDISSOLVES&OLDINSIFTEDICING
sugar.
3POONTHEMIXTUREINTOAPIPINGBAGFITTED
WITHASMALLSTARSHAPEDNOZZLE0IPE
SMALLMERINGUESABOUTCMONTOTHE
prepared baking trays.
"AKEFORABOUTMINUTESORUNTILCRISP
and dry. Cool meringues on trays.
3ANDWICHCOOLEDMERINGUESWITHWITH
CHANTILLYCREAMRECIPEONPAGEBASIC
BUTTERCREAMRECIPEONPAGEOR
CHOCOLATEGANACHERECIPEONPAGE
Tip: If you do not have a piping bag, use two
teaspoons to spoon rounds of meringue
MIXTUREONTOPREPAREDTRAYS
.
99
Recipes continued
Chocolate Chip Cookies
Makes: about 30
Preparation: 15 minutes
Cooking: 10-15 minutes per batch
125g butter, softened
½ cup firmly packed brown sugar
½ cup caster sugar
1 teaspoon vanilla extract
1 egg
1 ¾ cup self raising flour
1 cup choc chips
1.Preheat oven to moderate (180°C/160
fan-forced). Grease and line baking trays
with baking paper.
2.Place butter, sugars and vanilla in a bowl.
Using the beaters, beat on Low speed
(1-2) until combined. Increase speed to
Medium/High (4-5) and beat until light and
creamy.
3.Add egg and beat until combined. Reduce
speed to Low (1-2). Add flour and
chocolate chips. Beat until combined.
4.Roll tablespoons of mixture into balls and
place onto prepared trays. Press lightly
with the back of a fork. Ensure that
the cookies are well spaced to allow for
spreading.
5.Bake cookies in batches for about 10 -1
5
minutes or until golden. Cool on trays.
Meringue kisses
Makes: about 24
Preparation: 30 minutes
Cooking: 30 minutes
1 egg white
¼ cup caster sugar
½ teaspoon white vinegar
2 teaspoons icing sugar
Whipped cream, to serve
1. Preheat oven to very slow (120°C/100°
C
fan-forced). Grease baking trays and dust
with corn flour. Shake off excess.
2. Place egg white in a small bowl. Using th
e
whisk,
beat on High speed (5-6) until soft
peaks form. Gradually add the caster sugar
and vinegar. Continue beating until sugar
dissolves. Fold in sifted icing sugar.
3. Spoon the mixture into a piping bag fitte
d
with
a small star shaped nozzle. Pipe
small meringues (about 1.5cm) onto the
prepared baking trays.
4. Bake for about 30 minutes or until crisp
and dry. Co
ol meringues on trays.
5. Sandwich cooled meringues with with
chantilly cream (recipe on page 12), basic
butter cream (recipe on page 12), or
chocolate ganache (recipe on page 12)
Tip: If you do not have a piping bag,
use two
teaspoons to spoon rounds of meringue
mixture onto prepared trays.
JMP2000_20EM1 (ANZ).indd 6-7JMP2000_20EM1 (ANZ).indd 6-7 5/19/20 11:085/19/20 11:08
98
Recipes Recipes
Recipes continued
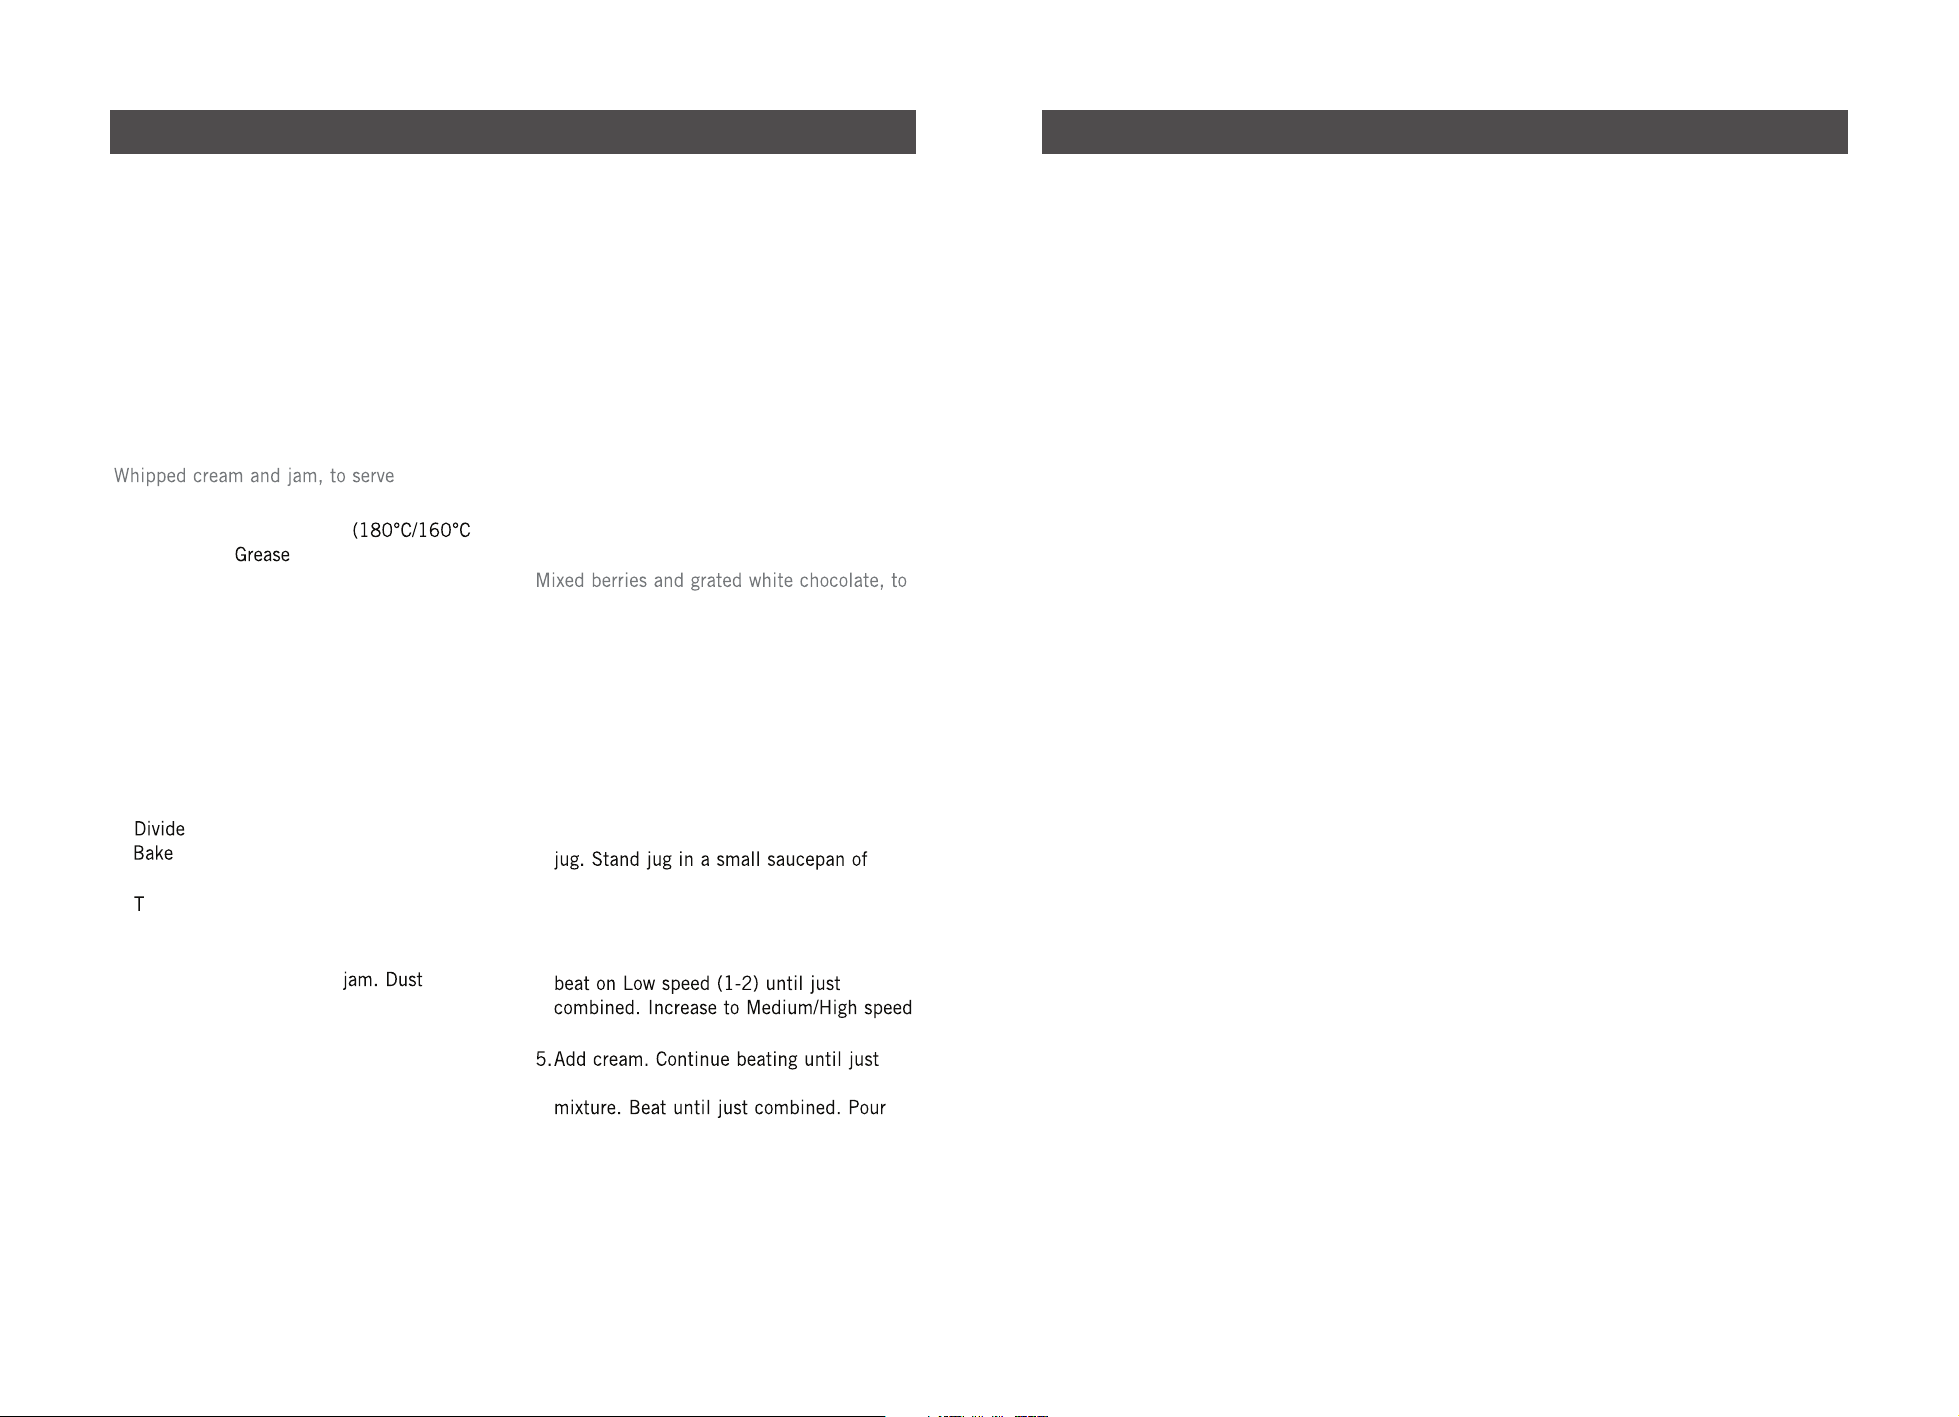
Classic Sponge Cake
Serves: 8
Preparation: 20 minutes
Cooking: 20 minutes
4 eggs
¾ cup caster sugar
1 cup wheaten cornflour
1 teaspoon cream of tartar
½ teaspoon bicarbonate of soda
1. Preheat oven to moderate
fan-forced).
and line two 22cm
round cake pans.
2. Place eggs in a small bowl. Using the
beaters, beat on High speed (5-6) until
thick and creamy (about 5 minutes).
Continue beating, gradually adding the
sugar until dissolved.
3. Sift flour, cream of tartar and bicarbonate
of soda twice onto baking paper. Sift into
egg mixture and use a large metal spoon to
fold until combined.
4.
mixture evenly among cake pans.
for about 20 minutes or until skewer
inserted into the centre comes out clean.
5. urn cakes immediately onto a baking paper
lined wire rack.
6. Serve cool sponges sandwiched together
with whipped cream and
with
icing sugar.
White Chocolate cheesecake
Serves: 10
Preparation: 30 minutes (plus refrigeration
time)
250g plain sweet biscuits
125g butter, melted
2 teaspoons gelatine
¼ cup water
375g cream cheese, softened
½ cup caster sugar
1 teaspoon vanilla extract
300ml thickened cream
150g white chocolate, melted
garnish
1. Grease and line a 22cm spring form tin
with baking paper.
2. Place biscuits in a food processor. Process
until fine. Add melted butter. Process until
combined. Press mixture onto the base
of the prepared tin. Refrigerate for 30
minutes.
3. Sprinkle gelatine over water in a heatproof
simmering water. Stir until gelatine
dissolves. Cool slightly.
4. Place cream cheese, sugar and vanilla
extract in a large bowl. Using the beaters,
(4-5) and beat until smooth.
combined. Add chocolate and gelatine
mixture into prepared tin. Refrigerate
overnight or until firm.
6. Serve garnished with mixed berries and
grated chocolate.
Recipes continued
Classic Sponge Cake
Serves: 8
Preparation: 20 minutes
Cooking: 20 minutes
4 eggs
¾ cup caster sugar
1 cup wheaten cornflour
1 teaspoon cream of tartar
½ teaspoon bicarbonate of soda
1. Preheat oven to moderate
fan-forced).
and line two 22cm
round cake pans.
2. Place eggs in a small bowl. Using the
beaters, beat on High speed (5-6) until
thick and creamy (about 5 minutes).
Continue beating, gradually adding the
sugar until dissolved.
3. Sift flour, cream of tartar and bicarbonate
of soda twice onto baking paper. Sift into
egg mixture and use a large metal spoon to
fold until combined.
4.
mixture evenly among cake pans.
for about 20 minutes or until skewer
inserted into the centre comes out clean.
5.
urn cakes immediately onto a baking paper
lined wire rack.
6. Serve cool sponges sandwiched together
with whipped cream and
with
icing sugar.
White Chocolate cheesecake
Serves: 10
Preparation: 30 minutes (plus refrigeration
time)
250g plain sweet biscuits
125g butter, melted
2 teaspoons gelatine
¼ cup water
375g cream cheese, softened
½ cup caster sugar
1 teaspoon vanilla extract
300ml thickened cream
150g white chocolate, melted
garnish
1.Grease and line a 22cm spring form tin
with baking paper.
2.Place biscuits in a food processor. Process
until fine. Add melted butter. Process until
combined. Press mixture onto the base
of the prepared tin. Refrigerate for 30
minutes.
3.Sprinkle gelatine over water in a heatproof
simmering water. Stir until gelatine
dissolves. Cool slightly.
4.Place cream cheese, sugar and vanilla
extract in a large bowl. Using the beaters,
(4-5) and beat until smooth.
combined. Add chocolate and gelatine
mixture into prepared tin. Refrigerate
overnight or until firm.
6.Serve garnished with mixed berries and
grated chocolate.
Recipes continued
Chocolate mousse
Serves: 8
Preparation: 20 minutes
300ml thickened cream
3 eggs, separated
2 tablespoons caster sugar
200g dark chocolate, chopped
30g unsalted butter, chopped
Whipped cream and extra chocolate to
garnish
1. Place cream in a bowl. Using the beaters,
beat on High speed (5-6) until soft peaks
form.
2. Place egg whites in a clean bowl. Using the
whisk, beat on High speed (5-6) until soft
peaks
form. Add sugar and beat until sugar
dissolves.
3. Place chocolate in a heatproof bowl. Place
bowl over a saucepan of simmering water.
Stir with a metal spoon until melted.
Remove from heat, add butter and stir until
melted.
4. Add egg yolks and stir until smooth.
5. Fold cream and egg whites into chocolate
mixture in two batches.
6. Spoon mixture into 8 serving glasses. Cover
and refrigerate overnight.
7. Serve with extra whipped cream and garnish
with shaved chocolate.
JMP2000_20EM1 (ANZ).indd 8-9JMP2000_20EM1 (ANZ).indd 8-9 5/19/20 11:085/19/20 11:08

98
Recipes Recipes
Recipes continued
Classic Sponge Cake
Serves: 8
Preparation: 20 minutes
Cooking: 20 minutes
4 eggs
¾ cup caster sugar
1 cup wheaten cornflour
1 teaspoon cream of tartar
½ teaspoon bicarbonate of soda
1. Preheat oven to moderate
fan-forced).
and line two 22cm
round cake pans.
2. Place eggs in a small bowl. Using the
beaters, beat on High speed (5-6) until
thick and creamy (about 5 minutes).
Continue beating, gradually adding the
sugar until dissolved.
3. Sift flour, cream of tartar and bicarbonate
of soda twice onto baking paper. Sift into
egg mixture and use a large metal spoon to
fold until combined.
4.
mixture evenly among cake pans.
for about 20 minutes or until skewer
inserted into the centre comes out clean.
5. urn cakes immediately onto a baking paper
lined wire rack.
6. Serve cool sponges sandwiched together
with whipped cream and
with
icing sugar.
White Chocolate cheesecake
Serves: 10
Preparation: 30 minutes (plus refrigeration
time)
250g plain sweet biscuits
125g butter, melted
2 teaspoons gelatine
¼ cup water
375g cream cheese, softened
½ cup caster sugar
1 teaspoon vanilla extract
300ml thickened cream
150g white chocolate, melted
garnish
1. Grease and line a 22cm spring form tin
with baking paper.
2. Place biscuits in a food processor. Process
until fine. Add melted butter. Process until
combined. Press mixture onto the base
of the prepared tin. Refrigerate for 30
minutes.
3. Sprinkle gelatine over water in a heatproof
simmering water. Stir until gelatine
dissolves. Cool slightly.
4. Place cream cheese, sugar and vanilla
extract in a large bowl. Using the beaters,
(4-5) and beat until smooth.
combined. Add chocolate and gelatine
mixture into prepared tin. Refrigerate
overnight or until firm.
6. Serve garnished with mixed berries and
grated chocolate.
Recipes continued
Classic Sponge Cake
Serves: 8
Preparation: 20 minutes
Cooking: 20 minutes
4 eggs
¾ cup caster sugar
1 cup wheaten cornflour
1 teaspoon cream of tartar
½ teaspoon bicarbonate of soda
1. Preheat oven to moderate
fan-forced).
and line two 22cm
round cake pans.
2. Place eggs in a small bowl. Using the
beaters, beat on High speed (5-6) until
thick and creamy (about 5 minutes).
Continue beating, gradually adding the
sugar until dissolved.
3. Sift flour, cream of tartar and bicarbonate
of soda twice onto baking paper. Sift into
egg mixture and use a large metal spoon to
fold until combined.
4.
mixture evenly among cake pans.
for about 20 minutes or until skewer
inserted into the centre comes out clean.
5.
urn cakes immediately onto a baking paper
lined wire rack.
6. Serve cool sponges sandwiched together
with whipped cream and
with
icing sugar.
White Chocolate cheesecake
Serves: 10
Preparation: 30 minutes (plus refrigeration
time)
250g plain sweet biscuits
125g butter, melted
2 teaspoons gelatine
¼ cup water
375g cream cheese, softened
½ cup caster sugar
1 teaspoon vanilla extract
300ml thickened cream
150g white chocolate, melted
garnish
1.Grease and line a 22cm spring form tin
with baking paper.
2.Place biscuits in a food processor. Process
until fine. Add melted butter. Process until
combined. Press mixture onto the base
of the prepared tin. Refrigerate for 30
minutes.
3.Sprinkle gelatine over water in a heatproof
simmering water. Stir until gelatine
dissolves. Cool slightly.
4.Place cream cheese, sugar and vanilla
extract in a large bowl. Using the beaters,
(4-5) and beat until smooth.
combined. Add chocolate and gelatine
mixture into prepared tin. Refrigerate
overnight or until firm.
6.Serve garnished with mixed berries and
grated chocolate.
Recipes continued
Chocolate mousse
Serves: 8
Preparation: 20 minutes
300ml thickened cream
3 eggs, separated
2 tablespoons caster sugar
200g dark chocolate, chopped
30g unsalted butter, chopped
Whipped cream and extra chocolate to
garnish
1. Place cream in a bowl. Using the beaters,
beat on High speed (5-6) until soft peaks
form.
2. Place egg whites in a clean bowl. Using the
whisk, beat on High speed (5-6) until soft
peaks
form. Add sugar and beat until sugar
dissolves.
3. Place chocolate in a heatproof bowl. Place
bowl over a saucepan of simmering water.
Stir with a metal spoon until melted.
Remove from heat, add butter and stir until
melted.
4. Add egg yolks and stir until smooth.
5. Fold cream and egg whites into chocolate
mixture in two batches.
6. Spoon mixture into 8 serving glasses. Cover
and refrigerate overnight.
7. Serve with extra whipped cream and garnish
with shaved chocolate.
JMP2000_20EM1 (ANZ).indd 8-9JMP2000_20EM1 (ANZ).indd 8-9 5/19/20 11:085/19/20 11:08

10
WarrantyNotes
JMP2000_20EM1 (ANZ).indd 10-11JMP2000_20EM1 (ANZ).indd 10-11 5/19/20 11:085/19/20 11:08
10
WarrantyNotes
JMP2000_20EM1 (ANZ).indd 10-11JMP2000_20EM1 (ANZ).indd 10-11 5/19/20 11:085/19/20 11:08

NEWELL AUSTRALIA PTY LTD ABN 68 075 071 233
Due to continued product improvements,
product illustrations and photographs in this User Guide
may differ slightly from the actual product.
JMP2000_20EM1 (ANZ) GCDS-SUN1107896-JC
PN: 3934
Need help with your appliance?
Contact our Customer Care Team or
visit our website for information and tips
on getting the most from your appliance.
AUSTRALIA
Visit:
Phone:
Mail:
NEW ZEALAND
Visit:
Phone:
Mail:
Sunbeam Corporation PTY LTD | ACN 000 006 771
Sunbeam is a registered trade mark.
Due to continued product improvements,
product illustrations and photographs in this User Guide
may differ slightly from the actual product.
JM7000_JM7050_18EM1 GCDS-SUN250618-SL
6/18
Need help with your appliance?
Contact our Customer Care Team or
visit our website for information and tips
on getting the most from your appliance.
AUSTRALIA
Visit:
Phone:
Mail:
NEW ZEALAND
Visit:
Phone:
Mail:
MADE IN CHINA TO
SUNBEAM’S
SPECIFICATION
AUTHORITIES
ELECTRICAL REGULATORY
APPROPRIATE
APPROVED BY
www.sunbeam.com.au
1300 881 861
Units 5 & 6, 13 Lord Street,
Botany NSW 2019
www.sunbeam.co.nz
0800 786 232
Level 6, Building 5, Central Park,
660–670 Great South Road,
Greenlane, Auckland
LC5500__LC3680_LC6500_LC3266_17EM2.indd 26 11/6/17 10:38
www.sunbeam.com.au
1300 881 861
Suite 1, Level 1, 13 Lord Street,
Botany NSW 2019
www.sunbeam.co.nz
0800 786 232
Level 6, Building 5, Central Park,
660–670 Great South Road,
Greenlane, Auckland
JMP2000_20EM1 (ANZ).indd 12JMP2000_20EM1 (ANZ).indd 12 5/19/20 11:085/19/20 11:08