Loading ...
Loading ...
Loading ...
ASSEMBLY
7
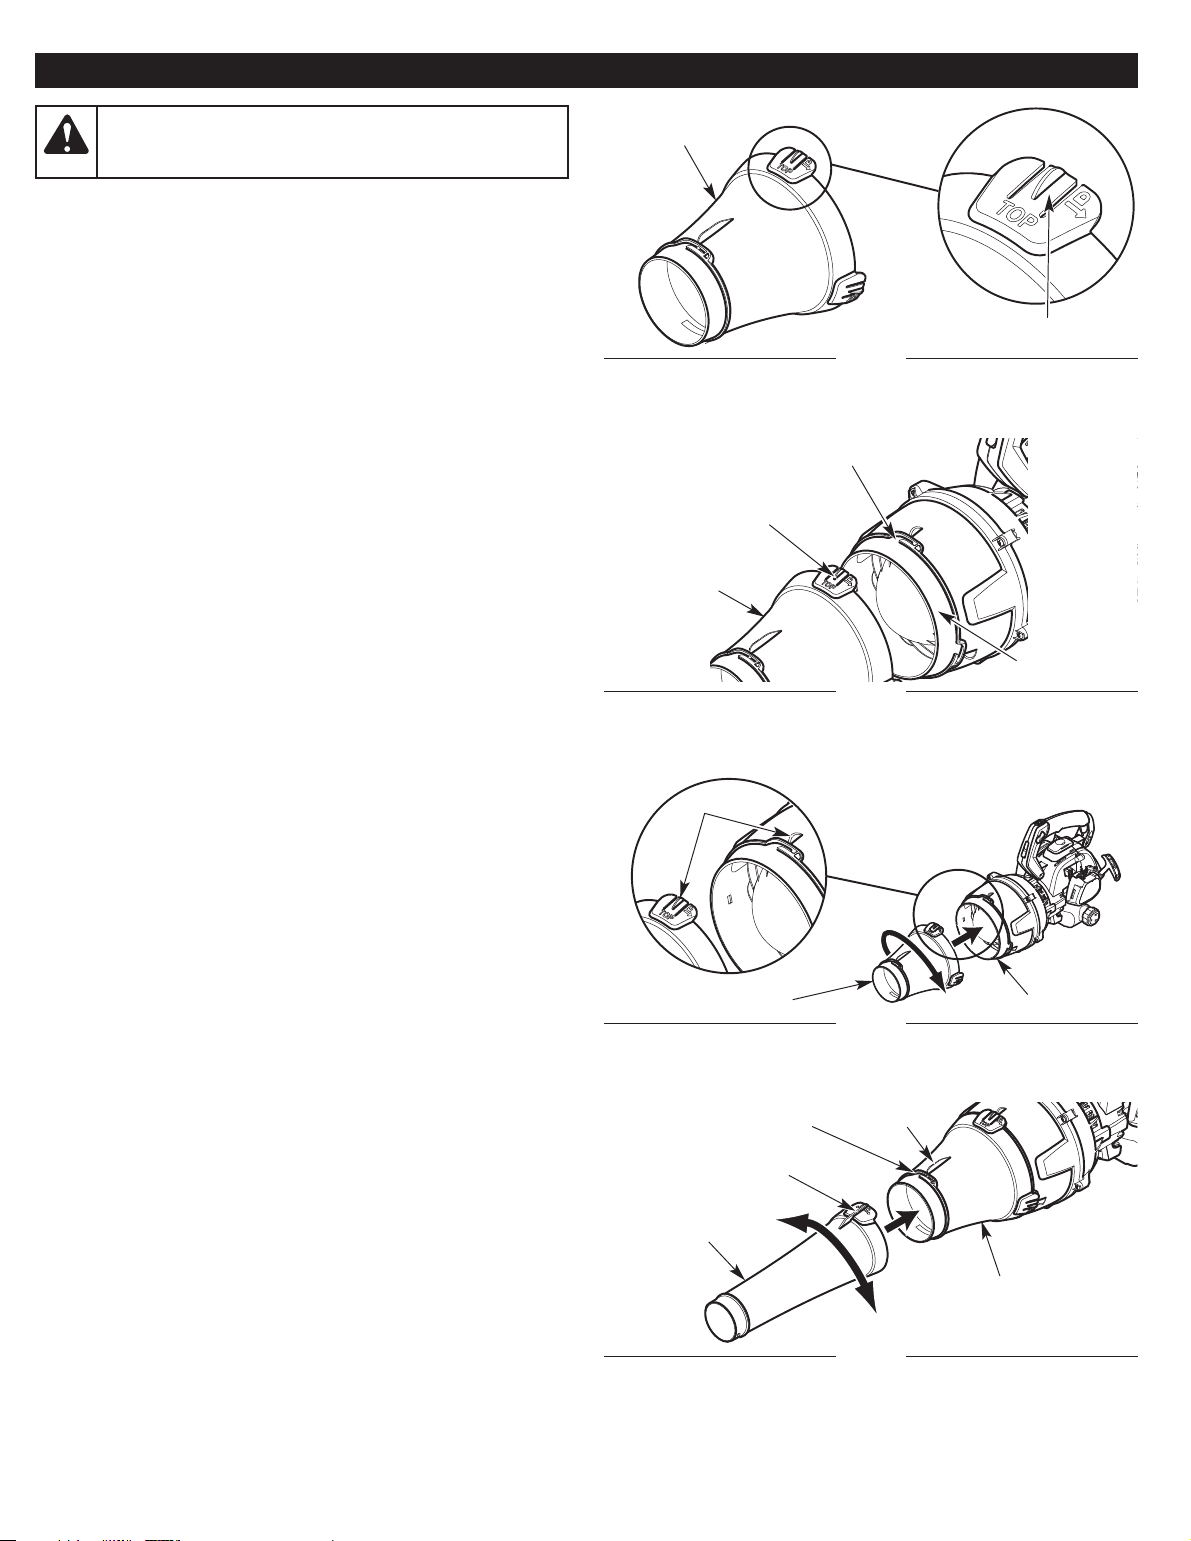
INSTALLING THE BLOWER TUBES
Installing the Upper Blower Tube
1. Set the unit on a flat, level surface.
2. Rotate the upper blower tube so that the TOP lock tab is facing
up (Fig. 1).
3. Align the TOP lock tab on the upper blower tube with the groove
on the blower outlet (Fig. 2).
4. Push the upper blower tube onto the blower outlet (Fig. 3).
5. While holding the handle firmly, turn the upper blower tube
clockwise until it locks into place (Fig. 3). The tab on the upper
blower tube should align with the tab on the blower outlet (Fig. 3).
Installing the Lower Blower Tube
1. Align the tab on the lower blower tube with the groove on the
upper blower tube (Fig. 4).
2. Push the lower blower tube onto the upper blower tube (Fig. 4).
3. While holding the handle firmly, turn the lower blower tube
clockwise until it locks into place (Fig. 4). The tab on the lower
blower tube should align with the tab on the upper blower tube.
Fig. 1
TOP Lock Tab
Fig. 2
WARNING:
To avoid serious personal injury and
damage to the unit, shut the unit off before removing or
installing blower tubes.
Upper Blower
Tube
TOP Lock Tab
Groove
Fig. 4
Upper
Blower Tube
Lower
Blower Tube
Tab
Groove
Blower Outlet
Tab
Fig. 3
Upper Blower Tube
Tab
Blower Outlet
Upper Blower
Tube
Loading ...
Loading ...
Loading ...