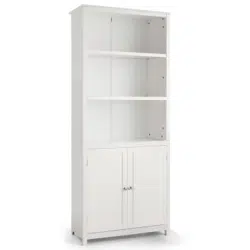
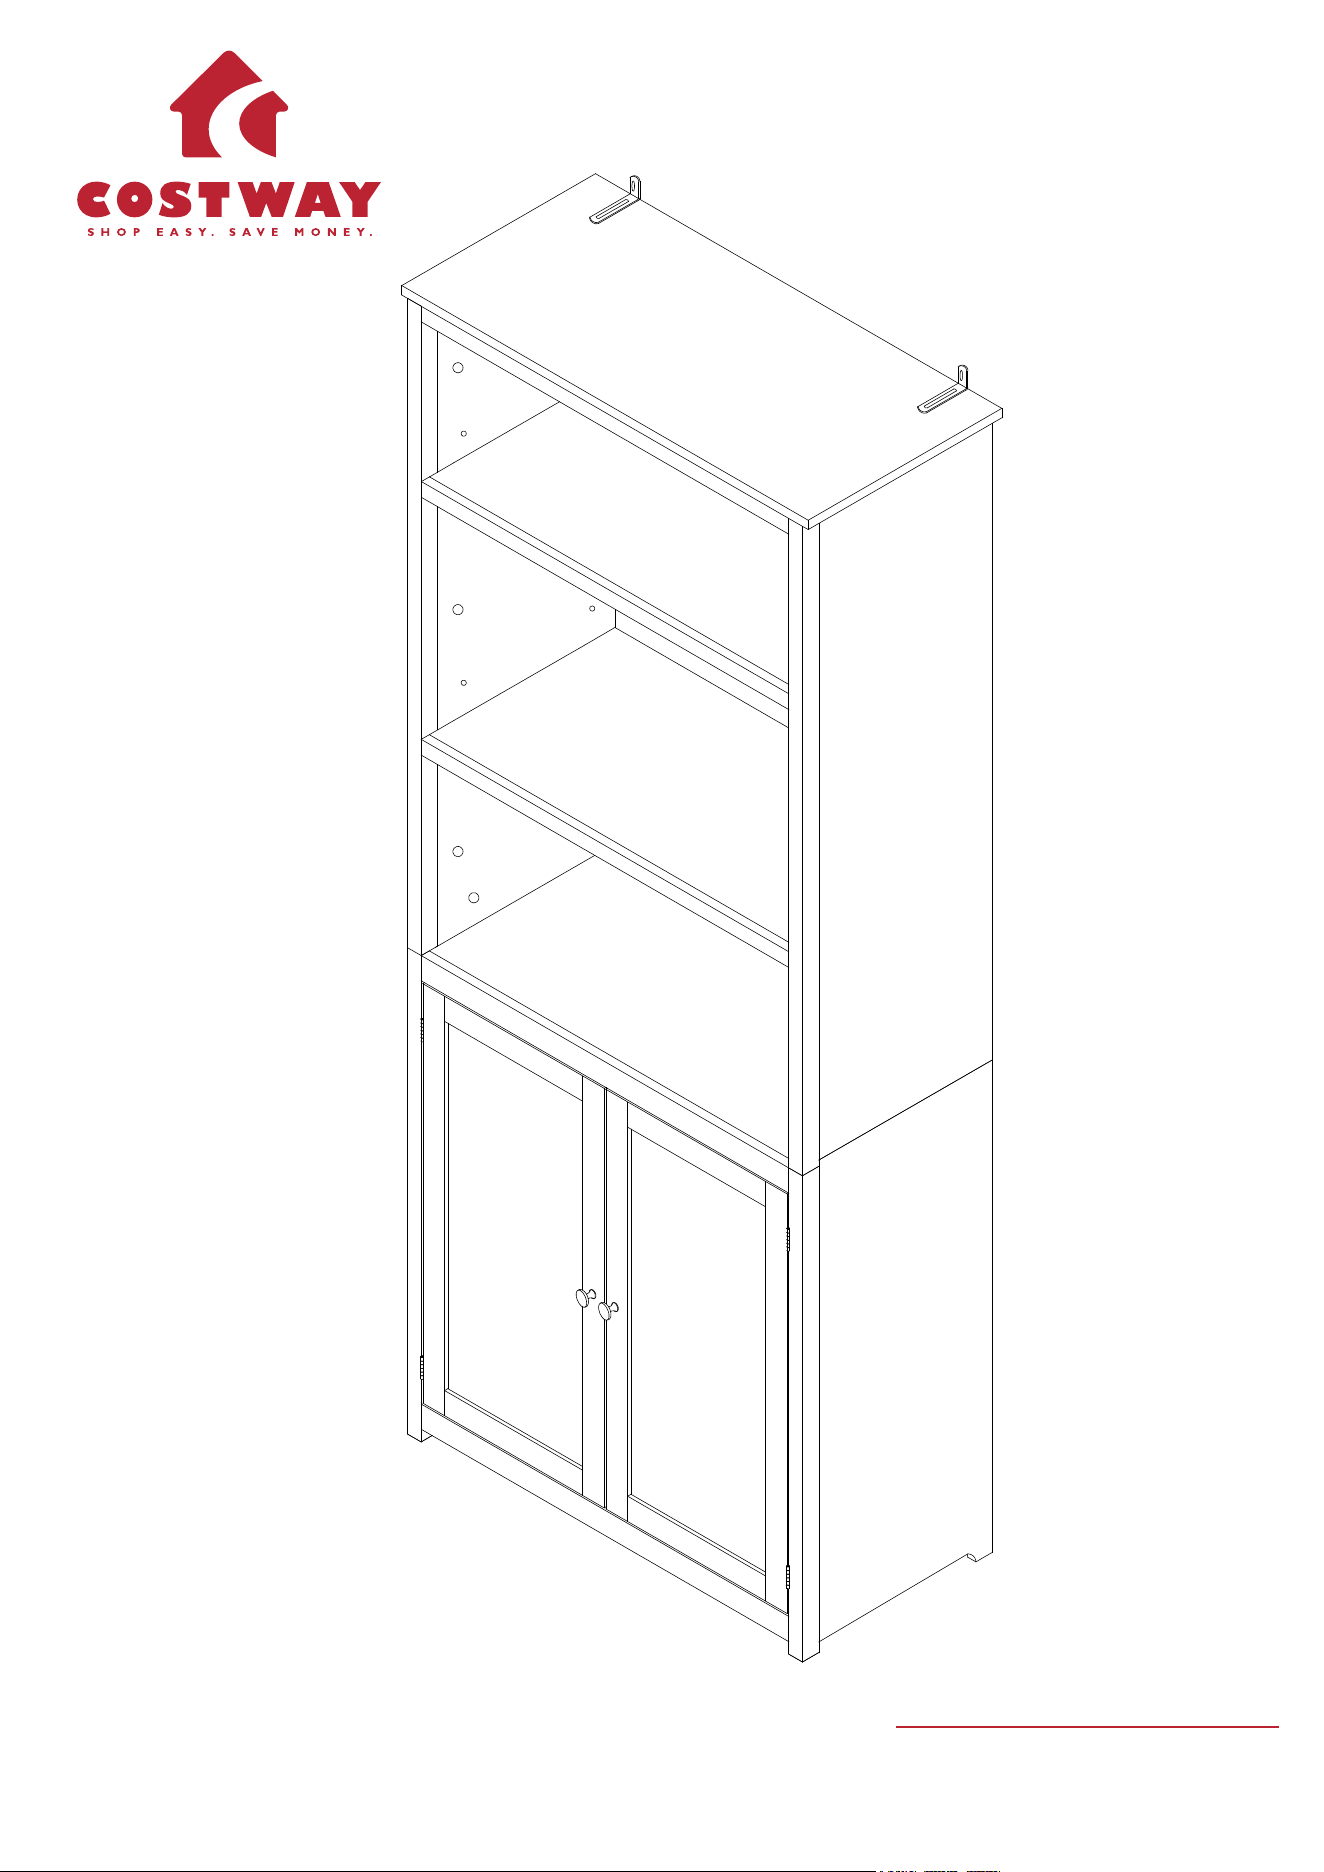
USER'S MANUAL
Bookcase
HW61830
Top Panel
Upper Side Panel
Lower Back
Connect Bar
Top Connect
Bar
Upper Adjustable
Shelf
Front Deco Rail
for Upper Shelf
Left Upper
Deco Rail
Right Upper
Deco Rail
Middle and
Bottom Shelf
Front Deco Rail
for Middle Shelf
Magnetic Catch
Block
Lower Shelf
Upper Back
Connect Bar
Left Lower
Deco Rail
Right Lower
Deco Rail
Front Deco Rail for
Middle and Bottom
Shelf
Lower Left
Side Panel
Lower Right
Side Panel
Left Door
Right Door
Upper Back Panel
Lower Back Panel
1
1/11
1 pc
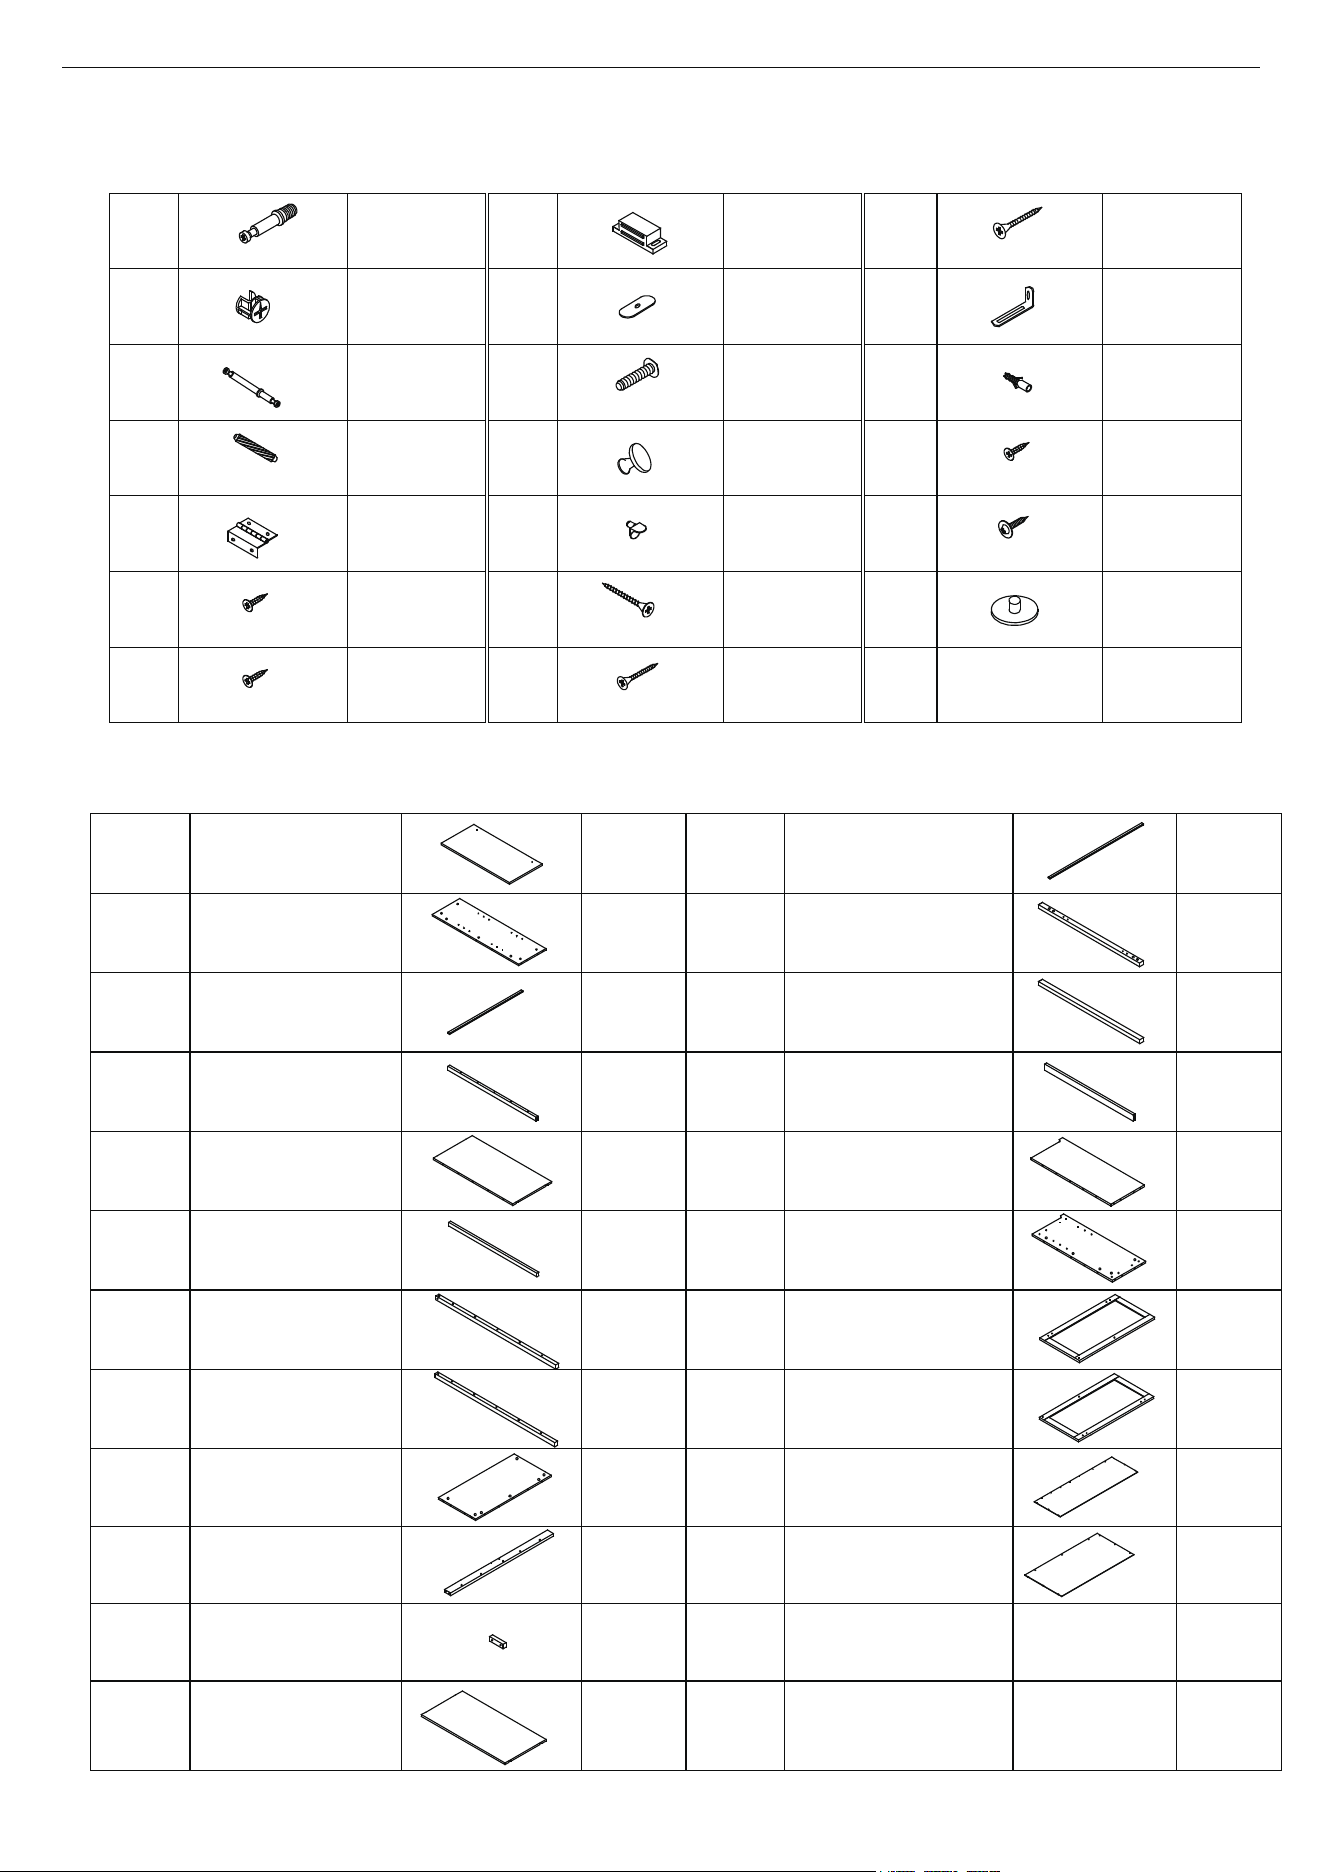
Hardware List
Parts List
38 pcs
2 pcs
18 pcs
A
B
I
J
1 pc
PRODUCT ASSEMBLY
2 pcs
3.5*40mm
46 pcs
8*30mm
6*35mm
15*10mm
4 pcs
2 pcs
C
D
G
H
44 pcs
K
L
4 pcs
12 pcs
2 pcs
Q
R
E
F
O
P
M
N
3*14mm
3*12mm
4*16mm
4*25mm
4*30mm
2
3
4
5
6
7
8
9
10
11
12
13
14
15
16
17
18
19
20
21
22
2 pcs
1 pc
1 pc
2 pcs
2 pcs
1 pc
1 pc
2 pcs
1 pc
1 pc
1 pc
1 pc
1 pc
1 pc
1 pc
1 pc
1 pc
1 pc
1 pc
2 pcs
2 pcs
3.5*12mm
S
2.5*12mm
2 pcs
2 pcs
3 pcs
2 pcs
2 pcs
2 pcs
38 pcs
T
38 pcs
2/11
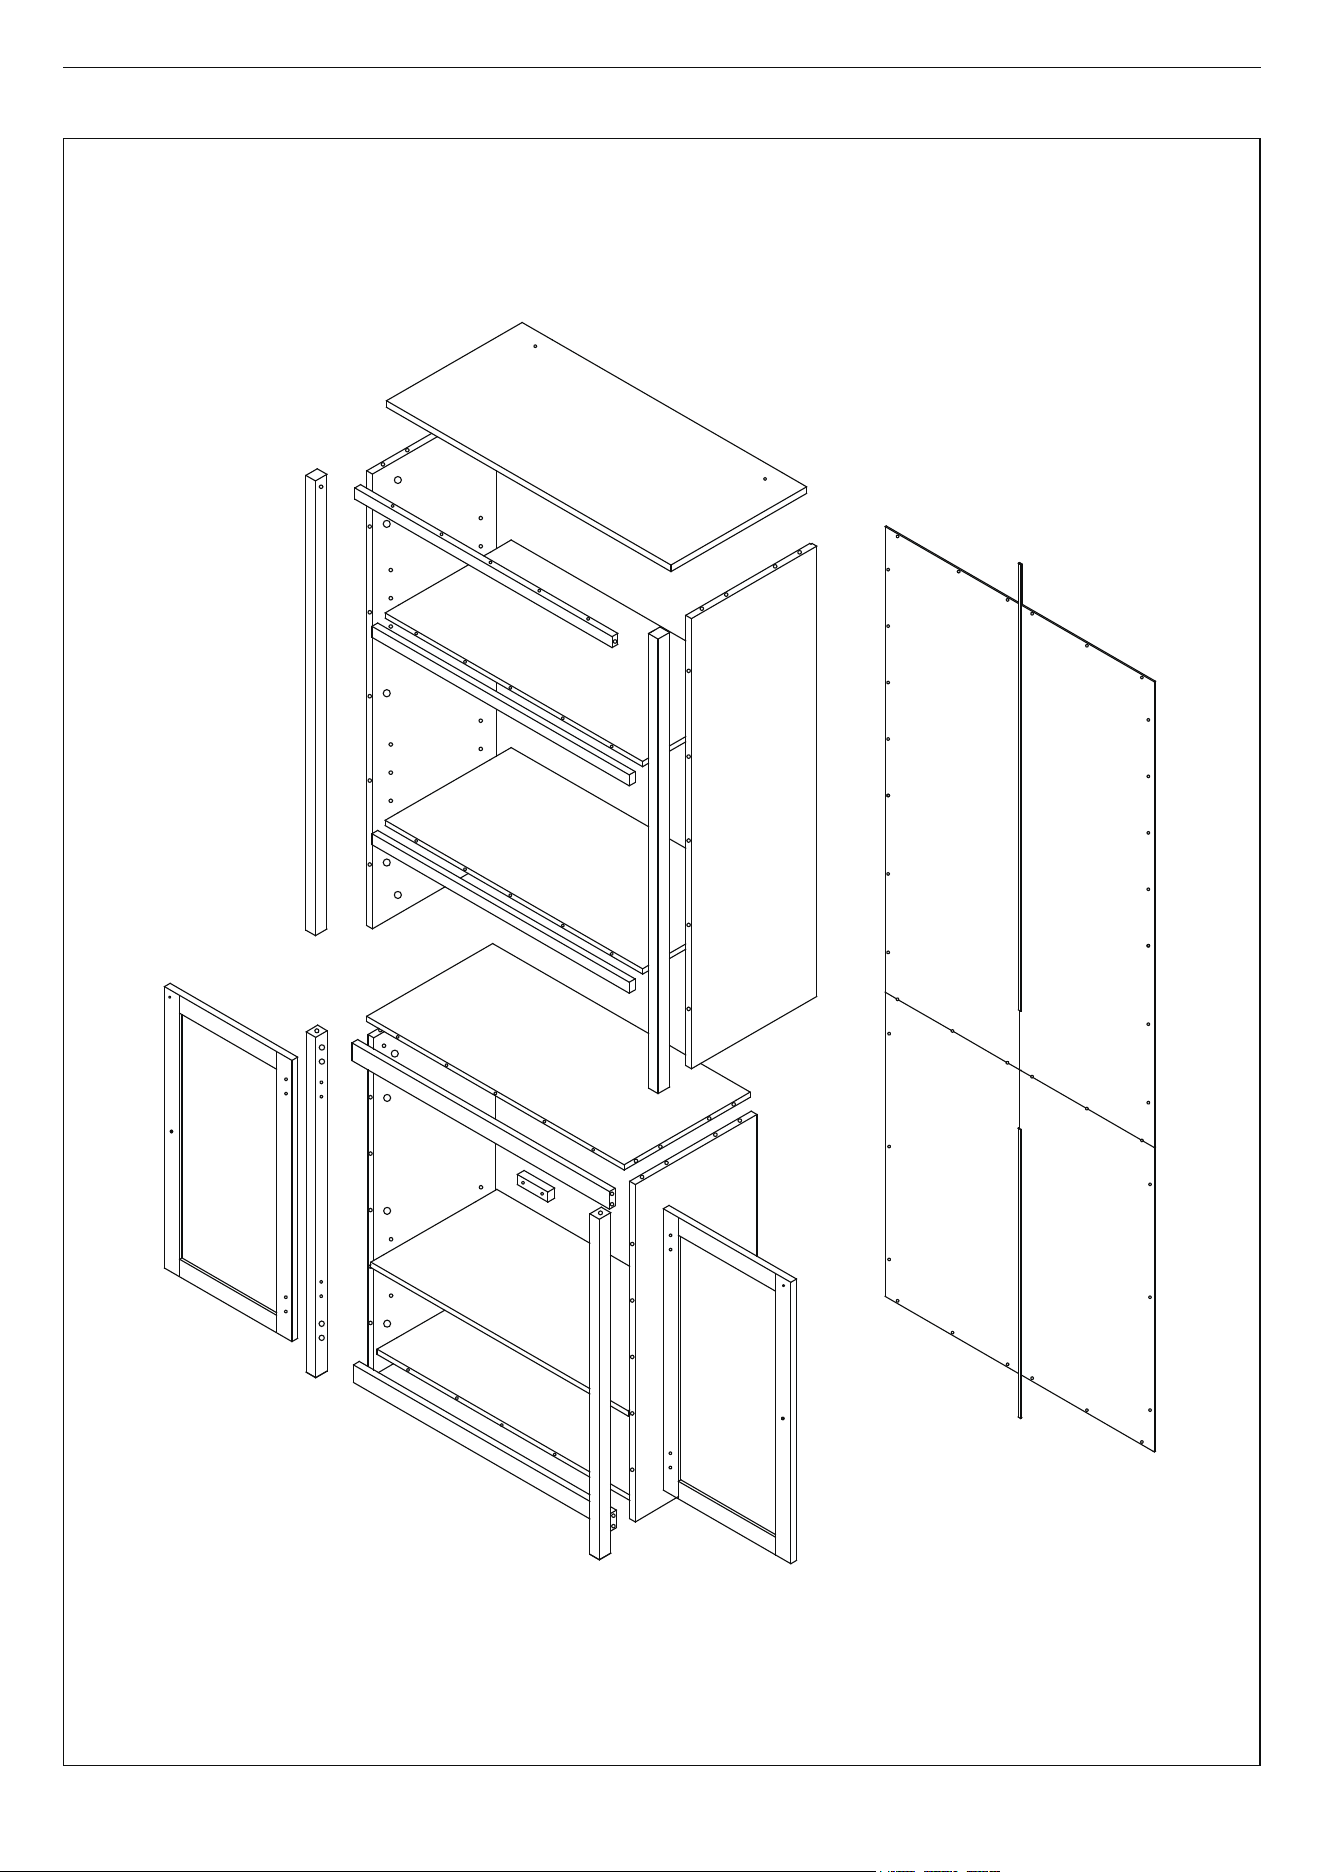
Part List Assembly Overview
1
PRODUCT ASSEMBLY
2
2
4
18
5
5
6
6
7
8
9
16
15
14
11
10
12
9
17
19
20
21
21
22
22
13
3
20
E
G
G
I
G
E
10
11
N
F
H
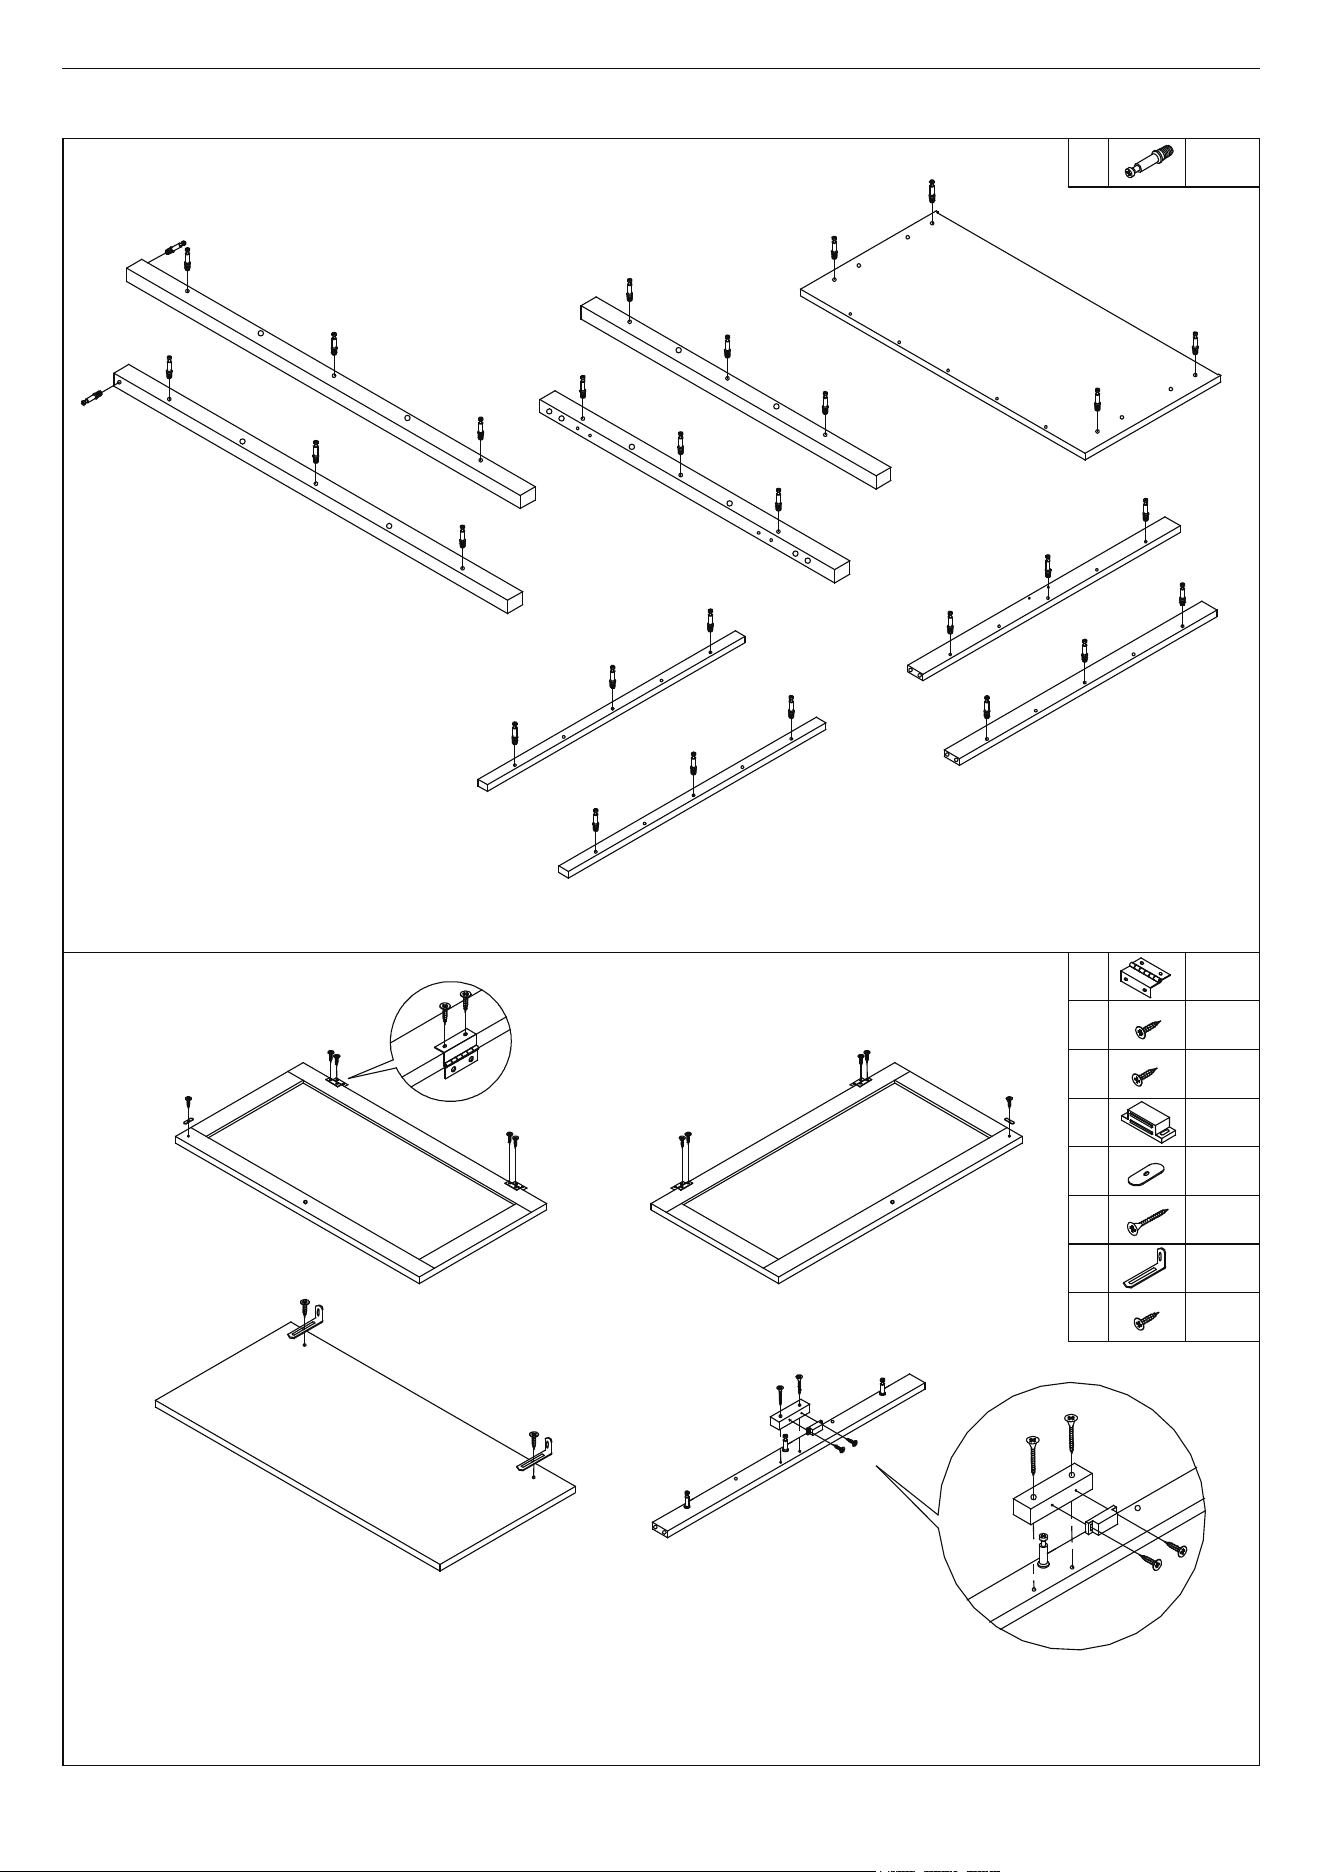
Screw In Cam-bolt (A) into the hole
on Deco Rail (6, 7, 8, 10, 14, 15 &
16) and Top Panel (1) as show.
1) Attach Hinge (E) and Magnetic bar (I) to Door (19 & 20) with Screw (G).
2) Attach Bracket (P) to Top Panel (1) with Screw (R).
3) Attach Magnetic Catch Block (11) to Front Deco Rail for Middle Shelf (10) with Screw (N) as shown.
4) Attach Magnetic Catch (H) to (11) with Screw (F) as shown.
11
N
H
F
Step 1
3/11
30 pcs
A
PRODUCT ASSEMBLY
A
A
A
A
A
A
A
A
A
1
7
8
14
15
16
10
6
6
19
1
4 pcs
E
2 pcs
F
10 pcs
G
1 pc
H
2 pcs
I
2 pcs
N
2 pcs
P
2 pcs
R
E
G
G
I
R
P
Step 2
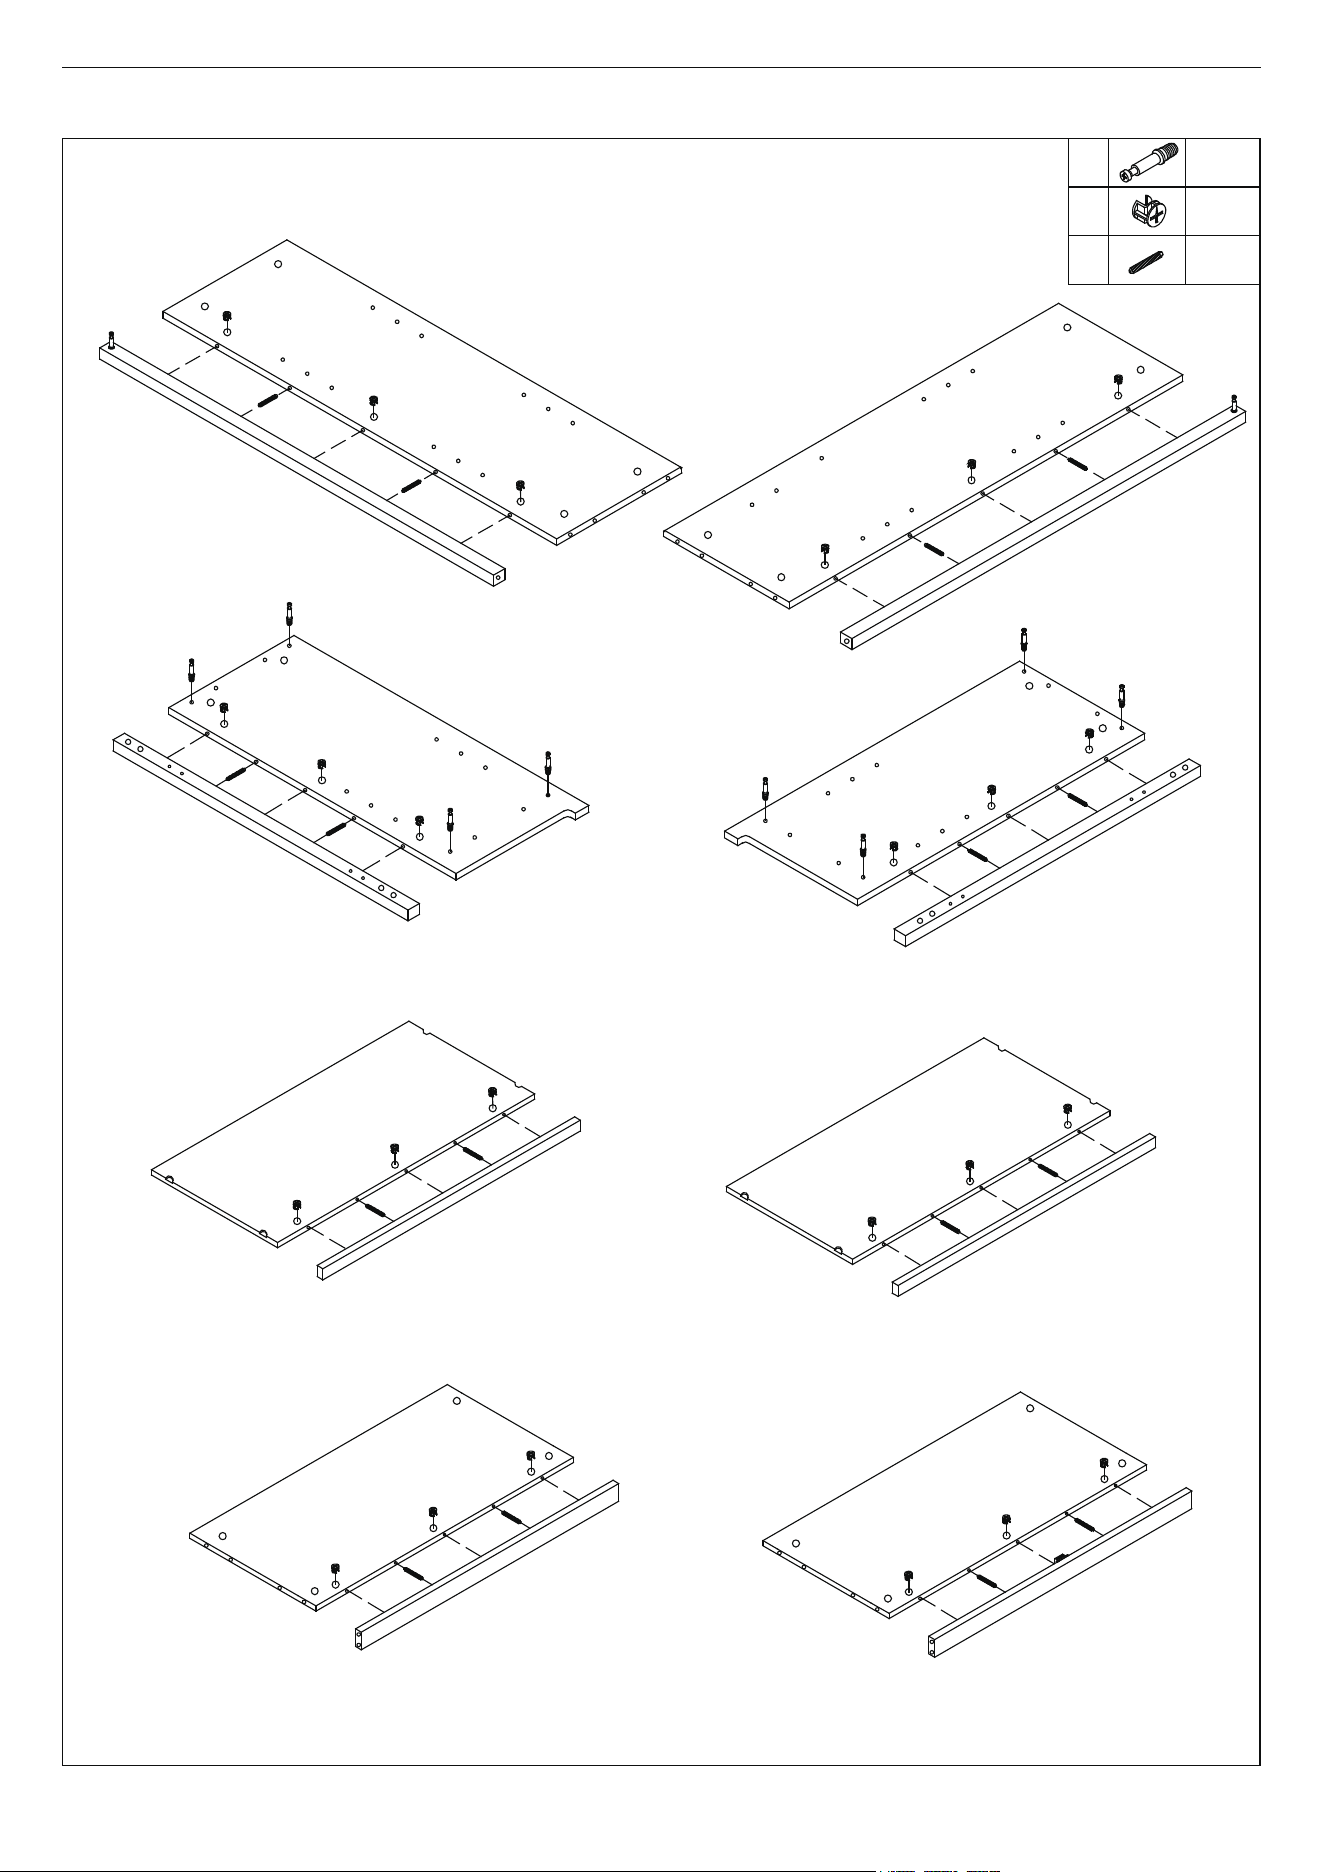
1) Attach Deco Rail (7 & 8) to Upper Side Panel (2) with Wood
Dowel (D) and Cam-bolt on (7 & 8). Insert Cam-lock (B) and
turn clockwise to lock onto Cam-bolt.
2) Attach Deco Rail (14 & 15) to Lower Side Panel (17 & 18) with Wood
Dowel (D) and Cam-bolt on (14 & 15). Insert Cam-lock (B) and turn
clockwise to lock onto Cam-bolt.
3) Attach Deco Rail (6) to Upper Adjustable Shelf (5) with Woo
d
Dowel (D) and Cam-bolt on (6). Insert Cam-lock (B) and turn
clockwise to lock onto Cam-bolt.
4) Attach Deco Rail (10 & 16) to Middle and Bottom Shelf (9) with Wood
Dowel (D) and Cam-bolt on (10 & 16). Insert Cam-lock and turn
clockwise to lock onto Cam-bolt.
Step 3
4/11
8 pcs
A
PRODUCT ASSEMBLY
7
8
2
2
15
14
17
18
5
5
6
6
10
16
9
9
B
D
D
D
D
D
D
B
B
B
B
B
B
B
A
A
B
16 pcs
D
24 pcs
D
D
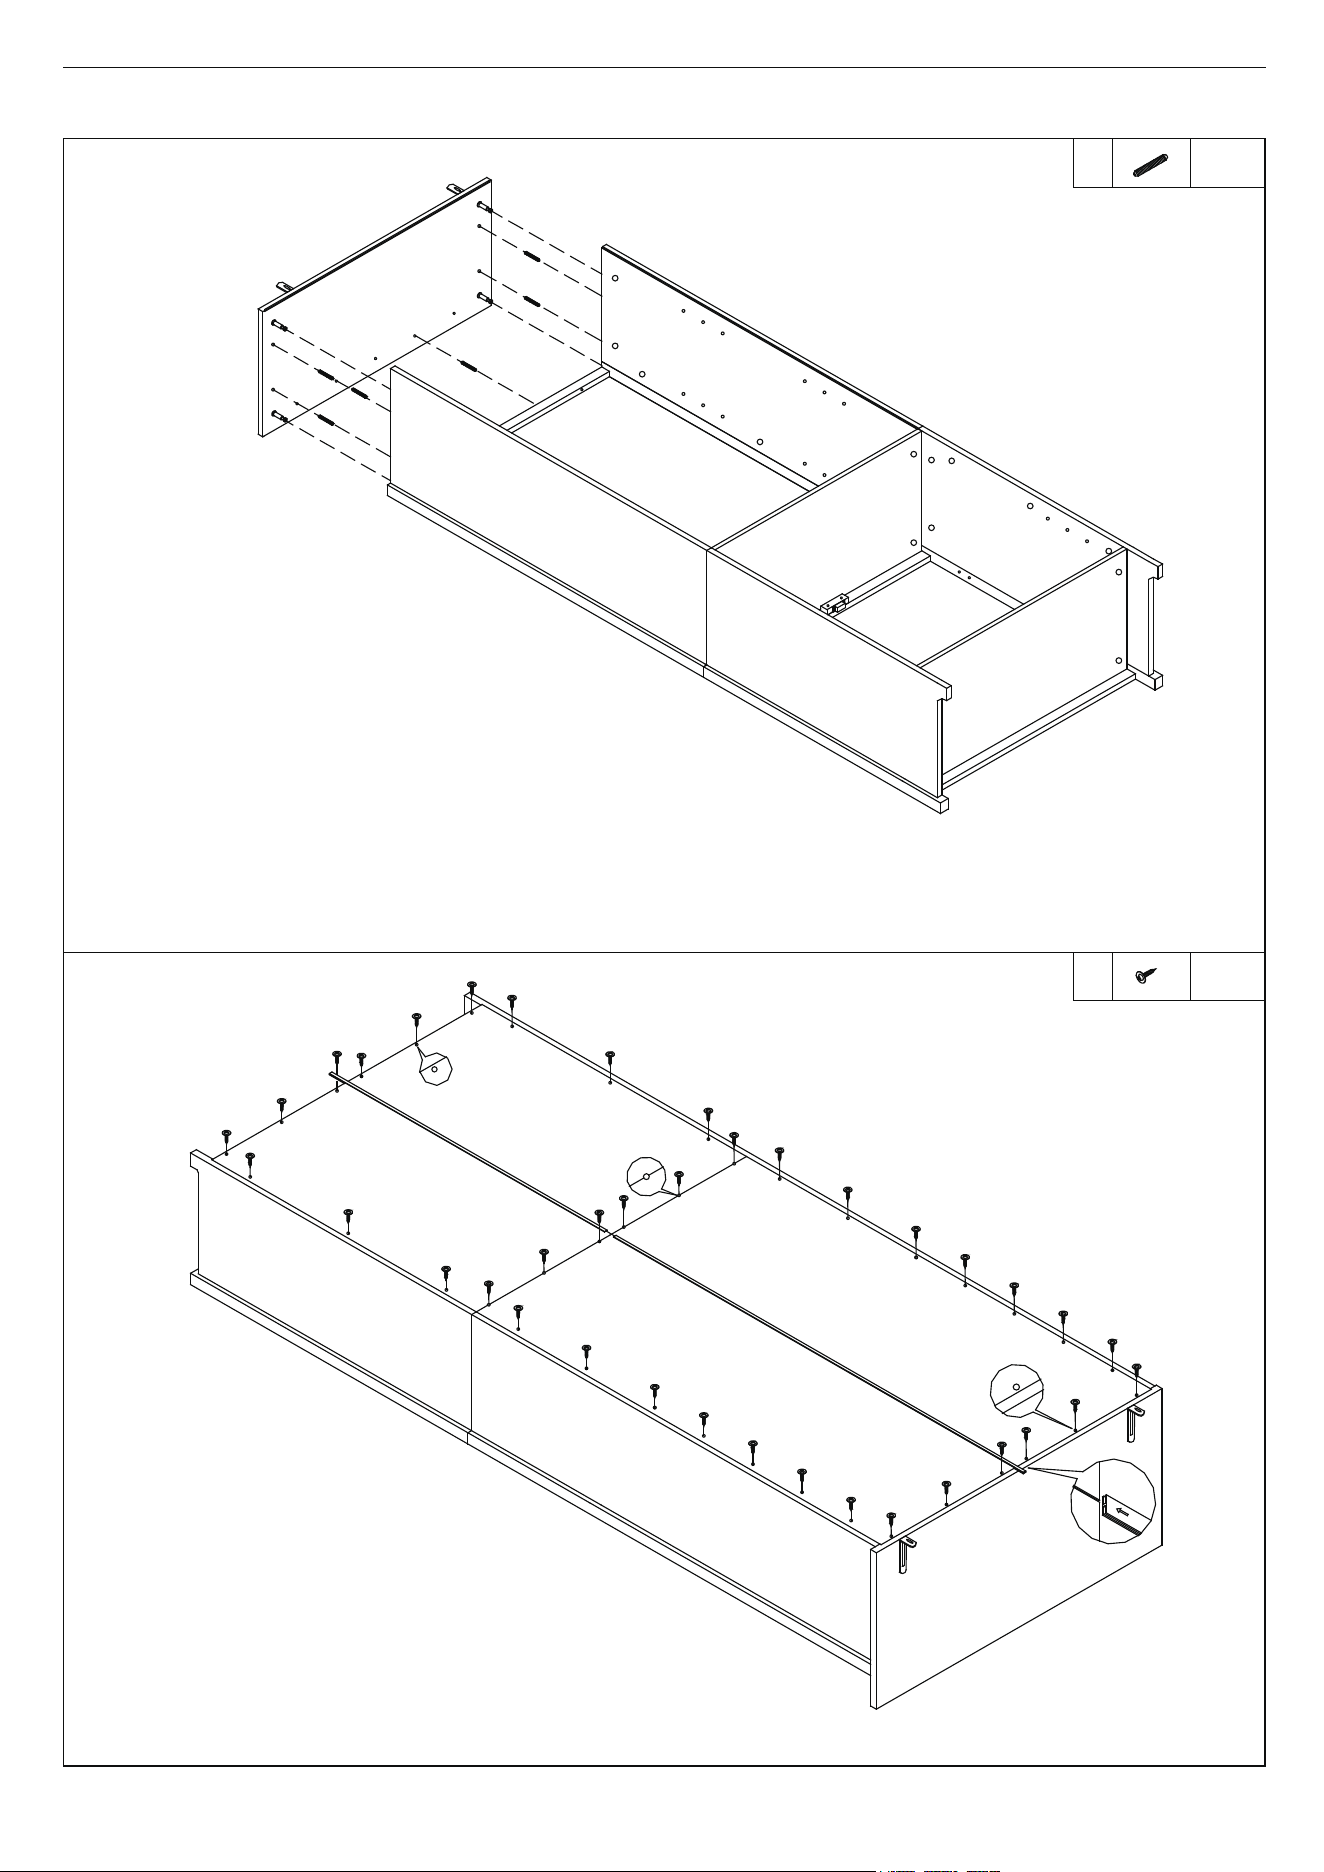
1) Insert Wood Dowel (D) into the holes on Shelf (9) and Deco Rail (10 & 16).
2) Attach Shelf (9) to Lower Right Side Panel (18).
3) Insert Cam-lock (B) to the holes on (9) and turn clockwise to lock onto Cam-bolt.
10
16
1) Insert Wood Dowel (D) into the holes on Shelf (9) and Deco Rail (10 & 16).
2) Attach Lower Left Side Panel (17).
3) Insert Cam-lock (B) to the holes on (9) and turn clockwise to lock
onto Cam-bolt.
9
9
10
16
Step 4
5/11
4 pcs
B
PRODUCT ASSEMBLY
D
8 pcs
Step 5
18
9
9
D
B
4 pcs
B
D
8 pcs
D
B
17
D
C
C
D
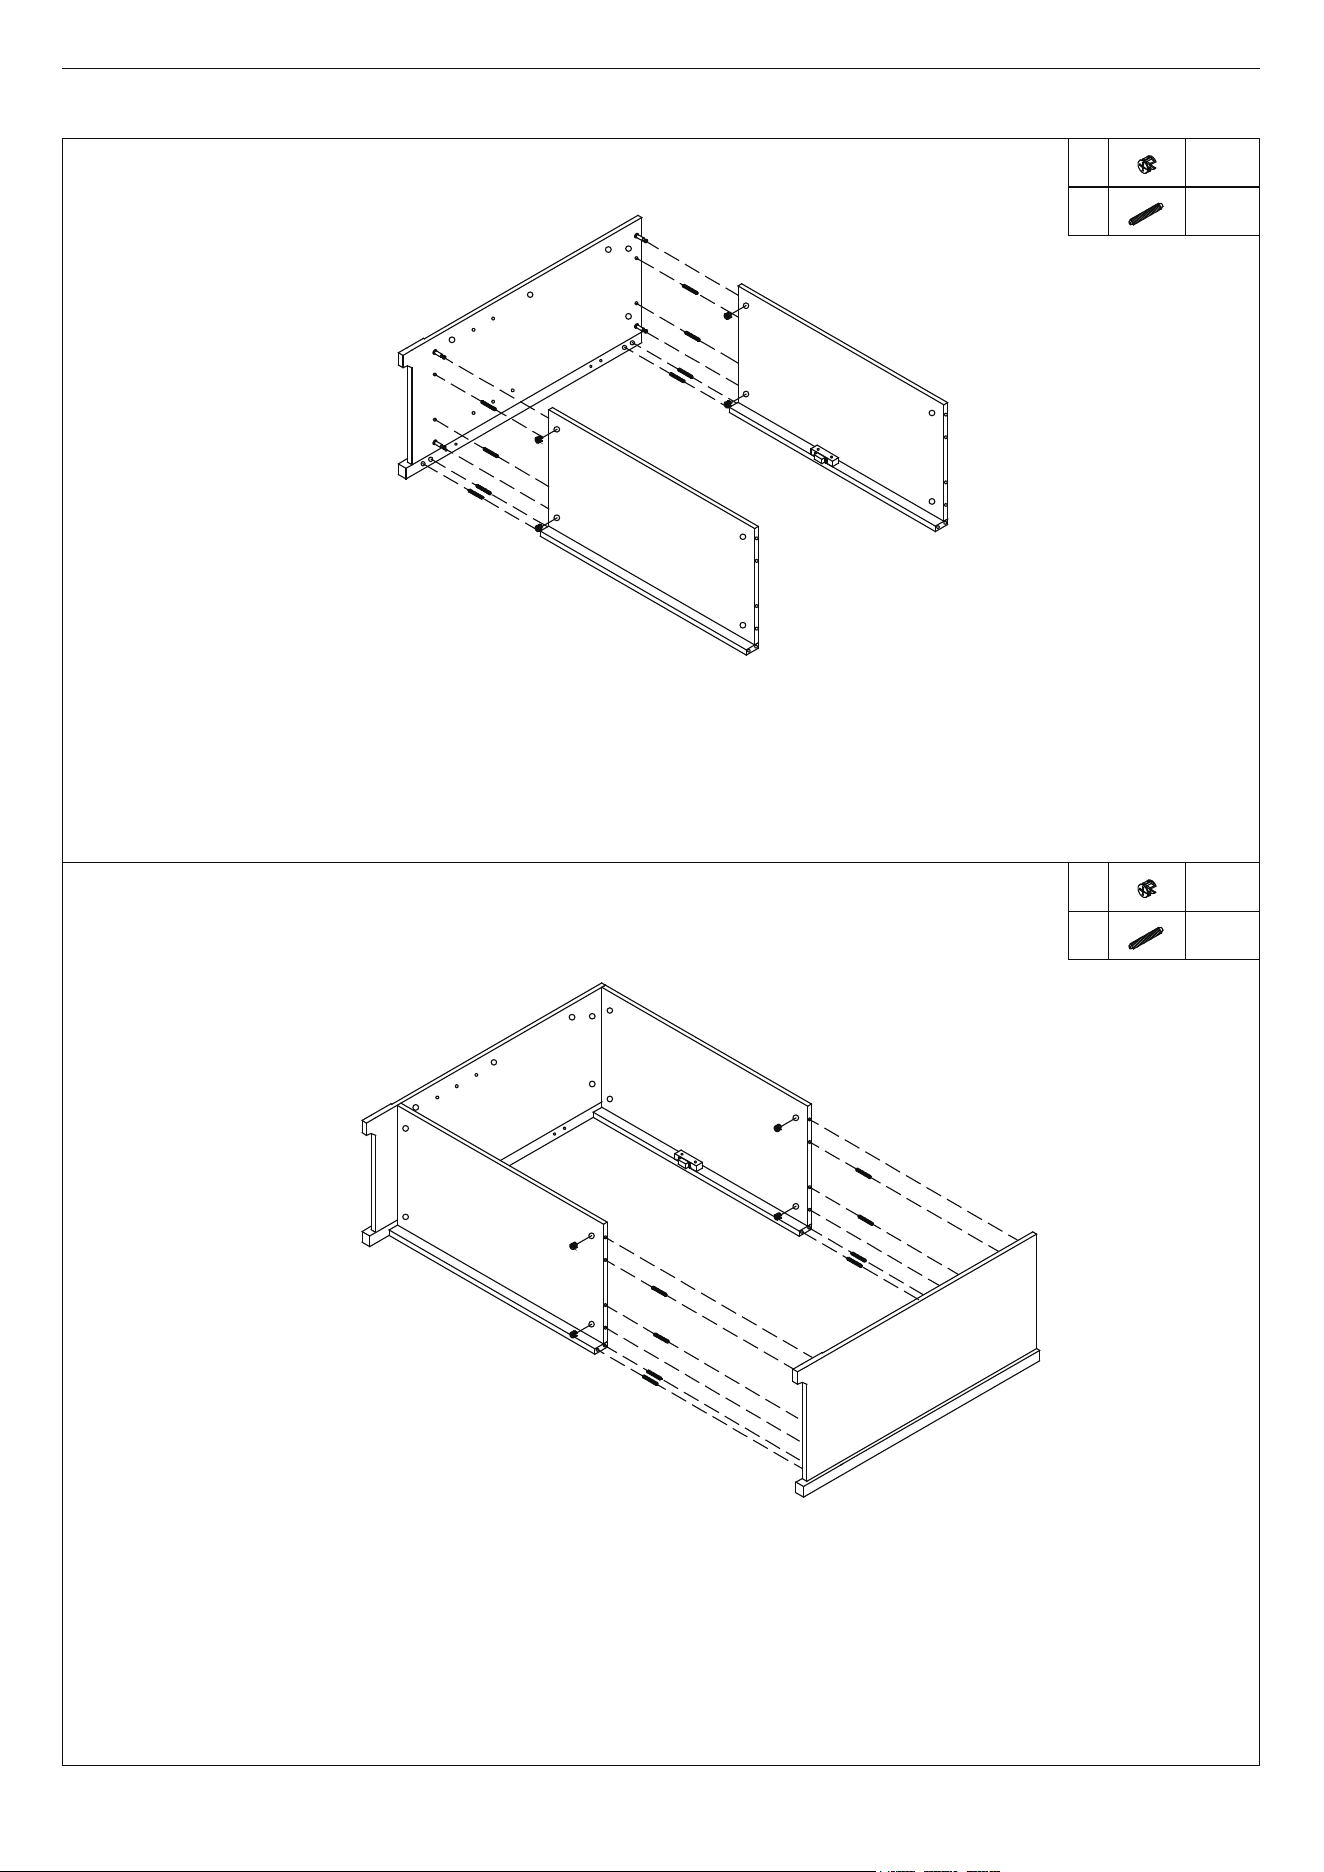
1) Insert Cam-bolt (C) and Wood Dowel (D) into the holes on Middle Shelf (9).
2) Insert Cam-lock (B) to the holes on (17 & 18) and turn clockwise to lock onto Cam-bolt.
3) Attach Upper Side Panel (2) to (9) via Wood Dowels and Cam-bolts on (9).
D
6 pcs
9
18
17
1) Attach Top Connect Bar (4) to Side Panel (2).
Important: The large hole is in under side.
2) Insert Cam-lock (B) to the holes on (4) and turn clockwise to lock onto Cam-bolt.
3) Insert Cam-lock (B) to the holes on (2) and turn clockwise to lock onto Cam-bolt.
Important: If you can't lock it, please loose the cam-lock on (17 & 18), tighten two Cam-locks
when both are in place.
2
2
18
17
large
8
7
Step 6
6/11
PRODUCT ASSEMBLY
B
6 pcs
Step 7
C
4 pcs
B
4 pcs
2
2
D
C
B
4
1) Insert Wood Dowel (D) into the holes on Side Panel (2).
2) Attach Top Panel (1) to (2) via Wood Dowels and Cam-bolts on (1).
3) Insert Cam-lock (B) to the holes on (2) and turn clockwise to lock onto Cam-bolt.
2
2
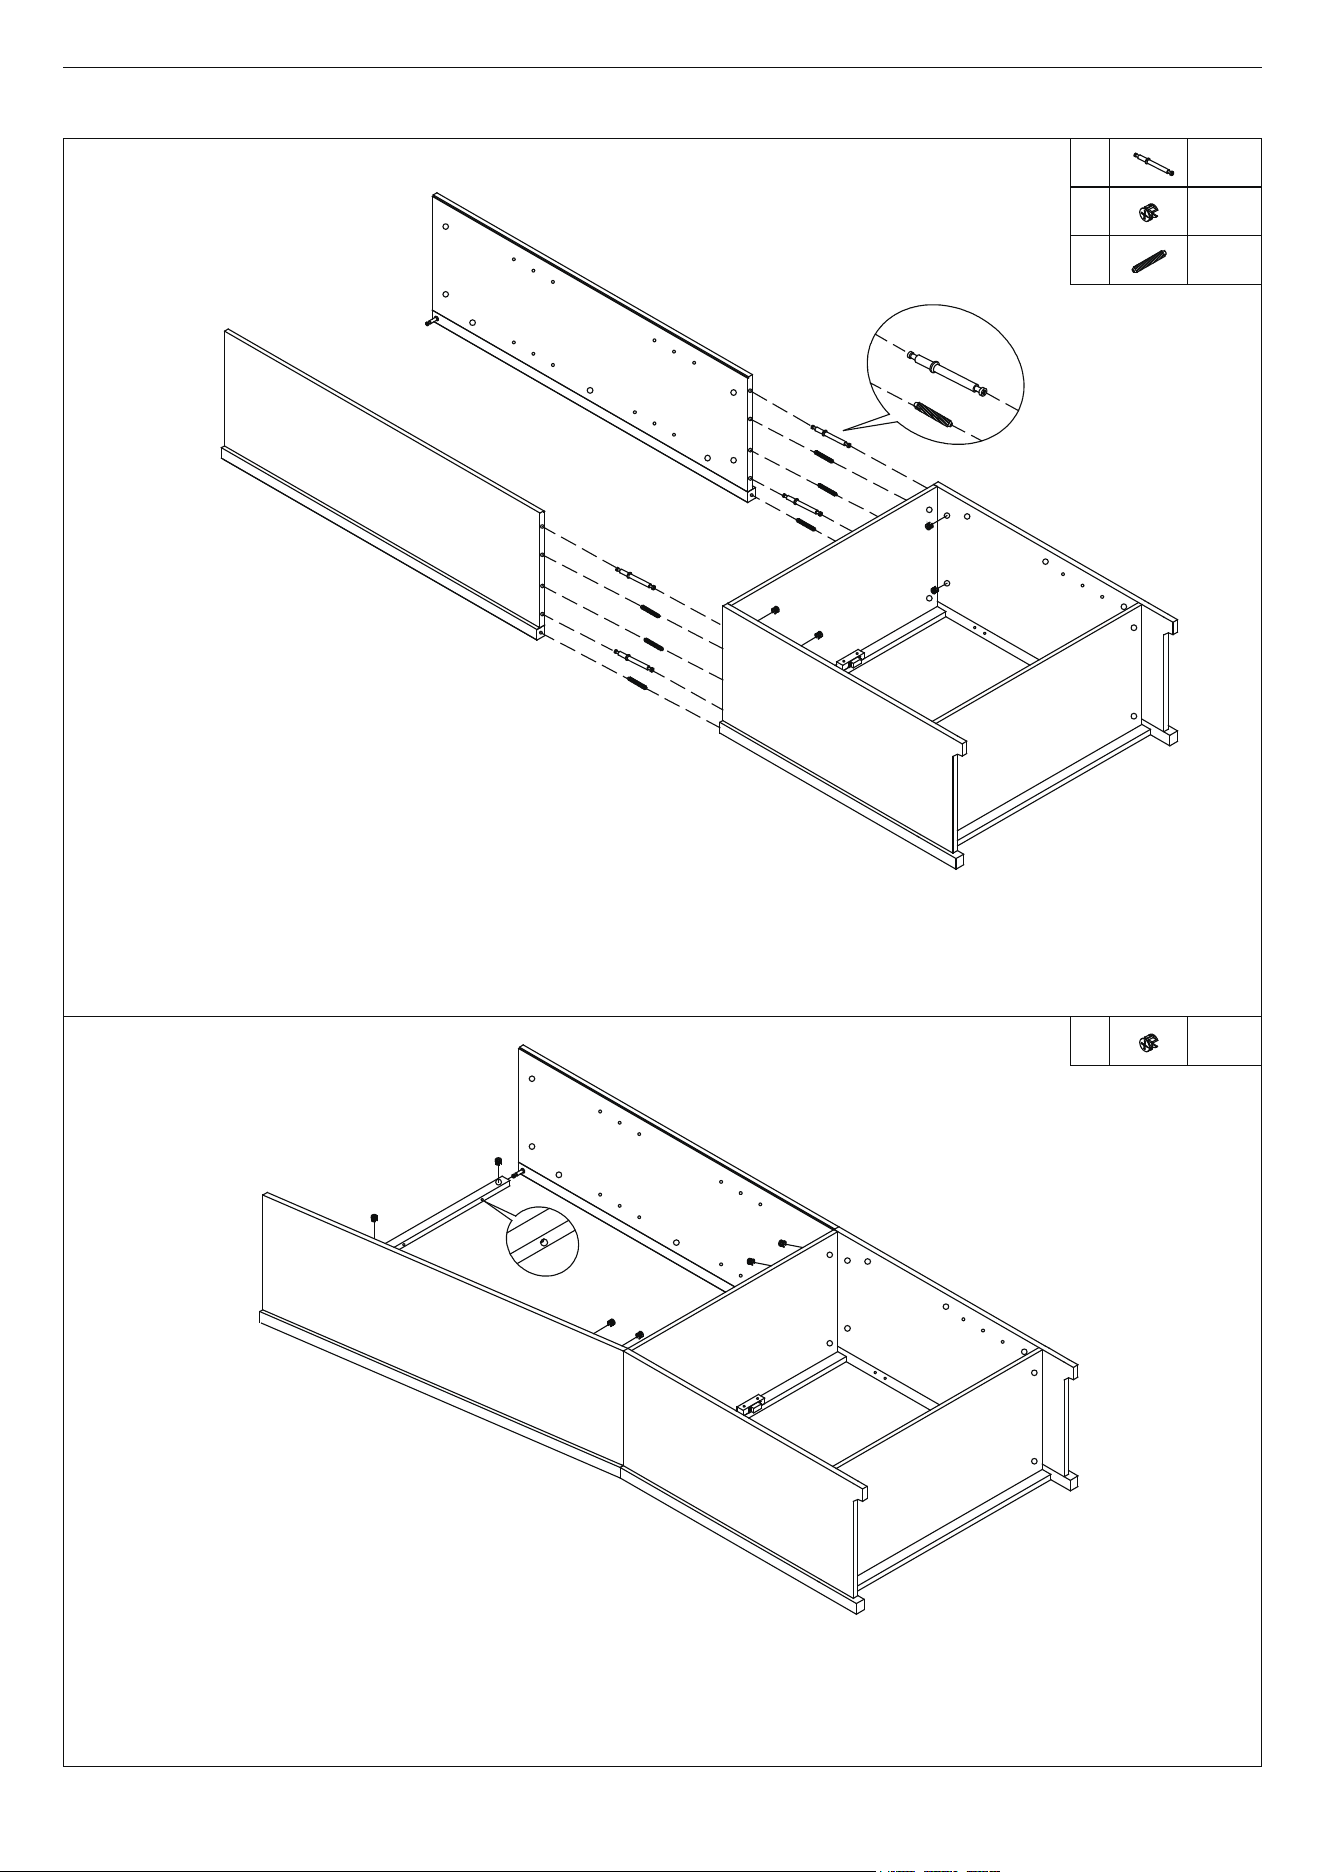
1) Attach Back Panel (21 & 22) with Screw (S).
Important: When you attach first back panel,
please assure the back panel is fitting well with
the top panel and side panel. Don't r
emain gap
between them, then tighten the Screw (S).
2) Slide in Connect Bar (3 & 13) as shown.
13
3
3
22
21
21
Step 8
7/11
PRODUCT ASSEMBLY
38 pcs
S
Step 9
1
D
6 pcs
D
S
22
3
13
22
21
21
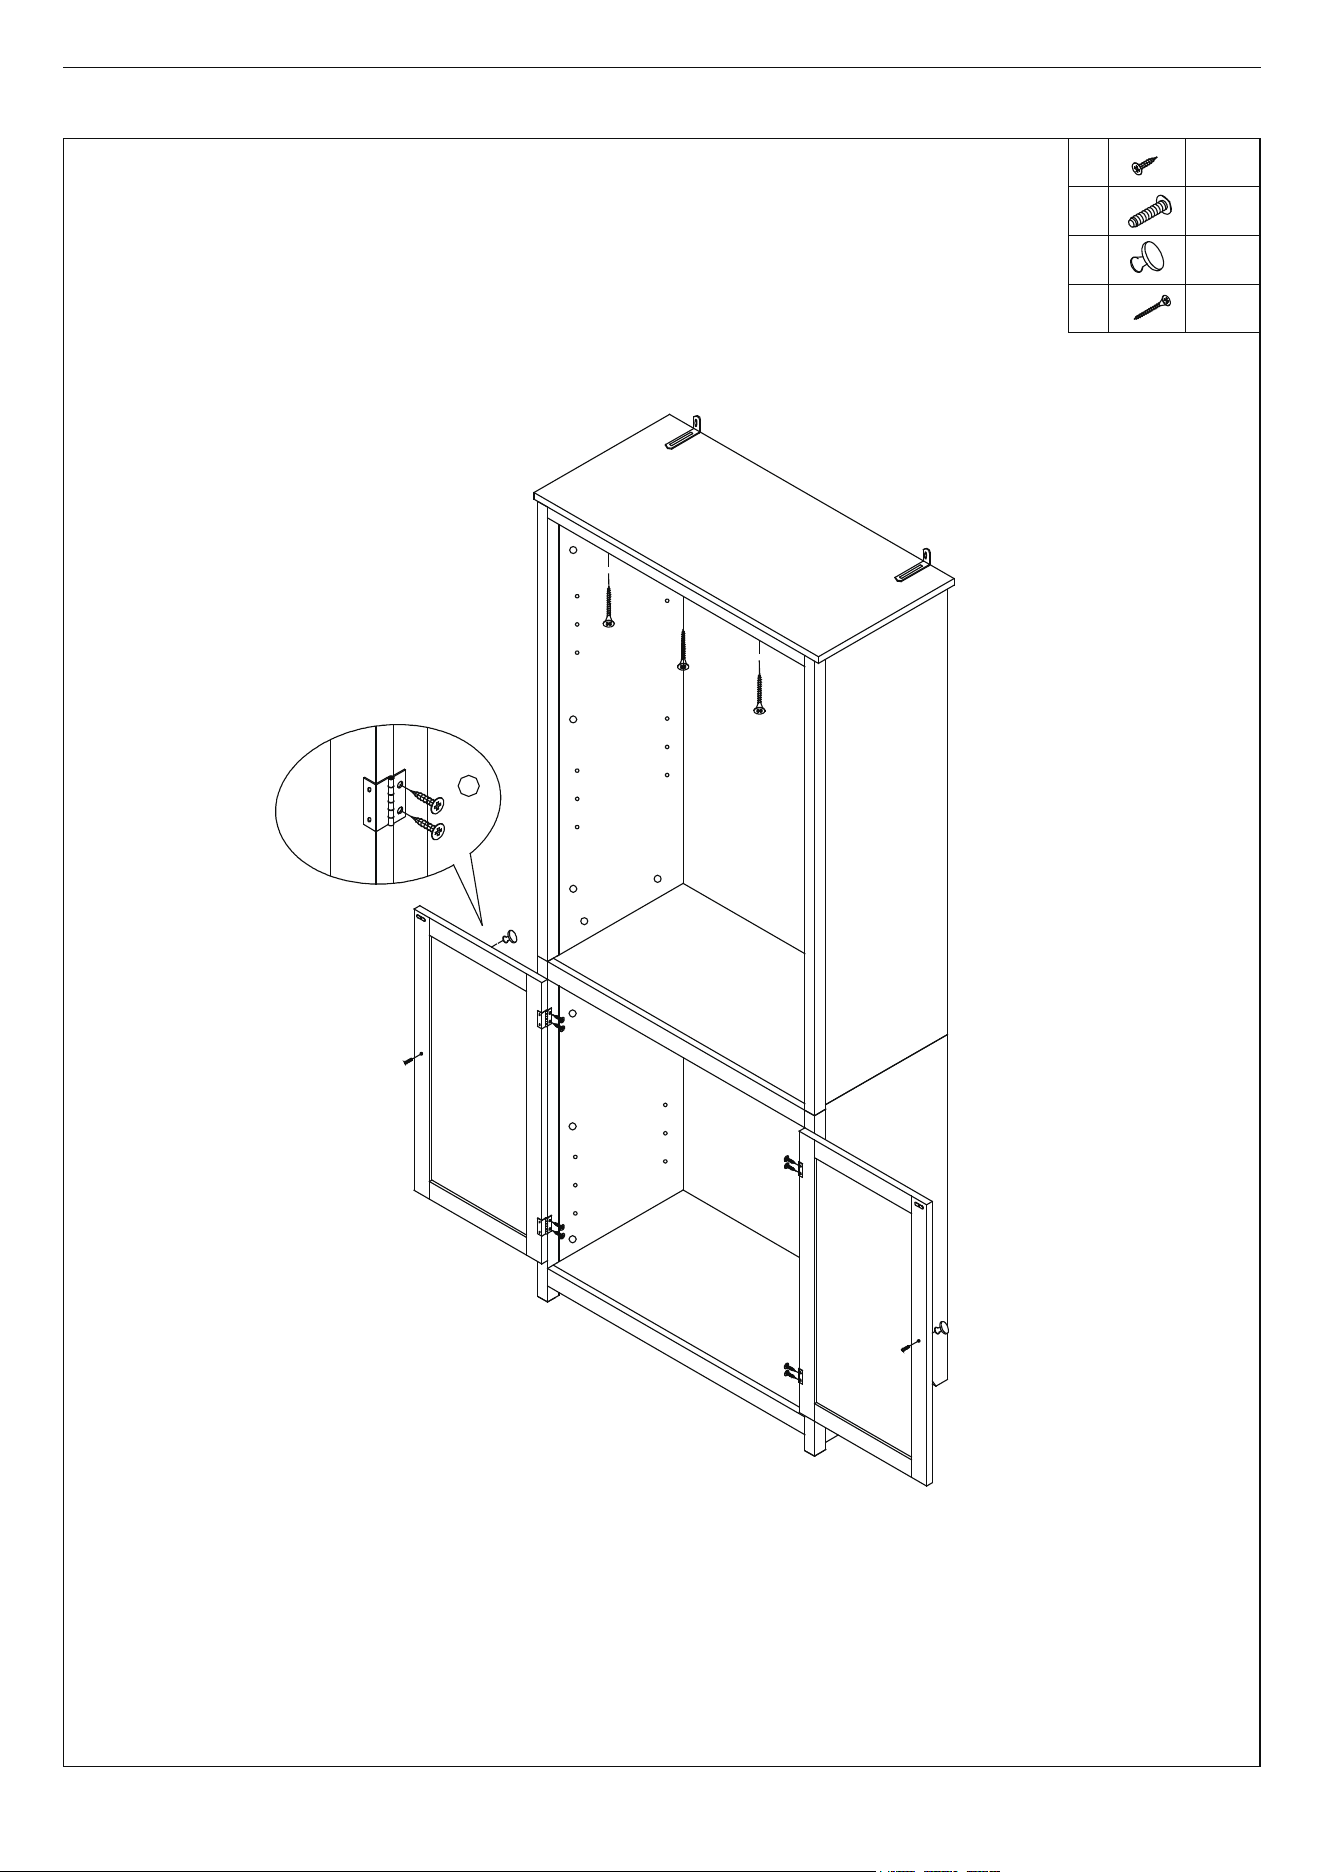
1) Affix Top Connect Bar (4) to Top Panel (1) with Screw (O).
2) Attach Door (19 & 20) to Side Panel with Screw (G).
3) Attach Knob (K) to Door (19 & 20) with Knob Bolt (J).
4
1
G
19
Step 10
8/11
PRODUCT ASSEMBLY
J
K
8 pcs
G
J
K
2 pcs
2 pcs
G
19
20
O
3 pcs
O
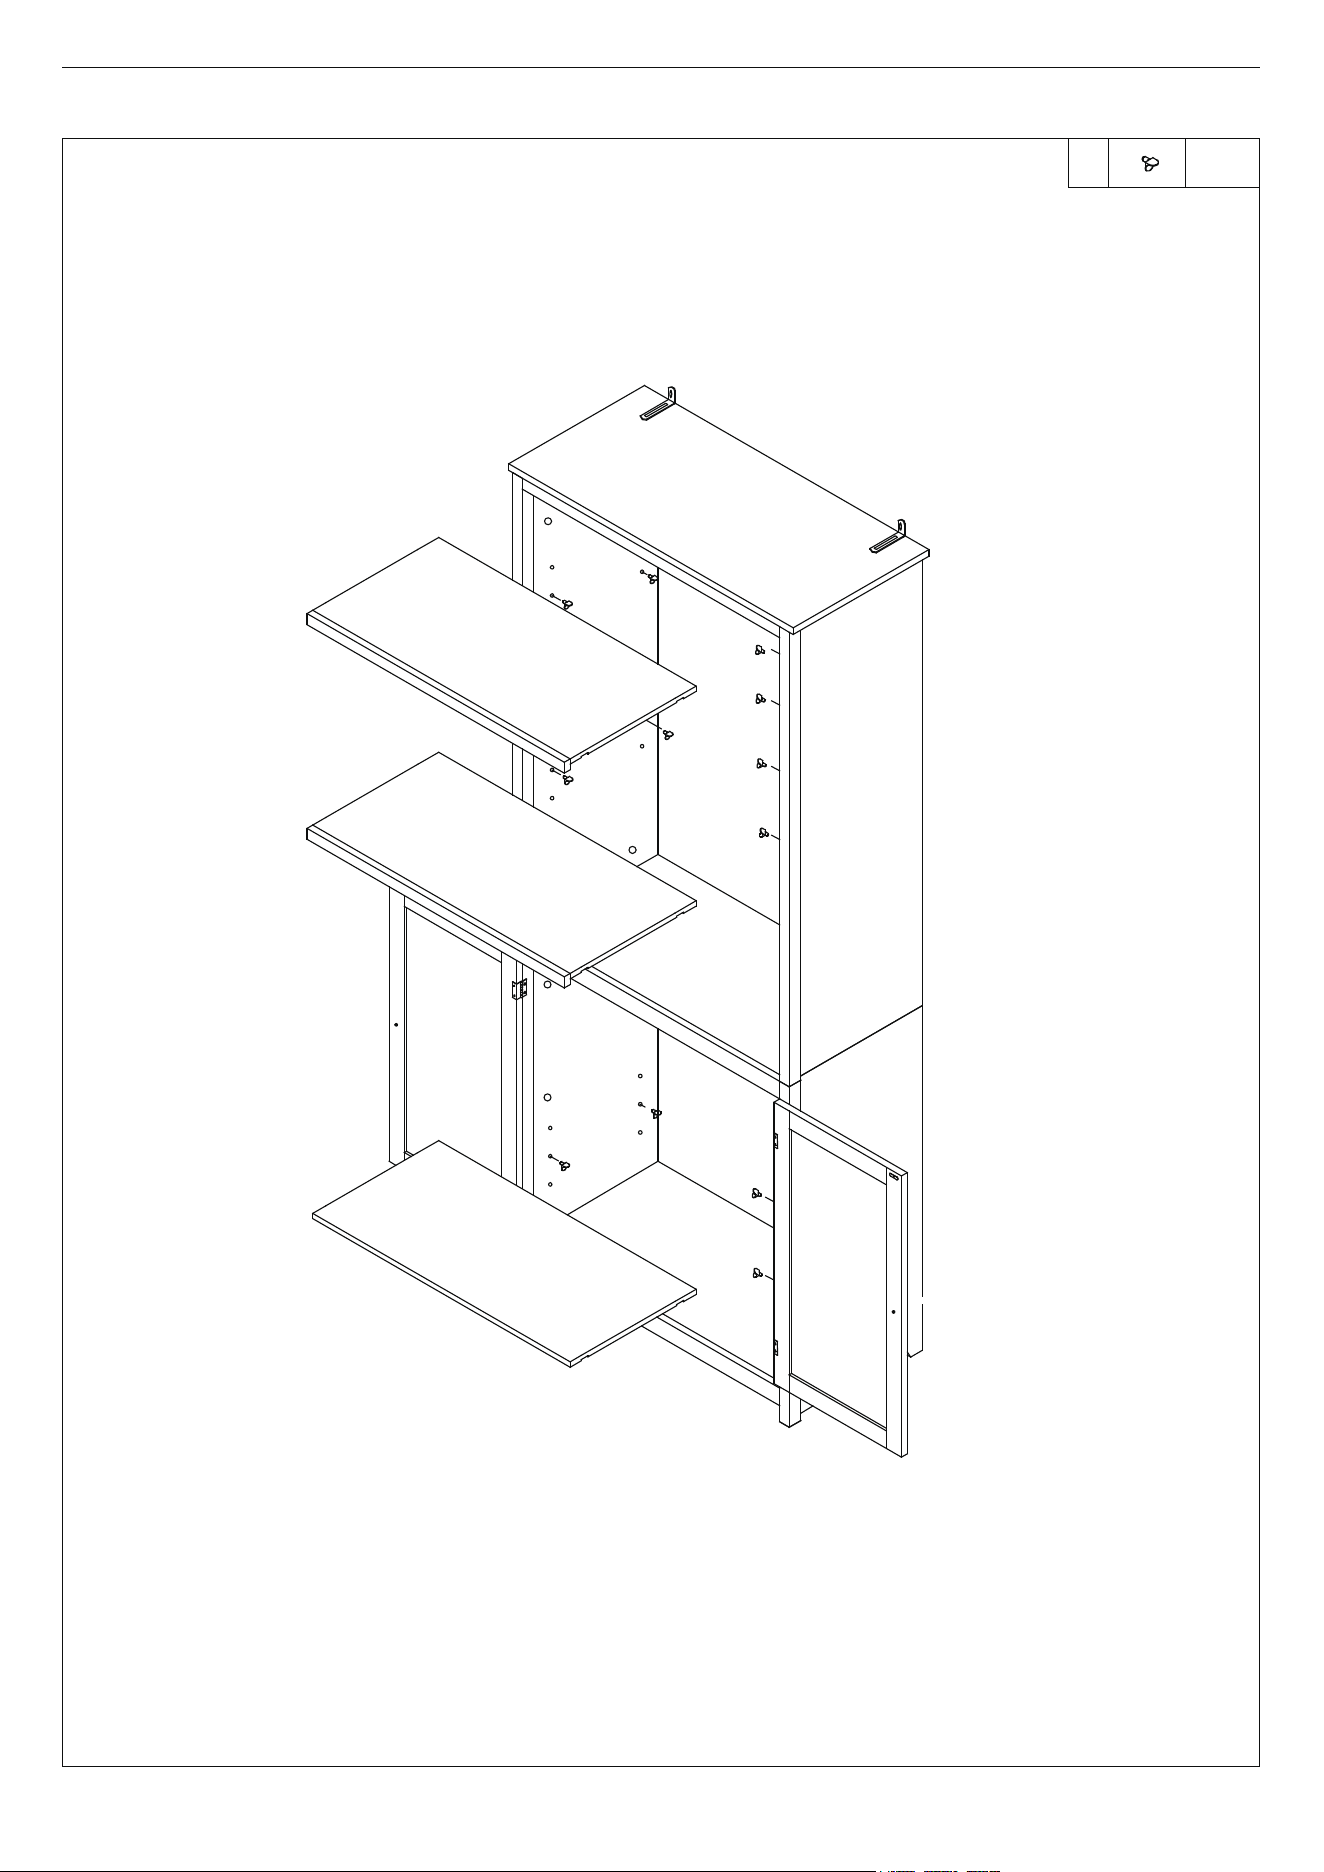
Insert Shelf Pin (L) and place Shelf (5 & 12) on it.
L
L
Step 11
9/11
PRODUCT ASSEMBLY
5
5
12
12 pcs
L
Cover the exposed holes of Cam-lock with Plastic Cover (T).
Step 12
10/11
PRODUCT ASSEMBLY
38 pcs
T
T
X38
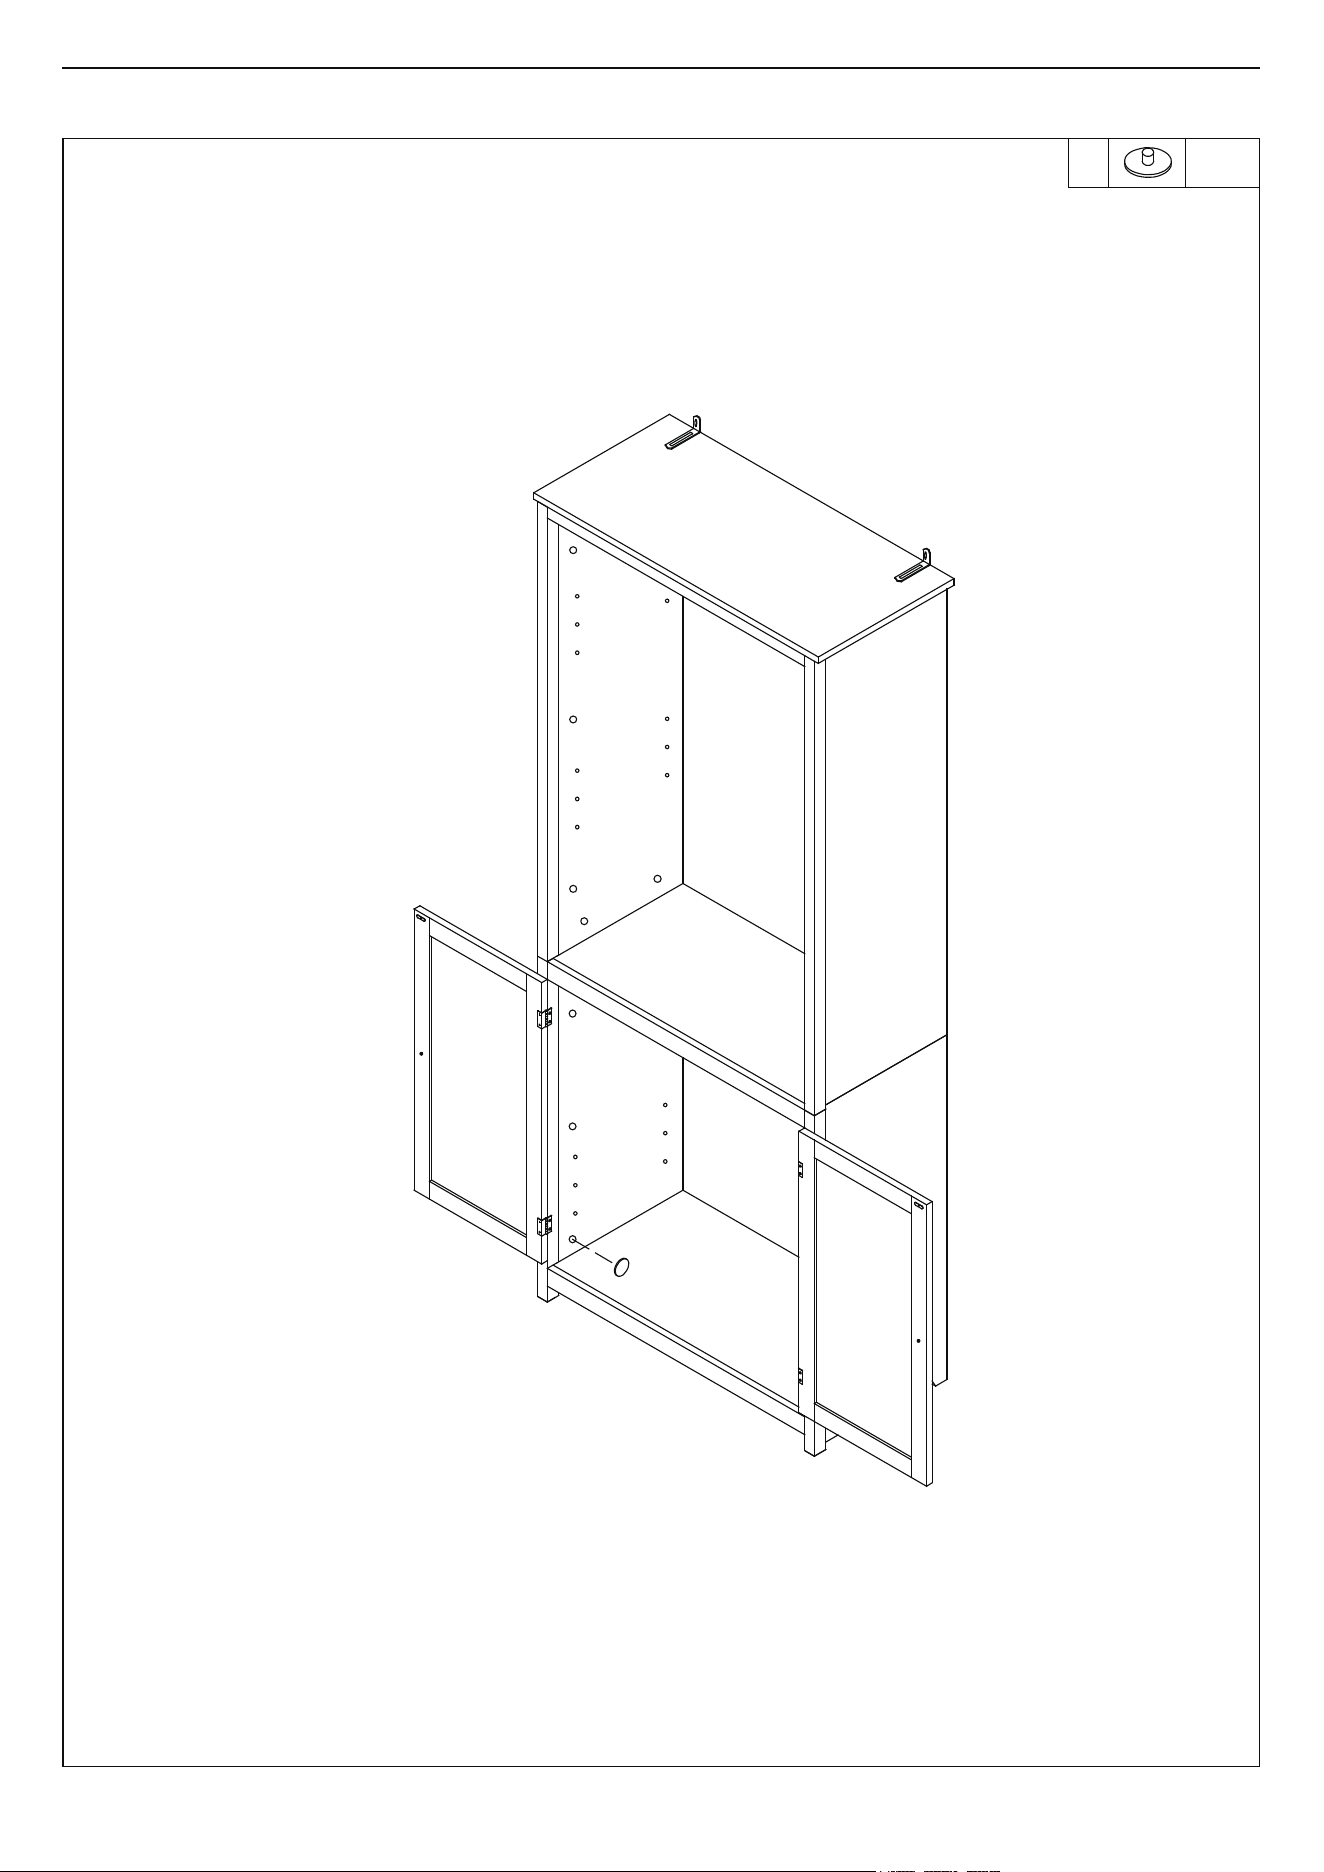
1) Drill two holes in the dry wall as per the length and dia of Plastic Anchor (Q) and distance between
two holes on Bracket (P) on Top Panel .
2) Press Plastic wall anchor (Q) to the drywall. Ensure that the anchor fits securely in the wall.
3) Move the bookcase to the wall as per the holes on wall and Bracket (P) on Top Panel.
4) Fix the bookcase on the wall using Screw (M).
P
P
R
R
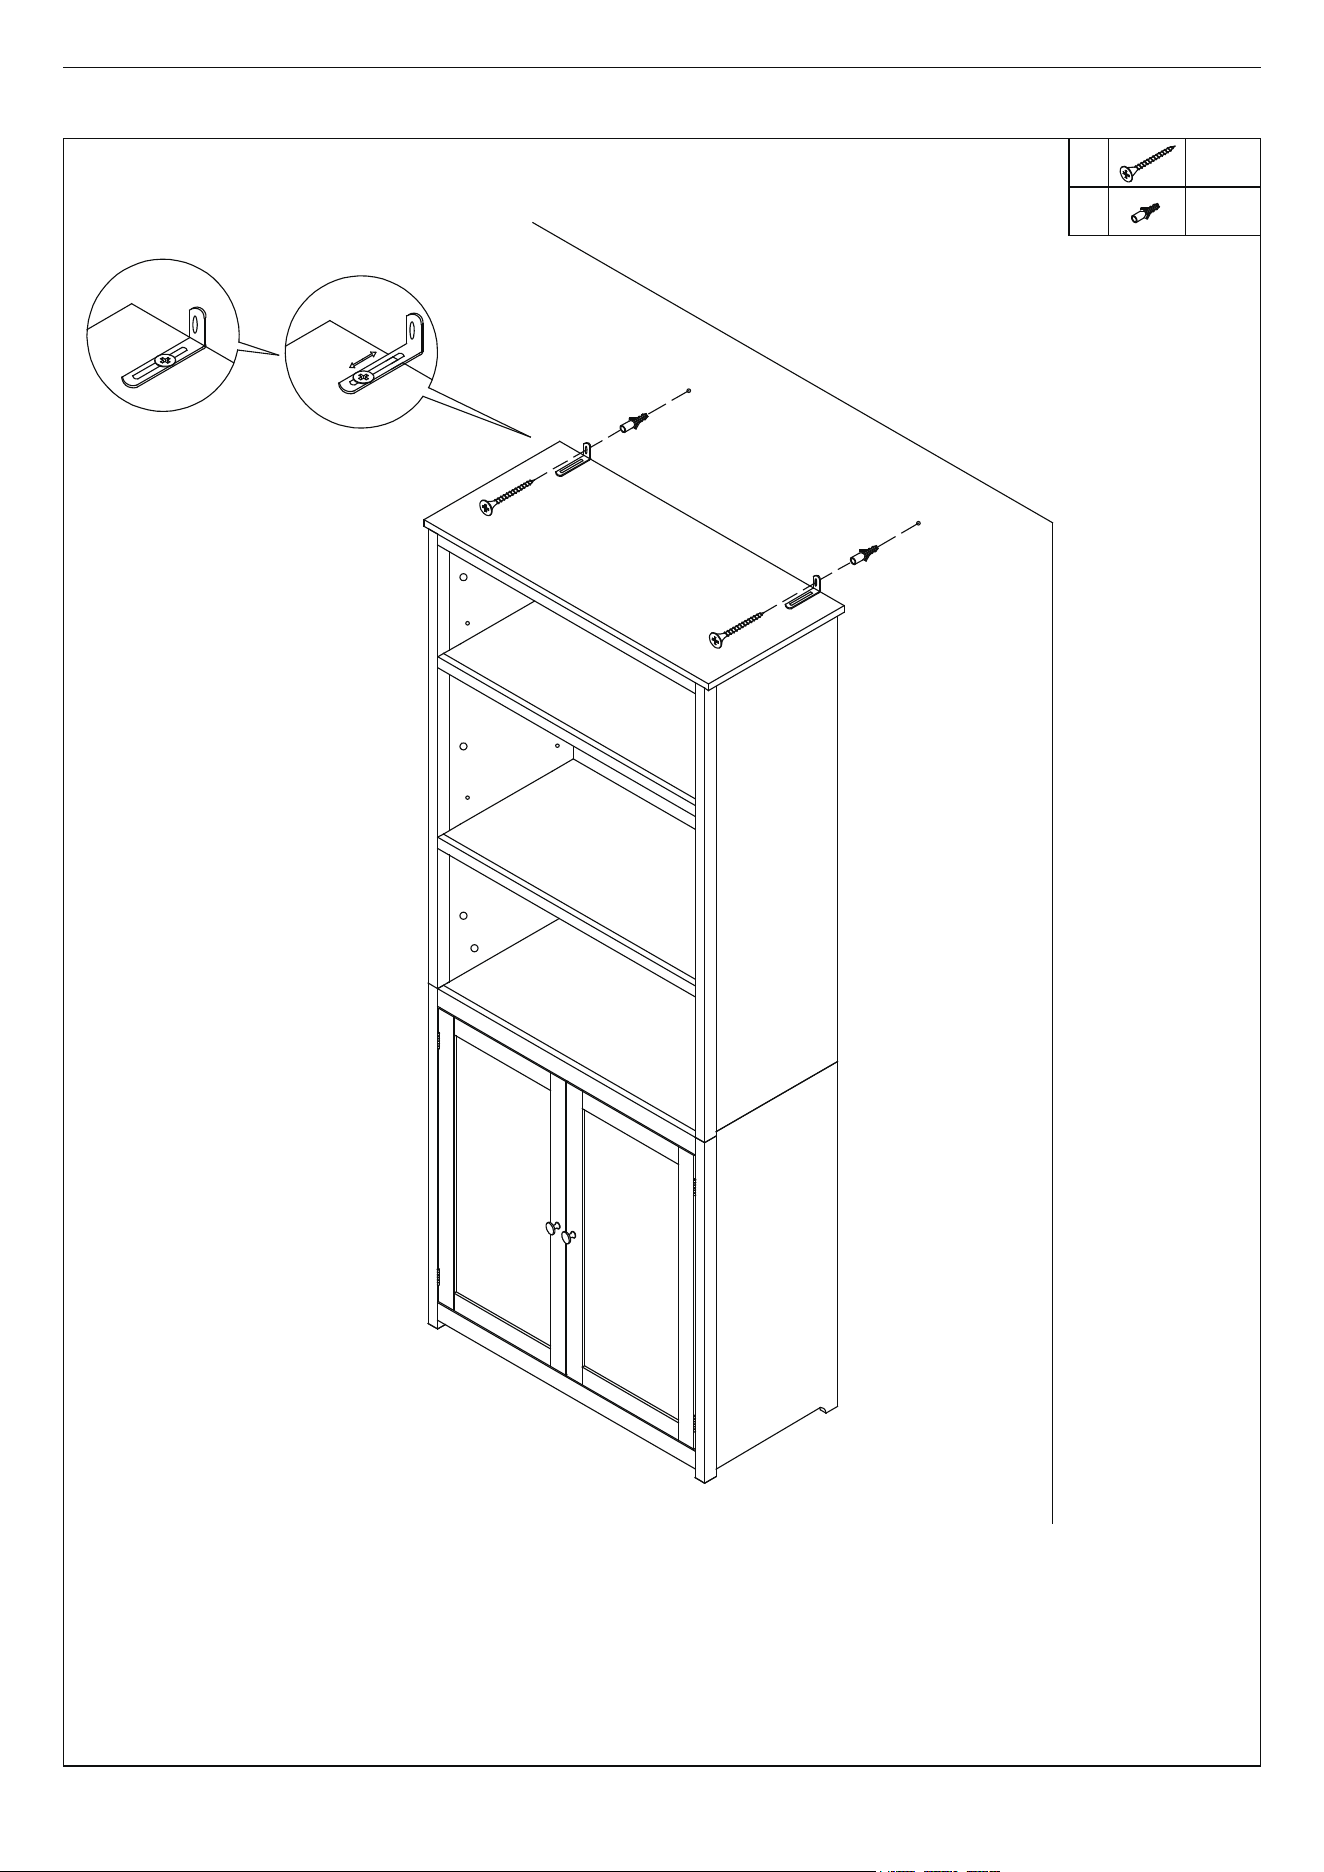
Bracket (P) is adjustable
when you rescrew
the screw (R).
Step 13
11/11
PRODUCT ASSEMBLY
M
M
2 pcs
Q
2 pcs
Q

TIPS:
Your suggestions and comments for Costway are really important to us!
We sincerely solicit you to go back to our shop and leave a good rating in just a
simple click. It would be quite encouraging if you could kindly do so like below:
February 24, 2018
Great product so far. Fast delivery, easy setup, and working without any issues.
Great products so far
With your inspiring rating, Costway will be more consistent to offer you
EASY SHOPPING EXPERIENCE, GOOD PRODUCTS and EFFICIENT SERVICE!
UNITED STATES
CANADA
UNITED KINGDOM
GERMANY
FRANCE
ITALY
SPAIN
JAPAN
RUSSIA
AUSTRALIA
US office:Fontana
UK office:Ipswich