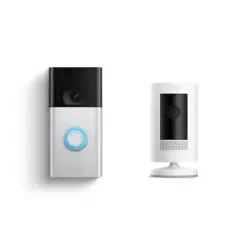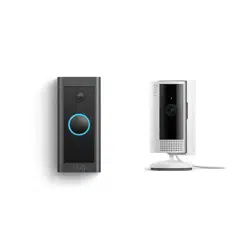

User Guide
Doorbell Wired
2 3
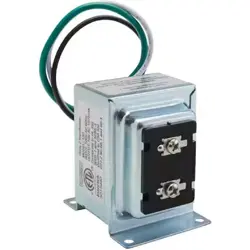
Included hardware. Find your doorbell chime.
Your Doorbell Wired is
designed to replace an
existing doorbell button,
and gets its power from the
doorbell system.
Ring your existing doorbell
and listen for the chime. If it
rings, we know your existing
doorbell system is working.
Follow the sound to find your
chime and make a mental
note of the location. We’ll
return to your chime soon.
Don’t have an existing
doorbell? You can power
your Doorbell Wired
directly using our Plug-in
Adapter. Visit ring.com/
accessories to learn more.
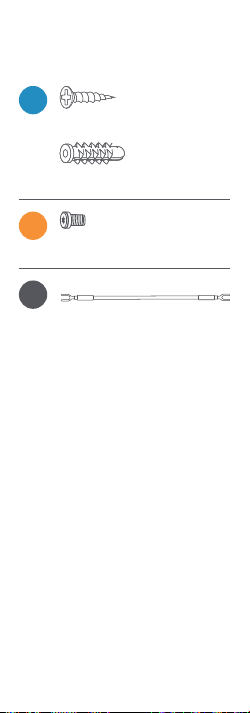
Bag Hardware
A
(2) 1" Mounting Screws
(2) Wall Anchors
B
(2) 3/16" Security Screws
C
1x Jumper Cable

2 3
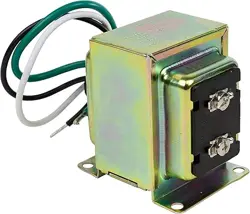
Included hardware. Find your doorbell chime.
Your Doorbell Wired is
designed to replace an
existing doorbell button,
and gets its power from the
doorbell system.
Ring your existing doorbell
and listen for the chime. If it
rings, we know your existing
doorbell system is working.
Follow the sound to find your
chime and make a mental
note of the location. We’ll
return to your chime soon.
Don’t have an existing
doorbell? You can power
your Doorbell Wired
directly using our Plug-in
Adapter. Visit ring.com/
accessories to learn more.
Bag Hardware
A
(2) 1" Mounting Screws
(2) Wall Anchors
B
(2) 3/16" Security Screws
C
1x Jumper Cable

4 5
Grab the included
Jumper Cable.
The Jumper Cable bypasses
and disables your existing
doorbell chime, and must be
installed before you install
your Ring Doorbell.
Your Doorbell Wired is
compatible with doorbell
systems supplying 10–24
volts AC, at 50 or 60Hz, 40VA
max. The AC connector is
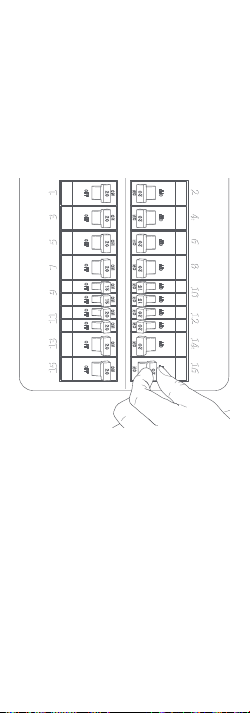
the class 2 energy source.
Turn o power
at the breaker.
This is essential to
keeping you and your
new Ring Doorbell safe.
If you’re not sure which
breaker controls your
doorbell chime, turn o the
master breaker for your home,
or contact an electrician.
CAUTION!
You’ll be working with electrical
wires during the install process.
If you are uncomfortable or
inexperienced with doing so,
consult with a licensed electrician.

4 5
Grab the included
Jumper Cable.
The Jumper Cable bypasses
and disables your existing
doorbell chime, and must be
installed before you install
your Ring Doorbell.
Your Doorbell Wired is
compatible with doorbell
systems supplying 10–24
volts AC, at 50 or 60Hz, 40VA
max. The AC connector is
the class 2 energy source.
Turn o power
at the breaker.
This is essential to
keeping you and your
new Ring Doorbell safe.
If you’re not sure which
breaker controls your
doorbell chime, turn o the
master breaker for your home,
or contact an electrician.
CAUTION!
You’ll be working with electrical
wires during the install process.
If you are uncomfortable or
inexperienced with doing so,
consult with a licensed electrician.

6 7
Remove the cover from your
doorbell chime.
After you’ve located your
doorbell chime and turned o
power at the breaker, remove
the cover from your chime
and set it aside for now.
Loosen the “Front” and
“Trans” terminal screws.
Make sure to keep the existing
doorbell wires in place.
Connect the Jumper Cable.
Connect one end of the
Jumper Cable to the “Front”
terminal, and the other to the
“Trans” terminal. It doesn’t
matter which wire you
connect to which terminal.
Then re-tighten the
terminal screws.
8 9
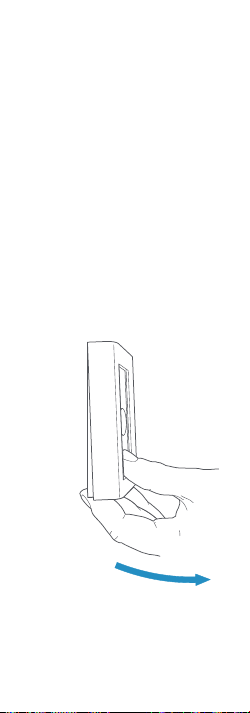
Uninstall your existing
doorbell button.
Remove your doorbell from
the wall.
Disconnect the wires. Make
sure they don’t fall back inside
your wall so you can access
them later.
Remove the faceplate.
Grasp the bottom of the
faceplate and pull to remove.
Mark the screw holes.
Using your Ring Doorbell as
a template, mark the location
of the two mounting holes on
your wall.

8 9
Uninstall your existing
doorbell button.
Remove your doorbell from
the wall.
Disconnect the wires. Make
sure they don’t fall back inside
your wall so you can access
them later.
Remove the faceplate.
Grasp the bottom of the
faceplate and pull to remove.
Mark the screw holes.
Using your Ring Doorbell as
a template, mark the location
of the two mounting holes on
your wall.

10 11
Install the anchors.
(optional)
On stucco, brick, or concrete,
use a ¼" masonry bit to drill
holes in your wall, then insert
the included wall anchors.
(If you’re installing on wood or
siding, you can skip this step.)
Connect the doorbell wires.
Loop one doorbell wire
around each of the screw
terminals on the rear of your
Ring Doorbell then tighten
the terminals to secure.
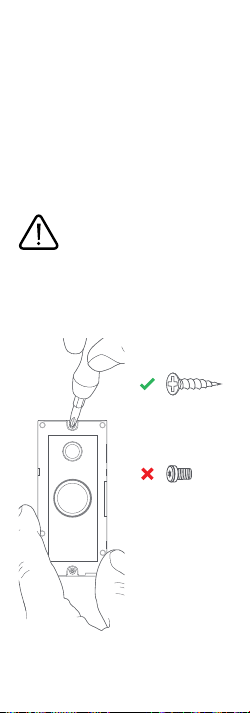
12 13
Screw in your
Ring Doorbell.
Mount your Ring Doorbell
with the two included
mounting screws.
Be sure to feed any excess
wiring back into the wall first.
Restore power
at the breaker.
It may take a moment for your
Ring Doorbell to power on.
You’ll know it’s ready once it
lights up and speaks to you.
3/16"
Security
screw
1"
Mounting
screw
DO NOT USE any screw other than
the included mounting screws
when securing your Ring Doorbell.

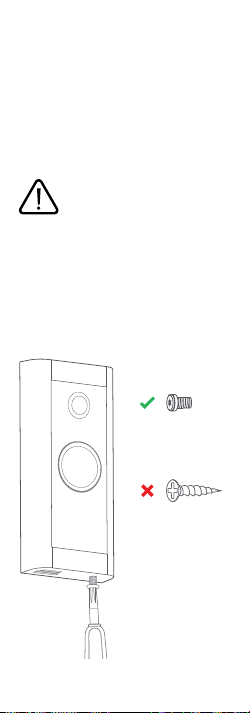
14 15
Secure your Ring Doorbell.
Re-attach the faceplate, then
use the included screwdriver
to drive the small security
screw into the bottom of
your Ring Doorbell.
Download the Ring App.
The Ring App walks you
through setting up and
managing your Ring Doorbell.
Search for “Ring” in one of the
app stores below, or visit
ring.com/app
Set up your Ring Doorbell.
In the Ring app, select Set
Up a Device and follow the
in-app instructions.
3/16"
Security
screw
1"
Mounting
screw
CAUTION!
If you use the wrong screws to
secure the Video Doorbell, you
could damage the battery during
installation, create a fire hazard,
and be seriously injured.

For information on our warranty, theft
protection, and Ring Protect Plans, see
ring.com/legal
© 2020 Ring LLC or its aliates.
Ring and all related marks are trademarks
of Ring LLC or its aliates.
For additional help, visit
ring.com/help
Or give us a call:
US 1 800 656 1918
Canada 1 855 300 7289
Worldwide +1 310 929 7085
For a list of all our customer
support numbers, visit
ring.com/callus