Loading ...
Loading ...
Loading ...
21
7. Return the damper plate to its original horizontal position.
A
A. Damper plate
8. Secure damper plate with screw removed in Step 1.
A
B
A. Damper plate
B. Screw
9. Repeat Step 14 from “Wall Venting Installation Only.”
Install Damper Assembly
If for recirculation installation, no need to install the damper
assembly, this section can be skip. And save it for future use.
Install Damper Assembly for Wall Venting
Installation
1. Check that damper blade moves freely and opens fully.
2. Position the damper assembly on the back of the microwave
oven so that the damper blade hinge is at the top, and the
damper blade opens away from the microwave oven.
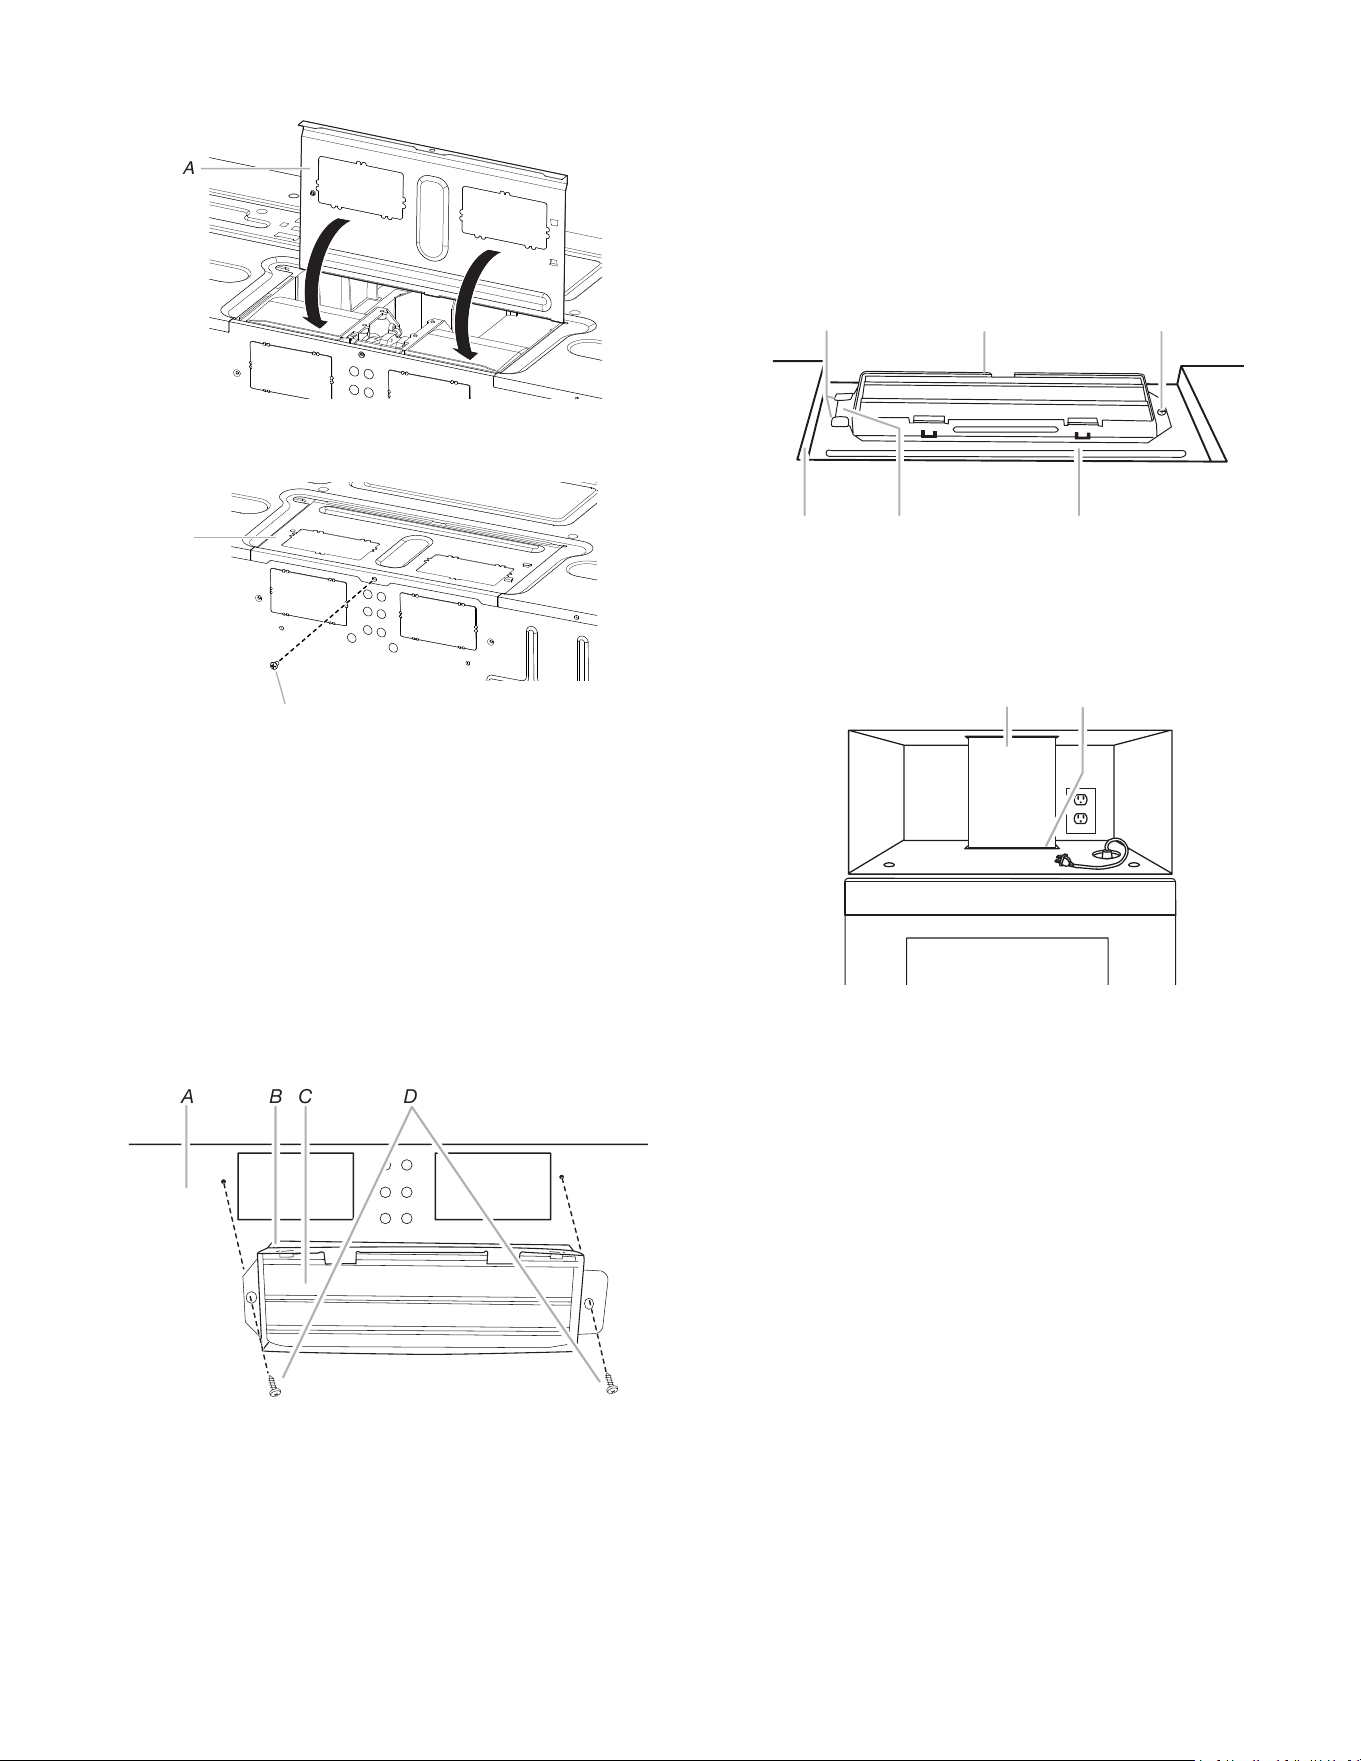
A B C D
A. Back of microwave oven
B. Damper assembly
C. Damper blade
D. #6 x 3/8" Sheet metal
screws
3. Secure damper assembly with two #6 x 3/8" sheet metal
screws.
Install Damper Assembly for Roof Venting
Installation
1. Check that damper blade moves freely and opens fully.
2. Insert damper assembly through the cabinet cutout so that the
long tab of the damper assembly slides under the raised tabs
of the damper plate. Then secure with #6 x 3/8" sheet metal
screw.
NOTE: The screw cannot be installed if the damper assembly
is not positioned as shown.
A B C
D E F
A. Raised tabs
B. Damper assembly
C. #6 x 3/8" Sheet metal
screws
D. Upper cabinet cutout
E. Long tab
F. Damper plate
3. Connect vent to damper assembly.
A B
A. Vent
B. Damper assembly (under vent)
Loading ...
Loading ...
Loading ...