THIS INSTRUCTION BOOKLET CONTAINS IMPORTANT SAFETY INFORMATION. PLEASE READ AND KEEP FOR FUTURE REFERENCE.
EN DE FR ES IT PL
USER'S MANUAL/HANDBUCH
/MANUEL DE L'UTILISATEUR/MANUAL DEL USUARIO
/MANUALE UTENTE/INSTRUKCJA OBSŁUGI
GT3904
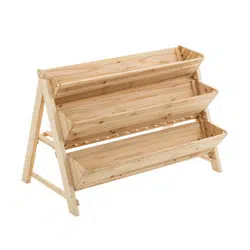
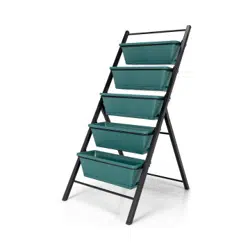
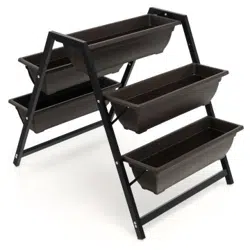
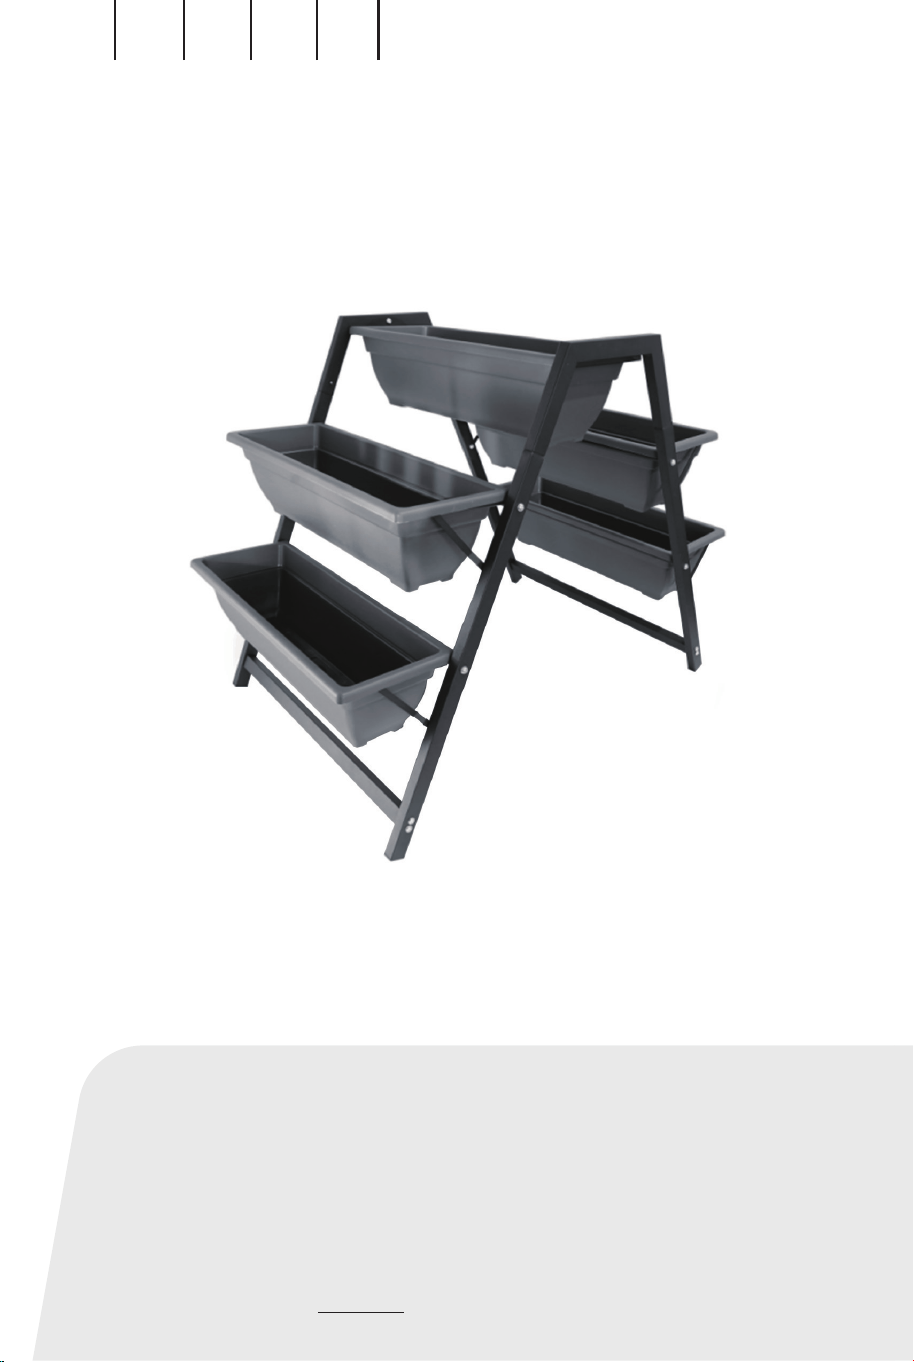
Raised Garden Planter / Hochbeet mit 5 Pflanzkästen
/ Support de Plante Indépendant / Jardinera Elevada
/ Fioriera Rialzata da Giardino
/ Metalowy kwietnik z 5 doniczkami
EN
DE
FR
ES
IT
PL
With your inspiring rating, COSTWAY will be more consistent to offer you EASY
SHOPPING EXPERIENCE, GOOD PRODUCTS and EFFICIENT SERVICE!
Mit Ihrer inspirierenden Bewertung wird COSTWAY konsistenter sein, um Ihnen EIN
SCHÖNES EINKAUFSERLEBNIS, GUTE PRODUKTE und EFFIZIENTEN SERVICE zu
bieten!
Avec votre évaluation inspirante, COSTWAY continuera à fournir une EXPÉRIENCE
D’ACHAT PRATIQUE, des PRODUITS DE QUALITÉ et un SERVICE EFFICACE !
Con su calificación inspiradora, COSTWAY será más consistente para ofrecerle
EXPERIENCIA DE COMPRA FÁCIL, BUENOS PRODUCTOS y SERVICIO EFICIENTE.
Con la tua valutazione incoraggiante, COSTWAY sarà più coerente per offrirti
ESPERIENZA DI ACQUISTO FACILE, BUONI PRODOTTI e SERVIZIO EFFICIENTE!
Dzięki twojej opinii COSTWAY będzie mógł oferować jeszcze WYGODNIEJSZE
ZAKUPY, LEPSZE PRODUKTY i SPRAWNIEJSZĄ OBSŁUGĘ KLIENTA.
US office: Fontana UK office: Ipswich AU office: Truganina
DE office: FDS GmbH, Neuer Höltigbaum 36, 22143 Hamburg, Deutschland
FR office: Saint Vigor d'Ymonville
PL office: Gdańsk
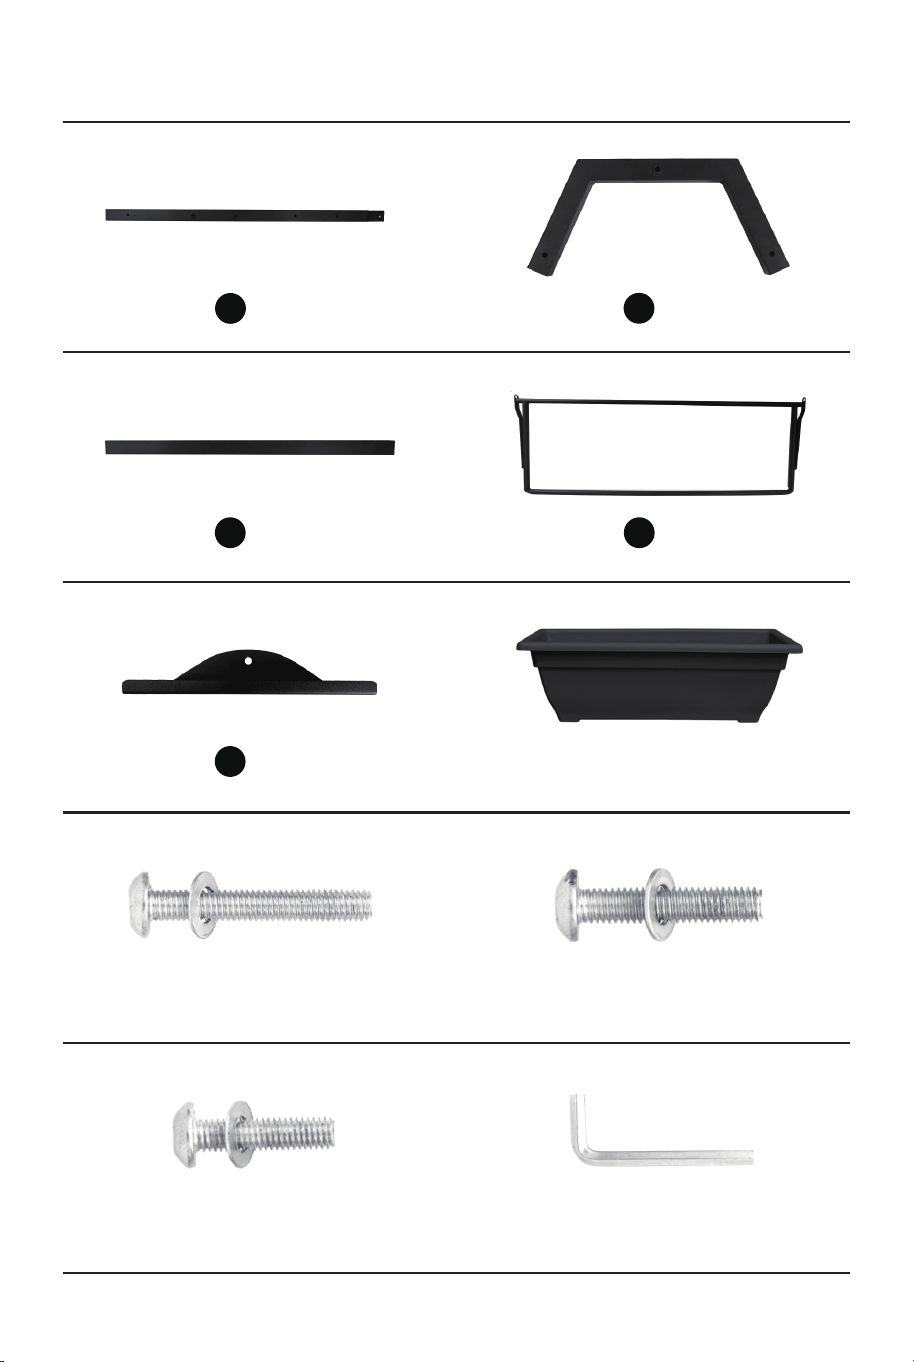
x8
x10
x8
x5
x1
40mm
40mm
20mm
30mm
x4
A
x2B
x2
F
x4
G
x2
H
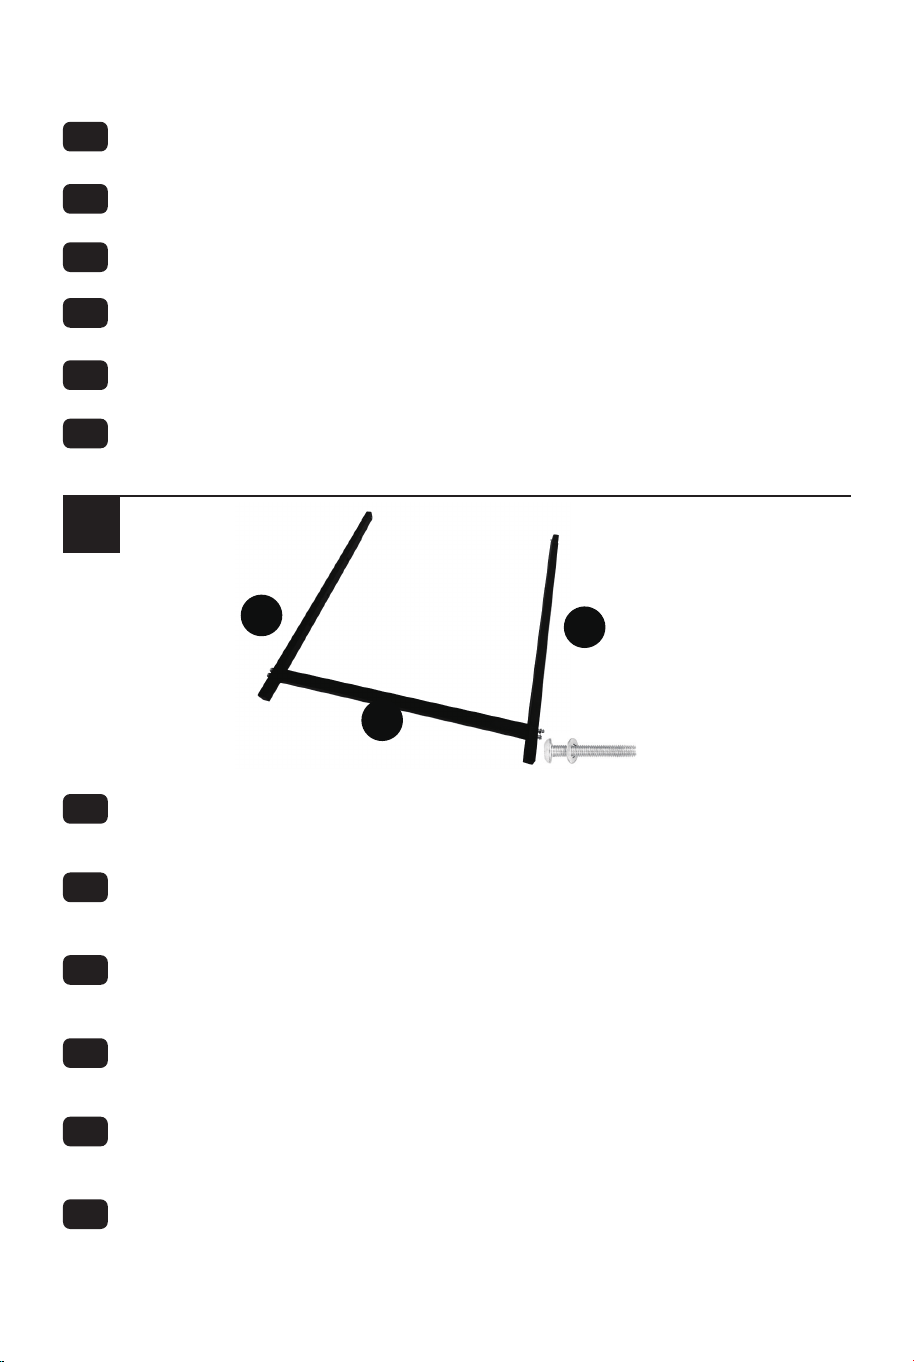
A
A
F
EN
DE
EN
FR
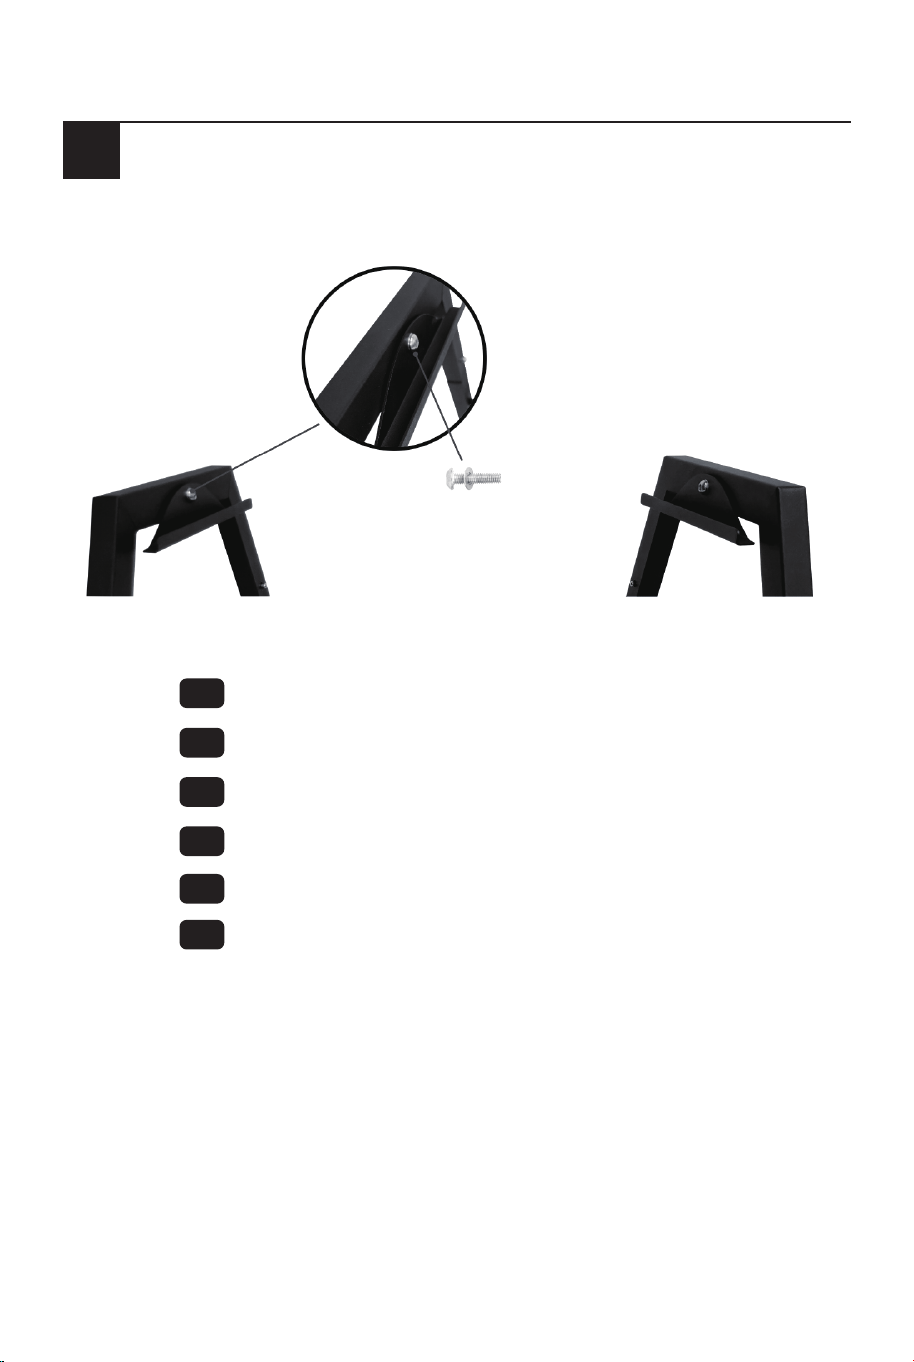
Attention: Do not tighten all the screws until assemble all parts to find
the horizontal line!
Achtung: Ziehen Sie nicht alle Schrauben an, bis Sie alle Teile
zusammengebaut haben, um die horizontale Linie zu finden!
FR
Attention : Ne serrez pas toutes les vis jusqu’à ce que vous assemblez
toutes les pièces pour trouver la ligne horizontale !
ES
IT
Atención: ¡No apriete todos los tornillos hasta que haya ensamblado
todas las piezas para encontrar la línea horizontal!
Attenzione: Non stringere tutte le viti fino al completamento di tutte le
parti per trovare la linea orizzontale!
PL
Uwaga: Aby prawidłowo wypoziomować kwietnik, nie dokręcaj śrub zbyt
mocno, dopóki nie zmontujesz wszystkich części.
1
Assemble 2pcs A with F
Direction same as the photo, the clasp spring button on A should be
inward.
Assemblez 2pcs A avec F
Direction identique à photo ci-dessous, le bouton de ressort fermoir sur
A doit être vers l’intérieur.
DE
Montieren Sie 2 Stück A mit F.
Richtung wie auf dem Foto, der Verschlussfederknopf an A sollte nach
innen zeigen.
ES
PL
Ensamble 2 piezas (A) con la pieza (F).
Dirección igual a la de la foto, el botón de resorte de cierre en las
piezas (A) debe estar hacia adentro.
Przymocuj dwie części A do części F, tak jak pokazano na rysunku.
Otwory na wsporniki doniczek w części A powinny być skierowane do
wewnątrz.
IT
Assemblare 2 pezzi (A) alla parte (F).
Direzione uguale a quella della foto, il pulsante a molla di chiusura sulle
parti (A) deve essere rivolto verso l'interno.
02 03
x8
x10
x8
x5
x1
40mm
40mm
20mm
30mm
x4
A
x2B
x2
F
x4
G
x2
H
A
A
F
EN
DE
EN
FR
Attention: Do not tighten all the screws until assemble all parts to find
the horizontal line!
Achtung: Ziehen Sie nicht alle Schrauben an, bis Sie alle Teile
zusammengebaut haben, um die horizontale Linie zu finden!
FR
Attention : Ne serrez pas toutes les vis jusqu’à ce que vous assemblez
toutes les pièces pour trouver la ligne horizontale !
ES
IT
Atención: ¡No apriete todos los tornillos hasta que haya ensamblado
todas las piezas para encontrar la línea horizontal!
Attenzione: Non stringere tutte le viti fino al completamento di tutte le
parti per trovare la linea orizzontale!
PL
Uwaga: Aby prawidłowo wypoziomować kwietnik, nie dokręcaj śrub zbyt
mocno, dopóki nie zmontujesz wszystkich części.
1
Assemble 2pcs A with F
Direction same as the photo, the clasp spring button on A should be
inward.
Assemblez 2pcs A avec F
Direction identique à photo ci-dessous, le bouton de ressort fermoir sur
A doit être vers l’intérieur.
DE
Montieren Sie 2 Stück A mit F.
Richtung wie auf dem Foto, der Verschlussfederknopf an A sollte nach
innen zeigen.
ES
PL
Ensamble 2 piezas (A) con la pieza (F).
Dirección igual a la de la foto, el botón de resorte de cierre en las
piezas (A) debe estar hacia adentro.
Przymocuj dwie części A do części F, tak jak pokazano na rysunku.
Otwory na wsporniki doniczek w części A powinny być skierowane do
wewnątrz.
IT
Assemblare 2 pezzi (A) alla parte (F).
Direzione uguale a quella della foto, il pulsante a molla di chiusura sulle
parti (A) deve essere rivolto verso l'interno.
02 03
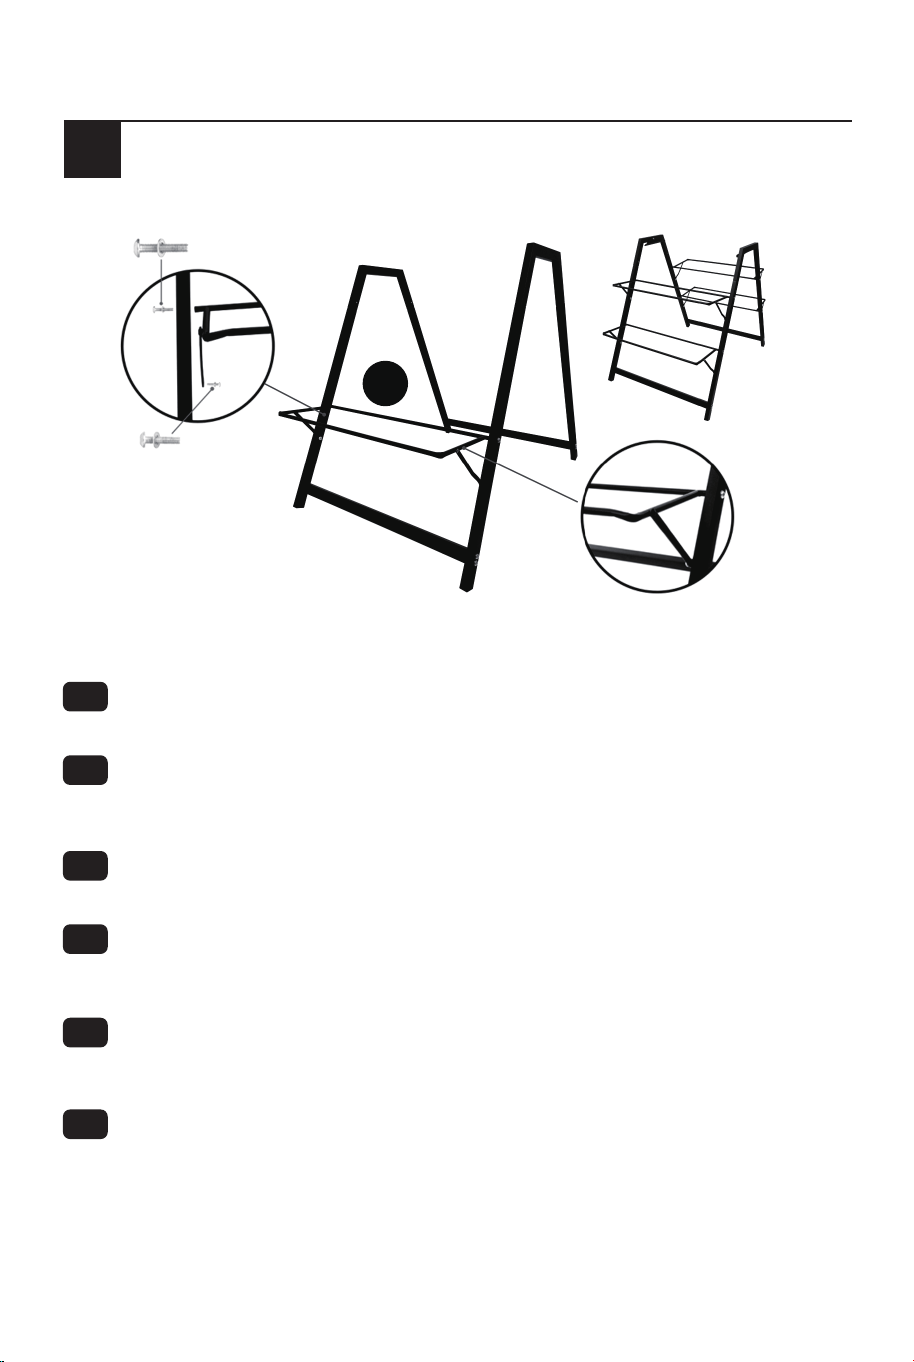
30mm
G
A
A
A
A
B
F
20mm
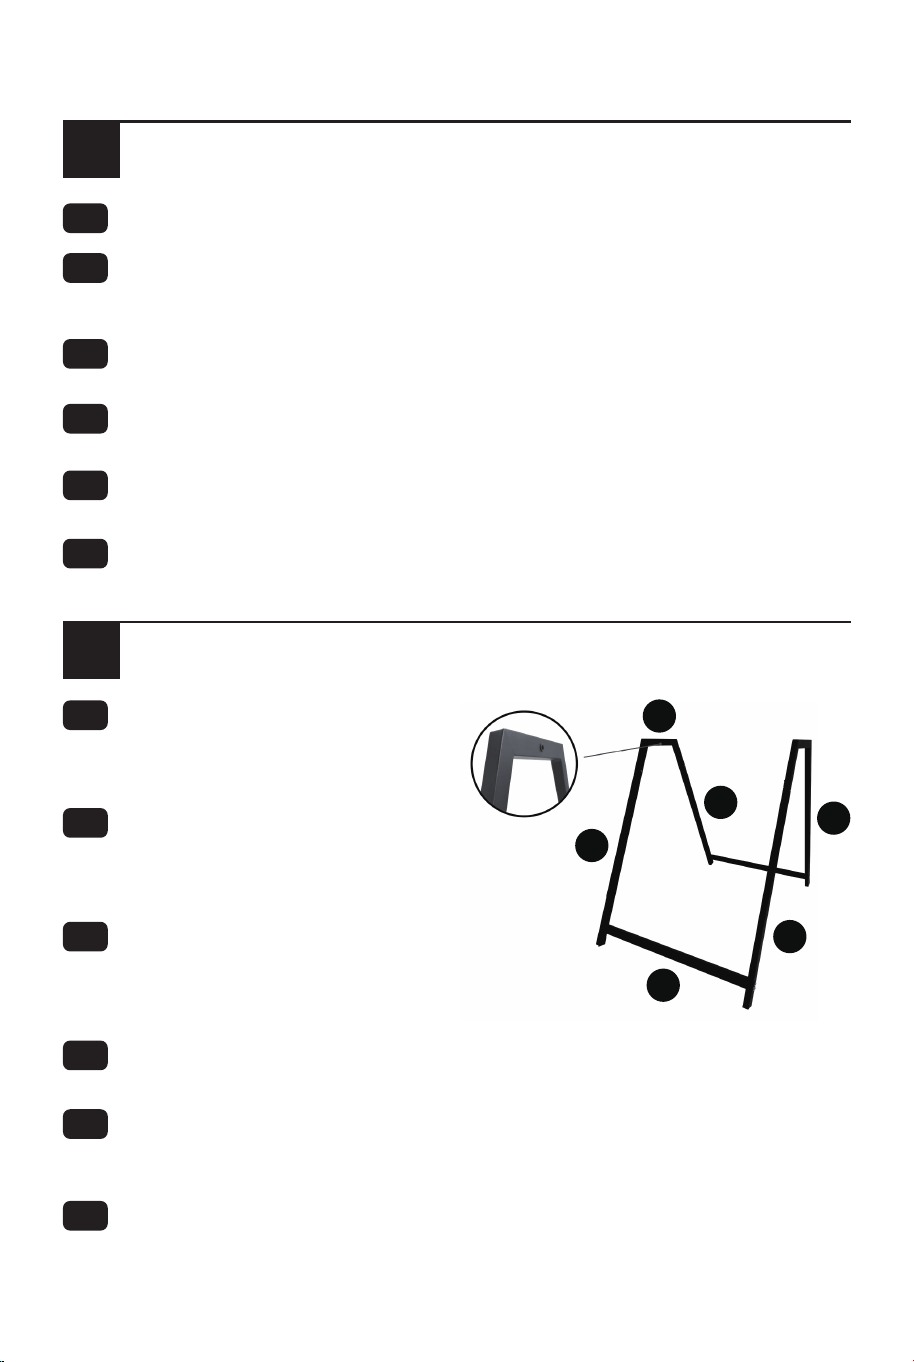
3
4
2
ES
PL
Igual que en el paso 1, ensamble las 2 piezas restantes (A) con la otra
pieza (F) para obtener otro marco.
Powtórz krok 1.
Powtórz krok 1, aby zmontować drugą część ramy.
IT
ES
PL
IT
Come nel passo 1, assemblare i restanti 2 pezzi (A) all'altra parte (F)
per ottenere un altro telaio.
EN
FR
Same as Step 1 Assemble the rest 2pcs A with F to get another frame.
DE
DE
Gleich wie Schritt 1.
Montieren Sie die restlichen 2 Stück A mit F, um einen weiteren
Rahmen zu erhalten.
Identique à l’étape 1
Assemblez 2pcs A avec F pour obtenir un autre cadre.
EN
FR
EN
Assemble G onto rack. From the bottom to the top, fix screws first, then
screw them firmly after all parts have been assembled.
Montieren Sie G auf dem Gestell. Schrauben von unten nach oben
zuerst fixieren, dann festschrauben, nachdem alle Teile
zusammengebaut sind.
FR
Montez G sur le rack. De bas en haut, fixez les vis, fixez toutes les
pièces, puis serrez-les.
Assemble the part of step 1 & 2
onto B
tips: the side has hole of B
should face inward
DE
Montieren Sie den Teil von
Schritt 1 & 2 auf B.
Tipps: Die Seite mit dem Loch
von B sollte nach innen zeigen.
Assemblez les pièces des étapes 1 et
2 sur B
Conseil : B doit être orienté vers
l'intérieur sur une face avec un trou
Ensamble las piezas del paso 1 y 2 con las piezas (B).
Consejo: El agujero en el lado de la pieza (B) debe mirar hacia adentro.
Assemblare i pezzi di passi 1 e 2 ai pezzi (B).
Suggerimento: il foro sul lato della parte (B) deve essere rivolto verso
l'interno.
Połącz części zmontowane w kroku 1 z częściami zmontowanymi w
kroku 2 za pomocą części B.
Uwaga: Otwór w części B powinien być skierowany do wewnątrz
ES
PL
IT
Monte las piezas (G) en el estante. Desde abajo hacia arriba, fije
primero los tornillos y luego atorníllelos firmemente después de haber
ensamblado todas las piezas.
Montare i pezzi (G) sullo scaffale. Dal basso verso l'alto, fissare prima
le viti e quindi avvitarle saldamente dopo aver assemblato tutte le
parti.
Zamocuj wsporniki doniczek (G) na kwietniku. Przykręć śruby,
zaczynając od tych, które znajdują się na dole. Po zmontowaniu
wszystkich wsporników mocno dokręć śruby.
04 05
30mm
G
A
A
A
A
B
F
20mm
3
4
2
ES
PL
Igual que en el paso 1, ensamble las 2 piezas restantes (A) con la otra
pieza (F) para obtener otro marco.
Powtórz krok 1.
Powtórz krok 1, aby zmontować drugą część ramy.
IT
ES
PL
IT
Come nel passo 1, assemblare i restanti 2 pezzi (A) all'altra parte (F)
per ottenere un altro telaio.
EN
FR
Same as Step 1 Assemble the rest 2pcs A with F to get another frame.
DE
DE
Gleich wie Schritt 1.
Montieren Sie die restlichen 2 Stück A mit F, um einen weiteren
Rahmen zu erhalten.
Identique à l’étape 1
Assemblez 2pcs A avec F pour obtenir un autre cadre.
EN
FR
EN
Assemble G onto rack. From the bottom to the top, fix screws first, then
screw them firmly after all parts have been assembled.
Montieren Sie G auf dem Gestell. Schrauben von unten nach oben
zuerst fixieren, dann festschrauben, nachdem alle Teile
zusammengebaut sind.
FR
Montez G sur le rack. De bas en haut, fixez les vis, fixez toutes les
pièces, puis serrez-les.
Assemble the part of step 1 & 2
onto B
tips: the side has hole of B
should face inward
DE
Montieren Sie den Teil von
Schritt 1 & 2 auf B.
Tipps: Die Seite mit dem Loch
von B sollte nach innen zeigen.
Assemblez les pièces des étapes 1 et
2 sur B
Conseil : B doit être orienté vers
l'intérieur sur une face avec un trou
Ensamble las piezas del paso 1 y 2 con las piezas (B).
Consejo: El agujero en el lado de la pieza (B) debe mirar hacia adentro.
Assemblare i pezzi di passi 1 e 2 ai pezzi (B).
Suggerimento: il foro sul lato della parte (B) deve essere rivolto verso
l'interno.
Połącz części zmontowane w kroku 1 z częściami zmontowanymi w
kroku 2 za pomocą części B.
Uwaga: Otwór w części B powinien być skierowany do wewnątrz
ES
PL
IT
Monte las piezas (G) en el estante. Desde abajo hacia arriba, fije
primero los tornillos y luego atorníllelos firmemente después de haber
ensamblado todas las piezas.
Montare i pezzi (G) sullo scaffale. Dal basso verso l'alto, fissare prima
le viti e quindi avvitarle saldamente dopo aver assemblato tutte le
parti.
Zamocuj wsporniki doniczek (G) na kwietniku. Przykręć śruby,
zaczynając od tych, które znajdują się na dole. Po zmontowaniu
wszystkich wsporników mocno dokręć śruby.
04 05
20mm
5 6
EN
DE
Assemble H onto B.
Montieren Sie H auf B.
FR
Assemblez H sur B.
Monte las piezas (H) en las piezas (B).
Assemblare i pezzi (H) ai pezzi (B).
Przymocuj uchwyt na doniczkę (H) do części B.
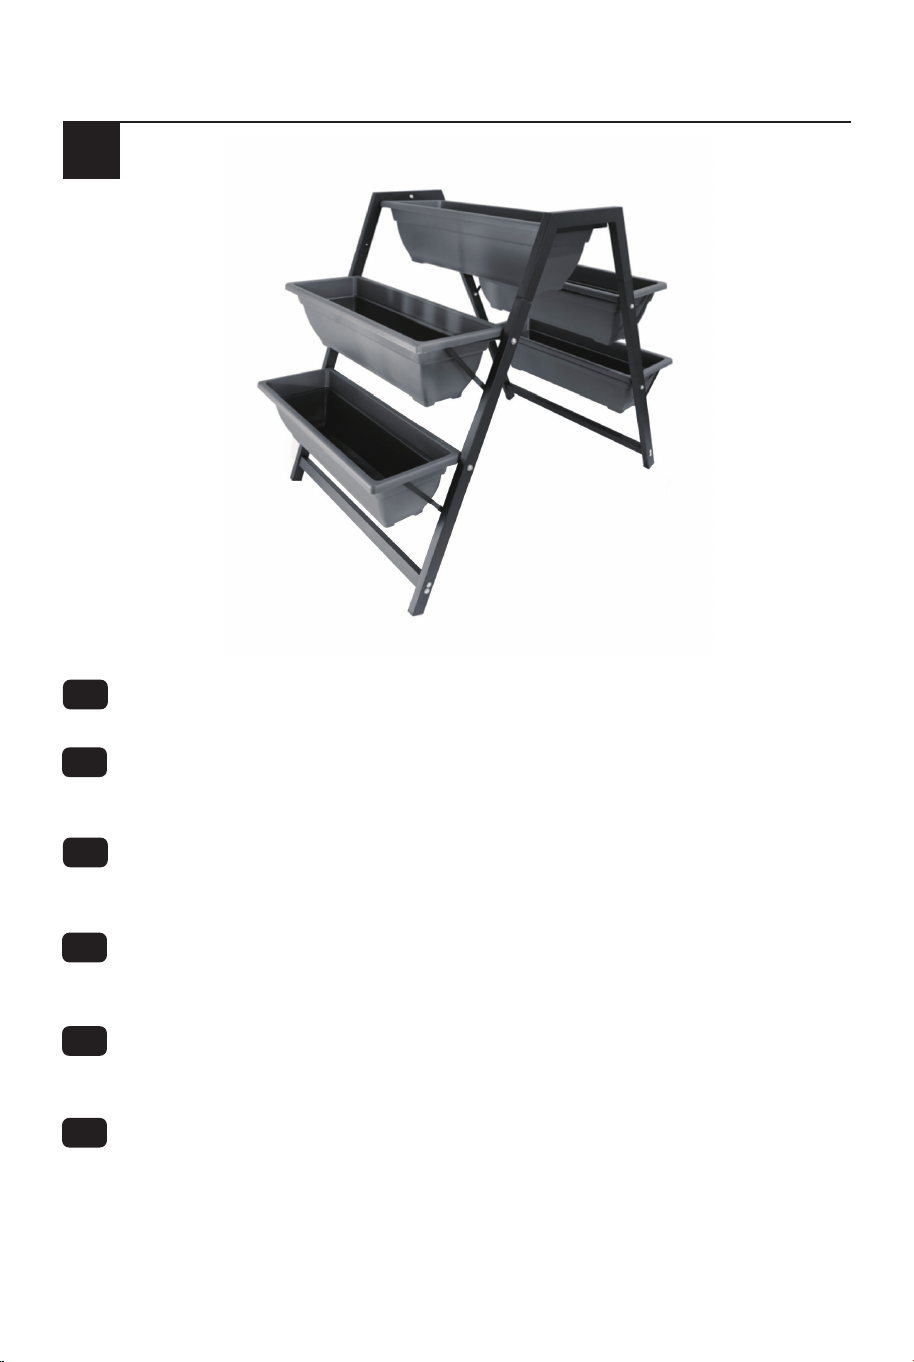
EN
FR
Place plastic pots onto the rack. The pot on G should let bottom holes
face outward, this can make sure water flow to below pot well.
Mettez le pot en plastique sur l'étagère. Le pot de fleurs sur G doit faire
le trou inférieur vers l'extérieur. Cela garantit que l'eau coule sous le
pot de fleurs.
ES
PL
IT
DE
Stellen Sie Plastiktöpfe auf das Gestell. Der Topf auf G sollte die
unteren Löcher nach außen zeigen lassen, dies kann sicherstellen, dass
das Wasser gut unter den Topf fließt.
ES
PL
IT
Coloque las macetas de plástico en el estante. Las macetas en las
piezas (G) deben dejar los agujeros del fondo hacia afuera, esto puede
asegurar que el agua fluya bien hacia abajo de la maceta.
Posizionare i vasi in plastica sullo scaffale. I vasi nei pezzi (G)
dovrebbero lasciare i fori sul fondo verso l'esterno, questo può
garantire che l'acqua scorra bene sotto il vaso.
Umieść plastikowe doniczki na kwietniku. Otwory drenażowe na dnie
każdej doniczki powinny być skierowane na zewnątrz, tak aby woda
mogła spływać.
06 07
20mm
5 6
EN
DE
Assemble H onto B.
Montieren Sie H auf B.
FR
Assemblez H sur B.
Monte las piezas (H) en las piezas (B).
Assemblare i pezzi (H) ai pezzi (B).
Przymocuj uchwyt na doniczkę (H) do części B.
EN
FR
Place plastic pots onto the rack. The pot on G should let bottom holes
face outward, this can make sure water flow to below pot well.
Mettez le pot en plastique sur l'étagère. Le pot de fleurs sur G doit faire
le trou inférieur vers l'extérieur. Cela garantit que l'eau coule sous le
pot de fleurs.
ES
PL
IT
DE
Stellen Sie Plastiktöpfe auf das Gestell. Der Topf auf G sollte die
unteren Löcher nach außen zeigen lassen, dies kann sicherstellen, dass
das Wasser gut unter den Topf fließt.
ES
PL
IT
Coloque las macetas de plástico en el estante. Las macetas en las
piezas (G) deben dejar los agujeros del fondo hacia afuera, esto puede
asegurar que el agua fluya bien hacia abajo de la maceta.
Posizionare i vasi in plastica sullo scaffale. I vasi nei pezzi (G)
dovrebbero lasciare i fori sul fondo verso l'esterno, questo può
garantire che l'acqua scorra bene sotto il vaso.
Umieść plastikowe doniczki na kwietniku. Otwory drenażowe na dnie
każdej doniczki powinny być skierowane na zewnątrz, tak aby woda
mogła spływać.
06 07

THIS INSTRUCTION BOOKLET CONTAINS IMPORTANT SAFETY INFORMATION. PLEASE READ AND KEEP FOR FUTURE REFERENCE.
EN DE FR ES IT PL
USER'S MANUAL/HANDBUCH
/MANUEL DE L'UTILISATEUR/MANUAL DEL USUARIO
/MANUALE UTENTE/INSTRUKCJA OBSŁUGI
GT3904
Raised Garden Planter / Hochbeet mit 5 Pflanzkästen
/ Support de Plante Indépendant / Jardinera Elevada
/ Fioriera Rialzata da Giardino
/ Metalowy kwietnik z 5 doniczkami
EN
DE
FR
ES
IT
PL
With your inspiring rating, COSTWAY will be more consistent to offer you EASY
SHOPPING EXPERIENCE, GOOD PRODUCTS and EFFICIENT SERVICE!
Mit Ihrer inspirierenden Bewertung wird COSTWAY konsistenter sein, um Ihnen EIN
SCHÖNES EINKAUFSERLEBNIS, GUTE PRODUKTE und EFFIZIENTEN SERVICE zu
bieten!
Avec votre évaluation inspirante, COSTWAY continuera à fournir une EXPÉRIENCE
D’ACHAT PRATIQUE, des PRODUITS DE QUALITÉ et un SERVICE EFFICACE !
Con su calificación inspiradora, COSTWAY será más consistente para ofrecerle
EXPERIENCIA DE COMPRA FÁCIL, BUENOS PRODUCTOS y SERVICIO EFICIENTE.
Con la tua valutazione incoraggiante, COSTWAY sarà più coerente per offrirti
ESPERIENZA DI ACQUISTO FACILE, BUONI PRODOTTI e SERVIZIO EFFICIENTE!
Dzięki twojej opinii COSTWAY będzie mógł oferować jeszcze WYGODNIEJSZE
ZAKUPY, LEPSZE PRODUKTY i SPRAWNIEJSZĄ OBSŁUGĘ KLIENTA.
US office: Fontana UK office: Ipswich AU office: Truganina
DE office: FDS GmbH, Neuer Höltigbaum 36, 22143 Hamburg, Deutschland
FR office: Saint Vigor d'Ymonville
PL office: Gdańsk