Loading ...
65036-AMZ
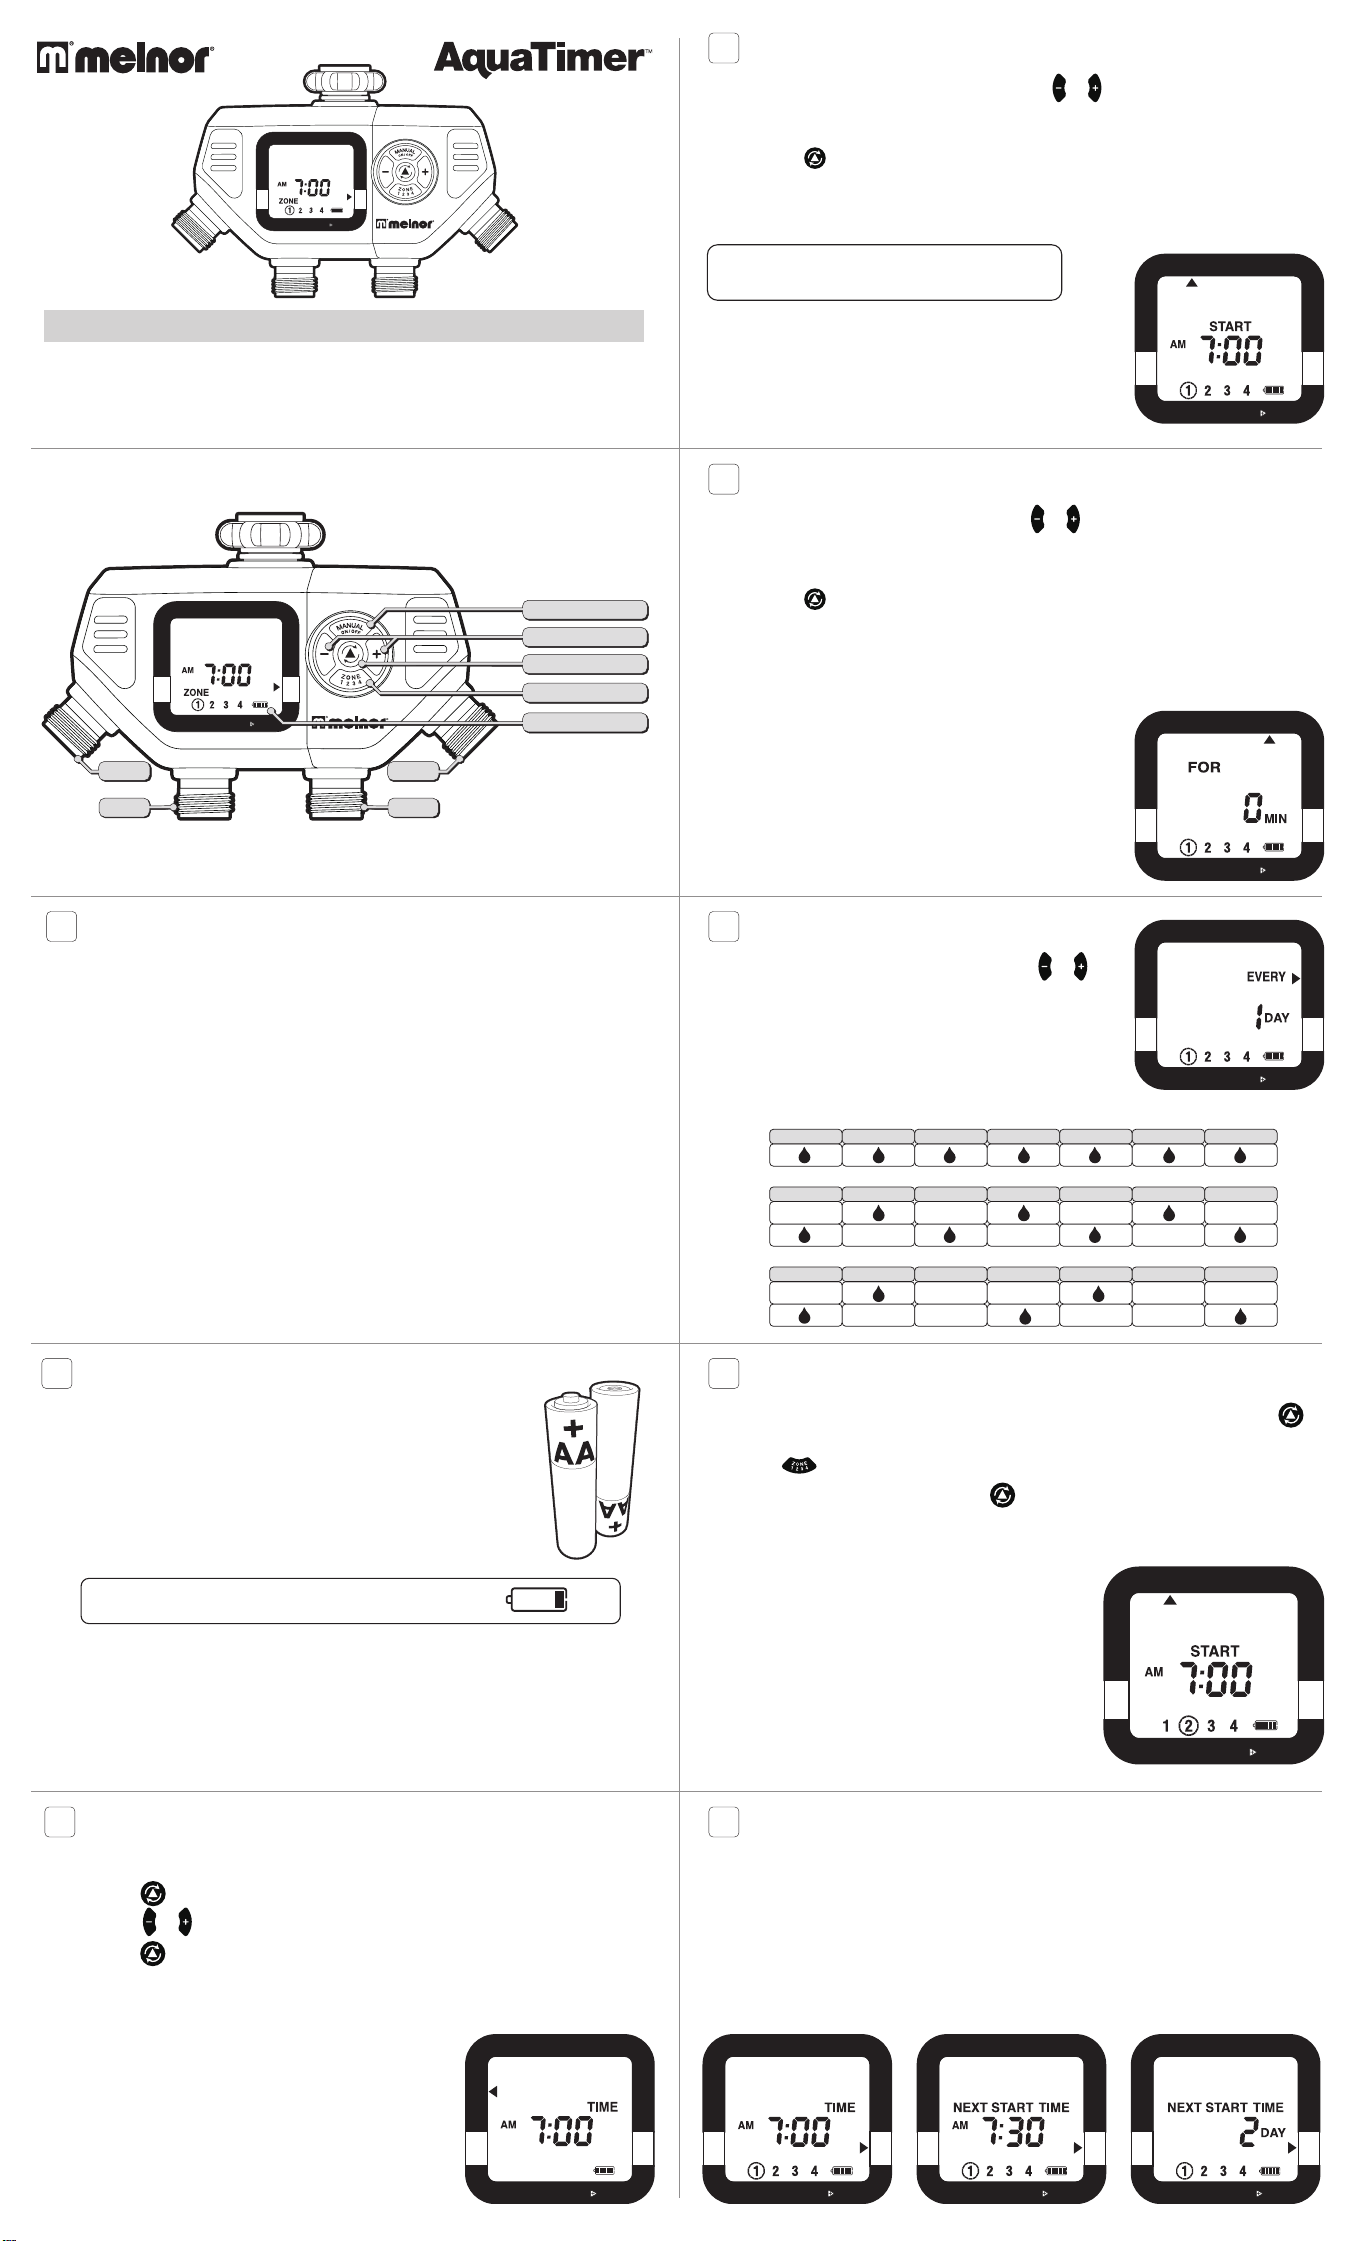
Four-Zone Electronic Water Timer
User Instructions
n
English
65036AMZ_INS_ENG_00
START WATER HOW LONG
OFF
HOW OFTEN AUTO
SET CLOCK
RAIN DELAY, HOLD
+/- Buttons
Zone Button
Battery Indicator
Manual Watering Button
Cursor Button
Zone 2
Zone 1
Zone 3
Zone 4
START WATER HOW LONG
OFF
HOW OFTEN AUTO
SET CLOCK
RAIN DELAY, HOLD
2
Battery Installation & Assembly
n Remove the battery holder from the back of the Timer Control Unit.
Insert two AA alkaline batteries (Do not use rechargeable batteries)
as indicated on the battery holder. Replace the battery holder, making
sure that it is firmly and securely placed in the Timer Control Unit.
n NOTE: Do not use your timer when the air temperature is below 40°F
(4.5° C). When storing your timer, be sure it is in a dry place and
protected from frost.
Installation of the Timer
n Attach the timer to an outside faucet and slowly turn on the water. The water must be left on
while the timer is attached to the faucet for your timer to operate.
n NOTE: You may choose to program your timer before or after attaching it to the faucet.
3
SETTING THE CLOCK
n Touch any button to wake the timer.
n Using the button, move the arrow to SET CLOCK.
n Press the & buttons to adjust the clock to the current time.
n Press the
button again to set the time and move to the next setting, START WATER.
4
SELECT WHEN TO WATER
n With the arrow pointing to START WATER, use the & buttons to select the first time
of the day you want to water. All remaining watering cycles during the day will be based on
this time.
n Press the
button to move to the next setting.
5
SELECT HOW LONG TO WATER
n With the arrow pointing to HOW LONG, use the & buttons to select the length of each
watering cycle.
n Cycles can be up to 360 minutes (6 hours) in duration.
n Press the
button to move to the next setting.
6
SELECT HOW OFTEN TO WATER
n With the arrow pointing to HOW OFTEN, use the &
buttons to select the watering frequency.
n Watering can be as often as Every 1 Hour or little as
Every 7 Days (once per week).
We recommend replacing batteries when the indicator reaches
START WATER HOW LONG
OFF
HOW OFTEN AUTO
SET CLOCK
RAIN DELAY, HOLD
START WATER HOW LONG
OFF
HOW OFTEN AUTO
SET CLOCK
RAIN DELAY, HOLD
START WATER HOW LONG
OFF
HOW OFTEN AUTO
SET CLOCK
RAIN DELAY, HOLD
START WATER HOW LONG
OFF
HOW OFTEN AUTO
SET CLOCK
RAIN DELAY, HOLD
SUNDAY MONDAY TUESDAY WEDNESDAY THURSDAY FRIDAY SATURDAY
SUNDAY MONDAY TUESDAY WEDNESDAY THURSDAY FRIDAY SATURDAY
SUNDAY MONDAY TUESDAY WEDNESDAY THURSDAY FRIDAY SATURDAY
EVERY 2 DAY
EVERY 1 DAY
EVER
Y
WEEK
WEEK
ONE
WEEK
TWO
WEEK
ONE
WEEK
TWO
EVERY 3 DAY
1
Understanding Zones
n This is a four zone timer allowing you to water four different areas from the same faucet.
Note: You will see Zone 1 highlighted at the bottom of
the screen; program Zone 1 before moving on to Zone 2.
START WATER HOW LONG
OFF
HOW OFTEN AUTO
SET CLOCK
RAIN DELAY, HOLD
8
AUTO MODE
n After programming, the timer will be in AUTO mode.
n The screen display will alternate between showing the current time and the next watering cycle
of each zone.
n If the next watering cycle is more than 24 hours away, the NEXT START TIME will be
displayed in days instead showing a time.
START WATER HOW LONG
OFF
HOW OFTEN AUTO
SET CLOCK
RAIN DELAY, HOLD
START WATER HOW LONG
OFF
HOW OFTEN AUTO
SET CLOCK
RAIN DELAY, HOLD
START WATER HOW LONG
OFF
HOW OFTEN AUTO
SET CLOCK
RAIN DELAY, HOLD
7
SETTING ANOTHER ZONE
n When you have set START WATER, HOW LONG and HOW OFTEN for Zone 1, press the
button to go back to START WATER.
n Press to select Zone 2, and repeat steps 4-6 above.
n When all desired zones are set, press the button to enter AUTO mode.
Loading ...