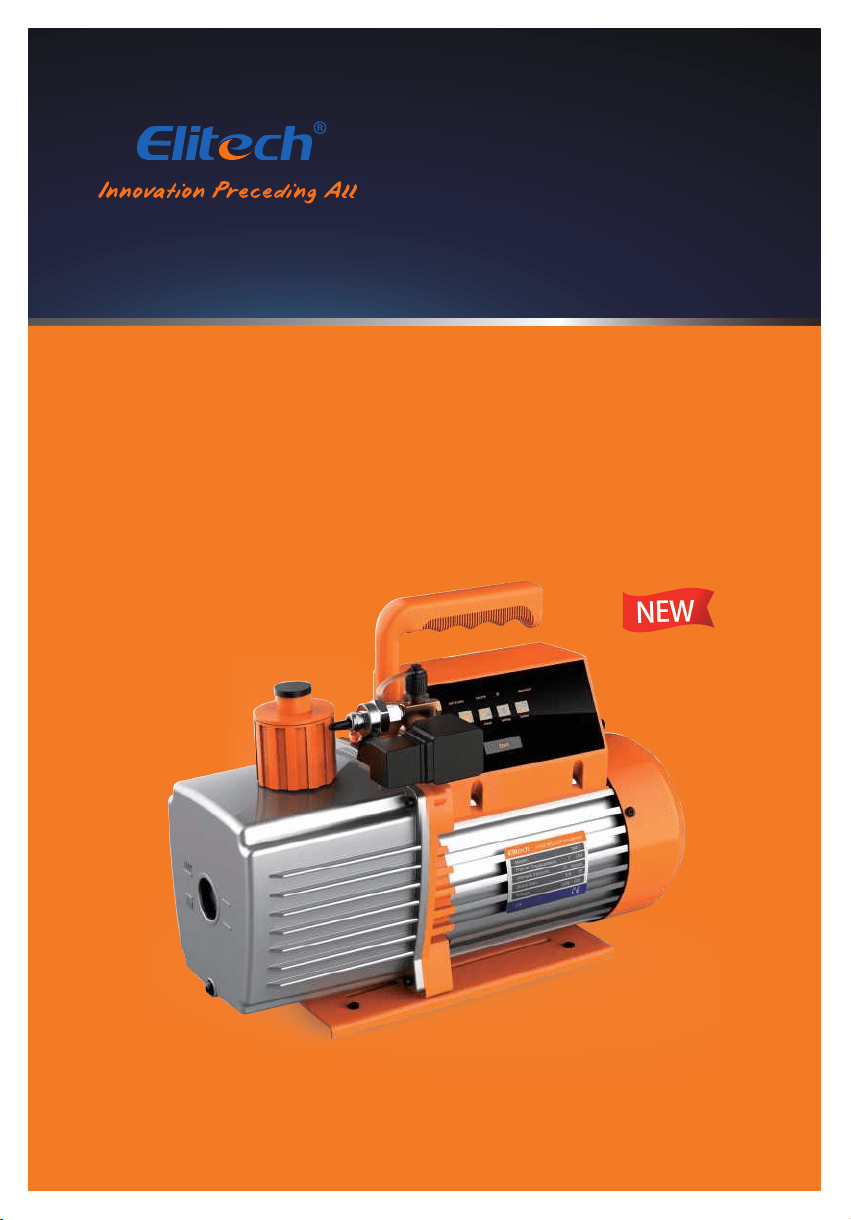
Intelligent Vacuum Pump
User Manual
SVP-7/SVP-9/SVP-12
NEW

Contents
Disclaimer ···························································································1
Product Features ···············································································2
Technical Parameters ·········································································2
Service Parts ······················································································3
Operation Guide ···············································································4
Care and Maintenance ·······································································9
App Operating Instructions ······························································11
Disclaimer
Warning Signs
• The vacuum pump is heavy. Be careful while handling to prevent personal injury.
• Use only ISO 46 mechanical oil to avoid vacuum pump damage.
• Do not cover the exhaust port during vacuum pump operation.
• Do not expose the suction port continuously to atmosphere for more than 3 minutes.
• The air inlet pressure should not exceed 27. 5 bar to avoid sensor damage.
-1-
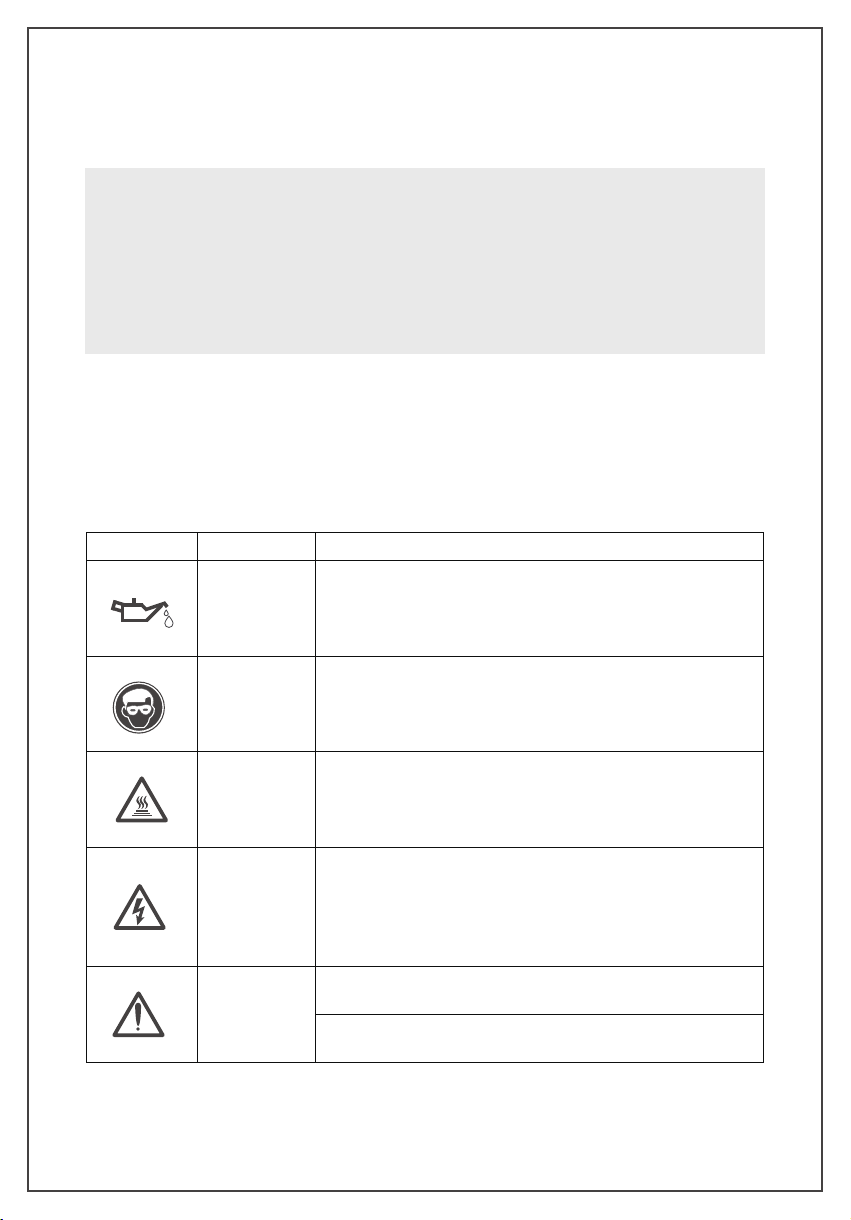
Sign
Name
Content
Check the Oil
Level
Add ISO 46 mechanical oil
before the first use and keep the oil level
between the maximum and minimum level
Wear Goggles
Wear goggles when working with refrigerants
.
Direct contact with
refrigerants may cause injury
Beware of High
Temperature
Burns
The pump surface becomes hot during normal operation. Do not
touch the pump body or motor during operation
Avoid Electrical
Shock Hazards
Improper use may cause electrical shock hazards
Read and follow the instructions carefully and take precautions to
avoid electrical shock hazards . Confirm that all associated devices
are grounded correctly before power on
Danger
Please remove the exhaust cap before starting up
Check the oil level and prohibit running without oil
Product Features
Technical Parameters
• Intelligent Control of Motor and Solenoid Valve
• Leakage Level Judgment
• Vacuum Change in Graph
• 4" Touch Screen Display
• Estimated Job Completion Time
• Data Logging and Storage via App
-2-
Models
SVP-7 SVP-9 SVP-12
Stage
2 stages
Power Supply
110V / 60HZ; 220V/50HZ
Motor
AC induction motor
Speed Regulation
Fixed speed
Vacuum Accuracy
1-10000microns ±10% of Reading / ±10microns
10000-19000 microns ±20% of Reading
Operating Temperature
5°C~40°C(41°F~104°F)
Transmission
Distance
30ft / 10m
Limit Vacuum
15 microns
Pumping Rate
7 CFM (3L/S) 9 CFM (4L/S) 12 CFM (5L/S)
Motor Power
3/4 HP ( 550 W ) 1 HP ( 750 W ) 1 HP ( 750 W )
Fuel Volume
22oz /(650ml) 22 oz /( 650ml) 25.3 oz( 750ml)
Overall Dimension
18.5in×10.5in×14.8in / (470mm*267mm*380mm)
Weight
34.2lbs / 14.8kg 35.3lbs / 15.3kg 36.8lbs / 16kg
Air Inlet
1/4 SAE ;3/8 SAE
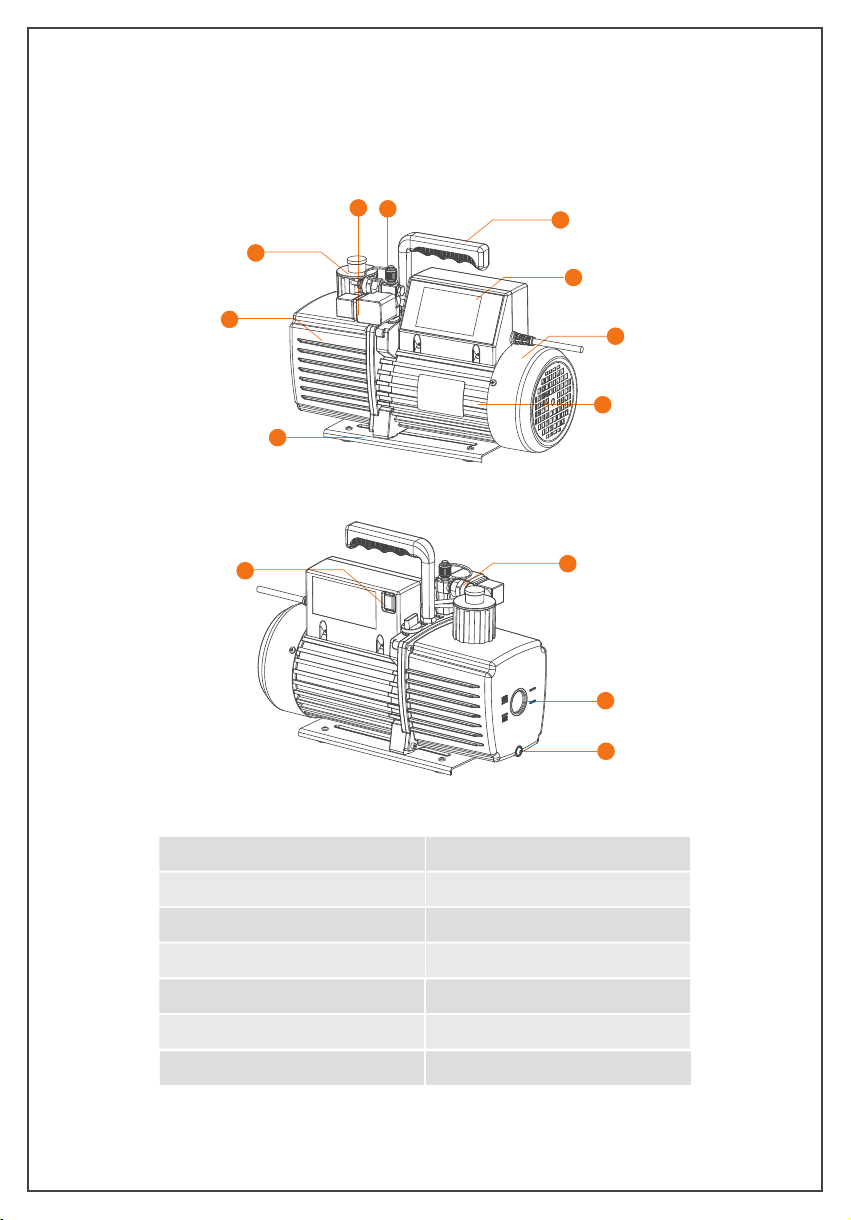
Service Parts
① Display screen
② Handle
③ Air inlet
④ Solenoid valve
⑤ Catcher
⑥ Oil tank
⑦ Base
⑧ Motor
⑨ Motor housing
⑩ Power button
⑪ Vacuum sensor
⑫ Oil window
⑬ Oil drain plug
-3-
1
9
8
7
6
5
2
4
3
12
13
10
11

Operation Guide
Interface Introduction
Conditions that must be met
1. Place on a flat surface.
2. Confirm the voltage and frequency at the outlet match with the vacuum pump
specifications.
3. Confirm the oil level is within the Min and Max level.
4.Remove the air inlet cap(1/4 SAE fitting as shown in the
right image), connect the pumped system(make sure the pipe
fitting is fit with the air inlet fitting). Tighten the air inlet and
make sure the system and hoses are sealed with no leakage.
5. Plug in the power cordand open the exhaust port.
Main interface
-4-
SVP-7 (110V)
Measure Graph Sengs System
16:22:34
Record: OFF
Start
1/4 SAE

(1) The status bar on top of the page shows the product model, time, Bluetooth status
and record status.
① Model number varies depending on the product models.
② Bluetooth not connect; Bluetooth connected.
③ During operation, appear when temperature exceeds the upper alarm limit,
and appear when temperature below the lower alarm limit.
④ Record: close means no data is recorded.Record: Open means that data is
being recorded.
(2) The middle part of the page is the sub-interface button.
① : Real-time measurement interface
② : Graph
③ : Vacuum parameter setting
④ : System parameter display and setting
(3) The bottom part is the “Start” and “Stop” button. The motor is o by default after
power-on. Click “Start” to start the motor. Button will be locked (within 3 sec);
Click “Stop” to stop the motor. Button will be locked (within 10 sec).
After the motor stops, in order to prevent frequent start and stop, the button is
invalid within 10 seconds.
When the motor starts, the solenoid valve automatically opens instantly. The
solenoid valve closes automatically after the motor stops to avoid the oil be suck to
vacuum sensor.
1. Real time measurement interface
Click the“Measure” button on the main interface to enter the real-time measurement
interface.
-5-

(1) Motor Status: show the current status of the motor.
(2) Motor Temp/Limit: show the surface temperature of the pump chassis and set
the alarm temperature.
(3) Oil Temp/Limit: show vacuum pump oil temperature and set the alarm temperature.
(4) Vacuum Status: display the current vacuum value status, "Decrease", "Stable",
"Rise", "--".
(5) Estimated End Time: when the vacuum is stable, it shows the estimated job
completion time including holding time.
(6) Vacuum Reading Display: Vacuum readings shows when the vacuum of the
system in real-time is below 60000microns. The waiting time for the vacuum
reading is longer for a larger system.
Note: The vacuum reading varies due to the sensor placement dierent. The reading
variances is caused by the uneven air flow during the vacuuming process. The farther
the air from the pump, the higher the air density is thus the vacuum reading is higher.
(7) Leakage level: when the vacuum is stable, check the leakage possibility from 0 to
100 levels. 0 represent uncertain leakage. The larger the number, the greater the
possibility of the leakage.
(8) Key: return to the main interface.
2. Graph
Click the “Graph” button on the main interface to view the vacuum change in real time.
(1) When the vacuum value drops below 60000microns, the vacuum change graph
is displayed.
(2) The X axis represent time. Y axis represent vacuum. The vacuum value is from
0-60000microns .
(3) Key: return to the main interface.
-6-
Return
Return

3. Settings
Click the “Settings”button on the main menu to enter the setting interface.
Unit(P/T)
Select Unit to set the unit for vacuum and temperature. The selected units are in green.
Vacuum
Set the minimum vacuum value, logging interval, and recording status.
(1) Minimum Vacuum: set the target vacuum value. The range of the minimum vacuum
value is 8-750 microns. Click the change button to switch the minimum vacuum value;
the display unit changes according to the selected unit.
(2) Logging Interval (S):1, 5, 10, 30, 60, 120, 300.
(3) Recording Status: The logging can be turned on and o. The upper right corner
shows the logging/recording status.
-7-
Time
(1) Set and save the time then it shows at the top of the screen.
(2) : Change key.
(3) : return to the main interface.
SVP-7 (110V)
16:22:34
Record: OFF
Return
Unit(P/t) Vacuum Time
M D Y
9 / 12 / 20
H Min
16 : 22
-8-
Return
SVP-7 (110V)
Running Time:
Holding Time:
Flow Rate:
3 Min
0 Min
7 CFM
16:22:34
Record: OFF
Return
4. System
In the main menu, click the “ System” button to enter the system interface.
(1) Running Time: refer to theaccumulatedrunning time of themotor.
(2) Holding Time: refer to the time for the vacuum pump to continue vacuuming
after the target vacuum value is stable.
(3) Flow Rate: refer to the pumping speed of the vacuum pump.
(4) : Change key.
(5) : return to the main interface.
Return

Other functions
1. Temperature alarm: When the oil temperature or motor chassis temperature exceeds
the upper limit alarm temperature set by the APP, the motor and solenoid valve are
closed, the temperature alarm icon " " isdisplayed at the top of the screen; When
the temperature decrease within the alarm temperature, the alarm will be cleared, and
the vacuum work continues .If temperature exceeds the oine alarm temperature, the
temperature alarm icon " " will bedisplayed on the top of the vacuum pump screen,
the motor operation will not be aected.
5. After using the vacuum pump
1. Close the valve between the pump and the pumped container.
2. Turn o the power switch on the pump, unplug the power plug, and remove the
connecting pipe.
3. Finally, close the air inlet cap to prevent dirt or floating particles from entering the
pump cavity.
Care And Maintenance
Precautions
-9-
1. When the vacuum is started, the air pressure is relatively high and the pump
exhaust volume is large, thus oil mist will be overflowing with a large amount of
gas. This is a common phenomenon for a rotary vane vacuum pump.
When the vacuum drops to a very low level, the pump exhaust volume is small,
and there will be no oil mist. Therefore, user should regularly monitor the oil level
via the oil window to avoid running out of oil.
2. During operation, storage and transportation, keep the vacuum pump clean to
prevent pollutants such as water, mechanical impurities,etc.from entering the
pump so as not to aect the service life of the vacuum pump and the normal
operation of the system.
3. The oil in the pump should be drained if it is not used for a long time. Store the
pump in a dry and clean environment.
4. The diameter of the pipe is larger than the inner diameter of the air inlet to avoid
aecting the pumping speed.
5. Check the tightness of the pipe connection to prevent leakage. Recommend using
the vacuum grease on the connection and clamp it with a clamp to ensurethe seal.
6. Do not use the pump to pump out gases which contain high level of oxygen,metal
corrosive and explosive gases. In addition, do not pump in any gases that react
with pump oil and containing large amount of water vapor.
7. It is recommended to clean the catcher once every half year.

Troubleshooting Guide
-10-
Failure
Phenomenon
Cause of Issue
Troubleshooting Method
Low Vacuum
1. Insucient Oil
Add oil between the maximum and minimum
level
2. Pump oil Emulsified, Polluted
Replace with new oil
3. The Oil Inlet Is Blocked or the Oil
Supply is Insucient
Clean the oil inlet and filter
4. Leakage of the Pump System and
Connection
Check the system and the connection to
prevent the leakage
5.
Improper Selection of Pump
Check the size of the pumped container,
recalculate and select the appropriate type of
pump
6. Parts Wear and Tear due to Long
Time Used.
Repair or replace with a new pump
Oil Leakage
1.
The Oil Seal Is Damaged
Replace oil seal
2.
Loose or D
amaged
Tank
Connections
Tighten the screws and replace the O -ring
How to replace the vacuum pump oil
1. Run the pump for about 3-5minutes until it is warmed up to runs out the pump oil.
2. When the pump is running, open the air inlet port at the same time to let the oil flow
back to the oil tank. The pump must stop when replacing the oil.
Stop the pump and open the oil drain plug. Then open the catcher to speed up the
process of oil exhausting.
3. Tilt the pump body to completely drain the residual oil, and tighten the drain plug.
4. Open the catch device and add the new pump oil.
5. Cover the air inlet cap and start the pump to run-check the oil level after one
minute.If the oil level is below the lower limit, slowly add the oil until it reaches the
normal oil level. Finally, screw on the catcher.
1. Power on the vacuum pump.
2. Turn on the Bluetooth function on the mobile phone.
3. Open the “Elitech Tools” AP P.
APP Operating Instructions
-11-
Fuel
Injection
1. Too Much of Oil
Drain the oil to the oil level line
2. The Air Inlet Is Over Pressured for
a Long Time
Choose a pump with larger pumping speed
Diculty
Starting
1. Oil Temperature is Too Low
Open the air inlet, start the motor repeatedly
or heat up the pump oil
2. Motor Failure
Check and repair
3. Foreign Objects Fallen into the
Pump
Check and clean
4. Power Failure
Check and repair
5. The Power Supply Voltage Is Too
Low
Check the power supply voltage

-12-
4. Enter the home page, enable “search nearby device” to find the vacuum pump.
Tap on the device found to connect to it. When connected, tap to enter the
device details interface.Enable “device list” to view models supported on this
app. Tap “View” to view the functions of the device.
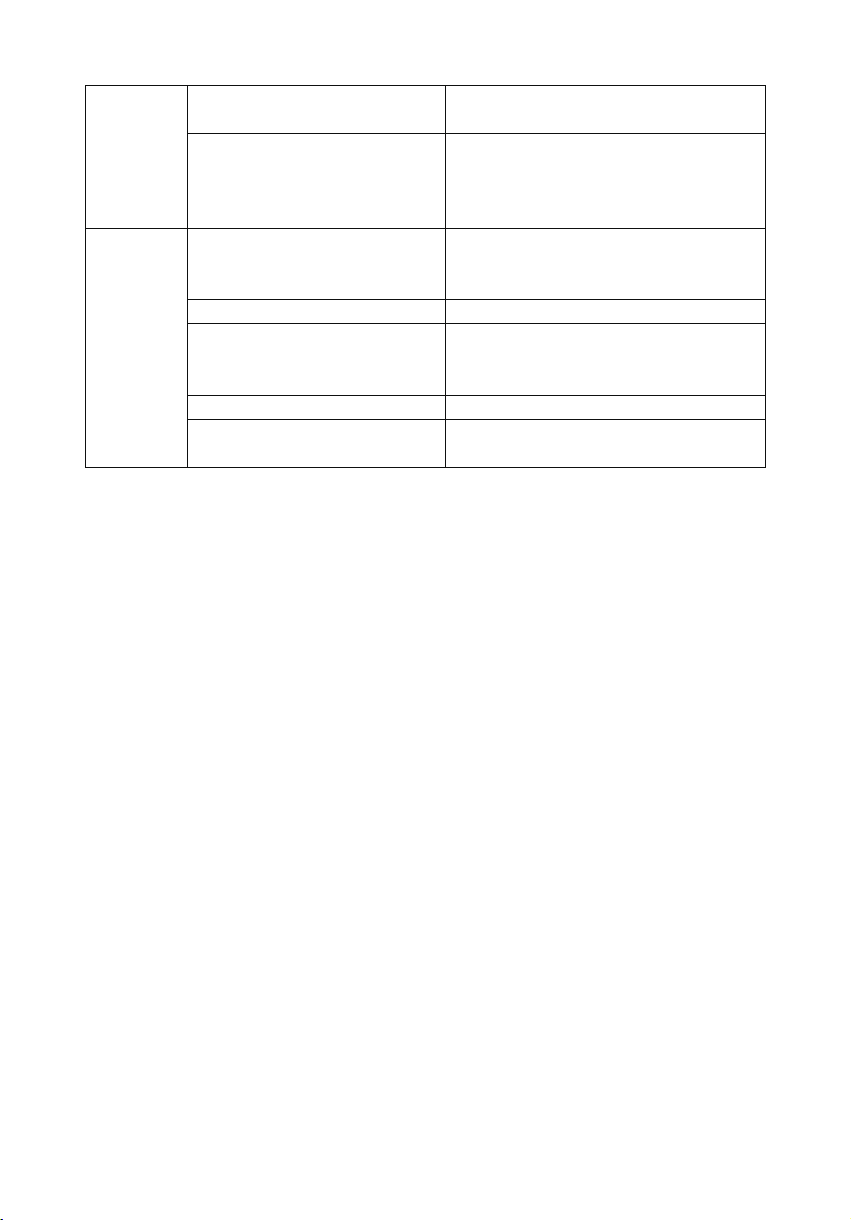
5. Tap “ ” on the top left corner to enter the menu. (Menu instructions below
are of vacuum pump only, not including other Elitech devices)
-13-
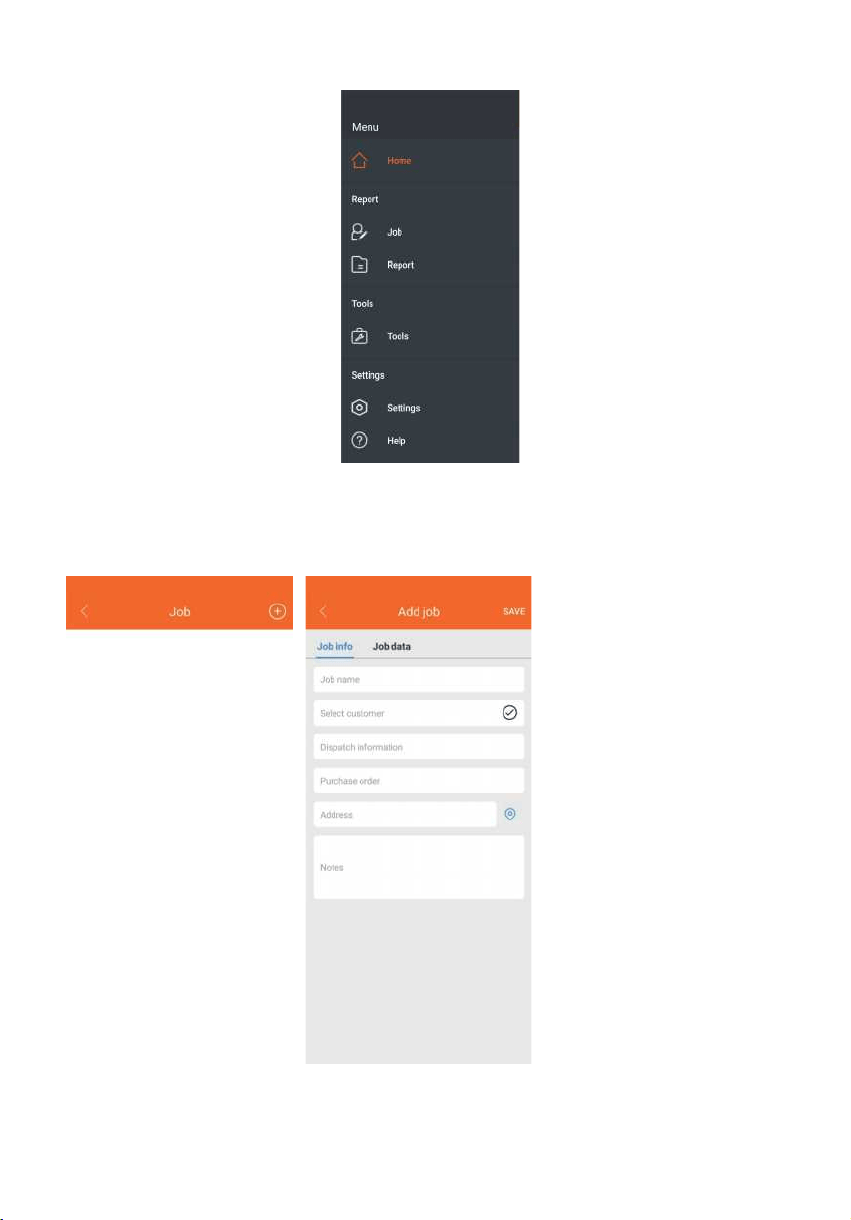
(1)Report
①Job: Tap the “Job” to enter the job list. Tap “+” to add a new job. Fill in work
information and tap “SAVE” to save the job.

-14-
② Report: Tap “Report” to enter the report interface.
Select a report by job or by date, tap to view data and graph. Tap "EXPORT" at the
bottom to export it in Excel or PDF.
At the saved report, swipe left to delete the report.

-15-
(2) Settings
① Setting:Tap the “Settings” to enter the system settings interface. .
Keep your phone screen on: the screen won't turn o while the app is in use.
Language setting: select language as English or Chinese.
②
Help: Tap the "Help" to enter the help interface. Tap the "About " to check
the app version.
.
Alarm : single sound, single vibration or sound and vibration alarm at the same time.
Real-time trend: the data refreshing interval on the graph, 1s, 10s, 30s, 1s by default.

-16-
8. Device Detail
Tap the connected device icon to enter the detailed interface of the device, display the
vacuum pump status, and control the vacuum pump.
Graph
Temperature status
of oil and shell
(1) :Motor stop status, tap to start running.
(2) :Motor running status, tap to stop the motor.
(3) Graph: The real-time vacuum graph will be displayed after the vacuum value
drops below 60000 microns.
(4)
Finish Time: When the vacuum comes to stability, the remaining vacuuming
time will be estimated, which includes the holding time set.
(5) Basic Function
①
Vacuum Value: the real-time vacuum value.
Expected completion
time
Motor control

-17-
③
Temperature status of oil and shell: Temperature status "High", "Normal",and "Low" displayed
according to the set alarm temperature.
④
Leakage Rate: A leakage level will be displayed (for reference only) when the
vacuum value is stable. The larger the number is, the greater the possibility of
leakage is. "---" will be displayed before the vacuum value is stable.
⑤
Extraction status: vacuum status display, (rise), (decrease), (stable),
––(exceed the range of vacuum sensor).
⑥
Vacuum Unit: select vacuum unit, inHg , Torr, mbar, mTorr, Pa, micron, kPa.
⑦
Record Switch: record the vacuum data, o by default.
⑧
Interval Time: select vacuum logging interval, 1S, 5S, 10S, 30S, 1Min, 2 Min, 5 Min.
Read data: read the data recorded while pumping. Before reading the data, it
will ask whether to delete the data after reading.
7.Settings
Tap “Settings” to enter the basic, alarm and recording settings interface.
②

-18
(1) Basic Settings
① Device Name: modify the device name, support up to 10 characters and numbers,
Tap “OK” to save the device name.
② Vacuum Unit: select vacuum unit, inHg, Torr, mbar, mTorr, Pa, micron, kPa.
③ Temperature Unit: select the temperature unit, ºC, ºF.
④ Holding Time: the continuous working time after reaching the target vacuum,
the setting range is 0 to 200 minutes.
(2) Alarm Settings
① Vacuum Min: A sound or vibration alarm will be triggered on your phone when
the vacuum reaches the target value.
② Temperature alarm setting: A sound or vibration alarm will be triggered on your phone
when the max and min oil temperature and shell temperature reach the target value.
The temperature setting range is -58°F to 185°F.
(3) Record Settings
① Record Switch: record the vacuum data, o by default.
② Interval Time: set vacumm logging interval , 1S, 5S, 10S, 30S, 1Min, 2 Min, 5 Min.
Enter the APP Store and search for "Elitech Tools" to download or scan the QR code
below to download.

Made in China