JH-MTF01R
PRODUCT USE GUIDE
IMPORTANT INSTRUCTIONS
!
- 2 -
1.To reduce the risk of fire or electrical shock, do not use this product with any solid-state
speed control device . To reduce the risk of fire or electric shock and injury to anyone , do
not use in a window.
2.Do not soak the main body of the motor in water or rinse under the tap tap
3.USE this fan only as described in this manual . Other uses are not recommended as it
may cause fire or electric shock.
4.To protect against electrical shock, do not place fan in window ,plug or cord in water. or
spray with liquids .
5.Unplug the fan from the outlet when not in use, when moving fan from one location to
another and before cleaning.
6.After the machine adds water, place or move and do not tilt or collide. Push it slowly so
as to avoid water overflow.It is strictly prohibited to turn it over and place it on the inclined
ground to prevent accidents.
7.This machine should not be placed at high temperature and ultra-low temperature. The
water in the water tank in the hot and summer season is easy to deteriorate and produce
odor. Please pay attention to update the water.
8.When packaging and storage are required, it shall be run with normal air for a period of
time so that the evaporator is fully dried to prevent the evaporator odor due to wet
surface.
9.This machine has a strong humidification effect, do not use it in a closed environment, if
used in a closed environment, please turn off the cold air function.
10.Add water promptly when the water level is below the lowest water line.
11.Do not operate the fan in the presence of explosive and/or flammable fumes.
12. Avoid contact with moving fan parts.
13.To disconnect , grip the plug and pull it from the wall outlet .Never yank the cord .
Always use on a dry surface.
-3 -
14.Do not operate any fan with a damaged cord or plug. discard fan or return to an
authorized service facility for examination and/or repair.
15. Arrange cord away from traffic area and where it will not be tripped over.
16.The appliance is not to be used by children or persons with reduced physical, sensory
or mental capabilities , or lack of experience and knowledge, unless they have been given
supervision or instruction.
17.Close supervision is necessary when any appliance is used by or near children .
Children should not play with the appliance.
18.Do not leave the fan running unattended.
19.Note: Remove the power before removing the protective housing.
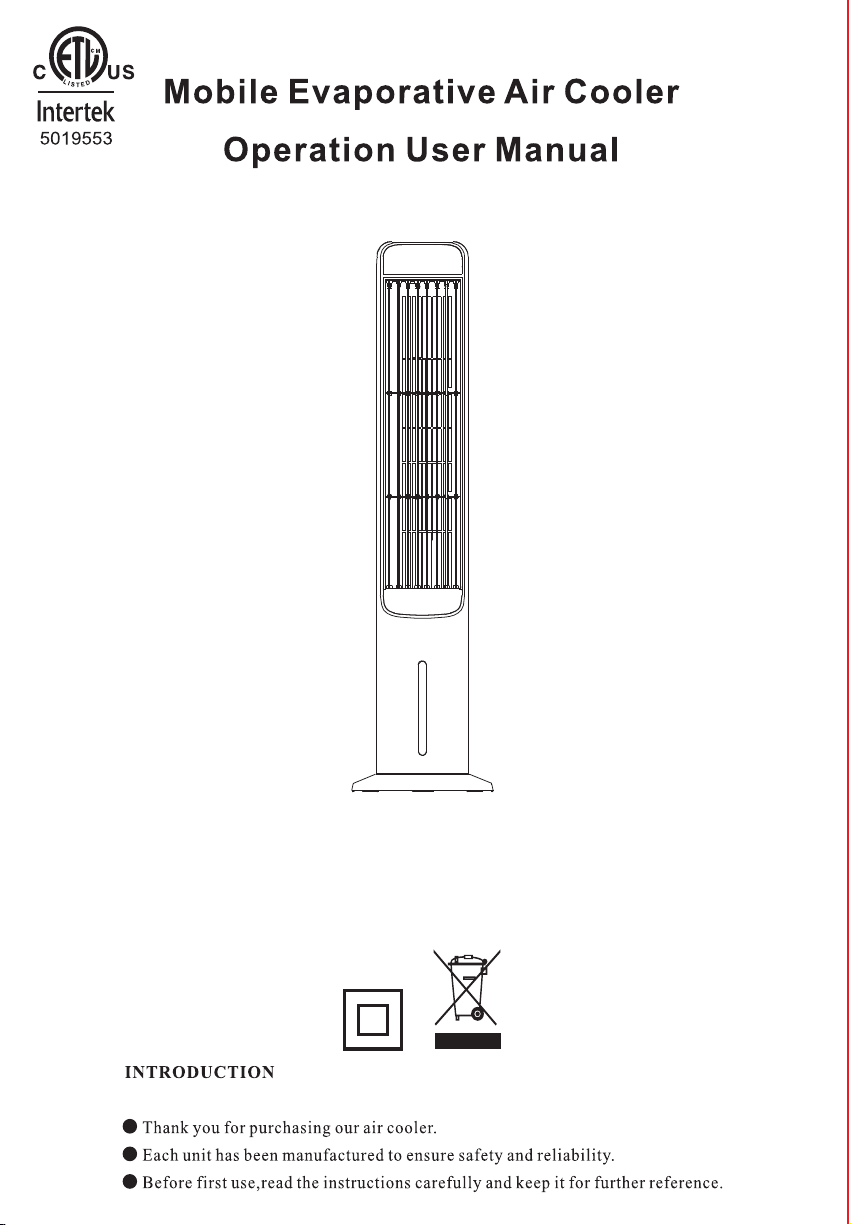
TECHNICAL PARAMETERSS
PRODUCT DIAGRAM
Control Panel
- 4 -
Handle
Wet Curtain Support
Wet Curtain Pape
Water Tank Rotary Buckle
Lower Water Tank
Display Panel
Swing Leaf
Water Level Window
Base
Model No.
Item Name
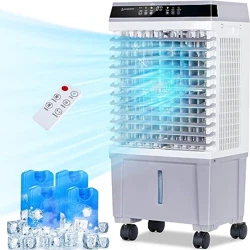
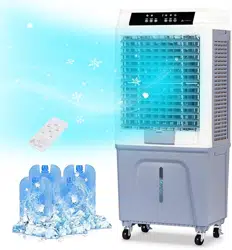
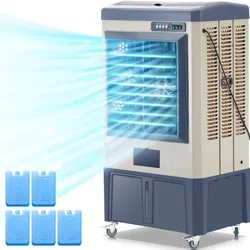
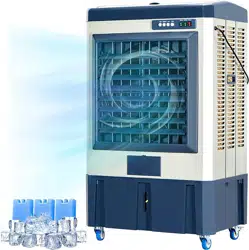
Evaporative Air Cooler
JH-MTF01R
Rated Voltage
Rated Power 80W
3 Mode Fan Speeds Low / Medium / High
3 Breeze Modes Normal / Natural / Sleep
Max Timer 12 Hours
Water Tank 4 L
120V ~ 60Hz
Package Size 41.30*9.84*11.42 inch
Air Outlet
Front Shell
Upper Water Tank Cover
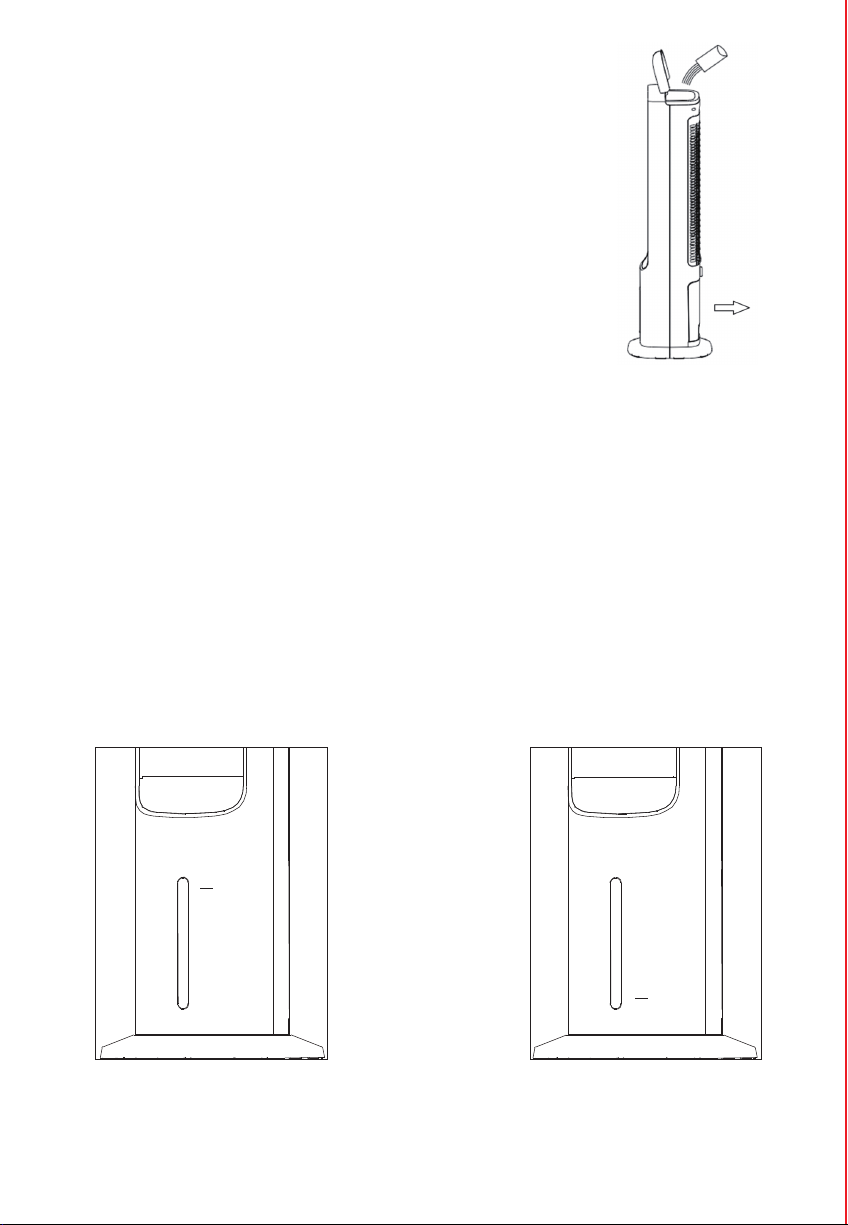
FILL THE WATER TANK
ATTENTION
Do not exceed the highest water level
Max
Do not fall below the lowest water level
- 6 -
Min
You can add water through the upper tank and the lower tank
● Open the upper water tank cover and add water (Figure).
● Pull out the lower water tank and add water(Figure).
Observe the water level through the water level window, control the water increase,
and pay attention to the following points when adding water:
● For you and your family health, you must use clean tap water and unplug it before
adding water.
● Do not splash water into the motor and surrounding parts to avoid leakage
accidents.
● Make sure the water level in the water tank is between minimum level ( Indicated
by " Min " ) and maximum level ( Indicated by " Max " ).
● Please slow down the speed of adding water if you want to add water from the
upper tank, otherwise it is easy to spill the water.
- 7 -
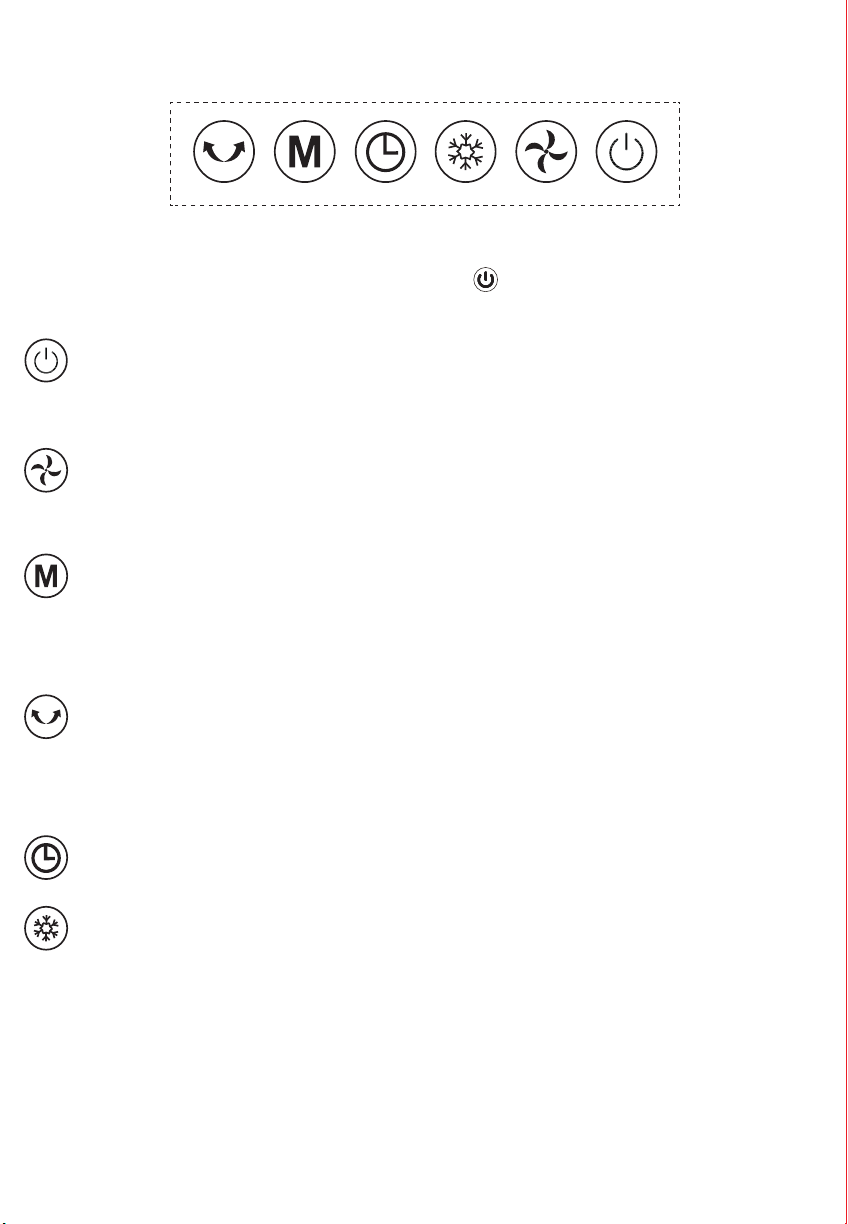
PANEL CONTROL
Place the unit on a firm level surface and plug it into a socket. Power indicator light
reminding this products in standby mode. Turn on button, default setting is in low
speed, Turn it again, products in standby.
On/off Button:
Press the on/off button to switch the fan on or off. After power on, the LED
display will show the current room temperature
Speed Button:
Press the button to change the speed between low-> medium-> high. Default
speed is low speed.
Mode Button:
Press the button to change fan mode between normal mode - natural mode->
sleep mode. Sleep mode: lowers speed every 30 minutes and then stays at the
lowest speed. Natural mode: the speed changes randomly.
Swing Button:
Press the button after turning on. The corresponding icon on the panel lights up,
and the left and right pages start to swing left to right. Then press again, turn off
the function. The air supply state is directional.
Timer Button:
Press this button set timer , step 1 hours ,max 12hours.
Cooling Button:
Press this button, the corresponding icon on the panel lit, turn on the cold wind
function, and then press this key, then turn off the cold wind function, you can
choose as needed.
- 9 -
Guidelines for use of batteries
Dispose of the batteries
● The battery must be brought to a household hazardous waste collection site for proper
handling.
STORAGE & MAINTAINENCE GUIDELINES
● Before first use:
Pull the protective film to remove it. The remote control is now ready for use.
● To replace the battery:
Open the battery compartment on the back of the remote control and replace the used
battery with a new one. Battery type:CR2025.
1.Be sure to unplug the power cord from the outlet before cleaning.
2.Plastic parts should be cleaned with mild soap and a damp cloth or sponge. Do not
submerge the unit in water to clean it . Thoroughly remove soap with clean water.
3.Be sure not to get water or other liquid inside the fan motor.
4.Dry all parts completely before reassembling and reconnecting to a power source.
5.Store the fan in a cool, dry location when not in use .To prevent dust and dirt
build-up, use the original packaging to repack the unit.
- 8 -
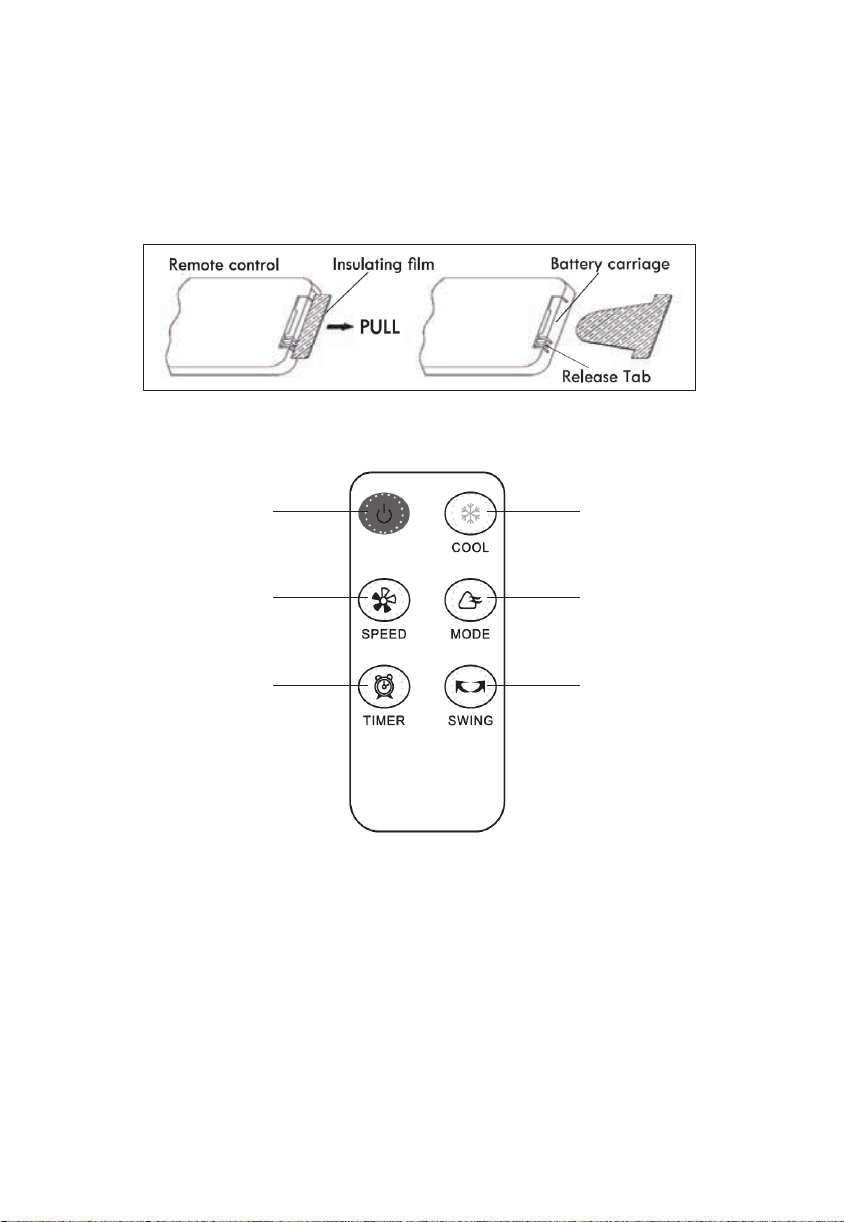
REMOTE CONTROL
● The remote control must be pointed towards directly the receiver on the fan when using.
● The working range for the remote control is 5 meters. If the remote control is not pointed
directly towards the receiver, the range will be decreased.
● The remote control may not operate in a room where heavy machinery is operating.
● Do not block the line of sight between the remote control and the receive.
● Handle the remote control with care. Do not drop the remote control on the floor or bang
it against hard objects.
COOLING
ON/OFF
BREEZE MODE
OSCILLATION
SPEED
TIMER
NOTE:
Remove the plastic insulation film located underneath the battery before using the remote.
Aftermarket31[email protected]
135*195mm
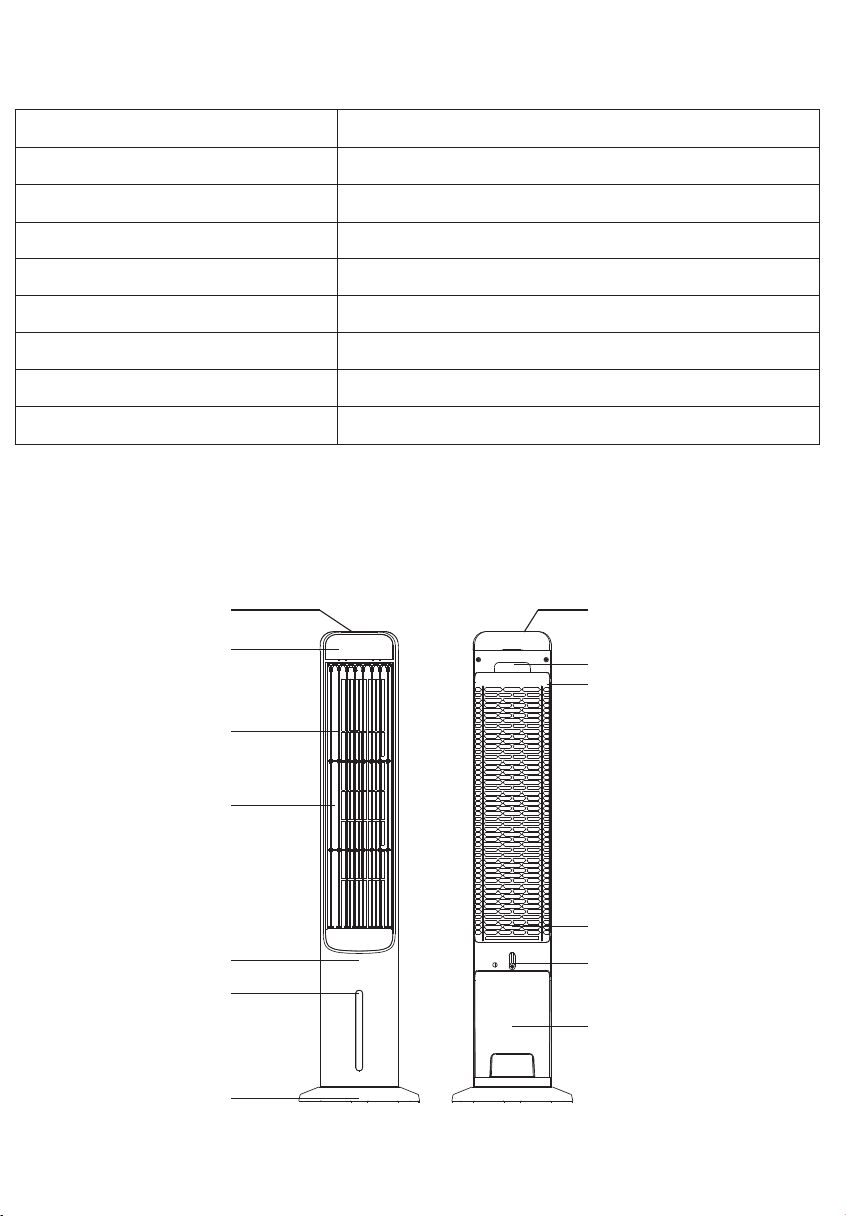
PACKAGE INCLUDE
BASE ASSEMBLING
- 5 -
2X Large Ice Box
1X Evaporative Air Cooler
4X 4*16 Secrews
1X JH-MTF01R 1X Remote Control
2X Small Ice Box
Step 1
Take out the left and right bases in the box,
first cross fasten this buckle, and then rotate
downward to make the left and right bases
as flat as each other.
Step 2
Align the positioning holes the base with the
positioning columns above the fuselage,
secure, and tighten the screws.
JH-MTF01R
PRODUCT USE GUIDE
Note: This product has a water level protection switch. When the cold air mode is
started, if there is no water or the water level is insufficient, the water pump will
automatically stop working and no longer pump water, so as to avoid damaging
the water pump that has been working without water for a long time.

JH-MTF01R
PRODUCT USE GUIDE
IMPORTANT INSTRUCTIONS
!
- 2 -
1.To reduce the risk of fire or electrical shock, do not use this product with any solid-state
speed control device . To reduce the risk of fire or electric shock and injury to anyone , do
not use in a window.
2.Do not soak the main body of the motor in water or rinse under the tap tap
3.USE this fan only as described in this manual . Other uses are not recommended as it
may cause fire or electric shock.
4.To protect against electrical shock, do not place fan in window ,plug or cord in water. or
spray with liquids .
5.Unplug the fan from the outlet when not in use, when moving fan from one location to
another and before cleaning.
6.After the machine adds water, place or move and do not tilt or collide. Push it slowly so
as to avoid water overflow.It is strictly prohibited to turn it over and place it on the inclined
ground to prevent accidents.
7.This machine should not be placed at high temperature and ultra-low temperature. The
water in the water tank in the hot and summer season is easy to deteriorate and produce
odor. Please pay attention to update the water.
8.When packaging and storage are required, it shall be run with normal air for a period of
time so that the evaporator is fully dried to prevent the evaporator odor due to wet
surface.
9.This machine has a strong humidification effect, do not use it in a closed environment, if
used in a closed environment, please turn off the cold air function.
10.Add water promptly when the water level is below the lowest water line.
11.Do not operate the fan in the presence of explosive and/or flammable fumes.
12. Avoid contact with moving fan parts.
13.To disconnect , grip the plug and pull it from the wall outlet .Never yank the cord .
Always use on a dry surface.
-3 -
14.Do not operate any fan with a damaged cord or plug. discard fan or return to an
authorized service facility for examination and/or repair.
15. Arrange cord away from traffic area and where it will not be tripped over.
16.The appliance is not to be used by children or persons with reduced physical, sensory
or mental capabilities , or lack of experience and knowledge, unless they have been given
supervision or instruction.
17.Close supervision is necessary when any appliance is used by or near children .
Children should not play with the appliance.
18.Do not leave the fan running unattended.
19.Note: Remove the power before removing the protective housing.
TECHNICAL PARAMETERSS
PRODUCT DIAGRAM
Control Panel
- 4 -
Handle
Wet Curtain Support
Wet Curtain Pape
Water Tank Rotary Buckle
Lower Water Tank
Display Panel
Swing Leaf
Water Level Window
Base
Model No.
Item Name
Evaporative Air Cooler
JH-MTF01R
Rated Voltage
Rated Power 80W
3 Mode Fan Speeds Low / Medium / High
3 Breeze Modes Normal / Natural / Sleep
Max Timer 12 Hours
Water Tank 4 L
120V ~ 60Hz
Package Size 41.30*9.84*11.42 inch
Air Outlet
Front Shell
Upper Water Tank Cover
FILL THE WATER TANK
ATTENTION
Do not exceed the highest water level
Max
Do not fall below the lowest water level
- 6 -
Min
You can add water through the upper tank and the lower tank
● Open the upper water tank cover and add water (Figure).
● Pull out the lower water tank and add water(Figure).
Observe the water level through the water level window, control the water increase,
and pay attention to the following points when adding water:
● For you and your family health, you must use clean tap water and unplug it before
adding water.
● Do not splash water into the motor and surrounding parts to avoid leakage
accidents.
● Make sure the water level in the water tank is between minimum level ( Indicated
by " Min " ) and maximum level ( Indicated by " Max " ).
● Please slow down the speed of adding water if you want to add water from the
upper tank, otherwise it is easy to spill the water.
- 7 -
PANEL CONTROL
Place the unit on a firm level surface and plug it into a socket. Power indicator light
reminding this products in standby mode. Turn on button, default setting is in low
speed, Turn it again, products in standby.
On/off Button:
Press the on/off button to switch the fan on or off. After power on, the LED
display will show the current room temperature
Speed Button:
Press the button to change the speed between low-> medium-> high. Default
speed is low speed.
Mode Button:
Press the button to change fan mode between normal mode - natural mode->
sleep mode. Sleep mode: lowers speed every 30 minutes and then stays at the
lowest speed. Natural mode: the speed changes randomly.
Swing Button:
Press the button after turning on. The corresponding icon on the panel lights up,
and the left and right pages start to swing left to right. Then press again, turn off
the function. The air supply state is directional.
Timer Button:
Press this button set timer , step 1 hours ,max 12hours.
Cooling Button:
Press this button, the corresponding icon on the panel lit, turn on the cold wind
function, and then press this key, then turn off the cold wind function, you can
choose as needed.
- 9 -
Guidelines for use of batteries
Dispose of the batteries
● The battery must be brought to a household hazardous waste collection site for proper
handling.
STORAGE & MAINTAINENCE GUIDELINES
● Before first use:
Pull the protective film to remove it. The remote control is now ready for use.
● To replace the battery:
Open the battery compartment on the back of the remote control and replace the used
battery with a new one. Battery type:CR2025.
1.Be sure to unplug the power cord from the outlet before cleaning.
2.Plastic parts should be cleaned with mild soap and a damp cloth or sponge. Do not
submerge the unit in water to clean it . Thoroughly remove soap with clean water.
3.Be sure not to get water or other liquid inside the fan motor.
4.Dry all parts completely before reassembling and reconnecting to a power source.
5.Store the fan in a cool, dry location when not in use .To prevent dust and dirt
build-up, use the original packaging to repack the unit.
- 8 -
REMOTE CONTROL
● The remote control must be pointed towards directly the receiver on the fan when using.
● The working range for the remote control is 5 meters. If the remote control is not pointed
directly towards the receiver, the range will be decreased.
● The remote control may not operate in a room where heavy machinery is operating.
● Do not block the line of sight between the remote control and the receive.
● Handle the remote control with care. Do not drop the remote control on the floor or bang
it against hard objects.
COOLING
ON/OFF
BREEZE MODE
OSCILLATION
SPEED
TIMER
NOTE:
Remove the plastic insulation film located underneath the battery before using the remote.
Aftermarket31[email protected]
135*195mm
PACKAGE INCLUDE
BASE ASSEMBLING
- 5 -
2X Large Ice Box
1X Evaporative Air Cooler
4X 4*16 Secrews
1X JH-MTF01R 1X Remote Control
2X Small Ice Box
Step 1
Take out the left and right bases in the box,
first cross fasten this buckle, and then rotate
downward to make the left and right bases
as flat as each other.
Step 2
Align the positioning holes the base with the
positioning columns above the fuselage,
secure, and tighten the screws.
JH-MTF01R
PRODUCT USE GUIDE
Note: This product has a water level protection switch. When the cold air mode is
started, if there is no water or the water level is insufficient, the water pump will
automatically stop working and no longer pump water, so as to avoid damaging
the water pump that has been working without water for a long time.
JH-MTF01R
PRODUCT USE GUIDE
IMPORTANT INSTRUCTIONS
!
- 2 -
1.To reduce the risk of fire or electrical shock, do not use this product with any solid-state
speed control device . To reduce the risk of fire or electric shock and injury to anyone , do
not use in a window.
2.Do not soak the main body of the motor in water or rinse under the tap tap
3.USE this fan only as described in this manual . Other uses are not recommended as it
may cause fire or electric shock.
4.To protect against electrical shock, do not place fan in window ,plug or cord in water. or
spray with liquids .
5.Unplug the fan from the outlet when not in use, when moving fan from one location to
another and before cleaning.
6.After the machine adds water, place or move and do not tilt or collide. Push it slowly so
as to avoid water overflow.It is strictly prohibited to turn it over and place it on the inclined
ground to prevent accidents.
7.This machine should not be placed at high temperature and ultra-low temperature. The
water in the water tank in the hot and summer season is easy to deteriorate and produce
odor. Please pay attention to update the water.
8.When packaging and storage are required, it shall be run with normal air for a period of
time so that the evaporator is fully dried to prevent the evaporator odor due to wet
surface.
9.This machine has a strong humidification effect, do not use it in a closed environment, if
used in a closed environment, please turn off the cold air function.
10.Add water promptly when the water level is below the lowest water line.
11.Do not operate the fan in the presence of explosive and/or flammable fumes.
12. Avoid contact with moving fan parts.
13.To disconnect , grip the plug and pull it from the wall outlet .Never yank the cord .
Always use on a dry surface.
-3 -
14.Do not operate any fan with a damaged cord or plug. discard fan or return to an
authorized service facility for examination and/or repair.
15. Arrange cord away from traffic area and where it will not be tripped over.
16.The appliance is not to be used by children or persons with reduced physical, sensory
or mental capabilities , or lack of experience and knowledge, unless they have been given
supervision or instruction.
17.Close supervision is necessary when any appliance is used by or near children .
Children should not play with the appliance.
18.Do not leave the fan running unattended.
19.Note: Remove the power before removing the protective housing.
TECHNICAL PARAMETERSS
PRODUCT DIAGRAM
Control Panel
- 4 -
Handle
Wet Curtain Support
Wet Curtain Pape
Water Tank Rotary Buckle
Lower Water Tank
Display Panel
Swing Leaf
Water Level Window
Base
Model No.
Item Name
Evaporative Air Cooler
JH-MTF01R
Rated Voltage
Rated Power 80W
3 Mode Fan Speeds Low / Medium / High
3 Breeze Modes Normal / Natural / Sleep
Max Timer 12 Hours
Water Tank 4 L
120V ~ 60Hz
Package Size 41.30*9.84*11.42 inch
Air Outlet
Front Shell
Upper Water Tank Cover
FILL THE WATER TANK
ATTENTION
Do not exceed the highest water level
Max
Do not fall below the lowest water level
- 6 -
Min
You can add water through the upper tank and the lower tank
● Open the upper water tank cover and add water (Figure).
● Pull out the lower water tank and add water(Figure).
Observe the water level through the water level window, control the water increase,
and pay attention to the following points when adding water:
● For you and your family health, you must use clean tap water and unplug it before
adding water.
● Do not splash water into the motor and surrounding parts to avoid leakage
accidents.
● Make sure the water level in the water tank is between minimum level ( Indicated
by " Min " ) and maximum level ( Indicated by " Max " ).
● Please slow down the speed of adding water if you want to add water from the
upper tank, otherwise it is easy to spill the water.
- 7 -
PANEL CONTROL
Place the unit on a firm level surface and plug it into a socket. Power indicator light
reminding this products in standby mode. Turn on button, default setting is in low
speed, Turn it again, products in standby.
On/off Button:
Press the on/off button to switch the fan on or off. After power on, the LED
display will show the current room temperature
Speed Button:
Press the button to change the speed between low-> medium-> high. Default
speed is low speed.
Mode Button:
Press the button to change fan mode between normal mode - natural mode->
sleep mode. Sleep mode: lowers speed every 30 minutes and then stays at the
lowest speed. Natural mode: the speed changes randomly.
Swing Button:
Press the button after turning on. The corresponding icon on the panel lights up,
and the left and right pages start to swing left to right. Then press again, turn off
the function. The air supply state is directional.
Timer Button:
Press this button set timer , step 1 hours ,max 12hours.
Cooling Button:
Press this button, the corresponding icon on the panel lit, turn on the cold wind
function, and then press this key, then turn off the cold wind function, you can
choose as needed.
- 9 -
Guidelines for use of batteries
Dispose of the batteries
● The battery must be brought to a household hazardous waste collection site for proper
handling.
STORAGE & MAINTAINENCE GUIDELINES
● Before first use:
Pull the protective film to remove it. The remote control is now ready for use.
● To replace the battery:
Open the battery compartment on the back of the remote control and replace the used
battery with a new one. Battery type:CR2025.
1.Be sure to unplug the power cord from the outlet before cleaning.
2.Plastic parts should be cleaned with mild soap and a damp cloth or sponge. Do not
submerge the unit in water to clean it . Thoroughly remove soap with clean water.
3.Be sure not to get water or other liquid inside the fan motor.
4.Dry all parts completely before reassembling and reconnecting to a power source.
5.Store the fan in a cool, dry location when not in use .To prevent dust and dirt
build-up, use the original packaging to repack the unit.
- 8 -
REMOTE CONTROL
● The remote control must be pointed towards directly the receiver on the fan when using.
● The working range for the remote control is 5 meters. If the remote control is not pointed
directly towards the receiver, the range will be decreased.
● The remote control may not operate in a room where heavy machinery is operating.
● Do not block the line of sight between the remote control and the receive.
● Handle the remote control with care. Do not drop the remote control on the floor or bang
it against hard objects.
COOLING
ON/OFF
BREEZE MODE
OSCILLATION
SPEED
TIMER
NOTE:
Remove the plastic insulation film located underneath the battery before using the remote.
Aftermarket31[email protected]
135*195mm
PACKAGE INCLUDE
BASE ASSEMBLING
- 5 -
2X Large Ice Box
1X Evaporative Air Cooler
4X 4*16 Secrews
1X JH-MTF01R 1X Remote Control
2X Small Ice Box
Step 1
Take out the left and right bases in the box,
first cross fasten this buckle, and then rotate
downward to make the left and right bases
as flat as each other.
Step 2
Align the positioning holes the base with the
positioning columns above the fuselage,
secure, and tighten the screws.
JH-MTF01R
PRODUCT USE GUIDE
Note: This product has a water level protection switch. When the cold air mode is
started, if there is no water or the water level is insufficient, the water pump will
automatically stop working and no longer pump water, so as to avoid damaging
the water pump that has been working without water for a long time.

JH-MTF01R
PRODUCT USE GUIDE
IMPORTANT INSTRUCTIONS
!
- 2 -
1.To reduce the risk of fire or electrical shock, do not use this product with any solid-state
speed control device . To reduce the risk of fire or electric shock and injury to anyone , do
not use in a window.
2.Do not soak the main body of the motor in water or rinse under the tap tap
3.USE this fan only as described in this manual . Other uses are not recommended as it
may cause fire or electric shock.
4.To protect against electrical shock, do not place fan in window ,plug or cord in water. or
spray with liquids .
5.Unplug the fan from the outlet when not in use, when moving fan from one location to
another and before cleaning.
6.After the machine adds water, place or move and do not tilt or collide. Push it slowly so
as to avoid water overflow.It is strictly prohibited to turn it over and place it on the inclined
ground to prevent accidents.
7.This machine should not be placed at high temperature and ultra-low temperature. The
water in the water tank in the hot and summer season is easy to deteriorate and produce
odor. Please pay attention to update the water.
8.When packaging and storage are required, it shall be run with normal air for a period of
time so that the evaporator is fully dried to prevent the evaporator odor due to wet
surface.
9.This machine has a strong humidification effect, do not use it in a closed environment, if
used in a closed environment, please turn off the cold air function.
10.Add water promptly when the water level is below the lowest water line.
11.Do not operate the fan in the presence of explosive and/or flammable fumes.
12. Avoid contact with moving fan parts.
13.To disconnect , grip the plug and pull it from the wall outlet .Never yank the cord .
Always use on a dry surface.
-3 -
14.Do not operate any fan with a damaged cord or plug. discard fan or return to an
authorized service facility for examination and/or repair.
15. Arrange cord away from traffic area and where it will not be tripped over.
16.The appliance is not to be used by children or persons with reduced physical, sensory
or mental capabilities , or lack of experience and knowledge, unless they have been given
supervision or instruction.
17.Close supervision is necessary when any appliance is used by or near children .
Children should not play with the appliance.
18.Do not leave the fan running unattended.
19.Note: Remove the power before removing the protective housing.
TECHNICAL PARAMETERSS
PRODUCT DIAGRAM
Control Panel
- 4 -
Handle
Wet Curtain Support
Wet Curtain Pape
Water Tank Rotary Buckle
Lower Water Tank
Display Panel
Swing Leaf
Water Level Window
Base
Model No.
Item Name
Evaporative Air Cooler
JH-MTF01R
Rated Voltage
Rated Power 80W
3 Mode Fan Speeds Low / Medium / High
3 Breeze Modes Normal / Natural / Sleep
Max Timer 12 Hours
Water Tank 4 L
120V ~ 60Hz
Package Size 41.30*9.84*11.42 inch
Air Outlet
Front Shell
Upper Water Tank Cover
FILL THE WATER TANK
ATTENTION
Do not exceed the highest water level
Max
Do not fall below the lowest water level
- 6 -
Min
You can add water through the upper tank and the lower tank
● Open the upper water tank cover and add water (Figure).
● Pull out the lower water tank and add water(Figure).
Observe the water level through the water level window, control the water increase,
and pay attention to the following points when adding water:
● For you and your family health, you must use clean tap water and unplug it before
adding water.
● Do not splash water into the motor and surrounding parts to avoid leakage
accidents.
● Make sure the water level in the water tank is between minimum level ( Indicated
by " Min " ) and maximum level ( Indicated by " Max " ).
● Please slow down the speed of adding water if you want to add water from the
upper tank, otherwise it is easy to spill the water.
- 7 -
PANEL CONTROL
Place the unit on a firm level surface and plug it into a socket. Power indicator light
reminding this products in standby mode. Turn on button, default setting is in low
speed, Turn it again, products in standby.
On/off Button:
Press the on/off button to switch the fan on or off. After power on, the LED
display will show the current room temperature
Speed Button:
Press the button to change the speed between low-> medium-> high. Default
speed is low speed.
Mode Button:
Press the button to change fan mode between normal mode - natural mode->
sleep mode. Sleep mode: lowers speed every 30 minutes and then stays at the
lowest speed. Natural mode: the speed changes randomly.
Swing Button:
Press the button after turning on. The corresponding icon on the panel lights up,
and the left and right pages start to swing left to right. Then press again, turn off
the function. The air supply state is directional.
Timer Button:
Press this button set timer , step 1 hours ,max 12hours.
Cooling Button:
Press this button, the corresponding icon on the panel lit, turn on the cold wind
function, and then press this key, then turn off the cold wind function, you can
choose as needed.
- 9 -
Guidelines for use of batteries
Dispose of the batteries
● The battery must be brought to a household hazardous waste collection site for proper
handling.
STORAGE & MAINTAINENCE GUIDELINES
● Before first use:
Pull the protective film to remove it. The remote control is now ready for use.
● To replace the battery:
Open the battery compartment on the back of the remote control and replace the used
battery with a new one. Battery type:CR2025.
1.Be sure to unplug the power cord from the outlet before cleaning.
2.Plastic parts should be cleaned with mild soap and a damp cloth or sponge. Do not
submerge the unit in water to clean it . Thoroughly remove soap with clean water.
3.Be sure not to get water or other liquid inside the fan motor.
4.Dry all parts completely before reassembling and reconnecting to a power source.
5.Store the fan in a cool, dry location when not in use .To prevent dust and dirt
build-up, use the original packaging to repack the unit.
- 8 -
REMOTE CONTROL
● The remote control must be pointed towards directly the receiver on the fan when using.
● The working range for the remote control is 5 meters. If the remote control is not pointed
directly towards the receiver, the range will be decreased.
● The remote control may not operate in a room where heavy machinery is operating.
● Do not block the line of sight between the remote control and the receive.
● Handle the remote control with care. Do not drop the remote control on the floor or bang
it against hard objects.
COOLING
ON/OFF
BREEZE MODE
OSCILLATION
SPEED
TIMER
NOTE:
Remove the plastic insulation film located underneath the battery before using the remote.
Aftermarket31[email protected]
135*195mm
PACKAGE INCLUDE
BASE ASSEMBLING
- 5 -
2X Large Ice Box
1X Evaporative Air Cooler
4X 4*16 Secrews
1X JH-MTF01R 1X Remote Control
2X Small Ice Box
Step 1
Take out the left and right bases in the box,
first cross fasten this buckle, and then rotate
downward to make the left and right bases
as flat as each other.
Step 2
Align the positioning holes the base with the
positioning columns above the fuselage,
secure, and tighten the screws.
JH-MTF01R
PRODUCT USE GUIDE
Note: This product has a water level protection switch. When the cold air mode is
started, if there is no water or the water level is insufficient, the water pump will
automatically stop working and no longer pump water, so as to avoid damaging
the water pump that has been working without water for a long time.
JH-MTF01R
PRODUCT USE GUIDE
IMPORTANT INSTRUCTIONS
!
- 2 -
1.To reduce the risk of fire or electrical shock, do not use this product with any solid-state
speed control device . To reduce the risk of fire or electric shock and injury to anyone , do
not use in a window.
2.Do not soak the main body of the motor in water or rinse under the tap tap
3.USE this fan only as described in this manual . Other uses are not recommended as it
may cause fire or electric shock.
4.To protect against electrical shock, do not place fan in window ,plug or cord in water. or
spray with liquids .
5.Unplug the fan from the outlet when not in use, when moving fan from one location to
another and before cleaning.
6.After the machine adds water, place or move and do not tilt or collide. Push it slowly so
as to avoid water overflow.It is strictly prohibited to turn it over and place it on the inclined
ground to prevent accidents.
7.This machine should not be placed at high temperature and ultra-low temperature. The
water in the water tank in the hot and summer season is easy to deteriorate and produce
odor. Please pay attention to update the water.
8.When packaging and storage are required, it shall be run with normal air for a period of
time so that the evaporator is fully dried to prevent the evaporator odor due to wet
surface.
9.This machine has a strong humidification effect, do not use it in a closed environment, if
used in a closed environment, please turn off the cold air function.
10.Add water promptly when the water level is below the lowest water line.
11.Do not operate the fan in the presence of explosive and/or flammable fumes.
12. Avoid contact with moving fan parts.
13.To disconnect , grip the plug and pull it from the wall outlet .Never yank the cord .
Always use on a dry surface.
-3 -
14.Do not operate any fan with a damaged cord or plug. discard fan or return to an
authorized service facility for examination and/or repair.
15. Arrange cord away from traffic area and where it will not be tripped over.
16.The appliance is not to be used by children or persons with reduced physical, sensory
or mental capabilities , or lack of experience and knowledge, unless they have been given
supervision or instruction.
17.Close supervision is necessary when any appliance is used by or near children .
Children should not play with the appliance.
18.Do not leave the fan running unattended.
19.Note: Remove the power before removing the protective housing.
TECHNICAL PARAMETERSS
PRODUCT DIAGRAM
Control Panel
- 4 -
Handle
Wet Curtain Support
Wet Curtain Pape
Water Tank Rotary Buckle
Lower Water Tank
Display Panel
Swing Leaf
Water Level Window
Base
Model No.
Item Name
Evaporative Air Cooler
JH-MTF01R
Rated Voltage
Rated Power 80W
3 Mode Fan Speeds Low / Medium / High
3 Breeze Modes Normal / Natural / Sleep
Max Timer 12 Hours
Water Tank 4 L
120V ~ 60Hz
Package Size 41.30*9.84*11.42 inch
Air Outlet
Front Shell
Upper Water Tank Cover
FILL THE WATER TANK
ATTENTION
Do not exceed the highest water level
Max
Do not fall below the lowest water level
- 6 -
Min
You can add water through the upper tank and the lower tank
● Open the upper water tank cover and add water (Figure).
● Pull out the lower water tank and add water(Figure).
Observe the water level through the water level window, control the water increase,
and pay attention to the following points when adding water:
● For you and your family health, you must use clean tap water and unplug it before
adding water.
● Do not splash water into the motor and surrounding parts to avoid leakage
accidents.
● Make sure the water level in the water tank is between minimum level ( Indicated
by " Min " ) and maximum level ( Indicated by " Max " ).
● Please slow down the speed of adding water if you want to add water from the
upper tank, otherwise it is easy to spill the water.
- 7 -
PANEL CONTROL
Place the unit on a firm level surface and plug it into a socket. Power indicator light
reminding this products in standby mode. Turn on button, default setting is in low
speed, Turn it again, products in standby.
On/off Button:
Press the on/off button to switch the fan on or off. After power on, the LED
display will show the current room temperature
Speed Button:
Press the button to change the speed between low-> medium-> high. Default
speed is low speed.
Mode Button:
Press the button to change fan mode between normal mode - natural mode->
sleep mode. Sleep mode: lowers speed every 30 minutes and then stays at the
lowest speed. Natural mode: the speed changes randomly.
Swing Button:
Press the button after turning on. The corresponding icon on the panel lights up,
and the left and right pages start to swing left to right. Then press again, turn off
the function. The air supply state is directional.
Timer Button:
Press this button set timer , step 1 hours ,max 12hours.
Cooling Button:
Press this button, the corresponding icon on the panel lit, turn on the cold wind
function, and then press this key, then turn off the cold wind function, you can
choose as needed.
- 9 -
Guidelines for use of batteries
Dispose of the batteries
● The battery must be brought to a household hazardous waste collection site for proper
handling.
STORAGE & MAINTAINENCE GUIDELINES
● Before first use:
Pull the protective film to remove it. The remote control is now ready for use.
● To replace the battery:
Open the battery compartment on the back of the remote control and replace the used
battery with a new one. Battery type:CR2025.
1.Be sure to unplug the power cord from the outlet before cleaning.
2.Plastic parts should be cleaned with mild soap and a damp cloth or sponge. Do not
submerge the unit in water to clean it . Thoroughly remove soap with clean water.
3.Be sure not to get water or other liquid inside the fan motor.
4.Dry all parts completely before reassembling and reconnecting to a power source.
5.Store the fan in a cool, dry location when not in use .To prevent dust and dirt
build-up, use the original packaging to repack the unit.
- 8 -
REMOTE CONTROL
● The remote control must be pointed towards directly the receiver on the fan when using.
● The working range for the remote control is 5 meters. If the remote control is not pointed
directly towards the receiver, the range will be decreased.
● The remote control may not operate in a room where heavy machinery is operating.
● Do not block the line of sight between the remote control and the receive.
● Handle the remote control with care. Do not drop the remote control on the floor or bang
it against hard objects.
COOLING
ON/OFF
BREEZE MODE
OSCILLATION
SPEED
TIMER
NOTE:
Remove the plastic insulation film located underneath the battery before using the remote.
Aftermarket31[email protected]
135*195mm
PACKAGE INCLUDE
BASE ASSEMBLING
- 5 -
2X Large Ice Box
1X Evaporative Air Cooler
4X 4*16 Secrews
1X JH-MTF01R 1X Remote Control
2X Small Ice Box
Step 1
Take out the left and right bases in the box,
first cross fasten this buckle, and then rotate
downward to make the left and right bases
as flat as each other.
Step 2
Align the positioning holes the base with the
positioning columns above the fuselage,
secure, and tighten the screws.
JH-MTF01R
PRODUCT USE GUIDE
Note: This product has a water level protection switch. When the cold air mode is
started, if there is no water or the water level is insufficient, the water pump will
automatically stop working and no longer pump water, so as to avoid damaging
the water pump that has been working without water for a long time.