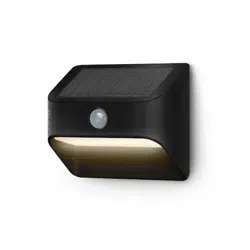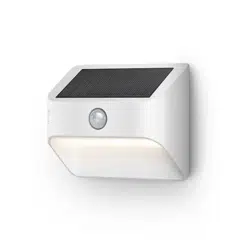
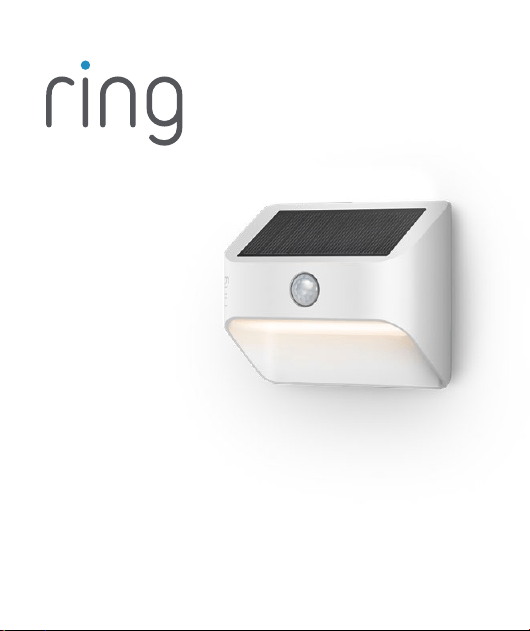
Solar Steplight
Smart Lighting
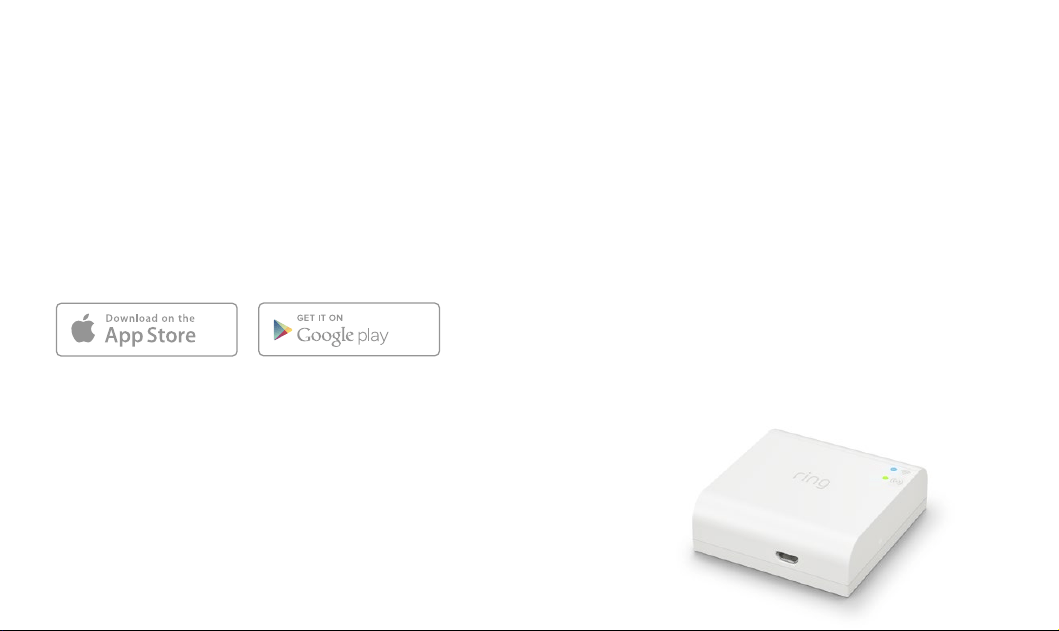
Download the Ring app.
The app walks you through setting
up and managing your Steplight.
Search for “Ring” in one of these
app stores, or visit: ring.com/app
Set up your Ring Bridge.
The Bridge is required to connect
your Ring Smart Lights to the Ring
app and other compatible
Ring devices.
To set up your Bridge, follow the
instructions in the Ring app or the
Bridge user manual.
Download from
Windows Store
32
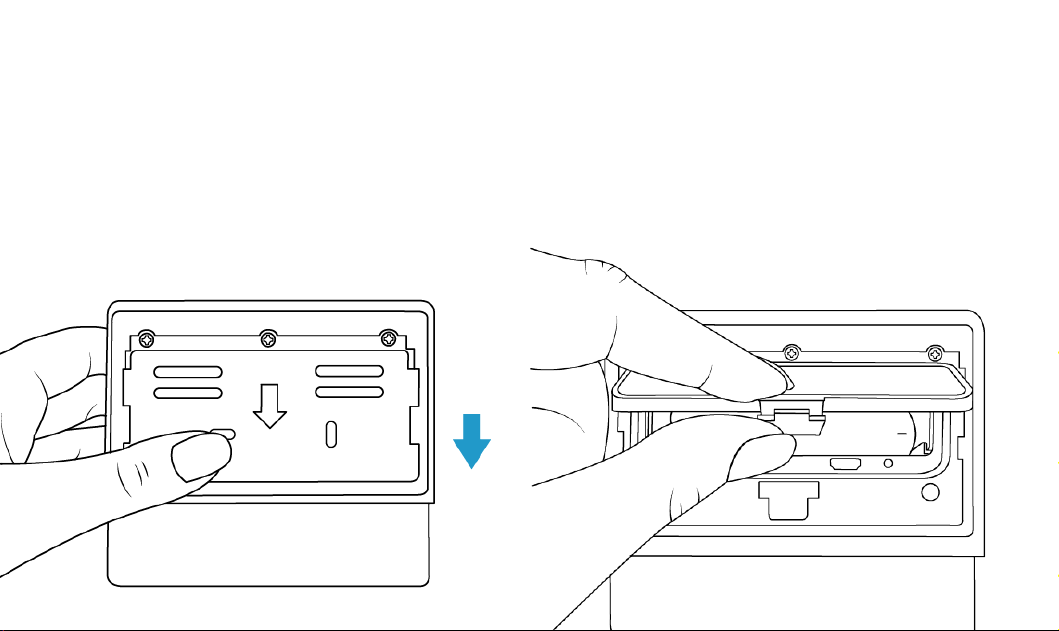
Slide o the
mounting plate.
Slide the tabs out of the
grooves and remove the plate
from the rear of your Steplight.
Remove the battery
cover.
Press in the tab on the bottom
and lift to remove.
54
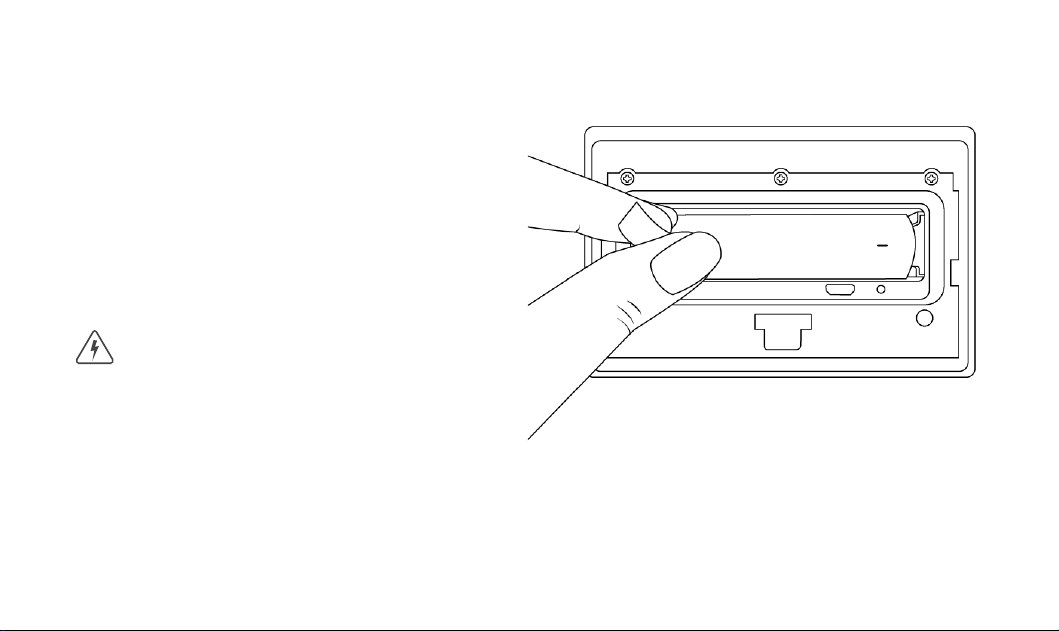
Remove the battery
pull-tab.
Once removed, the included
lithium-ion battery will be
activated and your Steplight
will flash twice to indicate its
powered on.
Risk of fire, explosion, or burn. Do not
short circuit, crush, heat above 60°C,
incinerate, or disassemble the battery.
76

Charge your Steplight.
Plug the provided micro USB
cord into a USB power supply
(not included), then connect it
to your Steplight to fully charge
the battery.
The light will slowly turn on and
o while charging and glow on
continuously once charged.
Once charged, remove the
micro USB cord.
If you can’t wait to play with your
Steplight, go ahead and set it
up. But we recommend you fully
charging it before installation.
98
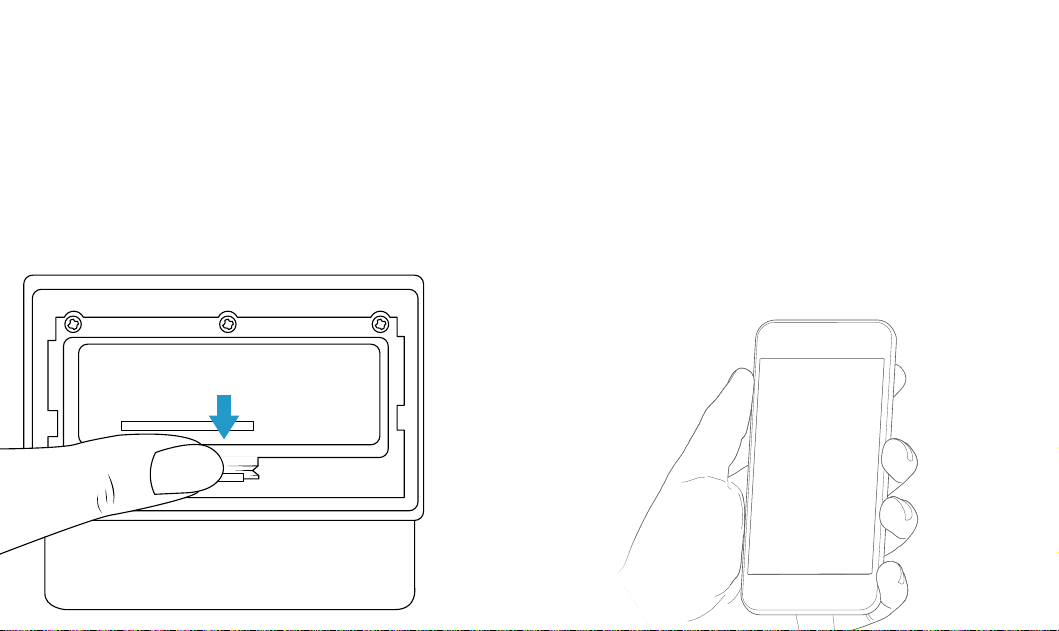
Re-attach the
battery cover.
Push the battery cover back
onto your Steplight, making
sure the tab snaps into place.
Set up your Steplight
in the Ring app.
In the app, tap Set Up a Device.
When prompted, select Smart
Lights and follow the in-app
instructions.
1110
Mark the screw holes.
Use the holes in the mounting
plate as a template to mark the
screw locations.
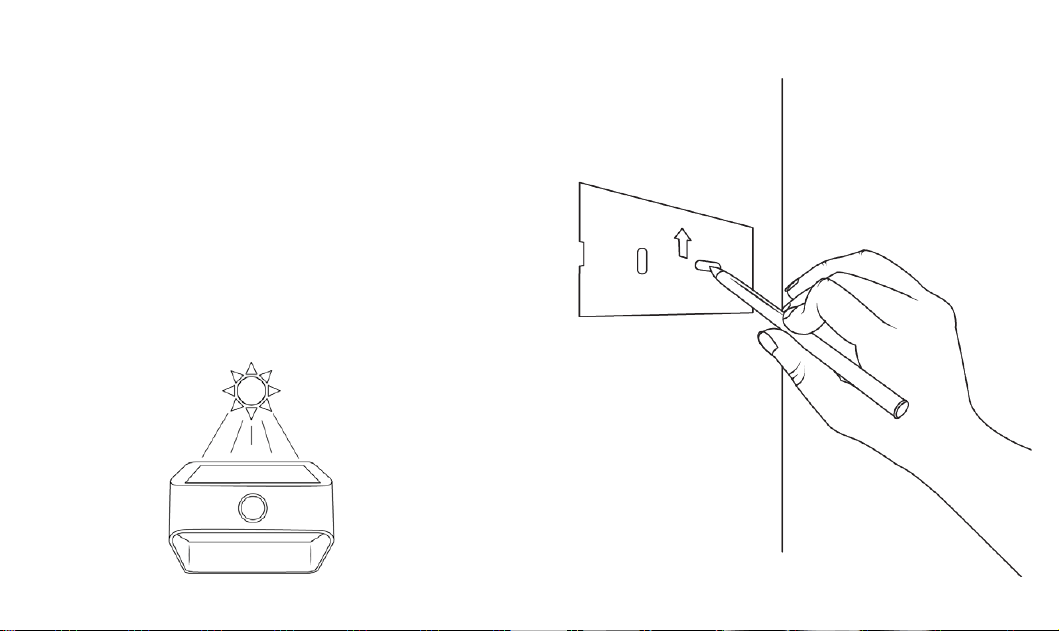
As a solar light, please ensure
you install your light in an area
with plenty of sun.
1312
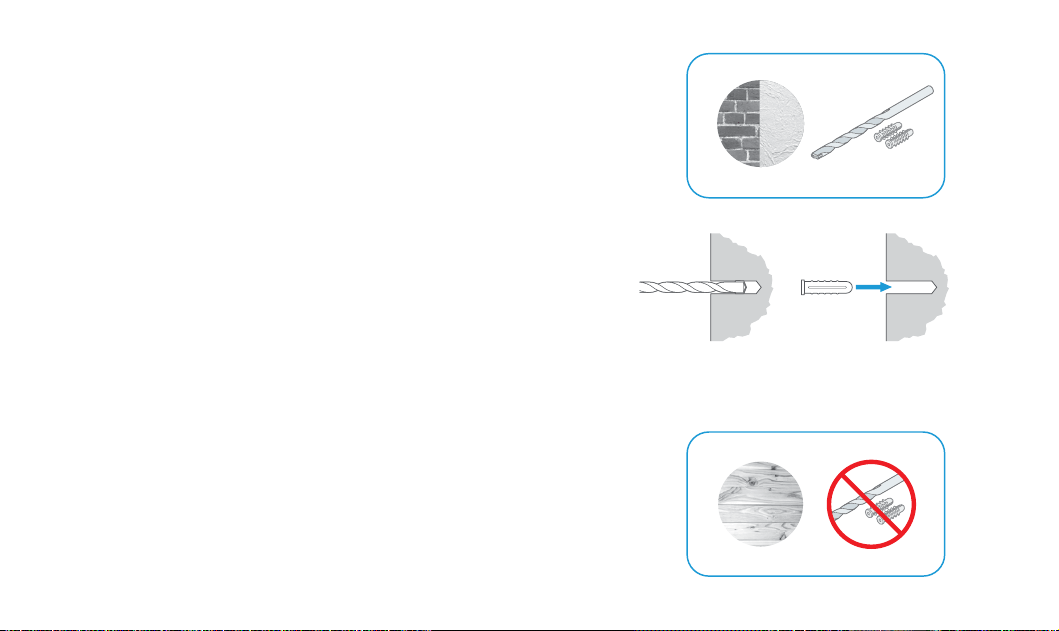
Install Wall Anchors
(optional).
If installing on a hard surface
(such as stucco or brick), first
drill holes using a 3/16” drill bit
(not included).
If installing on wood or siding,
skip this step.
1514
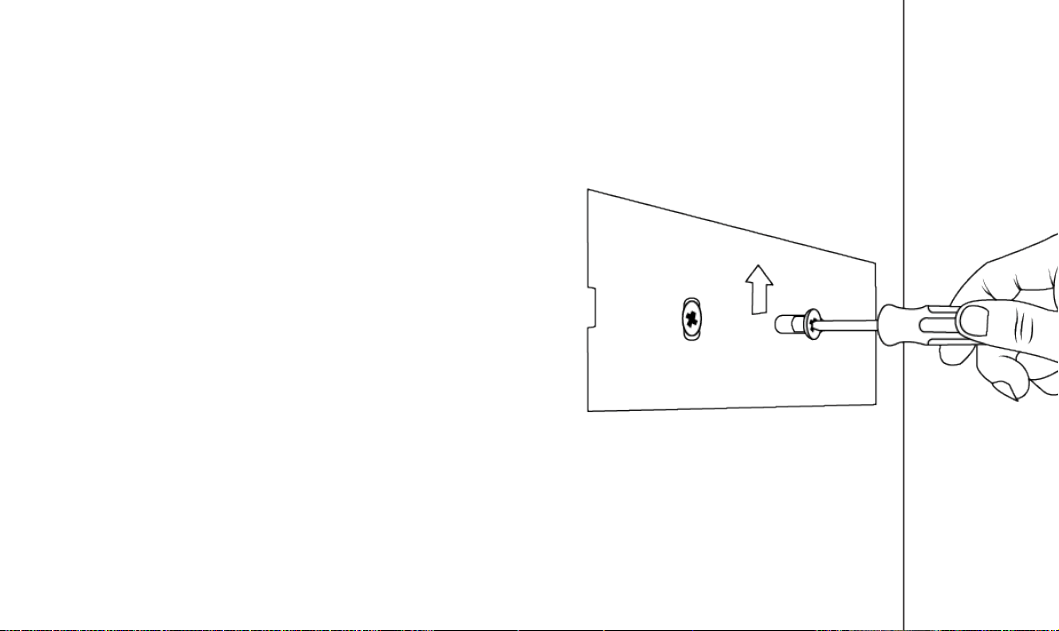
Install the
mounting plate.
Place the mounting plate
against the surface, making
sure the arrow is pointing
upwards, and drive the two
mounting screws until the
mounting plate is flush against
the surface.
If installing on a wood surface,
you can screw the bracket
directly into your wall using a
Philips head screwdriver.
1716
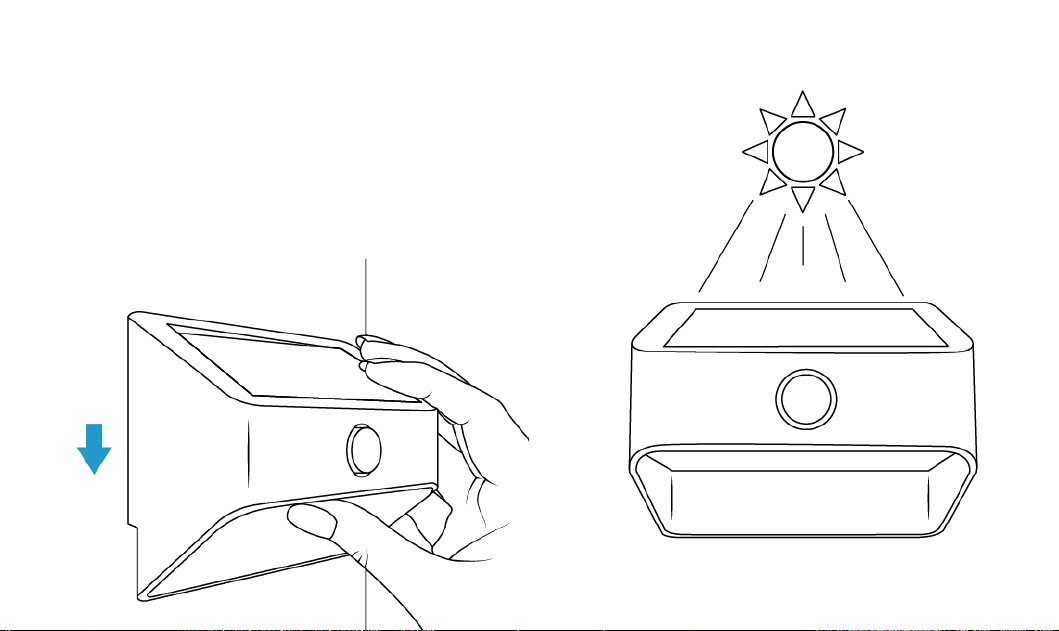
Mount your Steplight.
Place your Steplight over the
mounting plate, then slide it
downward to lock it in place.
1918

For additional help, visit:
ring.com/help
Or give us a call…
US 1 800 656 1918
Canada 1 855 300 7289
Worldwide +1 310 929 7085
© 2019 Ring LLC or its aliates.
Ring and all related logos are trademarks of Ring LLC or its aliates.
For a list of all our customer
support numbers, visit:
ring.com/callus