Loading ...
Loading ...
Loading ...
ASSEMBLY
7
WARNING:
To avoid serious personal injury and
damage to the unit, shut the unit off before removing or
installing blower tubes, vacuum tubes or the vacuum bag.
ASSEMBLING THE UNIT AS A BLOWER
Always install the upper blower tube. The lower blower tube is optional.
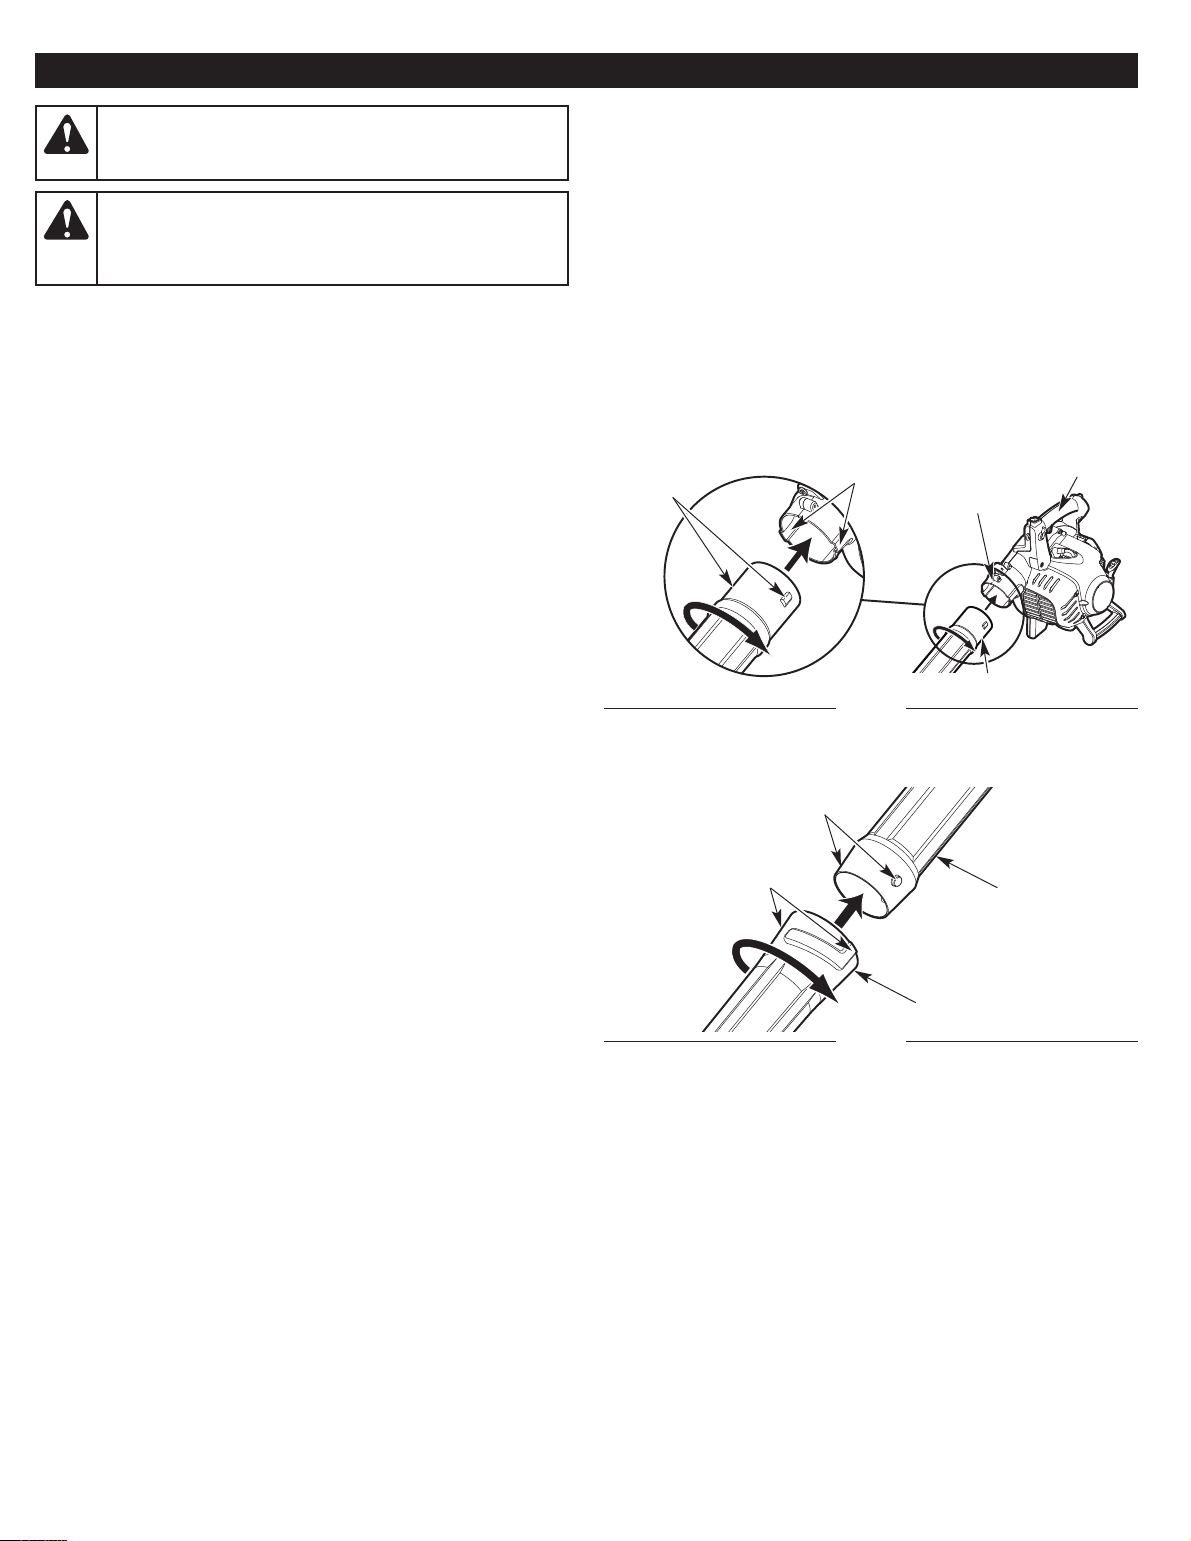
Installing the Upper Blower Tube
1. Set the unit on a flat, level surface.
2. Align the bumps on the upper end of the upper blower tube with
the slots on the blower outlet (Fig. 1).
3. Insert the upper blower tube into the blower outlet (Fig. 1).
4. While holding the handle, twist the upper blower tube cl
ockwi
se
until it locks into place (Fig. 1).
Installing the Lower Blower Tube
1. Set the unit on a flat, level surface.
2. Align the slots on the lower blower tube with the bumps on the
lower end of the upper blower tube (Fig. 2).
3. Install the lower blower tube onto the upper blower tube (Fig. 2).
4. While holding the upper blower tube, twist the lower blower tube
clockwise until it locks into place (Fig. 2)
.
Fig. 1
Blower
Outlet
Upper Blower Tube
Handle
Slots
Bumps
WARNING:
To prevent serious personal injury, never
operate the unit without the blower tubes, or vacuum tubes
and vacuum bag, securely attached. Make sure the
vacuum bag is completely zipped closed.
Fig. 2
Upper
Blower Tube
Lower
Blower Tube
Bumps
Slots
Loading ...
Loading ...
Loading ...