Thanks for Choosing DREO!
Your support means the world to us. We hope you enjoy our product as much as we did creating it.
IMPORTANT SAFETY INSTRUCTIONS

GENERAL SAFETY
- Children shall not play with the appliance. Cleaning and maintenance shall not be performed by children without supervision.
- Use the appliance as described in the user manual only. Any other use not recommended in the user manual may cause fire, electrical shock, or personal injury.
- This appliance can be used by children aged above 8 years and persons with reduced physical, sensory or mental capabilities or lack of experience and knowledge if they have been given supervision or instruction concerning use of this appliance in a safe way and understand the hazards involved.
LOCATION SAFETY
- Always place this appliance on a firm, flat and level surface to avoid dropping or tilt.
- Always place this appliance 2 feet (60cm) above the floor, 12 inches (30cm) away from the wall or wooden furniture.
- DO NOT move this appliance while it is on.
- DO NOT attempt to repair any parts on this appliance. Doing so will void your warranty. The inside of this appliance contains no user serviceable parts, All servicing should be performed by qualified personnel only.
Electricity Safety
- Make sure that the voltage of your electricity supply is the same as that indicated on the appliance.
- Always unplug before cleaning or leaving the appliance unused for a long period of time. Keep your hands dry when plugging/unplugging.
- To avoid fire hazard, NEVER put the cord under rugs, near heat registers, radiator, stoves or heaters.
- Do not use this appliance if the cord has been damaged to avoid fire or electric hazard.
- Keep the cord out of heavy traffic areas and where it will not be tripped over.
- Do not operate any humidifier with a damaged cord or plug. Discard the appliance or return to an authorized service facility for examination and/or repair.
- Do not run cord under carpeting. Do not cover cord with throw rugs, runners, or similar coverings. Do not route cord under furniture or appliances. Arrange cord away from traffic area and where it will not be tripped over.
- WARNING: To reduce the risk of fire or electric shock, do not use this humidifier with any solid-state speed control device.
- This appliance has a polarized plug (one blade is wider than the other). To reduce the risk of electric shock, this plug is intended to fit in a polarized outlet only one way. If the plug does not fit fully in the outlet, reverse the plug. If it still does not fit, contact a qualified electrician. Do not attempt to defeat this safety feature.
FOR HOUSEHOLD USE ONLY
Gentle Reminder
Check the appliance regularly and refer to TROUBLESHOOTING or contact our customer support if it shows any of the following signs:
- Power cord or plug is damaged.
- Loud noise, unusual smell or excessive heat.
Specifications
| Model No. |
DR-HHM004 |
| Input |
120V 60Hz |
| Rated Power |
28W |
| Water Tank Capacity |
1.6 Gal (6L) |
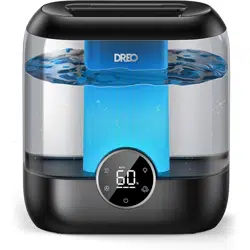
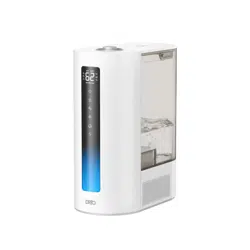
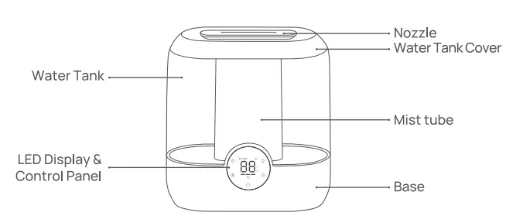
KNOWING YOUR HUMIDIFIER
Package Contents
- Water Tank Cover
- Water Tank
- LED Display & Control Panel
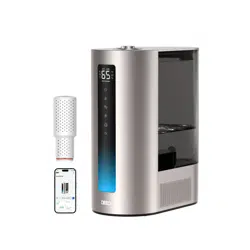
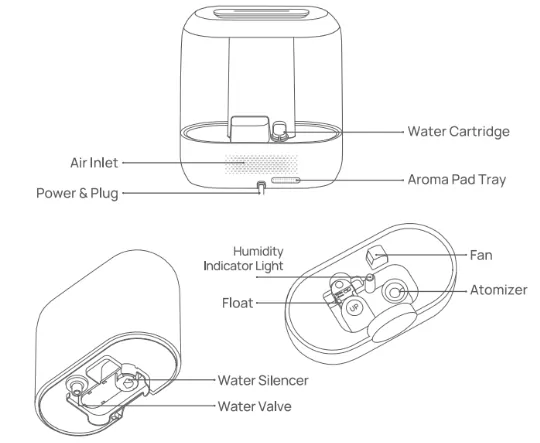
- Water Cartridge
- Aroma Pad Tray
- Power & Plug
- Indicator Light
- Water Silencer
- Water Valve
- User Manual
- Cleaning Brush
- Quick Start Guide
- Aroma Pad X2
LED Display
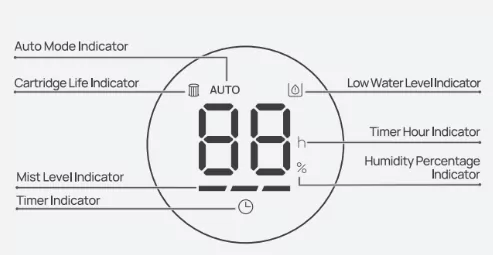
Note:
- When humidity levels are below 10%, the display will show "LO".
- When humidity levels are above 90%, the display will show "HI".
- When the water is low, the Water Tank Level indicator will flash for 5 seconds then the humidifier will switch to standby.
Control Panel
| Power Button |
- Turn the humidifier on/off.
- Long press for 7 seconds to restore to factory settings. |
Manual Mode Button  |
- Switch between Low/Medium/High mist level |
Auto Mode Button  |
- Turn Auto Mode on
- Touch the (A) to increase the target humidity by 5% (target humidity range from 30% to 90%).
- In Auto Mode, mist level is adjusted according to your target humidity.
- Touch the (A) to exit Auto Mode. |
| Timer Button |
- Select to set a timer (0-12H). |
Humidity Indicator Button  |
- Turn the Humidity Indicator Light and Display on/off. |
Humidity Indicator Light
| Light Color |
Humidity Level |
| Yellow |
≤30% |
| Green |
31% - 60% |
| Blue |
≥61% |
The night light will change according to your room humidity level.
USING YOUR HUMIDIFIER
Before Use
When using your humidifier for the first time, remove the wraps and follow the steps below.
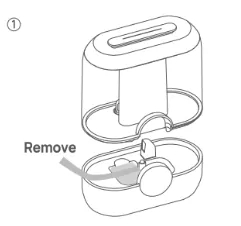
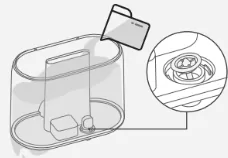
Remove the yellow label on the base and all the plastic wraps around your humidifier.
[IMAGE]
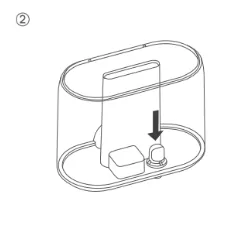
Make sure the water cartridge is installed correctly.
Rinse all parts with water.
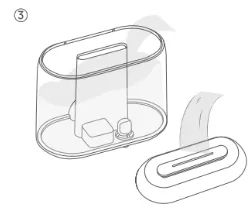
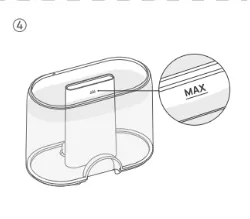
Fill the tank with water, making sure it doesn't pass the MAX line.
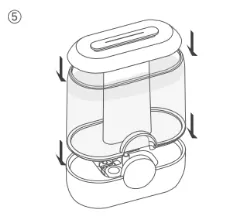
Put the water tank back in place and close the top cover.
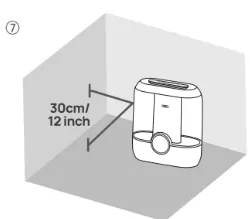
Place the humidifier on a flat, level surface, keeping at least 30 cm/12 inch away from walls or any major obstacles.
ATTENTION:
- It is recommended to add purified or distilled water to prevent white powder residue from forming.
- Do not add essential oil into the water tank to avoid damage to the tank.
- Direct the mist away from walls, furniture and electrical appliances.
- It is recommended to place a water-resistant mat under the humidifier to catch spills and droplets.
- Empty and clean the humidifier before storage. Clean the humidifier before next use.
- Be aware that high humidity levels may encourage the growth of biological organisms in the environment.
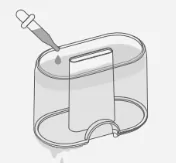
Adding Essential Oil
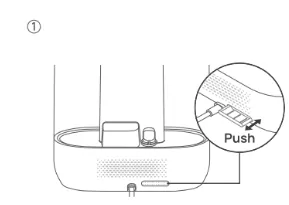
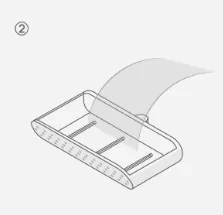
Push to open the aroma pad tray.
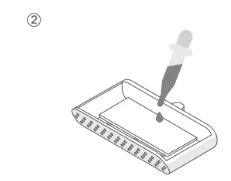
Add 5-10 drops of essential oil on the aroma pad.
Put the aroma pad tray back in place.
Note:
- Add essential oils on the aroma pad only. Do not add into the water tank or any other places.
- The scent may be soft, this humidifier is not intended to work as an aroma diffuser.
- The scent level cannot be adjusted.
- If the aroma pad becomes too stiff, it needs to be replaced.
CLEANING AND MAINTENANCE
Always turn off and UNPLUG the humidifier before any cleaning or maintenance. Do not clean the main body under running water. Do not let water splash into the air outlets. Do not use any chemical agents when cleaning the humidifier. Store in a cool, dry place and cover it to protect from dust. Empty and clean the humidifier before storage. Clean the humidifier before next use. Do not overfilling the humidifier due to the potential risk of electric shock.
Filling & Refilling
Empty the tank and refill every third day. Before refilling, clean it with fresh tap water or cleaning agents if required by the manufacturer. Remove any scale, deposits, or film that has formed on the sides of the tank or on interior surfaces, and wipe all surfaces dry.
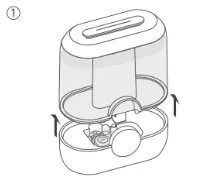
Detach the water tank from the base.
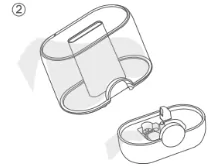
Take out the water tank cover, drain any remaining water from the tank and the base.
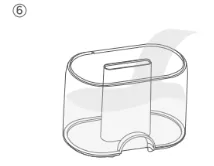
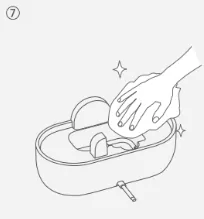
Rinse the tank with warm water.
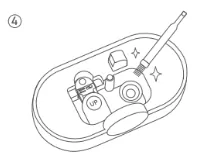
Gently clean the base with a soft cloth or the included cleaning brush.

Wipe the tank clean with a soft, damp cloth.
Fill the tank with room temperature water. Do not fill with hot water.
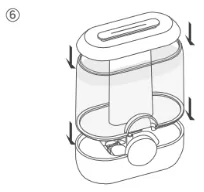
Attach the water tank to the base, replace the top cover.
Descaling
RECOMMENDED ONCE A MONTH
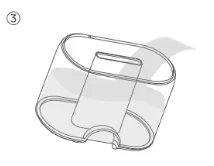
Detach the water tank from the base. Take out the water tank cover and rinse it with warm water.
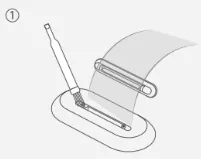
For a throughout cleaning, you may detach the nozzle from the cover and clean it with the included brush.
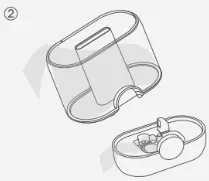
Drain any remaining water from the tank and the base.
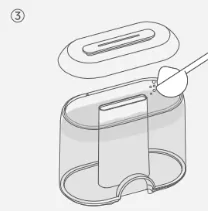
Fill the tank with a solution of bleach and water (one teaspoon of bleach for each gallon of water.) Replace the tank cover and shake around the tank.
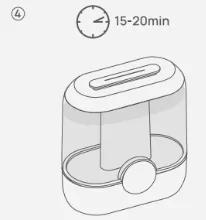
Attach the water tank to the base. Let it sit for 15-20 minutes.
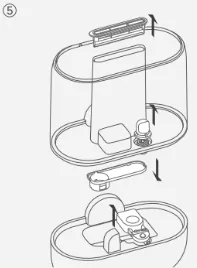
Remove the water silencer, water cartridge, droplet collector, and float.

Remove the tank and detach the cover, drain any remaining solution from the tank and the base. Rinse the tank with water until the bleach smell is gone.
Clean the base with a soft cloth, you may use the included cleaning brush to remove excess of mineral deposit. Make sure all parts are dry before reassembling your humidifier.
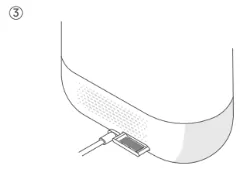
Cleaning the aroma pad tray
RECOMMENDED ONCE A WEEK
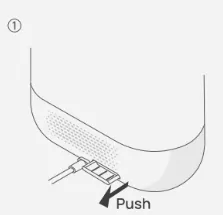
Push to open the aroma pad tray at the back of the base to pull it out. Rinse with water and place back into the base.
Is Your New Humidifier Leaking?
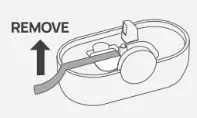
Make sure to remove the protective foam.
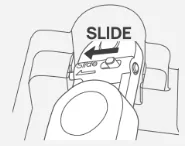
Fix the left prong on the bracket, then slide the other prong to secure the float in place.
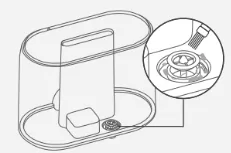
Remove any particles or hair blocking the water valve.
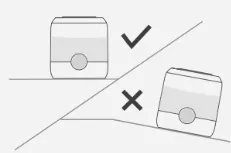
Make sure the humidifier is placed on a flat surface.
Contact Customer Service If...
The water valve is not flat or the tank leaks water when refilling.
Your water tank has leakage due to prolonged use of essential oils.
If your humidifier keeps leaking water, please contact customer support (see page 16).
TROUBLESHOOTING
My humidifier does not work.
- Make sure that the cord is connected to a powered outlet and the mains voltage corresponds with the voltage indicated on the humidifier.
- The humidifier will shut down automatically in the event of low water.
- Check the water tank is installed properly.
- In Auto Mode, the humidifier will stop adding moisture when it reaches the room humidity target.
My humidifier is not misting.
- Turn the mist level to a higher setting.
- The base has too much water. Empty the base and refill the water tank (not the base).
- Please check whether the air inlet is blocked.
- Make sure the nozzle is not blocked.
- Make sure the humidifier is on a flat surface.
- The water temperature may be too low. Turn the mist level to the highest setting and let it run for a while, then adjust to the desired setting.
- If the water tank or base was washed with detergent, rinse thoroughly with clean water to remove any remaining detergent.
There is white dust in the water tank.
You should descale the humidifier regularly. Using purified or distilled water can help prevent the formation of scale.
The mist produces an unpleasant smell.
- Use purified or distilled water only. It is not recommended to use tap water.
- Change water regularly to avoid dirty water accumulation.
- Clean the humidifier and keep it dry for 12 hours with the cover detached.
Water leaks from my humidifier.
- Make sure the silicone sealing ring around the water outlet valve is secure.
- Avoid running the humidifier in a room with over 60% relative humidity.
- Wipe any excess water.
- Do not shake the humidifier.
- Make sure to place the humidifier on a flat, level surface.
- Check the water tank for leaks. If there are leaks, contact Customer Support (see page 16).
- Make sure the float is secured in place.
If your problem is not listed or still persists, contact our Customer Support.
DREO CUSTOMER CARE
Default 12-Month Warranty
This appliance is covered by Dreo warranty for 12 months from the date of its original purchase.
Extend Your Warranty
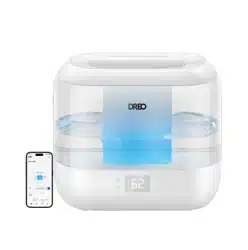
Extend your warranty by registering your new appliance on our website https://dreo.com/warranty.
The warranty will not apply in cases of:
- Accident, misuse, or repairs performed by unauthorized personnel.
- Any unit that has been tampered with or used for commercial purposes.
- Normal wear and tear of wearable parts.
- Use of force, damage caused by external influences.
- Damage caused by non- observance of the User Manual, e.g. connection to an unsuitable mains supply or noncompliance with the instructions.
- Partially or completely dismantled appliances.
- Defects caused by or resulting from damages from shipping or from repairs, service, or alteration to the product or any of its parts that have been performed by a repair person not authorized by DREO.
We can only provide after-sales service for products that are sold by DREO or DREO authorized retailers and distributors. If you have purchased your unit from a different place, please contact your seller for return and warranty issues.
We're Here to Help!
(888) 290-1688 Mon-Fri, 9:00 am-5:00 pm PST/PDT
www.dreo.com
[email protected]
Shenzhen Hesung Innovation Technology Co., LTD
26F, Bldg A7, Creative City, Shenzhen, China