Loading ...
Loading ...
Loading ...
INSTALLATION
BEFORE USING YOUR WINE CELLAR
• Remove the exterior and interior packing.
• Before connecting the Wine Cellar to the power source, let it stand upright for approxi-
mately 2 hours. This will reduce the possibility of a malfunction in the cooling system from
handling during transportation.
• Clean the interior surface with lukewarm water using a soft cloth.
INSTALLATION OF YOUR WINE CELLAR
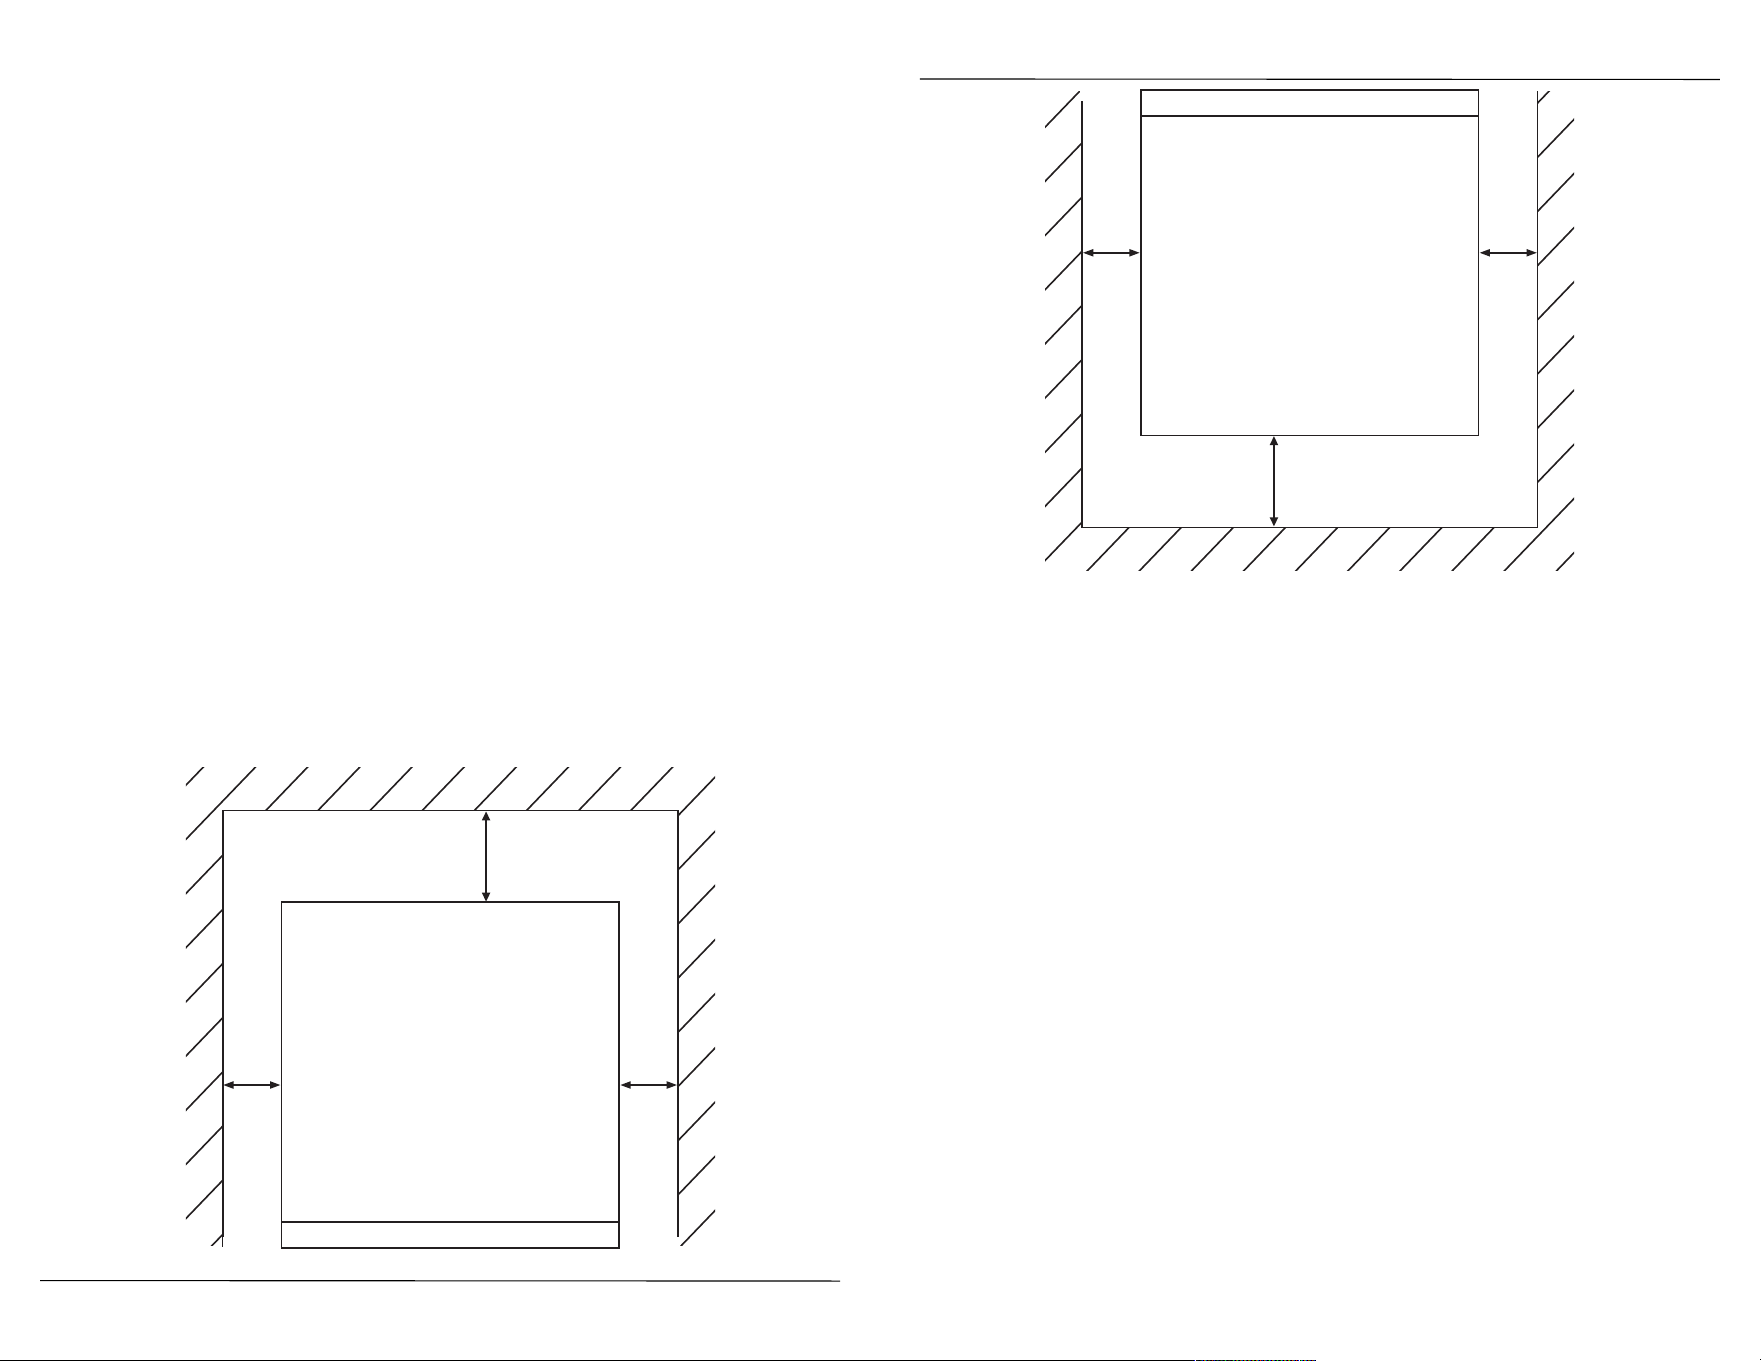
• This appliance is designed for free standing installation. Allow 50 mm of space between
the unit's side and 100 mm between back and the wall.
• Place your Wine Cellar on a floor that is strong enough to support it when it is fully loaded.
To level your Wine Cellar, adjust the front leveling leg at the bottom of the Wine Cellar.
• Locate the Wine Cellar away from direct sunlight and sources of heat (stove, heater,
radiator, etc.). Direct sunlight may affect the acrylic coating and heat sources may increase
electrical consumption. Extreme cold ambient temperatures may also cause the unit not to
perform properly.
• Avoid locating the unit in moist areas.
• Plug the Wine Cellar into an exclusive, properly installed-grounded wall outlet. Do not
under any circumstances cut or remove the third (ground) prong from the power cord. Any
questions concerning about power and/or grounding should be directed toward a certified
electrician or an authorized products service center.
4
100mm
4 in
50mm
2 in
50mm
2 in
INSTALLATION
AVANT D'UTILISER VOTRE REFROIDISSEUR À VIN
• Retirez l'emballage extérieur et intérieur.
• Avant de brancher le refroidisseur à vin à la source d'alimentation, laissez-le debout pen-
dant environ 2 heures. Ceci réduira la possibilité d'un mauvais fonctionnement du système
de refroidissement en raison de la manipulation lors du transport.
• Nettoyez la surface intérieure avec de l'eau tiède en utilisant un linge doux.
INSTALLATION DE VOTRE REFROIDISSEUR À VIN
• Cet appareil est conçu pour une installation debout libre. Assurez 50 mm d'espace entre le
côté du refroidisseur à vin et le mur, et 100 mm entre le dos et le mur.
• Placez votre refroidisseur à vin sur un plancher assez solide pour le supporter quand il est
pleinement chargé. Pour mettre votre refroidisseur à vin à niveau, ajustez le pied de mise
à niveau avant au bas du refroidisseur à vin.
• Assurez un placement à l'abri du soleil et des sources de chaleur (poêle, chaufferette, radi-
ateur, etc.). La lumière directe du soleil peut affecter le revêtement acrylique et les sources
de chaleur peuvent augmenter la consommation électrique du refroidisseur à vin. Des tem-
pératures ambiantes extrêmement froides peuvent aussi causer des problèmes de fonc-
tionnement.
• Évitez de placer l'appareil dans des endroits humides.
• Branchez le refroidisseur à vin dans une prise murale mise à la terre exclusivement dédiée
pour son alimentation électrique. Ne coupez pas ou ne retirez pas en aucun cas la troisième
broche (terre) de la fiche du cordon d'alimentation. Toute question concernant
l'alimentation électrique et/ou la mise à la terre doit être adressée à un électricien certifié
ou un centre de réparations agréé.
4
100mm
4 in
50mm
2
in
50mm
2
in
Loading ...
Loading ...
Loading ...