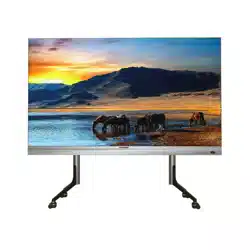
LED Multi-Media Display
User Manual

LED Multi-Media Display User Manual
i
Legal Information
© 2023 Hangzhou Hikvision Digital Technology Co., Ltd. All rights reserved.
About this Manual
The Manual includes instructions for using and managing the Product. Pictures, charts, images and
all other information hereinafter are for description and explanation only. The information
contained in the Manual is subject to change, without notice, due to firmware updates or other
reasons. Please find the latest version of this Manual at the Hikvision website
(https://www.hikvision.com/).
Please use this Manual with the guidance and assistance of professionals trained in supporting the
Product.
Trademarks
and other Hikvision's trademarks and logos are the properties of
Hikvision in various jurisdictions.
Other trademarks and logos mentioned are the properties of their respective owners.
: The terms HDMI and HDMI High-Definition Multimedia Interface, and the HDMI
Logo are trademarks or registered trademarks of HDMI Licensing Administrator, Inc. in the United
States and other countries.
Disclaimer
TO THE MAXIMUM EXTENT PERMITTED BY APPLICABLE LAW, THIS MANUAL AND THE PRODUCT
DESCRIBED, WITH ITS HARDWARE, SOFTWARE AND FIRMWARE, ARE PROVIDED "AS IS" AND
"WITH ALL FAULTS AND ERRORS". HIKVISION MAKES NO WARRANTIES, EXPRESS OR IMPLIED,
INCLUDING WITHOUT LIMITATION, MERCHANTABILITY, SATISFACTORY QUALITY, OR FITNESS FOR
A PARTICULAR PURPOSE. THE USE OF THE PRODUCT BY YOU IS AT YOUR OWN RISK. IN NO EVENT
WILL HIKVISION BE LIABLE TO YOU FOR ANY SPECIAL, CONSEQUENTIAL, INCIDENTAL, OR INDIRECT
DAMAGES, INCLUDING, AMONG OTHERS, DAMAGES FOR LOSS OF BUSINESS PROFITS, BUSINESS
INTERRUPTION, OR LOSS OF DATA, CORRUPTION OF SYSTEMS, OR LOSS OF DOCUMENTATION,
WHETHER BASED ON BREACH OF CONTRACT, TORT (INCLUDING NEGLIGENCE), PRODUCT
LIABILITY, OR OTHERWISE, IN CONNECTION WITH THE USE OF THE PRODUCT, EVEN IF HIKVISION
HAS BEEN ADVISED OF THE POSSIBILITY OF SUCH DAMAGES OR LOSS.
YOU ACKNOWLEDGE THAT THE NATURE OF THE INTERNET PROVIDES FOR INHERENT SECURITY
RISKS, AND HIKVISION SHALL NOT TAKE ANY RESPONSIBILITIES FOR ABNORMAL OPERATION,
PRIVACY LEAKAGE OR OTHER DAMAGES RESULTING FROM CYBER-ATTACK, HACKER ATTACK,
VIRUS INFECTION, OR OTHER INTERNET SECURITY RISKS; HOWEVER, HIKVISION WILL PROVIDE
TIMELY TECHNICAL SUPPORT IF REQUIRED.
YOU AGREE TO USE THIS PRODUCT IN COMPLIANCE WITH ALL APPLICABLE LAWS, AND YOU ARE
SOLELY RESPONSIBLE FOR ENSURING THAT YOUR USE CONFORMS TO THE APPLICABLE LAW.
ESPECIALLY, YOU ARE RESPONSIBLE, FOR USING THIS PRODUCT IN A MANNER THAT DOES NOT
INFRINGE ON THE RIGHTS OF THIRD PARTIES, INCLUDING WITHOUT LIMITATION, RIGHTS OF

LED Multi-Media Display User Manual
ii
PUBLICITY, INTELLECTUAL PROPERTY RIGHTS, OR DATA PROTECTION AND OTHER PRIVACY RIGHTS.
YOU SHALL NOT USE THIS PRODUCT FOR ANY PROHIBITED END-USES, INCLUDING THE
DEVELOPMENT OR PRODUCTION OF WEAPONS OF MASS DESTRUCTION, THE DEVELOPMENT OR
PRODUCTION OF CHEMICAL OR BIOLOGICAL WEAPONS, ANY ACTIVITIES IN THE CONTEXT RELATED
TO ANY NUCLEAR EXPLOSIVE OR UNSAFE NUCLEAR FUEL-CYCLE, OR IN SUPPORT OF HUMAN
RIGHTS ABUSES.
IN THE EVENT OF ANY CONFLICTS BETWEEN THIS MANUAL AND THE APPLICABLE LAW, THE
LATTER PREVAILS.

LED Multi-Media Display User Manual
i
Symbol Conventions
The symbols that may be found in this document are defined as follows.
Symbol
Description
Danger
Indicates a hazardous situation which, if not avoided, will or could
result in death or serious injury.
Caution
Indicates a potentially hazardous situation which, if not avoided,
could result in equipment damage, data loss, performance
degradation, or unexpected results.
Note
Provides additional information to emphasize or supplement
important points of the main text.
Safety Instruction
For safety concerns, the device has been strictly tested before shipment. However, incorrect
installation or usage may lead to hazardous results such as electric shock and fire. To ensure the
service life and best performance of the device, please read the notice and plate signs carefully
and follow the safety instructions. Keep this guide properly for later use.
Caution
● To ensure safety, the installation parts and the wall should support four times the weight of the
device.
● Install the device no more than 5 mm away from the wall or other metal racks in case of lamp
board drop resulting in electric shock.
● Please set the brightness of the LED display within 500 nits to avoid power overload.
● The device may generate radio interference in indoor environment. Necessary precautions may
be required.
● To reduce the risk of fire or electric shock, please do not expose the device to rain or humid
environment.
● Electric discharge may last for a short period of time after the power is shut down. Please wait
two minutes after the power is shut down before operating the device.
● To avoid the risk of electric shock, please do not operate when the power is on.
● Please do not plug and unplug the power cable when the power is on.
● Ensure the correct wire sequence of the terminals connected to the AC power supply.
● Do not place anything containing liquid on the device to avoid the risk of fire or electric shock
caused by liquid-splashing.
● The device is only suitable for installation on the concrete or non-flammable surfaces, to
prevent molten material from dripping to the bottom during fire caused by internal failure.
● Keep 90 degrees when moving and using the device.

LED Multi-Media Display User Manual
ii
● After installation, there should be no openings around the LED module. The bottom bracket
under the wire outlet position should completely cover the bottom hole only to let the wire out,
to prevent the molten material from dripping to the bottom during fire caused by internal
failure.
Warning
● In the use of the product, you must be in strict compliance with the electrical safety regulations
of the nation and region.
● Disconnect the power plug before maintenance.
● Make sure the power supply is well-grounded.
● The protective grounding of the device should be reliably connected to the building protective
grounding.
● To reduce the risk of electric shock, install protective shield on the exposed connector after
installing LED screen.
● Disconnect the power plug before installing the protective shield.
● A disconnecting device should be provided on the outside of the equipment. A single device is
recommended for AC 220 V / 230 V / 240 V, 6 A circuit breakers. When multiple devices are
superimposed, a suitable circuit breaker should be selected according to the total rated current,
but it must not exceed the building equipped circuit specifications.
● To prevent injury, the device must be securely fixed to the ground, wall, ceiling, or steel frame.
The all-in-one rack should be fixed to the ground with expansion screws.
● The supporting rack can only be used with the device. Using it with other devices may cause
instability and injury.
● The device can only be used with the supporting rack. Using it with other equipment (such as a
cart, shelf, or handling device) may cause instability and injury.
● Please strictly follow the installation method in this guide.
● The external wire connection between device and hazardous electronic terminals should be
operated by professionals.
● This is a class A product and may cause radio interference in which case the user may be
required to take adequate measures.

LED Multi-Media Display User Manual
iii
Contents
Chapter 1 Product Introduction .................................................................................................. 1
Chapter 2 Sending Card Configuration ........................................................................................ 1
2.1 Activate Device ...................................................................................................................... 1
2.2 Add Device ............................................................................................................................. 3
2.2.1 Add Single or Multiple Online Devices ...................................................................... 3
2.2.2 Add Device by IP Address........................................................................................... 5
2.2.3 Add Device by IP Segment ......................................................................................... 7
2.2.4 Import Devices in Batch ............................................................................................. 9
2.3 Import Configuration File .................................................................................................... 10
2.4 Set Display Attribute ........................................................................................................... 10
2.5 Set Screen Type ................................................................................................................... 11
2.6 Set Signal Connection .......................................................................................................... 13
Chapter 3 System Introduction ................................................................................................... 1
3.1 Home ...................................................................................................................................... 1
3.2 Wireless Sharing .................................................................................................................... 1
3.3 Network ................................................................................................................................. 2
3.3.1 Wired Network ........................................................................................................... 2
3.3.2 Wireless Network ....................................................................................................... 3
3.3.3 Hotspot ....................................................................................................................... 4
3.3.4 Bluetooth .................................................................................................................... 4
3.4 Picture .................................................................................................................................... 4
3.5 Sound ..................................................................................................................................... 5
3.6 General................................................................................................................................... 5
3.6.1 Signal ........................................................................................................................... 6
3.6.2 Apps ............................................................................................................................ 7
3.6.3 Date & Time ................................................................................................................ 7
3.6.4 Language & Keyboard ................................................................................................ 8
3.6.5 Wallpaper ................................................................................................................... 8
3.6.6 Assistive Touch ........................................................................................................... 8

LED Multi-Media Display User Manual
iv
3.6.7 Bottom Gesture .......................................................................................................... 8
3.6.8 Float Menu ................................................................................................................. 9
3.6.9 Select Desktop Style ................................................................................................... 9
3.7 System .................................................................................................................................... 9
3.6.1 Schedule Startup and Shutdown ............................................................................. 10
3.6.2 Reset to Factory Settings ......................................................................................... 10
3.6.3 System Upgrade ....................................................................................................... 11
3.6.4 About ........................................................................................................................ 11
3.6.5 Beginner’s Guide ...................................................................................................... 11
Chapter 4 Remote Control ........................................................................................................ 12
A. Communication Matrix and Device Command ...................................................................... 13

LED Multi-Media Display User Manual
1
Chapter 1 Product Introduction
The LED multi-media display, hereinafter referred as terminal or device, is a standardized display
product, featuring in self-illuminating display, comprehensive information release, remote
management and control, miracast, etc. With its fashionable and simple design, the terminal
boasts good performance in various aspects. It can bring a wide view without light reflection even
in strong light. The integrated management system enables you to remotely control terminals,
manage programs, and perform miracast by a PC or mobile phone. Operation through a remote
control is also allowed. The LED multi-media display is equipped with Hikvision’s professional
image processing technology, including Pix Code (algorithm for optimizing the details of low-
grayscale image), Pix Master (algorithm for image enhancement), Color Master (algorithm for
color fidelity), HDR display, 3D display and other research and development achievements. With
clear and vivid images, the device is applicable to scenes with 100 to 200 inch wide view, such as
large-scale shopping malls, business buildings, financial halls, airports, high-speed railway stations,
government halls, news release halls, exhibition halls, etc.

LED Multi-Media Display User Manual
1
Chapter 2 Sending Card Configuration
2.1 Activate Device
Activate the sending card via the LED Display Client when using it for the first time.
Before You Start
● The client has been installed correctly.
● Ensure the PC running the client and the sending card are in the same LAN.
Steps
1. Run the client.
Online Device list will display all the online devices in the current network segment. You can
click Refresh to refresh the online devices.
Figure 2-1 LED Display Client
2. Select the inactive device from the list, and click Activate.
3. Enter the password and confirm it. Click OK.

LED Multi-Media Display User Manual
2
Figure 2-2 Activation
Caution
The password strength of the device can be automatically checked. We highly recommend you
change the password of your own choosing (using a minimum of 8 characters, including at least
three kinds of following categories: upper case letters, lower case letters, numbers, and special
characters) in order to increase the security of your product. And we recommend you change
your password regularly, especially in the high security system, changing the password monthly
or weekly can better protect your product.
Proper configuration of all passwords and other security settings is the responsibility of the
service provider and/or end-user.
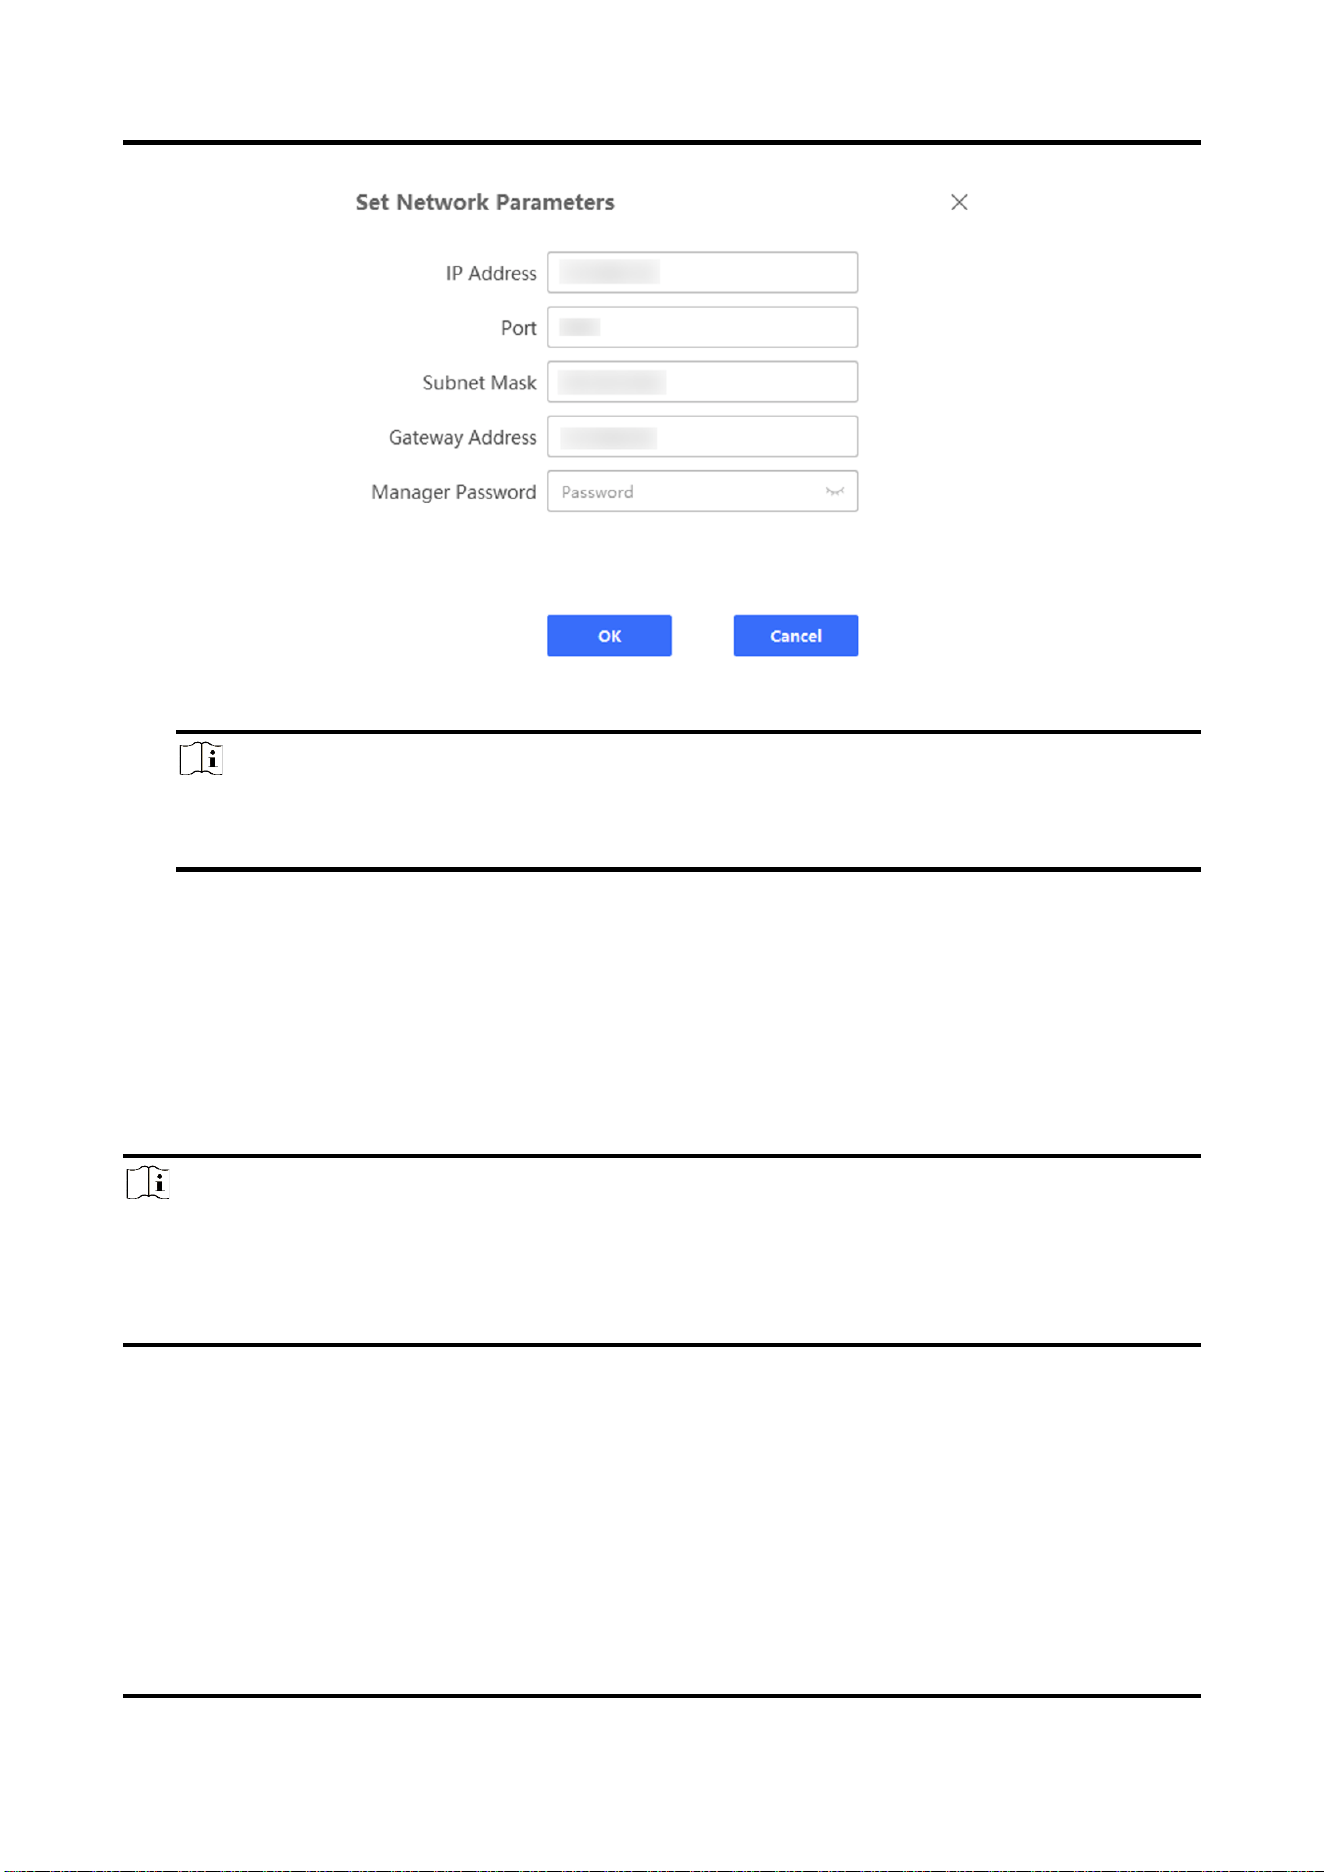
4. Optional: Edit network parameters of the activated device.
1) Select the activated device from Online Device list.
2) Click Set Network Parameters.
3) Edit the network parameters of the device, such as the IP address, subnet mask, gateway, etc.
4) Enter Admin Password, and click OK.
LED Multi-Media Display User Manual
3
Figure 2-3 Set Network Parameters
Note
If the device connected network has DHCP function, the IP address of the device will be
allocated automatically. You can skip step 4.
2.2 Add Device
The client provides multiple device adding modes including by IP address and IP segment. You can
also import multiple devices in batch when there are large amount of devices to be added. After
the devices are added to the client, you can realize remote configuration and management of the
added devices.
Note
If you want to add the 54-inch splicing screen, after adding, a message will prompt on top of
Device Group list: The current configuration is only available for the 54-inch LED splicing display
unit. If you need to set the normal LED display, delete the added 54-inch LED splicing display
unit(s) first.
2.2.1 Add Single or Multiple Online Devices
The client can detect online devices which are in the same network with the PC running the client.
You can select a detected online device displayed in the online device list and add it to the client.
For detected online devices sharing the same user name and password, you can add them to the

LED Multi-Media Display User Manual
4
client in batch.
Before You Start
● The device(s) to be added are in the same network with the PC running the client.
● The device(s) to be added have been activated.
Steps
1. Click Device Management.
2. Check one or more online device(s) from Online Device list, and click Add to.
Figure 2-4 Add Online Device
Note
You can judge whether the device(s) can be added to Device Group list via the status shown
under Add via OTAP item. Only the supported device(s) can be added to Device Group list.
3. Enter the required information.
Name
Enter a descriptive name for the device.
IP Address
The IP address of the device is obtained automatically in this adding mode.
Port
The port No. of the device is obtained automatically in this adding mode. You can also
customize the port No.

LED Multi-Media Display User Manual
5
User Name
By default, the user name is admin.
Password
Enter the device password.
Caution
The password strength of the device can be automatically checked. We highly recommend
you change the password of your own choosing (using a minimum of 8 characters, including
at least three kinds of following categories: upper case letters, lower case letters, numbers,
and special characters) in order to increase the security of your product. And we recommend
you change your password regularly, especially in the high security system, changing the
password monthly or weekly can better protect your product.
Proper configuration of all passwords and other security settings is the responsibility of the
service provider and/or end-user.
Synchronize Time
Check Synchronize Time to synchronize the device time with the PC running the client after
adding the device to the client.
4. Click OK.
2.2.2 Add Device by IP Address
If you know the IP address or domain name of the device to be added, you can add devices to the
client by specifying the IP address, user name, password, etc.
Steps
1. Click Device Management.
2. Click Add in Device Group list.
3. Select Adding Mode as IP Address.

LED Multi-Media Display User Manual
6
Figure 2-5 Add Device by IP Address
4. Enter the required information.
Caution
The password strength of the device can be automatically checked. We highly recommend you
change the password of your own choosing (using a minimum of 8 characters, including at least
three kinds of following categories: upper case letters, lower case letters, numbers, and special
characters) in order to increase the security of your product. And we recommend you change
your password regularly, especially in the high security system, changing the password monthly
or weekly can better protect your product.
Proper configuration of all passwords and other security settings is the responsibility of the
service provider and/or end-user.
5. Optional: Other operations.
Add Offline
You can check Add Offline if you want to add offline device(s). After
adding succeeded, the Network Status of the device shows Offline.
When the device is online, the Network Status will switch to Online
automatically, and the client will connect it automatically.

LED Multi-Media Display User Manual
7
Note
If you do not check Add Offline, you cannot add the offline device(s).
Synchronize Time
Check Synchronize Time to synchronize the device time with the PC
running the client after adding the device to the client.
Parameters Self-
Check
If you enable Parameters Self-Check, the device will detect some of
the sending/receiving card parameters. If abnormal parameters are
found, the device will configure parameters automatically and record
them in log.
6. Click Add to add the device and exit from the interface. Or click Add and New to save the
settings and continue to add other devices.
2.2.3 Add Device by IP Segment
If the devices share the same port No., user name, and password, and their IP addresses range in
the same IP segment, you can add them to the client by specifying the start IP address and the end
IP address, port No., user name, password, etc. of the devices.
Steps
1. Click Device Management.
2. Click Add in Device Group list.
3. Select Adding Mode as IP Segment.

LED Multi-Media Display User Manual
8
Figure 2-6 Add Device by IP Segment
4. Enter the required information.
Note
● The top three segments of the start and end IP addresses should be same. Up to 255 devices
in the same IP segment can be added.
● The password strength of the device can be automatically checked. We highly recommend
you change the password of your own choosing (using a minimum of 8 characters, including
at least three kinds of following categories: upper case letters, lower case letters, numbers,
and special characters) in order to increase the security of your product. And we recommend
you change your password regularly, especially in the high security system, changing the
password monthly or weekly can better protect your product.
● Proper configuration of all passwords and other security settings is the responsibility of the
service provider and/or end-user.
5. Optional: Other operations.
Add Offline
You can check Add Offline if you want to add offline device(s). After
adding succeeded, the Network Status of the device shows Offline.
When the device is online, the Network Status will switch to Online
automatically, and the client will connect it automatically.

LED Multi-Media Display User Manual
9
Note
If you do not check Add Offline, you cannot add the offline device(s).
Synchronize Time
Check Synchronize Time to synchronize the device time with the PC
running the client after adding the device to the client.
Parameters Self-
Check
If you enable Parameters Self-Check, the device will detect some of
the sending/receiving card parameters. If abnormal parameters are
found, the device will configure parameters automatically and record
them in log.
6. Click Add to add the device and exit from the interface. Or click Add and New to save the
settings and continue to add other devices.
2.2.4 Import Devices in Batch
You can add multiple devices to the client in batch by entering the device parameters in a pre-
defined CSV file.
Steps
1. Click Device Management.
2. Click Add in Device Group list.
3. Select Adding Mode as Batch Import.
Figure 2-7 Import Devices in Batch
4. Click Export Template and save the pre-defined template (CSV file) to your PC.
5. Open the exported template file and enter the required information of the devices to be added
on the corresponding column.

LED Multi-Media Display User Manual
10
Caution
The password strength of the device can be automatically checked. We highly recommend you
change the password of your own choosing (using a minimum of 8 characters, including at least
three kinds of following categories: upper case letters, lower case letters, numbers, and special
characters) in order to increase the security of your product. And we recommend you change
your password regularly, especially in the high security system, changing the password monthly
or weekly can better protect your product.
Proper configuration of all passwords and other security settings is the responsibility of the
service provider and/or end-user.
6. On Add Device interface, click and select the edited template file.
7. Click OK.
2.3 Import Configuration File
Import the receiving card configuration file.
Before You Start
Get the receiving card configuration file and save it to the PC running the client.
Steps
1. Go to LED Settings → Maintenance → System Maintenance → Import/Export → Import.
2. Check the device(s) to be set from the device list.
3. Click after Import Configuration File to select the configuration file saved in the PC.
4. Click Import.
5. Enter Password, and click OK.
Note
The password is the set password when exporting the configuration file.
2.4 Set Display Attribute
You can set the parameters such as video wall scale, screen resolution, etc.
Steps
1. Go to LED Settings → Screen Control → Signal Connection → Display Attribute Configuration.
2. Select the device to be set from the device list.

LED Multi-Media Display User Manual
11
Figure 2-8 Set Display Attribute
3. Set the display attribute.
Video Wall Scale
Set row(s) and column(s) of the screen according to the actual situation. Each cabinet
contains 1 or 2 receiving cards.
Enable Zooming
Check it to enable the signal source zooming. Uncheck it in splicing scenes.
Screen Resolution
Select the appropriate resolution. If there is no appropriate resolution, you can select Custom
Resolution, and enter Custom Screen Resolution. Click Add Resolution to add other
resolutions. Select Apply to apply the added resolutions.
Note
The width of the custom resolution should be a multiple of 4.
4. Click Save.
2.5 Set Screen Type
You can load screen type from the cloud or screen, or set screen type by importing the
configuration file.
Steps
1. Go to LED Settings → Screen Control → Screen Settings.
2. Check the device(s) to be set from the device list.
3. Select Configuration Type.
– Load from Cloud:
1. Click Load. The system will load the screen type automatically.
2. Select Screen Type, or enter the keyword to search and select from the dropdown list.

LED Multi-Media Display User Manual
12
Figure 2-9 Load Screen Type from Cloud
– Load from Screen:
Click Load. The system will load the screen type automatically.
Figure 2-10 Load Screen Type from Screen
– Import File:
1. Click to select the configuration file.
2. Click Import to import the configuration file.
Figure 2-11 Import File
4. Click Cure to save the parameters to the receiving card to ensure the screen can display
normally after next reboot.

LED Multi-Media Display User Manual
13
2.6 Set Signal Connection
Set signal line connection according to the actual receiving card connection between LED cabinets.
Steps
Note
After setting the video wall scale, the LED screen will show the signal line connection. The signal
connection via the client must match with the actual screen connection.
1. Go to LED Settings → Screen Control → Signal Connection → Signal Connection.
2. Select the device to be set from the device list.
Figure 2-12 Set Signal Connection
3. Click Display Line.
The location prompt of each screen will show on the screen.
4. Select a sending port to connect.
Note
● Connect the signal line according to the location prompt on each screen. If the prompt is 2-1,
the screen is the first screen to connect to No. 2 sending port.
● Signal line connection should be the same as the actual screen connection.
5. Connect signal cables.

LED Multi-Media Display User Manual
14
– Click the screen on the right side of the interface to connect signal lines.
– Select Line Type, and select the start port and end port.
6. Optional: Other operations.
Display/Hide Line
Click the button to display/hide the connection lines shown on the
screen.
Receiving Card Quick
Maintenance
Click the button to enter Receiving Card Quick Maintenance
interface. You can copy the configuration of the referenced receiving
card to the new receiving card, or export the program or
configuration file of the referenced receiving card and import it to the
other receiving cards of the current screen or to the receiving cards in
other projects.
Reset Sending Port
Click Reset Sending Port, and select the operation.
● Click Reset Current Sending Port to clear all the configuration of
the current signal sending port.
● Click Reset All Sending Ports to clear all the configuration of all the
signal sending ports.
Cancel the last operation.
Restore the last operation.
Signal Backup
Enable Signal Backup to enable dual-channel signal inputs to ensure
signal stability.
Note
If the function is enabled, the relationship between the active and
standby network interfaces should be the same as Active-Standby
Network Interface Relationship shown on the client.
7. Click Save.

LED Multi-Media Display User Manual
1
Chapter 3 System Introduction
3.1 Home
When sending card configuration is completed, the device will show system home. Introduction to
the software on the home is shown as follows.
● Wireless Sharing: Enables devices including PCs and mobile phones to mirror screen via
miracast or screen mirroring code. For more details, see Help.
● File Management: Stores files including images, audios, and videos.
● Help: Includes guide to the remote control, device interfaces, and screen mirroring.
● Windows: Switches the device to Windows operating system.
● More Apps: Includes WPS Office, Transcreen, Welcome, Browser, Whiteboard, and Settings.
Figure 3-1 Home
3.2 Wireless Sharing
The device supports various methods to mirror screen. Choose one according to actual situation
and your demands.
Click Wireless Sharing. Follow the guide on this page to mirror screen.

LED Multi-Media Display User Manual
2
Figure 3-2 Wireless Sharing
3.3 Network
Click Settings → Network. Set up wired network, wireless network, hotspot, and Bluetooth.
Figure 3-3 Network Settings
Note
Wired network and wireless network cannot be enabled at the same time.
3.3.1 Wired Network
Wired network can be enabled when the device is connected to a network cable. If wired network
is enabled, you can configure following parameters manually or automatically. These parameters
cannot be edited in automatic mode.

LED Multi-Media Display User Manual
3
Figure 3-4 Wired Network
3.3.2 Wireless Network
The device can also be connected to network via Wi-Fi.
Figure 3-5 Wireless Network
Note
Wireless network will be disabled when hotspot is enabled.

LED Multi-Media Display User Manual
4
3.3.3 Hotspot
When wired network is enabled, the device can be served as a hotspot.
● Default Hotspot Name: ZY_ADA.L8386
● Default Password: 88888888
Hotspot parameters can be edited.
Figure 3-6 Hotspot
Note
Wireless network will be disabled when hotspot is enabled.
3.3.4 Bluetooth
When the Bluetooth is enabled, the device can be paired to a Bluetooth speaker for audio output.
Figure 3-7 Bluetooth
3.4 Picture
Click Settings → Picture. Configure display effects.
● Supports four modes: Standard Mode, Soft Mode, Movie Mode, and Conference Mode. Each
mode has default parameters which can also be edited. Click Reset to reset the parameters of
the current mode to the default values.
● Blue light from the screen will be decreased if Eye Protection is enabled.

LED Multi-Media Display User Manual
5
Figure 3-8 Picture
3.5 Sound
Click Settings → Sound. Configure sound parameters.
● System Sound: If enabled, device volume can be adjusted; if disabled, the device is muted.
● Optical Fiber Output: If enabled, device sound will be output to the connected speaker via
optical fiber.
Figure 3-9 Sound
3.6 General
Click Settings → General. Configure signal, date and time, language and keyboard, and wallpaper,
or manage Apps on the device.

LED Multi-Media Display User Manual
6
Figure 3-10 General Settings
3.6.1 Signal
● Remember Signal: Select system signal input.
– Last Used: Signal input used last.
– Home: Android signal input.
– OPS: Windows signal input.
– HDMI2: HDMI signal input.
● Aspect Ratio: Set the aspect ratio of OPS or HDMI2 signal input as Auto Fit, 16:9, 4:3, or Pixel
to Pixel.
● EDID Version: Select the EDID version as Version 1.4 or 2.0 to match resolution and frame rate

LED Multi-Media Display User Manual
7
input.
Figure 3-11 Signal Settings
3.6.2 Apps
Select an application to see more details and for more operations: forcefully stop, open, uninstall,
or remove data.
3.6.3 Date & Time
Enable Set Automatically to synchronize system time automatically. Or disable the function to set
Date, Time, and Time Zone manually. You can also enable 24-Hour Time and set Data Format.
Figure 3-12 Date & Time

LED Multi-Media Display User Manual
8
3.6.4 Language & Keyboard
You can select system language.
Figure 3-13 Language & Keyboard
3.6.5 Wallpaper
Select system wallpaper or custom wallpaper.
Figure 3-14 Wallpaper
3.6.6 Assistive Touch
When enabled, click or on either side of the screen to use Assistive Touch.
Table 3-1 Assistive Touch Description
Icon
Description
Icon
Description
Return to the previous page, or
exit current application.
Set up Picture.
Return to home.
Set up signal, snap screenshots,
or see screen mirroring guide.
Open whiteboard.
-
-
3.6.7 Bottom Gesture
When enabled, swipe up from the bottom of the screen to go back to home.

LED Multi-Media Display User Manual
9
3.6.8 Float Menu
When enabled, float buttons will appear on the screen.
Table 3-2 Float Menu Description
Icon
Description
Icon
Description
Back to the previous page, or
exit current application.
Enter menu settings.
Open Whiteboard.
Enter system settings.
Switch to Windows OS.
Back to home.
3.6.9 Select Desktop Style
Set up desktop style, i.e. system theme.
Figure 3-15 Desktop Style
3.7 System
Click Settings → System. Set up scheduled startup and shutdown, reset the system to factory

LED Multi-Media Display User Manual
10
default or upgrade the system, and see more details about the device.
Figure 3-16 System Settings
3.6.1 Schedule Startup and Shutdown
Enable Schedule Startup and Schedule Shutdown, and set up time. The device will start up and
shut down at the scheduled time.
Figure 3-17 Schedule Startup and Shutdown
3.6.2 Reset to Factory Settings
You can reset the device to factory default settings and clear all data from local storage.
Figure 3-18 Schedule Startup and Shutdown

LED Multi-Media Display User Manual
11
3.6.3 System Upgrade
Upgrade system via the packages saved in a USB flash drive or local file folder.
Note
The upgrade package must be saved in the root directory of the local storage or the
connected USB flash drive.
Package name of a bin file must be: Ada8386Upgrade.bin, and package name of a zip file must
be: upgrade_signed.zip.
Figure 3-19 System Upgrade
3.6.4 About
See device name, Android card version, system release time, memory, storage, and system
version. Device name can be edited.
3.6.5 Beginner’s Guide
See the guide to remote control, device interfaces, and screen mirroring.

LED Multi-Media Display User Manual
12
Chapter 4 Remote Control
The device is equipped with an infrared remote controller, which can be paired with via Bluetooth.
In infrared mode, aim the remote controller at the power button at the bottom right of the device
to use.
Table 4-1 Remote Control Description
Remote Control
Button
Description
Start up/Shut down
Start screen mirroring
Press to enable volume adjustment and press
the left/right button to adjust volume
Mute/unmute and reset to the volume last
used
Press: Switch signal
Hold: Open Beginner’s Guide
OK
Return to the previous page or exit current
application
Open menu
Press: Back to home
Hold: Shut down all applications
Bluetooth mode: Delete
Infrared mode: Enter “#”
Enter “*” or “.”
Note
Press and at the same time to pair via Bluetooth.

LED Multi-Media Display User Manual
13
A. Communication Matrix and Device Command
Scan the QR code below to get the communication matrix of the device.
Scan the QR code below to get the device command.

UD32662B