
Multi Surface Cleaning Robot

Note! - Read all documents before using
The appliance is not to be used by children. Persons with reduced physical, sensory or mental
capabilities, or lack of experience and knowledge may only use this appliance if they are
supervised or have been given instruction about how to use it safely and understand what
risks are involved. Children should be supervised to ensure they do not play with the robot.
!!!The appliance is for window cleaning with Frames(Frameless glass/window cleaning is not
applicable).Users should judge and use it safely on proper operation sites,and be responsible
for all possible consequences.
Safety Information
Application of Power Adatper and Batterys
※ Use only the power adapter supplied with this device .Use of other type of power adapter
will result in malfunction and/or danger
※ Please use the proper electric outlet and make sure no heavy objects are placed on the
power adapter or power cord
※ Allow adequate ventilation around the adapter when using it to operate the device.Docover
the power adapter with objects that will reduce cooling.
※ Do not use the adapter in a high moisture enviroment.Never handle the adapter with wet
hands.
※ Connect the adapter to a proper power source.The votage requirements are found on the
adapter
※ Do not use broken adapter, power cord or plug.
※ Do not attempt to service the adapter. There are no sevice parts inside. Peplace the whole
unit if itis damanged or exposed to high moisture. Consult your dealer for help and
mantenance.
※ The battery used in this device may present a risk of fire or chemical burn if mistreated. Do
not disassemble, short contact, het above 60℃(140F), or incinerate.
※ If you have to dispose of this old equipment, please take it to the local recycling center for
recycling electrical and electronic parts
※ Retain the safety and operating instructions for future reference.
※ Follow all operating and use instructions
※ Do not expose your device to derect sunlighe or interce lighe source, and keep it away from
heat source(such as radiators, space heaters, stoves, and so on)
※ Do not place the device in the vicinity of strong magnetic fields
※ Keep the device andaccessories away from children.
※ Product operating temperature:0℃~40℃
WARNING: This appliance is only to be used with the power supply unit
(Model no: GM95-240375-F)
The appliance contains battery that are only replaceable by skilled persons

Risk of electric shock!
※ Always switch the device off before carrying out any cleaning or maintenance work.
※ Never pull the power plug out of the socket by the power cord; instead, pull it out by the
power plug itself.
※ Never perform repairs on your device yourself. Repairs to electric devices may only be
carried out by authorized customer service center.
※ Do not insert any pointed objects into the electric contacts.
※ Do not change the cotacts.
※ Do not continue to operate the robot if the device itself or the power cord is damaged.
※ Contact your loal customer service in the event of damage.
※ Do not clean the robot, thepower cable in water or other liquids.
※ Do not use the the robot on damp ground or in places in which it can get into contact with
liquids or be immersed in water.
※ Do not use the robot in hazardous areas such open fireplaces,running showers or
swimming pools.
※ Make sure that you do not damage, bend or twist the power cord.
※ Do not place any heavy objects on top of the cord.This could damage the power cord and
cause a fire or electrical shock.
※ Drooping or bare cables, curtains, tablecloths or cord in the working area of the robot are to
be secured in order to avoid damge to it or cause an electrical shock.
WARNING
1、Fasten the safety rope and tie to indoor fixture before operating the device.
2、Check if the safety rope is broken or the knot is loose before operating the device.
3、Set danger-warning area downstairs for no balcony window and door.
4、Battery shall be full-charged(green lamp ON)before using.
5、Do not use it in rainy or moist day.
6、Turn power on before put device onto glass.
7、Make sure appliance can stick and stand on glass surface while put onto glass.
8、Before turn power off, please hold device.
9、Do not use it on frameless glass.
10、Make sure put cleaning ring onto cleaning wheel correctly for no leakage.
11、Do not spray or pour water onto the appliance.
12、Prohibit children from using this device.
13、Remove anything from the glass. Do not use on cracked glass. Reflective or coating
glass might be slightly scratched due to dirt on the glass while operating.
14 、 Keep hair, loose clothing, fingers, and all parted of body away from the openings and
moving parts.
15、Do not use in areas with existed flammable or combustible liquids, gas.

About Window Cleaning Robot
GlassBot is a cleaning robot that works on multiple surfaces of glasses, tiles, smooth walls and
tables. It works with a built-in vacuum motor that helps it suck air and stand on the glass
surface. An embedded UPS (Un-interrupted Power System) prevents the robot falling from the
window even when no electrical power. With two wheels that freely traverse on the window
surface or on wall surface, GlassBot cleans glass surface efficiently by the intelligent
AI-technology path calculation. As well, it can be manually operated to clean under different
modes from the remote control.
Features
* APP Control through IOS/Android system
For glasses thicker than 6mm
AI Technology
Cleaning speed: 4minutes/meter^2
4 kinds of automatic operation modes for cleaning entire window
Auto-finish
Embedded UPS (Un-interrupted Power System)
Anti-dropping control algorithm
Auto detect edges of window
Micro-fiber cloth
High strength safety rope (150Kgf)
Remote control
Table cleaning mode
Specifications What’s in the package?
Input Voltage: AC110-240V Cleaner×1pcs
Dimension: 29*14*11.5cm Cleaning cloth×12pcs
Net Weight: 0.95KG Remote controller ×1pcs
Input Voltage: Adapter(100~240VAC,50~60Hz) ×1
AC 100~240V,50/60Hz Adaptor AC power cord×1pcs
24V, 80W,1.5m Cable DC power extension cable(4 meters) ×1
Safe Standby Power: User Manual×1
Built-in Li-ion battery, 600mAh 14.8V Cleaning ring×4
Charging Time :1hour Safety rope×1
1
Model M168
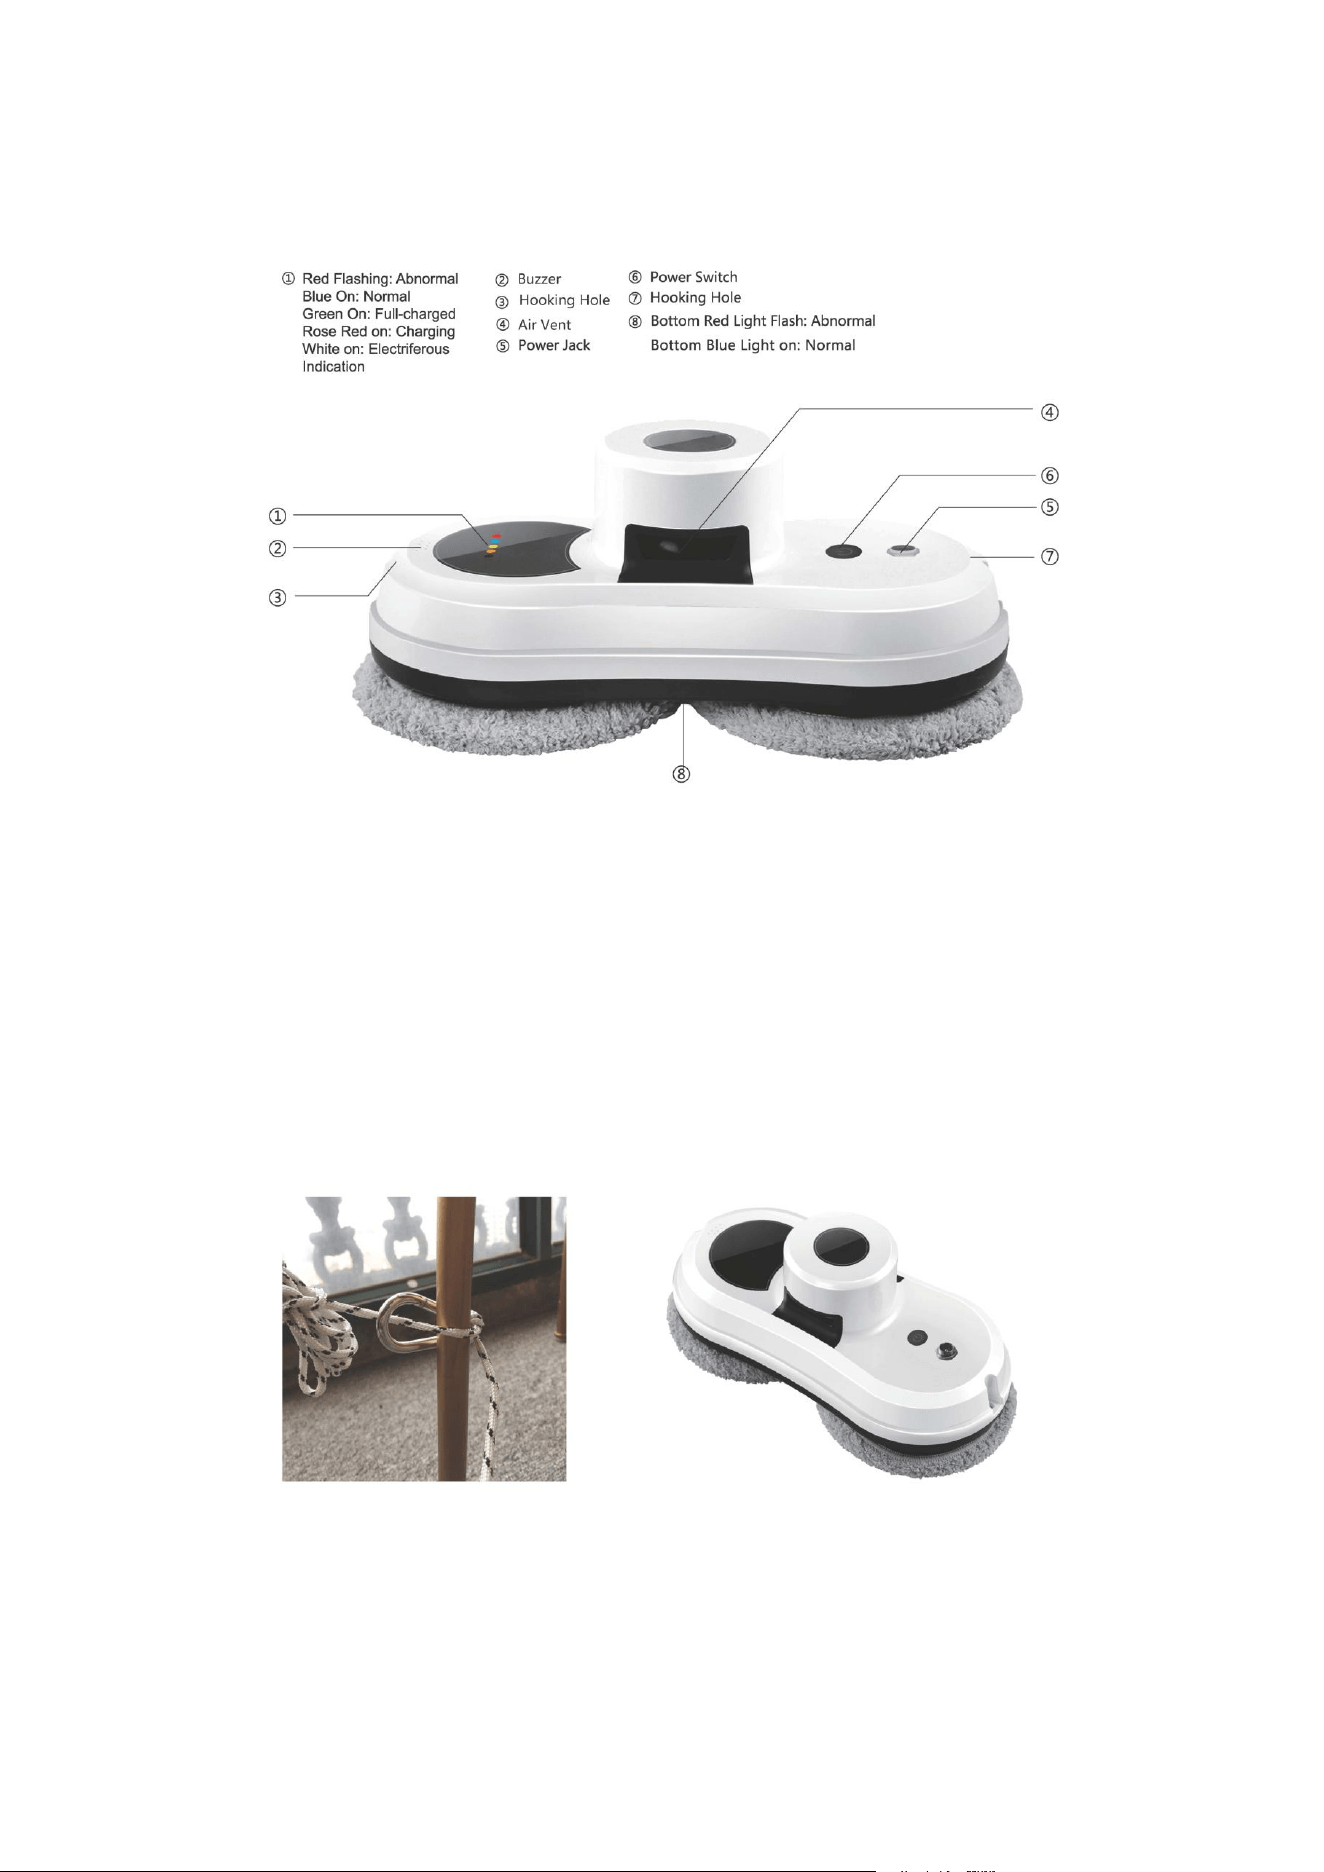
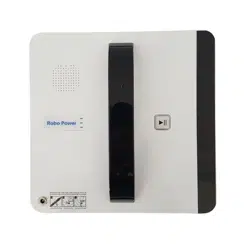
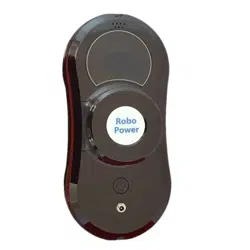
Know Your GlassBot
Top View
①Red Flashing:Abnormal ②Buzzer ⑥Power Switch
Blue ON:Normal ③Hooking Hole ⑦Hooking Hole
Green On:Full-charged ④Air Vent ⑧Bottom Red light Flash:Abnormal
Rose Red On:Charging ⑤Power Jack Bottom Blue Light On:Normal
White On:Electriferous Indication
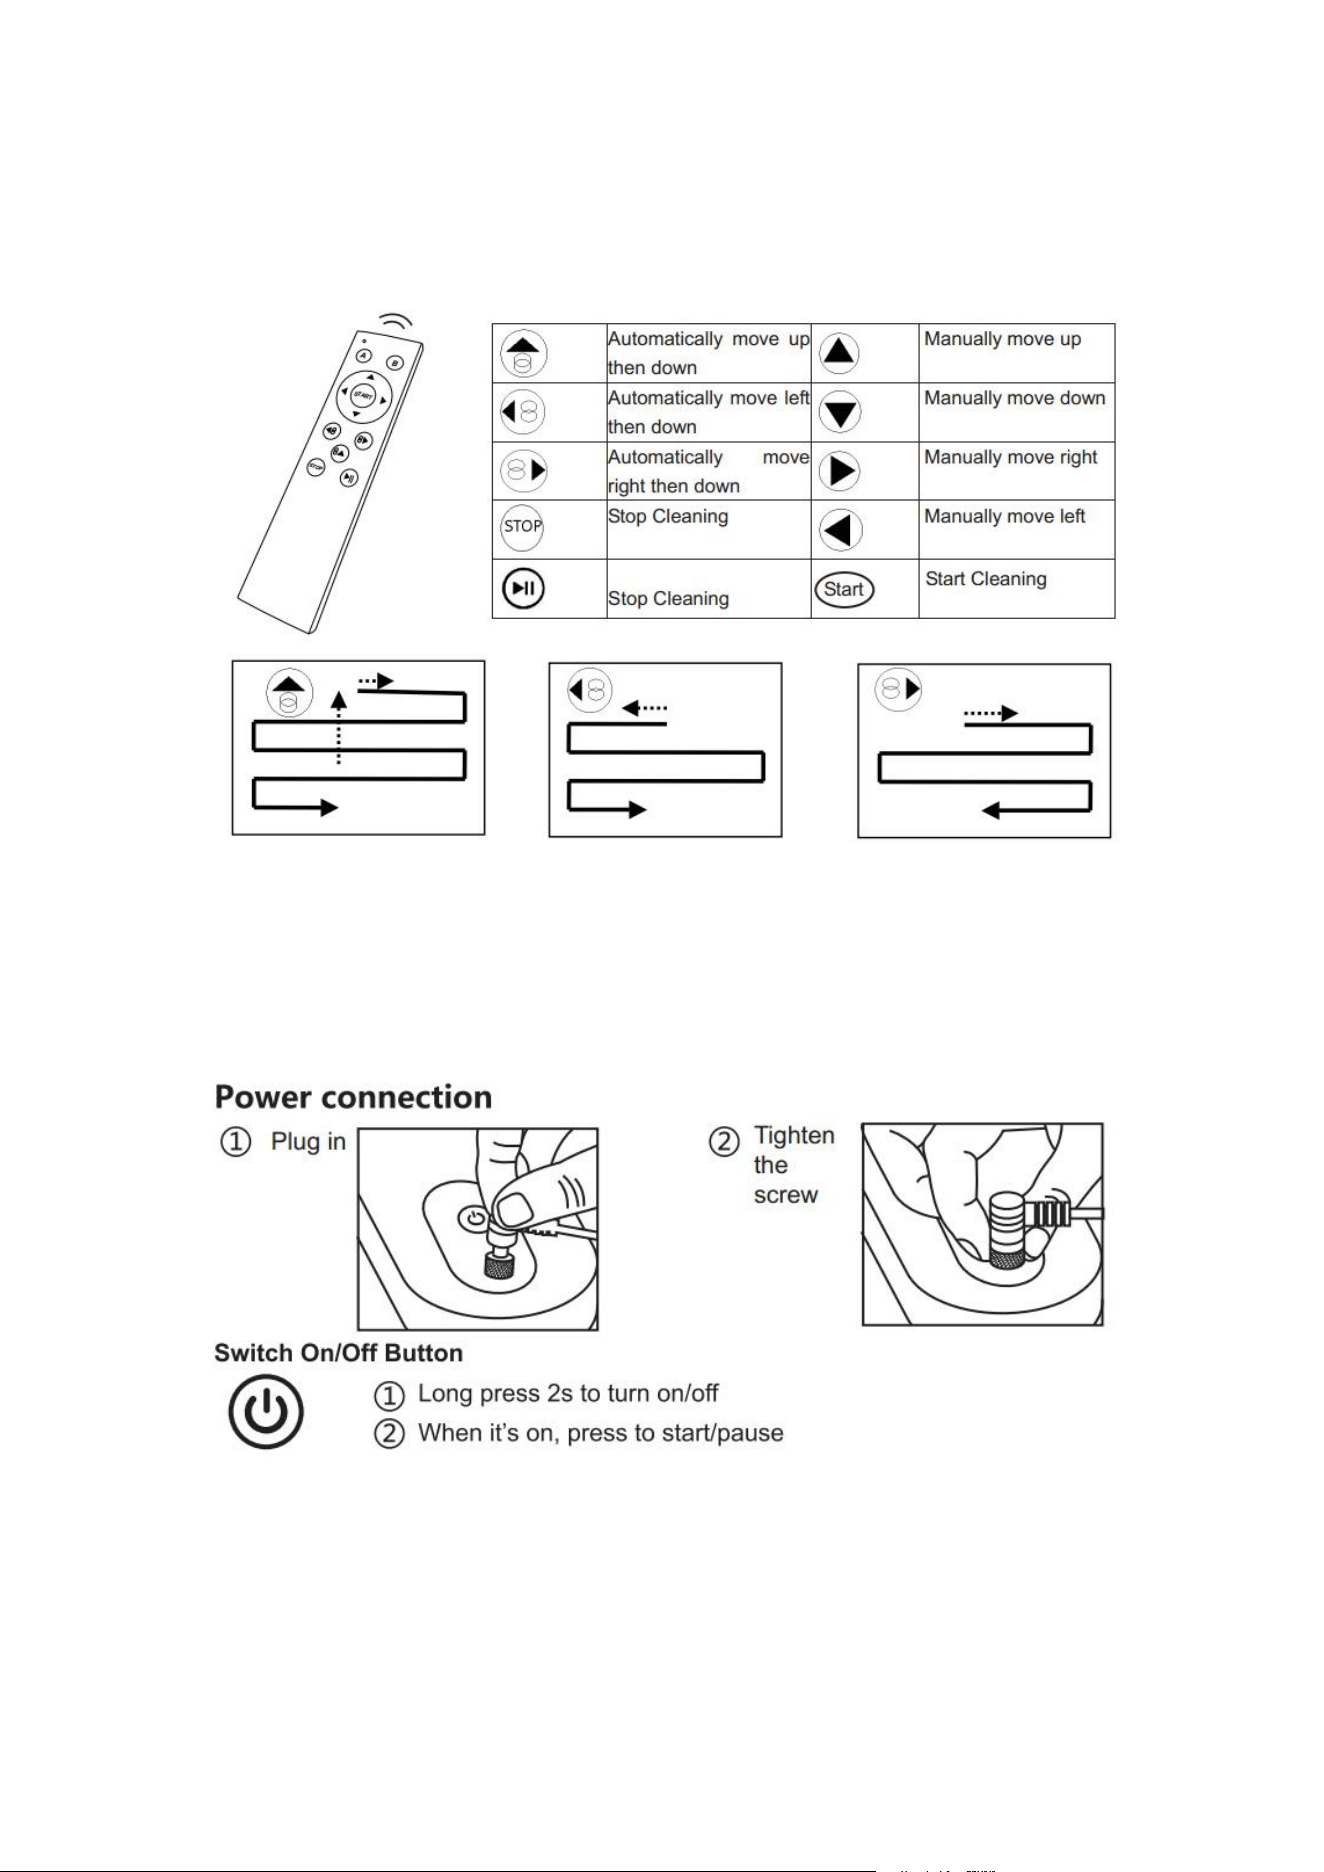
Know Your GlassBot
Remote Control
The device can be remote controlled from the front and backside.
Auto Up then Down Auto Left then Down Auto Right then Down
* Please remove the insulation spacer in the bottom of back of remote controller before
useing. If you have to replace the battery, just pull down the battery cover

Before Using
►
The robot shall always connect power cable for normal using.
► How to put the robot onto glass to start using?
(1) Turn on power-switch, and then make sure the fan is running.
(2) Put device onto glass and keep 10cm away from the window frame.
(3) Check if device can stick to the glass before releasing it.
►
How to take device down from glass?
(1) While device is running, please hold safety rope with one hand and take device down
from glass with the other hand.
(2) Turn off power-switch in safe area.
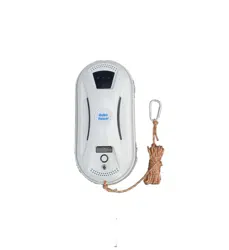
►
Safety rope and buckle
(1) Before using, check if the safety rope is broken or the knot is loose.
(2) Fasten the safety rope and tie to indoor fixture before operating.
► UPS (Un-interrupted Power System) function
(1) The UPS function will be enabled automatically when no electric power supplied. The
backup time of this UPS is 30 minutes.
(2) If no electric power is supplied, the device will stop automatically, alert and flash red
lamp. User shall take device down from the glass as soon as possible.
(3) User can pull device back by pulling safety rope. Slightly pull the safety rope at an
angle close to the glass to prevent dropping.
►
Please make sure the battery was full-charged (green lamp ON) before using
(1) First, turn off the power-switch on the device. Plug in the power. Orange lamp ON
means charging.
(2) Green lamp ON means the battery was full-charged.
►
Table cleaning mode
Put device on the table and select auto-cleaning mode, the device will run in
table-cleaning mode.
►
Notice
(1) Do not use it on frameless glass.
(2) Make sure put cleaning ring onto cleaning wheel correctly for no leakage.
(3) Do not use it in rainy or moist day.
(4) Set danger-warning area downstairs for no-balcony window and door.
How to Clean the Glass
Step I: Use ONLY clean-and-dry cleaning cloth to clean dust and sand on the glass.
Step II: Change again the cleaning cloth. Keep upper wheel’s cleaning cloth as
clean-and-dry. Spray a little detergent (1~2 spray) on lower wheel’s cleaning cloth, but not
make cloth wet (if too wet, the machine can’t move well). Then clean the glass again.
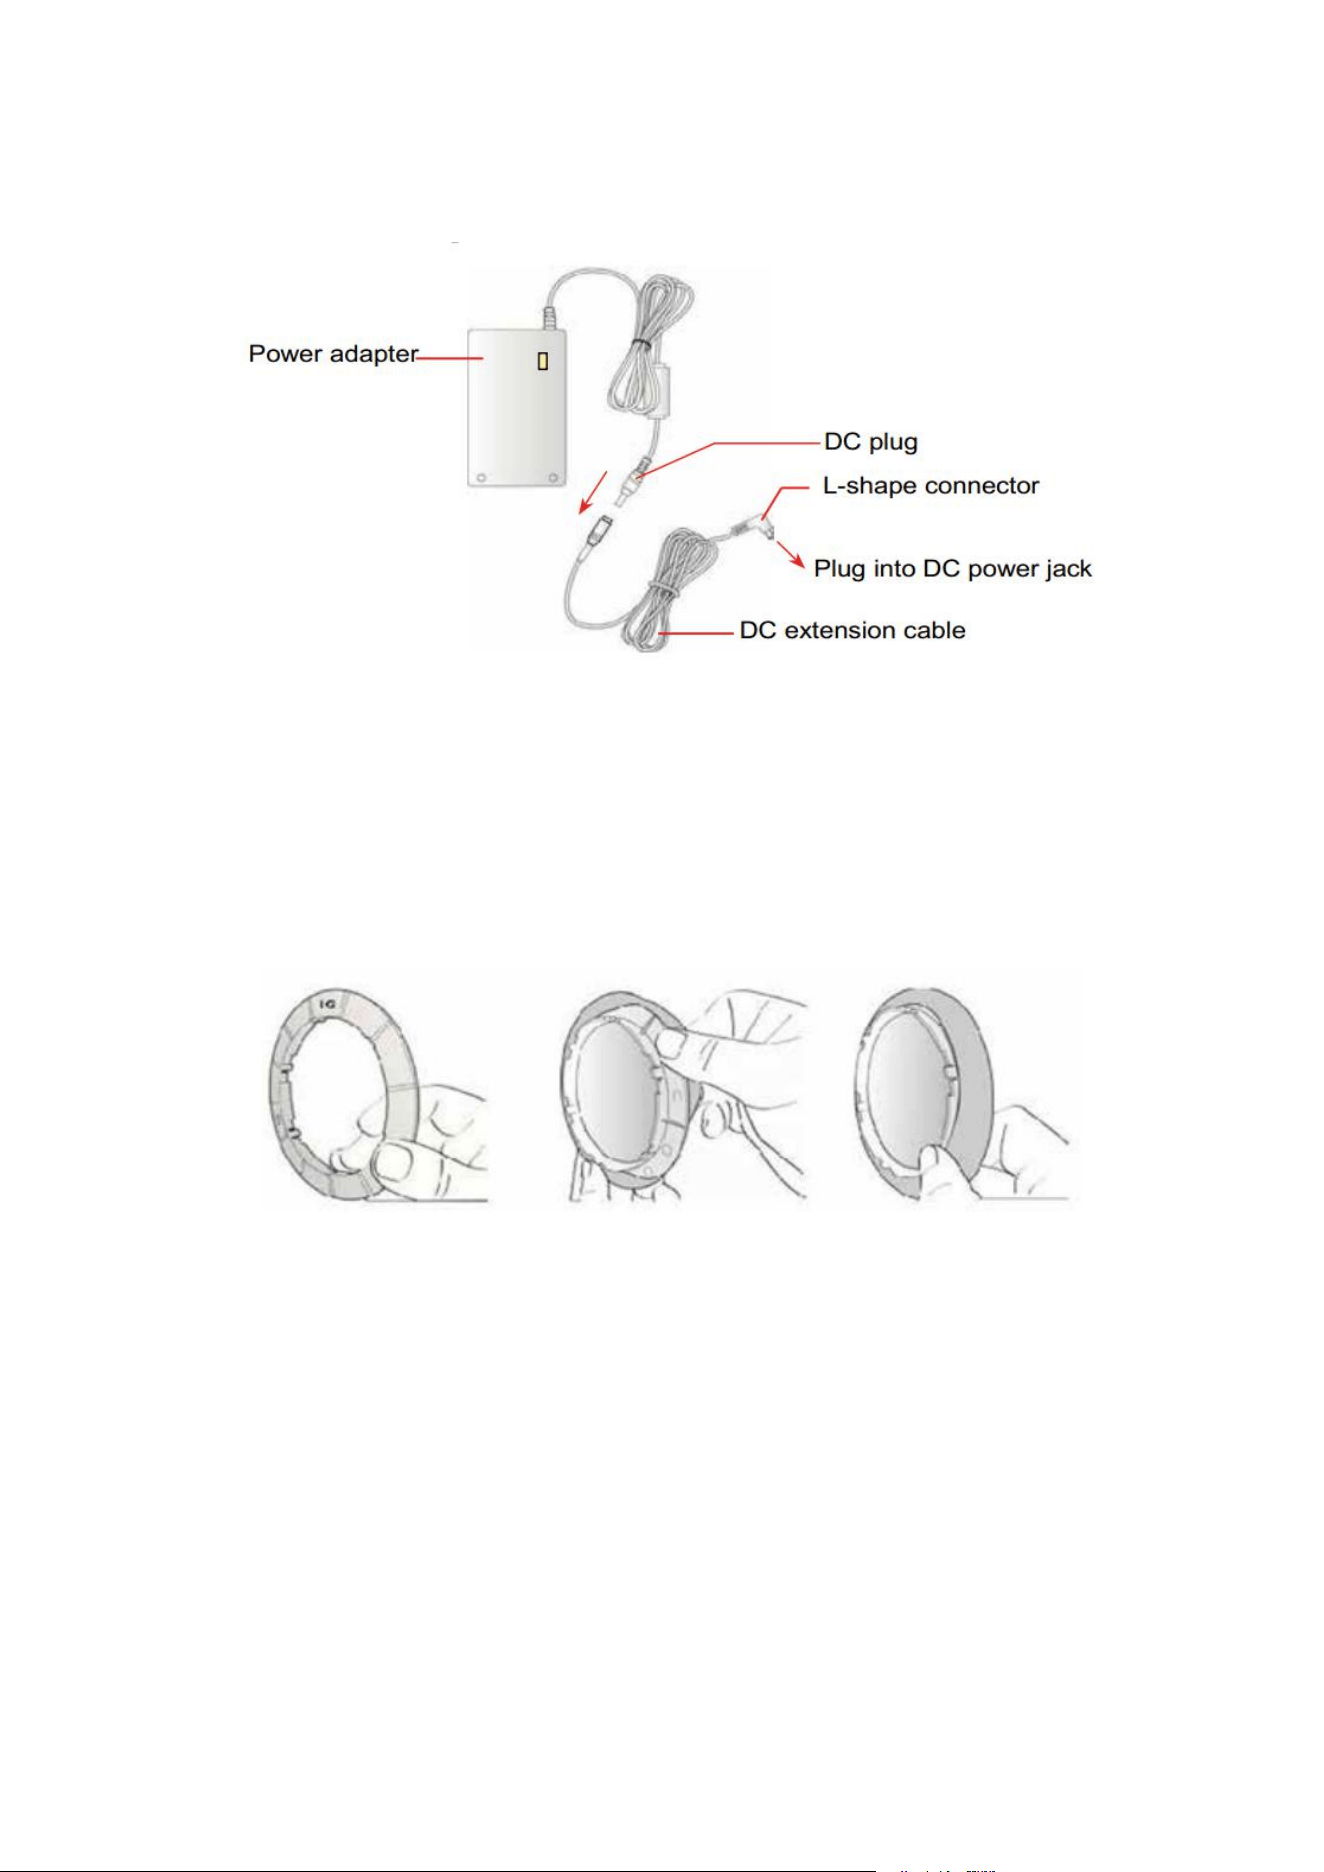
Power Adapter/DC Extension Cable
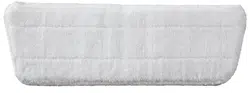
Using/Changing the Cleaning Cloth
1. Put clean-and-dry cleaning cloth onto cleaning ring.
2. Put the cleaning ring onto clean wheel and ensure the 6 slots on the ring are well fixed
with the cleaner wheel to avoid air leakage.
Frequently Asked Questions (FAQ)
Q1: If Robot can’t startup and alert at the beginning of self-test.
Ans: It means that the friction factor is not properly used. Please check:
(1) Whether the cleaning cloth is too dirty.
(2) Glass stickers, window film on the glass will also affect the friction factor.
(3) If clean window many times, the glass surface will become very slippery.
(4) The glass surface will become slippery if clean several times in low humidity
environment such as in air-conditioned rooms.
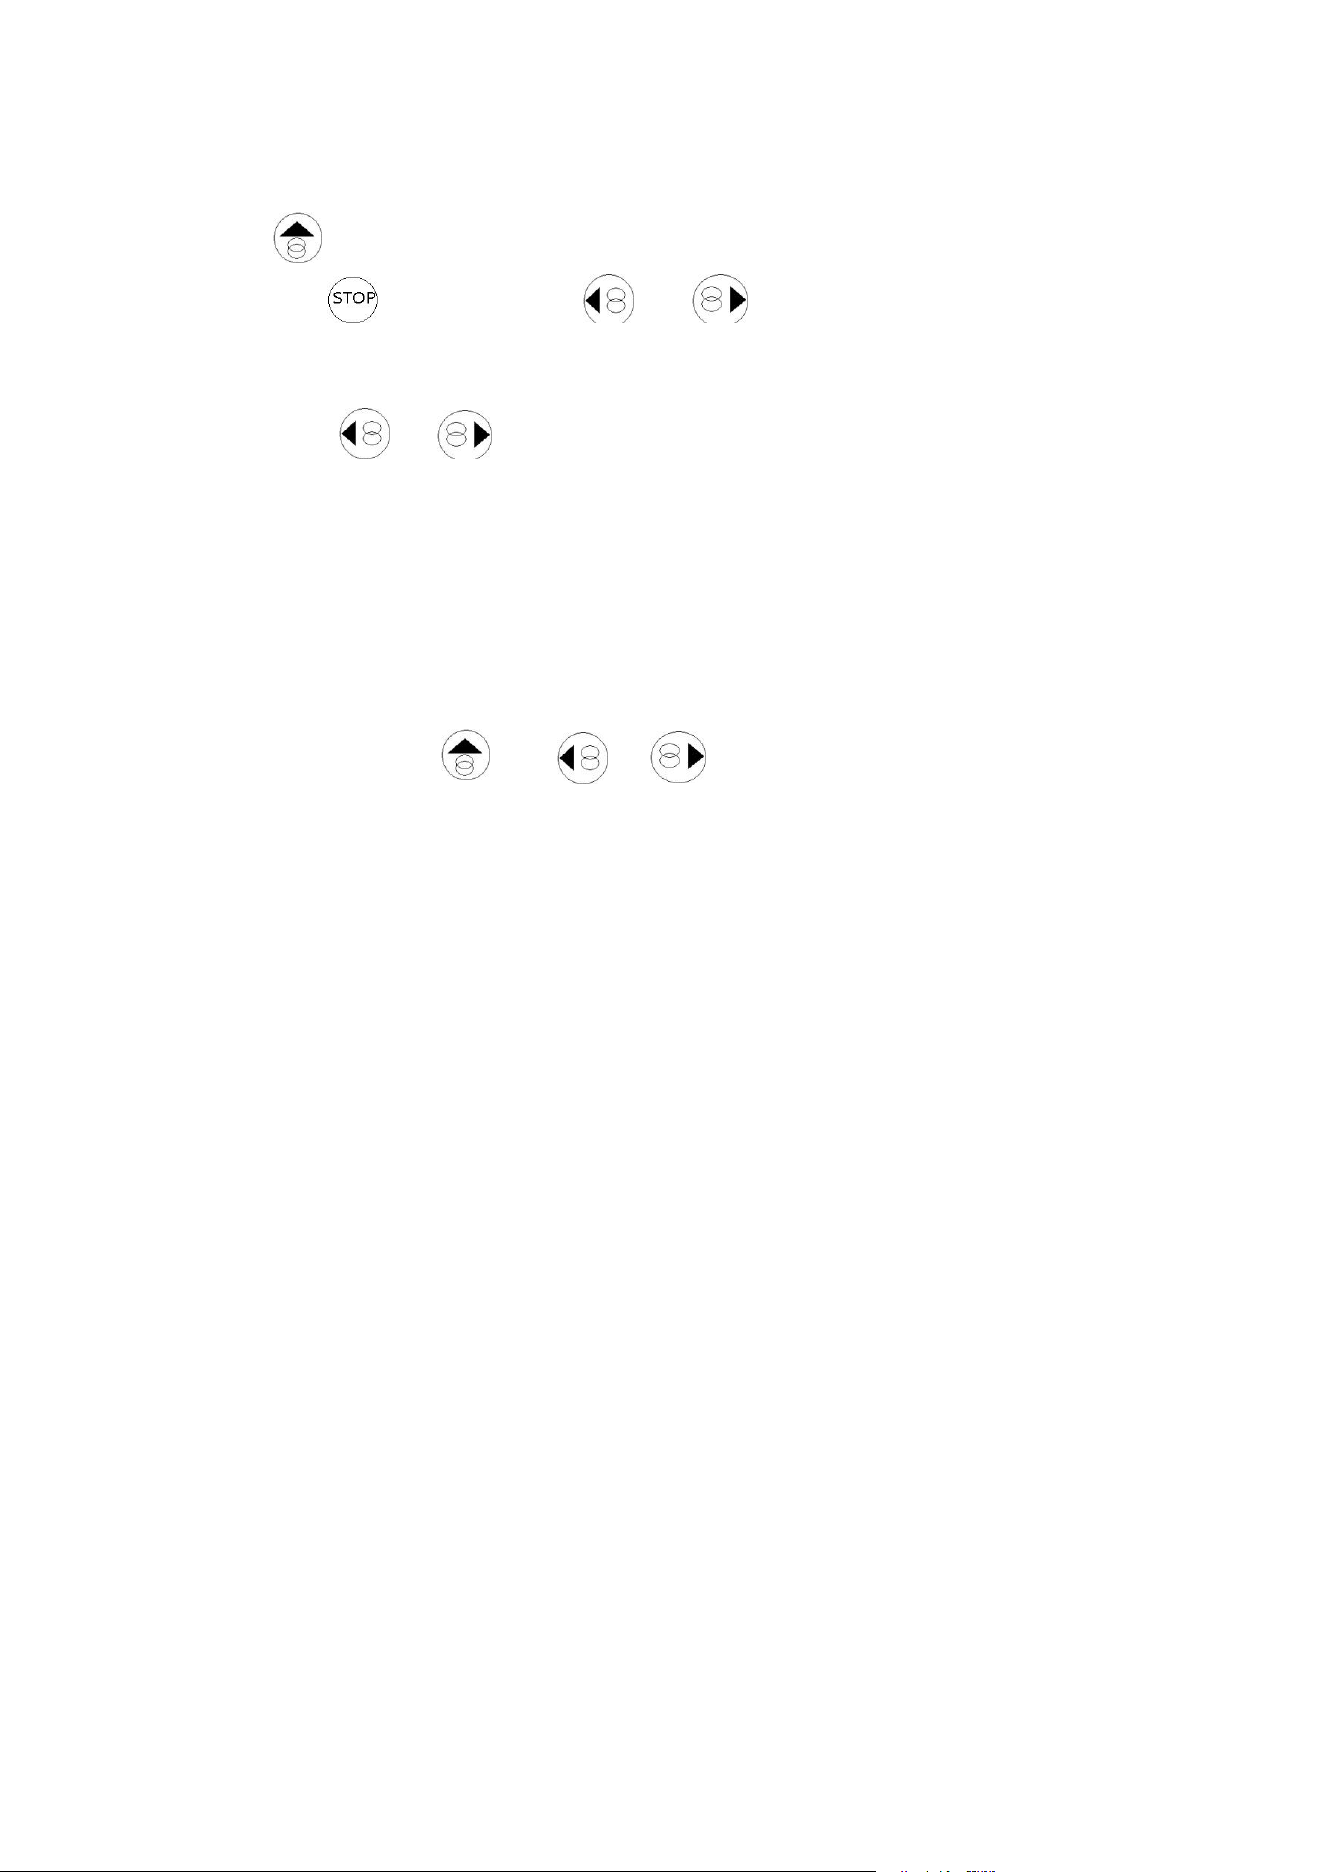
Q2: Robot slips and cannot detect the upper frame of window in “Auto Up then Down”
mode
Ans: Press key and switch to or mode to continue cleaning.
Q3: Robot cannot finish whole window and stop at middle area.
Ans: Press or mode to continue cleaning.
Q4: Robot slips and cannot get higher to the window frame.
Ans:
(1) Friction factor is too low that might be caused by glass stickers, window film on the
glass.
(2) Cleaning cloth might be too wet.
(3) If clean window many times, the glass surface will become very slippery.
(4) The glass surface will become slippery if clean several times in low humidity
environment such as in air-conditioned room.
(5) When startup (press , or or ), keep 10cm away from the window
frame.
Q5: Robot does not move smoothly or moves irregularly.
Ans:
(1) Cleaning cloth is too dirty. Please change the cleaning cloth.
(2) Glass surface has different friction factor areas due to stickers, window film, and son
on. Please use it in single area.
(3) The screw of cleaning wheel might be loose, please tighten it.
Q6: After cleaning, remained circle mark on the glass surface.
Ans: Cleaning cloth is too dirty. Please change the cleaning cloth and clean for the
second time.
Q7: What to do if robot stopped at higher area while no electric power supplied, it alarms and red
lamp flashes?
Ans:
(1) User can pull robot back with safety rope. Slightly pull the safety rope at an angle close to the glass
to prevent dropping.
(2) Switch the power-switch to “off” status.
(3) Check whether electric poor-contact, or cable broken.
Q8: What to do if robot abnormally stopped and red lamp keeps flashing, without alarm?
Ans: Ans:(1) User can move robot to safe area by remote control, or pull robot back
with safety rope. Slightly pull the safety rope at an angle close to the glass to
prevent dropping.
(2) Switch the power-switch to “off”
(3) Check whether there is air-leakage caused by gap, uneven window frame.
Q9: When turn on power switch, the FAN do not rotating, and no alarm.
Case
LED signal
Situation
1
Blue: flash
Red: on
No alarm
It means battery voltage too low, please
waiting for battery full-charged (Green lamp
on). If machine still can’t be use after charge 8
hours, the battery shall be change.
2
Blue: flash
Red: flash
No alarm
Machine hardware failure.
Please contact the local retailers or local
authorized dealers for repair.
Q10: The robot doesn't stop automatically after glass is fully cleaned.
Ans:Press Stop key to stop it, and take it off carefully from the glass.
Control it with your smart phone
Users can control the cleaner through bluetooth matching to your smart phone,
which is simple and convenient.
※ IOS System:
Requires iOS 7.0 or later. Compatible with iPhone, iPad, and iPod touch.
※ Android System:
Requires Android 4.3 or later, bluetooth 4.0 or later.
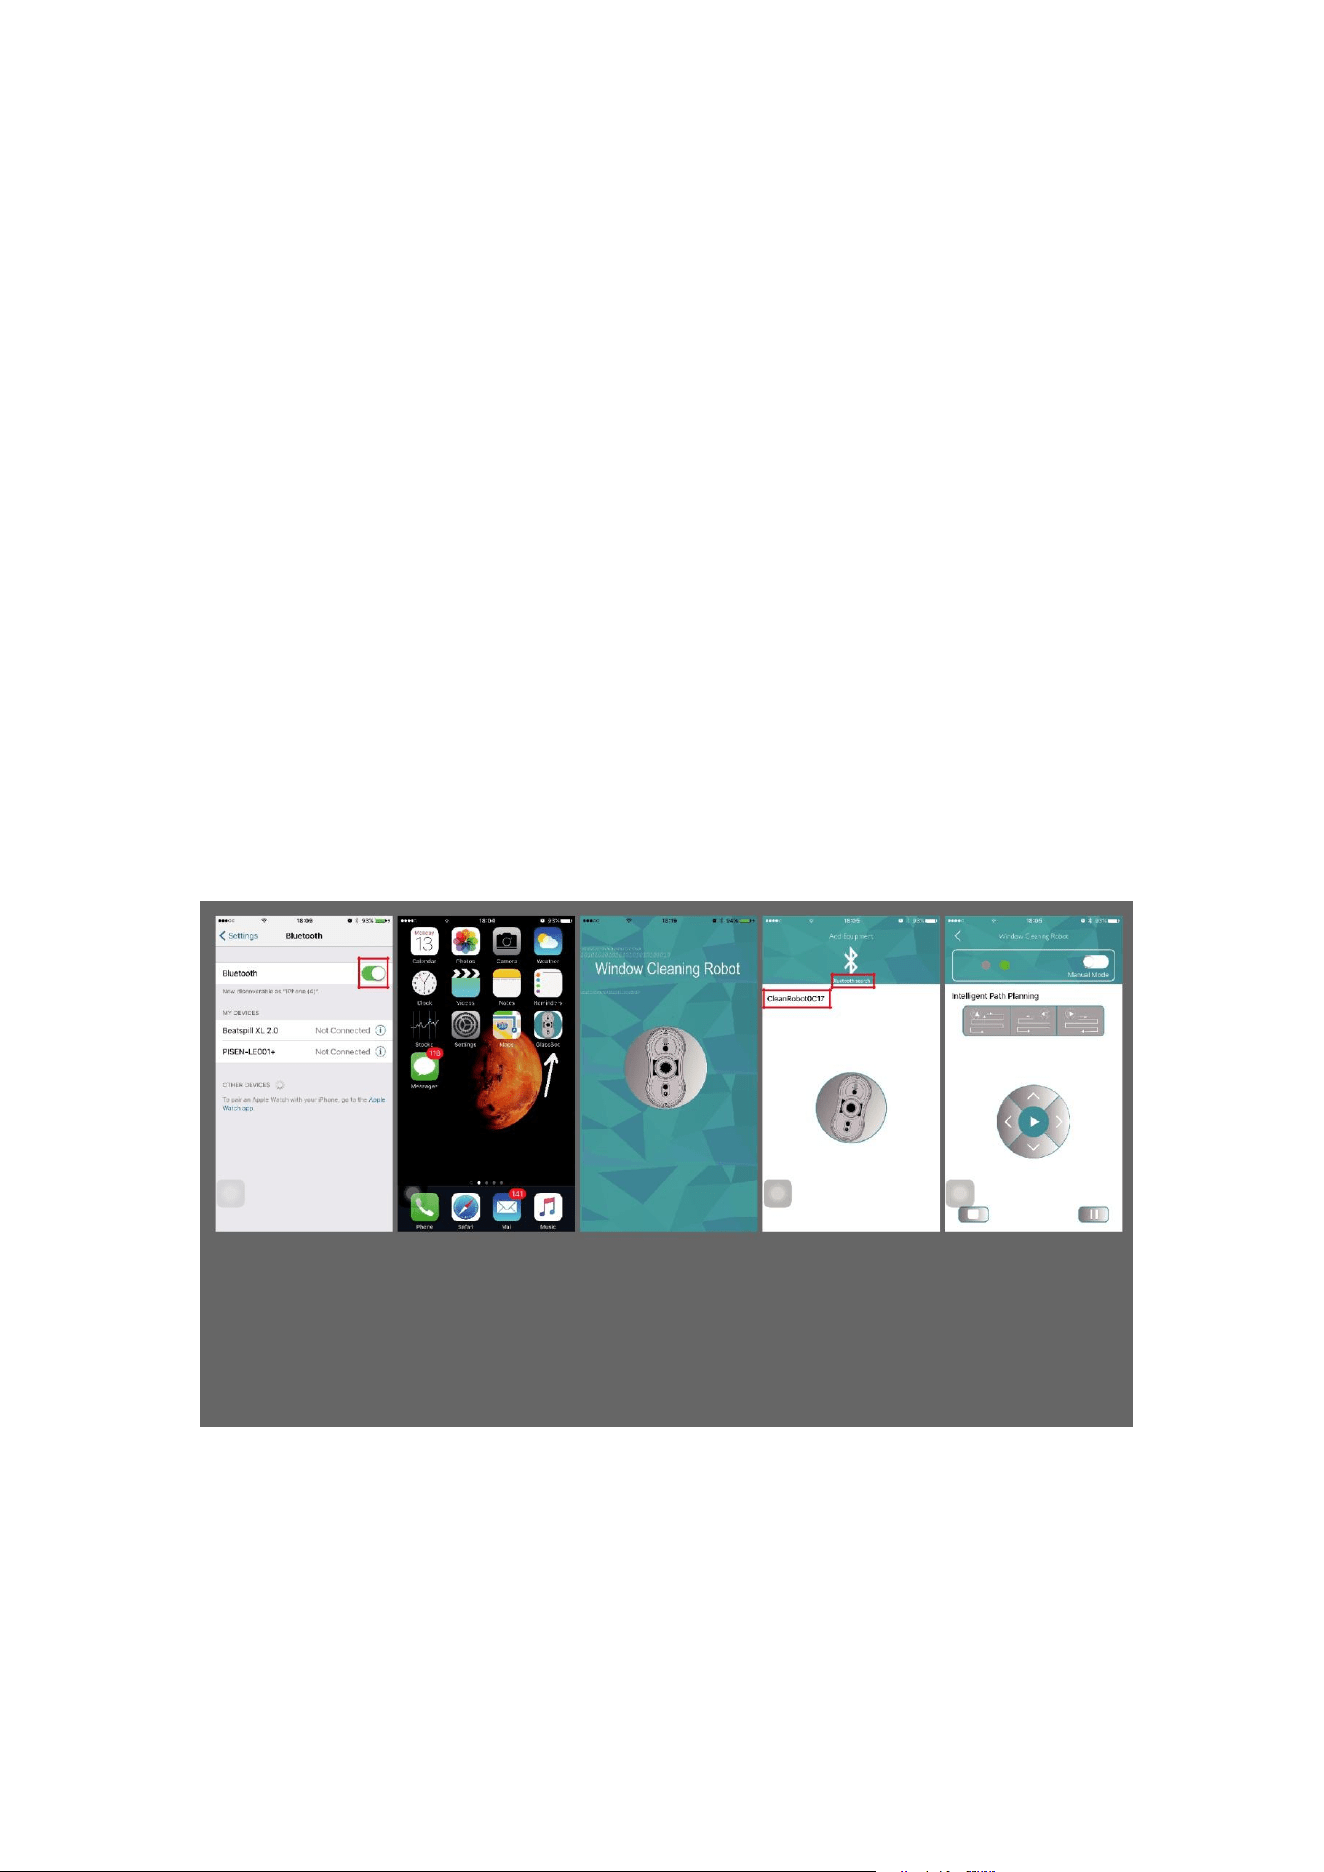
How to control it through APP ?
1. Connect the robot to power supply and press “Start” to turn it on
The robot has to be turned on so the program can be found and matched to your
smartphone.
2. Turn on your phone’s “bluetooth” (Fig 1)
3. Find Glassbot App and open it on your phone (Fig 2)
4. App is available (Fig 3)
5. Click “Bluetooth search” on your phone, and match it to your phone (Fig 4)
6. Connection successful, you can control it through your phone now (Fig 5)