Loading ...
Loading ...
Loading ...
6
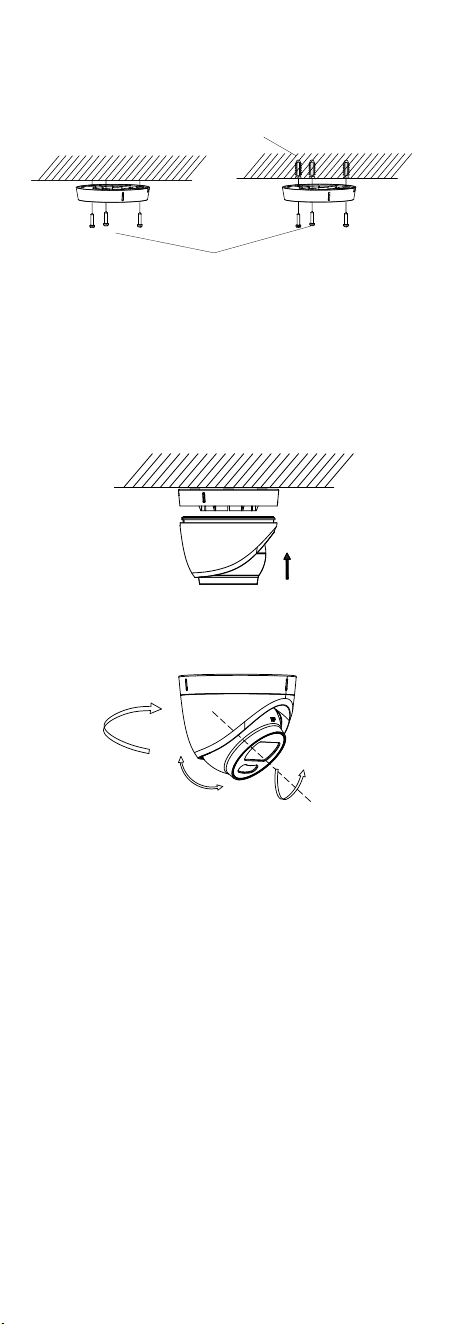
5. Attach the mounting base to the ceiling and secure
it with supplied screws. For cement ceiling, you
need to install wall plugs at first.
Screws
Wall Plugs
Figure 2-14 Attach Mounting Base to Ceiling
Note:
The supplied screw package contains self-tapping
screws and wall plugs.
6. Route the cables through the cable hole, or the side
opening.
7. Install the camera back to the mounting base and
secure it.
Figure 2-15 Install Camera Back
8. Connect the cables.
9. Power on the camera to adjust the view angle
according to the figure below.
Pan Position
[0° to 360°]
Tilt Position
[0° to 75°]
Rotation Position
[0° to 360°]
Figure 2-16 3-Axis Adjustment
1). Rotate the enclosure to adjust the pan position
[0° to 360°].
2). Move the camera body up and down to adjust
the tilt position [0° to 75°].
3). Rotate the main body to adjust the rotation
position [0° to 360°].
2.3.2 Ceiling/Wall Mounting with Junction Box
Before you start:
You need to purchase a junction box in advance. The
installation of ceiling mounting and wall mounting are
similar. Following takes wall mounting as an example.
Steps:
1. Paste the drill template on the wall.
2. Drill screw holes and the cable hole (optional)
according to the drill template.
Loading ...
Loading ...
Loading ...