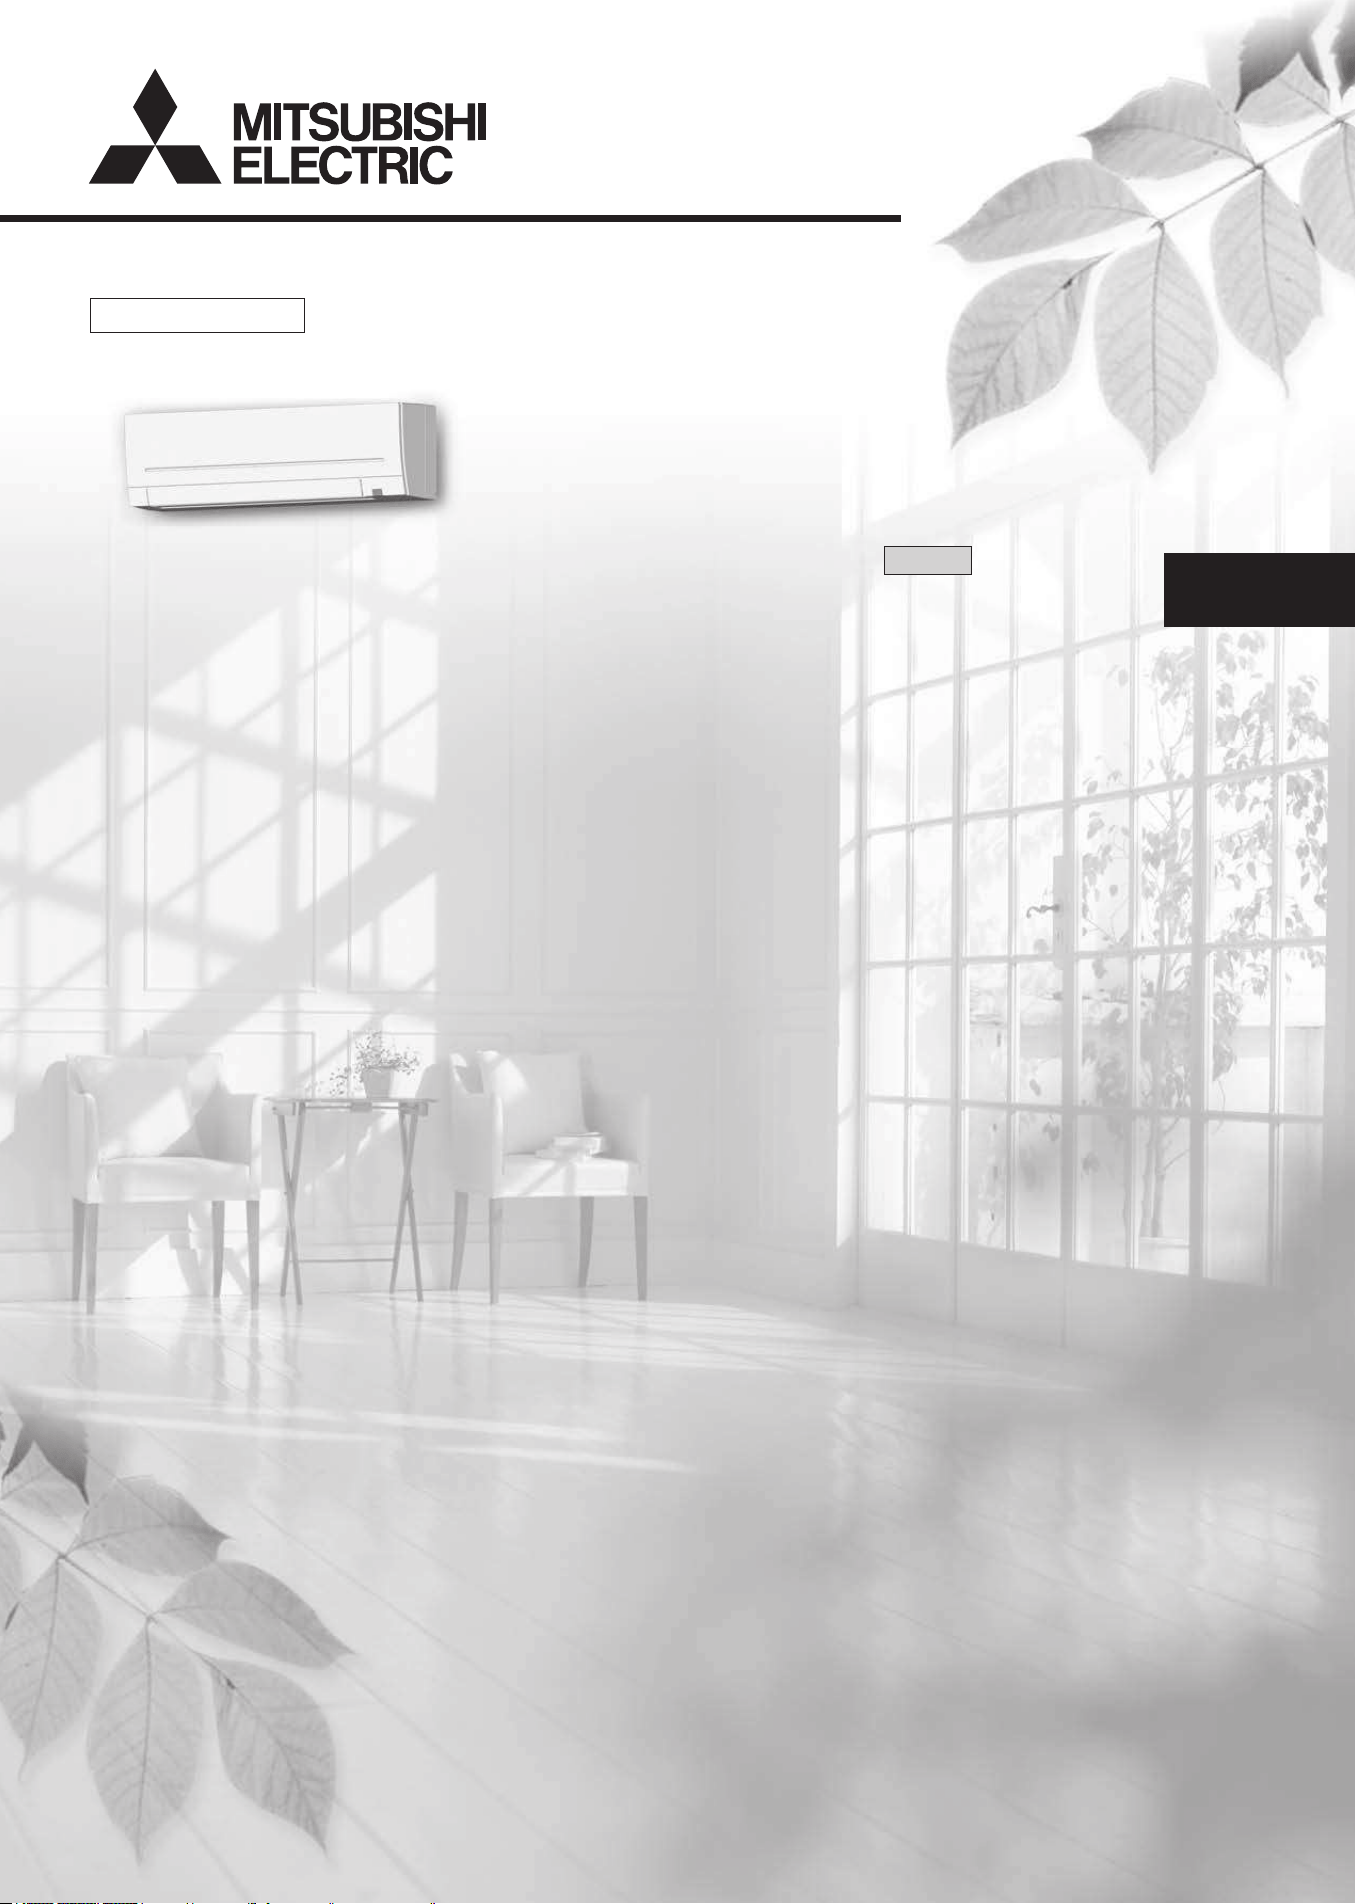
SPLIT-TYPE AIR CONDITIONERS
English
OPERATING INSTRUCTIONS
For user
• Tousethisunitcorrectlyandsafely,besuretoreadtheseoperating
instructionsbeforeuse.
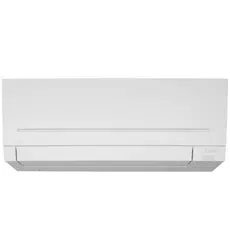
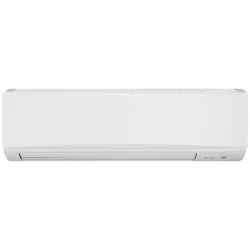
MSZ-AP60VGD MSZ-AP71VGD MSZ-AP80VGD
MSZ-AP60VGKD MSZ-AP71VGKD MSZ-AP80VGKD
INDOOR UNIT
En-1
● OPERATING INSTRUCTIONS ●
WARNING
Do not connect the power cord to an intermediate point, use an
extension cord, or connect multiple devices to a single AC outlet.
• Thismaycauseoverheating,re,orelectricshock.
Make sure the power plug is free of dirt and insert it securely into
the outlet.
• Adirtyplugmaycausereorelectricshock.
Do not bundle, pull, damage, or modify the power cord, and do not
apply heat or place heavy objects on it.
• Thismaycausereorelectricshock.
• Sincerotatingpartsandpartswhichcouldcauseanelectricshockareused
inthisproduct,besuretoreadthese“SafetyPrecautions”beforeuse.
• Sincethecautionaryitemsshownhereareimportantforsafety,besureto
observethem.
• Afterreadingthismanual,keepittogetherwiththeinstallationmanualina
handyplaceforeasyreference.
• Be suretoreceive aguarantee cardfromyour dealerand checkthatthe
purchaseddateandshopname,etc.areenteredcorrectly.
Marks and their meanings
WARNING:
Incorrect handling could cause serious hazard, such as
death,seriousinjury,etc.withahighprobability.
CAUTION:
Incorrecthandlingcouldcauseserioushazarddepending
ontheconditions.
Do not turn the breaker OFF/ON or disconnect/connect the power
plug during operation.
• Thismaycreatesparks,whichcancausere.
• AftertheindoorunitisswitchedOFFwiththeremotecontroller,make
suretoturnthebreakerOFFordisconnectthepowerplug.
Do not expose your body directly to cool air for a prolonged length
of time.
• Thiscouldbedetrimentaltoyourhealth.
Meanings of symbols used in this manual
: Besurenottodo.
: Besuretofollowtheinstruction.
: Neverinsertyourngerorstick,etc.
: Neverstepontotheindoor/outdoorunitanddonotputanythingon
them.
: Dangerofelectricshock.Becareful.
: Besuretodisconnectthepowersupplyplugfromthepoweroutlet.
: Besuretoshutoffthepower.
: Riskofre.
: Nevertouchwithwethand.
: Neversplashwaterontheunit.
SAFETY PRECAUTIONS
CONTENTS
Meanings of symbols displayed on indoor unit and/or outdoor unit
WARNING
(Riskofre)
Thisunitusesaammablerefrigerant.
Ifrefrigerantleaksandcomesincontactwithreorheatingpart,itwillcreateharmfulgasandthereisriskofre.
ReadtheOPERATINGINSTRUCTIONScarefullybeforeoperation.
ServicepersonnelarerequiredtocarefullyreadtheOPERATINGINSTRUCTIONSandINSTALLATIONMANUALbeforeoperation.
FurtherinformationisavailableintheOPERATINGINSTRUCTIONS,INSTALLATIONMANUAL,andthelike.
■ SAFETYPRECAUTIONS 1
■ NAMEOFEACHPART 4
■ PREPARATIONBEFOREOPERATION 5
■ SELECTINGOPERATIONMODES 6
■ FANSPEEDANDAIRFLOWDIRECTIONADJUSTMENT 7
■ LONGOPERATION 8
■ POWERFULOPERATION 8
■ I-SAvEOPERATION 8
■ ECONOCOOLOPERATION 9
■ NIGHTMODEOPERATION 9
■ TIMEROPERATION(ON/OFFTIMER) 10
■ EMERGENCYOPERATION 10
■ AUTORESTARTFUNCTION 10
■ WEEkLYTIMEROPERATION 11
■ DEMANDRESPONSEANDINDOORUNITOPERATION 12
■ CLEANING 13
■ Wi-FiINTERFACESETTINGUP(vGkTYPEONLY) 14
■ WHENYOUTHINkTHATTROUBLEHASOCCURRED 17
■ WHENTHEAIRCONDITIONERISNOTGOINGTOBEUSEDFORALONGTIME 18
■ INSTALLATIONPLACEANDELECTRICALWORk 18
■ SPECIFICATIONS 19
En-2En-2
The unit should not be installed, relocated, disassembled, altered,
or repaired by the user.
• Animproperlyhandledairconditionermaycausere,electricshock,
injury,orwaterleakage,etc.Consultyourdealer.
• Ifthepowersupplycordisdamaged,itmustbereplacedbythemanu-
factureroritsserviceagentinordertoavoidahazard.
When installing, relocating, or servicing the unit, make sure that
no substance other than the specied refrigerant (R32) enters the
refrigerant circuit.
• Anypresenceofforeign substance suchasaircancause abnormal
pressureriseandmayresultinexplosionorinjury.
• Theuseofanyrefrigerantotherthanthatspeciedforthesystemwill
causemechanicalfailure,systemmalfunction,orunitbreakdown.Inthe
worstcase,thiscouldleadtoaseriousimpedimenttosecuringproduct
safety.
This appliance is not intended for use by persons (including children)
with reduced physical, sensory or mental capabilities, or lack of ex-
perience and knowledge, unless they have been given supervision or
instruction concerning use of the appliance by a person responsible
for their safety.
Children should be supervised to ensure that they do not play with
the appliance.
Do not insert your nger, a stick, or other objects into the air inlet
or outlet.
• Thismaycauseinjury,sincethefaninsiderotatesathighspeedsduring
operation.
In case of an abnormal condition (such as a burning smell), stop the
air conditioner and disconnect the power plug or turn the breaker OFF.
• Acontinuedoperationintheabnormalstatemaycauseamalfunction,
re,orelectricshock.Inthiscase,consultyourdealer.
When the air conditioner does not cool or heat, there is a possibility of
refrigerant leakage. If any refrigerant leakage is found, stop operations
and ventilate the room well and consult your dealer immediately. If a
repair involves recharging the unit with refrigerant, ask the service
technician for details.
• Therefrigerantusedintheairconditionerisnotharmful.Normally,it
doesnotleak.However,ifrefrigerantleaksandcomesincontactwith
reorheatingpartofsuchafanheater,keroseneheater,orcooking
stove,itwillcreateharmfulgasandthereisriskofre.
The user should never attempt to wash the inside of the indoor unit.
Should the inside of the unit require cleaning, contact your dealer.
• Unsuitable detergent may cause damage to plastic material inside
theunit,whichmayresultinwaterleakage.Shoulddetergentcomein
contactwithelectricalpartsorthemotor,itwillresultinamalfunction,
smoke,orre.
• Theapplianceshallbestoredinaroomwithoutcontinuouslyoperating
ignitionsources(forexample:openames,anoperatinggasappliance
oranoperatingelectricheater).
• Beawarethatrefrigerantsmaynotcontainanodour.
• Donotusemeanstoacceleratethedefrostingprocessortocleanthe
appliance,otherthanthoserecommendedbythemanufacturer.
• Donotpierceorburn.
The indoor unit must be installed in rooms which exceed the oor
space specied. Please consult your dealer.
• AP60:1.9m²
• AP71/80:3.1m²
This appliance is intended to be used by expert or trained users in
shops, in light industry and on farms, or for commercial use by lay
persons.
CAUTION
Do not touch the air inlet or the aluminum ns of the indoor/outdoor
unit.
• Thismaycauseinjury.
Do not use insecticides or ammable sprays on the unit.
• Thismaycauseareordeformationoftheunit.
Do not expose pets or houseplants to direct airow.
• Thismaycauseinjurytothepetsorplants.
Do not place other electric appliances or furniture under the indoor/
outdoor unit.
• Water may drip down from the unit, which may cause damage or
malfunction.
Do not leave the unit on a damaged installation stand.
• Theunitmayfallandcauseinjury.
Do not step on an unstable bench to operate or clean the unit.
• Thismaycauseinjuryifyoufalldown.
Do not pull the power cord.
• Thismaycauseaportionofthecorewiretobreak,whichmaycause
overheatingorre.
Do not charge or disassemble the batteries, and do not throw them
into a re.
•
Thismaycausethebatteriestoleak,orcauseareorexplosion.
SAFETY PRECAUTIONS
Do not operate the unit for more than 4 hours at high humidity (80%
RH or more) and/or with windows or outside door left open.
• Thismaycausethewatercondensationintheairconditioner,which
maydripdown,wettingordamagingthefurniture.
• Thewatercondensationintheairconditionermaycontributetogrowth
offungi,suchasmold.
Do not use the unit for special purposes, such as storing food,
raising animals, growing plants, or preserving precision devices
or art objects.
• Thismaycausedeteriorationofquality,orharmtoanimalsandplants.
Do not expose combustion appliances to direct airow.
• Thismaycauseincompletecombustion.
Never put batteries in your mouth for any reason to avoid accidental
ingestion.
• Batteryingestionmaycausechokingand/orpoisoning.
Before cleaning the unit, switch it OFF and disconnect the power plug
or turn the breaker OFF.
• Thismaycauseinjury,sincethefaninsiderotatesathighspeedsduring
operation.
When the unit will be unused for a long time, disconnect the power
plug or turn the breaker OFF.
• Theunitmayaccumulatedirt,whichmaycauseoverheatingorre.
Replace all batteries of the remote controller with new ones of the
same type.
• Usinganoldbatterytogetherwithanewonemaycauseoverheating,
leakage,orexplosion.
If the battery uid comes in contact with your skin or clothes, wash
them thoroughly with clean water.
•
Ifthebatteryuidcomesincontactwithyoureyes,washthemthoroughly
withcleanwaterandimmediatelyseekmedicalattention.
Ensure that the area is well-ventilated when the unit is operated
together with a combustion appliance.
• Inadequateventilationmaycauseoxygenstarvation.
Turn the breaker OFF when you hear thunder and there is a possibility
of a lightning strike.
• Theunitmaybedamagediflightningstrikes.
After the air conditioner is used for several seasons, perform inspec-
tion and maintenance in addition to normal cleaning.
• Dirtordustinthe unitmaycreateanunpleasantodor,contribute to
growthoffungi,suchasmold,orclogthedrainpassage,andcause
watertoleakfromtheindoorunit.Consultyourdealerforinspection
andmaintenance,whichrequirespecializedknowledgeandskills.
Do not operate switches with wet hands.
• Thismaycauseelectricshock.
Do not clean the air conditioner with water or place an object that
contains water, such as a ower vase, on it.
• Thismaycausereorelectricshock.
Do not step on or place any object on the outdoor unit.
• Thismaycauseinjuryifyouortheobjectfallsdown.
IMPORTANT
Dirty lters cause condensation in the air conditioner which will contribute to the
growth of fungi such as mold. It is therefore recommended to clean air lters every
2 weeks.
Before starting the operation, ensure that the horizontal vanes are in the closed posi-
tion. If operation starts when the horizontal vanes are in the open position, they may
not return to the correct position.
En-3
● OPERATING INSTRUCTIONS ●
SAFETY PRECAUTIONS
WARNING
(Improper handling may have serious consequences, including serious
injuryordeath.)
This appliance can be used by children aged from 8 years and above
and persons with reduced physical, sensory or mental capabilities or
lack of experience and knowledge if they have been given supervi-
sion or instruction concerning use of the appliance in a safe way and
understand the hazards involved.
Children shall not play with the appliance. Cleaning and user mainte-
nance shall not be made by children without supervision.
Do not use the Wi-Fi interface nearby the medical electrical equipment
or people who have a medical device such as a cardiac pacemaker
or an implantable cardioverter-debrillator.
• Itcancauseanaccidentduetomalfunctionsofthemedicalequipment
ordevice.
Do not install the Wi-Fi interface nearby the automatic control devices
such as automatic doors or re alarms.
• Itcancauseaccidentsduetomalfunctions.
Do not touch the Wi-Fi interface with wet hands.
• Itcancausedamagetothedevice,electricshock,orre.
Do not splash water on the Wi-Fi interface or use it in a bathroom.
• Itcancausedamagetothedevice,electricshock,orre.
When the Wi-Fi interface is dropped, or the holder or cable is dam-
aged, disconnect the power supply plug or turn the breaker OFF.
• Itmaycausereorelectricshock.Inthiscase,consultyourdealer.
•
This device complies with all Australia and New zealand
regulrementsforEMCandelectricalsafety.
CAUTION
(Improper handling may have consequences, including injury or damage
tobuilding.)
Do not step on unstable stepstool to set up or clean the Wi-Fi interface.
• Itmaycauseinjuryifyoufalldown.
Do not use the Wi-Fi interface nearby other wireless devices, micro-
waves, cordless phones, or facsimiles.
• Itcancausemalfunctions.
For Wi-Fi interface
WARNING
Consult your dealer for installing the air conditioner.
• Itshouldnotbeinstalledbytheusersinceinstallationrequiresspecialized
knowledgeandskills.Animproperlyinstalledairconditionermaycause
waterleakage,re,orelectricshock.
Provide a dedicated power supply for the air conditioner.
• Anon-dedicatedpowersupplymaycauseoverheatingorre.
Do not install the unit where ammable gas could leak.
• Ifgasleaksandaccumulatesaroundtheoutdoorunit,itmaycausean
explosion.
Earth the unit correctly.
• Donotconnecttheearthwiretoagaspipe,waterpipe,lightningrod,or
atelephoneearthwire.Improperearthingmaycauseelectricshock.
CAUTION
Install an earth leakage breaker depending on the installation location
of the air conditioner (such as highly humid areas).
• Ifanearthleakagebreakerisnotinstalled,itmaycauseelectricshock.
Ensure that the drain water is properly drained.
• Ifthedrainpassageisimproper,watermaydripdownfromtheindoor/
outdoorunit,wettinganddamagingthefurniture.
In case of an abnormal condition
Immediatelystopoperatingtheairconditionerandconsultyourdealer.
For installation
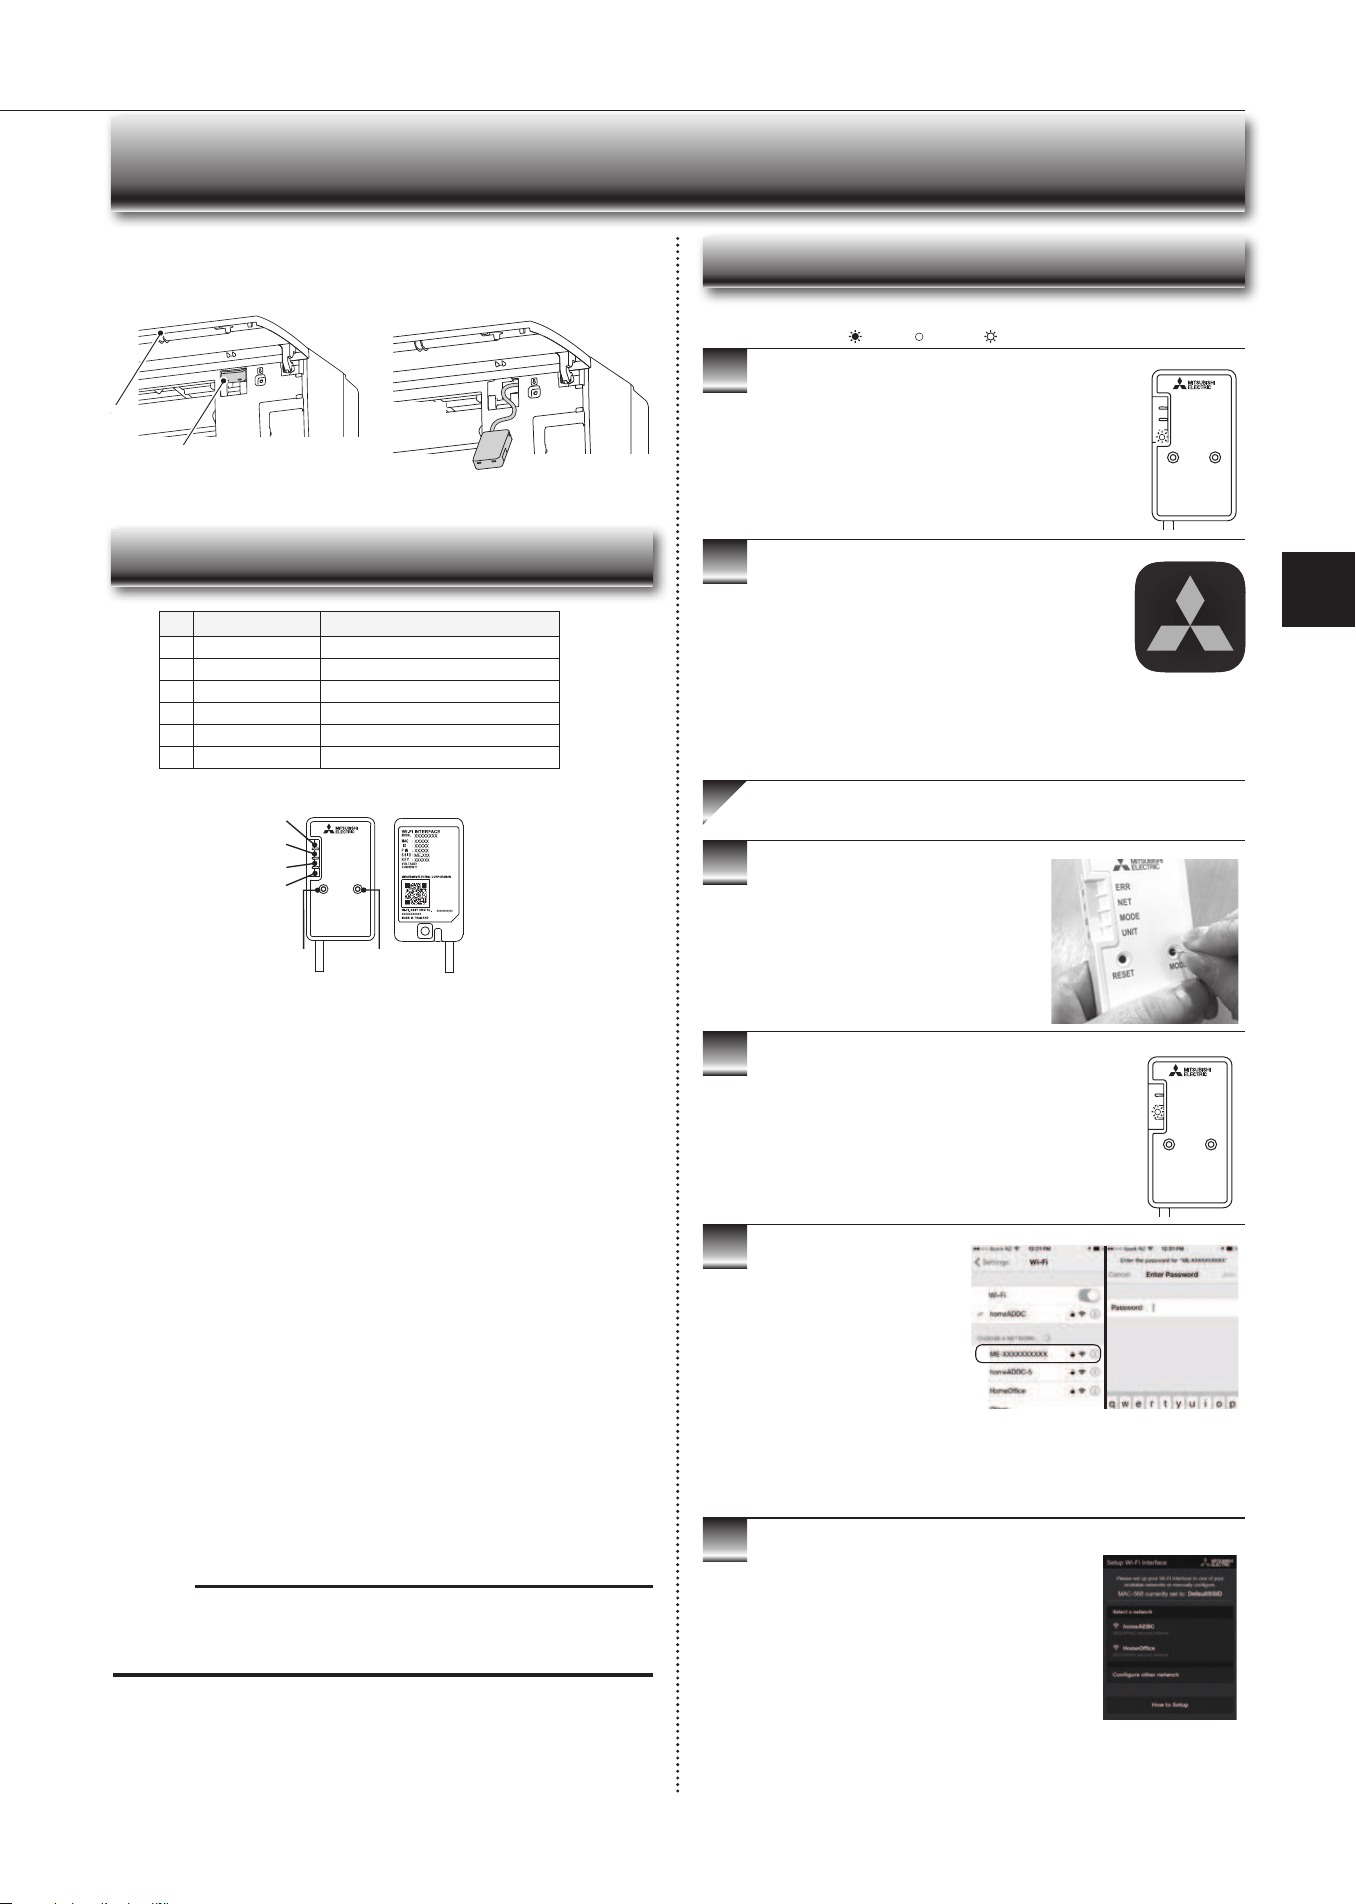
En-4
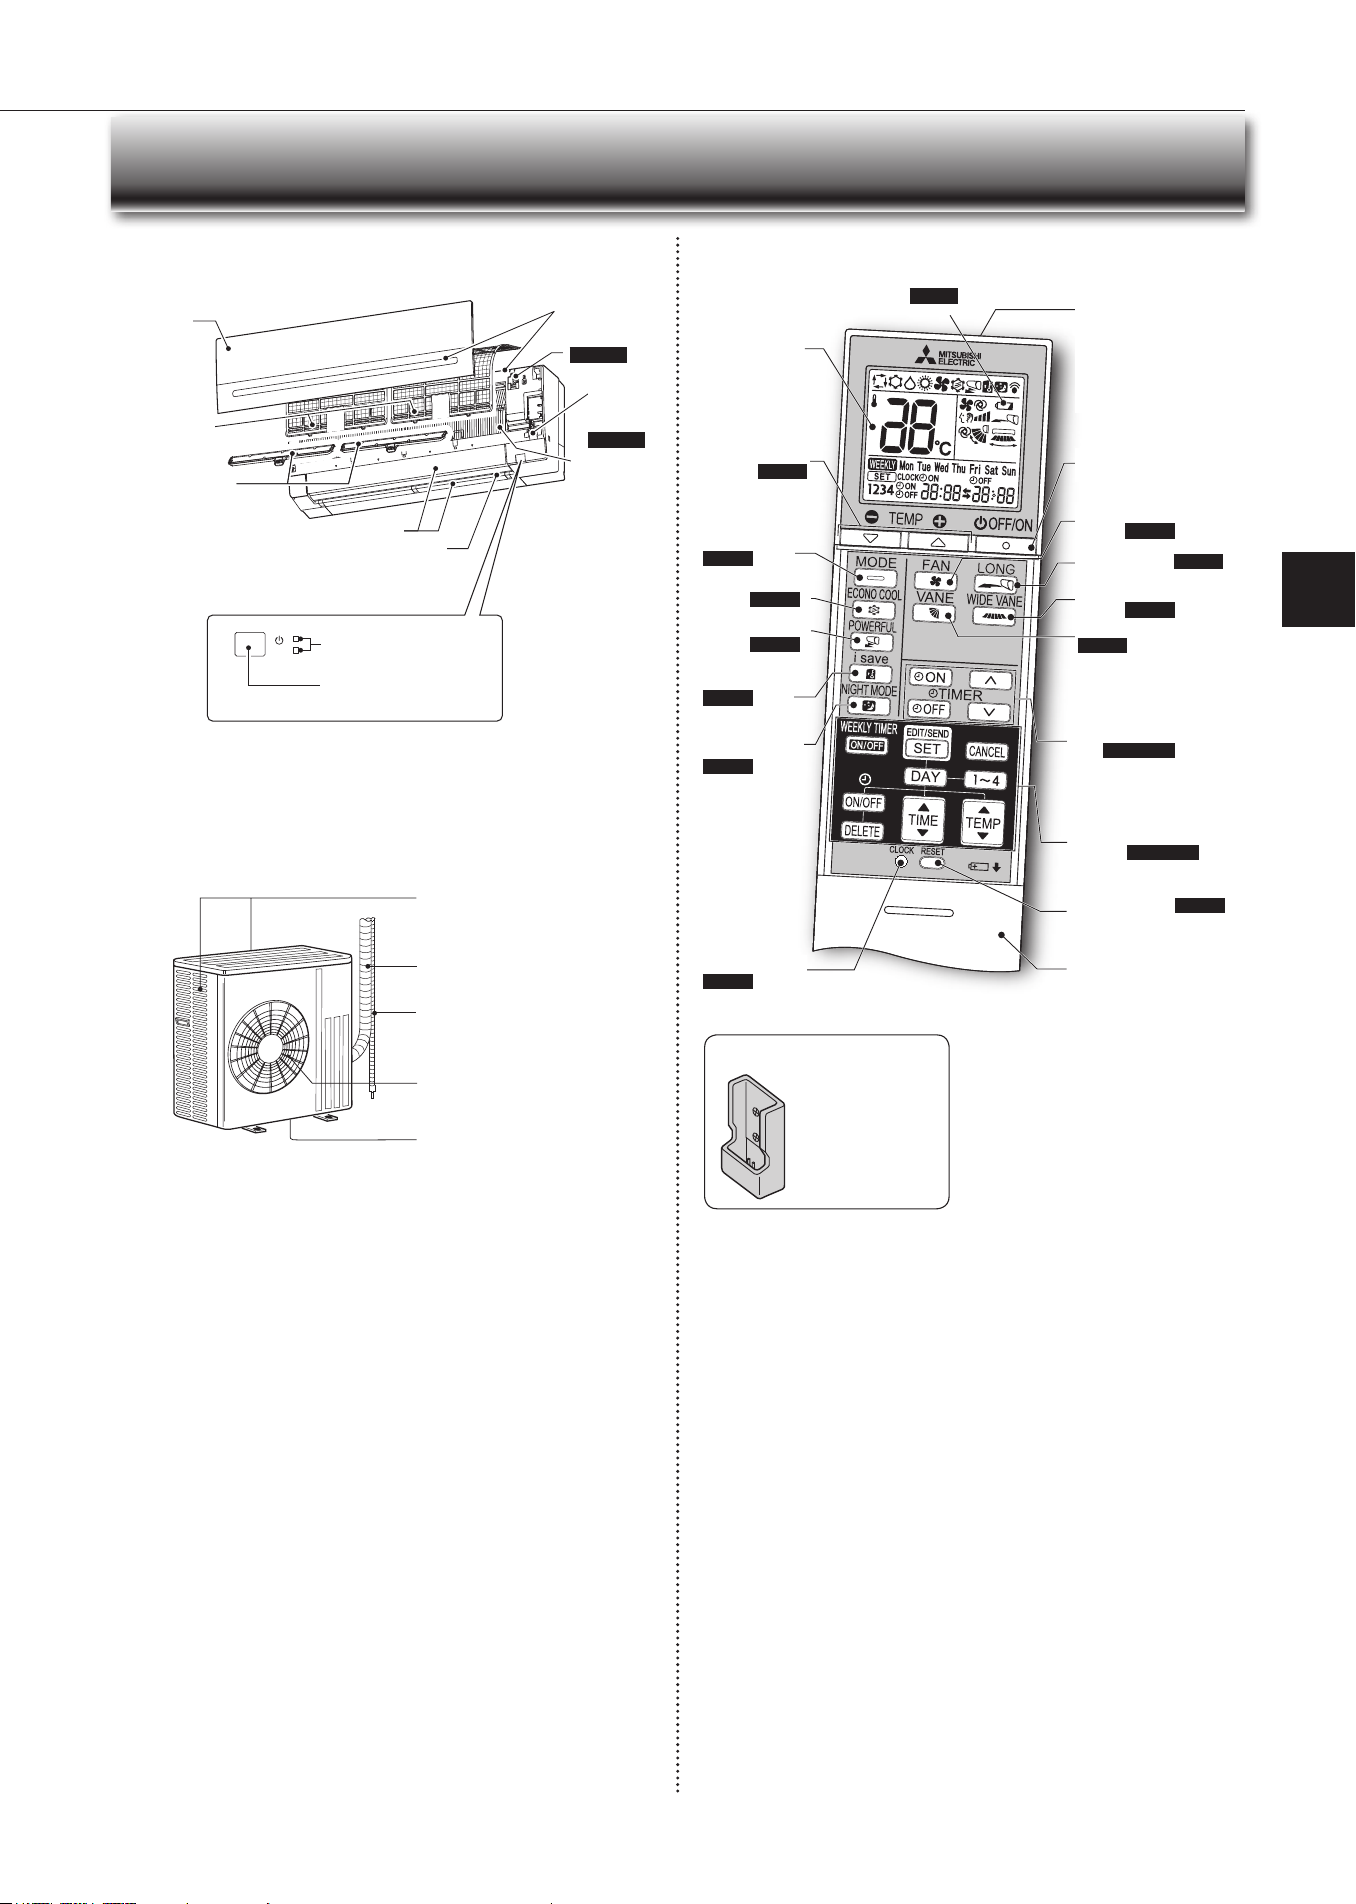
Operationindicatorlamp
Remotecontrolreceiving
section
Emergency
operation
switch
Page10
Horizontalvane
Airinlet
Airlter
Frontpanel
NAME OF EACH PART
Indoor unit Remote controller
Signaltransmitting
section
Distanceofsignal:
About6m
Beep(s)is(are)heardfrom
theindoorunitwhenthe
signalisreceived.
Operationdis-
playsection
OFF/ON(stop/operate)
button
Temperature
buttons
Page6
Operation
selectbutton
Page6
ECONOCOOL
button
Page9
POWERFUL
button
Page8
FANspeedcontrol
button
Page7
vANEcontrolbutton
Page7
TIME,TIMERsetbut-
tons
Page5,10
Increasetime
Decreasetime
CLOCkbutton
Page5
RESETbuttonPage5
Lid
Slidetheliddown
toopentheremote
controller.Slideitdown
furthertogettothe
weeklytimerbuttons.
Onlyusetheremotecontrollerprovided
withtheunit.
Donotuseotherremotecontrollers.
If2ormoreindoorunitsareinstalledin
proximitytooneanother,anindoorunit
thatisnotintendedtobeoperatedmay
respondtotheremotecontroller.
i-savebutton
Page8
WEEkLYTIMERset
buttons
Page5,11
Airoutlet
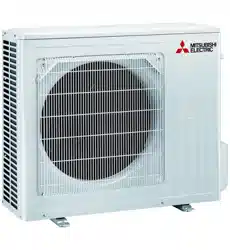
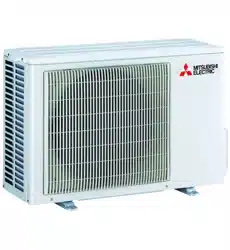
Outdoor unit
Outdoorunitsmaybedifferentinappearance.
Airinlet(backandside)
Refrigerantpiping
Drainagehose
Airoutlet
Drainoutlet
WIDEvANE
button
Page7
LONGbuttonPage8
NIGHTMODE
button
Page9
Wi-Fiinterface
Page14
BatteryreplacementindicatorPage5
Heat
exchanger
Remote controller holder
• Installtheremote
controllerholderina
placewherethesignal
canbereceivedbythe
indoorunit.
• Whentheremote
controllerisnotused,
placeitinthisholder.
Aircleaninglter
(Anti-AllergyEnzyme
lter)
(Electrostaticanti-
allergyenzymelter,
option)
En-5
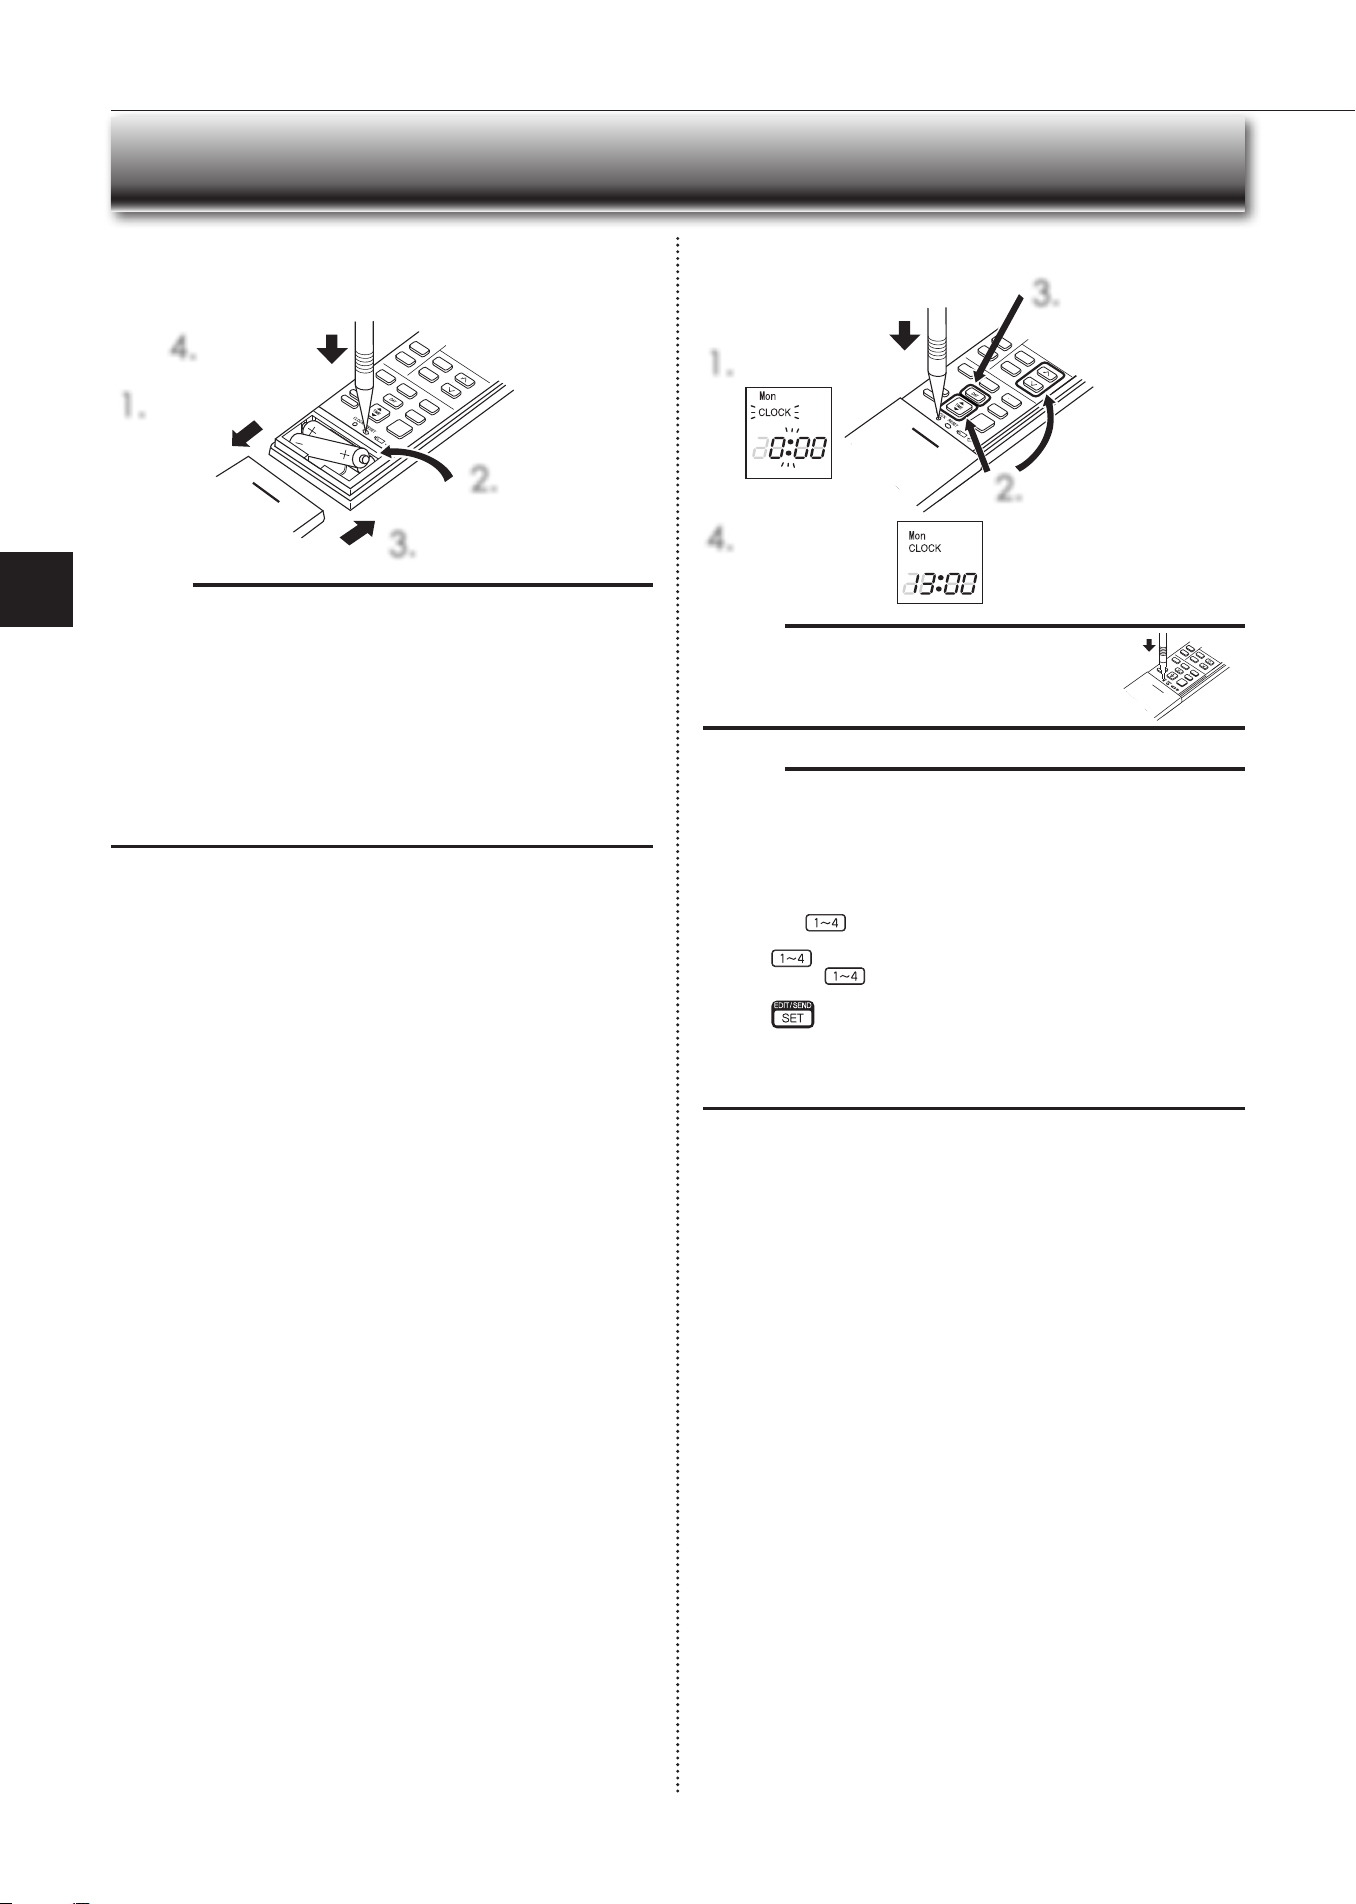
● OPERATING INSTRUCTIONS ●
Before operation: Insertthepowersupplyplugintothepoweroutletand/or
turnthebreakeron.
Installing the remote controller batteries
1.
Removethefrontlid.
2.
Insertthenegative
poleofAAAalkaline
batteriesrst.
3.
Installthefrontlid.
4.
PressRESET.
Setting current time
1.
PressCLOCk.
4.
PressCLOCkagain.
2.
PresseithertheTIMEbutton
ortheTIMERbuttonstoset
thetime.
Eachpressincreases/decreas-
esthetimeby1minute(10
minuteswhenpressedlonger).
3.
PresstheDAYbutton
tosettheday.
PREPARATION BEFORE OPERATION
Note:
• Makesurethepolarityofthebatteriesiscorrect.
• Donotusemanganesebatteriesandleakingbatteries.Theremotecontroller
couldmalfunction.
• Donotuserechargeablebatteries.
• Thebatteryreplacementindicatorlightsupwhenthebatteryisrunninglow.
Inabout7daysaftertheindicatorstartslightsup,theremotecontrollerstops
working.
• Replaceallbatterieswithnewonesofthesametype.
• Batteriescanbeusedforapproximately1year.However,batterieswithex-
piredshelfliveslastshorter.
• PressRESETgentlyusingathininstrument.
IftheRESETbuttonisnotpressed,theremotecontrollermaynotoperate
correctly.
Note:
• PressCLOCkgentlyusingathininstrument.
Note:
How to set remote controller exclusively for a particular indoor unit
Amaximumof4indoorunitswithwirelessremotecontrollerscan beusedin
aroom.
Tooperate the indoorunits individually witheach remote controller,assign a
numbertoeachremotecontrolleraccordingtothenumberoftheindoorunit.
Thissettingcanbesetonlywhenallthefollowingconditionsaremet:
• TheremotecontrollerispoweredOFF.
(1)Holddown
buttonontheremotecontrollerfor2secondstoenterthe
pairingmode.
(2)Press
buttonagainandassignanumbertoeachremotecontroller.
Eachpressof
buttonadvancesthenumberinthefollowingorder:1→
2→3→4.
(3)Press
buttontocompletethepairingsetting.
AfteryouturnthebreakerON,theremotecontrollerthatrstsendsasignal
toanindoorunitwillberegardedastheremotecontrollerfortheindoorunit.
Oncetheyareset,theindoorunitwillonlyreceivethesignalfromtheas-
signedremotecontrollerafterwards.
En-6
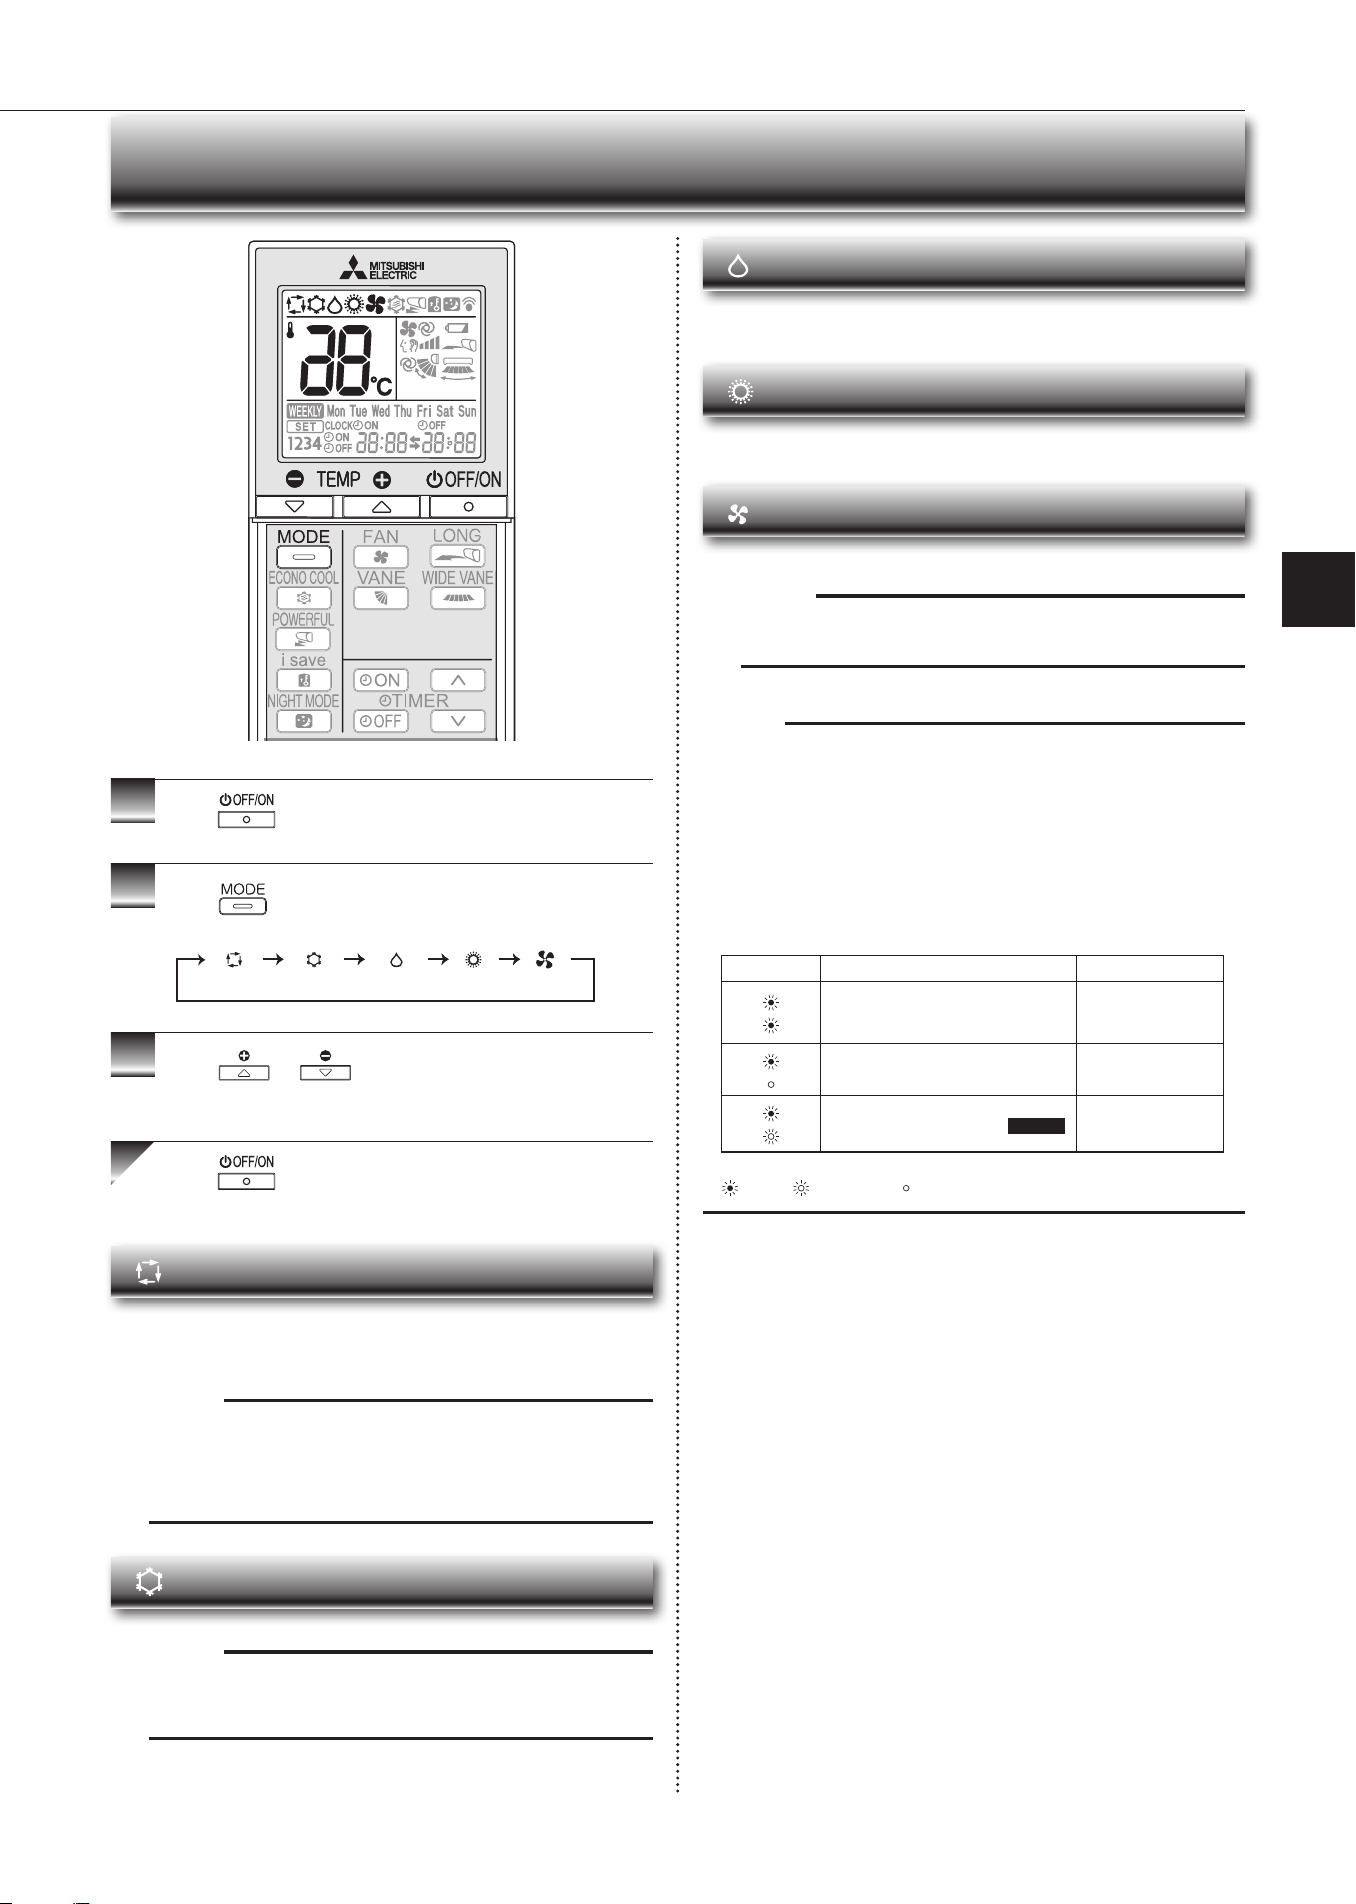
AUTO mode (Auto change over)
Theunitselectstheoperationmodeaccordingtothedifferencebetweenthe
roomtemperature and thesettemperature. DuringAUTOmode, theunit
changesmode(COOL↔HEAT)whentheroomtemperatureisabout2°C
awayfromthesettemperatureformorethan15minutes.
Note:
AutoModeisnotrecommendedifthisindoorunitisconnectedtoaMXZ
typeoutdoorunit.Whenseveralindoorunitsareoperatedsimultaneously,
theunit maynotbe ableto switchoperationmode betweenCOOLand
HEAT.Inthiscase,theindoorunitbecomesstandbymode(Refertotable
ofOperationindicatorlamp).
COOL mode
Enjoycoolairatyourdesiredtemperature.
Note:
DonotoperateCOOLmodeatverylowoutsidetemperatures(lessthan
-10°C).Watercondensedintheunitmaydripandwetordamagefurni-
ture,etc.
Note:
Multi syst em operation
Twoormoreindoorunitscanbeoperatedbyoneoutdoorunit.Whenseveral
indoor units are operated simultaneously, cooling/dry/fan and heating opera-
tionscannotbedoneatthesametime.WhenCOOL/DRY/FANisselectedwith
oneunitandHEATwithanotherorviceversa,theunitselectedlastgoesinto
standbymode.
Operation indic ator lamp
Theoperationindicatorlampshowstheoperationstateoftheunit.
Indication Operationstate Roomtemperature
Theunitisoperatingtoreachtheset
temperature
About2°Cor more
awayfromsettem-
perature
Theroomtemperatureisapproach-
ingthesettemperature
About1to2°Cfrom
settemperature
DemandResponsemodePage12 —
Lit Blinking Notlit
1
Press
tostarttheoperation.
2
Press toselectoperationmode.Eachpress
changesmodeinthefollowingorder:
3
Press or tosetthetemperature.
Eachpressraisesorlowersthetemperatureby1°C.
Press tostoptheoperation.
S
ELECTING OPERATION MODES
(AUTO) (COOL) (DRY) (HEAT) (FAN)
DRY mode
Dehumidifyyourroom.Theroommaybecooledslightly.
TemperaturecannotbesetduringDRYmode.
HEAT mode
Enjoywarmairatyourdesiredtemperature.
FAN mode
Circulatetheairinyourroom.
Note:
After COOL/DRY mode operation, it is recommended to operate in the
FANmodetodryinsidetheindoorunit.
En-7
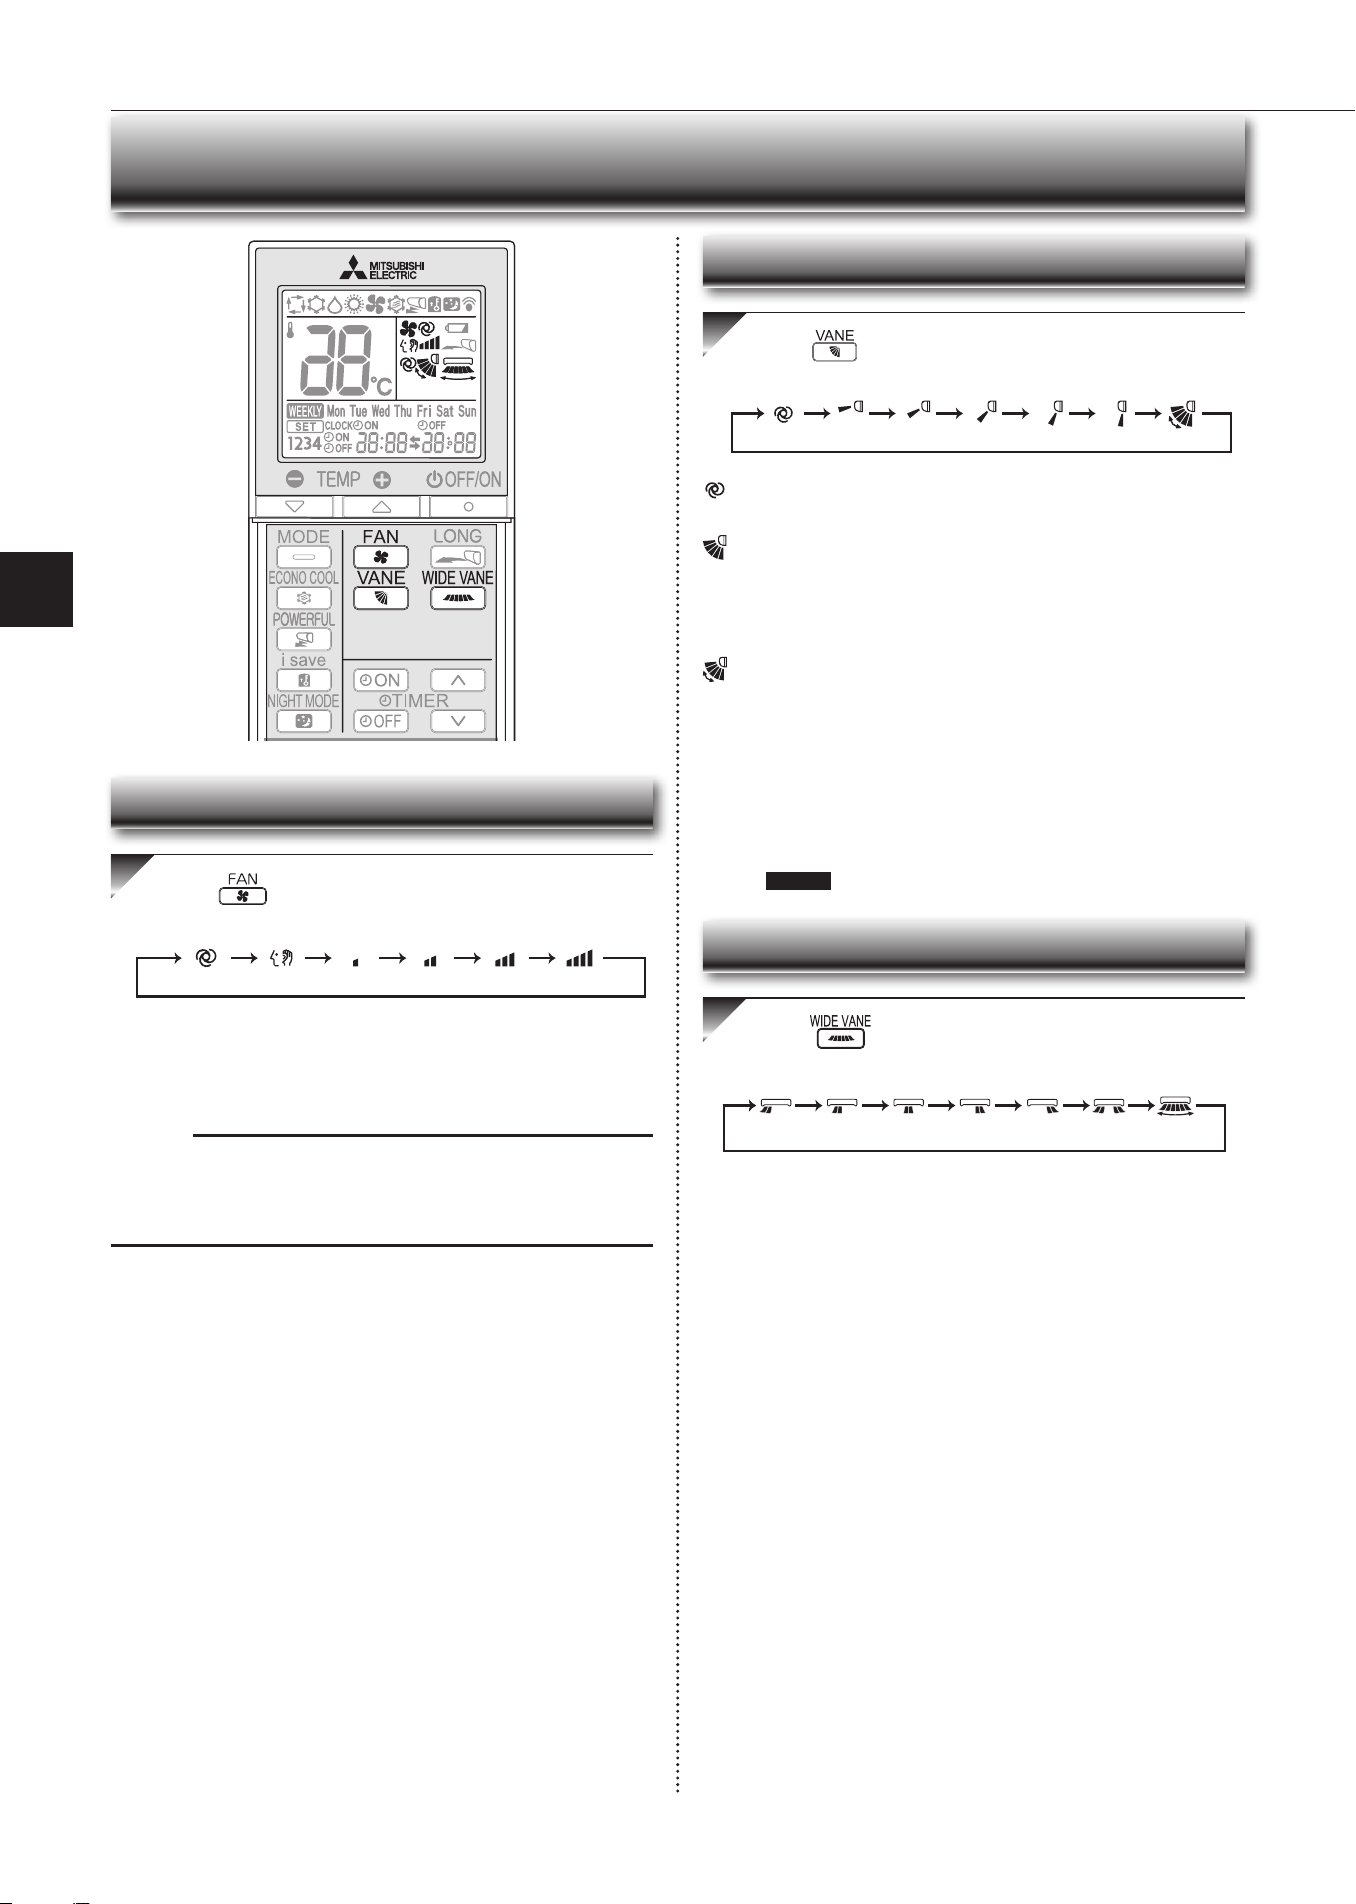
● OPERATING INSTRUCTIONS ●
Press toselectfanspeed.Eachpresschanges
fanspeedinthefollowingorder:
•TwoshortbeepsareheardfromtheindoorunitwhensettoAUTO.
•Usehigherfanspeedtocool/heattheroomquicker.Itisrecommended
tolowerthefanspeedoncetheroomiscool/warm.
•Uselowerfanspeedforquietoperation.
Note:
Multi syst em operation
Whenseveralindoorunitsareoperatedsimultaneouslybyoneoutdoorunitfor
heatingoperation,thetemperatureoftheairowmaybelow.Inthiscase,itis
recommendedtosetthefanspeedtoAUTO.
(AUTO) (Quiet) (Low) (Med.) (High) (SuperHigh)
Press toselectairowdirection.Eachpress
changesairowdirectioninthefollowingorder:
(AUTO).........Thevaneissettothemostefcientairowdirection.COOL/
DRY/FAN:horizontalposition.HEAT:position(4).
(Manual).......Forefficient air conditioning, select the upper position for
COOL/DRY, and the lower position for HEAT. If the lower
positionisselectedduringCOOL/DRY,thevaneautomatically
movestotheupwardpositionafter0.5to1hourtoprevent
anycondensationfromdripping.
(Swing).........Thevanemovesupanddownintermittently.
• TwoshortbeepsareheardfromtheindoorunitwhensettoAUTO.
• Alwaysusetheremotecontrollerwhenchangingthedirectionofair-
flow.Movingthehorizontalvaneswithyourhandscausesthemtomal-
function.
• Whenthebreakeristurnedon,thehorizontalvanes’positionwillbe
resetinaboutaminute,thentheoperationwillstart.Thesameistrue
intheemergencycoolingoperation.
• Whenthehorizontalvanesseemtobeinanabnormalposition,see
page13
.
(AUTO) (1) (2) (3) (4) (5) (SWING)
FAN SPEED AND AIRFLOW DIRECTION ADJUSTMENT
Press toselectairowdirection.Eachpress
changesairowdirectioninthefollowingorder:
(
SWING
)
Left-right Airflow direction
Fan speed
Up-down Airflow direction
En-8
I-SAvE OPERATION
1
Press duringCOOL,ECONOCOOL,NIGHT
MODE,orHEATmodetoselecti-savemode.
2
Setthetemperature,fanspeed,andairowdirection.
• The same setting is selected from the next time by simply pressing
.
• Twosettingscanbesaved.(Onefor COOL/ECONOCOOL, onefor
HEAT)
• Select the appropriate temperature, fanspeed,andairflow direction
accordingtoyourroom.
• Normally, the minimum temperature setting in HEAT mode is 16°C.
However,duringi-saveoperationonly,theminimumtemperatureset-
tingis10°C.
Press againtocanceli-saveoperation.
• i-saveoperationalsoiscancelledwhentheMODEbuttonispressed.
Note:
Exampleofuse:
1.Lowenergymode
Setthetemperature2°Cto3°CwarmerinCOOLandcoolerinHEATmode.
Thissettingissuitableforunoccupiedroom,andwhileyouaresleeping.
2.Savingfrequentlyusedsettings
SaveyourpreferredsettingforCOOL/ECONOCOOLandHEAT.Thisena-
blesyoutoselectyourpreferredsettingwithasinglepushofthebutton.
Asimpliedsetbackfunctionenablestorecallthepreferred(preset)
settingwithasinglepushofthe
button.Pressthebuttonagain
andyoucangobacktotheprevioussettinginaninstance.
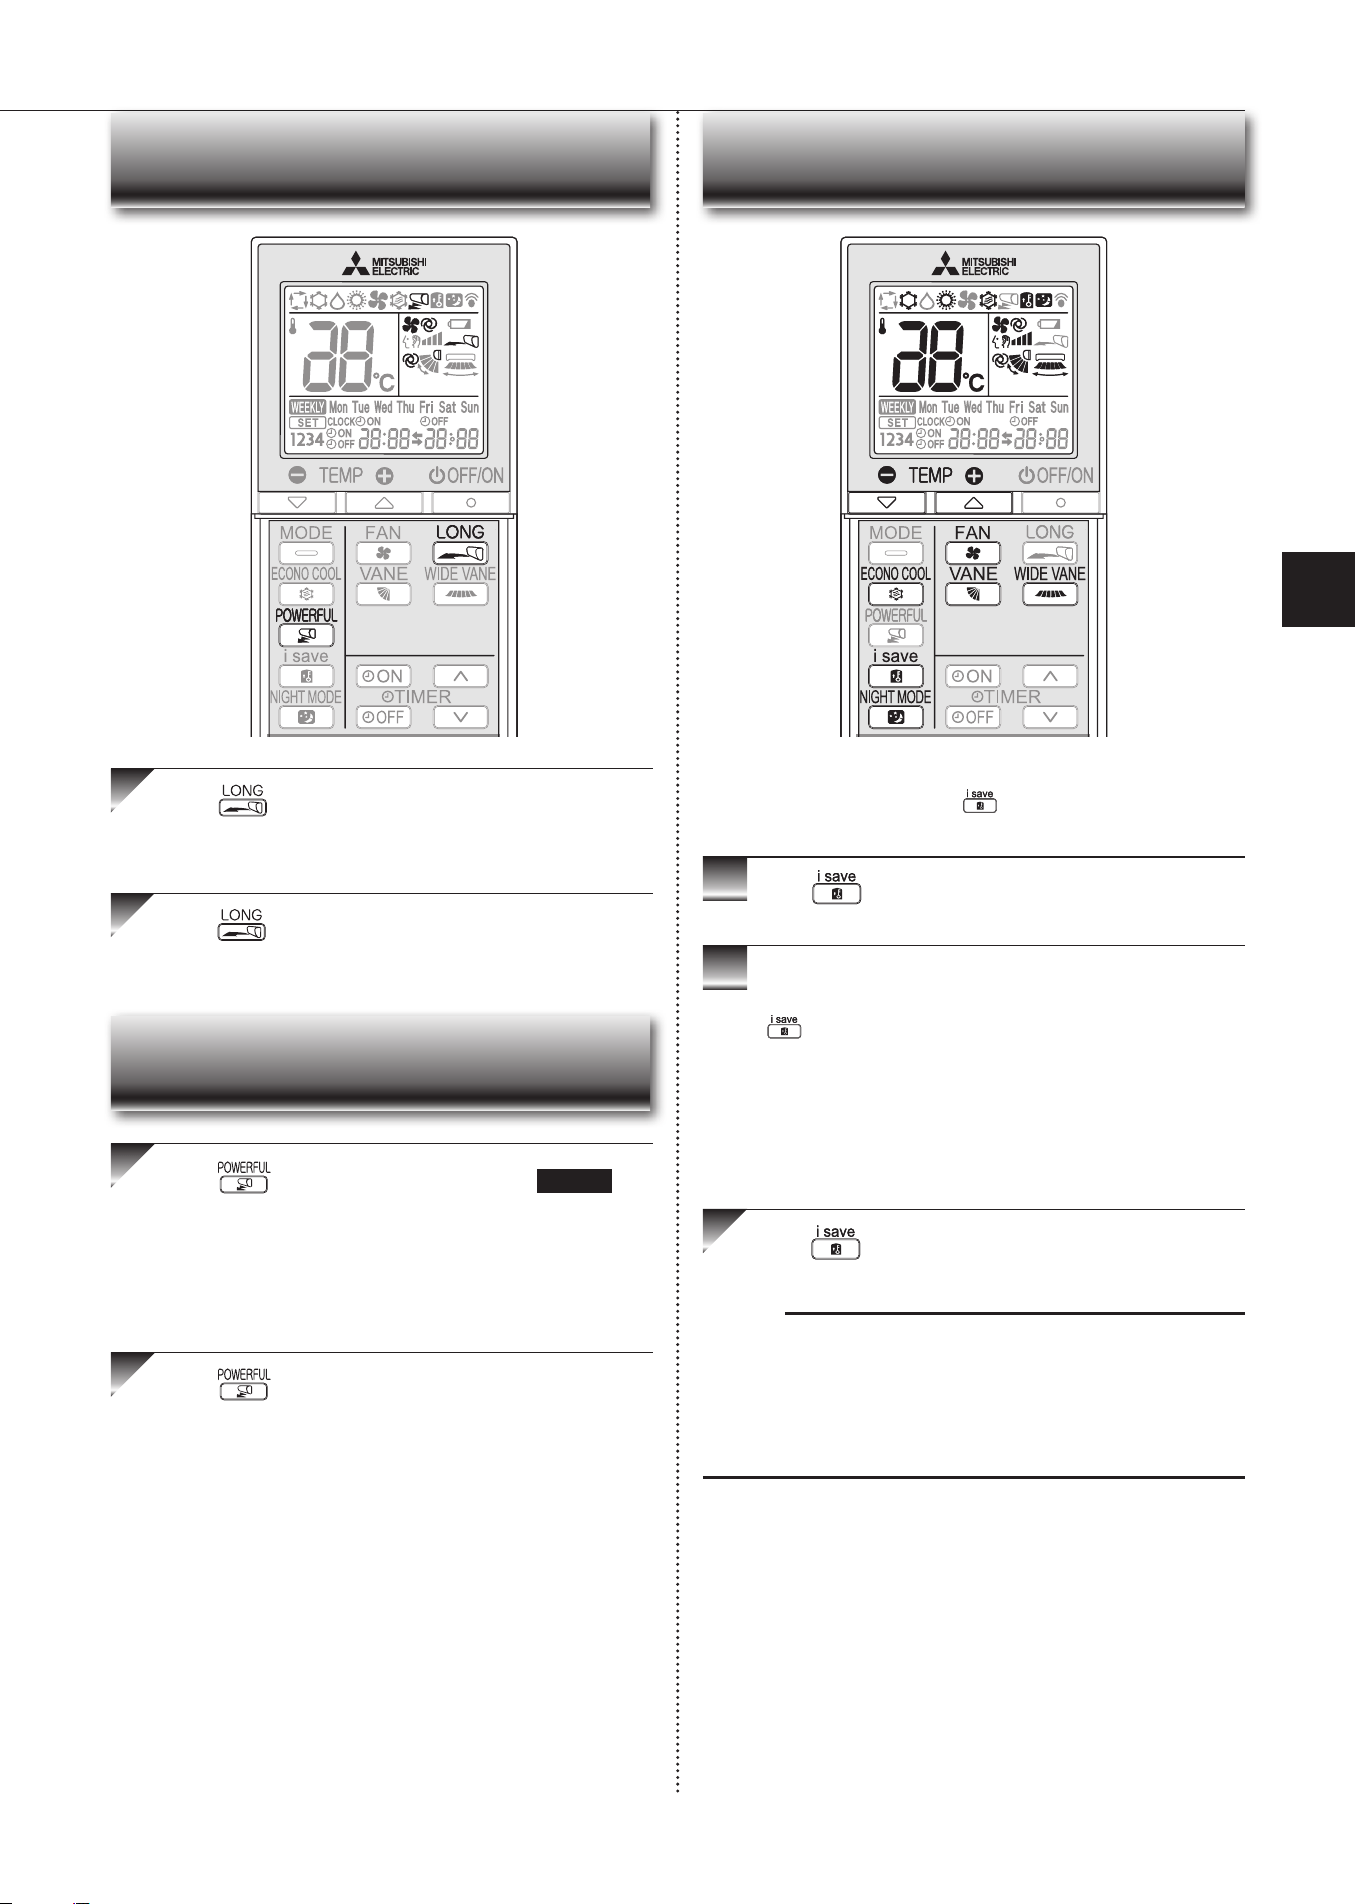
LONG OPERATION
Press tostartLONGoperation.
• Fanspeedincreasesandthehorizontalvanemovestothepositionfor
LONGmode.
• Airreachestolongerdistance.
Press againtocancelLONGoperation.
• LONG operation iscancelledwhen the OFF/ON, vANE, or ECONO
COOLbuttonispressed.
Press
duringCOOLorHEATmodePage6to
startPOWERFULoperation.
Fanspeed : ExclusivespeedforPOWERFULmode
Horizontalvane : Set position, or downward airflow position during
AUTOsetting
• TemperaturecannotbesetduringPOWERFULoperation.
Press againtocancelPOWERFULoperation.
• POWERFUL operation also is cancelled automatically in 15 min-
utes,orwhentheOFF/ON,FAN,ECONOCOOL,ori-savebuttonis
pressed.
POWERFUL OPERATION
En-9
● OPERATING INSTRUCTIONS ●
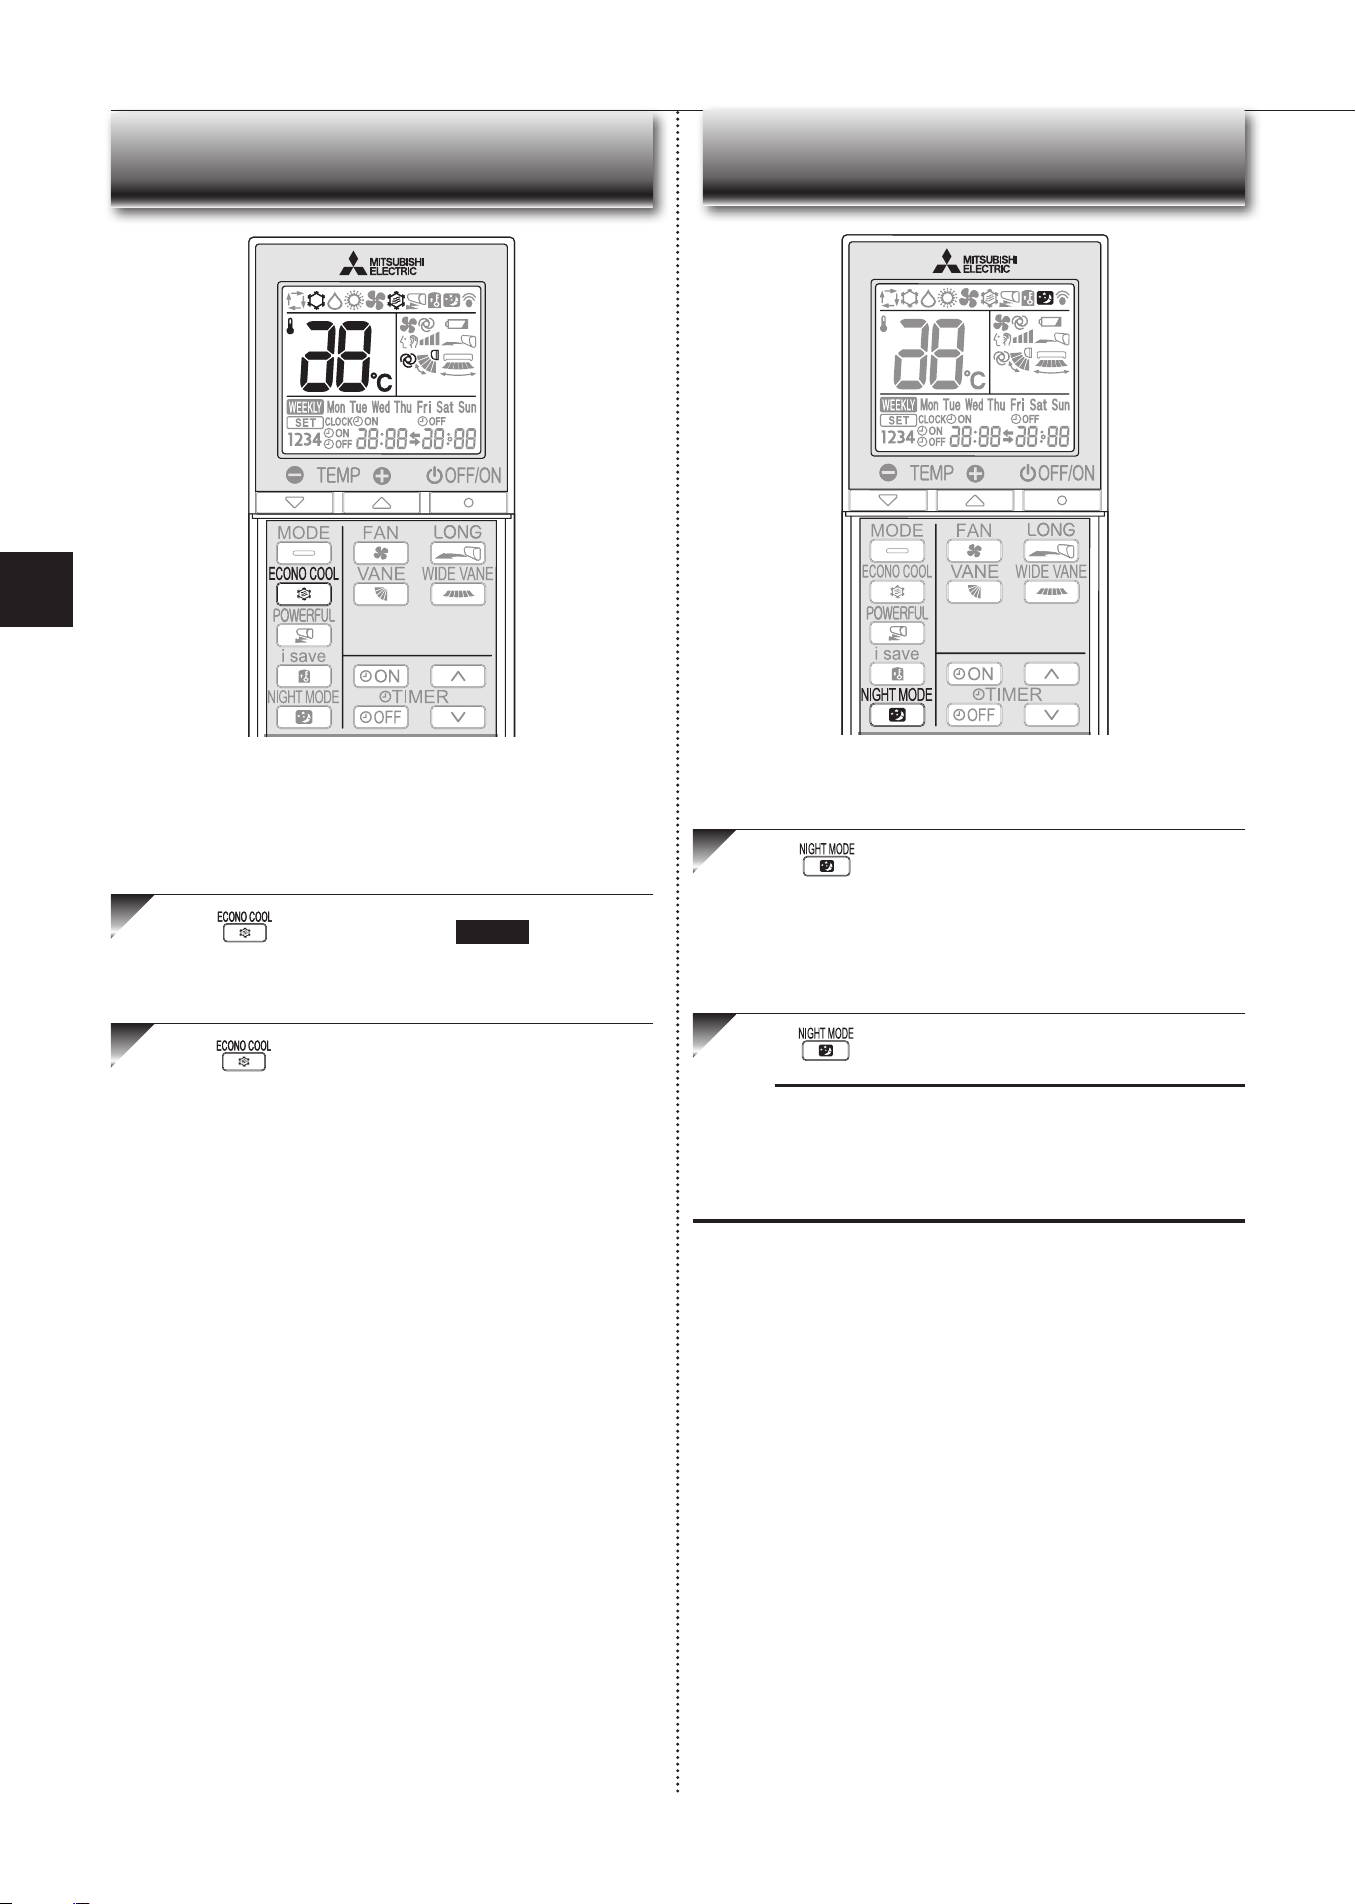
ECONO COOL OPERATION
Press duringCOOLmodepage6tostart
ECONOCOOLoperation.
Theunitperformsswingoperationverticallyinvariouscyclesaccordingtothe
temperatureairflow.
Press againtocancelECONOCOOLoperation.
• ECONOCOOLoperationisalsocancelledwhenthevANEbuttonis
pressed.
Swingairow(changeofairow)makesyoufeelcoolerthanstation-
aryairow.
Thesettemperatureandtheairowdirectionareautomaticallychanged
bythemicroprocessor.Itispossibletoperformcoolingoperationwith
keepingcomfort.Asaresultenergycanbesaved.
NIGHT MODE OPERATION
Press duringoperationtoactivateNIGHTMODE.
• Theoperationindicatorlampdims.
• Thebeepsoundwillbedisabledexceptthatemittedwhentheoperation
isstartedorstopped.
• Noise level of the outdoor unit will be lower than that mentioned in
SPECIFICATIONS.
Press againtocancelNIGHTMODE.
Note:
• Thecooling/heatingcapacitymaydrop.
• Noiseleveloftheoutdoorunitmaynotchangeafterstart-upoftheunit,during
theprotectionoperation,ordependingonotheroperatingconditions.
• Thefanspeedoftheindoorunitwillnotchange.
•
Theoperationindicatorlampwillbehardtobeseeninabrightroom.
•
NoiseleveloftheoutdoorunitwillnotdecreaseduringMultisystemoperation.
NIGHT MODE changes the brightness of the operation indicator,
disablesthebeepsoundandlimitsthenoiseleveloftheoutdoorunit.

En-10
1
Press or duringoperationtosetthetimer.
(ONtimer): TheunitturnsONatthesettime.
(OFFtimer): TheunitturnsOFFatthesettime.
*
or blinks.
*
Make sure that the current time and day are set correctly.
Page5
2
Press (Increase)and (Decrease)tosetthe
timeoftimer.
Eachpressincreasesordecreasesthesettimeby10minutes.
• Setthetimerwhile
or isblinking.
3
Press
or
againtocanceltimer.
Note:
• ONandOFFtimerscanbesettogether.
markindicatestheorderoftimer
operations.
• IfpowerfailureoccurswhileON/OFFtimerisset,see
page10“Autorestart
function”.
TIMER OPERATION (ON/OFF TIMER)
Operation indicator lamp
When the remote controller cannot be used...
Emergencyoperationcan beactivatedby pressing theemergencyoperation
switch(E.O.SW)ontheindoorunit.
EachtimetheE.O.SWispressed,theoperationchangesin
thefollowingorder:
Ifapowerfailureoccursorthemainpoweristurnedoffduringoperation,“Auto
restartfunction”automaticallystartsoperationinthesamemodeastheoneset
withtheremotecontrollerjustbeforetheshutoffofthemainpower.Whentimeris
set,timersettingiscancelledandtheunitstartsoperationwhenpowerisresumed.
If you do not want to use this function, please consult the service repre-
sentative because the setting of the unit needs to be changed.
Settemperature:24°C
Fanspeed:Medium
Horizontalvane:Auto
EmergencyCOOL
EmergencyHEAT
Stop
Note:
• Therst30minutesofoperationistestrun.Temperaturecontroldoesnot
work,andfanspeedissettoHigh.
• Intheemergencyheatingoperation,thefanspeedgraduallyrisestoblowout
warmair.
• In the emergency cooling operation, the horizontal vanes’ position will be
resetinaboutaminute,thentheoperationwillstart.
EMERGENCY OPERATION
AUTO RESTART FUNCTION

En-11
● OPERATING INSTRUCTIONS ●
WEEkLY TIMER OPERATION
• Amaximumof4ONorOFFtimerscanbesetforindividualdaysoftheweek.
• Amaximumof28ONorOFFtimerscanbesetforaweek.
Setting the weekly timer
* Makesurethatthecurrenttimeanddayaresetcorrectly.
1
Press toentertheweeklytimersettingmode.
2
Press and toselectsettingdayandnumber.
3
Press , ,and tosetON/OFF,time,and
temperature.
Press and tocontinuesettingthetimerfor
otherdaysand/ornumbers.
4
Press tocompleteandtransmittheweeklytimer
setting.
Note:
• Press
totransmitthesettinginformationofweeklytimertotheindoor
unit.Pointtheremotecontrollertowardtheindoorunitfor3seconds.
• Whensettingthetimerformorethanonedayoftheweekoronenumber,
does nothave tobepressedpereach setting.Press once
afterallthesettingsarecomplete.Alltheweeklytimersettingswillbesaved.
• Press
toenterthe weekly timer setting mode, and press andhold
for 5 seconds to erase all weekly timer settings. Point the remote
controllertowardtheindoorunit.
5
Press toturntheweeklytimerON.( lights.)
* WhentheweeklytimerisON,thedayoftheweekwhosetimersetting
iscomplete,willlight.
Press againtoturntheweeklytimerOFF.(
goesout.)
Note:
ThesavedsettingswillnotbeclearedwhentheweeklytimeristurnedOFF.
Checking weekly timer setting
1
Press toentertheweeklytimersettingmode.
* blinks.
2
Press or toviewthesettingoftheparticular
dayornumber.
Press toexittheweeklytimersetting.
Note:
Whenalldaysoftheweekareselectedtoviewthesettingsandadifferent set-
tingisincludedamongthem,
willbedisplayed.
*
whichwasblink-
inggoesout,andthe
currenttimewillbe
displayed.
*
blinks.
Note:
ThesimpleON/OFFtimersettingisavailablewhiletheweeklytimerison.In
thiscase,theON/OFFtimerhaspriorityovertheweeklytimer;theweeklytimer
operationwillstartagainafterthesimpleON/OFFtimeriscomplete.
E.g. : Runs at 24°C from waking up to leaving home, and runs at 27°C from
getting home to going to bed on weekdays.
Runs at 27°C from waking up late to going bed early on weekends.
Setting1 Setting2 Setting3 Setting4
Setting1 Setting2
6:00 8:30 17:30 22:00
8:00 21:00
24°C 27°C
ON OFF ON OFF
ON OFF
Mon
Fri
~
Sat
Sun
~
27°C
Pressing selectsthedayof
theweektobeset.
Pressing selects
thesettingnumber.
* Alldayscanbeselected.
E.g.: [MonTue...Sun]
and[1]areselected.
E.g.: [ON],[6:00]
and[24°C]are
selected.
Pressing
selects
ON/OFFtimer.
Pressing
deletes
timersetting.
Pressing
adjuststhetime.
Pressing
adjuststhetem-
perature.
* Holddownthebuttontochangethetimequickly.
En-12
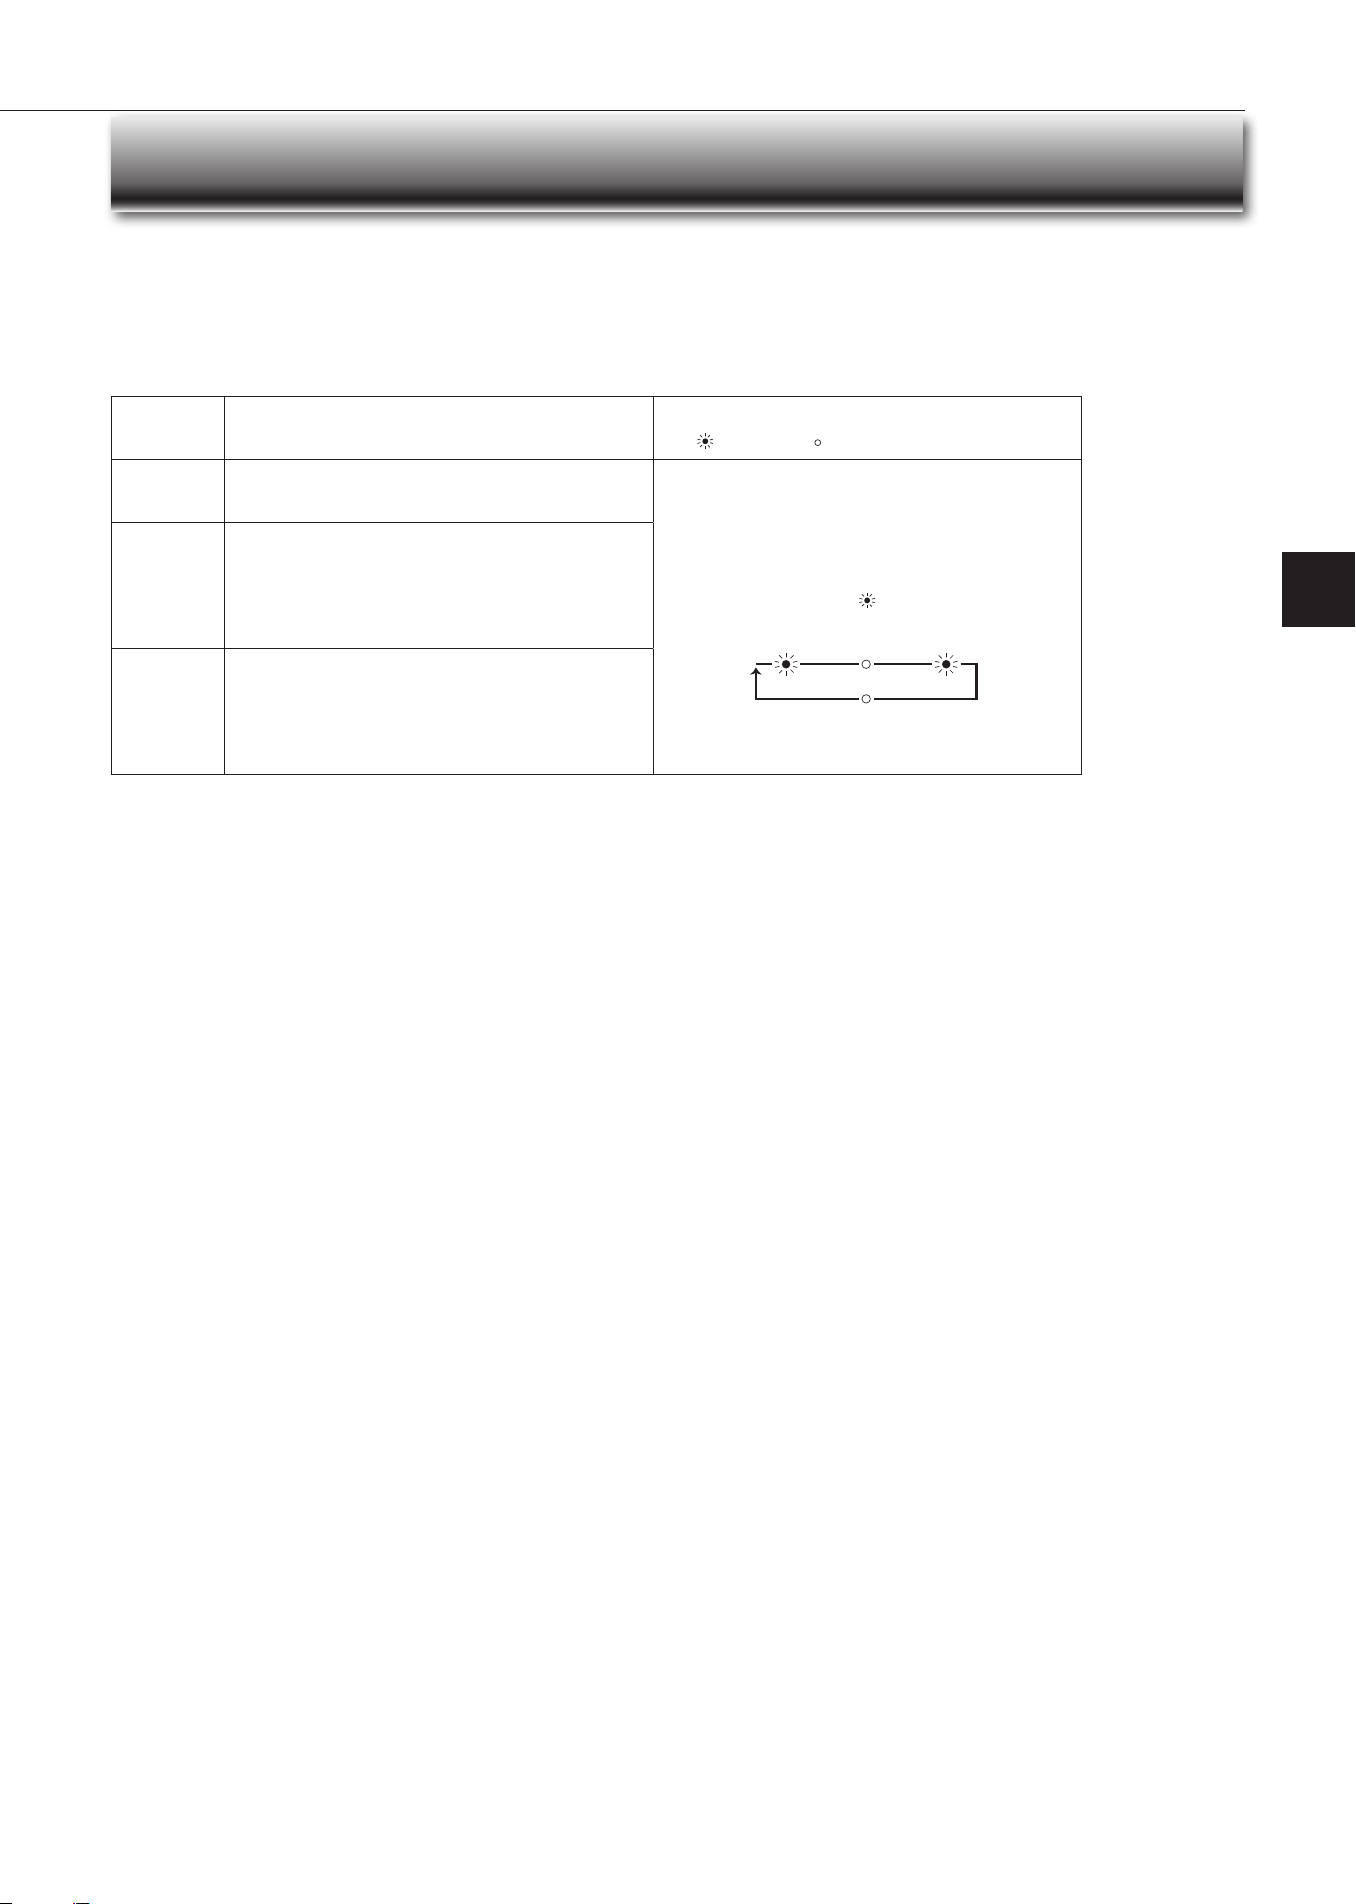
Demand response
ThisunithasdemandresponsecapabilitywhichiscompliantwithAS/NZS4755.3.1.
Toactivatethisfunction,youneedtomakeacontractwithremoteagentssuchaselectricsupplycompany,thenthisunitshouldbeconnectedtoDemandresponseenabling
devise(DRED).Forfurtherinformation,consultyourdealer.
Demandresponserepresentstheautomatedalterationofanelectricalproduct’snormalmodeofoperationinresponsetoaninitiatingsignaloriginatingfromordened
byaremoteagent.
Thisunitsupports3DemandResponseModes(DRMs).
DRM Description of operation in this mode
Operation indicator lamp
Lit Notlit
DRM1
Compressoroff
Theairconditionerdoesnotperformcoolingorheatingopera-
tionduringthedemandresponseevent.
Upperlampislit.
Lowerlampblinks.
2.5 sec 2.5 sec0.5 sec
2.5 sec
DRM2
Theairconditionercontinuestoperformcoolingorheating
operationduringthedemandresponseevent,buttheelec-
tricalenergyconsumedbytheairconditionerinahalfhour
period is not more than 50% of the total electrical energy
thatwouldbeconsumedifoperatingattheratedcapacityin
ahalfhourperiod.
DRM3
Theairconditionercontinuestoperformcoolingorheating
operationduringthedemandresponseevent,buttheelec-
tricalenergyconsumedbytheairconditionerinahalfhour
period is not more than 75% of the total electrical energy
thatwouldbeconsumedifoperatingattheratedcapacityin
ahalfhourperiod.
Note:
• DRMisautomaticallyactivatedorreleasedaccordingtothesignalsfromDRED.
DRMcannotbeinvalidatedorchangedmanually.
• YoumightfeelthisunitdoesnotsufcientlyperformcoolingorheatingoperationduringDRM.
• OperationsettingscanbechangedasusualwiththeremotecontrollerduringDRM.
However,youmightnotfeelcoolorwarmenoughasDRMisprioritized.
DEMAND RESPONSE AND INDOOR UNIT OPERATION(DEMAND TYPE ONLY)
En-13
● OPERATING INSTRUCTIONS ●
1.Liftthefrontpaneluntila“click”isheard.
2.Holdthehingesandpulltoremoveasshownintheillustrationabove.
• Wipewithasoftdryclothorrinseitwithwater.
• Donotsoakitinwaterformorethantwohours.
• Dryitwellinshadebeforeinstallingit.
3.Installthefrontpanelbyfollowingtheremovalproce-
durein reverse. Closethefront panelsecurelyand
pressthepositionsindicatedbythearrows.
Instruc tions:
CLEANING
• Switchoffthepowersupplyorturnoffthebreakerbeforecleaning.
• Becarefulnottotouchthemetalpartswithyourhands.
• Donotusebenzine,thinner,polishingpowder,orinsecticide.
• Useonlydilutedmilddetergents.
• Donotuseascrubbingbrush,ahardsponge,orthelike.
• Donotsoakorrinsethehorizontalvane.
• Donotusewaterhotterthan50°C.
• Donotexposepartstodirectsunlight,heat,orretodry.
• Donotapplyexcessiveforceonthefanasitmaycausecracksorbreakage.
Air lter (Air purifying lter)
•
Clea n eve ry 2 w ee ks
• Removedirtbyavacuumcleaner,orrinsewithwater.
• Afterwashingwithwater,dryitwellinshade.
Front panel
Air cleaning lter
(Anti-Allergy Enzyme lter)
Every 3 months:
• Removedirtbyavacuumcleaner.
When dirt ca nnot be removed by vac uum clea ning:
•
Soakthelteranditsframeinlukewarmwaterbeforerinsingit.
•
Afterwashing,dryitwellinshade.
Installalltabsoftheairlter.
Every ye a r:
• Replaceitwithanewaircleaninglterforbestperformance.
• PartsNumber
MAC-2350FT-E
Hole
Hinge
Im porta nt
• Clean the lters regularly for best performance and to
reduce pow e r consumption.
• Dirty lters cause condensation in the air conditioner
which will contribute to the growth of fungi such as
mold. It is therefore recommended to clean air lters
every 2 w eek s.
(Electrostatic anti-allergy enzyme lter,
option)
Every 3 months:
• Removedirtbyavacuumcleaner.
When dirt ca nnot be removed by vac uum clea ning:
•
Soakthelteranditsframeinlukewarmwaterbeforerinsingit.
•
Afterwashing,dryitwellinshade.
Every ye a r:
• Replaceitwithanewaircleaninglterforbestperformance.
• PartsNumber
MAC-2310FT-E
Pushtoinstall
intotheunitalong
thelterguide.
Pulltoremovefromtheunit.
Filterguide
En-14
Wi-Fi INTERFACE SETTING UP (vGk TYPE ONLY)
ThisWi-Fiinterface,communicatesthestatusinformationandcontrols
thecommandsfromtheserverbyconnectingtotheindoorunit.
Wi-Fiinterface
Wi-Fiinterface
Frontpanel
Frontpanel
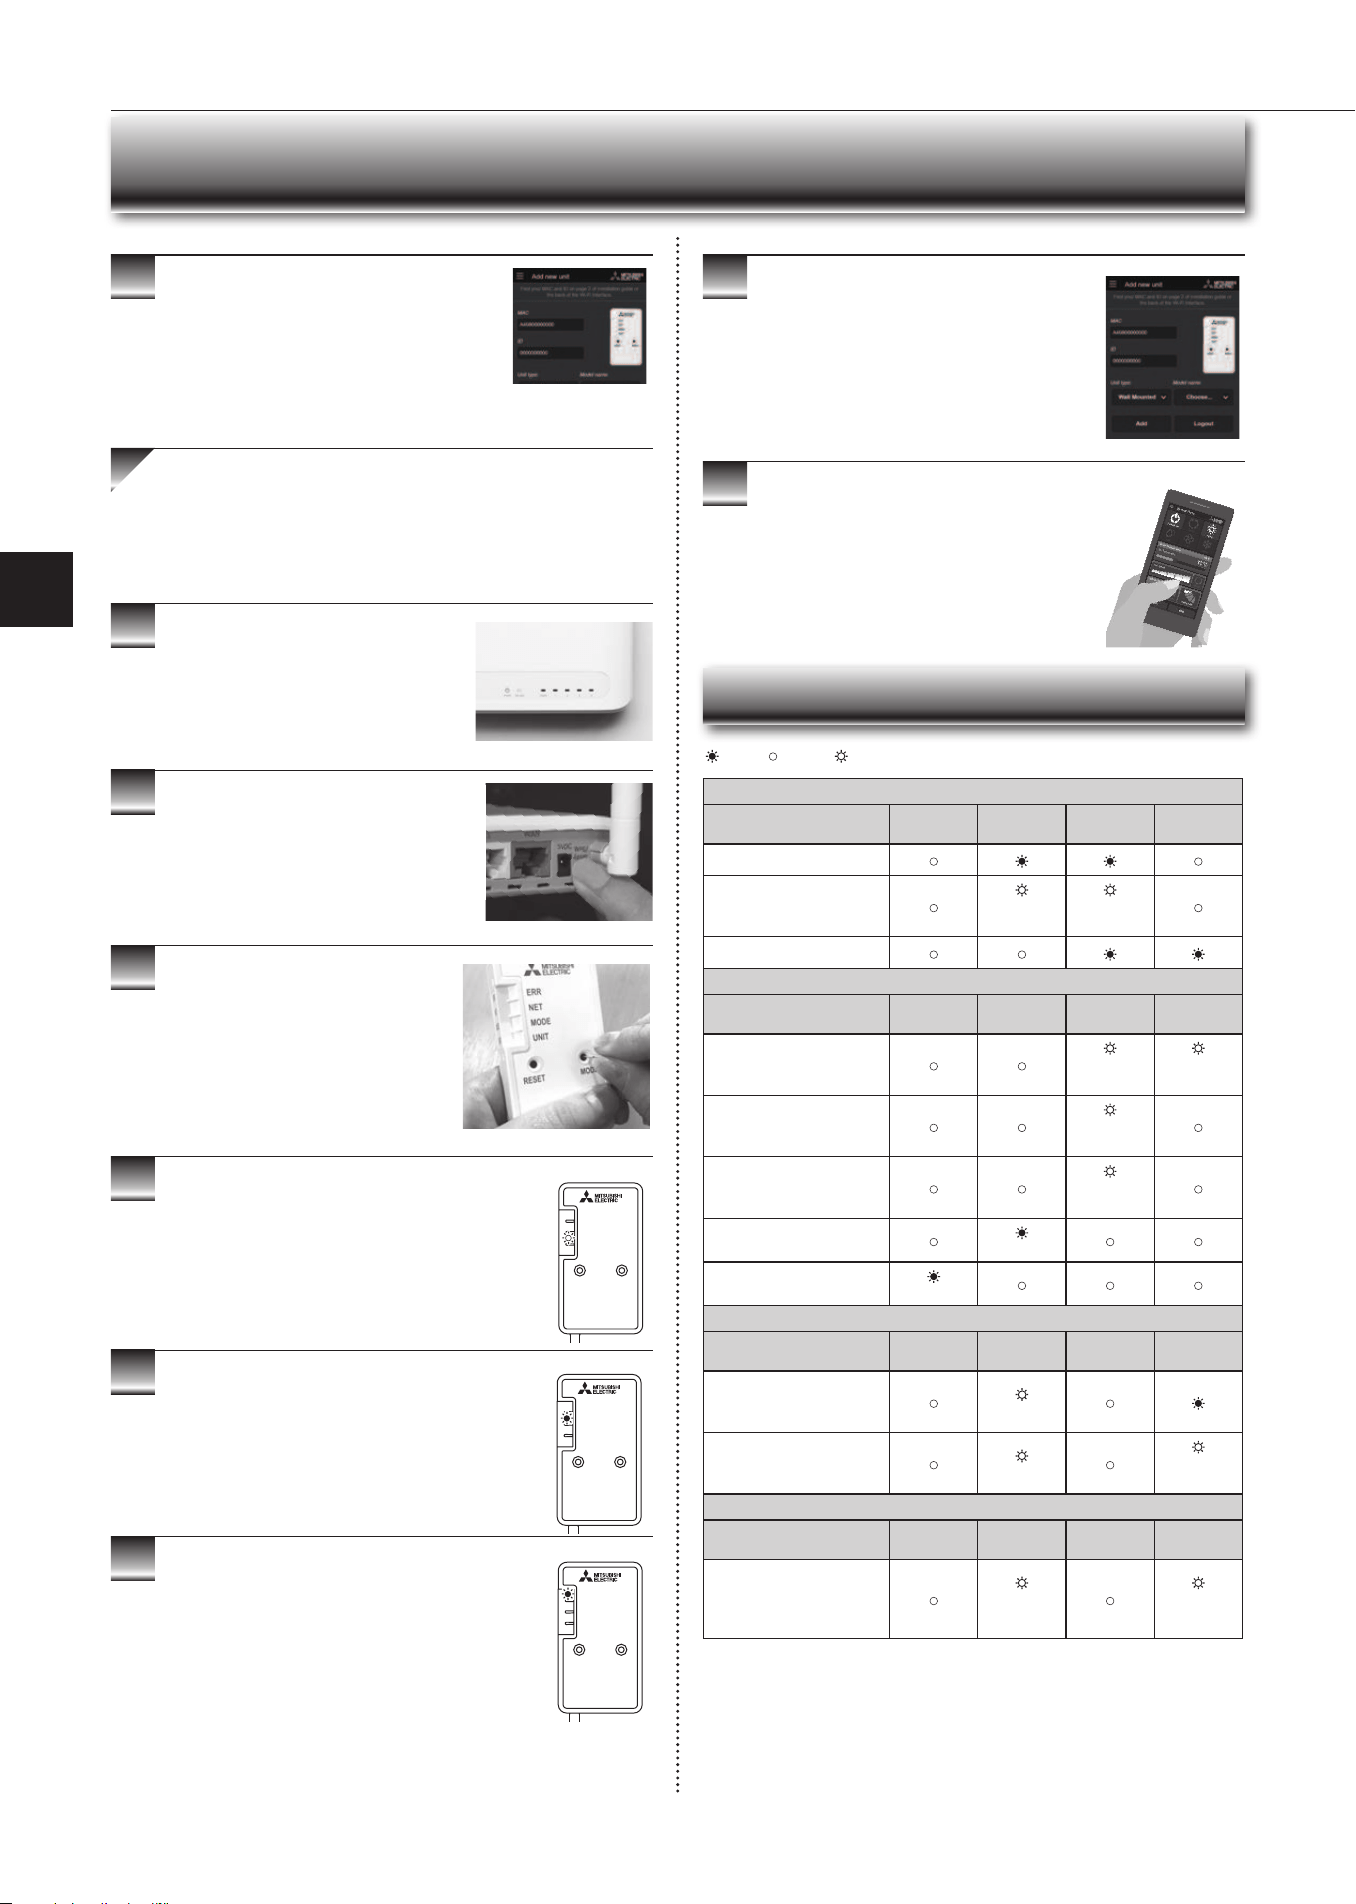
Wi-Fi interface introduction
RESET
ERR
NET
MODE
UNIT
MODE
3
4
5
6
2
1
(1) MODE Button
WPS-Push
• HolddowntheMODEButtonfor2secondstostartWPS-PushPairing.
• WhenWPS-PushisenabledontheWi-Fiinterface,theMODELEDstarts
ashingorange(everysecond)andthepairingcanbecompletedby
enablingWPS-PushontheRouter.
Access Point Mode
• HolddowntheMODEButtonfor7secondstostartAccessPointMode.
• WhenAccessPointModeisenabledontheWi-Fiinterface,theMODELED
startsashingorange(every5seconds).
• TocancelAccessPointMode,holddowntheMODEButtonfor7seconds
againandensurethattheMODELEDisnolongerashing.
WPS-PIN
• HolddowntheMODEButtonfor15secondstostartWPS-PINPairing.
• WhenWPS-PINisenabledontheWi-Fiinterface,MODELEDstarts
ashingorange(every0.5seconds)andthepairingcanbecompletedby
enablingWPS-PINontheRouter.
• BeforeusingWPS-PIN,thePINcodeoftheWi-Fiinterfaceneedstobeset
ontheRouter.
Note:
WhentheWi-Fiinterfaceisresettothefactorydefault,ALLthe
congurationinformationwillbelost.Takegreatcareinimplementingthis
operation.
(2) RESET Button
• HolddowntheRESETButtonfor2secondstorebootthesystem.
• HolddowntheRESETButtonfor15secondstoinitialisetheWi-Fiinterface
tothefactorydefault.
No Item Description
1
MODEButton Selectsmodes.
2
RESETButton ResetsthesystemandALLsettings.
3
ERRLED(Orange) Showsthenetworkerrorstate.
4
NETLED(Green) Showsthenetworkstate.
5
MODELED(Orange) ShowstheAccessPointModestate.
6
UNITLED(Green) Showstheindoorunitstate.
3
4
5
6
Information for users
ThefollowingstepsexplainhowtoconnecttheWi-FiinterfacetoaRouter.
1
2
.
THERE ARE TWO OPTIONS OF
CONNECTING
RESET
ERR
NET
MODE
UNIT
MODE
RESET
ERR
NET
MODE
UNIT
MODE
EnsuretheWi-Fiinterfaceisconnectedcorrectlyasper
theprevioussection,‘ConnectingtheWi-Fiinterface’.
UNITLEDshouldbeashinggreenonly.
: ON : Flashing : OFF
KEY (LED LIGHTS):
DownloadandinstallWi-FiControlApptoyour
compatibleAppleorAndroidsmartphone/tablet
(searchterm:MitsubishiWi-FiControl).
Wi-Fi Control
ActivateAccessPointModeonyour
Wi-Fiinterfacebyusingasmallobjectto
pressandholdtheMODEButtonfor7
seconds.
WhenAccessPointModeisenabledontheWi-Fi
interface,MODELEDstartsashingorange(every5
seconds).
Option 1 - Access Point Mode Pairing
Checkthelabelontheback
oftheinterfacefortheSSID.
OpentheWi-Finetworks
screenonyoursmartphone/
tabletandconnecttothe
networkwiththesamename
astheSSID.Thenetwork
password,labelledkEY,is
justundertheSSIDonthe
interface.
Youwillnowbeconnectedto
thisWi-Fiinterface
OpenWi-FiControlAppandfollowthe‘Howto
Setup’instructionsinthe‘SetupWi-Fiinterface’
section.
Iftheappdoesnotgotothissection,youare
notconnectedtotheWi-Fiinterface’sAccess
Point;pleasestartprocessagain.
YoucaneitherselectyouravailableWi-Fi
Network,ormanuallycongureaWi-FiNetwork.
En-15
● OPERATING INSTRUCTIONS ●
9
10
3
4
5
6
7
8
WhenWPS-PushisenabledontheWi-Fiinterface,
MODELEDstartsashingorange(everysecond).
OpenWi-FiControlApp.EnterMACandIDinto
‘Addnewunit’andselect‘Add’.
Oncecompleted,controlyourheatpumpviaWi-Fi.
7
Wi-Fi INTERFACE SETTING UP (vGk TYPE ONLY)
RESET
ERR
NET
MODE
UNIT
MODE
RESET
ERR
NET
MODE
UNIT
MODE
● Software initialising
Description
ERR
(Orange)
NET
(Green)
MODE
(Orange)
UNIT
(Green)
Firmwareupdating
Firmwaredownloading
(every
second)
(every
second)
Resettothefactorydefault
● Wireless setting
Description
ERR
(Orange)
NET
(Green)
MODE
(Orange)
UNIT
(Green)
AccessPointMode
activated
(every5
sec)
(every5
sec)
WPS-PUSHModeactivated
(every
second)
WPS-PINModeactivated
(every0.5
sec)
PairingprocessviaWPS
completed
(5sec)
PairingprocessviaWPS
failed
(5sec)
● Connection to server in progress
Description
ERR
(Orange)
NET
(Green)
MODE
(Orange)
UNIT
(Green)
Communicatingwithserver,
andstartingupindoorunit
communication
(*1)
Communicatingwithserver,
andcommunicatingwith
indoorunit
(*1)
(every5
sec)
● Normal operation
Description
ERR
(Orange)
NET
(Green)
MODE
(Orange)
UNIT
(Green)
Communicatingwithserver,
andcommunicatingwith
indoorunit
(every5
sec)
(every5
sec)
(*1)Detailsofashpattern
• Every0.5sec:Searchingforserver.
• Everysecond:RegisteringtheinformationoftheWi-Fiinterfacetoserver.
: ON : Flashing : OFF
Oncecompleted,theMACandIDwillbelledin
‘Addnewunit’.Select‘Add’andthencontrolyour
heatpumpviaWi-Fi.
Option 2 - WPS-Push Pairing
•PleaseNote:TheWPSandRouterresetbuttonsmaybe
similaronsomeRouters.
•PleaseexercisecautionasresettingyourRouterwillerase
networkconguration.
CheckWi-FiandWPSareenabledonyour
Router.Theconnectionprocedurevaries
dependingonyourRouter–refertoyour
Router’smanualformoreinformation.
ActivateWPSModeonyourRouter.This
willbeenabledforasetperiodallowing
approximately2minutestocompletethenext
step.Todoso,pleaserefertoyourRouter’s
manual.
RESET
ERR
NET
MODE
UNIT
MODE
ActivateWPSonyourWi-Fiinterfaceby
usingasmallobjecttopressandholdthe
MODEButtonfor2seconds.
WhenpairingprocessiscompletedontheWi-Fi
interface,theNETLEDlightsupsolidgreenfor5
seconds.
IfERRLEDlightsuporangefor5secondsatanystage,
theremaybeaproblem;pleasestartprocessagain.
LED Pattern
En-16
Description
ERR
(Orange)
NET
(Green)
MODE
(Orange)
UNIT
(Green)
Connectiontoserver
established,andconnectionto
indoorunitfailed
ConnectiontoRouterfailed,
andconnectiontoindoorunit
established
(*3)
ConnectiontoRouterfailed,
andstartingupindoorunit
connection
(*3)
ConnectiontoRouterfailed,
andconnectiontoindoorunit
failed
(*3)
Connectiontoserverfailed,
andconnectiontoindoorunit
established
(*2)
Connectiontoserverfailed,
andstartingupindoorunit
connection
(*2)
Connectiontoserverfailed,
andconnectiontoindoorunit
failed
(*2)
(*2)Detailsofashpattern
• Every 0.5 sec: IP address setting is invalid.Check DHCP Settings of the
Router,orcheckIPaddresssettingsoftheWi-Fiinterface.Ifbothsettingsare
correctbut stilltheproblempersists,push RESETButtonformorethan15
secondstoretrythepairing.
• Every second: DNS setting is invalid.Check DNS Settings of the Router,
orcheck DNSaddresssettingsofthe Wi-Fiinterface. Ifbothsettingsare
correctbutstilltheproblempersists,pushRESET Buttonformorethan15
secondstoretrythepairing.
• Twiceevery5sec:Notconnectedtoserver.CheckiftheRouterisconnected
totheinternet.
• Once every 5 sec: Not communicating with server properly. Push RESET
Buttonfor2seconds.
(*3)DetailswhenNETLEDisOFF
TheWi-FiinterfacefailedtoconnecttotheRouter.Checkthefollowing,andpair
theWi-Fiinterface.
• MakesurethatthecommunicationdistanceisnottoofarbetweentheWi-Fi
interfaceandtheRouter.
• Makesure2.4GHzisenabledondualbandRouters.
• MakesurethattheRouterusesWPA2-PSk(AES)encryption.
• Make sure that the number of connected devices to the Router does not
exceedthelimit.
• MakesurethatWPSisworkingontheRouter.
• MakesurethattheRouteriscompatiblewiththeWi-Fiinterface.
• IfStaticIPhasbeenset-makesureitiscorrectasperRouternetworksettings.
IfaproblemregardingconnectingyourRouterandtheWi-Fiinterfacepersists,
pleasecontactyourlocalMitsubishiElectricofce,aslistedonthebackofthis
guide.AlistofcompatibleRoutersisalsoavailable.
: ON : Flashing : OFF
Wi-Fi INTERFACE SETTING UP (vGk TYPE ONLY)
Note:
• Ensure that the Router supports the WPA2-AES encryption setting before
startingtheWi-Fiinterfacesetup.
• TheEndusershouldreadandacceptthetermsandconditionsoftheWi-Fi
servicebeforeusingthisWi-Fiinterface.
• TocompleteconnectionofthisWi-FiinterfacetotheWi-Fiservice,theRout-
ermayberequired.
• ThisWi-Fiinterfacewillnotcommencetransmissionofanyoperationaldata
fromthesystemuntiltheEnduserregistersandacceptsthetermsandcon-
ditionsoftheWi-Fiservice.
• ThisWi-FiinterfaceshouldnotbeinstalledandconnectedtoanyMitsubishi
Electricsystemwhichistoprovideapplicationcriticalcoolingorheating.
• PleasewritedowntheinformationregardingtheWi-Fiinterfacesettingonthe
lastpageofthismanual,whenyousetupthisWi-Fiinterface.
• Atthetime of relocation ordisposal,reset the Wi-Fi interfacetothefactory
default.
MitsubishiElectric’sWi-Fiinterfaceisdesignedforcommunicationto
MitsubishiElectric’sWi-Fiservice.ThirdpartyWi-Fiinterfacescannot
connecttoMitsubishiElectric’sWi-Fiservice.MitsubishiElectricisnot
responsibleforany(i)underperformanceofasystemoranyproduct;(ii)
systemorproductfault;or(iii)lossordamagetoanysystemorproduct;
whichiscausedbyorarisesfromconnectiontoand/oruseofanythird
partyWi-FiinterfaceoranythirdpartyWi-FiservicewithMitsubishiElectric
equipment.
ForthelatestinformationregardingWi-FiControl:
NewZealandbasedenquiriespleasevisit:www.mitsubishi-electric.co.nz/wi
Australianbasedenquiriespleasevisit:www.mitsubishielectric.com.au/wi
Onceregisteredyouwillbeabletocontrolyourheat
pumpwithyoursmartphone,tabletoronlineaccount
usinganinternetconnection.
(Foralistofcompatibledevices,pleasevisitthe
MitsubishiElectricwebsite).
User Manual
Acopyoftheusermanual,terms&conditionsand
privacypolicycanbedownloadedatanytimefromthe
MitsubishiElectricwebsite.
Mitsubishi Electric New Zealand
www.mitsubishi-electric.co.nz/wi
Phone:0800639434
Mitsubishi Electric Australia
www.mitsubishielectric.com.au/wi
Phone:1300728119
Register Your Heat Pump(s)
ThankyouforchoosingaMitsubishiElectricHeatPumpwithWi-FiControl.
OnceyourWi-Fiinterfaceisinstalled,eitherdownloadtheapp(searchterm:
MitsubishiWi-FiControl)orvisitourwebsitetoregisteryourheatpump(s).
*AppleandtheApplelogoaretrademarksofAppleInc.,registeredintheU.S.
andothercountries.AppStoreisaservicemarkofAppleInc.,registeredin
theU.S.andothercountries.
*GooglePlayandtheGooglePlaylogoaretrademarksofGoogleInc.
Troubleshooting
Mitsubishi Electric Wi-Fi Heat Pump Control
En-17
● OPERATING INSTRUCTIONS ●
Even if these items are checked, when the unit does not recover from the
trouble, stop using the air conditioner and consult your dealer.
Symptom Explanation & Check points
Indoor Unit
Theunitcannotbeoperated.
• Isthebreakerturnedon?
• Isthepowersupplyplugconnected?
• IstheONtimerset?
Page10
Thehorizontalvanedoesnot
move.
• Are thehorizontal vaneand theverticalvane
installedcorrectly?
• Isthefanguarddeformed?
• Whenthebreakeristurnedon,thehorizontal
vanes’positionwillberesetinaboutaminute.
Aftertheresethascompleted,thenormalhori-
zontalvanes’operationresumes.Thesameis
trueintheemergencycoolingoperation.
Theunitcannotbeoperatedfor
about3minuteswhenrestarted.
• Thisprotectstheunitaccordingtoinstructions
fromthemicroprocessor.Pleasewait.
Mistisdischargedfromtheair
outletoftheindoorunit.
•
Thecoolairfromtheunitrapidlycoolsmoisture
intheairinsidetheroom,anditturnsintomist.
TheswingoperationoftheHORI-
ZONTALvANEissuspendedfora
while,thenrestarted.
• ThisisfortheswingoperationoftheHORIZON-
TALvANEtobeperformednormally.
WhenSWINGisselectedin
COOL/DRY/FANmode,the
lowerhorizontalvanedoesnot
move.
• Itisnormalthatthelowerhorizontalvanedoes
notmovewhenSWINGisselectedinCOOL/
DRY/FANmode.
Theairowdirectionchanges
duringoperation.
Thedirectionofthehorizontal
vanecannotbeadjustedwith
theremotecontroller.
• When the unit is operated in COOL or DRY
mode,iftheoperationcontinueswithairblow-
ingdownfor0.5to1hour,thedirectionofthe
airowisautomaticallysettoupwardposition
topreventwaterfromcondensinganddripping.
• In the heating operation, if the airow tem-
peratureistooloworwhendefrostingisbeing
done,thehorizontal vaneisautomaticallyset
tohorizontalposition.
Theoperationstopsforabout
10minutesintheheating
operation.
• Outdoorunitisindefrost.
Since this is completed in max. 10 minutes,
pleasewait.(Whentheoutside temperatureis
toolowandhumidityistoohigh,frostisformed.)
Theunitstartsoperationby
itselfwhenthemainpoweris
turnedon,buthasn’treceived
signfromtheremotecontroller.
• These models are equipped with an auto
restart function. When the main power is
turned off without stopping the unit with the
remote controller andisturned on again, the
unitstartsoperationautomaticallyinthesame
modeastheonesetwiththeremotecontrol-
ler justbeforethe shutoff of the main power.
Referto“Autorestartfunction”.
Page10
Thetwohorizontalvanestouch
eachother.Thehorizontal
vanesareinanabnormalposi-
tion.Thehorizontalvanesdo
notreturntothecorrect“close
position”.
Performoneofthefollowing:
•
Turnoffandonthebreaker.Makesurethehori-
zontalvanesmovetothecorrect“closeposition”.
• Startandstoptheemergencycoolingoperation
andmakesurethehorizontalvanesmovetothe
correct“closeposition”.
In COOL/DRY mode, when the
room temperature reaches near
theset temperature,the outdoor
unit stops, then the indoor unit
operatesatlowspeed.
• Whentheroomtemperaturedeviatesfromthe
settemperature,theindoorfanstartsrunning
accordingtothesettingsontheremotecontrol-
ler.
Theindoorunitdiscolorsover
time.
• Althoughplasticturnsyellowduetotheinuence
of some factors such as ultraviolet light and
temperature,thishasnoeffectontheproduct
functions.
Theoperationindicatorlampis
dim.Theunitdoesnotbeep.
• IstheNIGHTmodeset? Page9
Multi system
Theindoorunitwhichisnot
operatingbecomeswarmanda
sound,similartowaterowing,
isheardfromtheunit.
• Asmallamountofrefrigerantcontinuestoow
intotheindooruniteventhoughitisnotoperat-
ing.
Whenheatingoperationis
selected,operationdoesnot
startrightaway.
• Whenoperationisstartedduringdefrostingof
outdoorunitisdone,ittakesafewminutes(max.
10minutes)toblowoutwarmair.
Outdoor Unit
Thefanoftheoutdoorunitdoes
notrotateeventhoughthecom-
pressorisrunning.Evenifthe
fanstartstorotate,itstopssoon.
• When the outside temperature is low during
coolingoperation,thefanoperatesintermittently
tomaintainsufcientcoolingcapacity.
Waterleaksfromtheoutdoor
unit.
• DuringCOOLandDRYoperations,pipeorpipe
connectingsectionsarecooledandthiscauses
watertocondense.
• Intheheatingoperation,watercondensedon
theheatexchangerdripsdown.
• Intheheatingoperation,thedefrostingoperation
makesiceformingontheoutdoorunitmeltand
dripdown.
Whitesmokeisdischargedfrom
theoutdoorunit.
• Intheheatingoperation,vaporgeneratedbythe
defrostingoperationlookslikewhitesmoke.
Symptom Explanation & Check points
Remote controller
Thedisplayontheremote
controllerdoesnotappearorit
isdim.Theindoorunitdoesnot
respondtotheremotecontrol
signal.
• Arethebatteriesexhausted?Page5
• Is the polarity (+, -) of the batteries correct?
Page5
• Areanybuttonsontheremotecontrollerofother
electricappliancesbeingpressed?
Does not cool or heat
Theroomcannotbecooledor
heatedsufciently.
• Isthetemperaturesettingappropriate?
Page6
• Is the fan setting appropriate? Please change
fanspeedtoHighorSuperHigh.
Page7
• Aretheltersclean?Page13
•
Is the fan or heat exchanger of the indoor unit
clean?
Page13
• Arethereanyobstaclesblockingtheairinletor
outletoftheindoororoutdoorunit?
• Isawindowordooropen?
• It maytake a certaintime toreachthe setting
temperatureormaynotreachthatdependingon
thesizeoftheroom,theambienttemperature,
andthelike.
• IstheNIGHTmodeset?
Page9
Theroomcannotbecooled
sufciently.
• Whenaventilationfanoragascookerisused
inaroom,thecoolingloadincreases,resulting
inaninsufcientcoolingeffect.
• Whentheoutsidetemperatureishigh,thecooling
effectmaynotbesufcient.
Theroomcannotbeheated
sufciently.
• Whentheoutsidetemperatureislow,theheating
effectmaynotbesufcient.
Airdoesnotblowoutsoonin
theheatingoperation.
• Pleasewaitastheunitispreparingtoblowout
warmair.
Airow
Theairfromtheindoorunit
smellsstrange.
• Aretheltersclean?Page13
• Isthefanorheatexchangeroftheindoor unit
clean?Page13
• The unit may suck in an odor adhering to the
wall,carpet,furniture,cloth,etc.andblowitout
withtheair.
Sound
Crackingsoundisheard. • Thissoundisgeneratedbytheexpansion/con-
tractionofthefrontpanel,etc.duetochangein
temperature.
“Burbling”soundisheard. • This sound is heard when the outside air is
absorbedfromthedrainhosebyturningonthe
rangehoodortheventilationfan,makingwater
owinginthedrainhosetospoutout.
This sound isalso heardwhenthe outsideair
blows into the drain hose in case the outside
windisstrong.
Mechanicalsoundisheard
fromtheindoorunit.
• Thisistheswitchingsoundinturningon/offthe
fanorthecompressor.
Thesoundofwaterowingis
heard.
• This is the sound of refrigerant or condensed
waterowingintheunit.
Hissingsoundissometimes
heard.
• This is the sound when the ow of refrigerant
insidetheunitischanged.
Timer
Weeklytimerdoesnotoperate
accordingtosettings.
• IstheON/OFFtimerset?Page10
• Transmit the setting information of the weekly
timerto the indoorunit again.When the infor-
mationissuccessfullyreceived,alongbeepwill
soundfromtheindoorunit.Ifinformationfailsto
bereceived,3shortbeepswillbeheard.Ensure
informationissuccessfullyreceived.
Page11
• Whenapowerfailureoccursandthemainpower
turns off, the indoor unit built-in clock will be
incorrect.Asaresult,theweeklytimermaynot
worknormally.
Be sure to place the remote controller where
the signal can be received by the indoor unit.
Page5
Theunitstarts/stopstheopera-
tionbyitself.
• Istheweeklytimerset?Page11
WHEN YOU THINk THAT TROUBLE HAS OCCURRED
En-18
Installation place
Avoid installing the air conditioner in the following places.
• Wherethereismuchmachineoil.
• Saltyplacessuchastheseaside.
• Wheresuldegasisgeneratedsuchashotspring,sewage,wastewater.
• Whereoilissplashedorwheretheareaislledwithoilysmoke(suchascook-
ingareasandfactories,inwhichthepropertiesofplasticcouldbechanged
anddamaged).
• Wherethereishigh-frequencyorwirelessequipment.
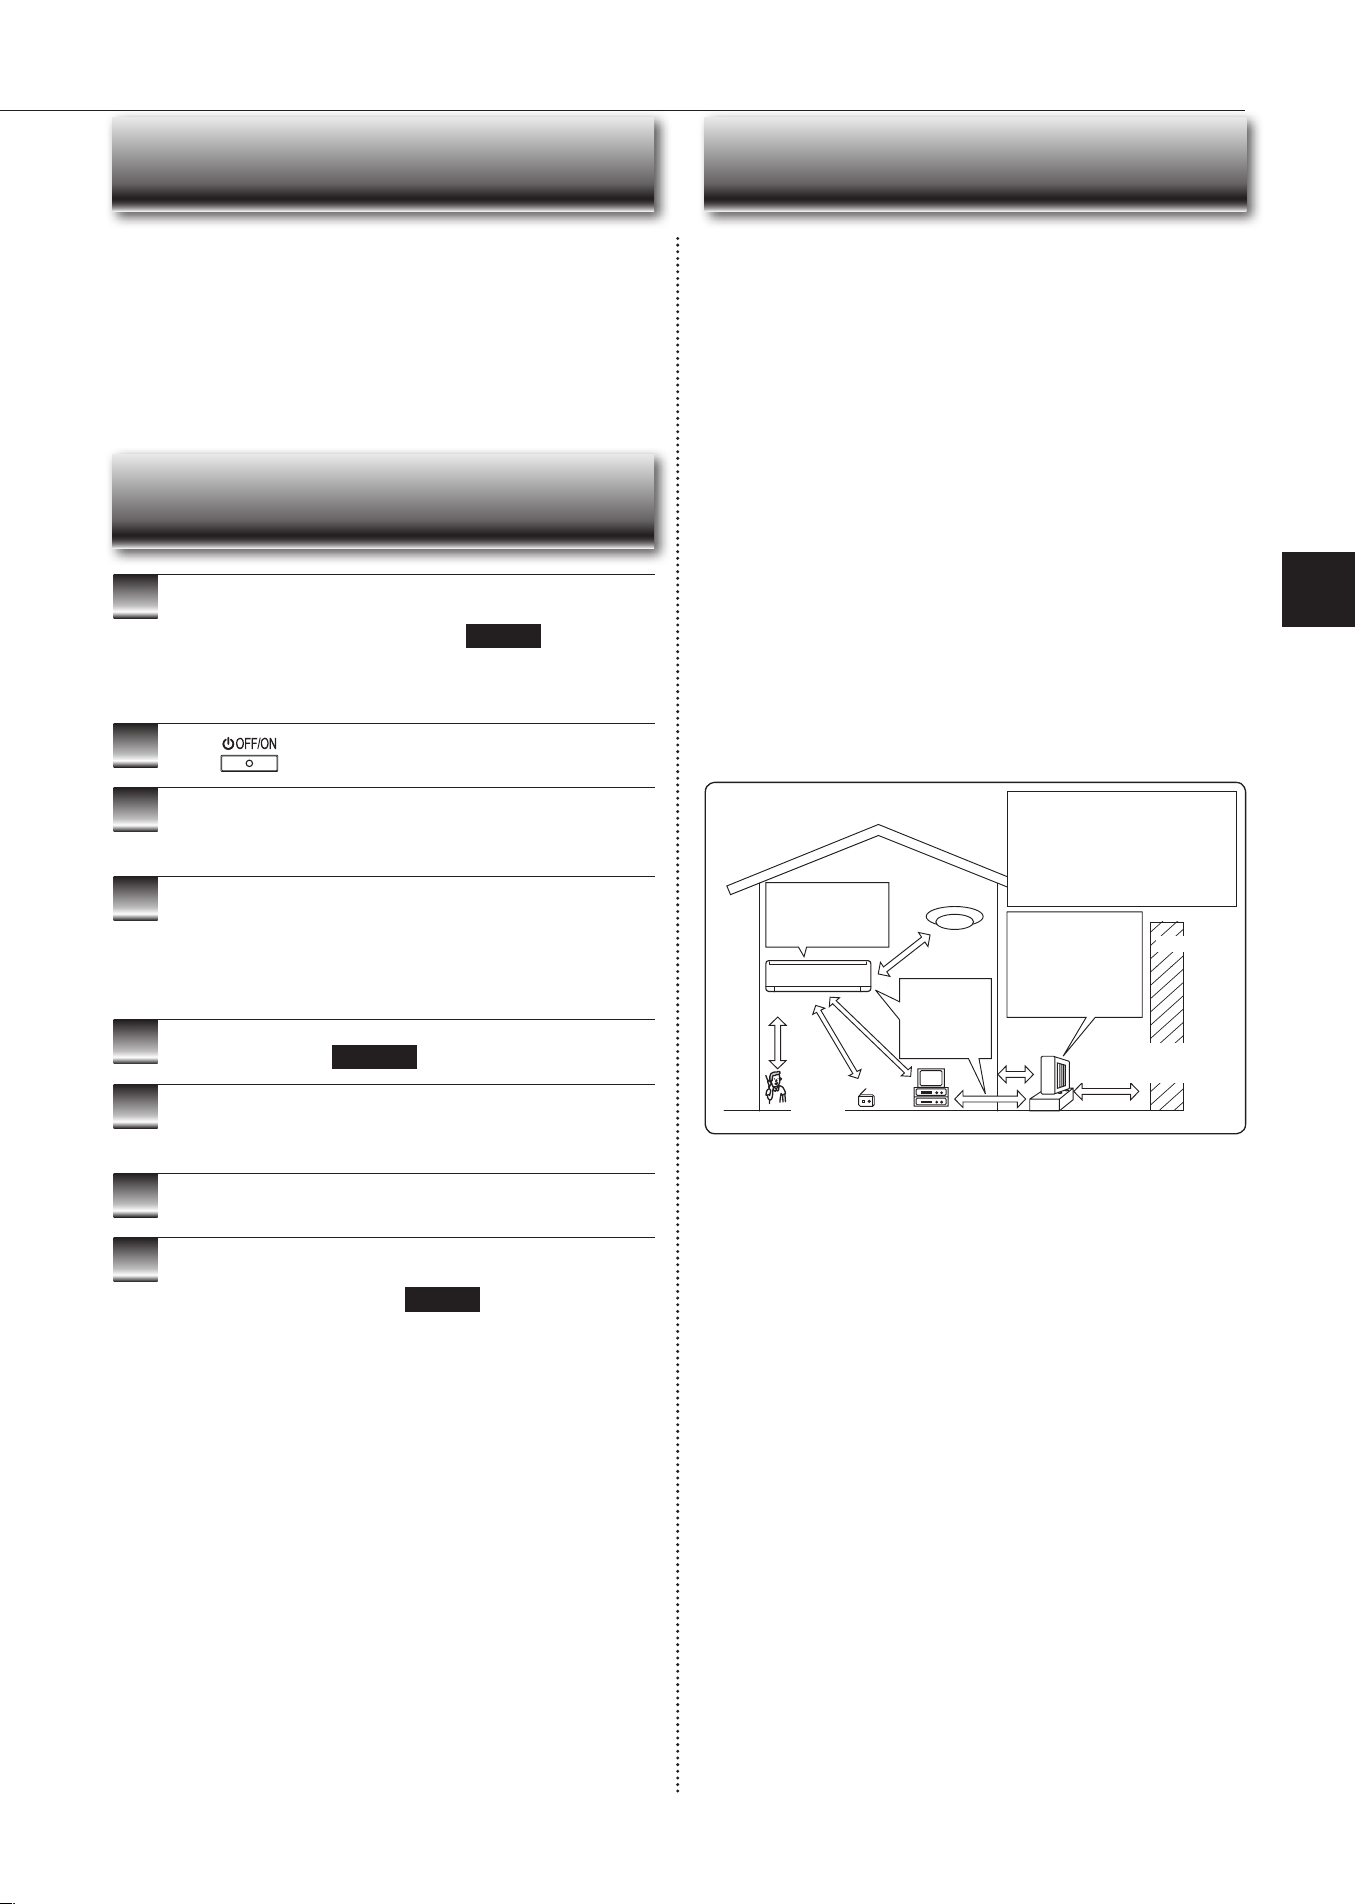
• Wheretheairfromtheoutdoorunitairoutletisblocked.
• Wheretheoperationsoundorairfromtheoutdoorunitbothersthehousenext
door.
• Themountingheightofindoorunit1.8mto2.3misrecommended.Ifitis
impossible,pleaseconsultyourdealer.
• Donotoperatetheairconditionerduringinteriorconstructionandnishing
work,orwhilewaxingtheoor.Beforeoperatingtheairconditioner,ventilate
theroomwellaftersuchworkisperformed.Otherwise,itmaycausevolatile
elementstoadhereinsidetheairconditioner,resultinginwaterleakageor
scatteringofdew.
• DonotusetheWi-Fiinterfacenearbythemedicalelectricalequipmentorpeo-
plewhohaveamedicaldevicesuchasacardiacpacemakeroranimplantable
cardioverter-debrillator.
Itcan cause anaccidentdue tomalfunctionsof themedicalequipment or
device.
• Thisequipmentshouldbeinstalledandoperatedwithaminimumdistanceof
20cmbetweenthedeviceandtheuserorbystanders.
• DonotusetheWi-Fiinterfacenearbyotherwirelessdevices,microwaves,
cordlessphones,orfacsimiles.
Itcancausemalfunctions.
Electrical work
• Provideanexclusivecircuitforthepowersupplyoftheairconditioner.
• Besuretoobservethebreakercapacity.
If you have any questions, consult your dealer.
INSTALLATION PLACE AND
ELECTRICAL WORk
1
OperatebyCOOLmodewiththehighesttemperature
setorFANmodefor3to4hours.Page6
• Thisdriestheinsideoftheunit.
• Moistureintheairconditionercontributestofavorableconditionsfor
growthoffungi,suchasmold.
2
Press
tostoptheoperation.
3
Turnoffthebreakerand/ordisconnectthepowersup-
plyplug.
4
Removeallbatteriesfromtheremotecontroller.
When using the air conditioner again:
1
Cleantheairlter.Page13
2
Checkthattheairinletandoutletoftheindoorand
outdoorunitsarenotblocked.
3
Checkthattheearthisconnectedcorrectly.
4
Refertothe“PREPARATIONBEFOREOPERATION”,
andfollowtheinstructions.
Page5
WHEN THE AIR CONDITIONER IS NOT
GOING TO BE USED FOR A LONG TIME
Topreventtheeffects
ofauorescentlamp,
keepasfarapartas
possible.
wall,etc.
Inverter-type
uorescentlamp
keepaspace
toprevent
thepicture
distortionor
thenoise.
1m
or
more
Radio
100mmor
more
Tv
Cordless
phoneor
Portable
phone
3mormore
1m
ormore
Theinstallation location ofthe outdoor
unitshould be at least 3m awayfrom
theantennasforTvsets,radios,etc.In
areaswherethereceptionisweak,pro-
videgreaterspacebetweentheoutdoor
unit and the antenna of the affected
deviceifoperationoftheairconditioner
interfereswithradioorTvreception.
(AP60/AP71,80)
200/500mmormore
Fortheoptimumef-
ciencyandtoextend
thelifetimeofusing,
theoutdoorunit
shouldbeinstalledin
awell-ventilateddry
place.
In the following cases, stop using the air conditioner and consult your dealer.
• Whenwaterleaksordripsfromtheindoorunit.
• Whentheoperationindicatorlampblinks.
• Whenthebreakertripsfrequently.
• TheremotecontrolsignalisnotreceivedinaroomwhereanelectronicON/
OFFtypeuorescentlamp(inverter-typeuorescentlamp,etc.)isused.
• OperationoftheairconditionerinterfereswithradioorTvreception.Anampli-
ermayberequiredfortheaffecteddevice.
• Whenanabnormalsoundisheard.
• Whenanyrefrigerantleakageisfound.
WHEN
YOU THINk THAT
TROUBLE HAS OCCURRED
En-19
● OPERATING INSTRUCTIONS ●
SPECIFICATIONS
Wi-Fi interface
Model MAC-568IFB2-E
Inputvoltage DC12.7v(fromindoorunit)
Powerconsumption MAX2W
SizeH×W×D(mm) 79×44×18.5
Weight(g) 60(includingcable)
Transmitterpowerlevel(MAX) 17.5dBm@IEEE802.11b
RFchannel 1ch~13ch(2412~2472MHz)
Radioprotocol IEEE802.11b/g/n(20)
Encryption AES
Authentication WPA2-PSk
Softwareversion XX.00
Wi-Fi interface setting information
Indoorunitmodelname
Indoorunitserialnumber
Outdoorunitmodelname
Outdoorunitserialnumber
Wi-FiinterfaceMACaddress(MAC)
Wi-Fiinterfaceserialnumber(ID)
Wi-FiinterfacePIN(PIN)
Wi-FiinterfaceSSID(SSID)
Wi-FiinterfacekEY(kEY)
Systemcommissioningdate
Wi-Fiinterfaceinstallationdate
Installer contact details
Name
Telephonenumber
MEMO
Indoor Outdoor
Cooling
Upperlimit
32°CDB
23°CWB
46°CDB
—
Lowerlimit
21°CDB
15°CWB
-10°CDB
—
Heating
Upperlimit
27°CDB
—
24°CDB
18°CWB
Lowerlimit
20°CDB
—
-15°CDB
-16°CWB
Guaranteed operating range
DB :DryBulb
WB:WetBulb
HEADOFFICE:TOkYOBUILDING,2-7-3,MARUNOUCHI,CHIYODA-kU,TOkYO100-8310,JAPAN
JG79Y406H01