
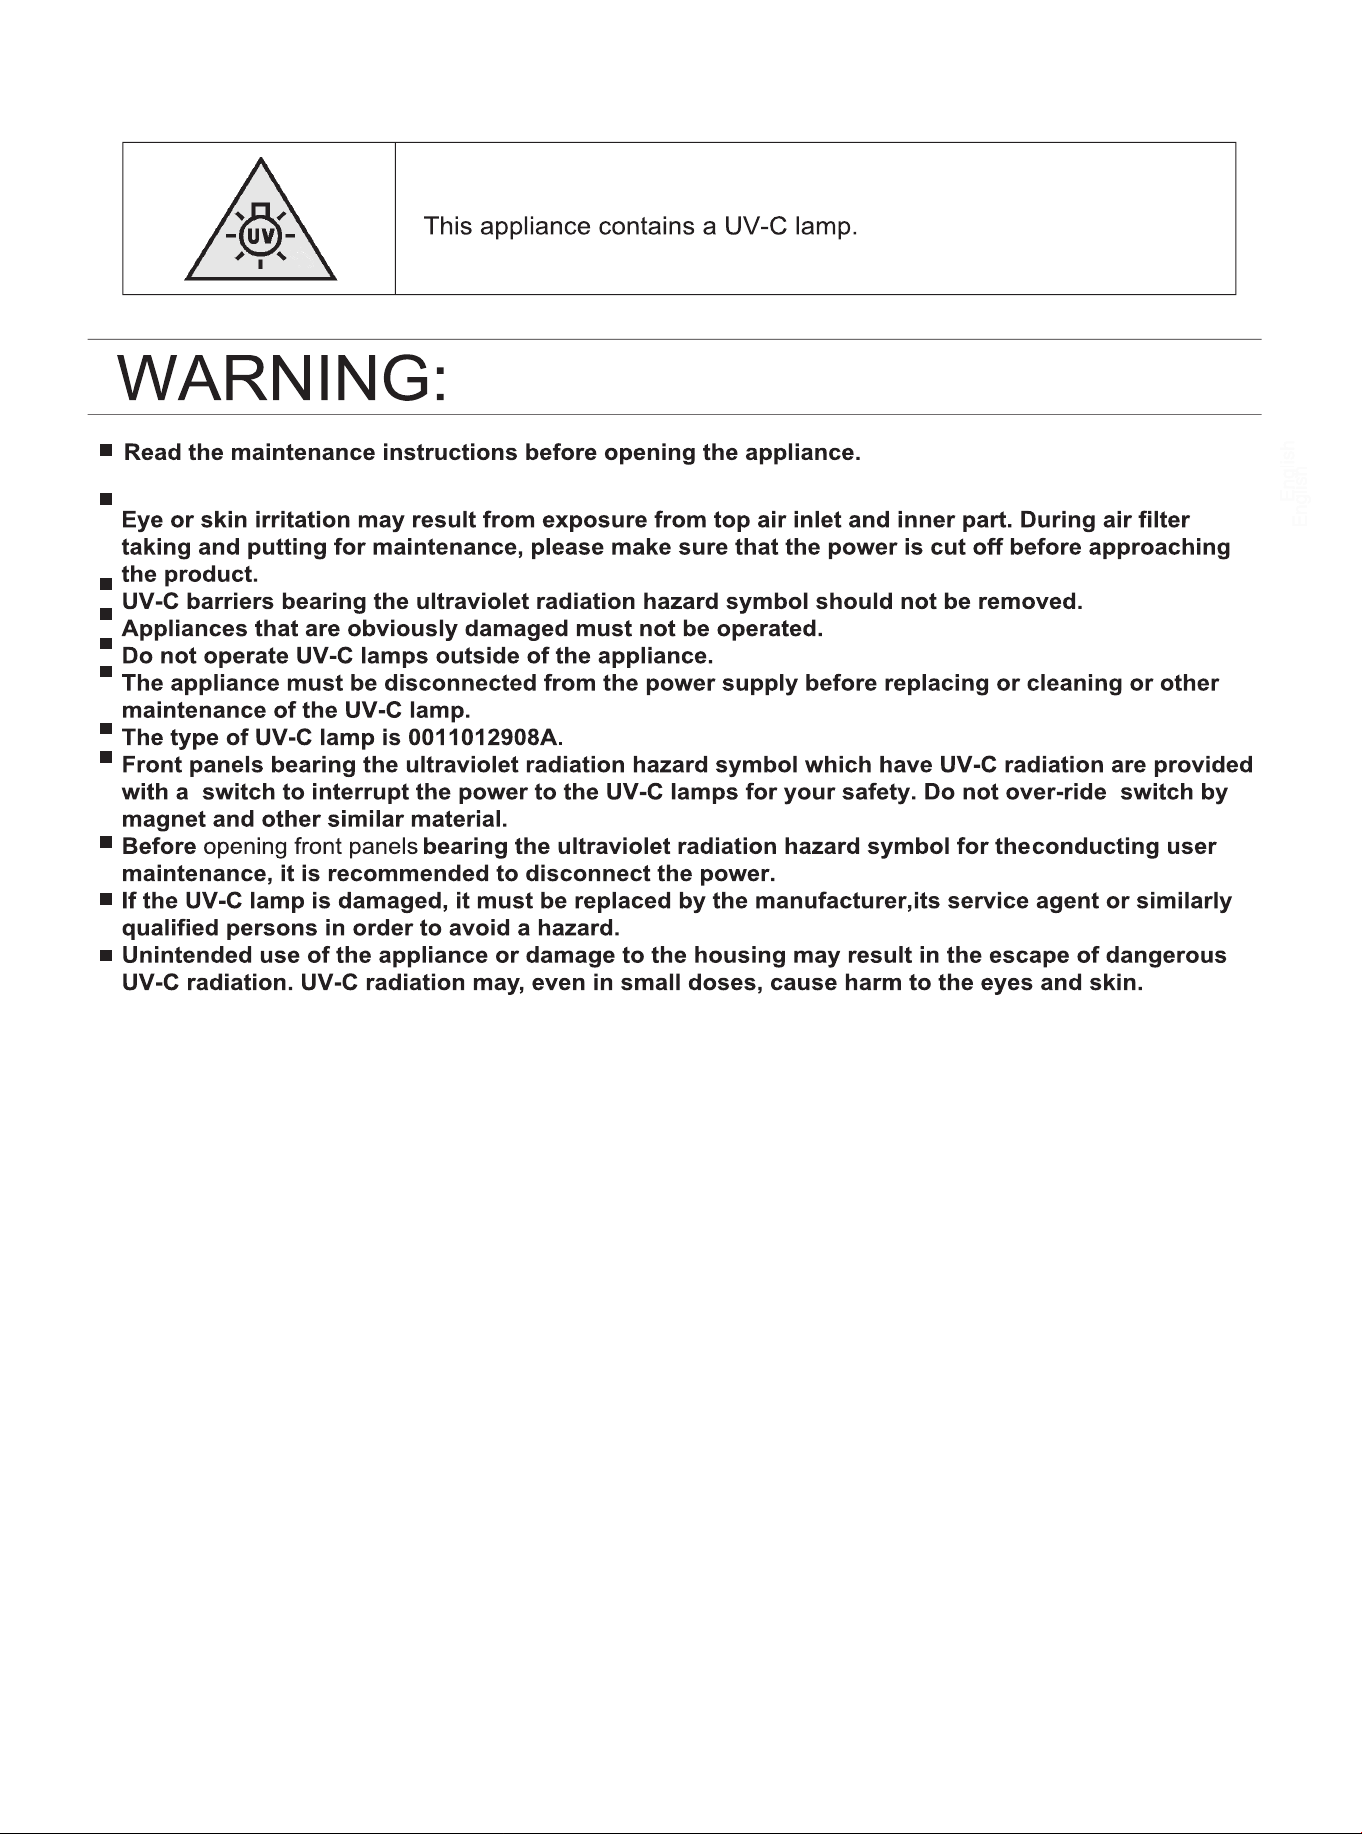
Parts and Functions
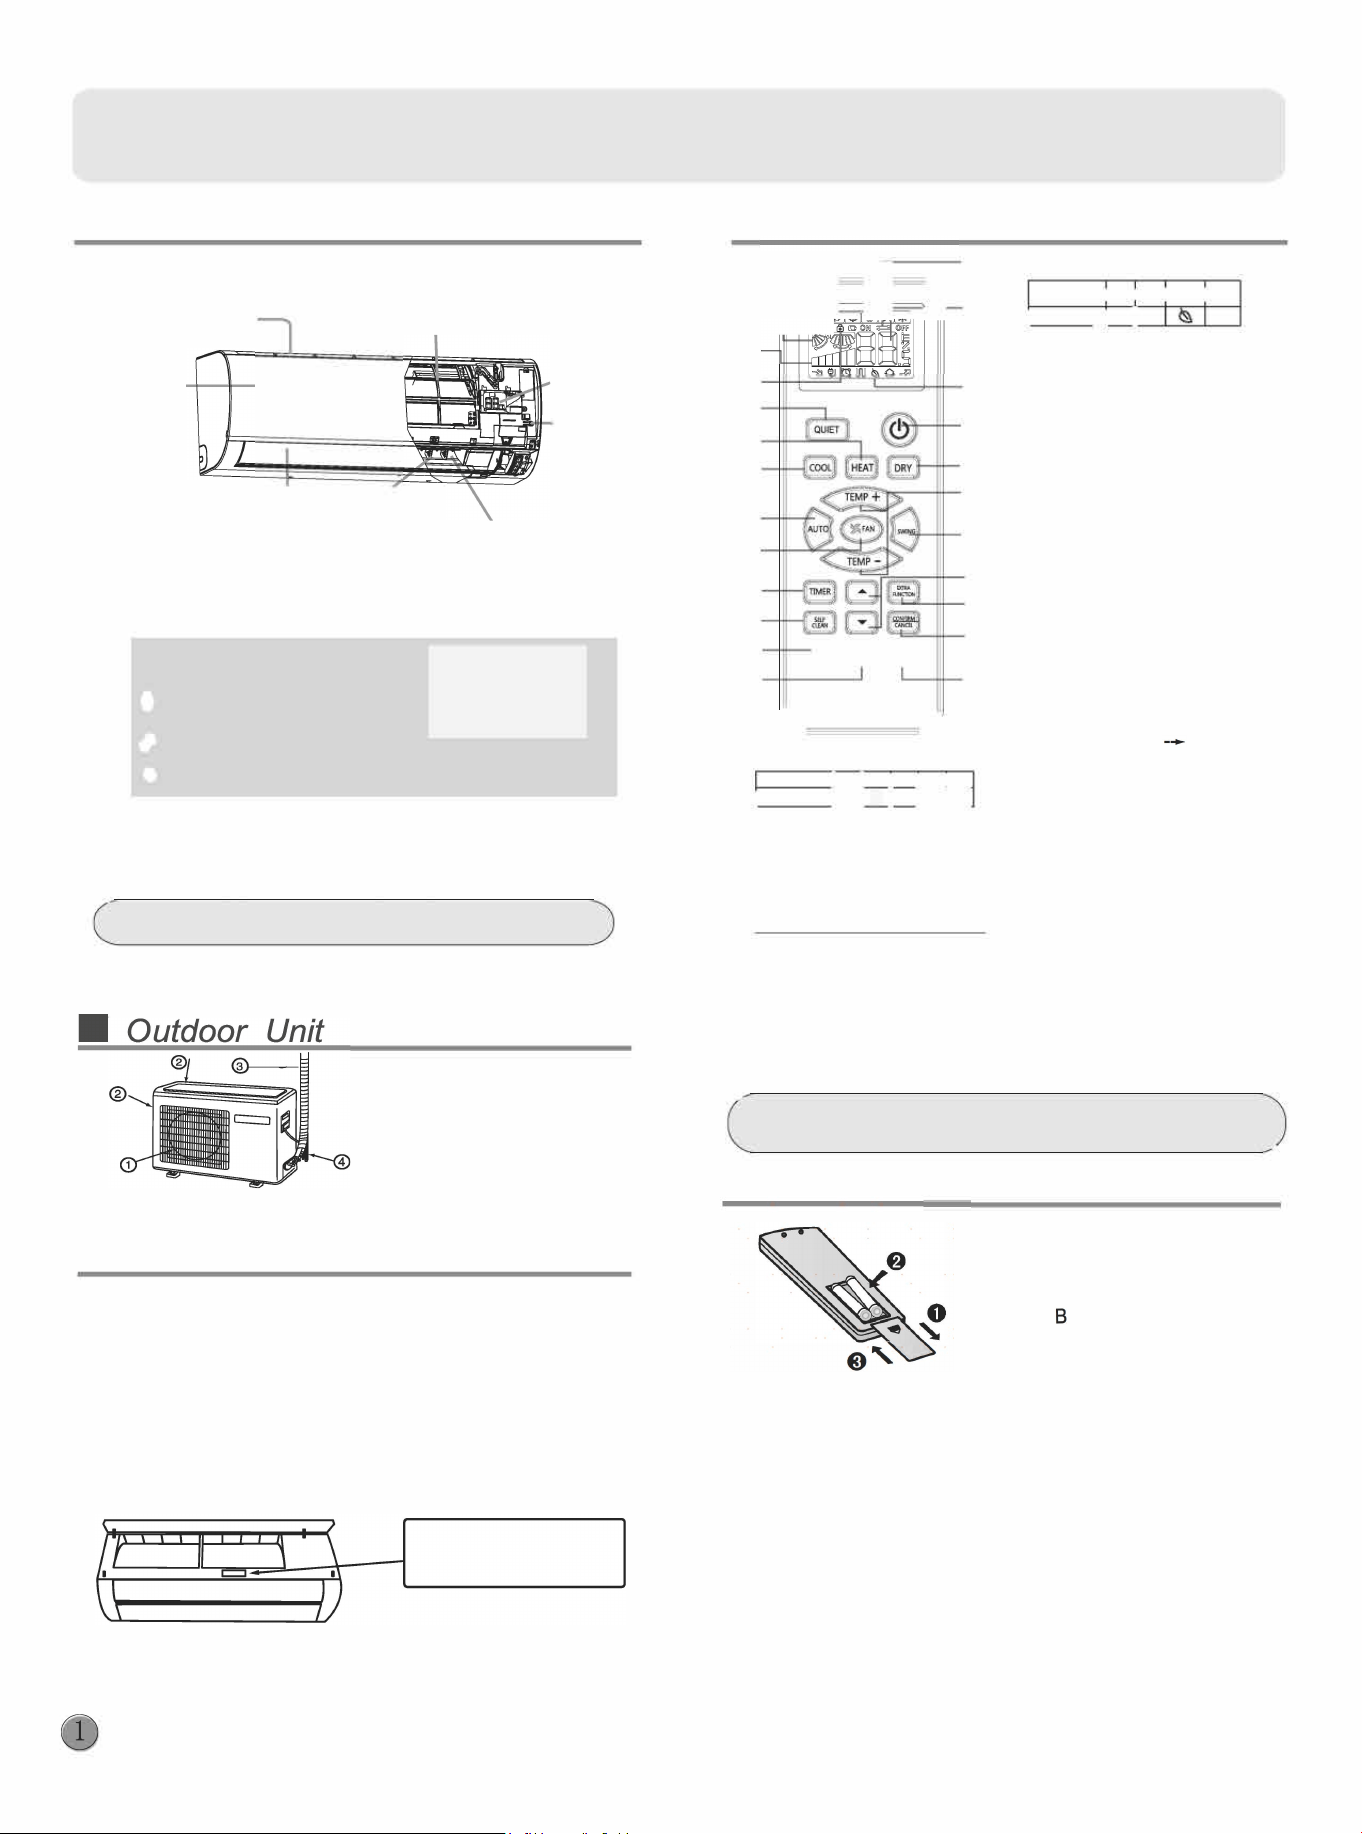
•Indoor Unit
•Remote controller
Inlet
Air Purifying Filter
{inside)
Inlet grille
Horizontal flap
丿
Vertical
.
blade
(
adjust
up and
do
w
n air flo
w
(
ad
j
ust le
and
Don't adjust it manually)
「ightair flow}
Display board
0 Setting temp.display
1=10
巳巳
Operation mode indicator
8 Remote signal receiver
Outlet
Display
board
Emergency
Switch
蕴
一
@
跪
一
©
Actual inlet grille may va from the one shown in the
manual according to the product purchased
•
Setup
@OUTLET
@ INLET
@ CONNECTING PIPING
AND ELECTRICAL WIRING
@ DRAIN HOSE
If your Air Cond几ioner(AC) has a Connected Appliance Information
label located under the front cover as shown below, your AC is
WiFi Connect Enabled. A WiFi communication card is built into the
product allowing it to communicate with your smart phone for remote
monitoring, control and notifications.
Please visit www.haier.com.au/smart or www.haier.co.nz/smart to
learn more about connected appliance featu「es,and to learn what
connected appliance apps will work with you「smart phone.
三I
念
J,�,l:
@
®
®
@
@
@
®
远
@
@
@
@
@
@
@
@
。。。
@
coc, U础吐匀
@
器
`
�
1. Mode display
Opera沁nmode I AUTO I I D I F心IH还T
8 . Additional functions display
Ope,atoo mode louiE计SLEEP
!
HEAL TH
I
TURBO
!Remote o
o
o四叫
Im
Contl the lightening and
extinguishing of the indoor LED
display board.
I
R
砌啦如t�llec画口
Im
国国
2. Signal sending display
3. SWING displ
4. FAN SPEED display
Display
LO
MED
d-dll--1111
HI
I
厂
一
c
i
r
c
u
l
a
t
e
d
7
AUTO
Function: Setting and cancel to
5.LOCK display
the timer and other additional
6. TIMER OFF display
functions.
TIMER ON display
25.RESET button
7. TEMP display
When the remote controller
appears abnormal, use a sharp
pointed article to press this button
to reset the remote.
UV-C lamp starts working)
-
Healthy
airflow
position1-
Healthy
airflow
position 2-Power -Air
sending-A-8 yard --
Le/Right
Swing(This
function
is unavailable
on some
models.)
24.CANCEUCON FIRM button
NOTE:
Cooling only unit do not have displays and functions related
w
ith heating
If the unit which you purchased has healthy function,follow it.If not,please ignore
•
Loading of e batte
1 Remove the batte cover;
2 Load the batteries as illustrated.
2 R-03 batteries, resetting key
(
c
y
l
i
n
d
e
r
)
;
e
s
u
r
e
t
h
a
t
t
h
e
l
o
a
d
i
n
g
i
s
i
n
l
i
n
e
w
i
t
h
t
h
e
"
+
"
/
史
"
;
Note:
3
Load the batte.then put on the
cover again.
•
The distance between the signal transmission head and the rece-
iver hole should be within 7m without any obstacle as well.
•
When electronic-started type fluorescent lamp or change-over
type fluorescent lamp or wireless telephone is installed in the
room, the receiver is apt to be disturbed in receiving the signals,
so the distance to the indoor unit should be shorter.
•
Full display or unclear display during operation indicates the
batteries
have been used up.
Please change batteries.
•
If the remote controller can't run normally during operation, please
remove the batteries and「eloadseveral minutes later.
@
Function: Sleeping HEALTH
(
9 . QUIET button
10.HEAT button
11.COOL button
12.AUTO button
13.FAN SPEED button
14.TIMER button
15.SELF CLEAN button
16.LOCK button
Used to lock buttons and LCD display
17.LIGHT button
Cont
r
ol t
h
e li
gh
tenin
g
and
e
x
tin
g
uis
h
in
g
o
f
t
h
e indoo
r
LED
display boa
r
d.
1
8
. PO
W
ER ON
/
OFF button
19.DR
Y
button
20.TEMP button
21.SWING button
22.HOUR button
23.EXTRA FUNCTION button
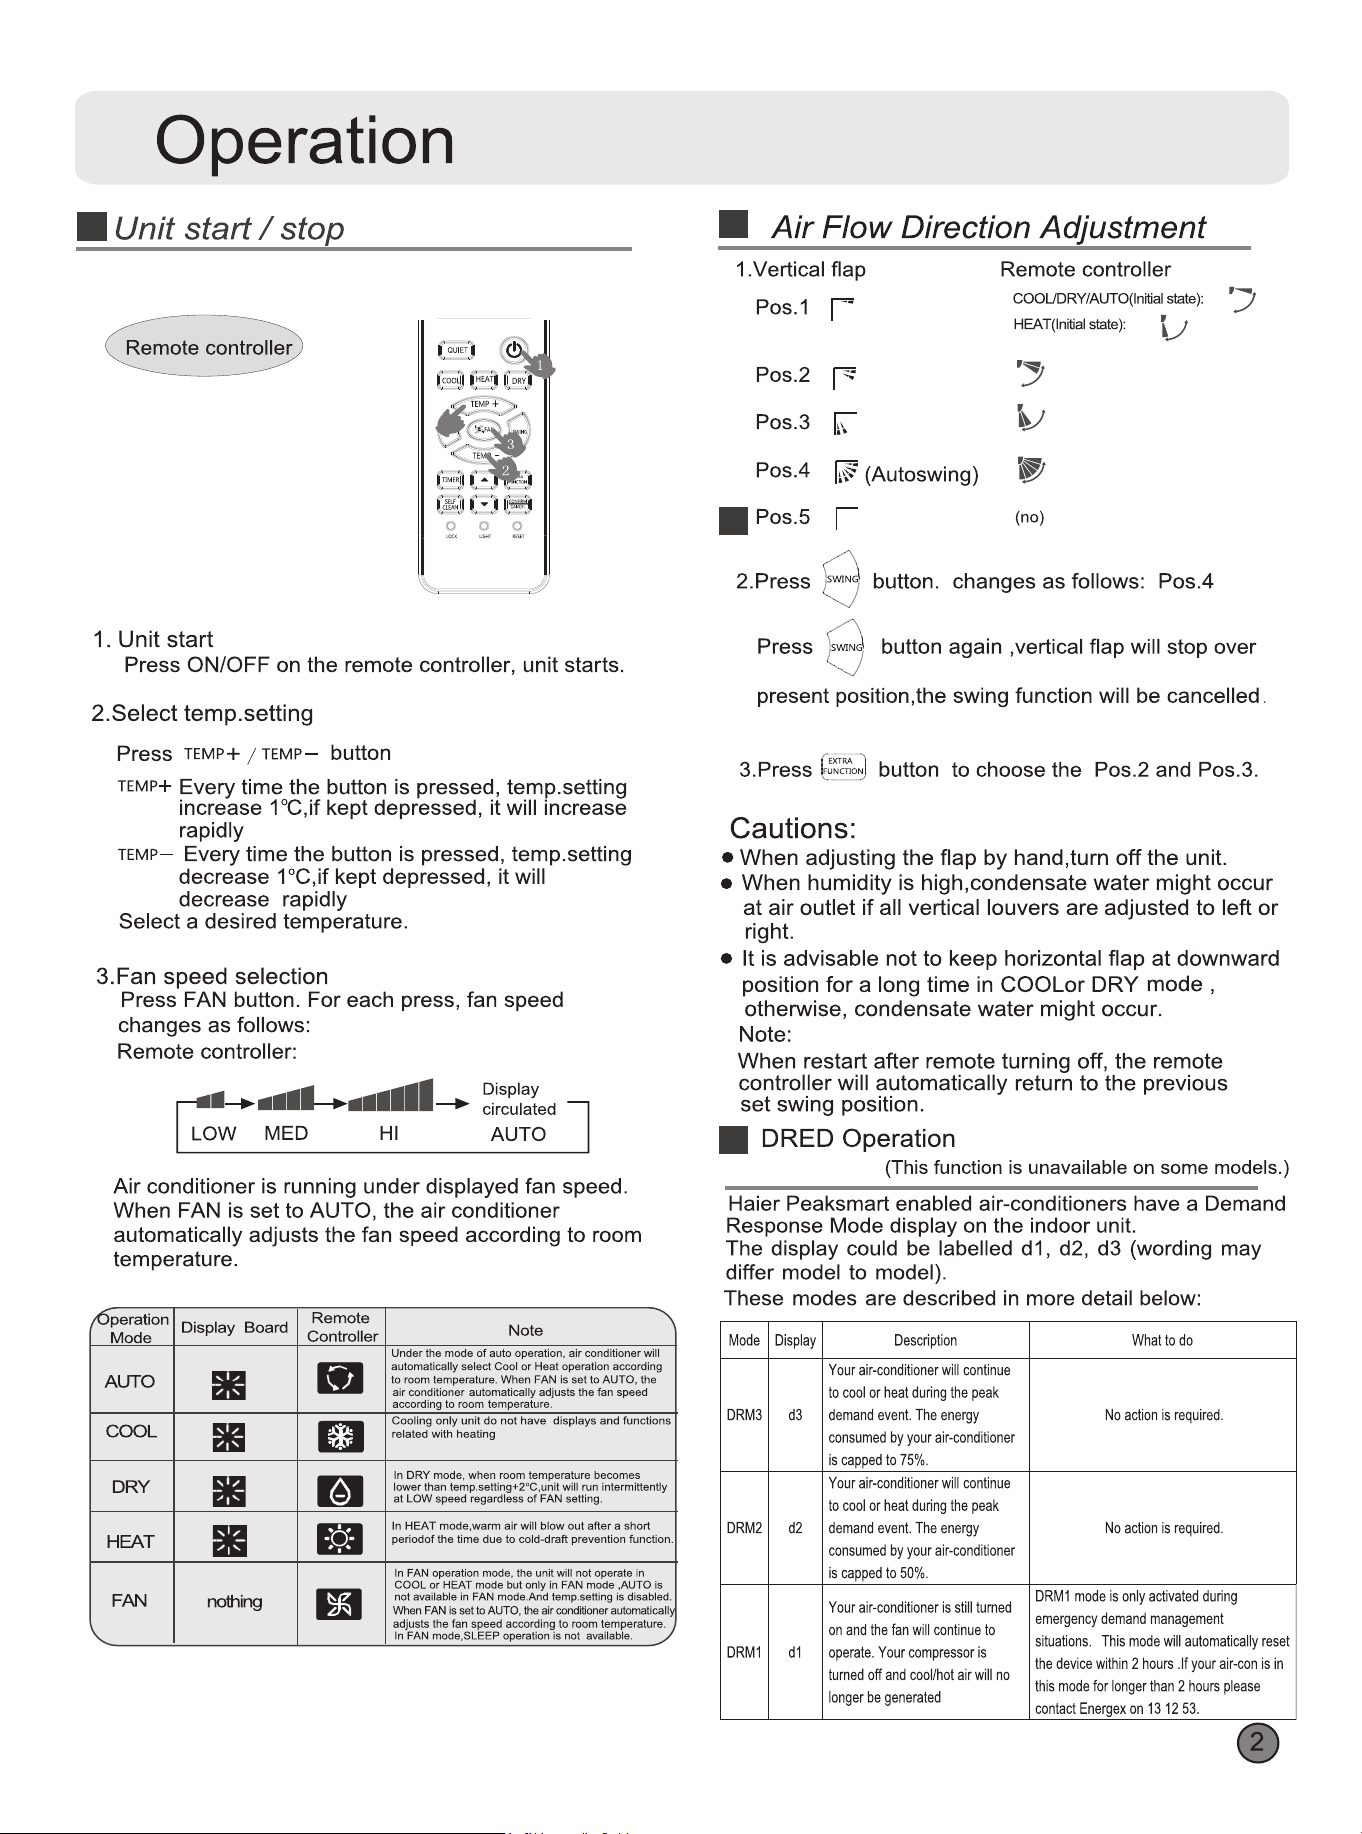
Operation
•er On/O On-O Operation
1.Aer unit starts, select your desired operation mode.
2.Press TIMER button to change TIMER mode. Every
time the button is pressed, display changes as llows:
Remote controller:
......................
--....一一一一....一一一一..
ON -
O
FF
i
O
N -O
FF
, i
OFF -ON
i-BLANK
••••••••••••••••••••••
• 一..一.........一一一一...
0.5h
0.5h
0.5h 0.5h
TIMER ON TIMER OFF TIMER ON-OFF
TIMER OFF-ON
Then select your desired TIMER mode (TIMER ON or
TIMER OFF or TIMER ON-OFF). " ON "or" OFF "will flash.
3.Press T / A button to set time.
A Press the button r each time, setting time in the first
12 hours increased by 0.5 hour every time, aer 12
hours.increased by 1 hour every time.
T Press the button r each time, settiing time in the first
12 hours decreased by 0.5 hour every time, after 12
hours,decreased by 1 hour every time.
It can be adjusted within 24 hours.
4.Confirm timer setting
er adjust the time,pressbuttonand confirm the
time ON or OFF button will not flash any more.
5.Cancel timer setting
Press the言buttonby times until the time display
eliminated.
Hints:
After replacing batteries or a power failure happens, time
setting should be reset.
According to the Time setting sequence of TIMER ON or
TIMER OFF, either Start-Stop or Stop-Start can be achieved.
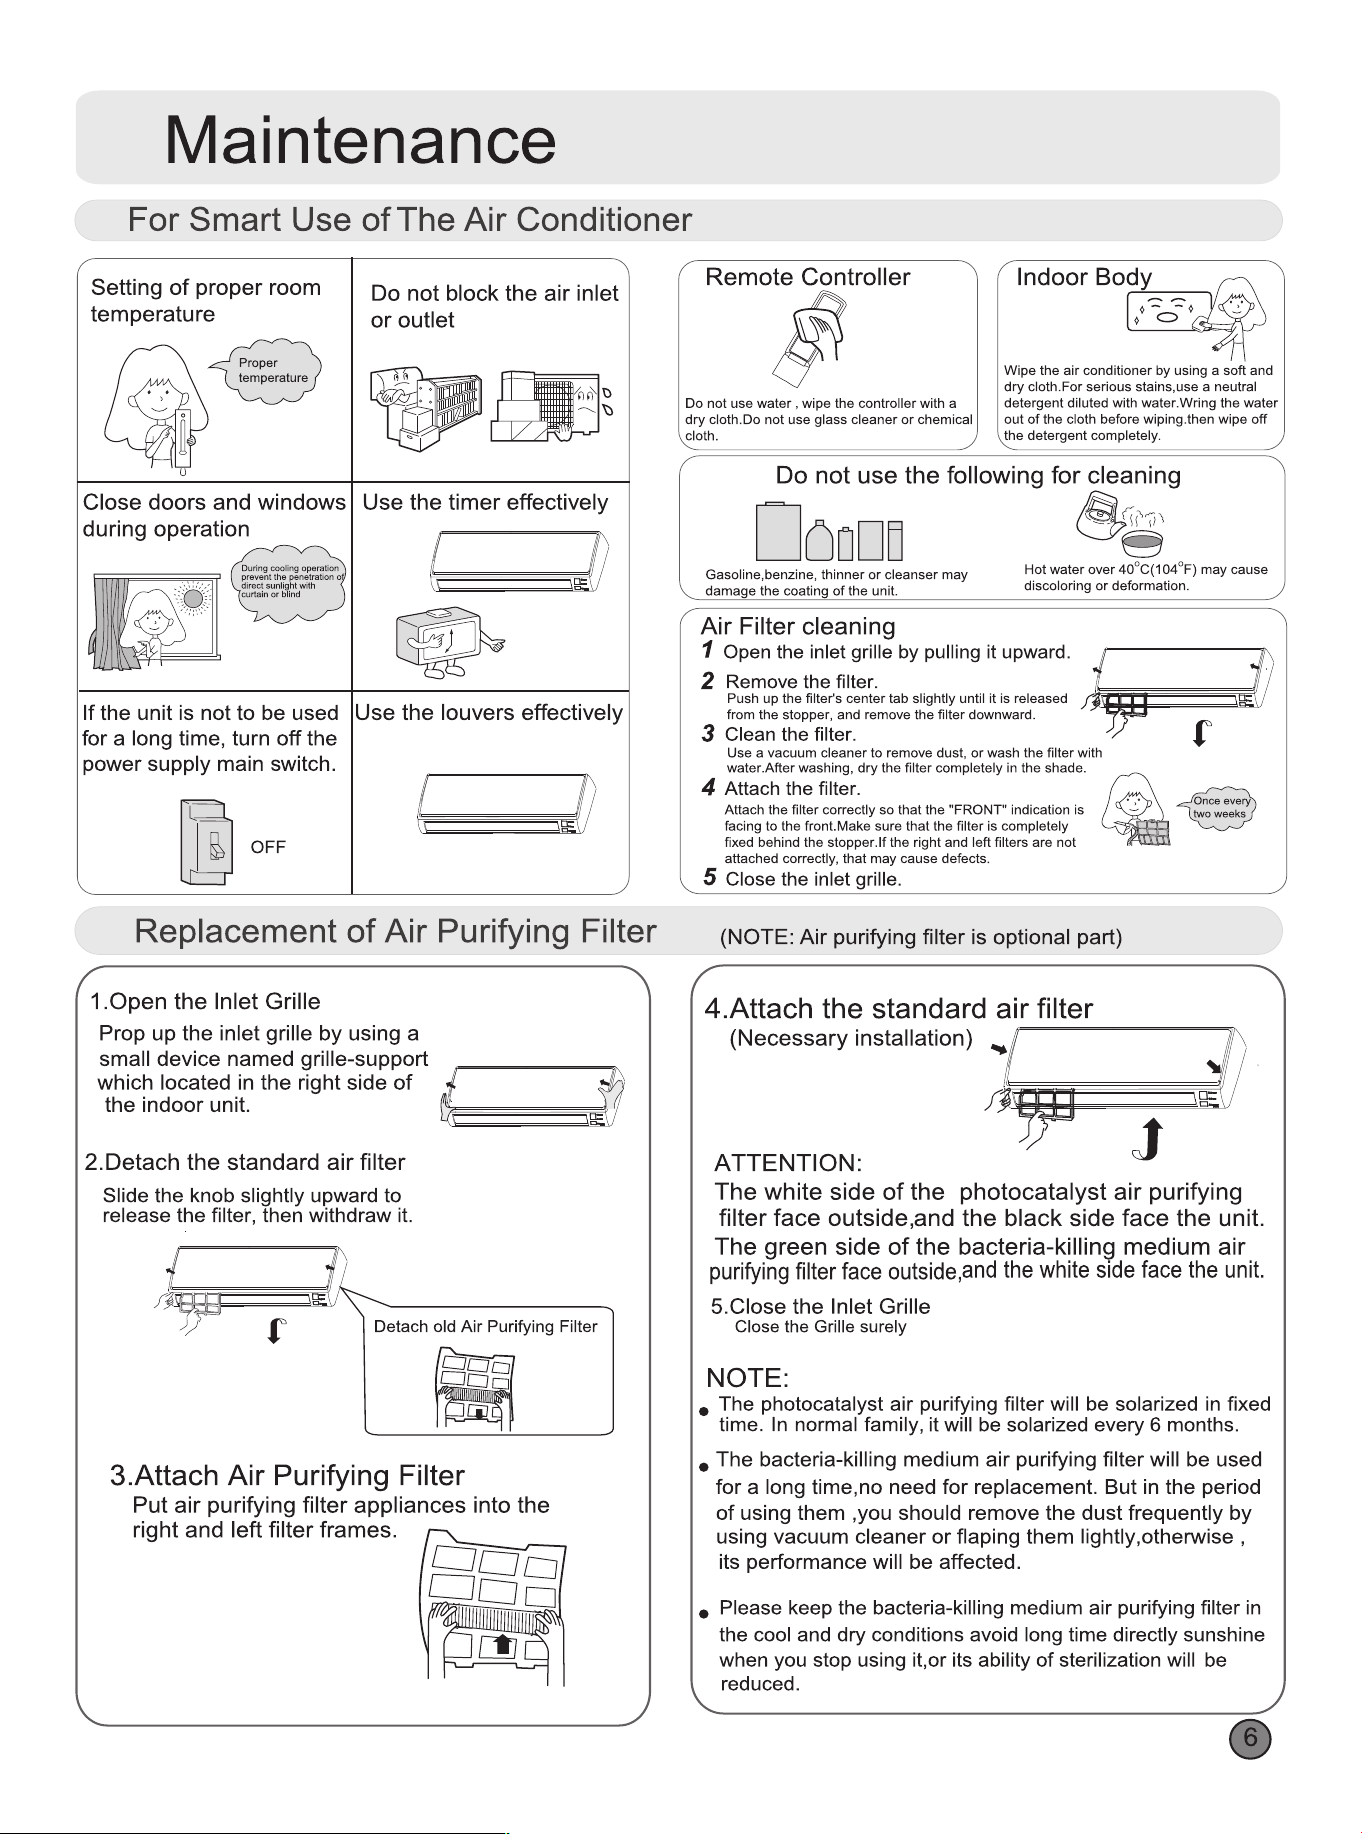
•Se Clean Operation
+Functional description: the purpose of this function is to
clean the evaporator and condenser.
枉ntryand exit, Press self clean button to enter this
function, then it will display "CL" on the panel of the indoor
unit and also on the remote controller. After running 20-30
minutes, this function will exit automatically when the " Pi "
sound is heard twice, then the unit returns to original state.
Under operation process of self clean, pressing the button
repeatedly has no eect and the function will not exit, but
pressing the power o button and other mode button can
make it exit.
•
POWESOFT Operation
(1) POWER Operation
When you need rapid heating or cooling,
you can use this function.
Pressbutton to enter additional options, when cycle
display to�.� 习willflash, and then press,enterto
power function. When cancel the function, please enter
additional options again and to cancel power function.
(2) QUI ET Operation
You can use this function when silence is needed r rest or reading.
Press QUIET button, the remote controller will show飞,
and then achieve to the quiet function. Press again this
QUIET button , the quiet function will be cancelled.
Note:
During POWER operation, in rapid COOL mode , the room
will show inhomogeneous temperature distribution.
Long period QUIET operation will cause eect of not too
cool or not too warm.
•
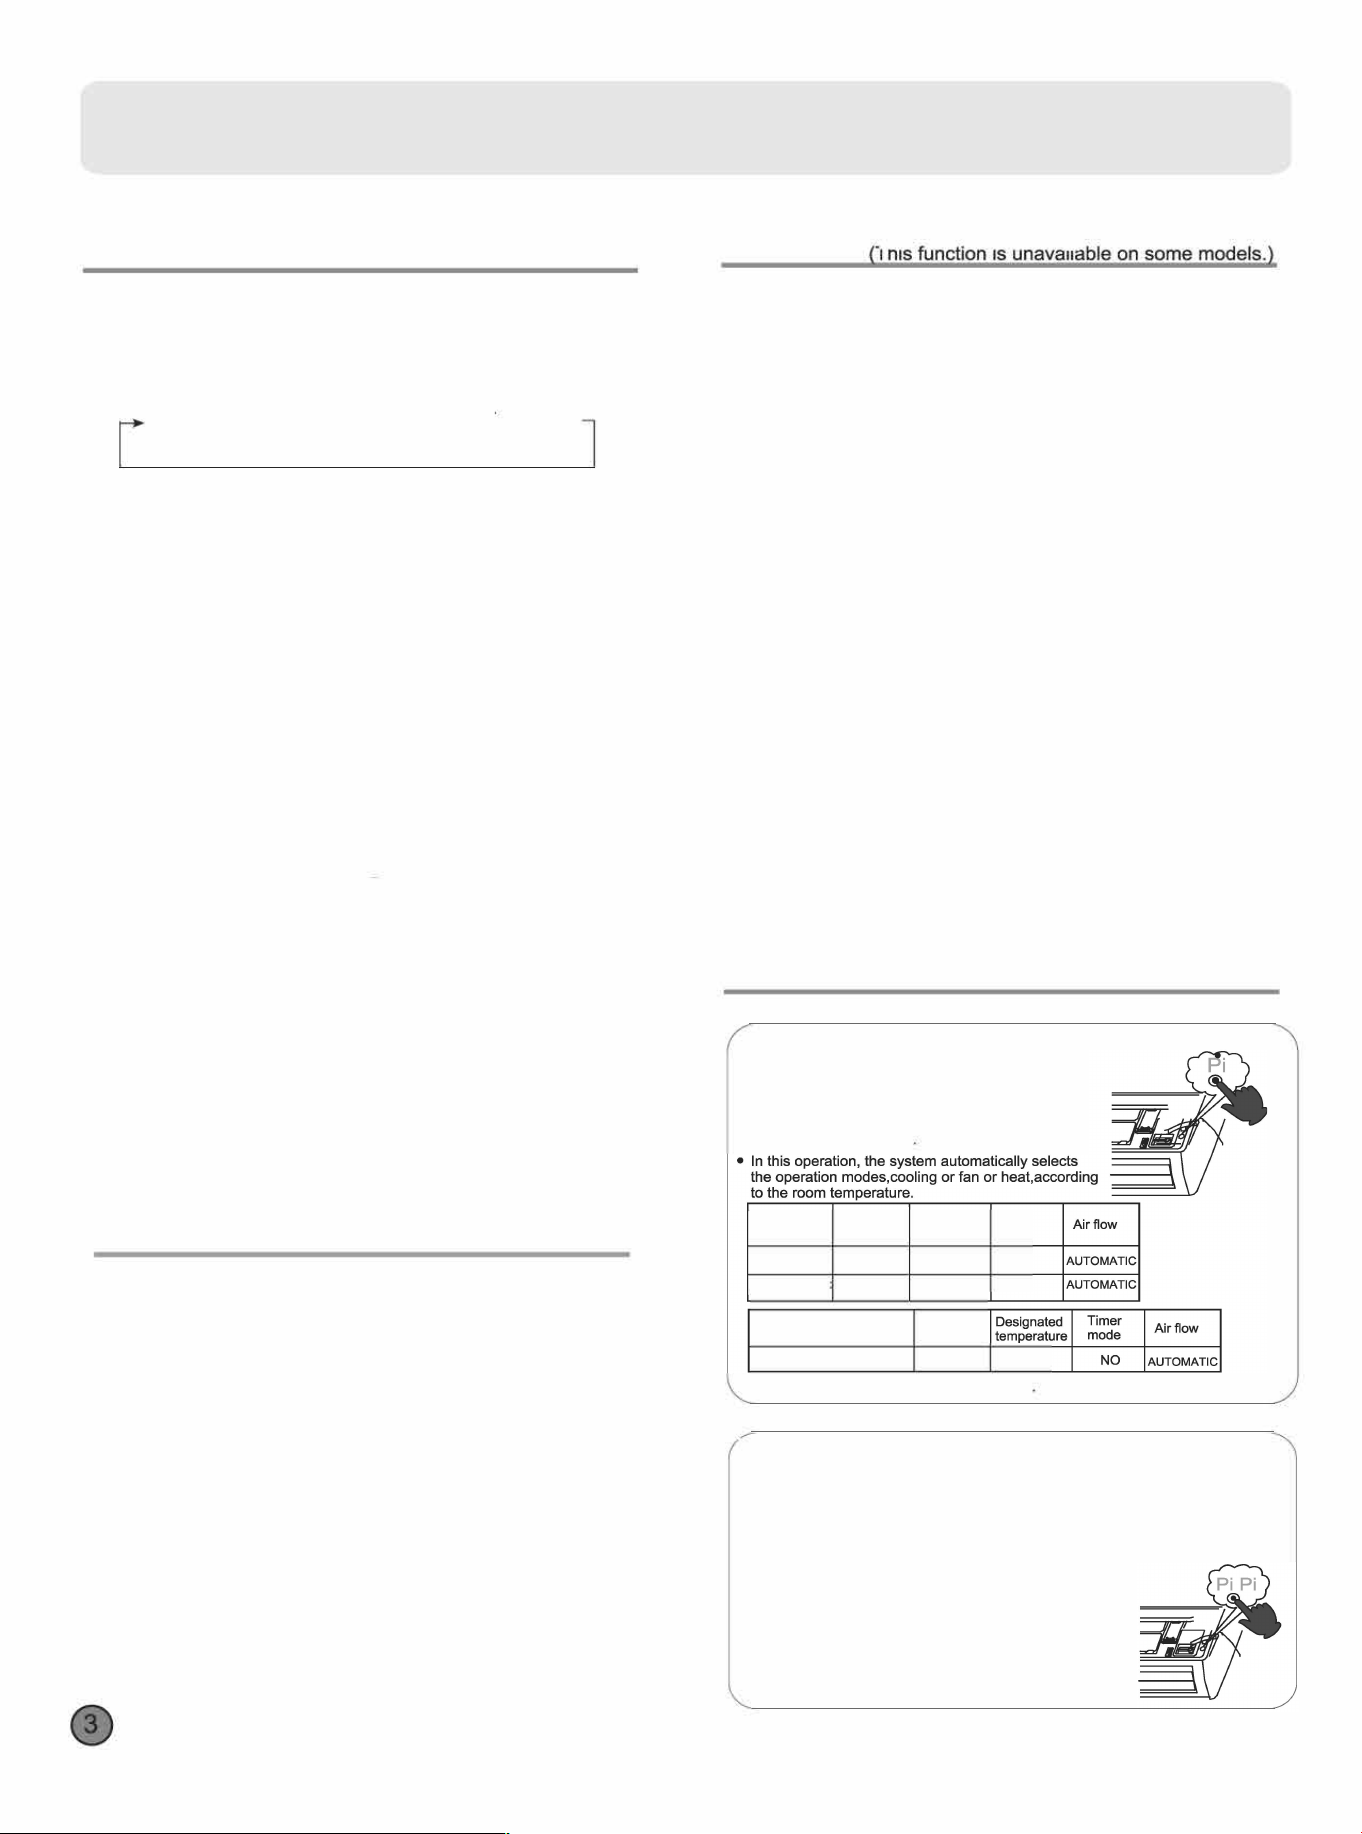
ergency operaon and test operaon
Emergency Operation:
•Use this operation only when the remote controller
is dective or lost.
• When the emergency operation switch is
pressed.the" Pi "sound is heard once, which means
the start of this operation
Room
Operation
Designated
Timer
temperature
mode temperature
mode
ABOVE 23
°
C
COOLI
N
G
26
°
C
NO
BELOW23气
HEAT
23
°
c
NO
(Cooling only uint)
Operation
Room temperature
mode
BELOW23屯
FAN
26
°
C
• It is not possible to opete in d mode
Test operation:
Test operation switch is the same as emergency switch.
•
Use this switch in the test operation when the om temperature is below
16·c, do not use it in the normal operation.
•Continue to press the test operation switch r more
than 5 seconds. After you hear the "Pi" sound ice,
release your finger fm the switch: the cooling
operation stas with the air flow speed "Hi".
•Aer 30 minutes, test opetion ends automatically.
Operation
•
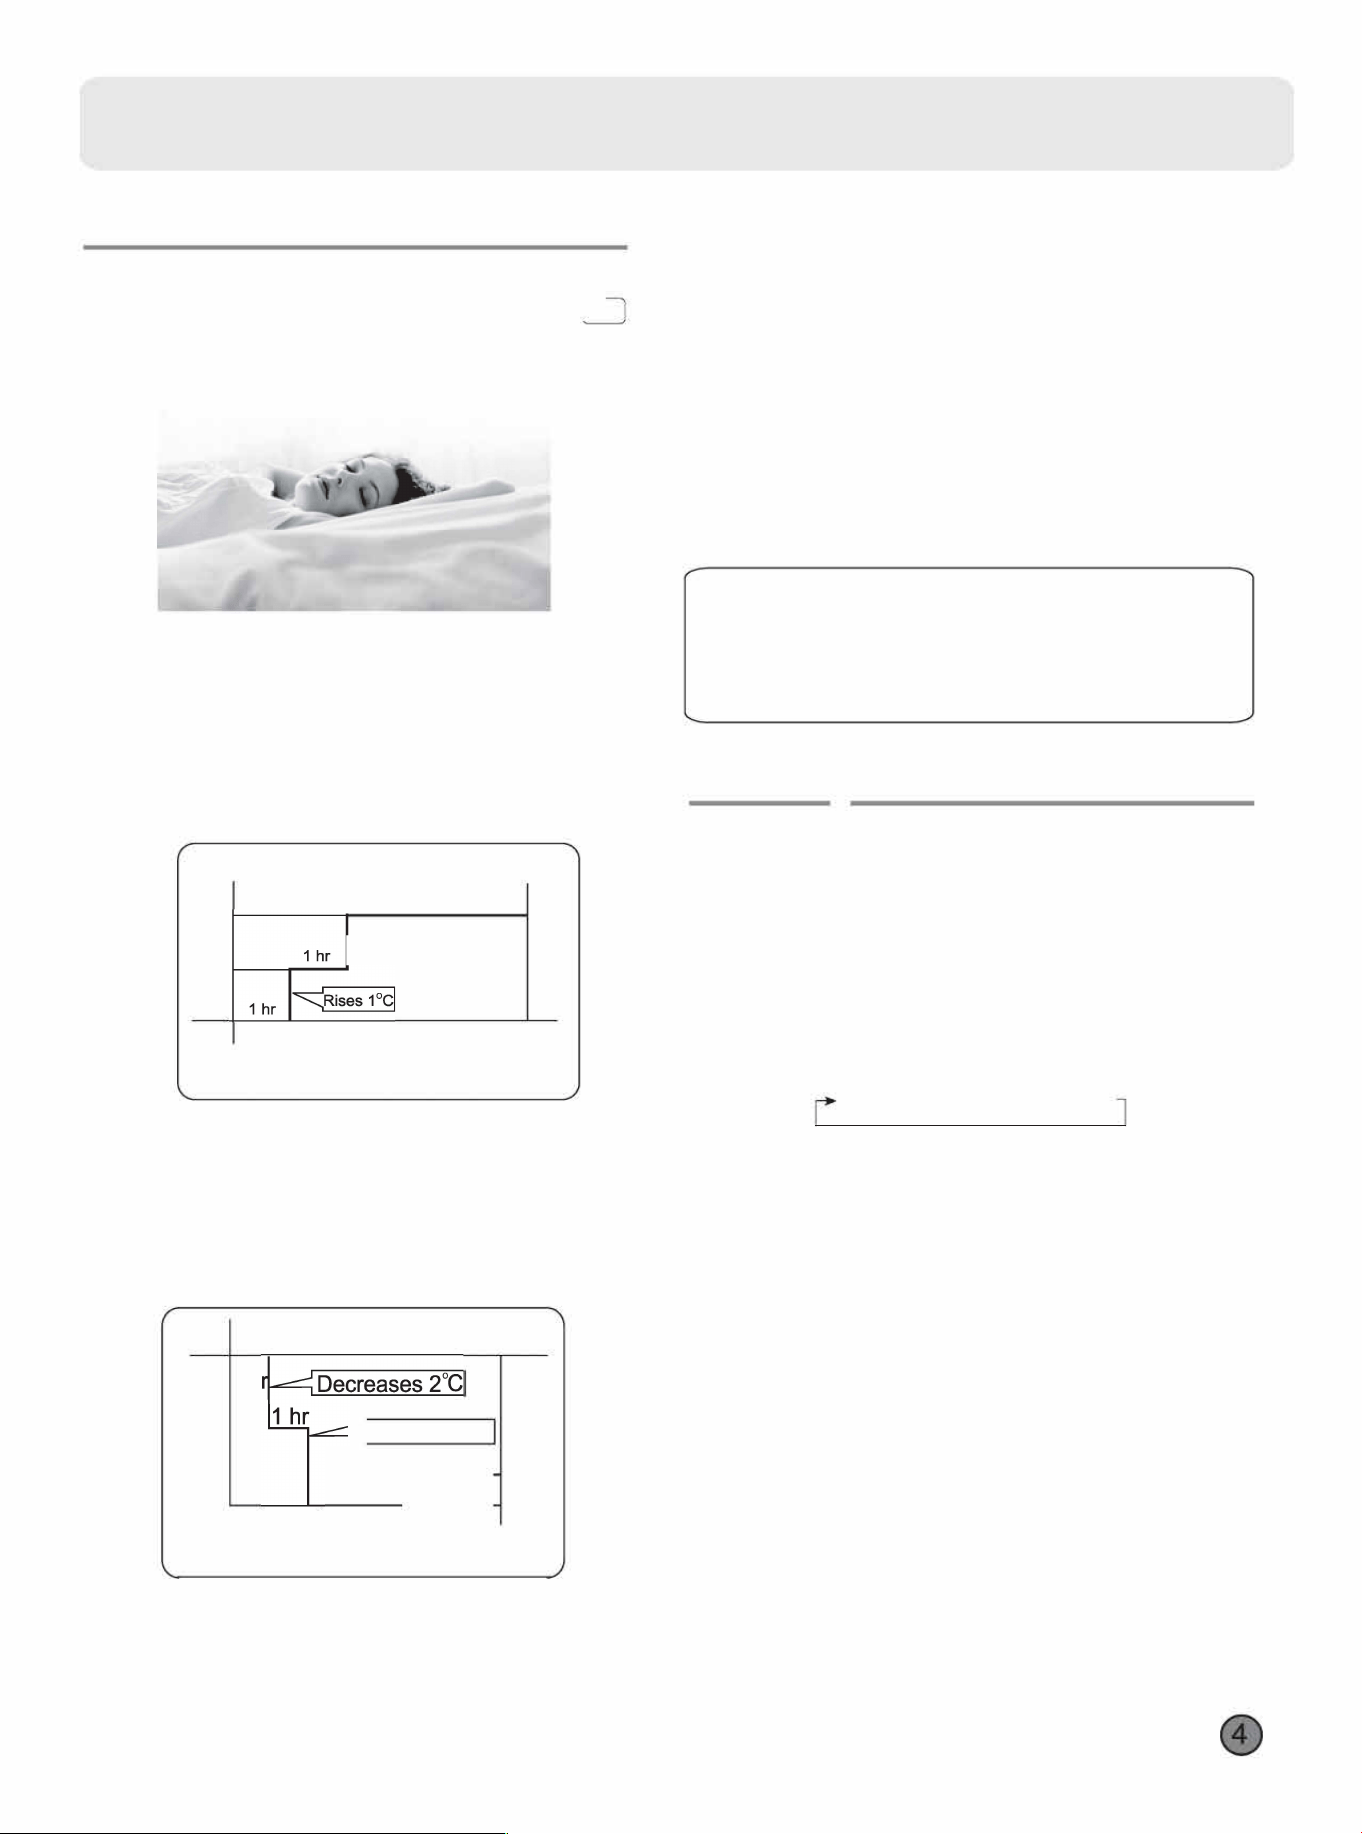
Comfoable SLEEP
p「essbuttonto enter additional options, when
cycle display to四,过willflash. And then press
enter to sleep function.
Operation Mode
1.In COOL,DRY mode
1 hour aer SLEEP mode starts.temp will become
1
°
C higher than temp setting. Aer another 1 hour,
temp risesby 1
°
C futher .The unit will run for further
6 hours then stops Temp is higher than temp setting
so that room temperature won't be too low for your
sleep.
SLEEP operation sta「ts
SLEEP operation stops
Approx.6hrs
1� 二
Temp.setting Unit stop
In COOL, DRY mode
2.ln HEAT mode
1 hour after SLEEP mode starts, temp will become
沪Clower than temp setting. Aer another 1 hour,
temp decrease by 2 further. Aer more another
3 hours, temp rises by 1
°
c further.The unit will run
r further 3 hours then stops.Temp is lower than
temp setting so that room temperature won't be too
high for your sleep.
Temp.setting
Unit stop
1
1 h
ecreases 2
3 h
rs
3 hrs二
SLEEP SLE.EP
operation starts
operation stops
In HEAT mode
3.ln AUTO mode
The unit operates in corresponding sleep mode
corresponding sleep mode adapted to the
automatically seleed opetion mode.
4.In FAN mode
It has no SLEEP function.
5.When comfortable sleeping function is set to 8 hours the
comrtable sleeping time can not be adjusted.When TIMER
function is set,the comfortable sleeping function can't be set
up. Aer the sleeping function is set up,if user resets
TIMER function, the sleeping function will be cancelled; the
machine will be in the state of timing-on,if the two modes
are set up at the same time,either of their operation time is
ended first, the unit will stop automatically,and the other
mode will be cancelled.
Note
When TIMER function is set, the sleeping function can't be
set up .After the sleeping function is set up,if user resets
TIMER function, the sleeping function will be cancelled; the
machine will be in the state of timing-on.
Power Failure Resume Function
If the unit is staed for the ti「st time, the compressor will not
sta running unless 3 minutes have elapsed. When the power
resumes aer power failure, the unit will run automatically,
and 3 minutes later the compressor stas running.
•
Heal
y
ailow Operation
1.Press to starting
Setting the comrt work conditions.
2.The setting of healthy airflow function
Pressbuttonto enter additional options.Press this
button continuously, the louvers location will cycle between
in the following three locations, to choose the swing location
what you needed,and then pressbuttonto confirm.
Healthy
Healthy
'
a
i
ow_,
Pre
s
ent
J�
a
i
ow
-
p
o
s
邮
n
u
p
warder
downwarder
3.The cancel of the healthy airflow function
Press卢buttonto enter additional options,Press this
button continuously, the louvers location will cycle between
in the following three locations again,and then press
button to cancel.
Notice: Do not direct the flap by hand. Otherwise, the
grille will run incorrectly. If the grille is not run correctly, stop
r a minute and then sta, adjusting by remote
controller.
Note:
1.Aer setting the healthy ailow function, the position
grill is fixed.
2.ln cooling, it is better to select the尸mode.
3.ln cooling and dry, using the air conditioner for a long
time under the high air humidity, condensate water may
occur at the grille .

Operation
•H�TH Operation
(This function is unavailable on some models.)�
Press button to enter additional options, when cycle
display to �
,
will flash, and then press
,
enter to
HEALTH function.
W
hen cancel the function, please enter
additional options again and to cancel HEALTH function.
UV sterilization function: it uses the c-band with the most
eective sterilization eect in ultraviolet radiation to remove
harmful micro-organisms such as bacteria in the air, which
has remarkable effects to make the ai「 healthy.
Attention:
1.It is recommended to turn on the UV sterilization
function for 1-2 hours in one day, longer time will
aect the life of the UV lamp.
2.Do not look directly at the UV lamp or touch it
with your hand when the sterilizing function is on.
Please turn o the sterilizing function before
opening the panel.
3.Tinged blue light may appear near the air
conditioning inlet when the sterilizing function is
on.
4.Only when the internal fan starts and health
function turned on, the UV lamp will be lighted.
5