
For your safety and to achieve the best possible installation of this cabinet,
James Martin Vanities always recommends you consult with a professional contractor.
Two people are required for the assembly and installation of these cabinets.
Important Notes:
This vanity cabinet may be used freestanding, or may be mounted to a wall (floating). If you are using this cabinet as
a freestanding unit with the stainless steel legs, please follow the instructions on pages 05 - 06 *.
If you are using this cabinet as a wall mounted (floating) unit, please refer to pages 01 - 04 and 06 * .
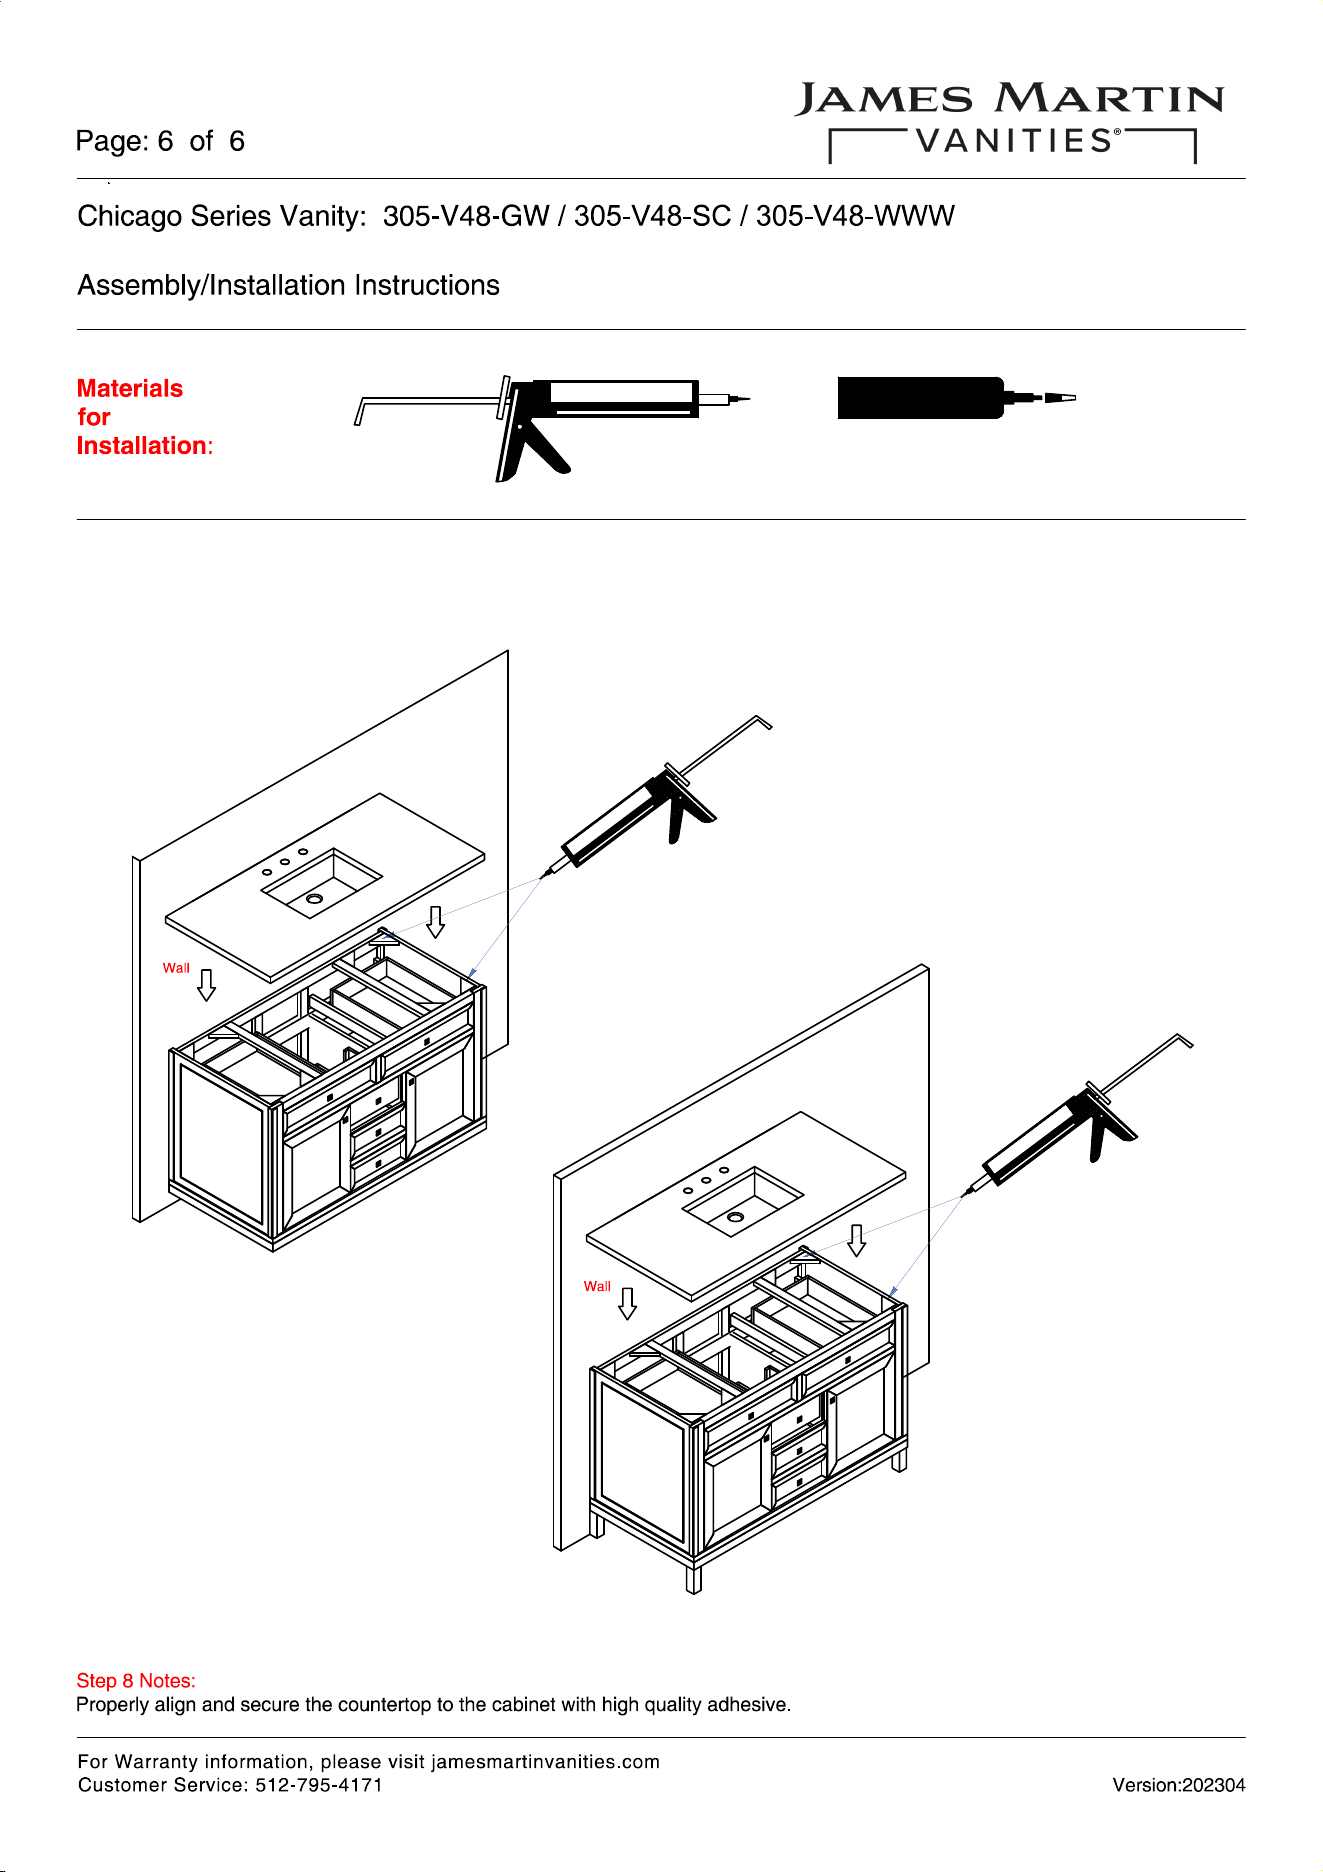
Chicago Series Vanity: 305-V48-GW / 305-V48-SC / 305-V48-WWW
Assembly/Installation Instructions
Materials
for
Installation:
Pencil
Tape
Measuring
Level
Step 1 Notes:
The metal mounting brackets have been pre-installed to the
backside of the cabinet 18 1/4" from the bottom of the
cabinet, remove one piece from the backside of the cabinet .
Step 2 Notes:
Draw a horizontal line on the wall at your desired height.
For this cabinet, most people use a height of 22"
Wall
Center line
A pre-attached metal mounting
(French Cleat) brackets(two pieces)
a
22"
back of vanity cabinet
B
a
b
18 1/4"
Page: 1 of 6
Version:202304
For Warranty information, please visit jamesmartinvanities.com
Customer Service: 512-795-4171
Wall stud
Wall stud
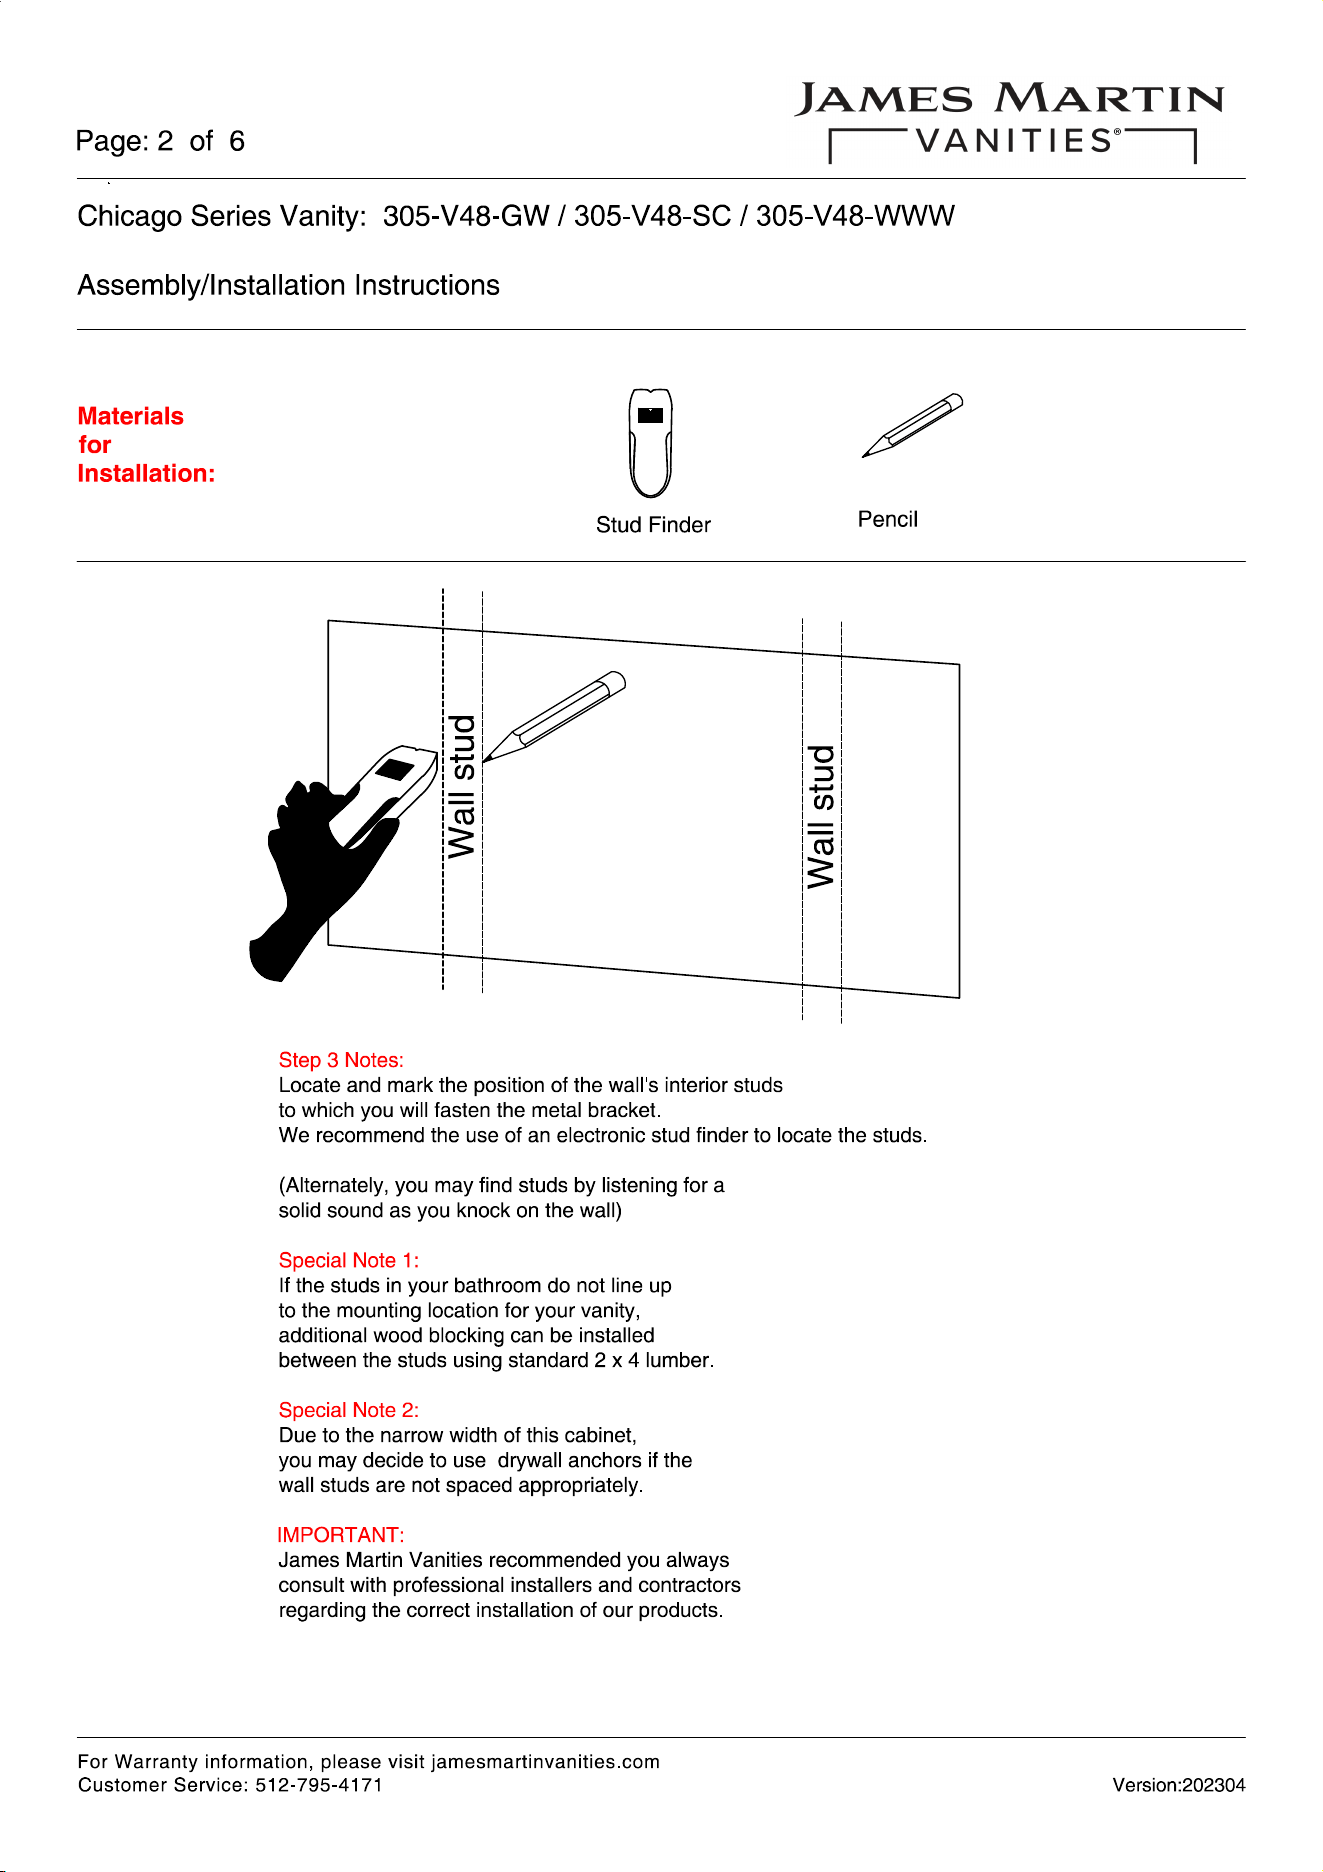
Step 3 Notes:
Locate and mark the position of the wall's interior studs
to which you will fasten the metal bracket.
We recommend the use of an electronic stud finder to locate the studs.
(Alternately, you may find studs by listening for a
solid sound as you knock on the wall)
Special Note 1:
If the studs in your bathroom do not line up
to the mounting location for your vanity,
additional wood blocking can be installed
between the studs using standard 2 x 4 lumber.
Special Note 2:
Due to the narrow width of this cabinet,
you may decide to use drywall anchors if the
wall studs are not spaced appropriately.
IMPORTANT:
James Martin Vanities recommended you always
consult with professional installers and contractors
regarding the correct installation of our products.
Materials
for
Installation:
Stud Finder
Pencil
Page: 2 of 6
Chicago Series Vanity: 305-V48-GW / 305-V48-SC / 305-V48-WWW
Assembly/Installation Instructions
Version:202304
For Warranty information, please visit jamesmartinvanities.com
Customer Service: 512-795-4171
Materials
for
Installation:
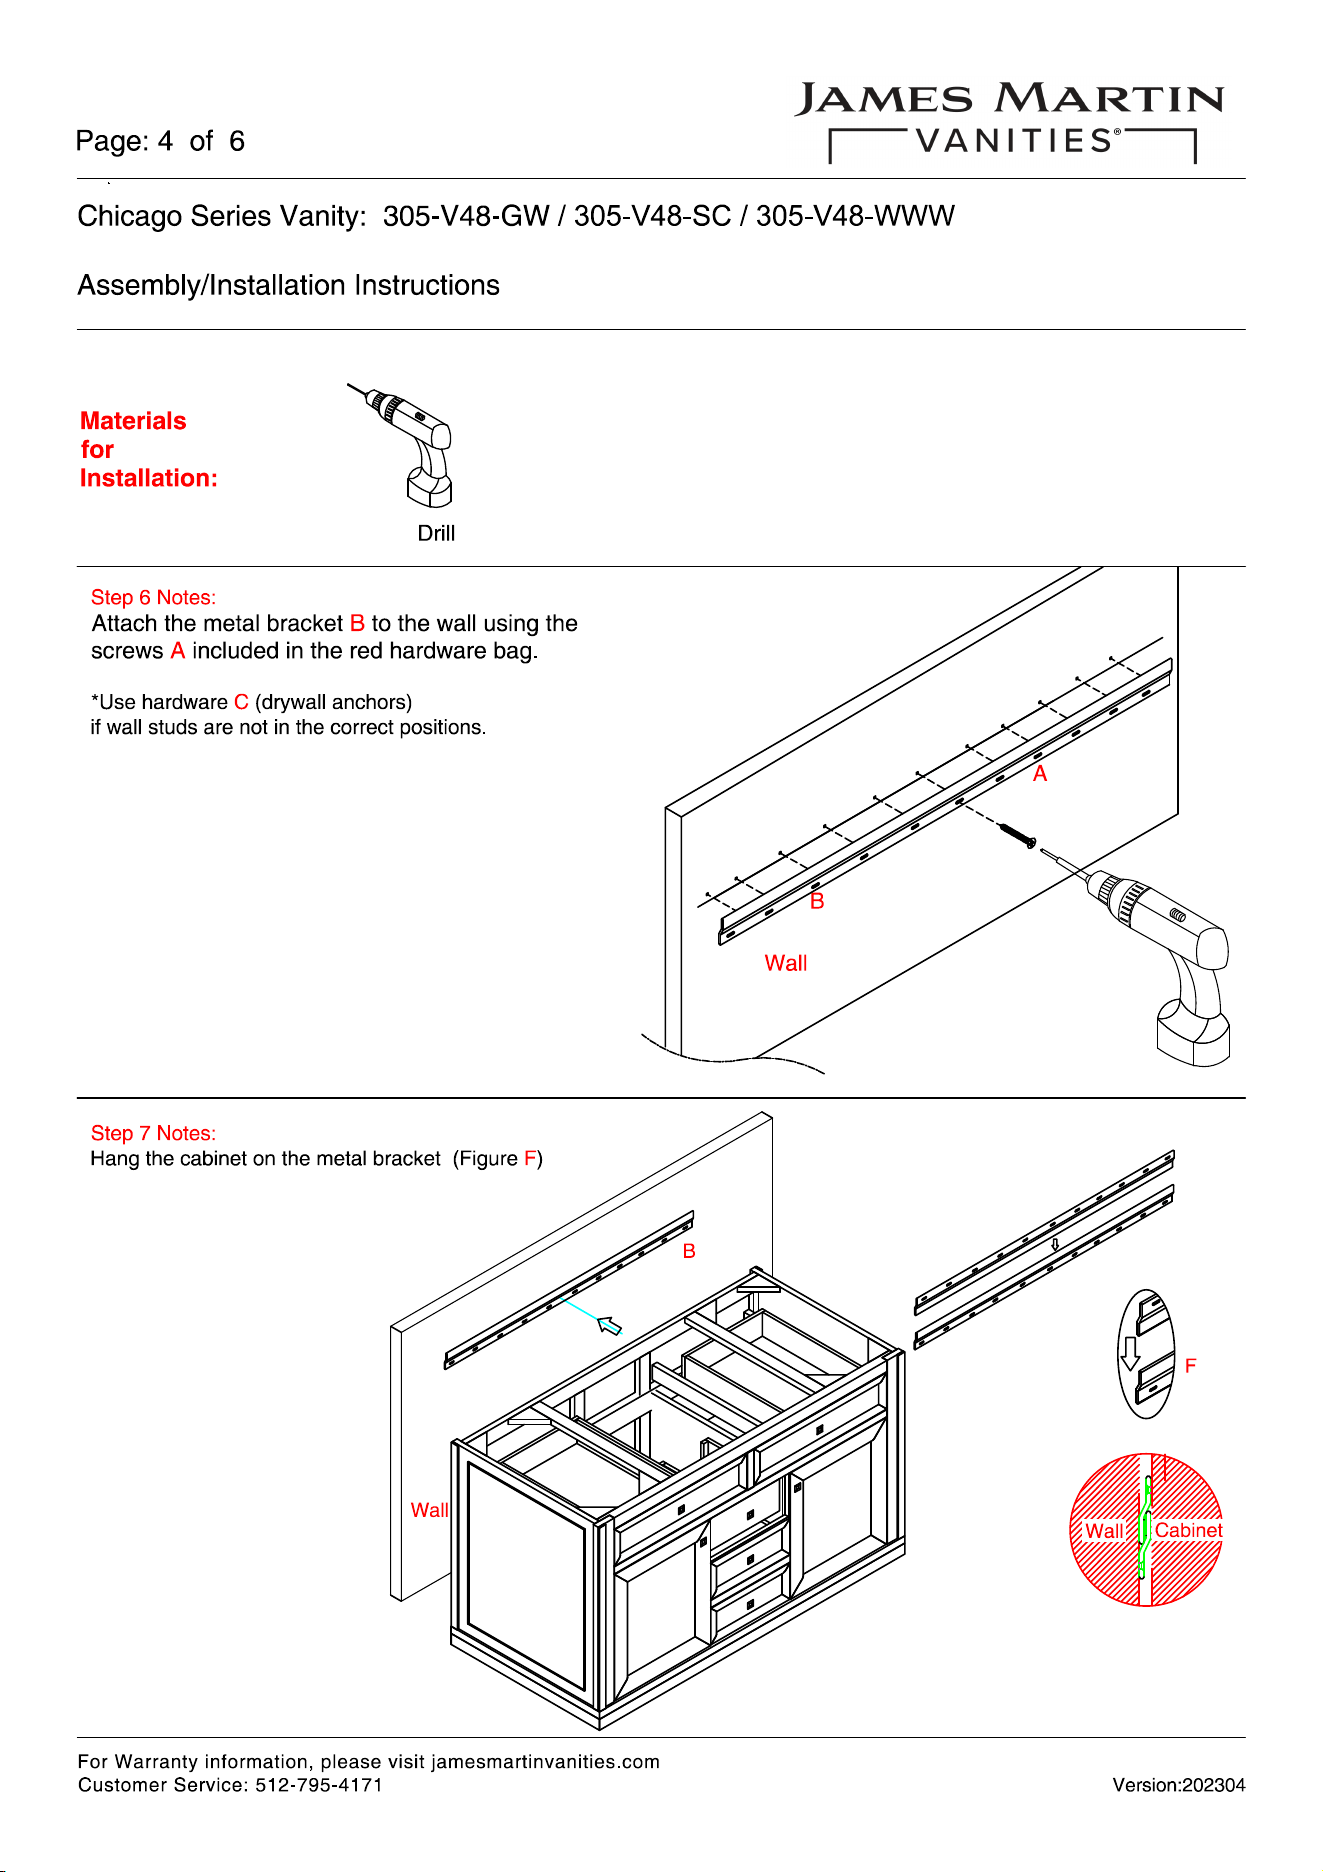
Drill
Pencil
Step 4 Notes:
After you have located the wall studs, position the metal bracket so the holes align
with the center points of the studs. Mark these positions with a pencil.
C
Wall
Center line
Step 5 Notes:
Drill holes for the screws in the positions you have marked with the pencil.
Drill the holes' deepth no less than 1 1/2"insert hardware C (drywall anchors) to
the holes by using hammer if wall studs are not in the correct positions
Hammer
A=11PCS screws for bracket Ø4*40mm
B=1PC metal bracket (42 1/8" 1070mm)
C=11PCS drywall anchors (optional)* Ø8*38mm
Wall
Center line
B
Page: 3 of 6
Chicago Series Vanity: 305-V48-GW / 305-V48-SC / 305-V48-WWW
Assembly/Installation Instructions
Version:202304
For Warranty information, please visit jamesmartinvanities.com
Customer Service: 512-795-4171
Materials
for
Installation:
Drill
Step 6 Notes:
Attach the metal bracket B to the wall using the
screws A included in the red hardware bag.
*Use hardware C (drywall anchors)
if wall studs are not in the correct positions.
Step 7 Notes:
Hang the cabinet on the metal bracket (Figure F)
F
Wall
Cabinet
A
B
Wall
Wall
B
Page: 4 of 6
Chicago Series Vanity: 305-V48-GW / 305-V48-SC / 305-V48-WWW
Assembly/Installation Instructions
Version:202304
For Warranty information, please visit jamesmartinvanities.com
Customer Service: 512-795-4171
Step 2b Notes:
Attach the countertop to the cabinet, secure the bolts (D) by turning the Allen Wrench (E)
E= 1 pc Allen Wrench #05
D = 8 pcs Bolt 5/16" x 3/4"
F= 8 pcs Spring Washer 5/16"
G = 8 pcs Flat Washer
Ø19mm
H = 4 pcs Metal Foot 83*83*127mm
Step1b Notes:
Place the vanity cabinet upside down on a blanket or
other soft material to prevent scratching.
Page: 5 of 6
Chicago Series Vanity: 305-V48-GW / 305-V48-SC / 305-V48-WWW
Assembly/Installation Instructions
Version:202304
For Warranty information, please visit jamesmartinvanities.com
Customer Service: 512-795-4171
Materials
for
Installation:
Step 8 Notes:
Properly align and secure the countertop to the cabinet with high quality adhesive.
Wall
Wall
Page: 6 of 6
Chicago Series Vanity: 305-V48-GW / 305-V48-SC / 305-V48-WWW
Assembly/Installation Instructions
Version:202304
For Warranty information, please visit jamesmartinvanities.com
Customer Service: 512-795-4171