UD.6L0201D1843A01
DS-2C E56C2T-I RP
0100001050127
Privacy Noce
Surveillance laws vary by jurisdicon. Check all
relevant laws in your jurisdicon before using
this product for surveillance purposes to
ensure that your use of this product conforms.
UD.6L0201D1843A01
DS-2C E56C2T-I RP
0100001050127
Privacy Noce
Surveillance laws vary by jurisdicon. Check all
relevant laws in your jurisdicon before using
this product for surveillance purposes to
ensure that your use of this product conforms.
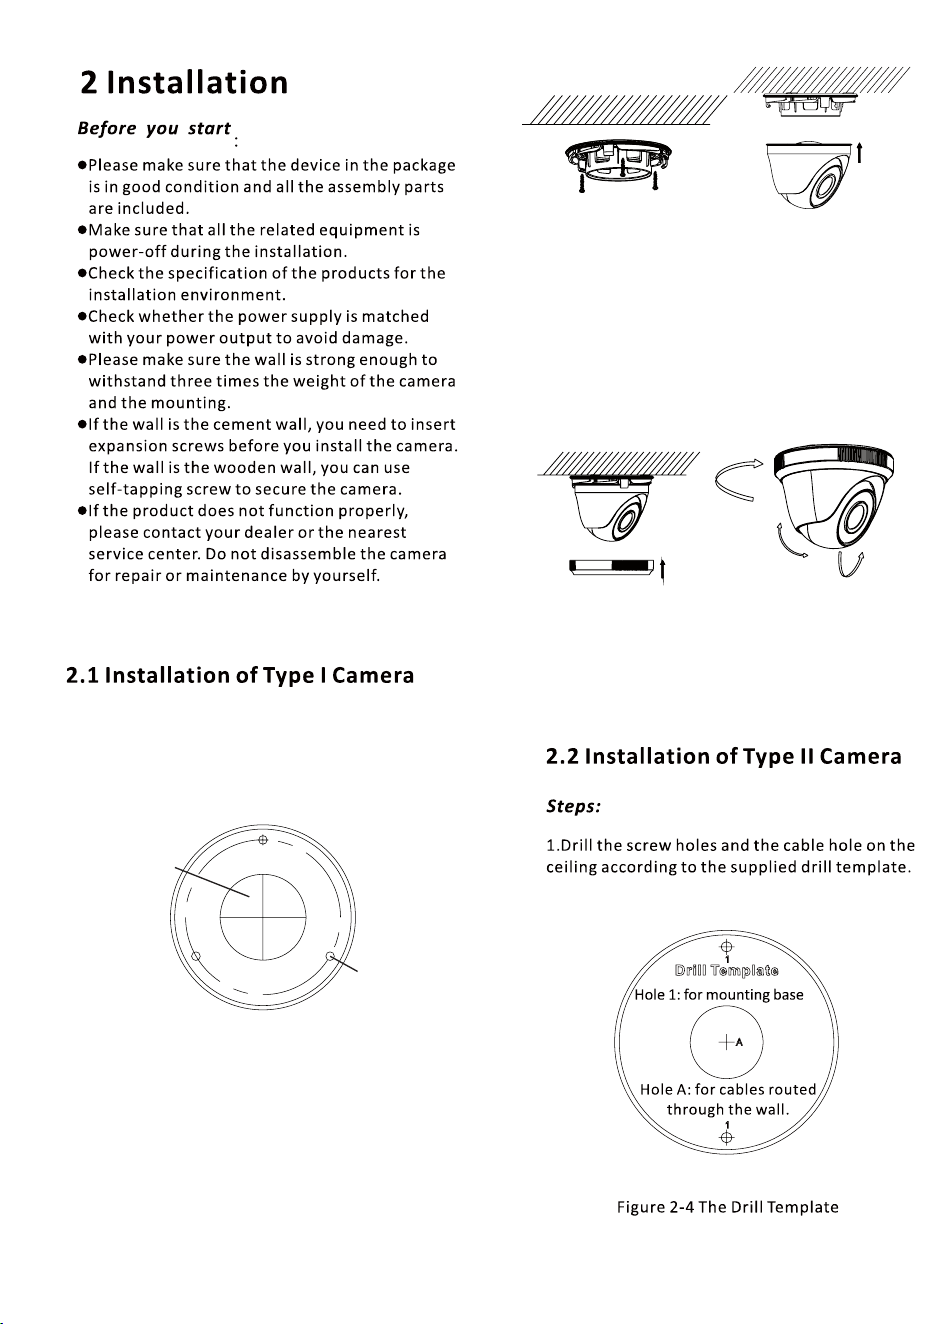
1.Drill the screw holes and the cable hole on the
ceiling according to the supplied drill template.
Steps:
Figure 2-5 The Drill Template
Screw Hole
Cable Hole
7.
Adjust the camera according to the figure 2-7 to
get an optimum angle and tighten the trim ring.
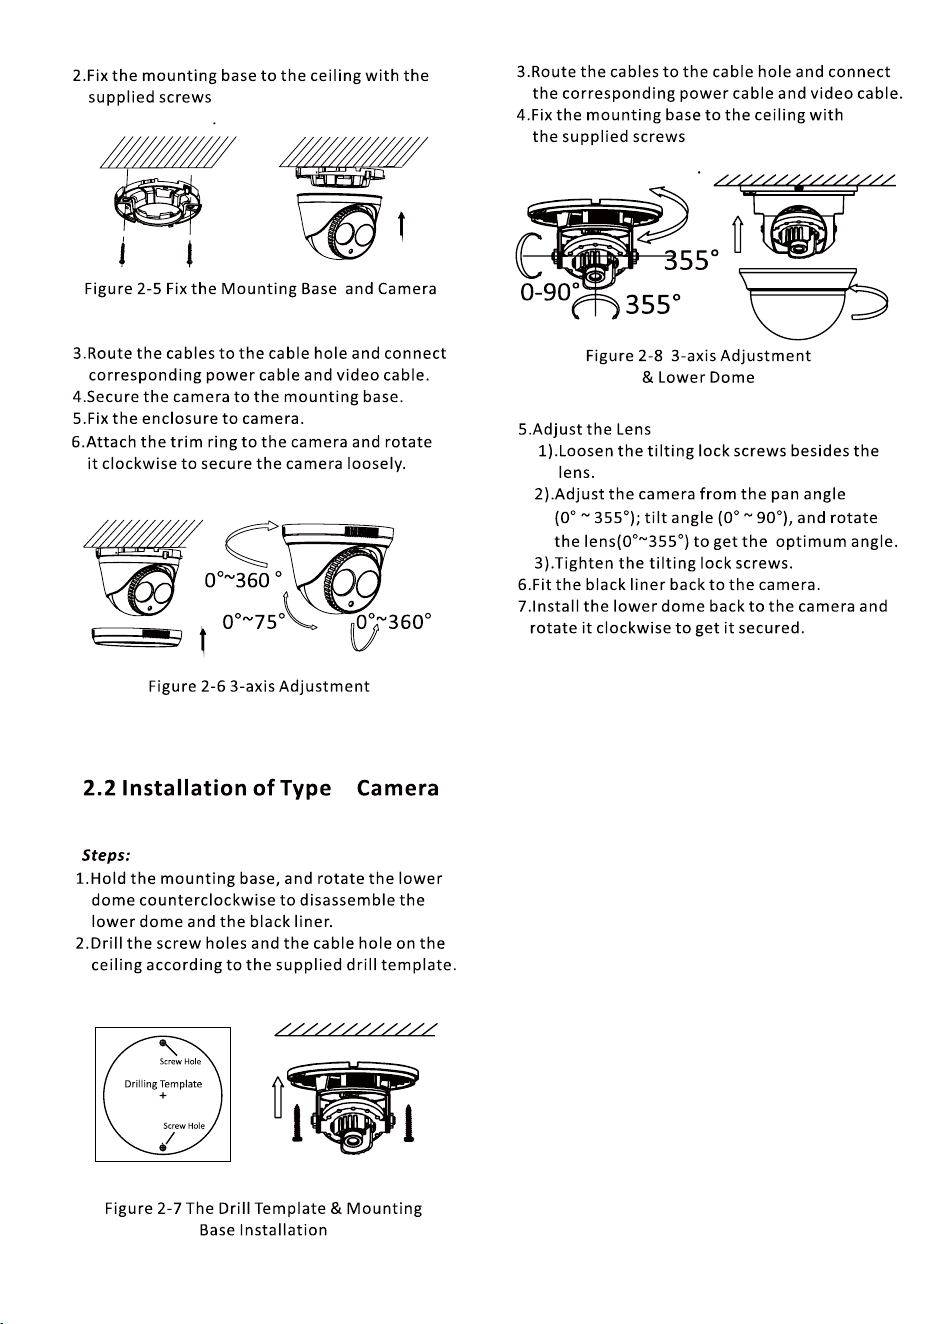
2.Fix the mounting base to the ceiling with the
supplied screws.
Figure 2-6 Fix the Mounting Base and Camera
3.Route the cables to the cable hole and connect
corresponding power cable and video cable.
4.Secure the camera to the mounting base.
5.Fix the enclosure to camera.
6.Attach the trim ring to the camera and rotate
it clockwise to secure the camera loosely.
0 ~360° °
0 ~75° °
0 ~360° °
Figure 2-7 3-axis Adjustment
III
1.Drill the screw holes and the cable hole on the
ceiling according to the supplied drill template.
Steps:
Figure 2-5 The Drill Template
Screw Hole
Cable Hole
7.
Adjust the camera according to the figure 2-7 to
get an optimum angle and tighten the trim ring.
2.Fix the mounting base to the ceiling with the
supplied screws.
Figure 2-6 Fix the Mounting Base and Camera
3.Route the cables to the cable hole and connect
corresponding power cable and video cable.
4.Secure the camera to the mounting base.
5.Fix the enclosure to camera.
6.Attach the trim ring to the camera and rotate
it clockwise to secure the camera loosely.
0 ~360° °
0 ~75° °
0 ~360° °
Figure 2-7 3-axis Adjustment
III