OM 8128 E A.7
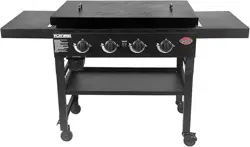
2-Burner Gas Griddle
Keep your receipt with
this manual for Warranty.
CUSTOMER SERVICE
1-912-638-4724
Service@CharGriller.com
Model #8128
Contents of this manual are Trademarked and Copyrighted by Char-Griller
®
| A&J Manufacturing
Using the information contained in this manual without consent of Char-Griller
®
and/or A&J Manufacturing is strictly prohibited.
OWNER’S MANUAL
LEARN HOW TO SEASON
YOUR NEW GRIDDLE!
TABLE OF CONTENTS
Safety Warnings & Warranty............................... A-1
Assembly Instructions ..................................... B-1
Product Usage .................................................. C-1
Recipes .............................................................. D-1
Accessories ....................................................... E-1
If you smell gas:
1. Shut off gas to the appliance.
2. Extinguish any open ame.
3. If odor continues, keep away from the
appliance and immediately call your gas
supplier or your re department.
1. Do not store or use gasoline or other
ammable liquids or vapors in the vicinity
of this or any other appliance.
2. An LP cylinder not connected for use
shall not be stored in the vicinity of this
or any other appliance.
Danger Warning
Warning
For Outdoor Use Only.
A-1
A propane gas cylinder is required for operation. This gas grill is not intended for
commercial use.
SAVE THESE INSTRUCTIONS FOR FUTURE REFERENCE. IF YOU ARE ASSEMBLING
THIS UNIT FOR SOMEONE ELSE, GIVE THIS MANUAL TO HIM OR HER TO SAVE FOR
FUTURE REFERENCE.
WARNING:
Improper installation, adjustment, alteration, service, or maintenance could cause injury or property
damage. Read the installation, operation, and maintenance instructions thoroughly before assembling
or servicing this equipment. Failure to follow these instructions could result in re or explosion that could
cause property damage, personal injury, or death.
DANGER:
DO NOT use gas grill for indoor cooking or heating. TOXIC fumes can accumulate and cause
asphyxiation. Do not use in or on boats or recreational vehicles.
WARNING:
Accessible parts may be very hot. Keep young children away. Read the instruction literature before
using the appliance. The use of unauthorized parts can create unsafe conditions and environment.
NOTE: The use and installation of this product must conform to local codes or, in absence of local
codes, the Natural Gas and Propane Installation Code, CSA B149.1, or the Propane Storage and
Handling Code,CSA B149.2.
IMPORTANT NOTICE: Read all instructions prior to assembly and use. Read and understand all
warnings and precautions prior to operating your grill.
READ ALL SAFETY WARNINGS AND INSTRUCTIONS CAREFULLY BEFORE
ASSEMBLING AND OPERATING YOUR GRILL
IMPORTANT SAFETY WARNINGS
WARNING:
FUELS USED IN LIQUEFIED PROPANE GAS APPLIANCES, AND THE PRODUCTS OF COMBUSTION OF SUCH FUELS, CAN EXPOSE YOU TO
CHEMICALS INCLUDING BENZENE, WHICH IS KNOWN TO THE STATE OF CALIFORNIA TO CAUSE CANCER AND CAUSE BIRTH DEFECTS OR OTHER
REPRODUCTIVE HARM. For more information go to: www.P65Warnings.ca.gov.
ADVERTENCIA: LOS COMBUSTIBLES USADOS EN EQUIPOS PARA LICUAR GAS PROPANO, ASÍ COMO LOS PRODUCTOS DE SU COMBUSTIÓN,
PUEDEN EXPONERTE A SUSTANCIAS QUÍMICAS, ENTRE ELLAS EL BENCENO, QUE EL ESTADO DE CALIFORNIA RECONOCE COMO CAUSA DE CÁNCER
Y DE MALFORMACIONES CONGÉNITAS Y OTROS DAÑOS AL SISTEMA REPRODUCTOR. Para más información, visite www.P65Warnings.ca.gov

A-2
Read the following instructions carefully and be sure your barbecue is properly assembled, installed
and maintained. Failure to follow these instructions may result in serious bodily injury and/or property
damage. If you have any questions concerning assembly or operation, consult your dealer or LP
gas company.
• When used, always place the appliance and gas bottle on at level ground. Grill can be used with
20lb gas cylinder. This grill is designed to operate at an inlet pressure of: 11 inches water column.
• DO NOT move the appliance during use.
• DO NOT attempt to disconnect any gas ttings while barbecue is in use.
• DO NOT use gas bottle if the bottle and/or valve are damaged, rusty, or dented as this may be
hazardous. Contact your supplier to have it checked.
• DO NOT lean over an open grill and be mindful of hands/ngers near the edge of the cooking area.
• Should a re occur, turn off all gas burners, close the lid, and stand back from grill until re is out.
• Should ames go out while in operation, turn off all gas valves and leave lid open. Return to grill
after ve minutes and try to relight the burners – following lighting instructions.
• Keep children and pets away from grill when in use. Some parts of the grill will become very hot.
• When cleaning the valves and burners, be careful not to stretch the valve orices or burner ports.
• Move gas hoses as far away as possible from hot surfaces and dripping hot grease.
• Gas may still be present in a cylinder that appears to be empty. Adhere to proper transportation/
storage of the cylinder at all times.
• If gas is leaking from cylinder, move away from cylinder immediately and call your gas supplier or
re department. DO NOT try to address problem yourself.
• DO NOT use a ame to check for gas leaks.
• DO check for gas leaks and any obstructions to burners before use. This is especially important
after a period of storage or non-use.
• The exible tube should be changed whenever it is damaged or cracked or by expiration date
printed on the tubing. Or, change tube every ve (5) years.
• Always connect or replace cylinder in a well-ventilated area, and never in the presence of a ame,
spark or heat source.
• Grill must be kept away from ammable materials.
• Turn off gas supply at gas container after use.
• Do not alter this grill in any manner.
• Do not touch metal parts of grill until it has completely cooled (about 45 minutes) to avoid burns,
unless you are wearing protective gear (BBQ mittens, pot holders, etc.).
• Note that parts sealed by manufacturer or its agent must not be altered.

A-3
• When assembling the grill, position the connection exible tube so that it is protected
against twisting.
• Stay away from any source of ignition when changing gas container.
• When assembling the grill, do not obstruct ventilation openings of grill’s container compartment. We
reserve the right to make minor technical adjustments to the device.
• When cooking with oil/grease, do not allow the oil/grease to exceed 350°F (177°C). Do not store or
use extra cooking oil in the vicinity of this or any other appliance.
• Never ll the cylinder beyond 80% full. Not following the above information exactly may result in a
re causing death or serious injury.
• Do not store a spare LP gas cylinder under or near this appliance.
CAUTION
• This grill is for use with propane gas only (propane gas cylinder not included).
• Never attempt to attach this grill to the self-contained propane system of a camper trailer, motor
home or house.
• Do not use gasoline, kerosene or alcohol for lighting. The LP gas supply cylinder must be
constructed and marked in accordance with the specications for propane gas cylinders of the U.S.
Department of Transportation (DOT) CFR 49.
• The gas supply cylinder must be provided with a listed overlling prevention device.
• The gas supply cylinder must be provided with a cylinder connection device compatible with the
connection for outdoor cooking appliances.
• This grill is not intended for use on recreation vehicles and/or boats.
• Do not use grill unless it is completely assembled and all parts are securely fastened and tightened.
• Keep all combustible items and surfaces at least 10 ft (3.05 M) away from grill at all times.
• DO NOT use this grill or any gas product near unprotected combustible constructions.
• Do not use in an explosive atmosphere. Keep grill area clear and free from combustible materials,
gasoline and other ammable vapors and liquids.
• Never keep a lled container in a hot car or car trunk. Heat will cause gas pressure to increase,
which may open relief valve and allow gas to escape.
• Keep grill’s valve compartment, burners and circulating air passages clean. Inspect grill before
each use.

A-4
WARNING
• This grill is for outside use only, and should not be used in a building, garage, or any other
enclosed area.
• The use of alcohol, prescription or non-prescription drugs may impair the operator’s ability to
properly assemble or safely operate the grill.
• Always open grill lid slowly and carefully as heat and steam trapped within the grill can burn
you severely.
• Always place grill on a hard, level surface far away from combustibles. An asphalt or blacktop
surface may not be acceptable for this purpose.
• Do not leave a lit grill unattended. Keep children and pets away from grill at all times.
• Do not place grill on any type of tabletop surface.
• Do not use grill in high winds.
• Disconnect the propane tank (LP tank) by rst turning off valve on top of propane tank, turn off
burner valves, then disconnect regulator from valve on propane tank by turning plastic connector
counter clockwise. Unscrew wing-bolt in bottom shelf to release the tank for removal.
DANGER
• Liquid propane (LP) gas is ammable and hazardous if handled improperly. Know its characteristics
before using any propane product.
• Propane Characteristics: ammable, explosive under pressure, heavier than air and settles in pools
and low areas.
• In its natural state, propane has no odor. For your safety, an odorant has been added.
• Contact with propane can cause freeze burns to skin.
• Never use a propane cylinder with a damaged body, valve, collar or footing.
• Dented or rusted propane cylinders may be hazardous and should be checked by your propane
gas supplier.
• Use caution when assembling and operating your grill to avoid scrapes or cuts from sharp edges.
• Use caution when moving grill to prevent strains.
• Never move grill when it is in use or hot.
• Make sure to empty grease tray after every use once completely cooled.
• To protect against bacteria that could cause illness, keep all meats refrigerated and thaw in
refrigerator or microwave. Keep raw meats separate from other foods, and wash everything that
comes in contact with raw meat.
• Cook meat thoroughly, and refrigerate leftovers immediately.

A-5
• Use a calibrated food thermometer and the USDA guidelines to ensure that meat, poultry, seafood,
and other cooked foods reach a safe minimum internal temperature.
• Always have a re extinguisher near at all times. Maintain and check your re extinguisher regularly.
• Non-rechargeable batteries are not to be recharged.
• Do not mix different types of batteries such as alkaline, carbon-zinc, or rechargeable batteries.
• Do not mix old and new batteries.
• Exhausted batteries are to be removed from the product.
• Batteries included.
• DO NOT DISPOSE OF BATTERIES IN FIRE. BATTERIES MAY EXPLODE OR LEAK.
A-6
*** STOP! CALL FIRST! ***
Do NOT Return Product to Store.
This grill has been made according to the highest of quality standards. If you have any questions
not addressed in this manual or if you need parts please call our Customer Service Department at
1-912-638-4724 (USA) or email Char-Griller
®
at: Service@CharGriller.com and have your serial
number handy.
REGISTER YOUR GRILL:
To take full advantage of the Char-Griller
®
warranty be sure to register your
grill by visiting www.CharGriller.com/Register or calling Customer Service
at 1-912-638-4724.
Registration provides important protections:
1. In the extremely unlikely event of a product recall Char-Griller
®
can easily
contact you and rectify the issue.
2. If a warrantied part is broken or missing we can send you the needed parts promptly.
NOTE: You will need your model #, serial number, and a copy of the original sales receipt
when registering.
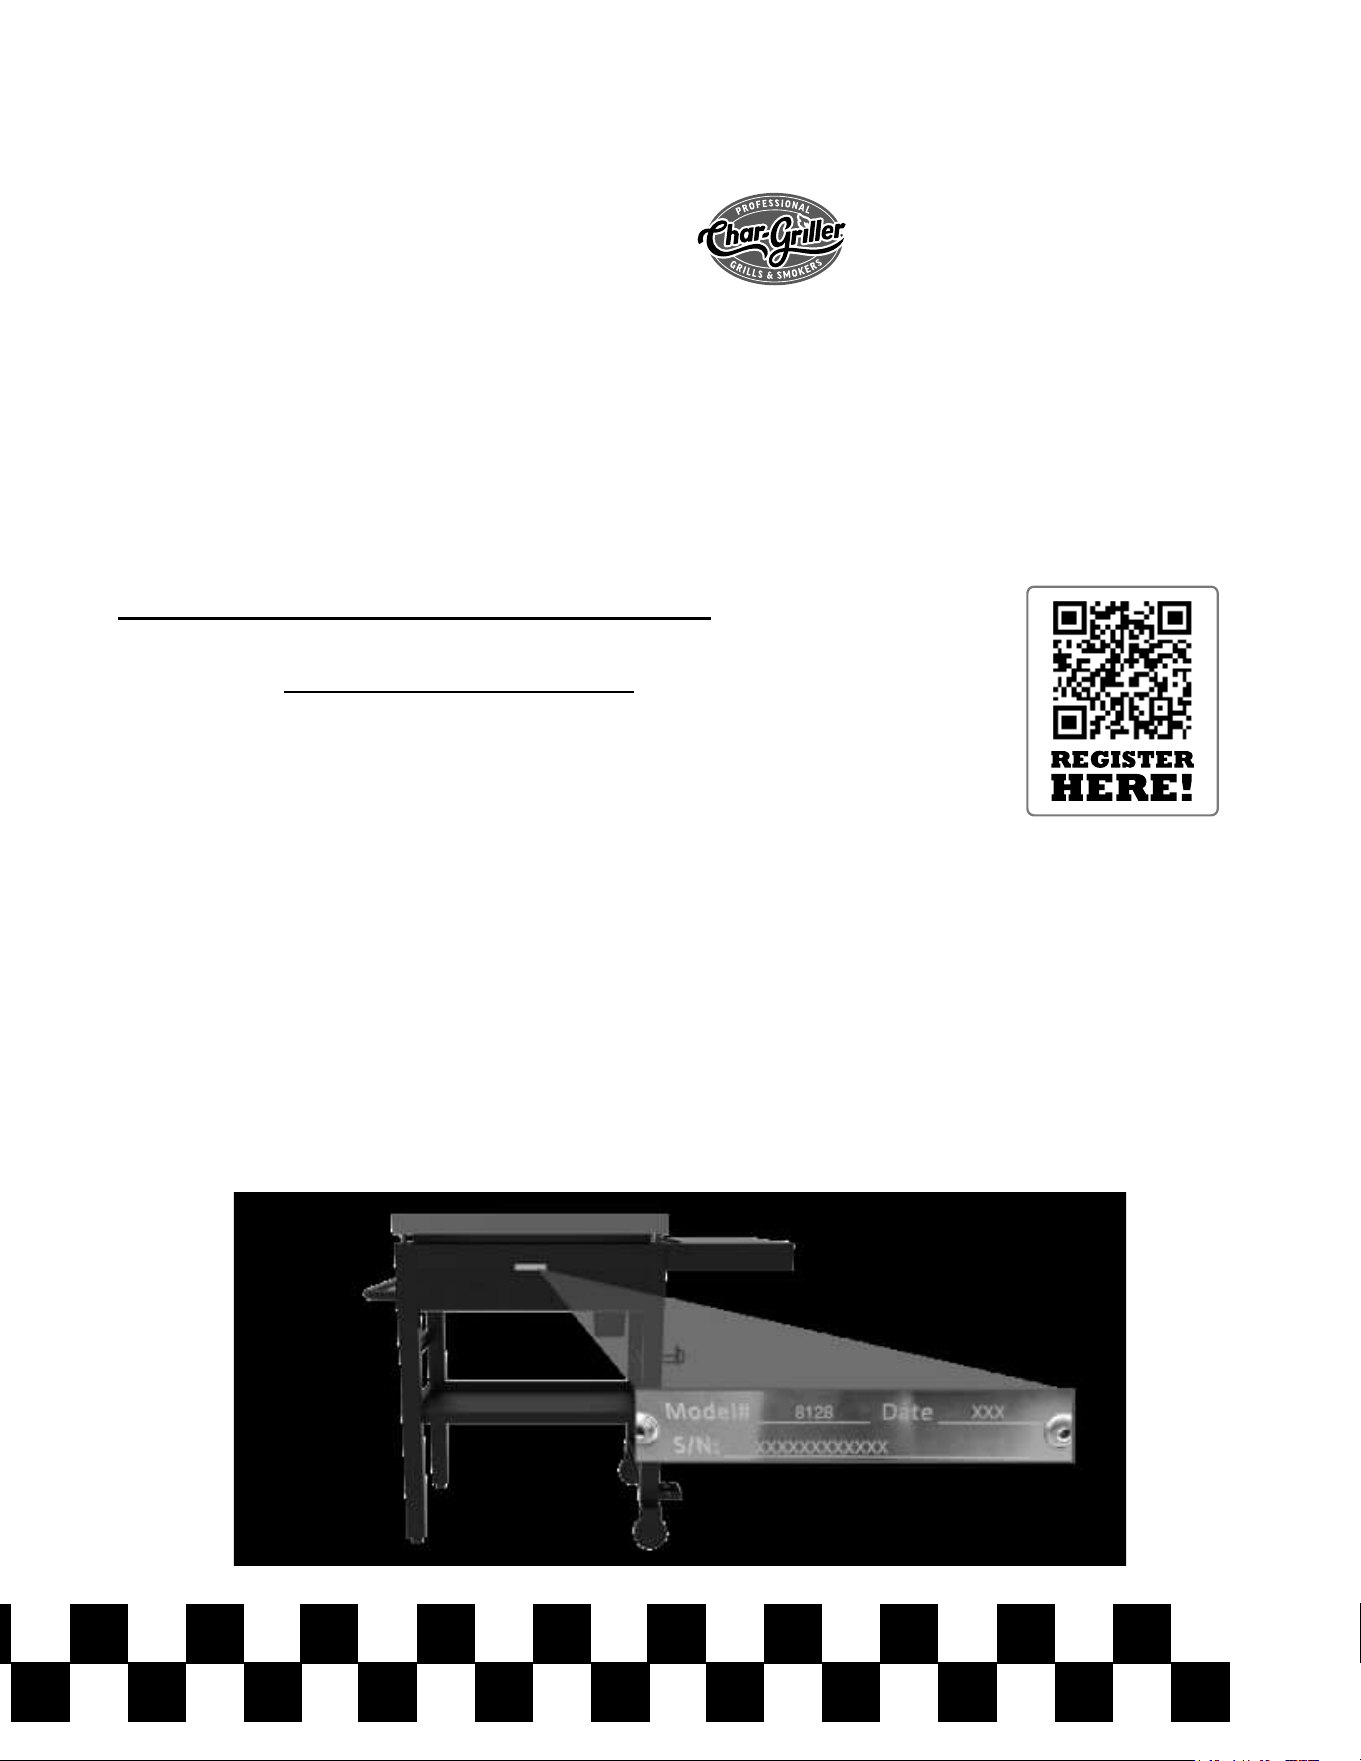
Document Your Serial Number HERE:
(Serial number is located on the back of the griddle body or on the leg.)
_________________________
(SERIAL #)
(example)
A-7
SURFACE RUST IS NOT CONSIDERED A MANUFACTURING OR MATERIALS DEFECT
Char-Griller
®
grills are made of steel and if exposed to the elements rust will occur naturally. Please refer to the
section entitled, “Usage” to review how to care for your grill properly.
Surface issues such as scratches, dents, corrosion or discoloring by heat, abrasive and chemical clearers, surface
rust or the discoloration of steel surfaces are NOT covered under these warranties.
Warranties are for the replacement of defective parts only. Char-Griller
®
is not responsible for damage resulting
from accident, alteration, misuse, abuse, hostile environments, improper installation, and installation not in
accordance with local codes of service of unit.
Excluded Under ALL Warranties
Paint; Surface Rust; Heat Damage; Incorrect Parts ordered by customer, including shipping; Worn Parts; Missing
or damaged parts not reported within two (2) months of purchase date; Defective parts not reported within one (1)
year of purchase date; Fading grill cover.
*NOTE: For warranty claims, photos and prepaid return of the item in question may be required. Misuse, abuse or
commercial use nullies all warranties.
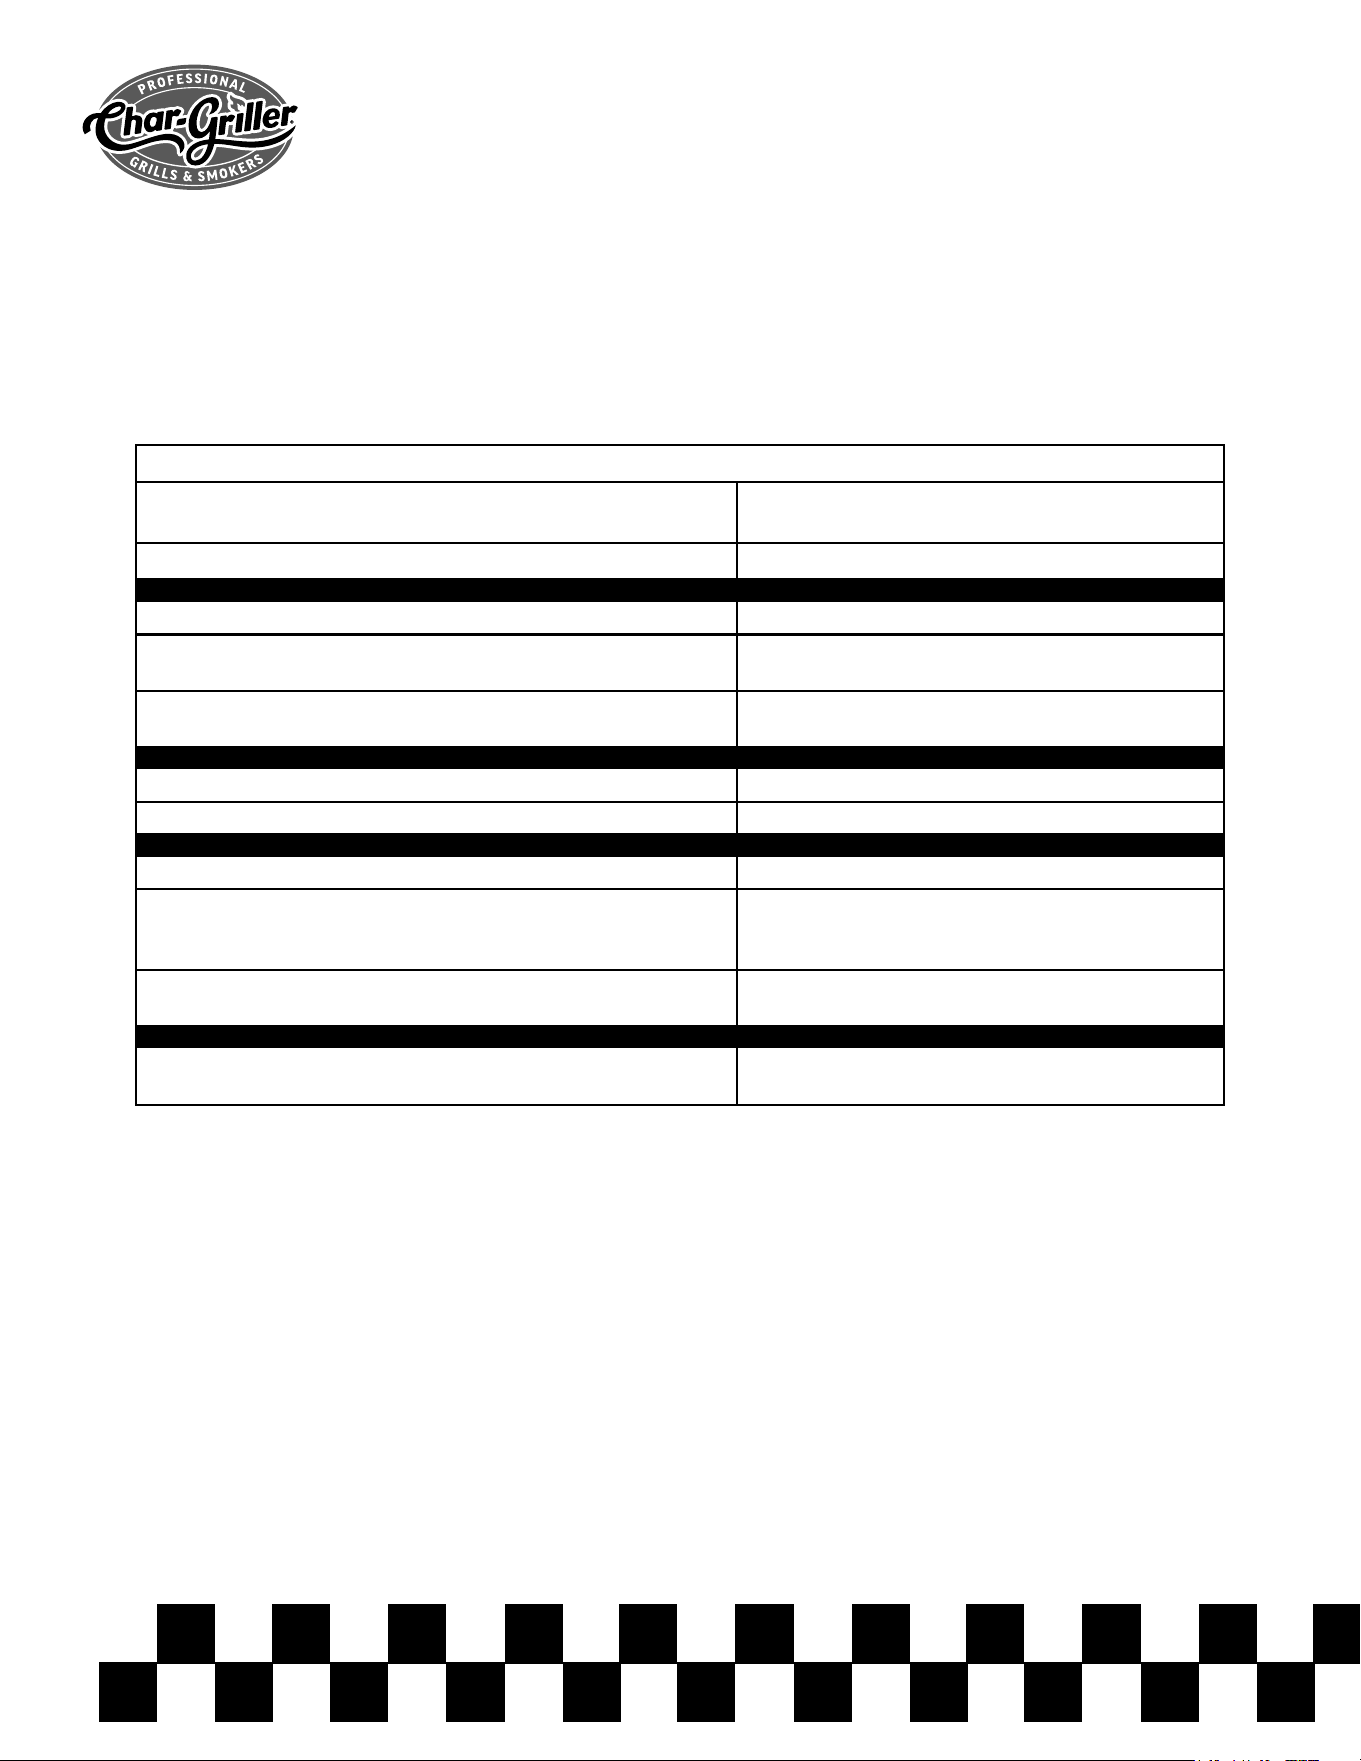
Charcoal / Pellet / Kamado Grills
Grill - Hood and Body
(excludes removable Ash Pan)
5 years from date of purchase for rust
through / burn through
Ash Pan and Defective Parts
1 year from date of purchase
Gas Grills
Grill Hood and Main Burner Tubes
(excludes Side Burner)
5 years from date of purchase for rust
through / burn through
Grill Body and Side Burner
and Defective Parts
1 year from date of purchase
Griddles
All Defective Parts 1 year from date of purchase
Dual Fuel Grills (Gas & Charcoal)
Charcoal Grill - Hood and Bottom and Gas
Grill Hood (TOP half) and Main Burner Tubes
(excludes Ash Pan and Side Burner)
5 years from date of purchase for rust
through / burn through
Ash Pan and Defective Parts and Gas Grill
Body (BOTTOM half) and Side Burner
1 year from date of purchase
Parts, Accessories, and Grill Covers 1 year from date of purchase
(seam tears only for covers)
WARRANTY INFORMATION
A COPY OF THE DATED PROOF OF PURCHASE (RECEIPT) IS REQUIRED WHEN REGISTERING OR
SUBMITTING A WARRANTY* CLAIM. PLEASE RETAIN A COPY OF THE RECEIPT FOR YOUR RECORDS.
Char-Griller
®
will replace any defective part of its grillers/smokers, under warranty, as outlined below.
PLEASE READ THIS INFORMATION IN DETAIL AND IF YOU HAVE ANY QUESTIONS CONTACT CUSTOMER
SERVICE AT 912-638-4724 OR [email protected].
B-1
ASSEMBLY INSTRUCTIONS
1
2
3
4
5
6
8
9
10
11
12
14
15
1617
18
19
20
21
22
23
24
25
26
27
30
31
7
32
29
13
13
28
2
4
24
23
14
B-2
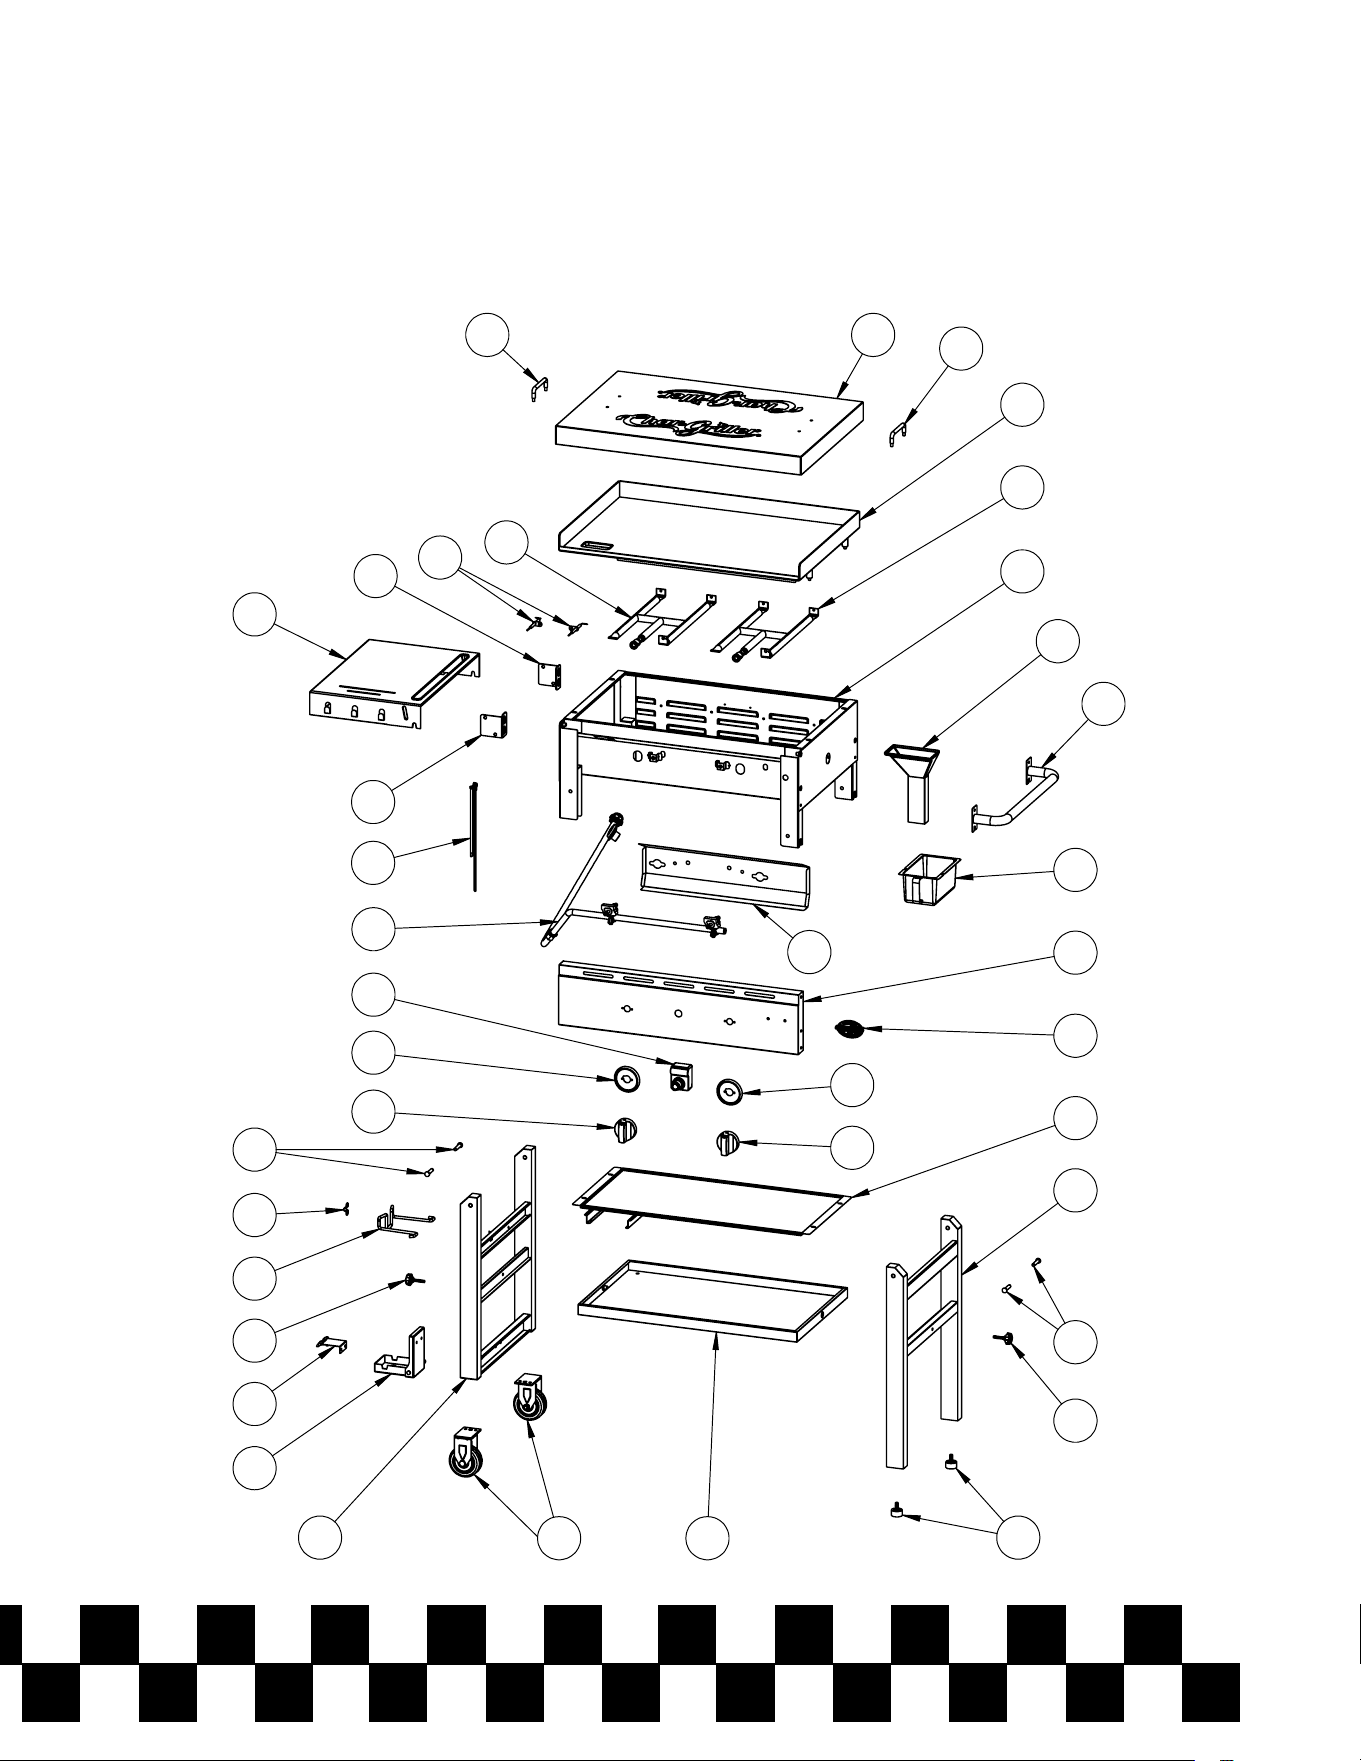
PARTS LIST
Item QTY Part Name
1 1 LID
2 2 LID HANDLE
3 1 GRIDDLE
4 2 BURNER
5 1 GRIDDLE BODY
6 1 GREASE FUNNEL
7 1 SIDE HANDLE
8 1 GREASE CUP
9 1 CONTROL PANEL
10 1 LOGO PLATE
11 1 PARTICLE SHEILD
12 1 RIGHT SIDE LEGS
13 4 LEG HINGE PIN
14 2 STAR GRIP BOLT
15 2 LEG CAP
16 1 BOTTOM SHELF
17 2 3.5” CASTER WHEEL
18 1 LEFT SIDE LEGS
19 1 TANK SUPPORT BRACKET
20 1 LEG LOCKING MECHANISM
21 1 TANK SECURE WIRE
22 1 TANK SECURE WIRE BRACKET
23 2 KNOB
24 2 KNOB BEZEL
25 1 IGNITOR
26 1 HOSE\VALVE\REGULATOR ASSEMBLY
27 1 HEAT SHIELD
28 1 MATCH HOLDER
29 1 SIDE SHELF RIGHT SUPPORT BRACKET
30 1 SIDE SHELF
31 1 SIDE SHELF LEFT SUPPORT BRACKET
32 2 SPARK TIP WITH WIRE
B-3
Assembly: Requires 2 people. Tools Needed: Hammer, Phillips Head Screwdriver, Pliers,
and a 7/16” Nut Driver.
**NOTE: DO NOT fully tighten any bolts until instructed to do so. Tightening too
soon may prohibit parts from tting together. All hex nuts should be on the inside
of the griddle unless stated otherwise. Unpack all contents in a well cleared and
padded area.**
Estimated Time: 30 minutes
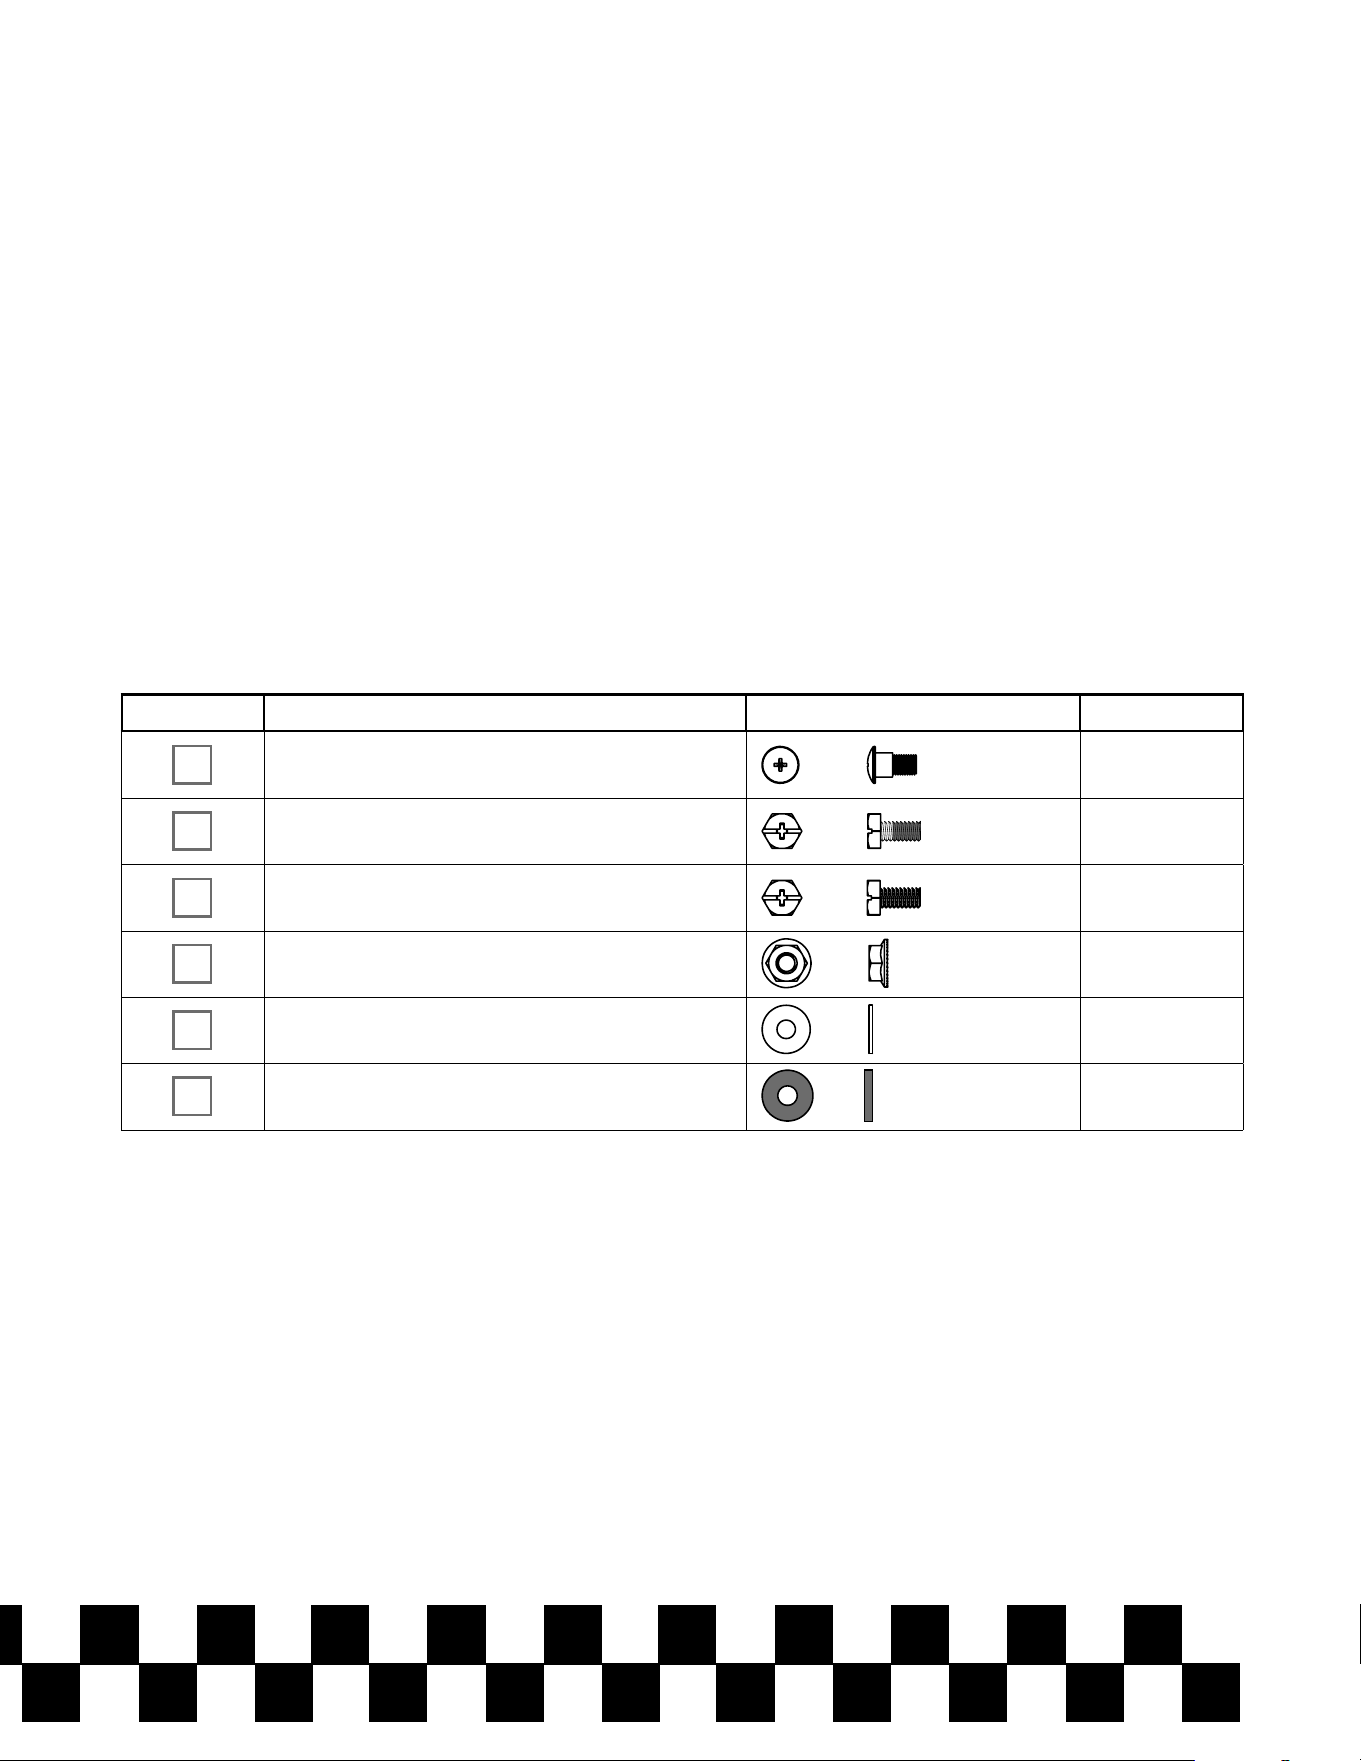
Hardware Pack #551157
HARDWARE NEEDED
Part No. Description Photo QTY
SHOULDER SCREW 4
HEX BOLT WITH BLUE LOCKING
COMPOUND 1/4 -20 X 3/4”
4
HEX BOLT 1/4 -20 X 3/4” 6
HEX NUT, FLANGE, 1/4-20 8
FLAT WASHER 4
RUBBER GASKET 4
A
C
B
D
E
F
B-4
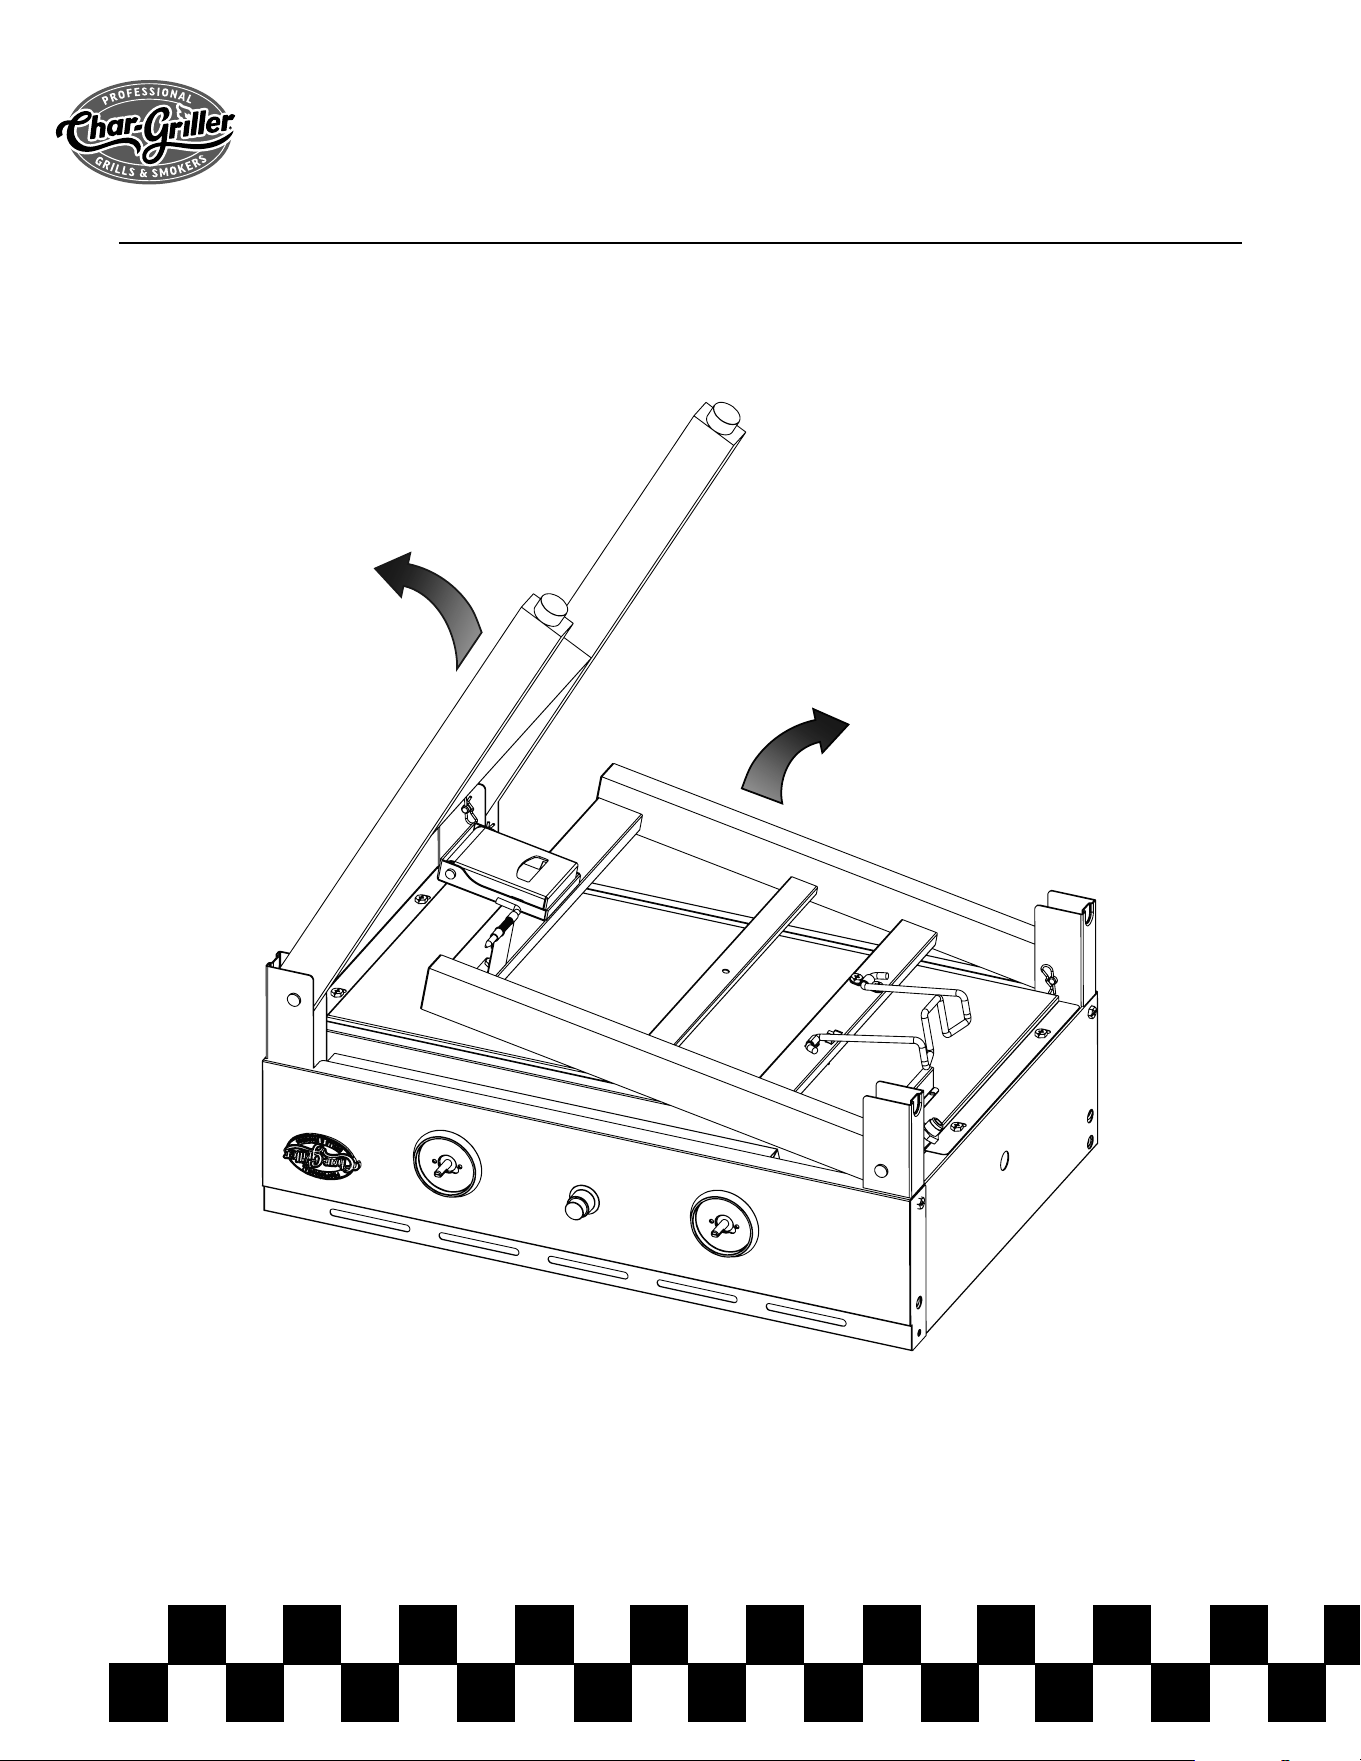
STEP 1
B-5
STEP 2
14
14
16
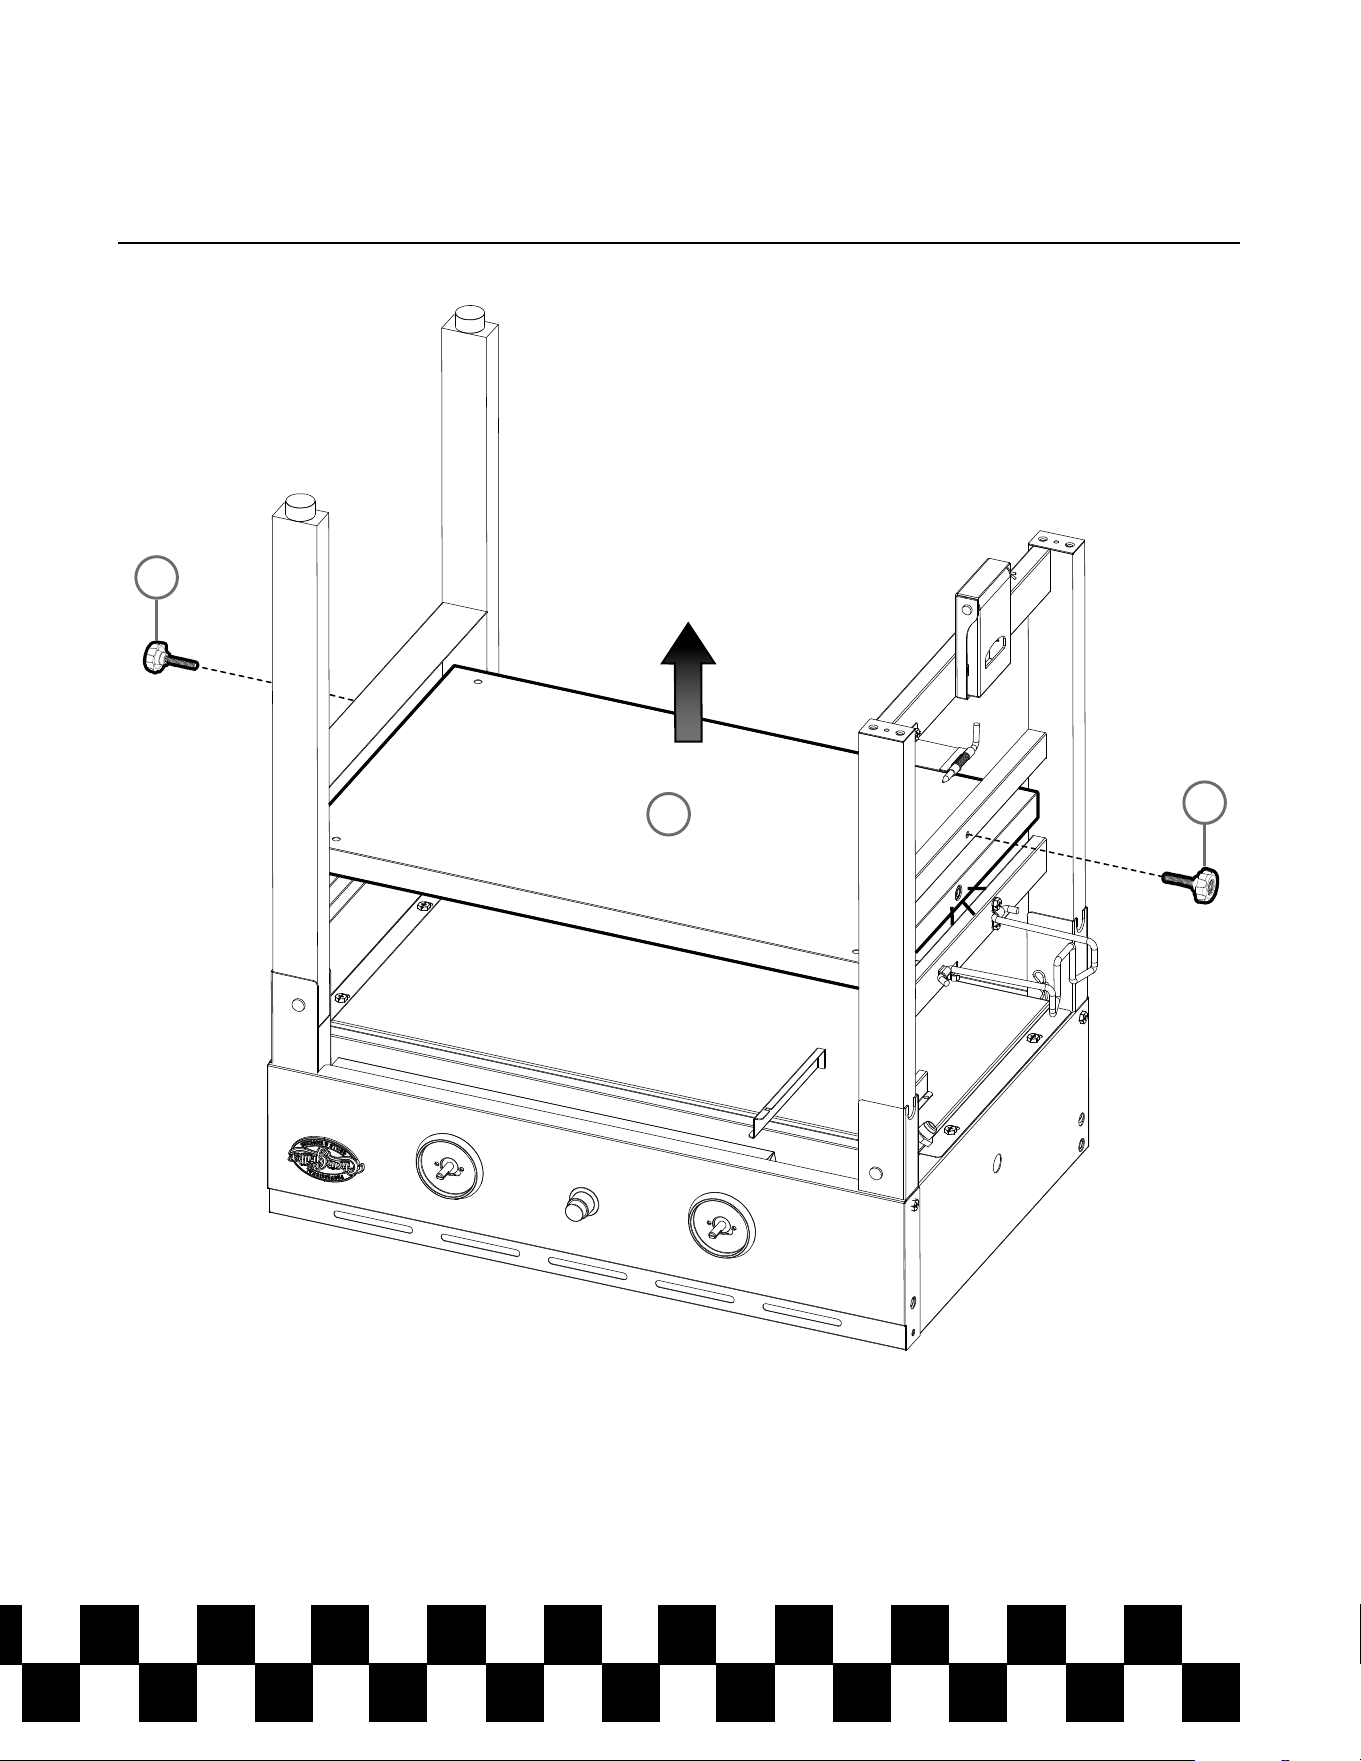
B-6
STEP 3
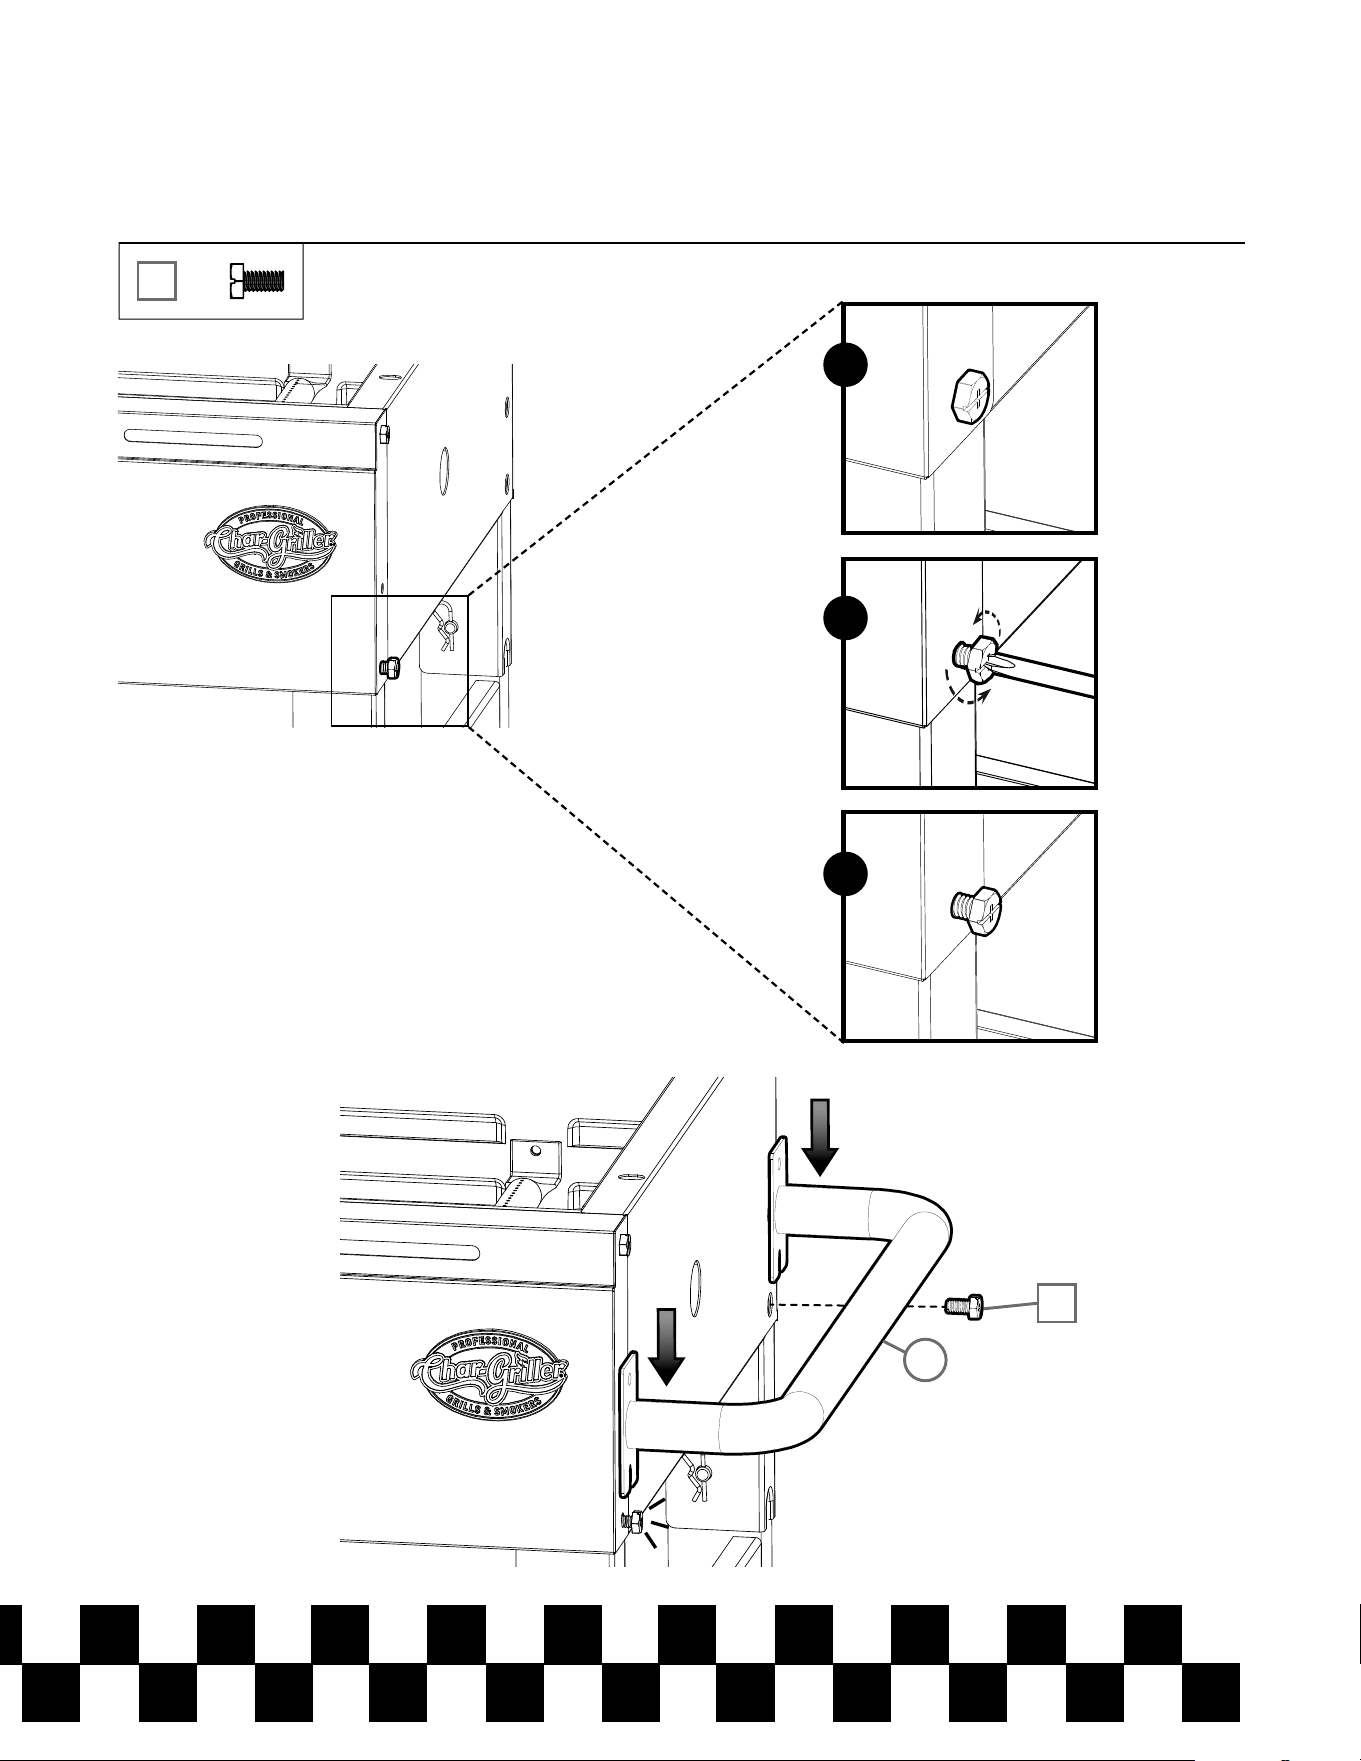
STEP 4
INTERIOR VIEW
x4
B
6
6
17
17
B
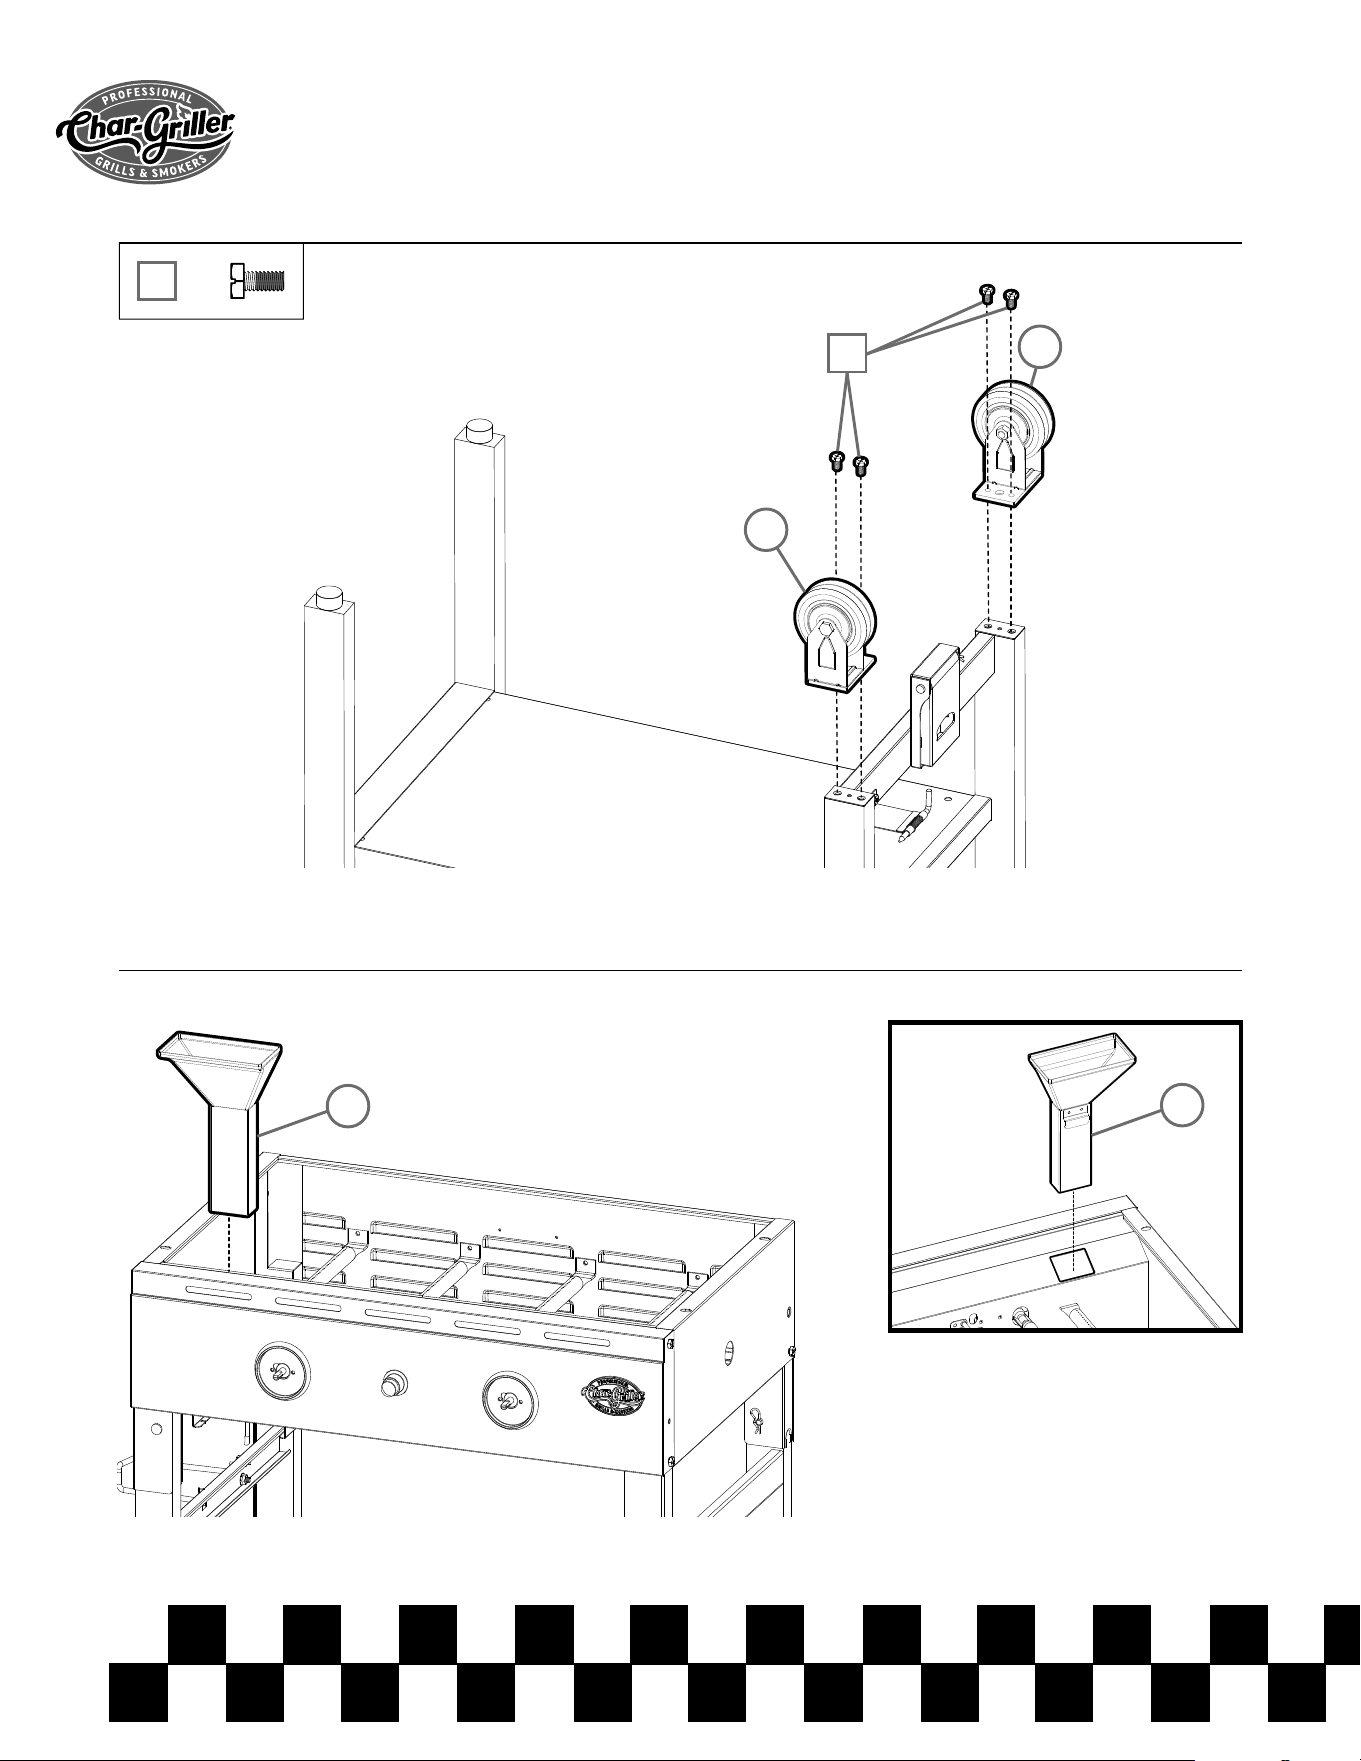
B-7
x3
C
STEP 5A
5
2
3
1
C
C
C
3
29
31
29
B-8
STEP 5B
x4
A
x4
D
3
21
30
A
A
30
29
31
31
29
D
A
A
D
B-9
C
STEP 6A
x1
C
2
3
1
7
B-10
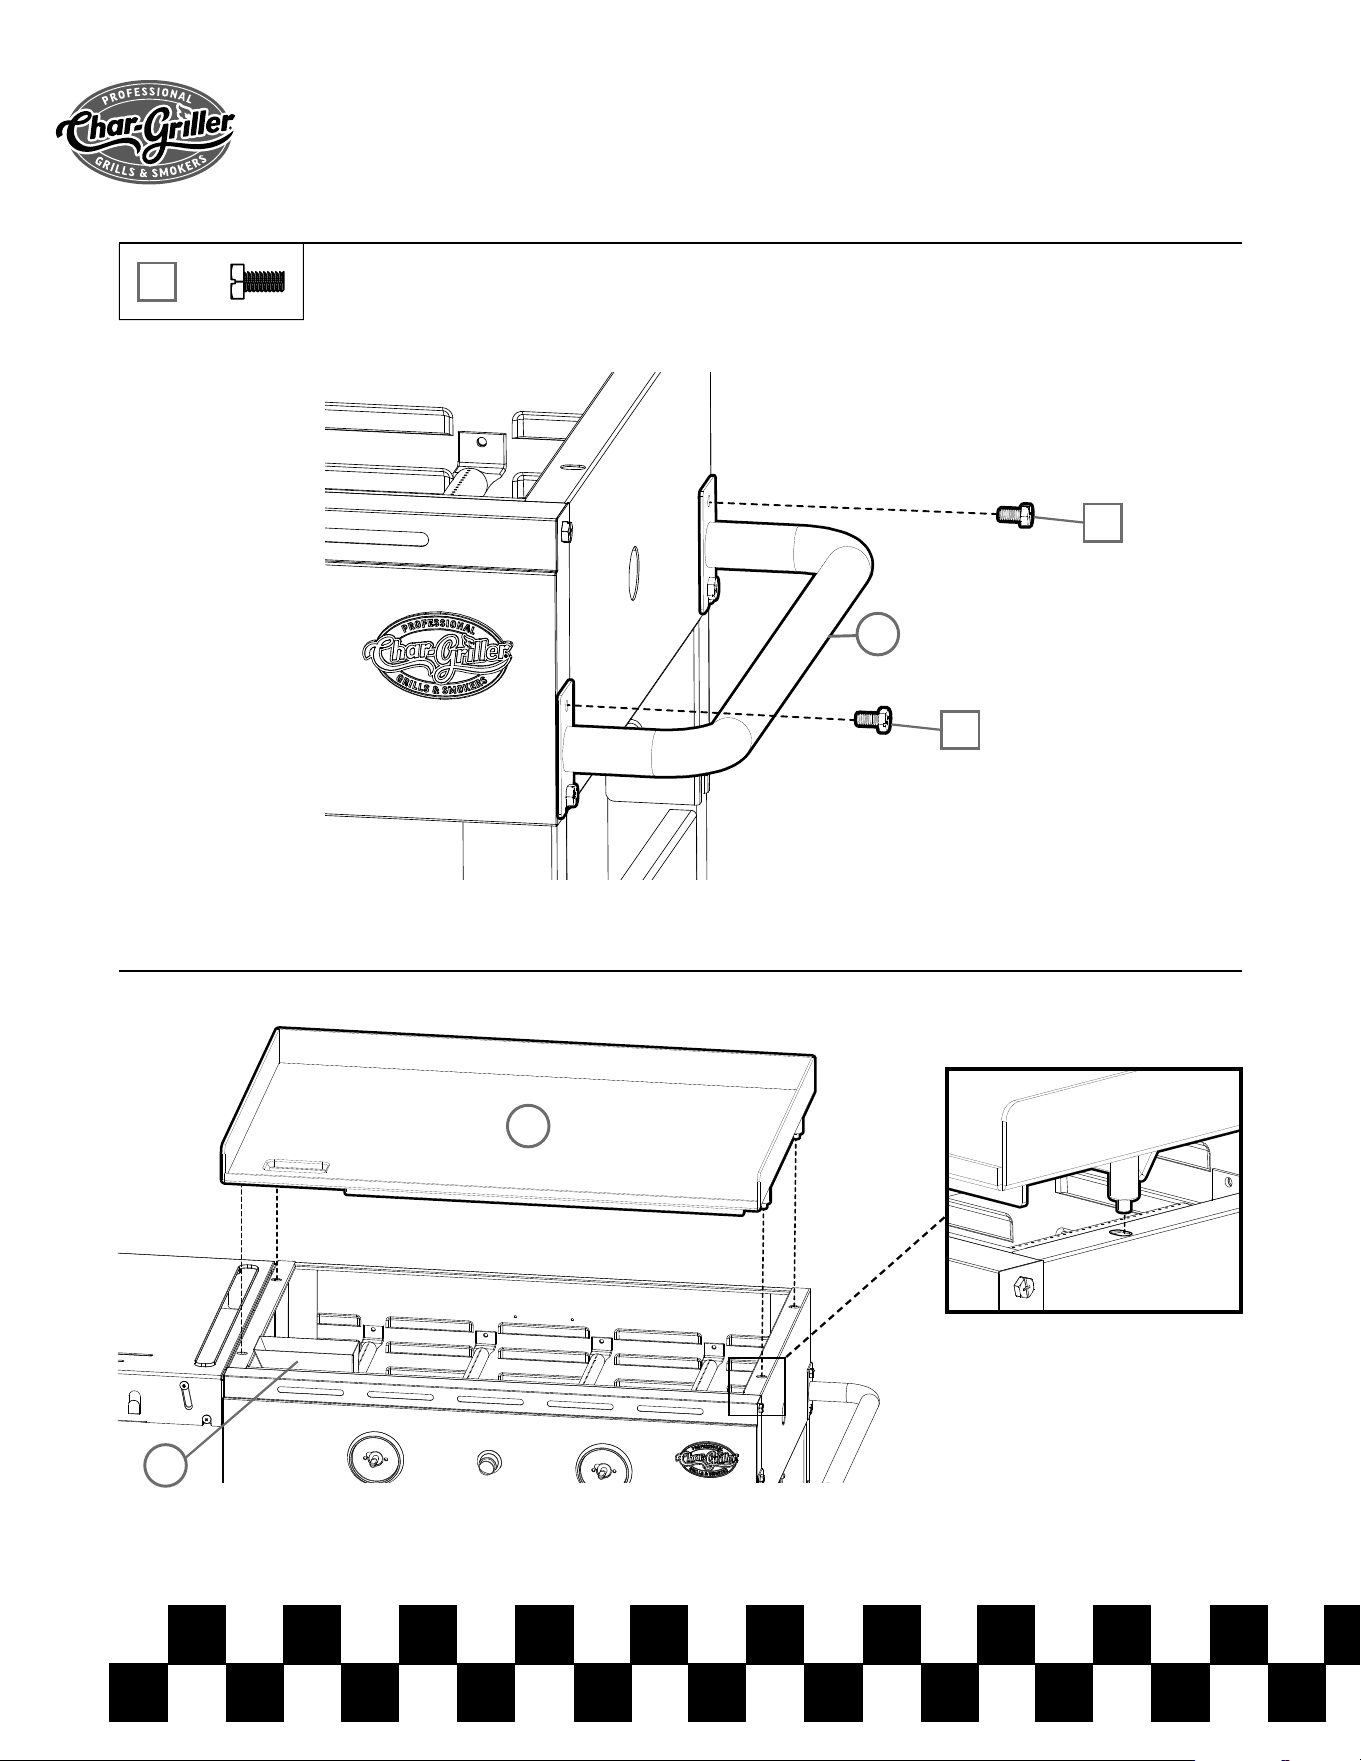
STEP 6B
STEP 7
x2
C
3
7
6
C
C

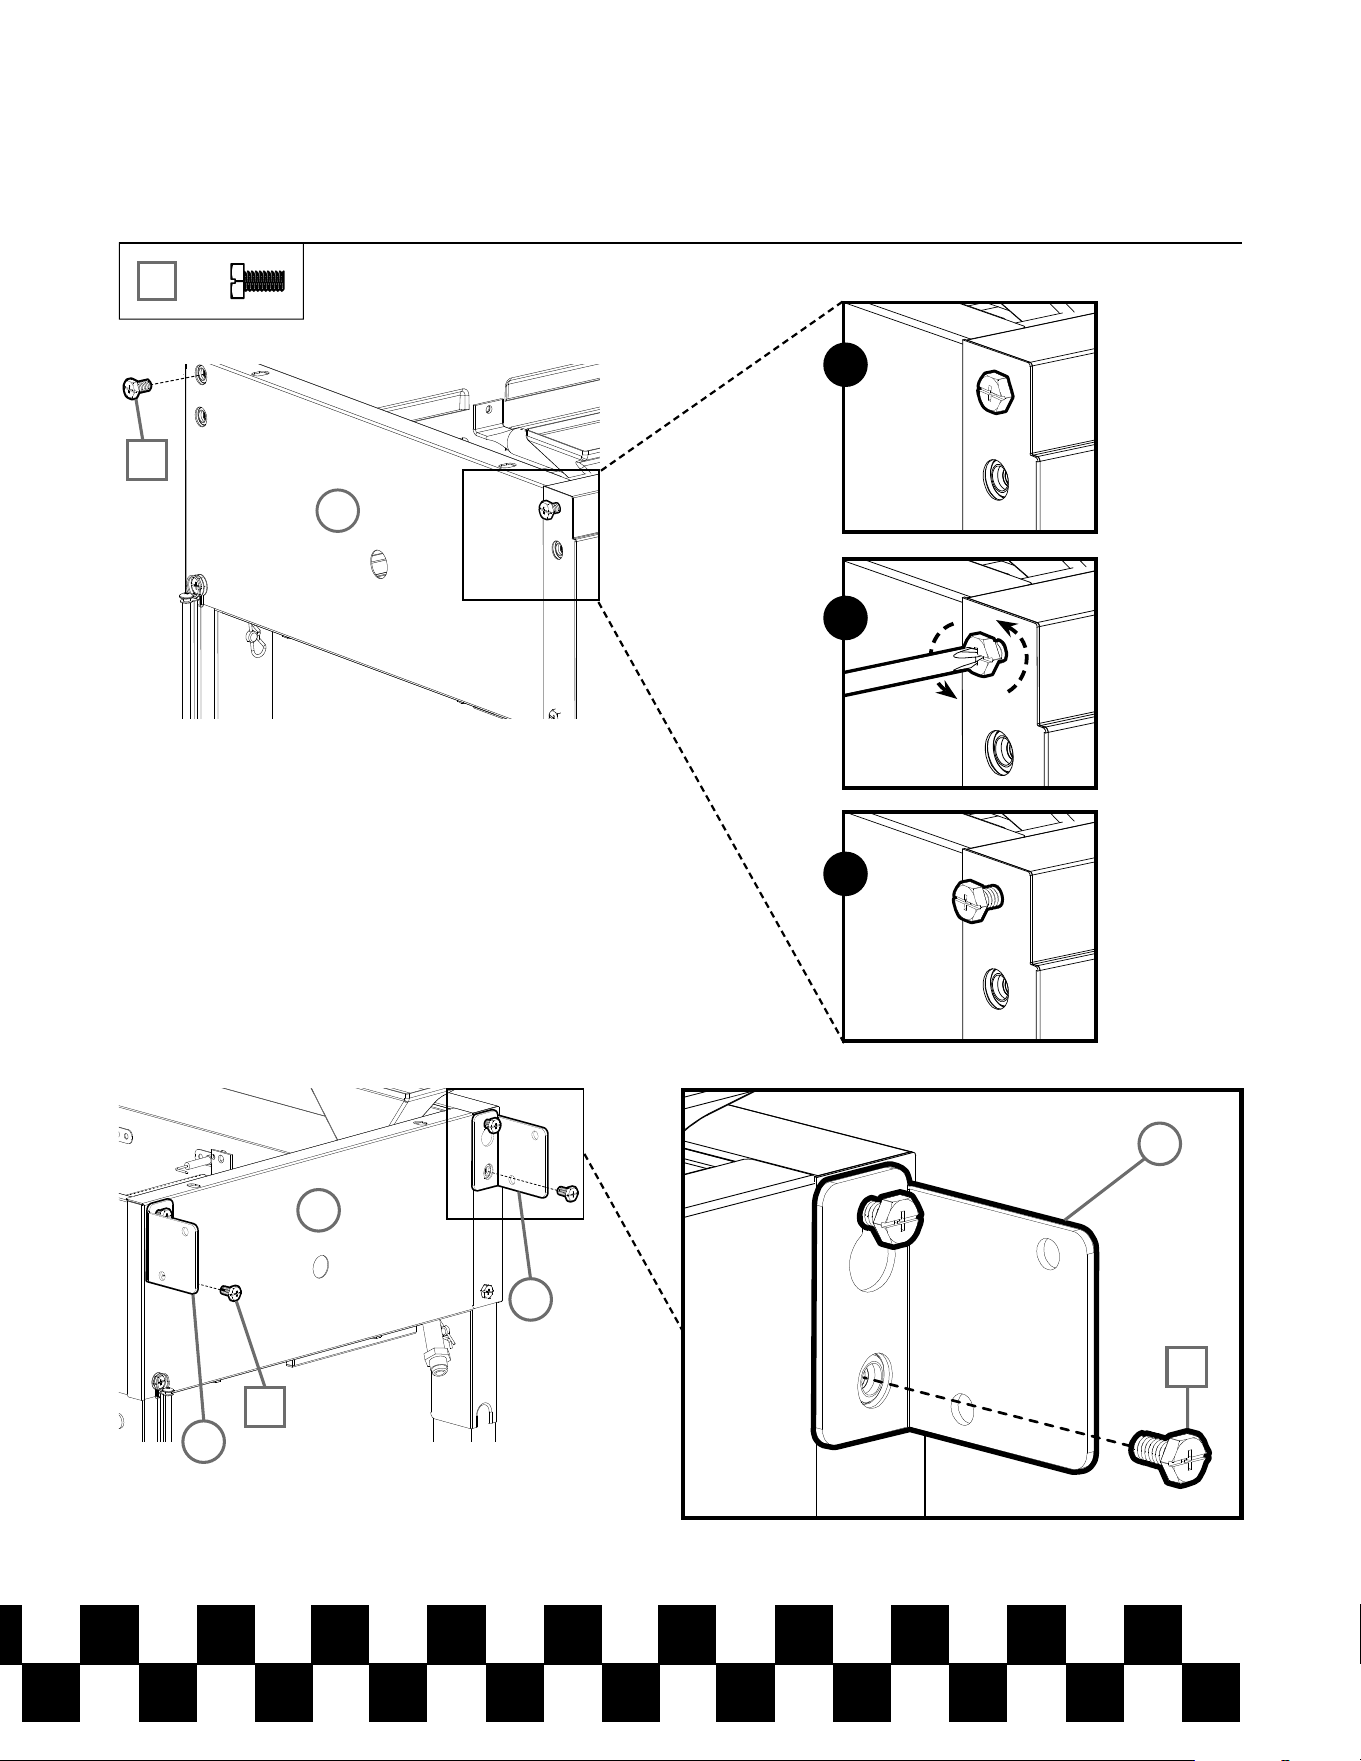
B-11
STEP 8
INSERT GREASE CUP HERE
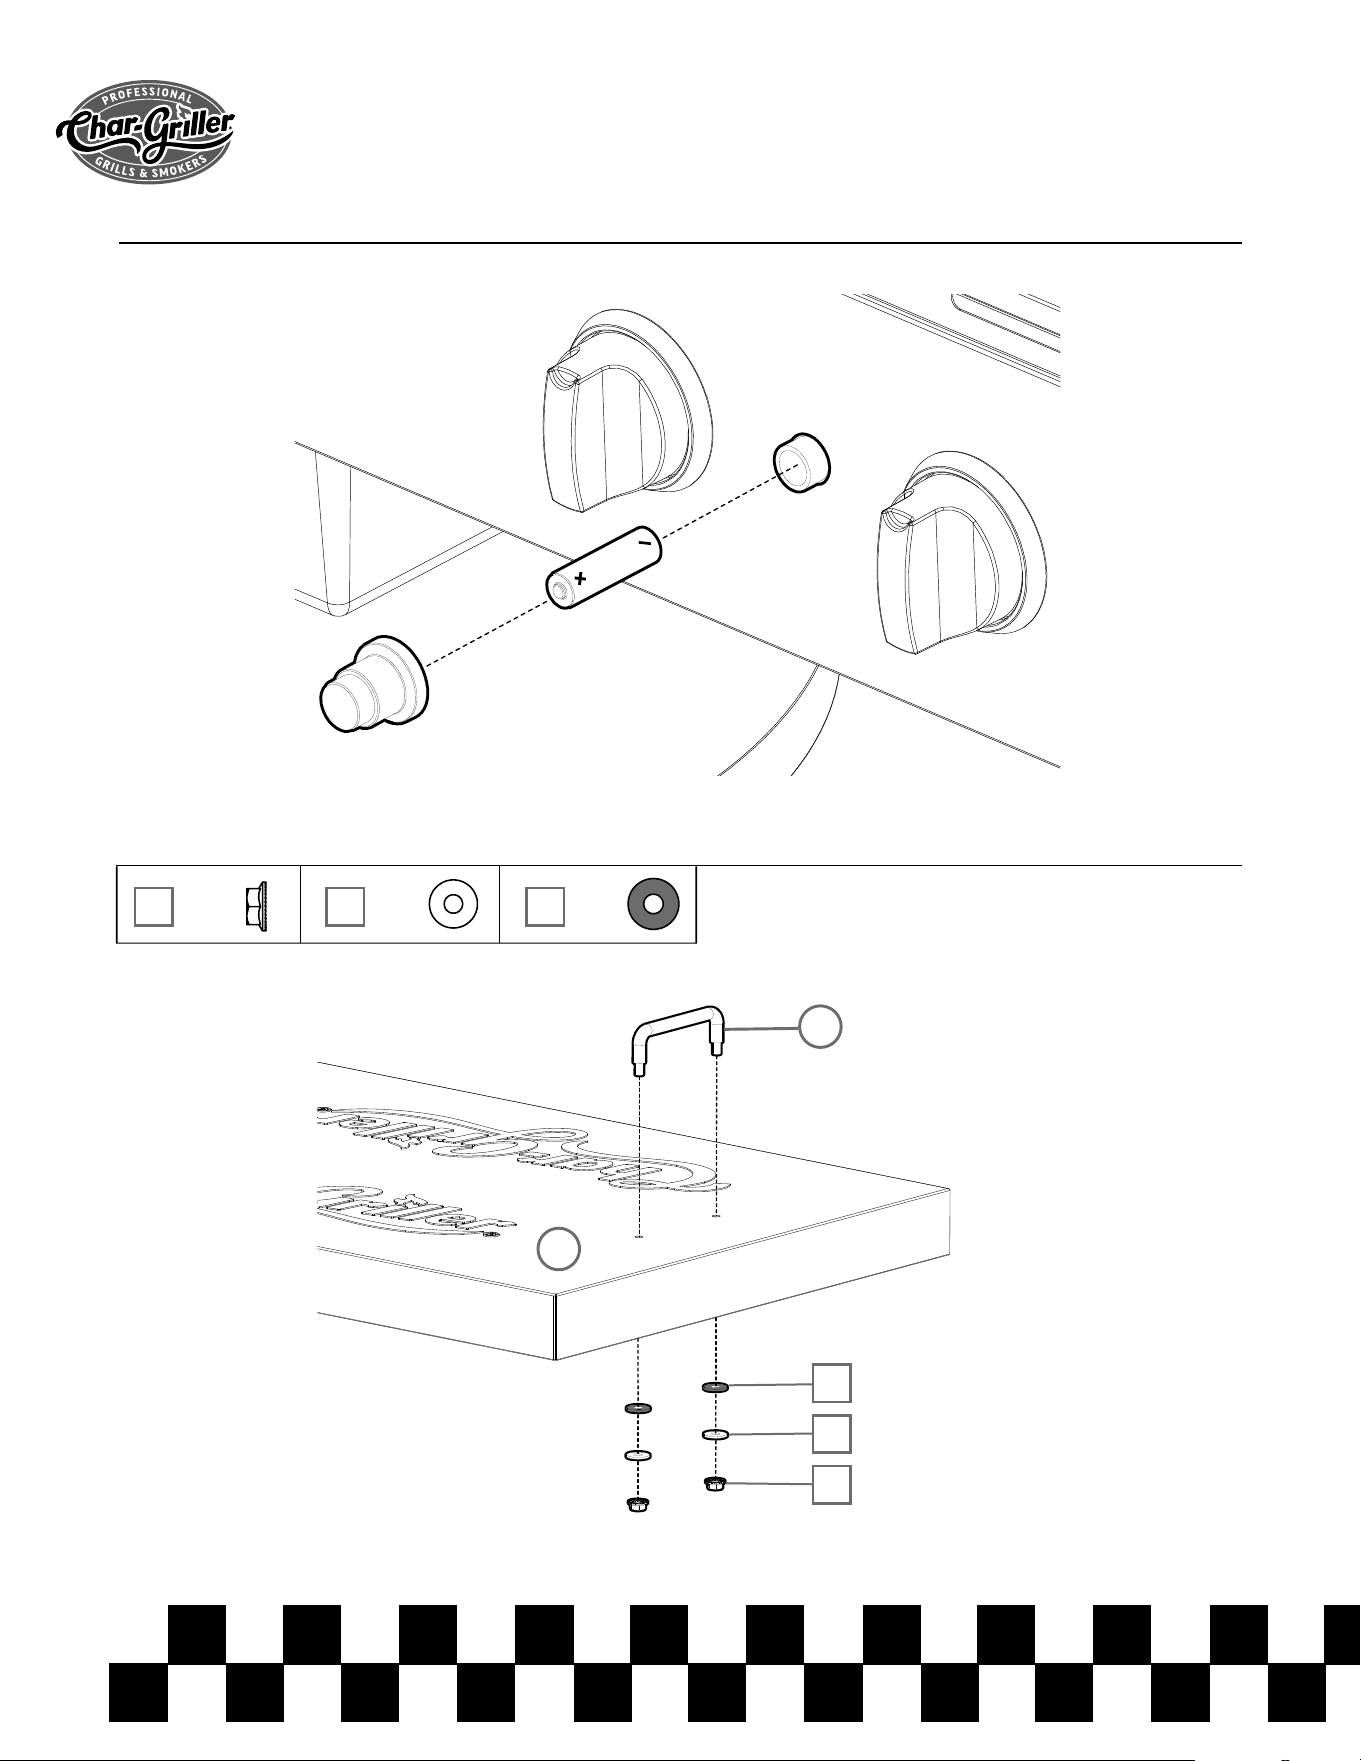
STEP 9
23
8
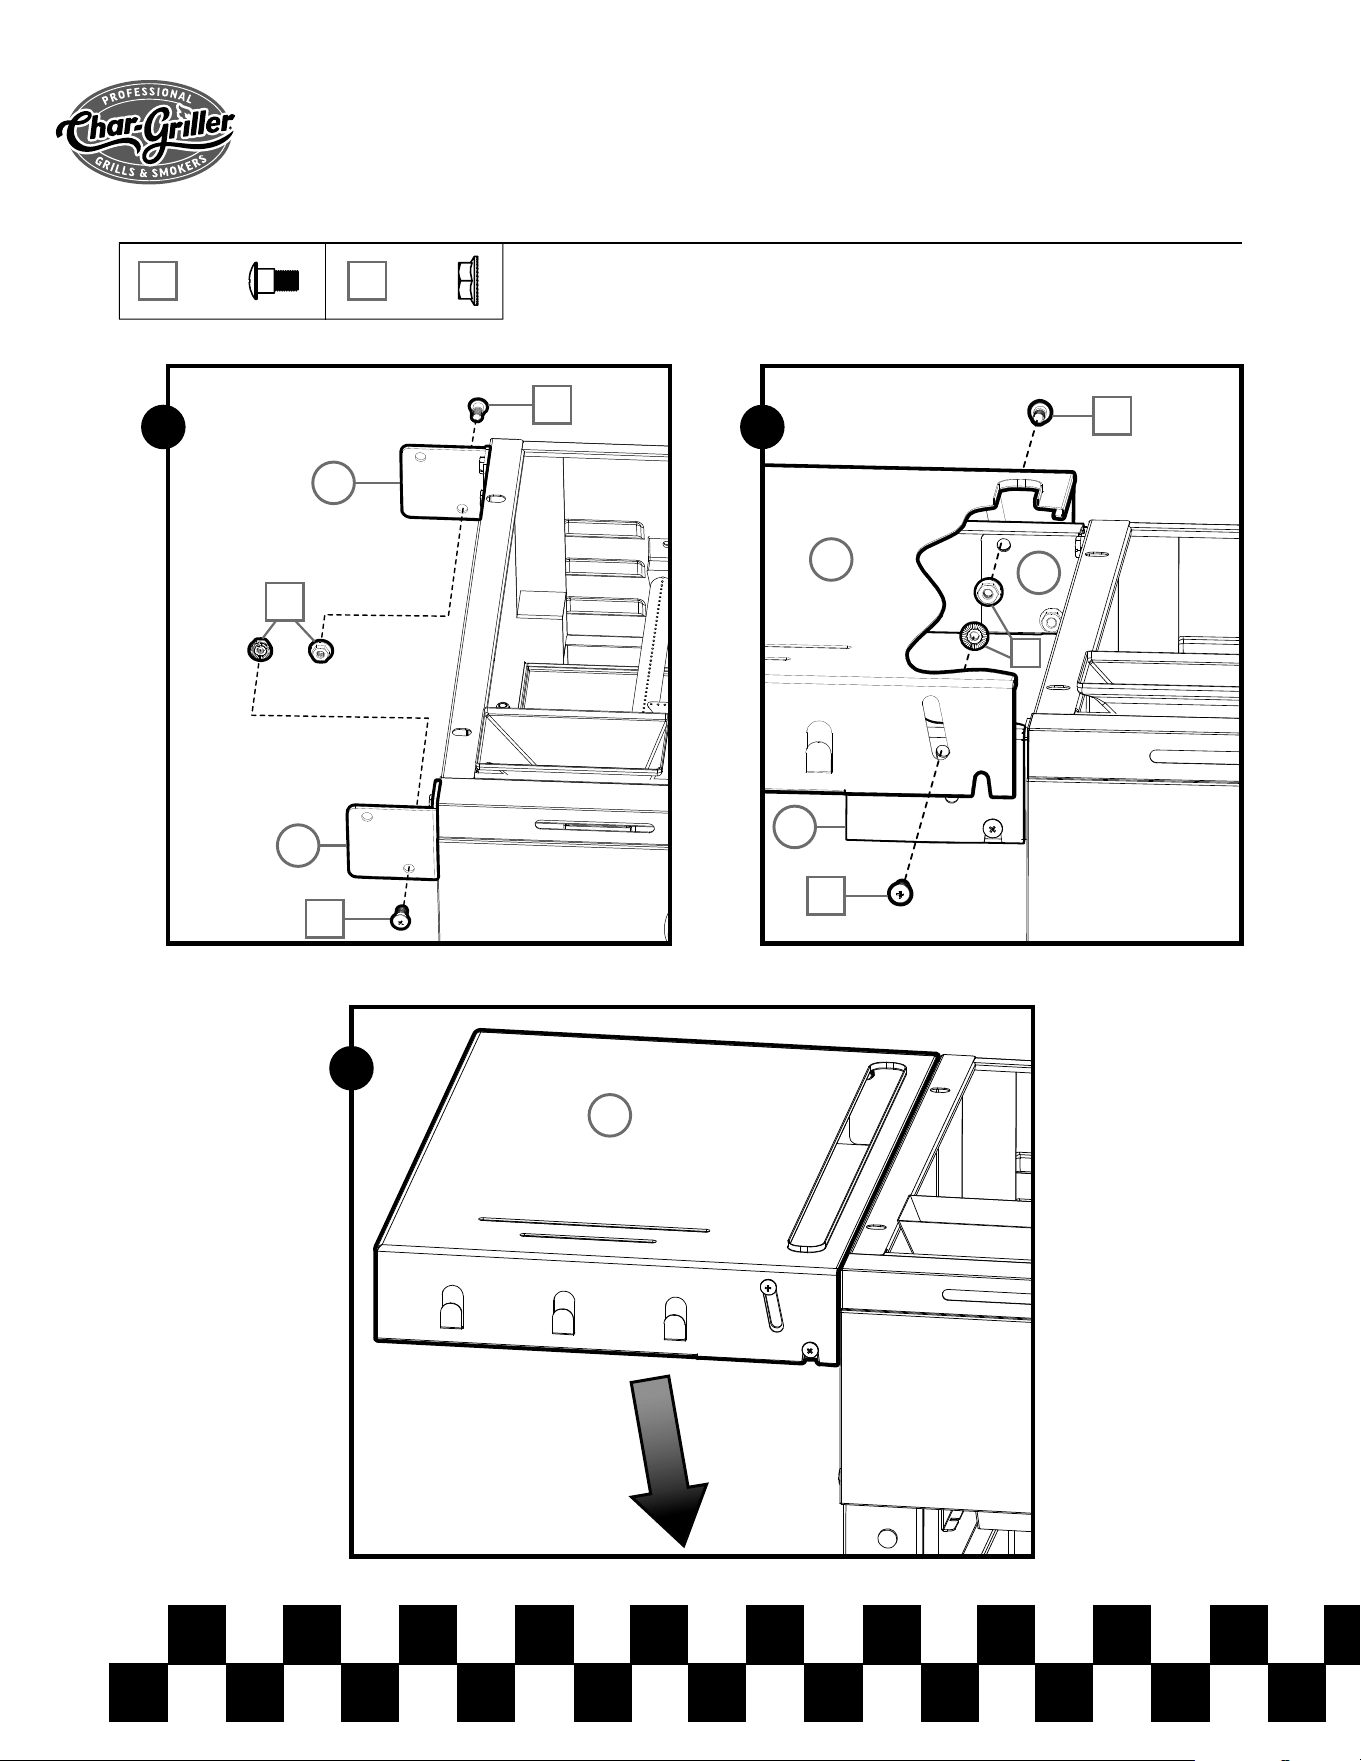
B-12
STEP 11A
x4 x4 x4
ED F
STEP 10
E
D
F
1
2
B-13
To ensure sturdy assembly, tighten all NUTS and BOLTS.
STEP 11B
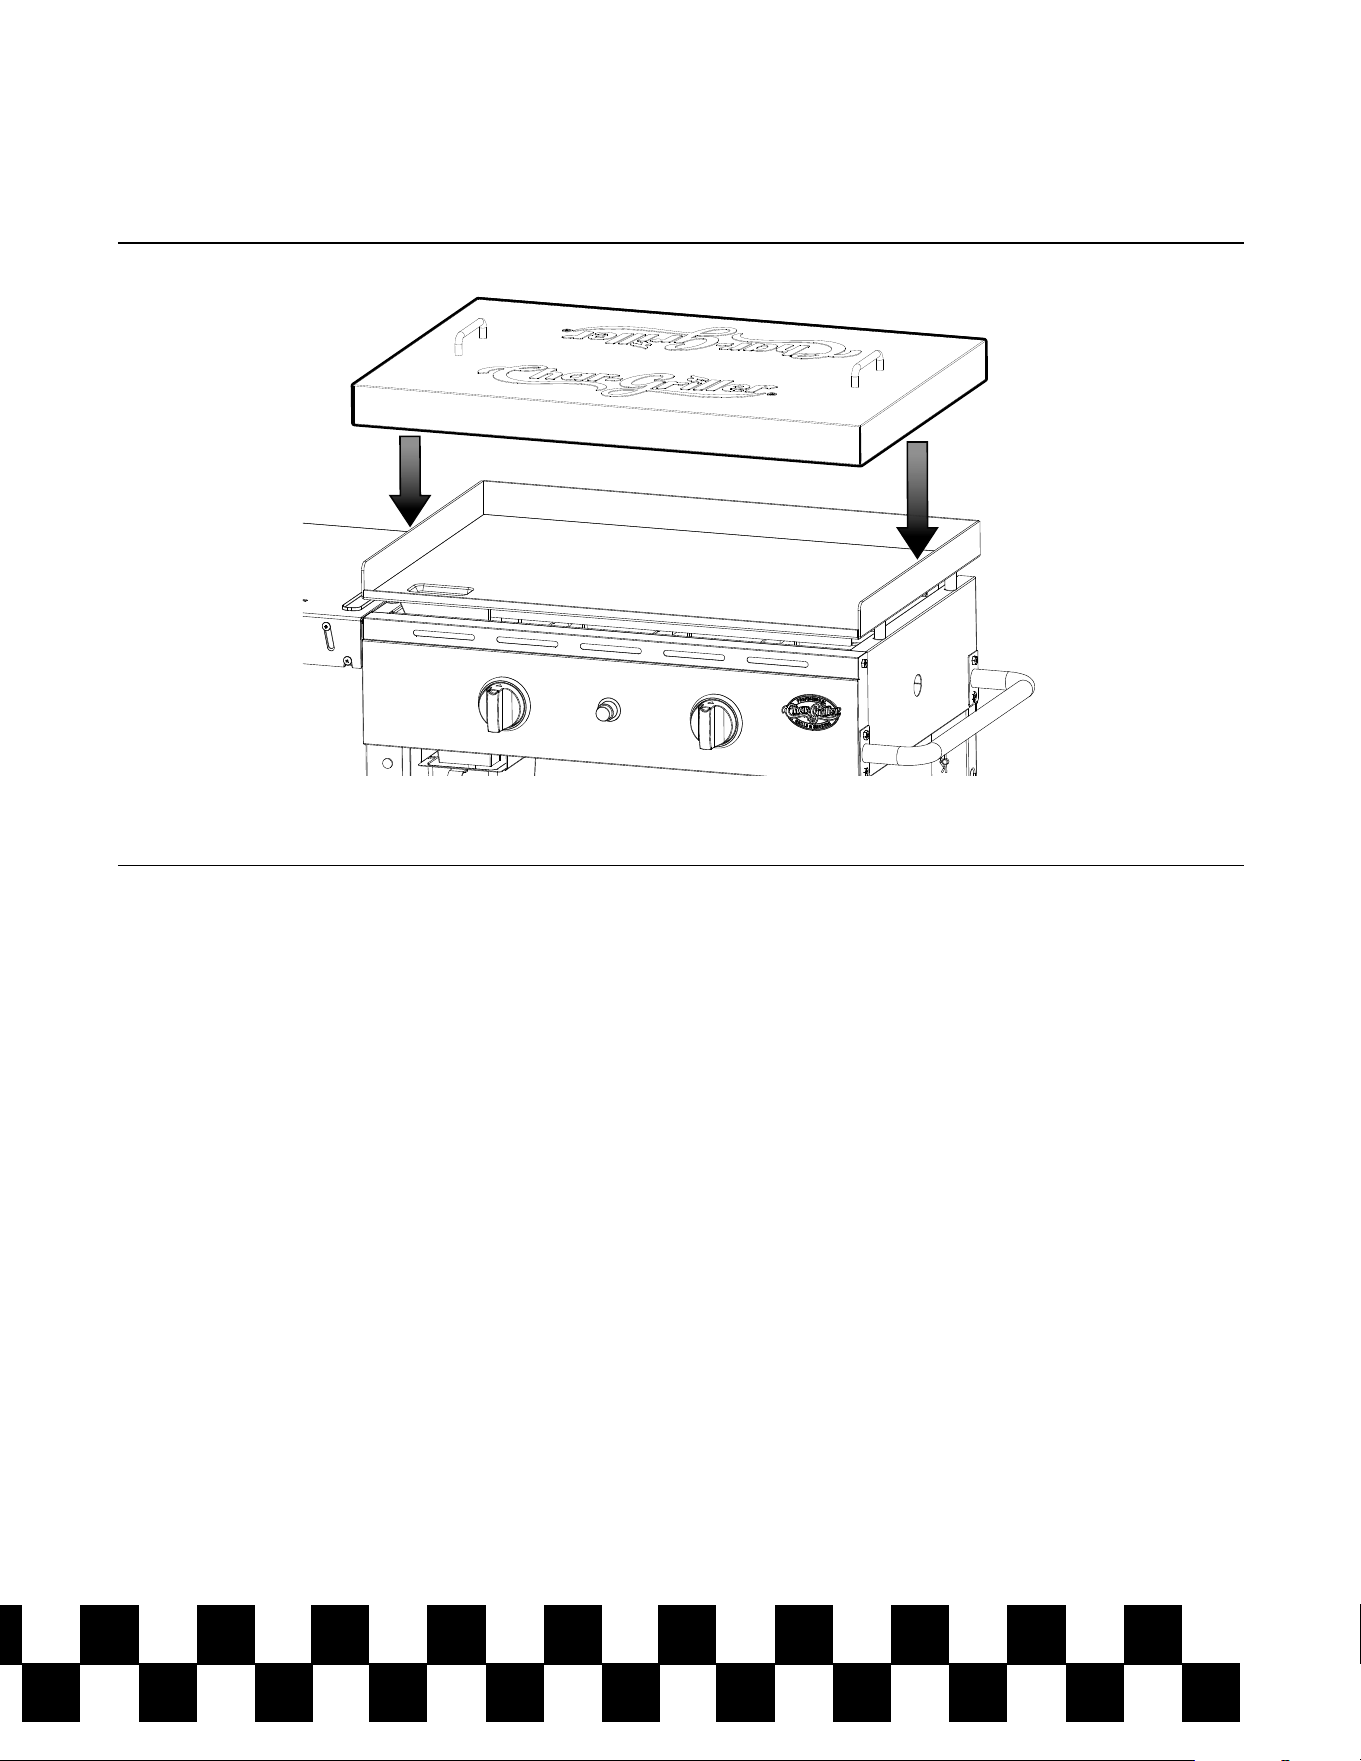
STEP 12
B-14
FULLY ASSEMBLED
LEARN HOW TO SEASON
YOUR NEW GRIDDLE!

C-1
OPERATING INSTRUCTIONS
Setting Up
This appliance is designed for use outdoors, away from any ammable materials. It is important
that there are no overhead obstructions and that there is a minimum distance of 36 inches (90 cm)
from the side or rear of the appliance. Maintain 10 ft. clearance to objects that can catch re or sources
of ignition such as pilot lights on water heaters, live electrical appliances, etc. It is important that the
ventilation openings of the appliance are not obstructed.
The griddle must be used on a level, stable surface. The appliance should be protected from direct
drafts and positioned or protected against direct penetration by any trickling water (e.g. rain). Do not
move griddle while hot, and do not leave unattended during operation.
Protect LP cylinder from direct sunlight and keep away from heat sources max. 122°F (50° C). Do not
move griddle while hot, and do not leave unattended during operation. Position gas cylinder such that
hose is not bent, twisted, subject to tension, or touching any hot parts of appliance.
NEVER EXCEED 650°F BECAUSE THIS WILL DAMAGE THE FINISH AND
CONTRIBUTE TO RUST. PAINT IS NOT WARRANTED AND WILL REQUIRE TOUCH-UP.
THIS UNIT IS NOT WARRANTED AGAINST RUST.
CAUTION:
1. All cleaning and maintenance should be done when the griddle is cool and the fuel supply
is DISCONNECTED.
2. Do NOT clean any griddle part in a self-cleaning oven as the extreme heat will damage
the nish.
3. Do NOT enlarge valve orices or burner ports when cleaning the valve or the burners.
NOTICES:
1. This griddle should be thoroughly cleaned, inspected and seasoned on a regular basis.
2. Abrasive cleaners will damage this product.
3. NEVER use oven cleaner on any part of this griddle.
BEFORE EACH USE:
1. Ensure griddle area is clean and free of any combustible materials like gasoline, lighter uid or any
other ammable vapors or liquids.
2. Do NOT obstruct the ow of the combustion of LP gas and the ventilation of air.
3. Keep the ventilation opening(s) of the LP gas tank area free and clear of debris.
4. Visually check the burner ames to make sure griddle is working properly.
5. See sections below for proper cleaning and maintenance instructions.
6. Check for obstructions of airow to the burners. Spiders, insects, and webs can clog the burner
tubes. A clogged burner can lead to a re.
C-2
Regulator and Hose
Regulator and Hose are supplied with the appliance. If a replacement is necessary, please visit
chargriller.com or call our customer service department, 912-638-4724. Do NOT use replacement parts
that are not intended for this grill. The life expectancy of the regulator is estimated as 10 years. It is
recommended that the regulator is changed within 10 years of the date of manufacture.
The use of the wrong regulator or hose is unsafe; always check that you have the correct items before
operating the appliance.
The hose used must conform to the relevant standard for the country of use. Worn or damaged hose
must be replaced. Ensure that the hose is not obstructed, kinked, or in contact with any part of the
griddle other than at its connection.
Connecting the Hose to the Appliance
Before connection, ensure that there is no debris caught in the head of the gas cylinder, regulator,
burner, and burner ports. Spiders and insects can nest within and clog the burner/venturi tube at the
orice. A clogged burner can lead to a re beneath the appliance.
Clean burner holes with a heavy-duty pipe cleaner.
If the hose is replaced it must be secured to the appliance and regulator connections with hose clips.
Disconnect the regulator from the cylinder (according to the directions supplied with the regulator) when
the appliance is not in use.
The appliance must be used in a well-ventilated area. Do not obstruct the ow of combustion air to the
burner when in use. ONLY USE THIS APPLIANCE OUTDOORS.
Connecting the Gas Cylinder
to the Grill
This appliance is only suitable for use with low-pressure propane gas
tted with the appropriate low-pressure regulator via a exible hose.
The hose should be secured to the regulator and the appliance with
hose clips.
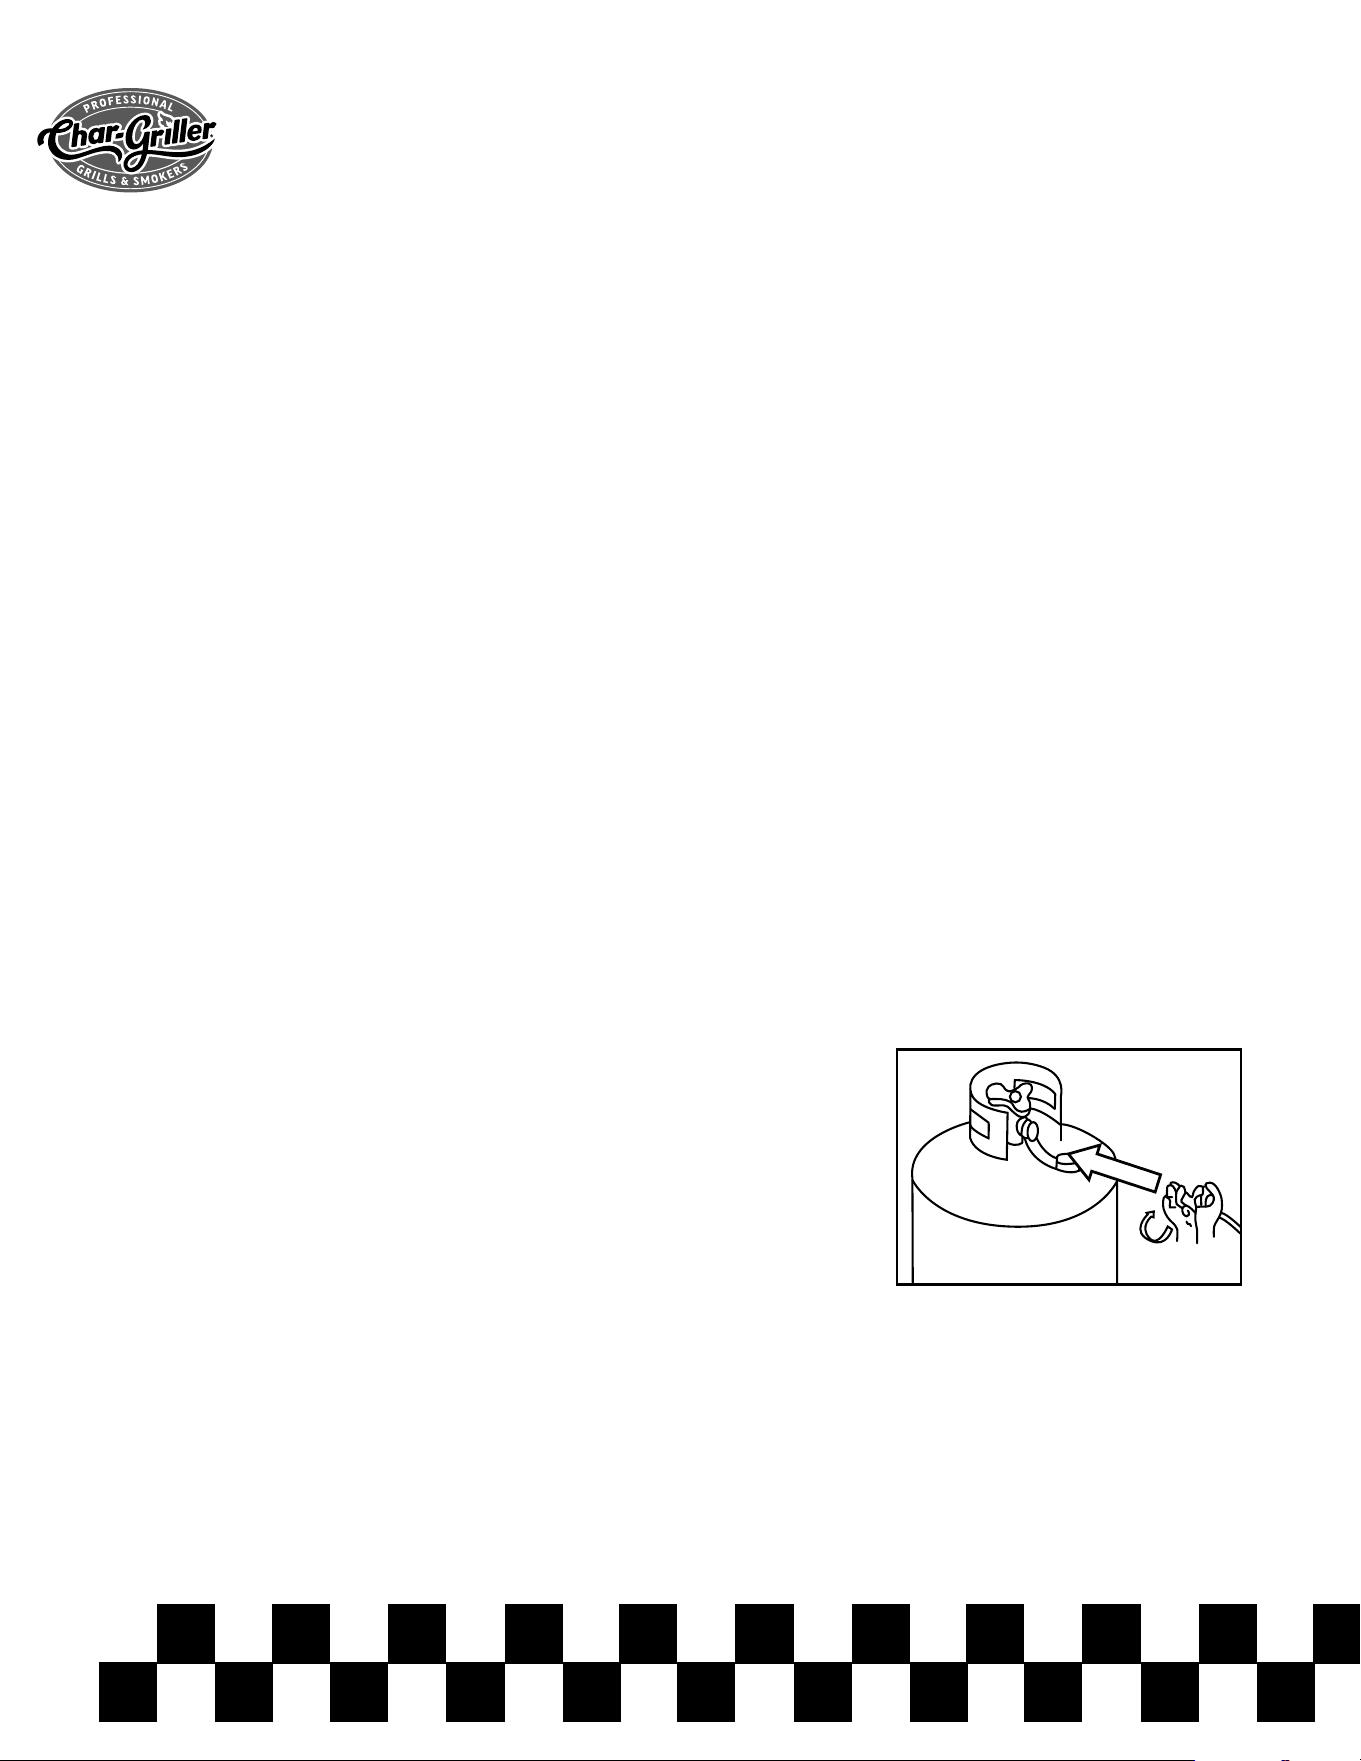
1. Ensure all control knobs are in the OFF position and verify that the
gas cylinder valve is closed by turning the handle on the gas cylinder valve clockwise until it stops.
2. Remove the protective cap from the gas cylinder valve nozzle.
3. Hold the regulator in a straight line with the gas cylinder valve nozzle so the connection does not
cross thread.
4. Insert regulator nipple into the gas cylinder valve nozzle opening.
5. Hand-tighten coupling nut in a clockwise direction. Do not use tools!
6. Perform a Leak Test. (See Leak Testing section of this manual).
GAS OPERATION

C-3
** BEFORE USE CHECK FOR LEAKS **
Never check for leaks with a naked eye. Always use a soapy water solution.
NOTE: Before starting the grill, check for leaks. Make sure the regulator valve is securely fastened to
the burner and the cylinder to prevent re or explosion hazard when testing for a leak.
Always perform the “Leak Test” as described below before lighting the griddle or each time the cylinder
is connected for use.
• Do not smoke or allow other sources of ignition in the area while conducting a leak test.
• Conduct leak test outdoors in a well-ventilated area.
• Do not use matches, lighters or a ame to check for leaks.
• Do not use griddle until any and all leaks are corrected. If you are unable to stop a leak, disconnect
the propane supply. Call a gas appliance serviceman or your local propane gas supplier.
Leak Test
1. In a spray bottle mix 6-9ml. solution, 1 part dish washing soap, 3 parts water.
2. Ensure control valves/burner knobs are in the off position and that regulator is securely connected.
3. Open LP cylinder valve completely by turning wheel counterclockwise.
4. Apply the solution to the hose, gas valve, and regulator, and cylinder.
5. If bubbles form and grow on any of the tested components, there is a leak in the component.
No bubbles means no leak.
6. If a leak has been identied please retest starting with steps 2-5. If leak persists,
call Customer Service, 912-638-4724 or consult your Owner’s Manual for how to replace
or repair griddle components.
Lighting Instructions
Your Char-Griller
®
Griddle is equipped with two individual heat zones each controlled by their own gas
burner. This gives you optimal exibility to cook multiple types of food on a single surface.
When lighting, keep your face and body as far away from burners as possible and never lean over
griddle surface. If griddle does not light in 3-5 seconds, turn off the griddle and wait 5 minutes for gas to
clear before attempting to relight. Failure to do so may result in an explosive are-up, which can cause
serious bodily injury or death. Once lit, but before cooking on griddle for rst time, let griddle sit for 15
minutes. This heat cleans griddle’s internal parts from anything they may have come into contact with
during manufacturing and shipping.
NOTE: Before rst use, it is important to properly season your griddle to ensure the optimal
performance and long life of your Char-Griller
®
Griddle (see the seasoning/care instruction provided in
this manual).
C-4
Main Burners
Make sure there are no obstructions of airow to gas unit. Spiders and
insects can nest within and clog the burner tube. A clogged burner tube
can lead to a re beneath appliance.
1. Make sure all burner knobs are in OFF position and the griddle
hood is open.
2. Open valve on LP gas cylinder.
3. To ignite a burner, push in and rotate knob counterclockwise to “HI,”
then push and hold Electronic Ignition Button until burner lights. If
burner does not light in 5 seconds, turn burner OFF, wait 5 minutes
for gas to clear and repeat procedure.
4. Repeat for all desired burners. Light only burners intended for use.
5. Adjust knobs to desired cooking setting.
After lighting, observe burner ame and make sure all burner ports are lit.
PRE-HEATING NOTE: NEVER PRE-HEAT YOUR GRIDDLE ON HIGH HEAT AS IT CAN CAUSE
DAMAGE TO THE GRIDDLE SURFACE AND NEVER LEAVE YOUR GRIDDLE UNATTENDED
Proper pre-heating will ensure the best cooking performance for your griddle. Always pre-heat your
griddle on the medium or medium-low setting for ve minutes and then turn to high heat or desired
temperature level.
If burner ame goes out during operation, immediately turn gas off on control panel and gas cylinder
valve. Let gas clear for 5 minutes before relighting. Clean griddle after each use. DO NOT use
abrasive or ammable cleaners, as they damage parts and may start a re.
Shutting Off Burners
1. Turn knob(s) clockwise to HI position, then push in and turn to OFF. Never force knob without
pushing in, as this can damage valve and knob.
2. Promptly close gas cylinder valve.
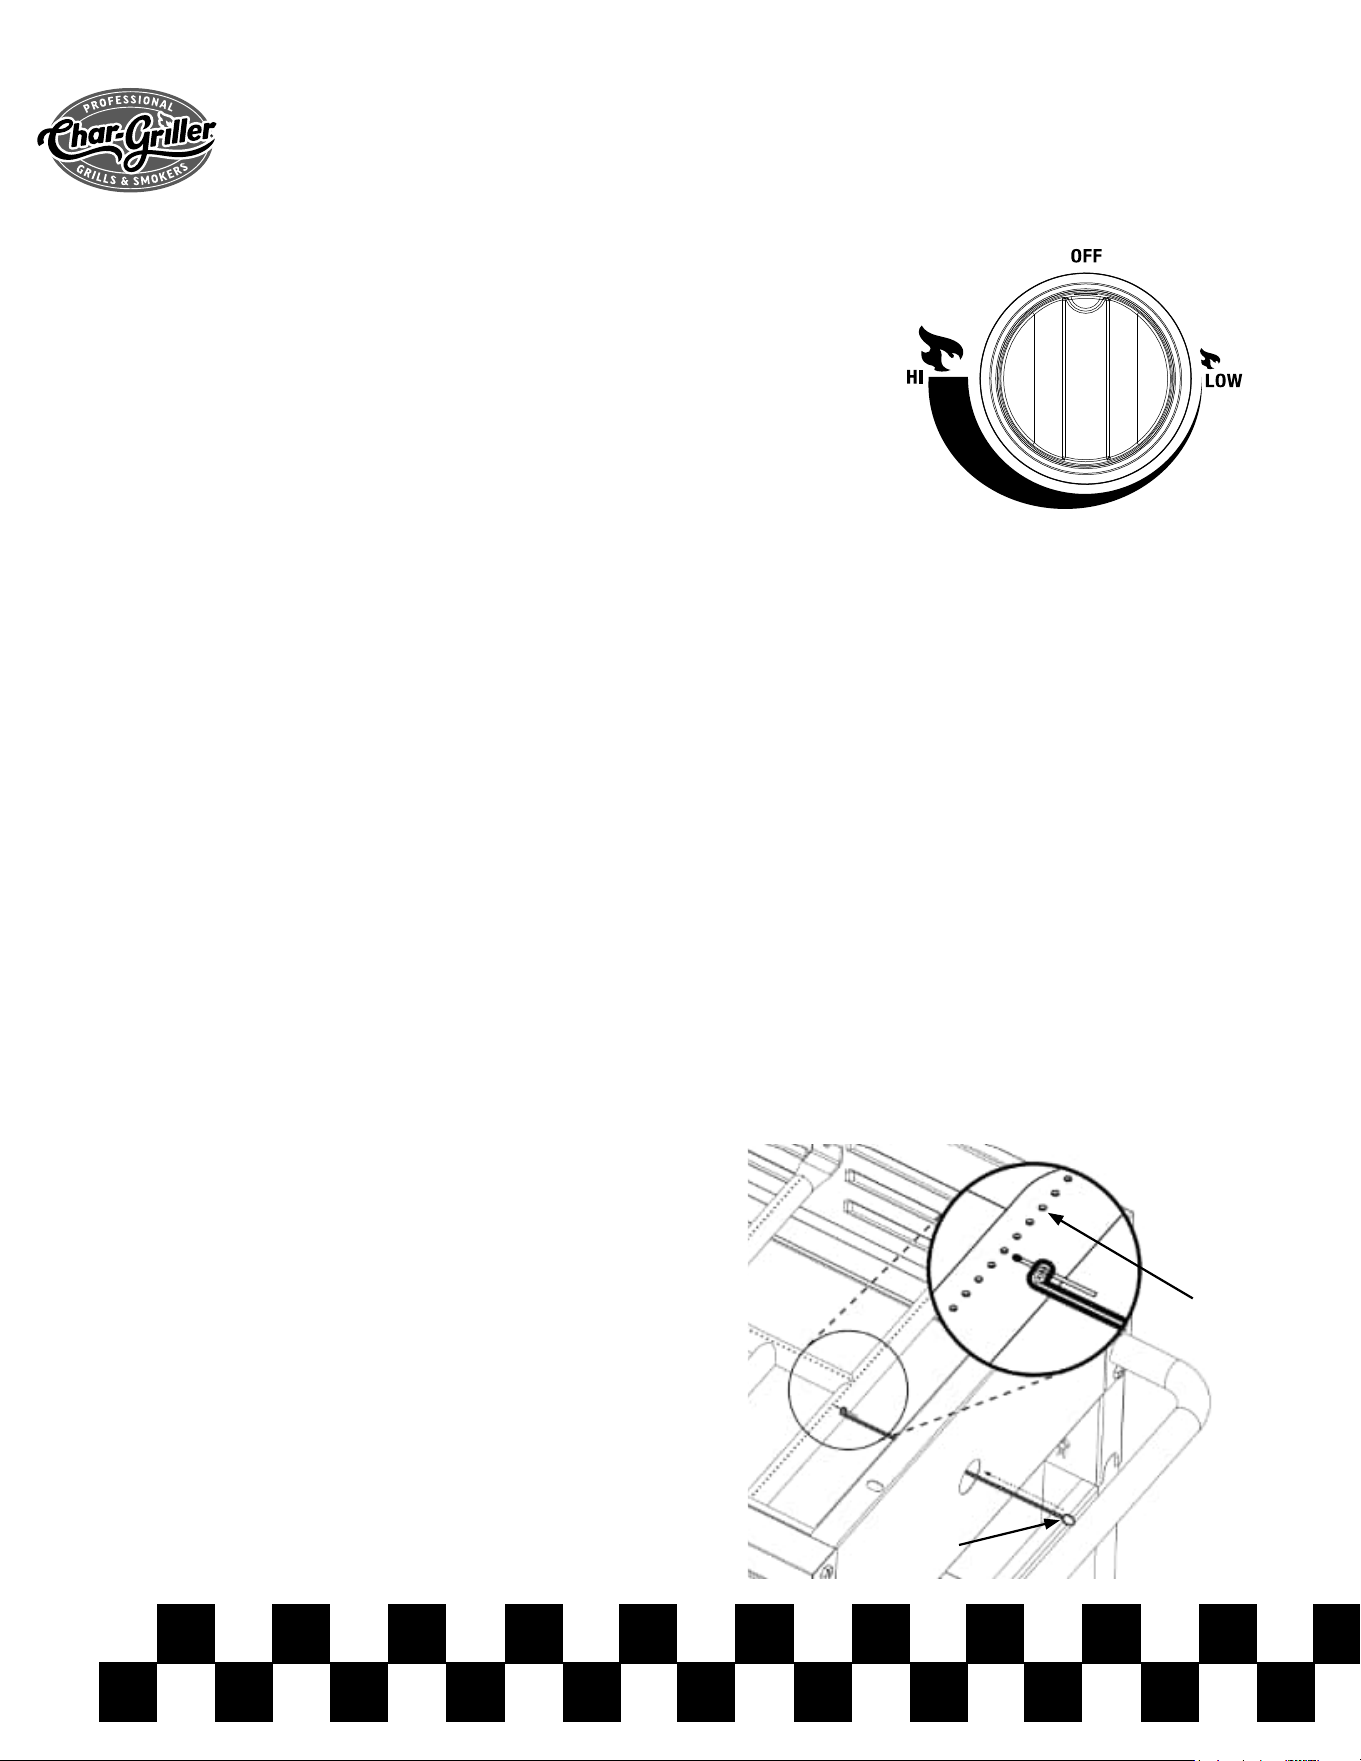
Lighting Burner with
a Match
1. Make sure all burner knobs are in OFF position.
2. Open valve on LP gas cylinder.
3. Push in and rotate knob counterclockwise to
“HI” position.
4. Place match in match holder installed on the side of
the griddle housing. Once match is lit, place ame
through hole on left side of the body near burner
ports. Burner should light immediately.
5. Adjust knobs to desired cooking settings.
Burner Ports
Match Holder
C-5
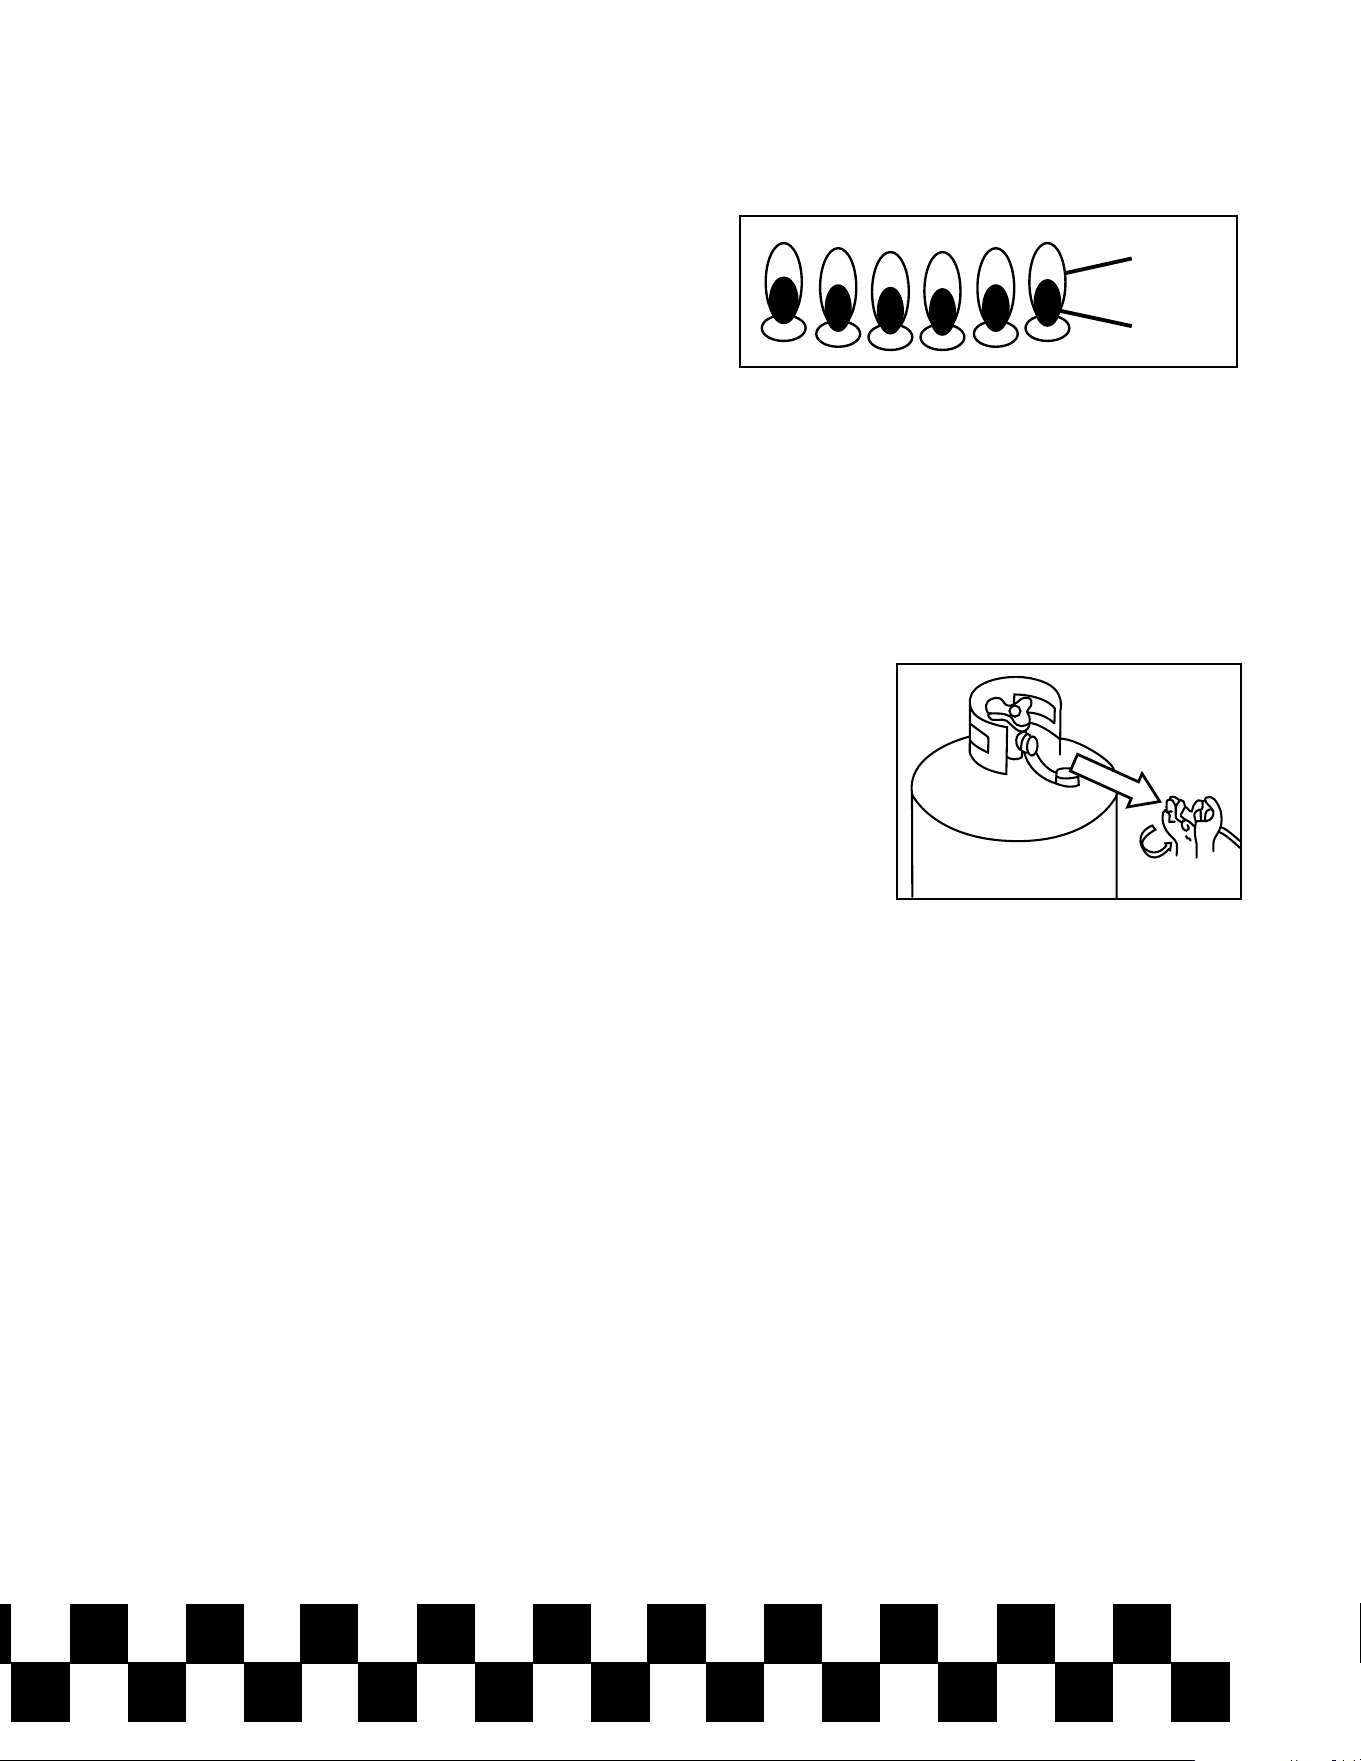
Observe Flame
Height When Lit
Flame should be blue and yellow in color and
approximately 1/2 in. - 3/4 in. (1.2 cm - 1.9 cm) tall on
HI setting.
Temperature Management
Manage heat by adjusting burner knobs from high to low to maintain desired heat for cooking
conditions. Weather conditions will impact your griddle’s heat uctuations. More heat will be required
for cold and windy conditions. Different types and amounts of food will also impact your temperature
management and distribution. Make sure to consider these elements when cooking for optimal the
griddle experience.
Disconnecting the
Gas Cylinder
1. Turn all control knobs to the OFF position and turn the handle on
the gas cylinder clockwise until it stops.
2. Turn coupling nut on regulator in a counter-clockwise direction
until regulator is released from threaded gas cylinder valve nozzle.
3. Place the protective cap over gas cylinder gas nozzle.
Gas Cylinder
The gas cylinder should not be dropped or handled roughly! If the appliance is not in use, the cylinder
must be disconnected. Replace the protective cap on the cylinder after disconnecting the cylinder from
the appliance.
Cylinders must be stored outdoors in an upright position and out of the reach of children. The cylinder
must never be stored where temperatures can reach over 122°F (50° C). Do not store the cylinder near
ames, pilot lights or other sources of ignition. DO NOT SMOKE NEAR A GAS CYLINDER.
Again, this appliance is designed for use outdoors only and away from any ammable materials. It is
important that there are no overhead obstructions and that there is a minimum distance of 36 inches
(90 cm) from the side or rear of the appliance. It is important that the ventilation openings of the
appliance are not obstructed. The griddle must be used on a level, stable surface. The appliance should
be protected from direct drafts and positioned or protected against direct penetration by any trickling
water (e.g. rain).
Parts sealed by the manufacturer or its agent must not be altered by the user. No
modications should be made to any part of this appliance and repairs and maintenance
should only be carried out by a registered service engineer or technician.
High
Low
C-6
Follow these simple cleaning and seasoning steps for optimal performance and long life of your
Char-Griller
®
Griddle. The griddle surface should be cleaned and seasoned regularly, preferably before
and after each use. This regular maintenance will improve your cooking experience as well as help
extend the longevity of your griddle. We strongly recommend that the unit be covered when left outside
for any length of time, especially during the winter months.
Char-Griller
®
products are packaged with a thin coating of vegetable oil to protect against rust and
damage during shipping. This coat may leave some discoloration on your griddle. This is normal and will
even out during the seasoning process.
What is Seasoning?
Seasoning is the process of treating a metal cooking surface with a non-stick coating formed from
bonding fat or oil to the surface with high heat. This step is essential to prepare raw steel or cast-iron
cookware for use. There are two main reasons for seasoning:
• To coat the cookware to prevent rust
• To create a natural, permanent non-stick cooking surface
Seasoning is an easy, but very important step when using and maintaining your Char-Griller
®
Griddle.
Your griddle can and should be seasoned repeatedly to constantly restore the cooking surface and to
continuously improve its cooking performance over time.
Remember: Seasoning is an ongoing process that takes time and repeated use before a griddle or pan
develops a shiny, black surface like your grandmother’s cast iron cookware. The more often you cook
on and season your griddle, the more non-stick the surface will become.
Seasoning Instructions
1. Ensure griddle surface is clean and completely dry.
2. Light the gas burners and allow the surface of the griddle
to heat up (MED-HI).
3. After griddle has heated up, carefully apply a generous, even coating of
food-grade cooking oil (vegetable, olive, axseed, etc.) to the griddle surface.
4. Use a paper towel and tongs to spread the oil evenly across and thinly coat
the entire cooking surface of the griddle.
5. When coated surface begins to lightly smoke, turn off the burners and allow
griddle to cool down naturally.
6. Your griddle is now ready for use!
For optimal results, season the griddle surface after each use for the rst 10 to 12 uses.
GRIDDLE CARE & SEASONING

C-7
Cleaning the Griddle
BEFORE FIRST USE:
Char-Griller
®
Griddles are coated with vegetable oil to prevent rust and damage during shipping. Before
rst time use, wash the griddle surface with hot, soapy water. THIS IS THE ONLY TIME YOU SHOULD
USE SOAP OR DETERGENT ON THE GRIDDLE. Rinse and dry completely with paper towels.
Proceed with seasoning instructions.
AFTER EACH USE:
To clean the griddle after each use, gently scrape away any food residue or build up with a spatula and
wipe down the griddle surface with a paper towel. If necessary, pour hot water onto the griddle surface
and let it boil off tough residue. Wipe again with a paper towel and dry completely. ¼ cup of table salt
can also be used to buff off stuck on food.
For optimal performance, coat the still warm griddle with a thin layer of vegetable oil after each cook to
help maintain the seasoned surface.
General Griddle Cleaning
• Do not mistake brown or black accumulation of grease and smoke for paint.
• Do NOT apply a caustic griddle/oven cleaner to painted surfaces.
• To clean plastic parts: Wash them with warm soapy water and wipe dry. Do not use Citrisol, abrasive
cleaners, degreasers or a concentrated oven cleaner on plastic parts. Damage to and failure of
parts can result.
• To clean painted surfaces: Wash with mild detergent or nonabrasive cleaner and warm soapy water.
Wipe dry with a soft nonabrasive cloth.
• If rust or scaling develop on the cooking surface, scrub it off using steel wool, a steel brush or high
grit sandpaper and re-season surface.
Baked-on grease deposits may require the use of an abrasive plastic cleaning pad. Use only in direction
of brushed nish to avoid damage. Do not use abrasive pad on areas with graphics.
Storage of Appliance
Ensure griddle surface is completely dry before storing. When the appliance is not in use, it should be
covered and stored in a dry, dust-free environment. Storage of an appliance indoors is only permissible
if the cylinder is disconnected and removed from the appliance. To maximize life of the grill, use a
custom-t Char-Griller
®
Cover (Model #8175).

C-8
Q. What if my griddle starts to rust?
A. If rust appears on the griddle surface, carefully rub the rust off with steel wool or low grain sandpaper
and re-season the surface. Take care to always completely dry your griddle before storing and keep
away from rain and sprinklers.
*CUSTOMERS IN HUMID OR COASTAL CLIMATES MAY REQUIRE MORE FREQUENT
SEASONINGS AND THE USE OF HEAVIER COOKING OILS TO AVOID RUSTING
AND CORROSION.*
Q. What types of cooking oils can I use to season my griddle?
A. We recommend the following oils for seasoning purposes: vegetable oil, canola oil, coconut oil,
axseed oil, olive oil and sesame oil. Lard can also be used to season the griddle top.
Q. Can I use dish detergent to clean my griddle?
A. Grease cutting dish detergents will erase the seasoning on the griddle, so we do not recommend
ever using soap on your griddle after it has been seasoned. For tough food caked on to the griddle, use
table salt and hot water and scrub. Make sure to fully dry off the griddle and coat with oil after scrubbing.
Q. Why does my griddle surface look dull and dry instead of shiny and black?
A. Season is a continuous process. Over time and the more often you season your griddle top, the more
shiny, black and non-stick it will become.
Q. What do I do if I need to store my griddle for an extended period of time?
A. We recommend coating your griddle top in a light layer of vegetable oil before storing for a long
period of time. This will prevent rust and any residue from collecting on the grill. Make sure to cover and
store in a dry place. When taking the griddle out of storage, wipe oil off with a paper towel.
FREQUENTLY ASKED QUESTIONS

D-1
Breakfast
SUNDRIED TOMATO OMELET
Ingredients (per omelet):
2 to 3 eggs
2 tbsp Milk
1 Tbsp Sundried tomatoes
1 to 2 slices diced ham
1/8 Cup Mozzarella Cheese
Fresh Basil, chopped
Salt and Pepper to Taste
Instructions:
1. Whisk together eggs, milk, and salt and pepper.
2. Preheat griddle to medium high and add desired oil.
3. Pour egg mixture on griddle using the spatulas to make sure it doesn’t spread too much.
4. Allow to cook for 2 to 3 minutes and add in tomatoes, cheese, ham and basil to one side of the
omelet and use the spatula to fold over the other side to make the omelet.
5. Turn down the burner to medium low and allow to cook until cheese is melted, ipping once.
PANCAKES
Ingredients:
3 Cups of Flour
2.5 Tbsp Baking Powder
2 tsp Salt
2 Tbsp Sugar
2.5 Cups Milk
Eggs
6 Tbsp Melted Butter
Instructions:
1. Combine all ingredients and mix until smooth.
2. Heat a lightly oiled griddle to medium high heat.
3. Pour scoops of batter onto griddle using approximately ¼ cup for each pancake.
4. Brown on both sides and serve hot.
GRIDDLE RECIPES

D-2
FRENCH TOAST
Ingredients:
12 slices of thick bread
4 eggs
1.5 Cups Milk
½ tsp Ground Cinnamon
½ tsp Ground Nutmeg
2 tsp Vanilla Extract
Salt to taste
Instructions:
1. Beat together egg, milk, salt, spices and vanilla.
2. Heat lightly oiled griddle to medium high heat.
3. Dunk slices of bread in egg mixture, ensuring both sides are soaked.
4. Place soaked slices on griddle, cook on both sides until golden brown.
BACON
Ingredients:
Package of favorite bacon
Instructions:
1. Heat griddle to medium high.
2. Place strips of bacon on griddle.
3. Flip to brown both sides.
4. Remove when desired level of crispiness is reached.

D-3
PHILLY CHEESESTEAK
Ingredients:
2 Lbs thinly sliced beef
1 Onion, Sliced
2 Green Peppers, Sliced
1 tsp garlic powder
2 Tbsp butter
Salt and Pepper to Taste
3 Tbsp Apple Cider Vinegar
12 to 16 slices of Provolone Cheese
1 Jar of Cheese Whiz
6 Hoagie Rolls
Instructions:
1. Preheat grilled to medium high heat.
2. Add tablespoon of butter and some oil to griddle.
3. Add onions and peppers to griddle.
4. Season with salt, pepper, vinegar and ½ tsp garlic powder. Toss to combine.
5. Add another tablespoon of butter and some oil to the griddle.
6. Add beef to the griddle and chop it up more with your metal spatulas to ensure it cooks evenly.
7. Season beef with salt, pepper and ½ tsp of garlic powder.
8. When meat is cooked, divide it up on the griddle top into 6 piles.
9. Turn griddle heat to medium and add a few tablespoons of Cheese Whiz to each pile of meat.
10. Divide veggies up evenly among the six piles of meat.
11. Add 2 to 3 slices of provolone cheese to each pile.
12. Split the hoagie rolls and toast them on the griddle.
13. Once the cheese is melted, put each pile of meat on hoagie roll and serve hot.
Lunch

D-4
SMASH BURGER
Ingredients:
2 Lbs of ground beef
American Cheese
Salt and Pepper
Char-Griller Steak Rub
Hamburger Buns – 12
Instructions:
1. Season beef and potion out into 1 inch round balls.
2. Preheat griddle to medium high heat.
3. Place beef on griddle and place spatula on them, press down on the spatula to smash the burger
until its super thin.
A rolling pin or wooden spoon helps with leverage.
4. Cook burgers for 1 minute and then ip immediately placing cheese on top of the burger.
5. Allow to cook for one more minute.
6. Toast buns on griddle.
7. Stack two burgers on top of each other on bun and add burgers toppings if desired.
FLAT IRON
®
TOMATO SOUP GRILLED CHEESE
Ingredients:
8 Slices of Bread (Your Favorite Kind)
4 Slices of Cheese (Your Favorite Kind)
2 Tomatoes (Cut Into 8 Slices)
1 Tbsp Garlic Salt
1 Tbsp Olive Oil
Instructions:
1. Make sure your Char-Griller
®
Flat Iron
®
griddle is seasoned and ready for use! Turn griddle on
medium low heat, and preheat for 5-10 minutes.
2. Drizzle bread with olive oil, and sprinkle slices with garlic salt. Arrange on Flat Iron
®
griddle, and let
the bread begin to toast for 2 minutes.
3. Next, layer your slice of bread with cheese, slices of tomato, and basil. Arrange the rest of the
ingredients on the bread and the cheese to melt, about 5 more minutes.
4. Fold opposite half onto it’s match, and pull sandwiches from griddle. Cut in half, and enjoy!

D-5
Dinner
FLAT TOP STEAK
Ingredients:
6 Strip Steaks
3 Tbsp Butter
Salt and Pepper
Instructions:
1. Season steaks with salt and pepper on both sides.
2. Add butter to griddle and heat to medium high heat.
3. Add steaks to griddle and sear for 5 to 6 minutes on each side or until desired temperature is
reached. (145 degrees is recommended).
CHICKEN
Ingredients:
2 Lbs Chicken Breasts
4 Tbsp Dijon Mustard
2 Tbsp Honey
2 Tbsp White Wine Vinegar
3 Scallions, diced
Salt and Pepper to Taste
1 tsp Paprika
Instructions:
1. Add chicken, mustard, honey, vinegar, scallions, salt and pepper and paprika to plastic bag.
2. Ensure chicken is fully coated in marinade.
3. Marinate in refrigerator for at least 2 hours.
4. Add oil of choice to griddle and preheat to medium high.
5. Place marinated chicken on griddle and cook for 6 to 8 minutes on each side or until internal
temperature reaches 165 degrees.
6. Serve with zucchini or asparagus. Also great chopped up on salads!
D-6
SHRIMP STIR FRY
Ingredients:
1 Lb. Shrimp, peeled and deveined
1 Head of broccoli, chopped
3 Large Carrots, peeled and chopped
1 can of water chestnuts, drained
1 can of baby corn, drained
1 yellow onion, sliced
2 Green Peppers, diced
4 Cups of cooked rice
1 Egg
1 Tbsp Freshly grated ginger
4 Tbsp Sesame Oil
Soy Sauce to Taste
Salt and Pepper to Taste
Instructions:
1. Add 2 Tbsp sesame oil to griddle and preheat to medium high.
2. Add all veggies to grill and toss to coat with sesame oil.
3. Cook for 6 to 8 minutes.
4. Add 1 Tbsp sesame oil to griddle and add shrimp.
5. Toss shrimp and cook until opaque. (about 5 to 6 minutes)
6. Combine veggies and shrimp and add desired amount of soy sauce, 1 Tbsp ginger and salt and
pepper to taste.
7. Turn the two left-most griddle burners to low and move veggies and shrimp to that side.
8. Add nal 1 Tbsp of sesame oil to griddle and crack egg.
9. Scramble egg and add rice to the egg. Cook until slightly browned.
10. Plate with rice under veggies and shrimp and serve.
FIND MORE RECIPES
AT CHARGRILLER.COM
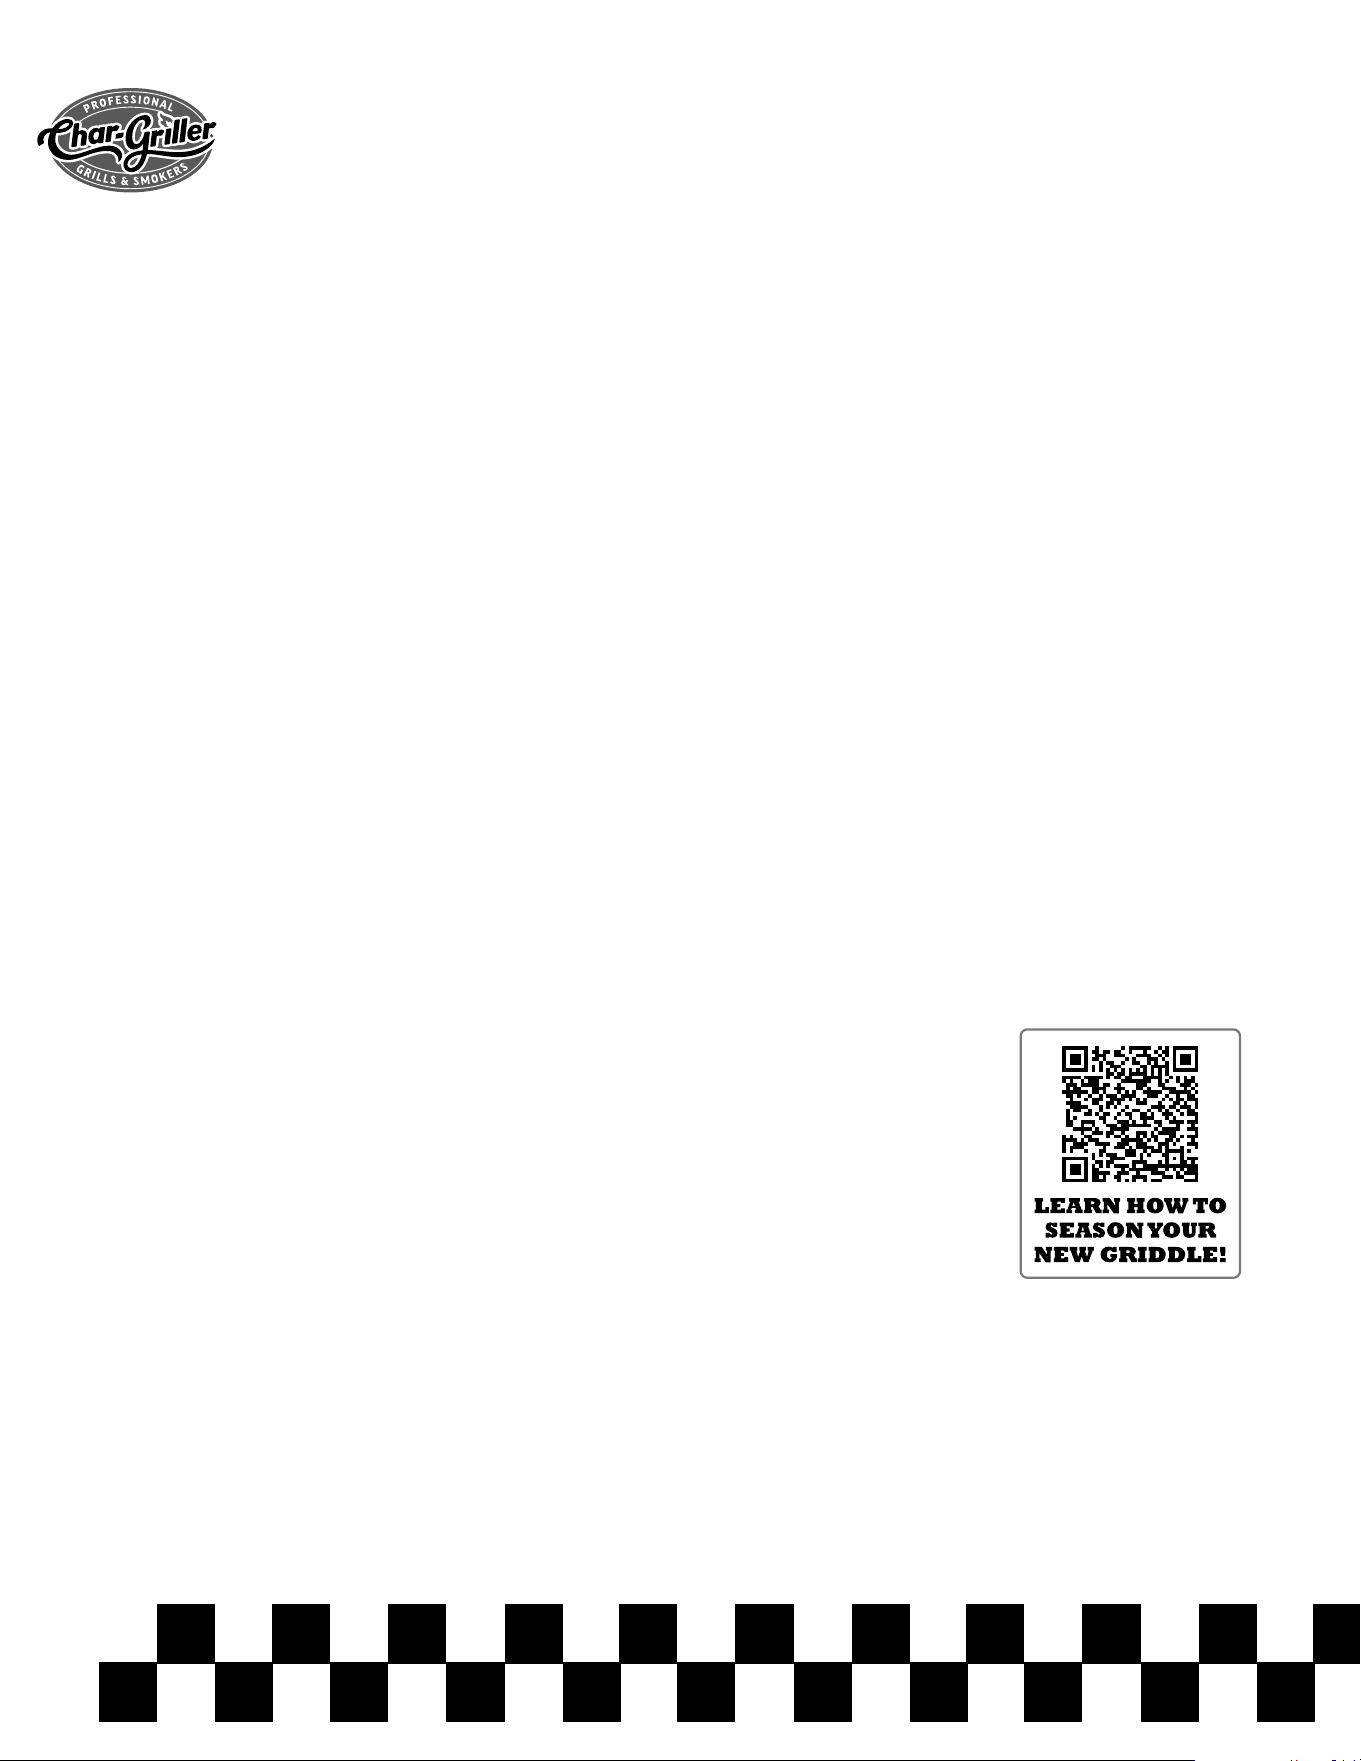
E-1
Flat Iron
®
Griddle Starter Kit
(2) Squirt Bottles
(2) Spatulas
Scraper
Model #8905
Flat Iron
®
Griddle Breakfast Kit
(1) Batter Dispenser
(1) Cast Iron Bacon Press
(2) Non-stick Egg Rings
Model #8933
Flat Iron
®
Griddle Cleaning Kit
(1) Griddle Scraper
(2) Cleaning Bricks & Handle
(3) Scouring Pads & Handle
Model #8922
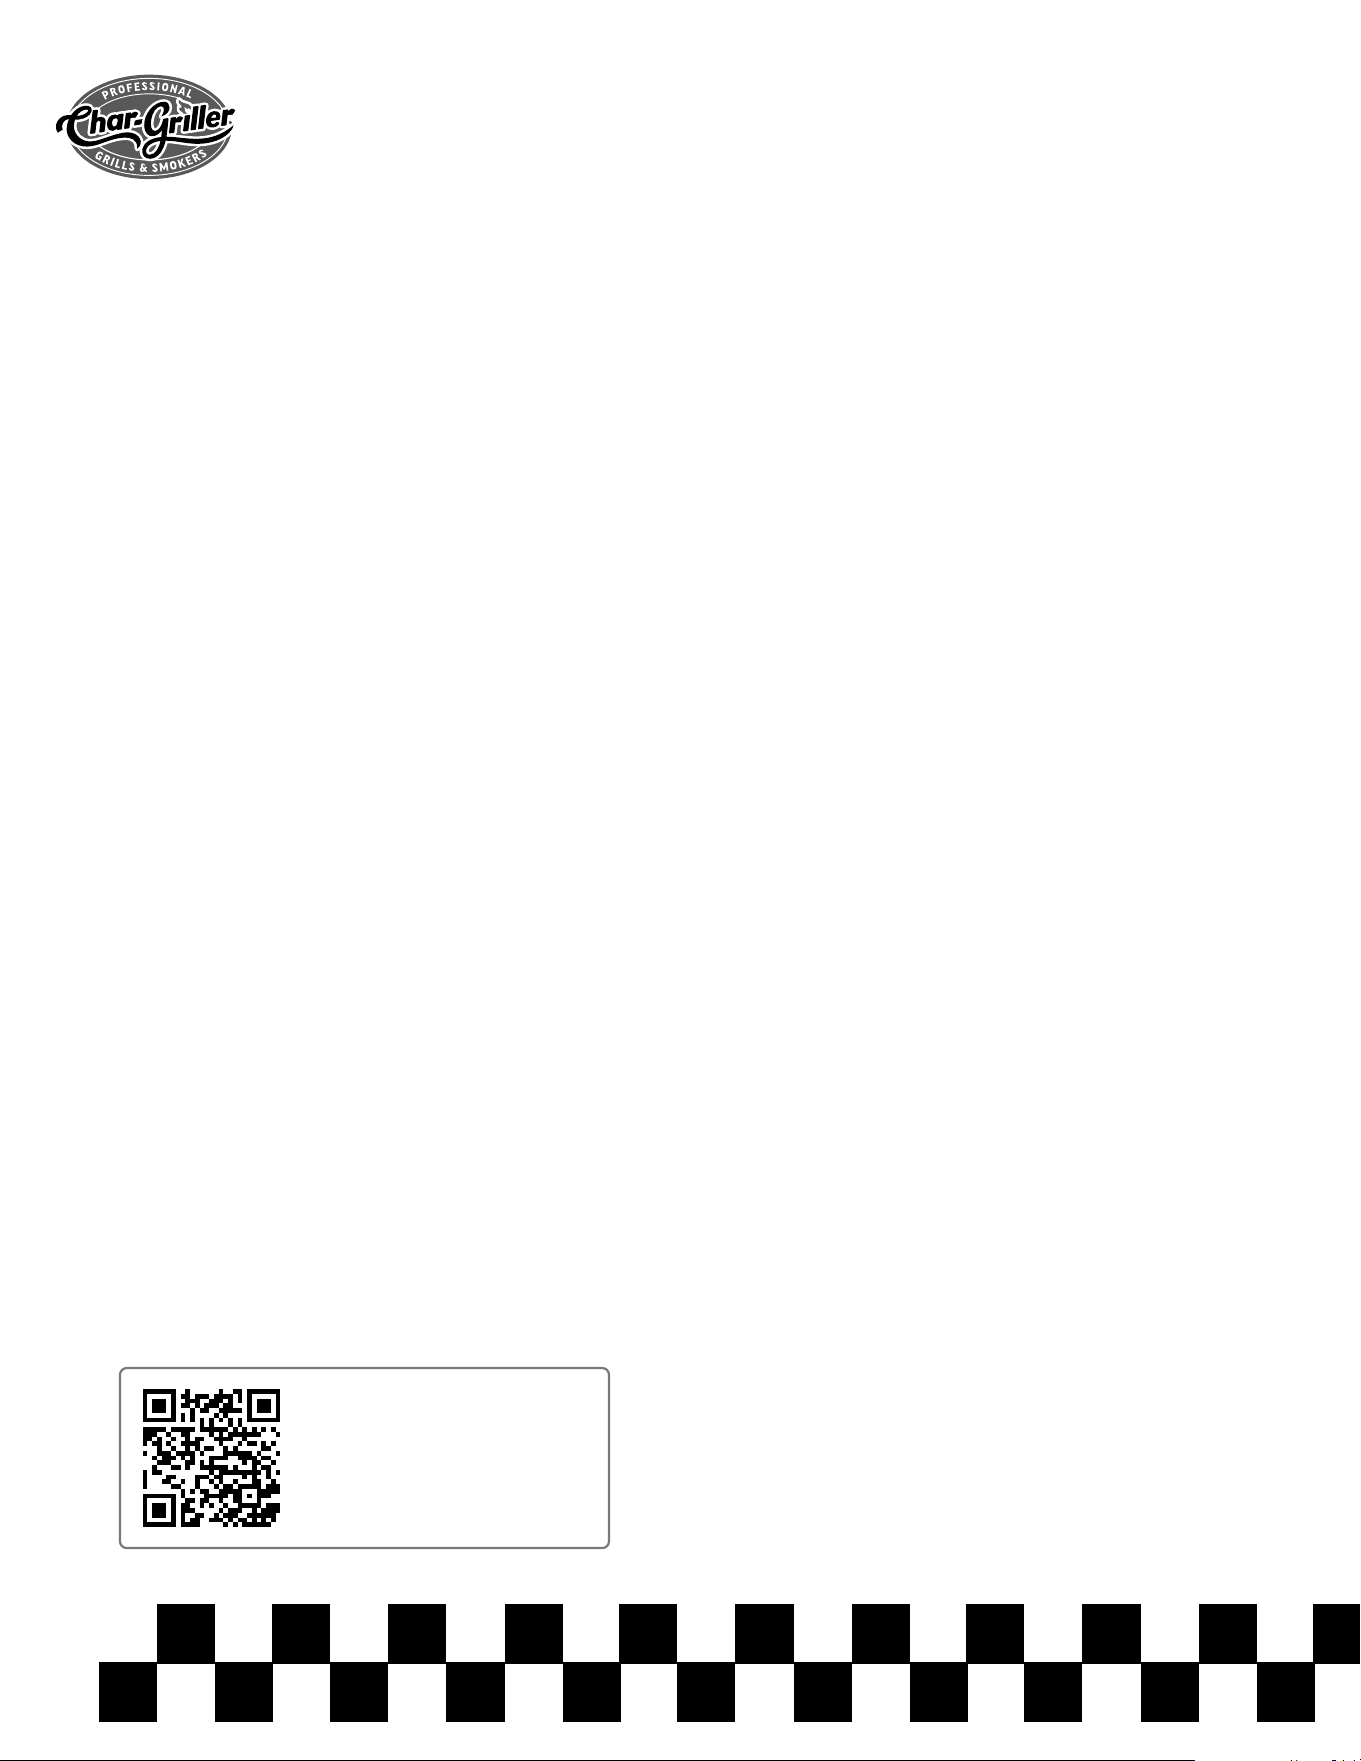
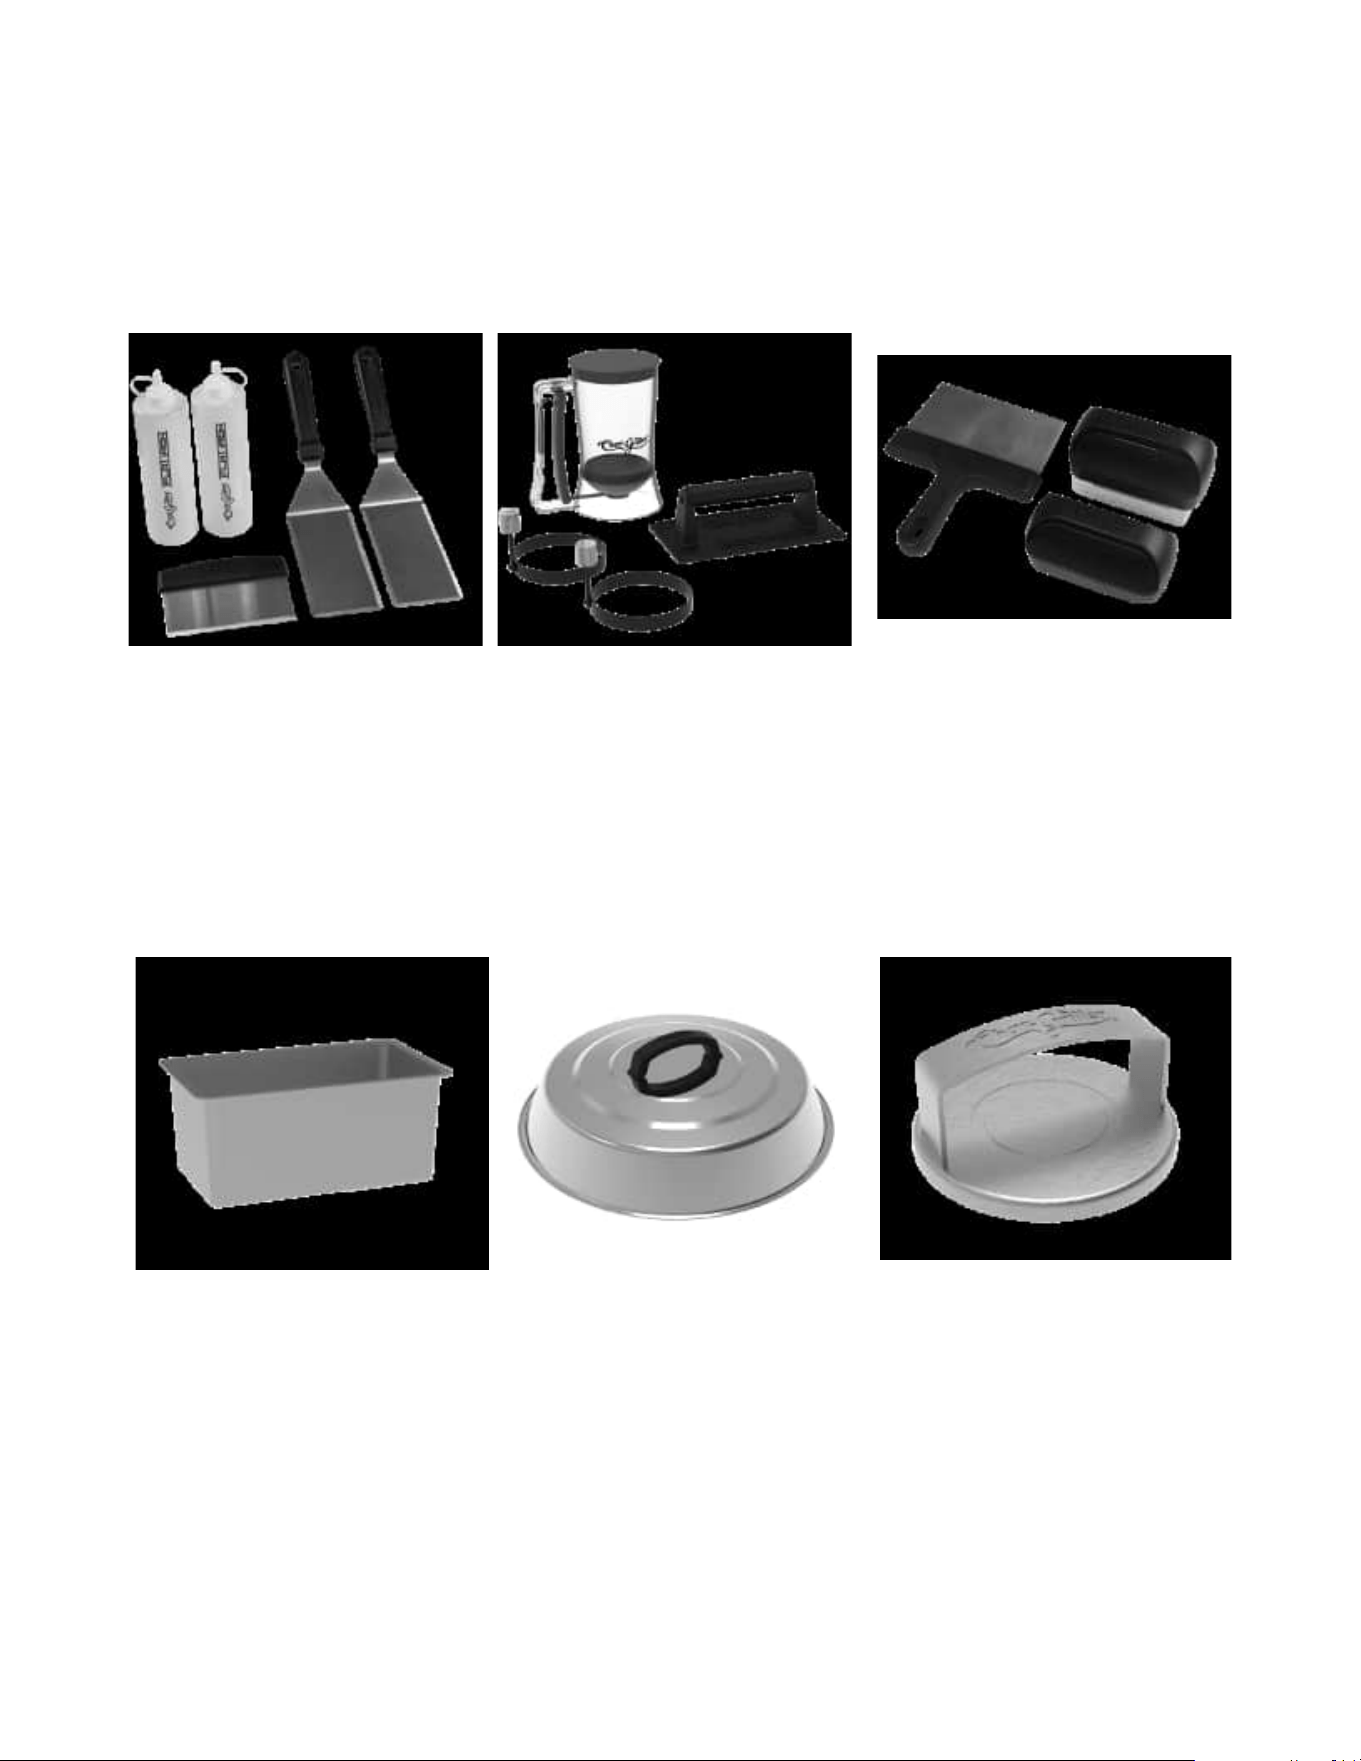
Flat Iron
®
Burger Press
Create perfect burgers
every time
Flat Iron
®
Basting Cover
Melt cheese
Steam vegetables
Keep food warm
Stay Cool™ handle
Flat Iron
®
Grease Cup Liners
Quick, easy and disposable
Make cooking and cleaning
on your Flat Iron
®
a breeze
Model #8903 Model #8966
Model #8813
FAVORITE ACCESSORIES
FOR THE FULL LINE OF ACCESSORIES VISIT CHARGRILLER.COM

This Page Intentionally
Left Blank

P.O. Box 30864
Sea Island, GA 31561
912-638-4724
www.CharGriller.com
Service@CharGriller.com
For product support, please contact us at:
Service@CharGriller.com
OR
CALL US: 912-638-4724