
(HOT, NORMAL & COLD WATER DISPENSER)
Read and save these instructions before use
USER MANUAL
TABLE TOP WATER DISPENSER
HOT COLDNORMAL
HOT POWER COLD
HWTLMC516S
www.honeywellwaterdispensers.com
support@honeywellwaterdispensers.com

Before first use
Parts and features
Important safety instructions
Function buttons
Indicator lights
Installation guidelines
Installing your water dispenser for the first time
Instructions for replacing the water bottle
Maintenance
Technical specification
Troubleshooting guide
Warranty card
2
3
12
9
CONTENTS
4-5
5
5
6
7
8
9
10-11

BEFORE FIRST USE
Read all instructions carefully before setting up and operating the unit.
Please keep this instruction manual for future reference. This manual is
designed to provide you with important information needed to operate
and maintain your water dispenser. If you don’t understand something
or you need more assistance please contact us. Failure to follow these
instructions may damage and/or impair the operation and void the
warranty. Keep proof of the original purchase date with this guide to
establish the warranty period. Keep a copy of the sales receipt.
Write down the model and serial numbers which can be found on a
label located on the side of the water dispenser.
Please write the information here:
EN 2
Date of Purchase:...............................................................................................................
Model Number: HWTLMC516S
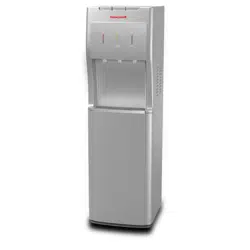
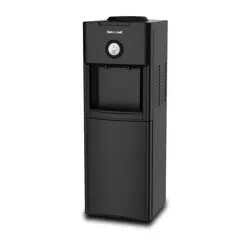
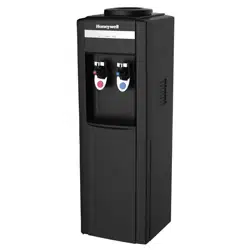
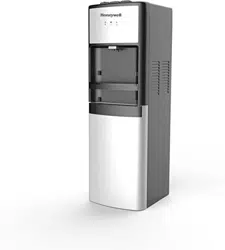
Color: White ( ) Silver ( ) Black ( )
Serial Number:......................................................................................................................
WARNING: BEFORE CONNECTING THE APPLIANCE TO THE POWER
SOURCE, LET IT STAND UPRIGHT FOR APPROXIMATELY 24 HOURS.
THIS WILL REDUCE THE POSSIBILITY OF A MALFUNCTION IN THE
COOLING SYSTEM FROM MISHANDLING DURING DELIVERY.
HOT COLDNORMAL
HOT POWER COLD
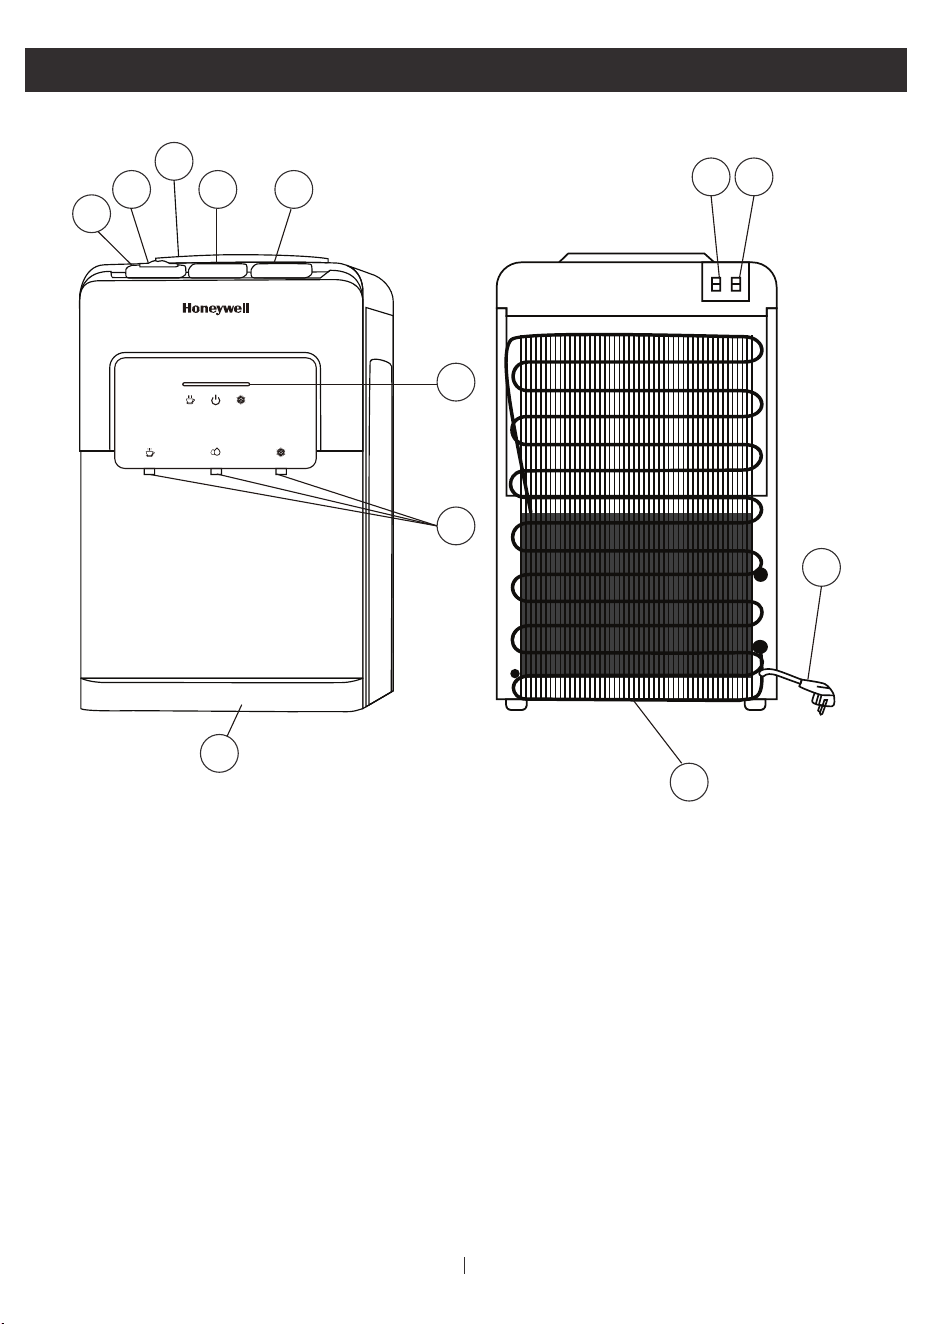
PARTS AND FEATURES
10
5
6
7
8
4
1
2
3
9
11
12
1. Bottle supporter
2. Safety lock
3. Hot water tap
4. Normal water tap
5. Cold water tap
6. Indicator light
7. Faucets
8. Drip tray
9. Hot switch (red)
10. Cold switch (green)
11. Power cord
12. Drain plug
EN 3

IMPORTANT SAFETY INSTRUCTIONS
WARNING: To reduce the risk of fire, electrical shock, or injury when using your
appliance, follow the basic precautions:
Read and understand all instructions before using the water dispenser.
EN 4
Never locate the product where it may fall into a bathtub or other water
container.
DO NOT use in bathrooms or outdoors.
If the unit is damaged or malfunctions, do not continue to operate it. Refer
to the troubleshooting section and/or please seek professional advice.
DO NOT let children play with this appliance, packing, or plastic bags.
DO NOT attempt to repair or adjust any electrical or mechanical functions
of the unit, as this may void the warranty.
Remove the power cord from the electrical receptacle by grasping and
pulling on the power cord plug-end only, never pull the cord.
Always unplug the appliance from the power source before cleaning,
servicing, or relocating the unit. Make sure to turn OFF the unit when the
hot and cold water tanks are empty. Always have water inside the tanks
before turning ON any switch. Overlook of this warning may cause
permanent damage to the unit from overheating.
DO NOT run the power cord under carpeting or cover it with rugs or runners.
Keep the cord away from areas where it may be tripped over.
DO NOT cut or remove the third (ground) prong from the power cord under
any circumstances. Any questions concerning power and/or grounding
should be directed toward a certified electrician. Improper use of the
grounded plug can result in the risk of electrical shock. If the power cord is
damaged, have it replaced by an authorized service center.
Make sure the water dispenser is plugged into an exclusive properly
installed MCB (Miniature Circuit Breaker).
DO NOT operate any product with a damaged cord or plug. Using an
extension cord is not recommended with this appliance.
Before operating the product remove it from its packing and check if it is in
good condition.
Your water dispenser uses 230V , 50Hz electrical current.

It has three indicator lights for the hot, cold water and power respectively,
which will light up while the feature is working. Once the water has reached
the temperature, the indicator lights will turn OFF.
Never clean parts with flammable fluids. The fuel can create a fire hazard
or explosion.
POWER:
IMPORTANT SAFETY INSTRUCTIONS (CONTINUED)
FUNCTION BUTTONS
INDICATOR LIGHTS
EN 5
Press the cold switch (green) on the back of the unit to turn ON the cooling
function. Press the hot switch (red) to turn on the heating function. DO NOT
turn on the hot function until the unit has water inside the tanks. Please
refer to INSTALLING YOUR WATER DISPENSER FOR THE FIRST TIME section.
WATER TAPS:
Press down the hot, normal or cold water taps to dispense the desired water
temperature. To use the hot water, slide the safety lock to the left side and
simultaneously press down the tap.
DRAIN PLUG:
Turn counterclockwise to remove the drain plug to drain the water from the
tanks. Turn clockwise to close the drain plug.
This appliance is not intended for use by persons (including children or
elderly) with reduced physical, sensory or mental capabilities, or lack of
experience and knowledge unless they have been given supervision or
instruction concerning the use of the appliance by a person responsible
for their safety.
DO NOT store or use gasoline or any other flammable vapors and liquids
in the vicinity of this or any other water dispenser. The fumes can create
a fire hazard or explosion.
Keep this instruction handy for future reference.
INSTALLATION GUIDELINES
DO NOT use an extension cord with this unit. If the power cord is too short,
have a qualified electrician or service technician install an outlet near the
appliance.
Remove the exterior and interior packing.
With both hands, one under the front panel between the faucets and the
other in the handle located in the back, move the unit and place it in the
desired location, provided it is a leveled surface.
ATTENTION: If you do not plan to use the water heating function for more than
three days, we recommend that you turn off the hot water power switch.
EN 6
freezing (32
0
F / 0
0
C).
This unit is for indoor use only and must be installed in a cool, ventilated area.
Place the unit on a level surface that is strong enough to support the
dispenser.
DO NOT cut or remove the third (ground) prong from the power cord under
any circumstances. Any questions concerning power and/or grounding
should be directed toward a certified electrician.
Plug the unit into an exclusive properly installed grounded wall outlet.
Make sure the hot and cold water power switches are in the OFF position
before plugging the unit into the power source.
Please follow the instructions to load the water bottle before plugging the
unit into a power source.
DO NOT locate the unit in areas where the temperature may fall below
Direct sunlight may also cause algae to grow inside your water bottle which
may later cause product malfunction.
Direct sunlight may affect the unit over time and heat sources may increase
electrical consumption. Extreme cold ambient temperatures may also cause
the appliance not to perform properly.
Locate the unit away from direct sunlight and sources of heat (stove, heater,
radiator, etc.).
Keep the area around the unit free of dust and dirt.
BEFORE CONNECTING THE UNIT TO THE POWER SOURCE, let it stand up
for uprights for approximately 24 hours. This will reduce the possibility of a
malfunction in the cooling system from mishandling during delivery.
Allow 6 inches of space between the unit and the wall.
DO NOT use an adapter plug with this unit.

INSTALLING YOUR WATER DISPENSER FOR THE
FIRST TIME
IMPORTANT STEPS BEFORE USING YOUR WATER DISPENSER
BEFORE CONNECTING THE APPLIANCE TO THE POWER SOURCE, let it
stand upright for approximately 24 hours. This will reduce the possibility of a
malfunction in the cooling system due to mishandling during delivery.
WARNING: Please make sure to turn OFF the unit when the hot and cold water
tanks are empty. Always have water inside the tanks before turning ON any
switch.
The water dispenser is pre-cleaned at the factory but the reservoir, hot and
cold water tanks, and water lines must be flushed with water before use as
follows (please run the process twice if there is an unpleasant taste or smell
after the first time):
1. Make sure the unit is unplugged.
2. Remove the receptacle by turning it to the left or right depending on the
model. Make sure that the hot water funnel (semi-transparent plastic
piece) is firmly placed on the metal tip of the tank.
3. Fill the water tank with tap water until it is full to at least 1 inch above the
hot water funnel. Allow the water to sit in the hot and cold water tanks for
at least 5 minutes.
4. Press each of the faucets (hot and cold) to confirm that water is coming
out of the dispenser.
5. Plug the dispenser into an outlet. Please review the IMPORTANT SAFETY
INSTRUCTIONS and INSTALLATION GUIDE sections first. The unit will
begin to fill the hot and cold water tanks (this will take approximately
5 minutes). Allow the water to settle in the hot and cold water tanks for
at least 5 minutes. Press on each of the faucets (hot and cold) to confirm
that water is running through the unit.
6. Press the hot water switch, wait a couple of minutes and turn on the cold
water switch. Allow the unit to reach minimum hot and cold water
temperatures. This will take approximately 30-45 minutes and the
indicator lights will turn off.
7. Test the temperature of the water by pressing each of the taps.
8. Turn off the hot and cold switches and unplug the unit from the outlet.
9. Turn the drain cap clockwise to open and drain water from tanks. Do not
tilt the unit to drain water. CAUTION: Hot water may come out of the drain.
10. Close the drain cap by turning it clockwise.
11. The unit is ready to be used.
EN 7

Remove the seal from the bottle lid.
INSTRUCTIONS FOR REPLACING THE WATER BOTTLE
WARNING: Only use a 10 or 20 liter bottle with this water dispenser.
WARNING: Make sure the unit is turned off when the hot and cold water tanks
are empty. There must be water inside the tanks before turning on any switches.
Your water dispenser is ready to be used.
Test the temperature of the water by pressing each of the faucets.
Turn on the hot and cold water switch. Allow unit to reach minimum hot and
cold water temperatures. This will take approximately 30-45 minutes and the
indicator lights will turn off.
Press on faucets to confirm water is flowing from all faucets.
Plug the unit into an outlet and allow all tanks to fill with water for
approximately 3 minutes.
The tip of the funnel will break the seal on the bottle lid, allowing water to flow
without spilling from the jug into the funnel and water tanks.
Flip the 10 or 20L bottle over the dispenser and carefully allow the neck of
the carboy to slide into the funnel, making sure the bottle cap slides toward
the tip of the funnel.
DO NOT place your hands blocking the opening of the bottle while you are
placing it. Please ask for help if you are unable to lift it.
Carefully lift the carboy. A bottle weighs approximately 20 kgs (for each 20L
bottles). Bend your knees to lift the bottle, not your back.
This unit has a pointed funnel to prevent spillage.
EN 8

Drain the water through the faucets and draining plug.
MAINTENANCE
TECHNICAL SPECIFICATION
MODEL NO. VOLTAGE &
FREQUENCY
RATED TOTAL
POWER
HEATING
POWER
COOLING
POWER
HEATING
CAPACITY
COOLING
CAPACITY
HWTLMC516S 230V~, 50Hz 585W 500W
85W
CAUTION:
Cleaning the outside of the water dispenser
Never use corrosive elements or any chemicals to clean this product.
When the product is not in use, store the unit in a dry place away from direct
sunlight.
Before cleaning the unit, switch the hot and cold switches to the OFF position
and remove the plug from the power socket.
To clean the outside of the unit, use a soft cloth with warm water. Avoid
abrasive cleaners or hard materials to prevent damage and/or scratches to
the unit.
Clean the dip tray regularly to avoid water buildup. To remove the drip tray
simply lift it up and outward.
To clean the back of the machine, clean with a duster such as a microfiber
cloth and/or vacuum the coils using the duster attachment of the vacuum
cleaner (please refer to your vacuum cleaner owner’s manual).
Turn OFF the hot and cold water switches, and unplug the power cord from
the power supply.
Storing your Water Dispenser
Please follow these instructions to store the water dispenser when it will not
be used for an extended period of time.
The unit must be stored in an upright position and protected from dust.
EN 9
5L/h -≥ 90
0
C 2L/h -≤ 10
0
C

No water comes out
from the faucet
No hot water
1. No water inside the tanks.
2. Tanks or tubes inside the unit
are clogged.
3. Taps are not working properly.
4. Unit is not plugged into the
electrical outlet.
1. Hot switch is OFF.
2. The unit may have overheated.
3. Hot switch is damaged.
4. No water inside the hot tank.
1. Make sure the unit is plugged into the
electrical outlet.
2. Make sure the tanks are filled with
water.
3. Contact customer service.
1. Turn ON the hot switch. Check the
temperature 30 to 45 minutes later.
2. Turn OFF the hot and cold switches
and allow the unit to rest for 1 hour.
3. Turn ON both switches again (make
sure there is water inside the tank).
4. Contact customer service.
No cold water 1. Cold switch is OFF.
2. The unit may have overheated.
3. Cold switch is damaged.
4. No water inside the hot tank.
1. Turn ON the cold switch. Check the
temperature 30 to 45 minutes later.
2. Turn OFF the hot and cold switches
and allow the unit to rest for 1 hour.
3. Turn ON both switches again (make
sure there is water inside the tank).
4. Contact customer service.
No normal water 1. The unit may have overheated.
2. No water inside the hot tank.
1. Turn OFF the hot and cold switches
and allow the unit to rest for 1 hour.
2. Turn ON both switches again (make
sure there is water inside the tank).
3. Contact customer service.
ISSUE POSSIBLE CAUSE SOLUTION
TROUBLESHOOTING GUIDE
IF THE UNIT IS NOT WORKING PROPERLY, PLEASE REFER TO THE
BELOW TABLE TO SOLVE THE MOST COMMON PROBLEMS:
EN 10

ISSUE POSSIBLE CAUSE SOLUTION
TROUBLESHOOTING GUIDE (CONTINUED)
EN 11
Water leaking from
the unit
1. Drip tray is full.
2. The water bottle cap and hose
connections are loose.
3. Water leakage inside of the
unit.
1. Empty the drip tray.
2. Turn OFF the cold and hot water
switches and dry the unit on the
outside and its surroundings.
3. If the problem continues, contact
customer service.
Odor in the water
Low electric shocks
1. New machine.
2. The unit has not been used
for a long time.
3. There may be an algae issue.
1. The unit is not properly
grounded.
2. The power cord is damaged.
1. Please proceed with First Time
Instructions on page 7.
2. If the problem continues, contact
customer service.
1. Please call a professional electrician
to assist you with any electrical
problem.
2. If the problem continues, contact
customer service.
For any issue not shown on the table, please contact customer service:
+91 8976588935
Do not attempt to disassemble the unit yourself. The manufacturer will not undertake
any responsibility for damages or incidents resulting from it. This action will void the
manufacturer’s warranty.

WARRANTY CARD
EN 12
Agile Brands Private Limited, warranties this product to be free from defects in materials and
workmanship for 1 year and is valid only in India.
This warranty only covers products that are properly installed, properly maintained and
appropriately operated by the instructions provided. This limited warranty does not cover any
failures or operating difficulties due to normal wear and tear, accident, abuse, misuse,
alteration, misapplication, improper installation or improper maintenance.
This warranty covers:
A. your water dispenser is modified or improperly installed or repaired;
B. damage is caused by accident, fire or misuse;
C. the original serial numbers are removed, obliterated or altered from the water dispenser.
Product name:.................................................................................................................................................................
Model no.:..........................................................................................................................................................................
Invoice no. and date:....................................................................................................................................................
Dealers name and address:......................................................................................................................................
1. Repair or replacement free of charge of any part or parts of the water dispenser for 1 year
from the date of purchase, when we identify the defects as due to faulty material or
workmanship and not due to improper usage, or faulty electric supply/connection.
2. The defective part/material shall be replaced with a functionally working equivalent part
material.
3. Free after-sales service during the above mentioned period is available within the municipal
limits of the city or town where the company's office or your dealer is located.
This warranty is not applicable if:
Product information:

WATER DISPENSER
(HOT, NORMAL AND COLD WATER DISPENSER)
BRAND: HONEYWELL
MODEL: HWTLMC516S
ELECTRIC SPECIFICATIONS
VOLTAGE: 230V
FREQUENCY: 50Hz
HOT: 500W/ COLD: 85W
TOTAL POWER: 585W
QUANTITY OF GAS: 23g
TYPE OF GAS: R134a
Do not attempt to disassemble the unit yourself. The manufacturer will not undertake
any responsibility for damages or incidents resulting from it. This action will void the
manufacturer’s warranty.
Manufactured by:
Agile Sources Limited
Unit 2 Floor 20, Assun Pacific Center,
41 Tsun Yip Street, Kwun Tong,
Kowloon, Hong Kong
support@honeywellwaterdispensers.com
www.honeywellwaterdispensers.com
+91 8976588935
Made in China
@2022 Agile Sources Limited,
All Rights Reserved
The Honeywell Trademark is
used under license from
Honeywell International Inc.
Honeywell International Inc.
makes no representations or
warranties with respect to
this product.