Loading ...
Loading ...
Loading ...

17
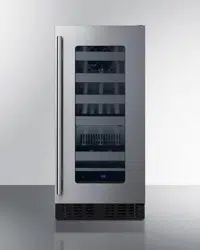
Models SWC1102 / SWC1926 / SWC1966
1. Remove the right bottom
hinge (2) and left bottom
hinge (1) by unscrewing the
eight lock screws (3). Be
careful to hold the door (4)
firmly after removing the
screws. (Fig. 1)
2. Gently pull down to remove
the door from the right top
hinge and place it on a
padded surface to avoid the
risk of damage. Then remove
the right top hinge (10). (Fig.
4)
3. Pop out the cover caps on
the left side of cabinet and
use them to cover the screw
holes on the right hand side.
4. Screw the alternative left top hinge (11), included in the fittings, on the left hand side of cabinet.
(Fig. 4)
5. Unscrew and transfer hinge pin (6) and door supporter (5) to the opposite bottom hinge. (Fig. 2)
6. Unscrew and transfer the door adapter (7) to the left designated positions of the door. (Fig. 3)
7. Relocate the door to the designated position. Then screw the bottom hinges on the designated
positions and tighten them. (Fig. 5)
8. Recheck and adjust the door alignment by loosening the screws (8) and moving the door adapter
(7). Tighten the screws (8) after the door is leveled. (Fig. 5)
9. Transfer the handles and plugs to the opposite positions. (See Installing the Stainless Steel
Handle.)
Adjusting the Kick Plate
Only for Models SWC007 / ALWC15 / ASDW1522 / LAWC1543 / ADWC1552 / SDW1527 / LWC1547
/ SDWC1556 / ASDW2412 / LAWC2431 / ADWC2442 / SDW2416 / LWC2435 / SDWC2446.
The pre-fitted kick-plate of the appliance includes an
adjustable kick-plate section that is initially seated behind
the upper section. In order to adjust the kick-plate height,
follow the instructions below:
1. Remove the screws (1) from both the top left- and top
right-hand sides of the kick-plate.
2. Loosen or remove the screws (2) from both the bottom
left- and bottom right-hand sides of the kick-plate.
Failure to loosen the bottom screws sufficiently may
cause damage to the lower trim when adjusting it.
3. Carefully guide the lower trim down until the desired
height is achieved.
4. Reinsert screws and tighten them.
7
1
3
2
6
5
1
2
3
9
4
8
1
2
3
5
4
Loading ...
Loading ...
Loading ...