
BEFORE OPERATING THE UNIT, PLEASE READ THIS MANUAL
THROUGHLY AND RETAIN IT FOR FUTURE REFERENCE
OWNER’S RECORD
THE MODEL AND SERIAL NUMBERS ARE LOCATED ON THE BOTTOM OF THE UNIT.
REFER TO THESE NUMBERS WHENEVER YOU CALL UPON YOUR DEALER
REGARDING THIS PRODUCT.
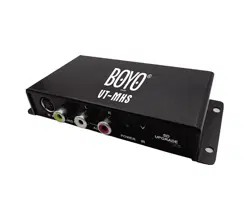
MODEL NO: VT-MHS
AGENT:
1TINSE126---012 Printed in China
INSTRUCTION MANUAL
VT-MHS

Contents
Safety Instruction ………………………………………………
Main Features ……………………………………………………
Front and Rear Panel/Installation ………………………………
Remote Control Unit (RCU) ……………………………………
Starting ……………………………………………………………
Operation …………………………………………………………
TV Menu …………………………………………………………
Setup Menu ……………………………………………………
Trouble Shooting ………………………………………………
Specification ……………………………………………………
2
2
3
4
5
5
6
6-7
8
9
1
This device complies with Part 15 of the FCC Rules. Operation is subject
to the following two conditions: (1) this device may not cause harmful
interference, and (2) this device must accept any interference received,
including interference that may cause undesired operation.
FCC compliance

ATSC M/H Receiver Specification:
RF Input Level: -98±3dBm (at SCCC,CR1/2 or CR1/4 )
Receiving Frequency range: UHF 470MHz to 806MHz
VHF 54MHz to 88/174-216MHz
Nominal Input: 75Ω (F Terminal)
Channel Selection: Electronic tuning, PLL synthesizer
Color System: NTSC
Video Output: 1Vpp 75ohmx3
Audio Output: Audio R/Audio L >1Vpp 10K ohm with E volume
Power Supply: DC 9V to 28V 130mA to 50mA , DC 12V 110mA
4pins Socket: ACC / Parking/+12V to 24V in/GND
Size (W xD xH ): 5 1/16"x3"x1 1/8" inches
Weight: 0.22 LBS (approx Net)
Operation Temperature: 14℉ to +122℉
Storage Temperature: -4℉ to +149℉
Active Antenna Specification:
Active antenna with built-in RF amplifier for digital TV
Impedance: 75 ohm TYP
Receiver frequency range: VHF-H 170 to 230 MHz
UHF 470 to 860MHz
Supply Voltage: DC+4.2V +5.5V (Max. 30mA)
Operation Temperature: -4℉ to +140℉
Storage Temperature: -40℉ to +185℉
V.S.W.R.: <2
Connector: F plug
Gain: 12dBm (at 5V in)
Antenna cable: L=5.0m
Accessories:
Remote Control x1
Power Supply Wire x1
IR Extension Box x1
Operation Manual x1
CAR Waterproof Active Antenna x1
RCA AV Wire x1
2
﹪
Safety Instruction
Main Features
* Compliance with ATSC M/H ATSC A/153 VSB standard.
* Speed over 120miles/h min (at SCCC,CR1/2 or CR1/4 ).
* Special design for car application with parking/ACC control.
* Wide range of operation voltage from DC 9V-28V.
* 3 sets of video output.
* A/V input for game or other AV source.
* Extended IR box for easy installation .
* Parent lock function.
* Supports ESG, closed caption.
* Fast automatic scan.
* Supports English, Spanish, French.
* Active antenna with RF amplifier included. Waterproof built-in
9
Specification
Please read the following instructions carefully
1. The power input is DC+12V~24V 10 .±
2.Do not expose the receiver to rain , moisture, direct sunlight
or do not place it near a heater.
3.Do not use liquid or aerosol cleaners. Use a light damp cloth
for cleaning.
4.The hole on the bottom of receiver must be left uncovered to
allow proper airflow to the unit.
5. Do not open or remove cover. Refer to all servicing to qualified
Service personnel.
6. Warning: Do not operate this unit unless vehicle is parked in
safe and legal area.
3
4
5
1
2
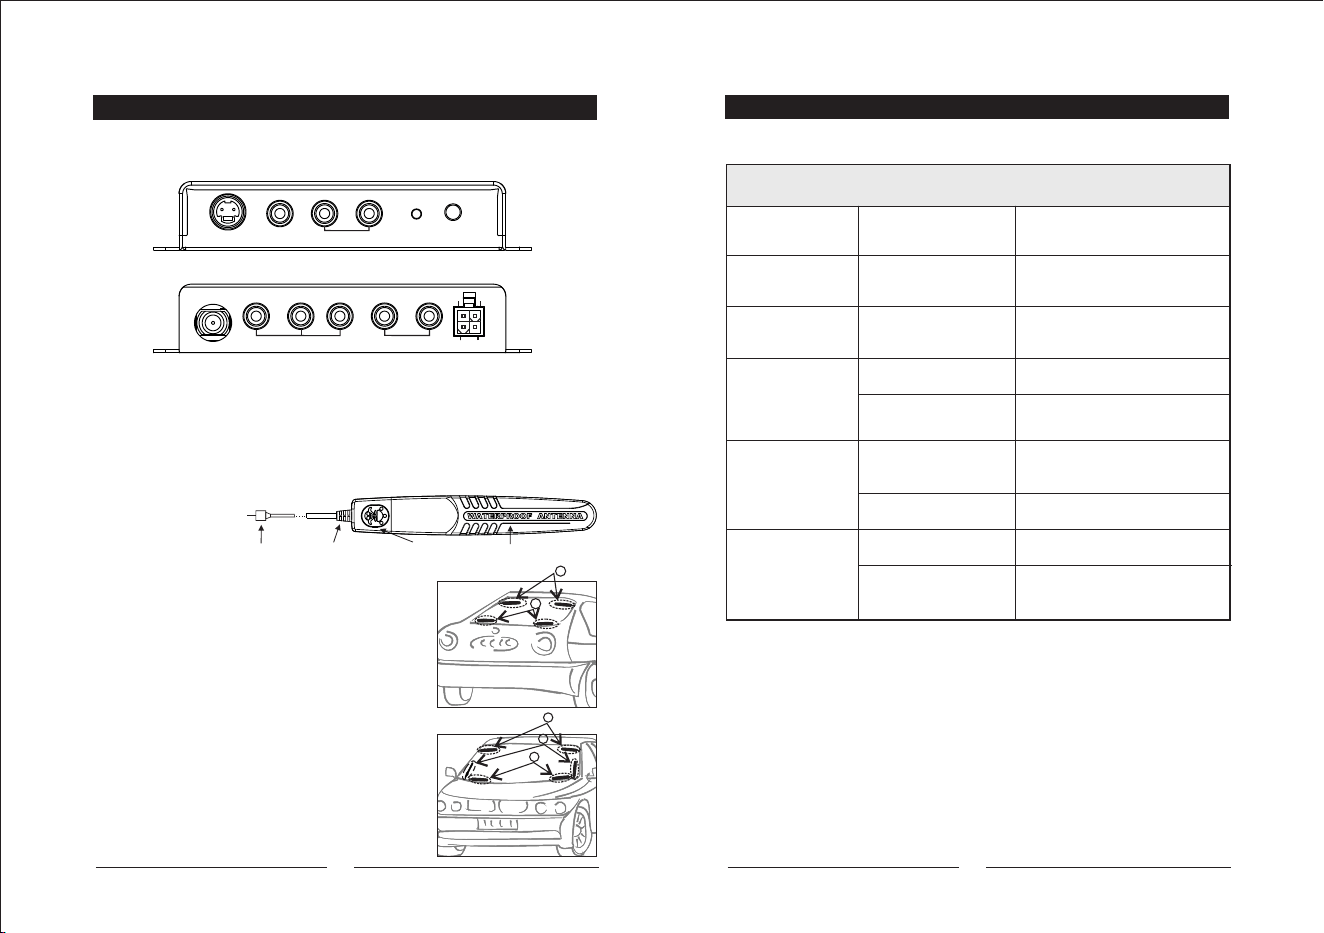
Front and Rear Panel/Installation
1.For car use: Connect the "+12~24V IN" wire to car battery "+" and connect
ACC wire to car ACC switch.
2. For home use: Put "+12~24V IN" and ACC wire together and connect to 12-24V DC.
3.GND must connect to GND or Battery"-" .
Problem Possible Causes Solution
Wiring of power cord Check the connection
of power cord
No sound or picture
but LED is on
In stand_by mode Press power key on remote
to turn on
No sound or picture No signal or signal
too weak
Check antenna or cable
connection
Signal is too strong
ADD an attenuator
Signal is too weak
Re-install antenna or move
antenna
Miss wiring /TV is
not on AV mode
Connect AV cable,
switch TV to AV mode
Above is OK
Send for repair
Remote control
does not operate
Battery exhausted
Replace battery
Something shield the
R/C signal
Keep the R/C window clear
in front
No power and
LED off
Picture NG
No picture
Trouble Shooting
83
ATSC / VT-MHS
Antenna Installation
1.Active Antenna:
F-TERMINAL
ANTENNA(ANT-366F)
POWER LED
12dB BOOSTER
2.Active Antenna Installation:
1.Window films will cause poor reception
due to it has a metallic coating.
Install antenna on a clear window position.
2.Set the antenna power supply to "ON" in the
setup menu of receiver, then go to channel
manager to check the signal strength and
quality. Move antenna to a best position.
3.The install location on figure are for
reference only.
Device Installation
Depend on space and personal favorite,
device may install under the seat or hatchback.
Front
Rear
RF IN LV1 V2
V3
R
+12V~24V
IN
ACC
GND
PARKING
VIDEO OUT AUDIO OUT
R
IR IN
VIDEO IN
V L
AUDIO IN POWER
IR
2.Parent Lock: To set up a password or change the password via
"Main Menu/Settings/Parent Lock"
-Set User Age: To select the user age ,over 14 or over 17.
Reminder: The default password is "0000”.
-Change Password: Enter the existing password and press "OK"
button on the remote control. It will ask you to enter new password
if the existing password enters correctly.
3.Factory Default: Press "Yes" to delete all programs from memory
and return all settings to factory default.
4.Transparency control: The degree of transparency of menu. Use
"VOL+/VOL-" buttons of the remote control to change the degree
of transparency from the transparency bar. The bigger number
means higher degree of transparency.
5.Version Display: System information includes version and date.
7
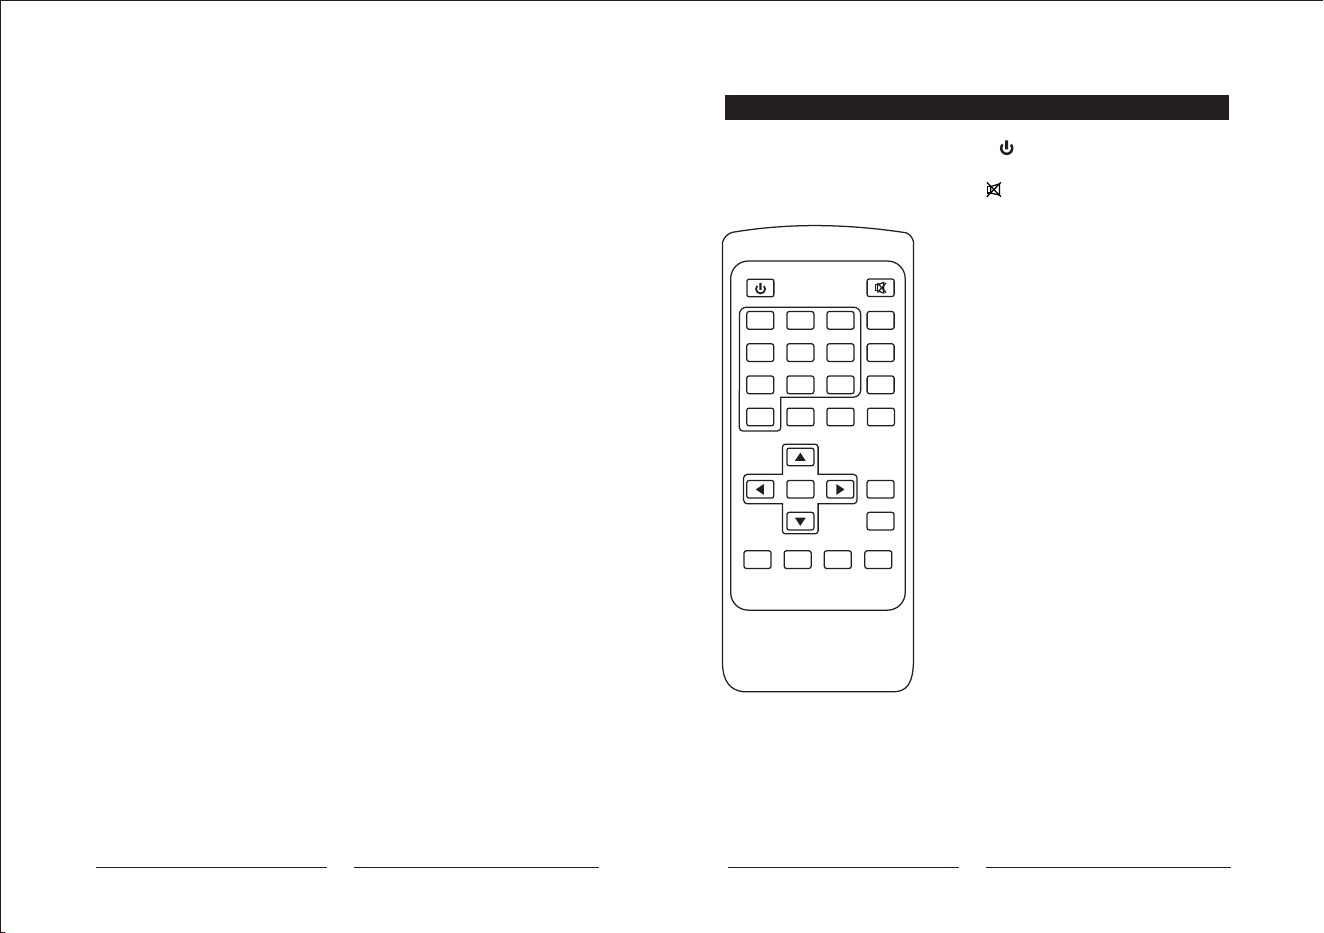
Remote Control Unit (RCU)
4
1 2
3
4 5
6
7 8
9
0
LIST
OK
ESG
PG UP PG DW
MENU
CH+
VOL- VOL+
CH-
RECALL
CAPTION
AUDIO
ABC DEF
GHI JKL MNO
PQRS TUV WXYZ
INFO
_
TV/AV
FAST SCAN
POWER MUTE
EXIT
- POWER :
Switch the receiver between stand-by & on mode
- MUTE : Mute the audio output
- Numeric Keys(0~9):
For direct entry of channel number
- Fast scan: Searching all channels quickly
- TV/AV: Switch between TV and AV input mode
" " : for logical channel input
In digital TV mode, there are more than
1 program in a channel location
for example:CH14 may has 14-1,14-2, and 14-3
- CAPTION:
Switch the closed caption "on" if the closed
caption is transmitted on this channel
- ESG: Call up the ESG function
- CH(+ / - ):
Change channels sequentially up or down in viewing
mode and move to the next higher or lower item
in the menu
- VOL( + / - ):
Alter the Audio output level up or down in viewing
mode or move to the left or right item in the menu
- LIST/OK:
Select an item or confirms a choice.
A list will display in viewing mode
- AUDIO:
Switch the audio language if transmitting more than
one language
- MENU: Access the main menu
- EXIT: To return to previous status or exit
- PG UP/PG DW:
Move up/down page in the channel list.
- RECALL: Go back to the previously viewed
- INFO: Display information of viewing channel
-
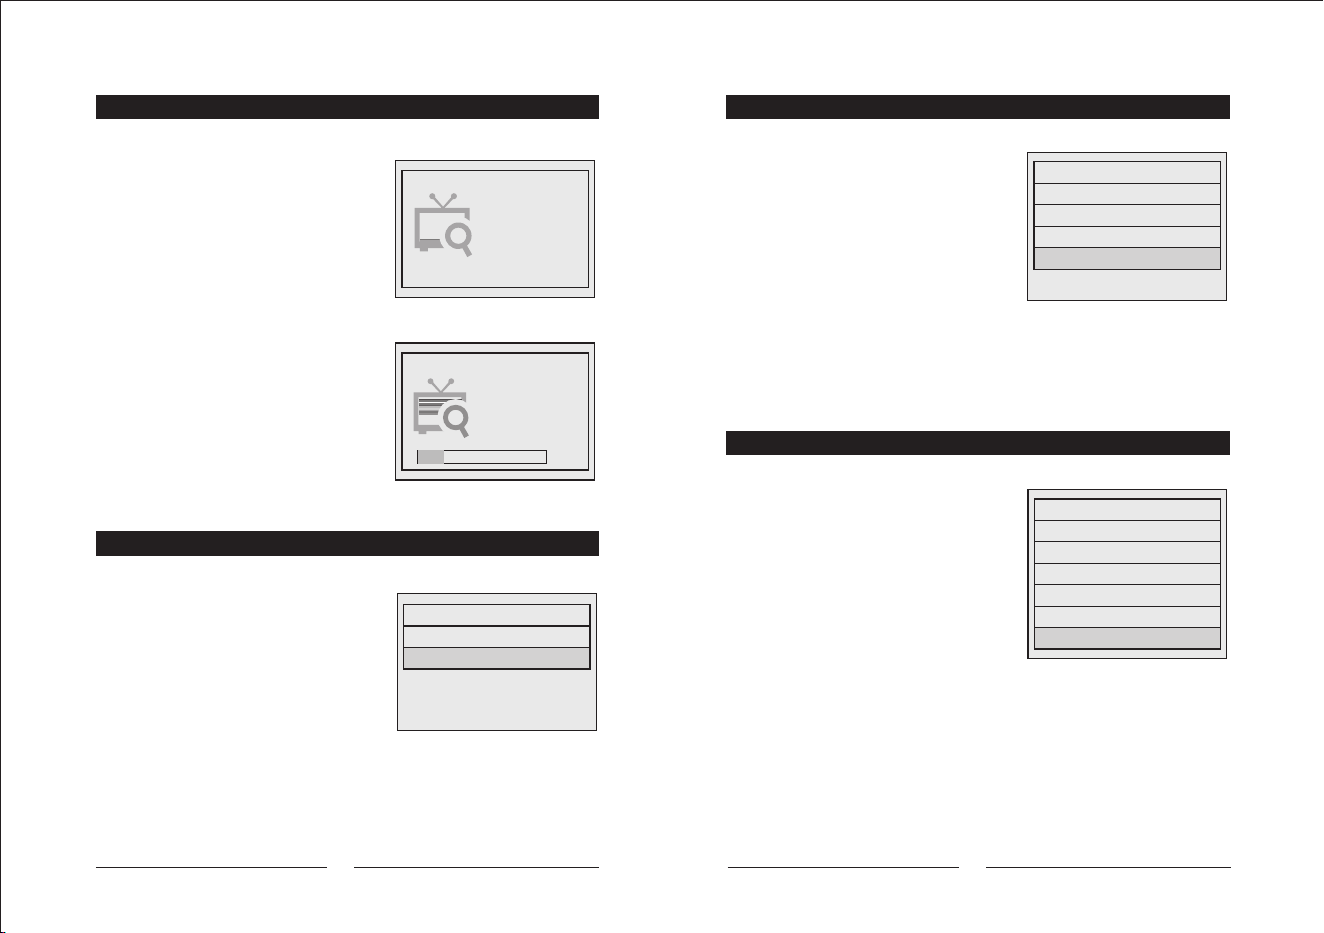
Starting
When you turn on the product, you
need to scan channels in this step.
(Shown on Figure. 1 No Program)
1. Connect the antenna to the antenna
Jack.
2.Start to use ATSC M/H, you need to
Press "OK” key to scan the
local broadcasting automatically
in order to get any available
channels and programs.
(Shown On Figure. 2 Scanning)
3.Volume Adjustment
Press "VOL+/VOL-" to adjust volume
when program is playing.
Figure.2 Scanning
Figure. 1 No Program
Operation
Two main options which are TV MENU
and SETUP MENU are shown when the
"Menu" button is pressed.
(Shown on Figure. 3 Main Menu)
Using "UP/DOWN" buttons to move
the option upward or downward.
Figure.3 Main Menu
TV Menu
Four sub menus are shown in the TV
Menu. (Shown on Figure. 4)
1.TV program: The number of channels
is shown as a list.
2.Guide of program: The timetable
of programs within a day can be
shown.
3. Channel Scan: To remove and update
programs. It will re-scan programs.
4.Option: ON/OFF the subtitle. (This function only applies to those
broadcast programs supported) .
Figure. 4 TV Menu
Setup Menu
Press "Menu" and choose second
choice:"SETUP MENU” to enter the
sub menu of settings.(Shown on
Figure. 5)
1.Channel No. Display-ON/OFF.
When you turn on the Channel
NO. Display, the number of the
channel will be shown on the
top left of screen.
2. Language:
There are 3 kinds of language to choose:
English, French or Spanish.
Figure. 5 sub menu of Settings
5 6
Press OK Button
SCANNING...
FREQ.: 189 Mhz
TV: 0
UNLOCK
10%
MENU
1. TV MENU
2. SETUP MENU
TV
1. TV Program
2. Guide of program
3. Channel Scan
4. Option
Setting
1. Channel No. Display
2. Language
3. Parent Lock
4. Factory Reset
5. Transparency Control
6. Version Display