MPC6018AASS
USER MANUAL
Warning notices: Before using this product, please read this manual carefully and keep it for future reference.
The design and specifications are subject to change without prior notice for product improvement.
Consult with your dealer or manufacturer for details.
The diagram above is just for reference. Please take the appearance of the actual product as the standard.
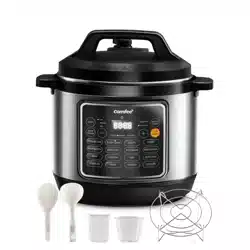
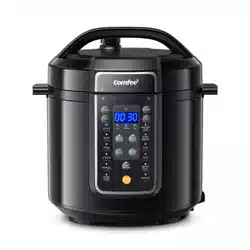
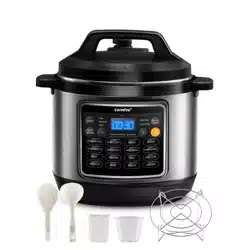
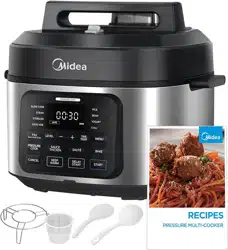
ELECTRIC PRESSURE COOKER

THANK YOU LETTER
Thank you for choosing Midea! Before using your new Midea product, please read
this manual thoroughly to ensure that you know how to operate the features and
functions that your new appliance offers in a safe way.
CONTENTS
0
02
1
08
06
07
13
17
23
25
26
THANK YOU LETTER
SAFETY INSTRUCTIONS
SPECIFICATIONS
PRODUCT OVERVIEW
QUICK START DUIDE
OPERATION INSTRUCTIONS
CLEANING AND MAINTENANCE
TROUBLESHOOTING
TRADEMARKS, COPYRIGHTS AND LEGAL STATEMENT
DATA PROTECTION NOTICE
01
27
1 YEAR LIMITED WARRANTY
02
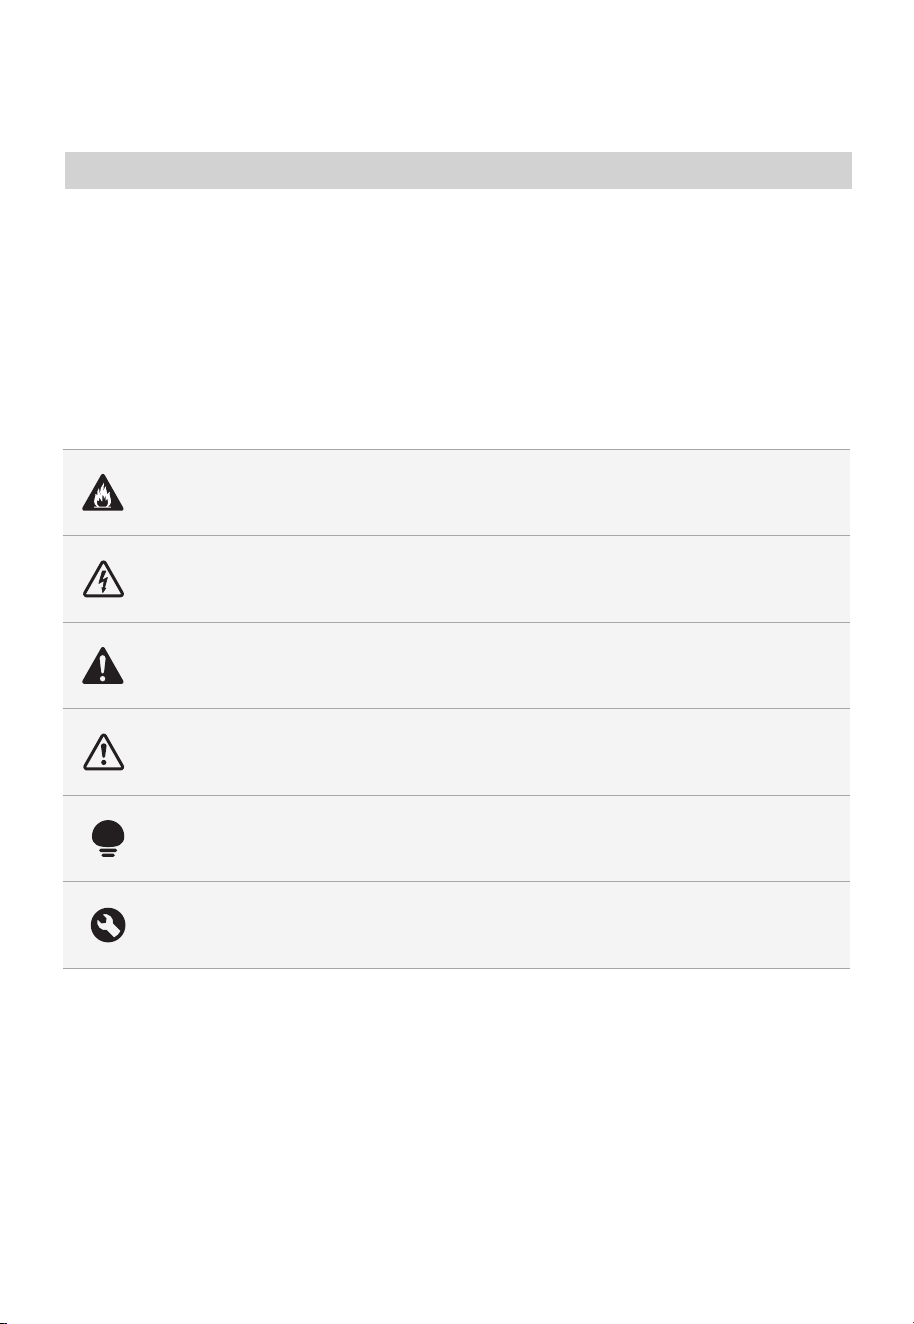
Danger
This symbol indicates that there are dangers to the life and health of
persons due to extremely flammable gas.
Warning of electrical voltage
This symbol indicates that there is a danger to life and health of
persons due to voltage.
Warning
The signal word indicates a hazard with a medium level of risk which, if
not avoided, may result in death or serious injury.
Caution
The signal word indicates a hazard with a low degree of risk which, if
not avoided, may result in minor or moderate injury.
Attention
The signal word indicates important information (e.g. damage to
property), but not danger.
Observe instructions
This symbol indicates that a service technician should only operate and
maintain this appliance in accordance with the operating instructions.
The following safety guidelines are intended to prevent unforeseen risks or damage from
unsafe or incorrect operation of the appliance. Please check the packaging and appliance
on arrival to make sure everything is intact to ensure safe operation. If you find any
damage, please contact the retailer or dealer. Please note modifications or alterations to
the appliance are not allowed for your safety concern. Unintended use may cause
hazards and loss of warranty claims.
Read these operating instructions carefully and attentively before using/commissioning the
unit and keep them in the immediate vicinity of the installation site or unit for later use!
Intended Use
Explanation of Symbols
SAFETY INSTRUCTIONS

CAUTION
IMPORTANT SAFEGUARDS
03
●
●
●
●
●
●
●
●
●
●
●
●
●
●
READ ALL INSTRUCTIONS.
Do not touch hot surfaces. Only use side handles or
knobs for carrying or moving.
To protect against electrical shock, do not immerse the
power cord, plugs, or appliance in water or other liquid.
Close supervision is necessary when the appliance is
used by or near children.
Unplug from outlet when not in use and before cleaning.
Allow to cool before putting on or taking off parts.
Do not operate any appliance with a damaged cord or
plug, or after the appliance malfunctions or has been
damaged in any manner. Return appliance to the nearest
authorized service facility for examination, repair, or
adjustment.
The use of accessory attachments not recommended by
the appliance manufacturer may cause injuries.
For household use only. Do not use outdoors.
Do not let power cord hang over edge of table or
counter, or touch hot surfaces.
Do not place the appliance on or near a hot gas or
electric burner, or a heated oven;
Extreme caution must be used when moving the
appliance containing hot liquids.
Always attach plug to appliance first, then plug cord into
the wall outlet To disconnect, turn appliance “off”, then
remove plug from wall outlet.
Do not use appliance for anything other than intended
use.
This appliance cooks under pressure. Improper use may
:

04
●
●
●
●
●
●
●
●
●
●
●
●
result in scalding injury. Make certain unit is properly
closed before operating. Please see the “Getting Started”
section.
Do not fill the appliance over 2/3 full. When cooking
foods that expand during cooking such as rice or dried
vegetables, do not fill the appliance over 1/2 full. Over
filling may cause a risk of clogging the vent pipe and
developing excess pressure. See the “Food Preparation/
Pressure Cooking” section.
Do not open the appliance until the appliance has cooled
and all internal pressure has been released. If the float
valve is still up and/or the lid is difficult to open, this
indicates that the appliance is still pressurized – do not
force it open. Any pressure in the appliance can be
hazardous. Please see the “Getting Started” section for
instructions to safely remove lid.
Always check the pressure release devices for clogging
before use.
Do not use this appliance for pressure frying with oil.
To prevent risk of explosion and injury, replace only
dynamic seal ring as recommended by the manufacturer.
See Operating Instructions.
Intended for countertop use only.
WARNING: Spilled food can cause serious burns. Keep
appliance and cord away from children. Never drape
cord over edge of counter, never use outlet below
counter, and never use with an extension cord.
CAUTION:Risk of Electric Shock. Cook only in
removable container.
This appliance is not intended for deep frying foods.
Be aware that certain foods, such as applesauce,
cranberries, pearl barley, oatmeal or other cereals, split
peas, noodles, macaroni, rhubarb, or spaghetti can foam,
froth, and sputter, and clog the pressure release device
(steam vent). These foods should not be cooked in a

PLEASE SAVE THESE
INSTRUCTIONS
:
●
●
●
pressure cooker.
When the normal operating pressure is reached, turn the
heat down so all the liquid, which creates the steam, does
not evaporate.
A short power-supply cord is used to reduce the risk
resulting from it being grabbed by children, becoming
entangled in, or tripping over a longer cord.
Prohibiting the use of a longer detachable power cord or
extension cord.
05

06
SPECIFICATIONS
MPC6018AASSProduct Model
Capacity
Power Supply
Rated Power
6.5Qt
120V~ 60Hz
Working Pressure 80kPa
1500W
Keep Warm Temperature
140° F~176° F
Parts List
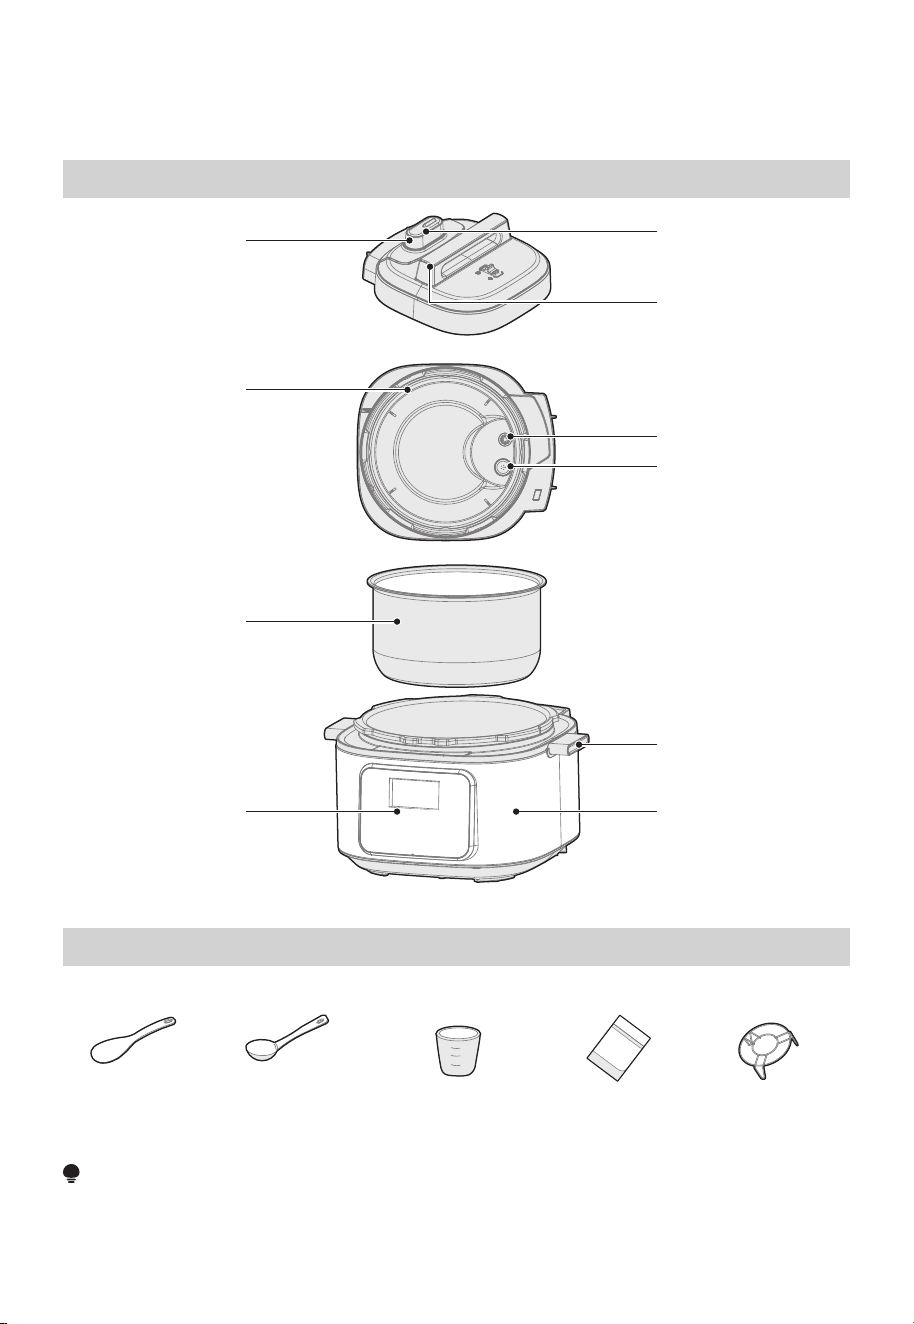
PRODUCT OVERVIEW
Component Name
07
NOTE
All the pictures in this manual are for explanation purpose only. Any discrepancy between
the real object and the illustration in the drawing shall be subject to the real subject.
Exhaust valve
Float valve
handle
Upper cover
handle
Seal ring
Sealing ring
Block proof
cover
Inner pot
Cooker body
handle
Control box
Cooker body
User Manual
Spoon
Soup Spoon
Measuring cup
Steamer
QUICK START GUIDE
Tips:
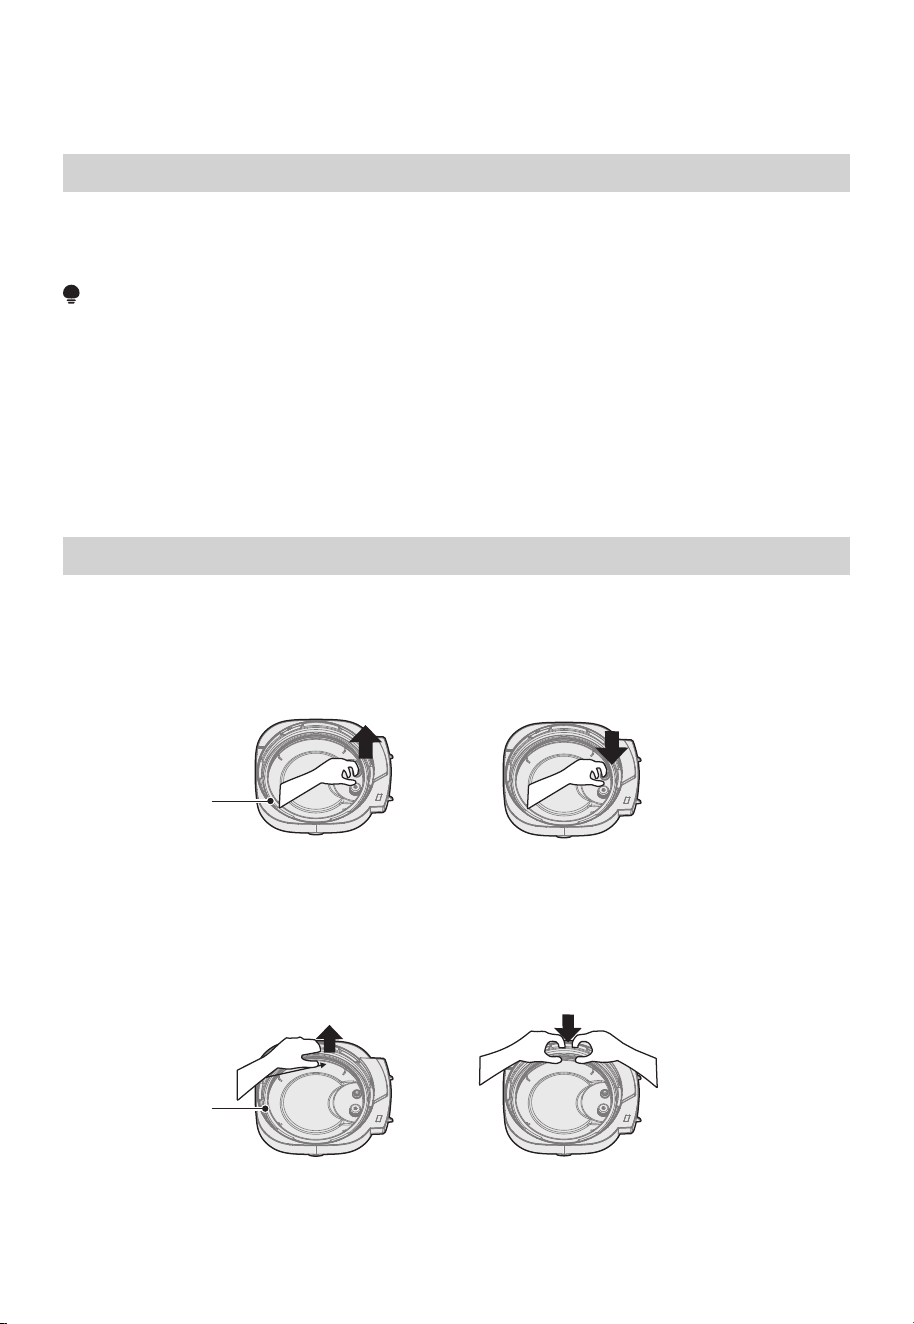
Disassemble and Install the Block Proof Cover and Seal Ring
• Please move the product with the handle of the cooker body;
• Please remove the water from the housing cover with cloth.
1. Check if the seal ring and block proof cover are correctly installed in the upper cover
before use each time.
2. After use, please clean the seal ring and around of block proof cover for avoiding
jamming the cover, keep it clean to avoid bad odor.
1. Please do not pull the seal ring, otherwise, the distorted seal ring may influence the
seal and pressure effect.
2. Do not use the dam aged seal ring, please replace it at the autho rized repair office.
08
• Exhaust valve: Pull out the exhaust valve from the lid. Clean the internal side of the
exhaust valve and the exhaust valve and float valve of the lid with brush and cloth at
least once a month.
• Sealing ring: Please remove oil and dirt from the sealing ring with detergent and brush.
• Water box: After cooking, the steam may stay in the water box of the external pot as
water. Water in the box should be removed for avoiding bad odor, please clean it with
clean cloth.
NOTE
Block
proof
cover
Disassemble
Pull it out upwards
Install
Press it down to install
Seal
ring
Disassemble
Pull it out upwards
Install
Press it down to install
Disassemble and install the block proof cover
Disassemble and install the seal ring

09
Use and Maintain the Inner Pot
It may cause yellowish and spotted inner pot or distorted bottom if it is empty for a
long time.
1. Do not leave appliance on and empty of liquids for a long time.
Although the inner pot has excellent anti-corrosion performance, it may cause
corrosion of certain degree, the suggested time of keep warm shall not exceed 2h.
2. Do not use it to store the acid, alkali and preserved foods for a long period
Do not immerse it in water for a long period.
Clean the inner pot with soap, mild detergent or warm water to remove dust, oil and
dirt.
3. Keep it clean to prolong the service life
Do not use a metal shovel or other hard tool, otherwise it will damage the inner
surface of pot.
4.
10
Prepare for Cooking
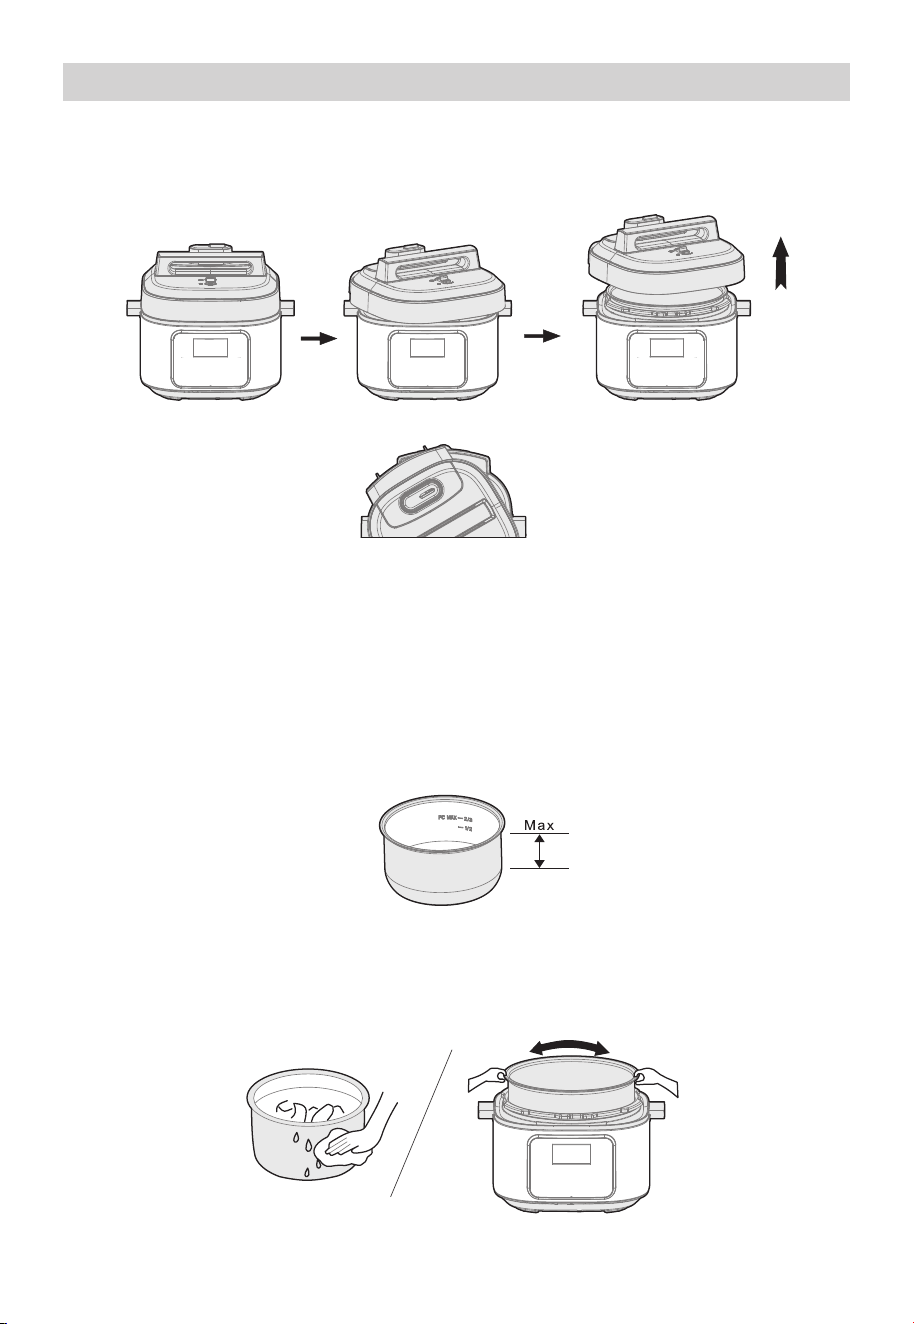
1 Opening the lid correctly
Unlock State
2 Check if the parts and accessories of lid are well installed
3 Take out the inner pot, put the foods and water into the inner pot
Usable Capacity
4 Put the inner pot into the cooker
• Hold the handle of upper cover, turn it anticlockwise for about 30°till the lid at unlock
state, and then lift the upper cover.
• Check if the floater valve and exhaust valve are jammed, confirm if the sealing ring and
block proof cover are well installed.
• The total amount of foods and water shall not exceed the Max marked on the inner
pot.
• Wipe to clean the external surface of inner pot, foreign object and water are not
allowed on the inner surface of electric pressure cooker;
• Turn the inner pot to left and right to ensure good contact with the heating plate.
lock State
11
• (Picture are for reference only, atual product may differ from picture shown)
NOTE
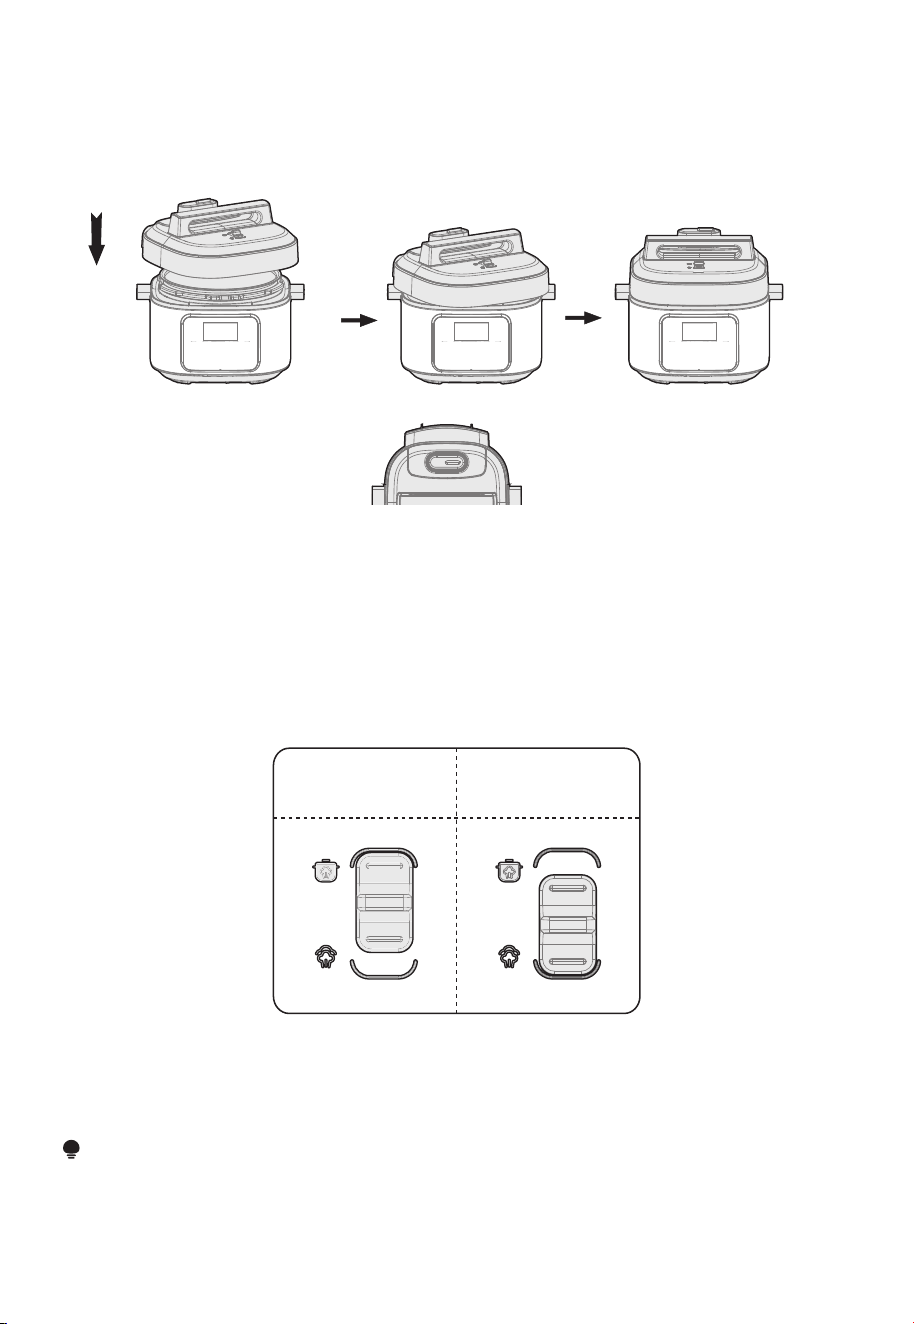
• Before closing the lid, check if the sealing ring is well installed.
• Hold the handle of upper cover, aim the lid as “unlock state”, put the top cover
horizontally on the cooker body, turn the upper cover clockwise for about 30°to the
lock place as “Lock State”.
5 Safely close the lid
• Check if the floater valve drops down before working (before heating, the floater valve
is down).
6 Turn the exhaust valve to the correct icon
Sealing schematic Exhaust schematic
diagram diagram
• Before working, please turn the exhaust valve to the sealing icon, the pressure
cooker stays at sealing state;
• For manual exhaust, please turn the exhaust valve handle to the exhaust icon, the
pressure cooker stays at the exhausting state; when exhausting, do not keep the
hands or face above the exhaust value;

12
• When the cooker is working, it is normal to hear “click” sound, please feel relax when
using.
• To cook a small amount of foods, the inner pot may possibly be lifted when opening
the lid, please shake the lid to drop the inner pot in the cooker body and then remove
the lid.
1. When you switch on, if the buttons are inactive, please confirm that the lid is closed at
the right place.
2. After cooking, the cooker may automatically enter into the keep warm state
(PRESSURE COOK, CHILI, STEAM, BEAN, RICE, SLOW COOK). and the indicator
display “00:00 (0 min), 00:01 (1 min)...
General Function
Tips:
1. Cut off power supply or remove the power plug
Safely Open the Lid
2. Exhaust method
A. Quickly open the lid (For non-fluid foods)
Turn the exhaust valve to the exhaust icon for exhausting. By pressing steam
release button “ ” till the float valve drops down.
B. Open the lid
Keep the electric pressure cooker cool till the float valve drops down.
3. Open the lid
A. Turn the upper cover anticlockwise, turn it to the cover open limit place, lift the
upper cover to open the lid.
B. Do not open the lid before the pressure in the pot has been completely released, do
not open the lid fiercely if it is difficult to open.
C. Do not pull out the exhaust valve when turning the exhaust valve.
D. After cooking fluid foods (porridge and soup), do not turn the exhaust valve or
press the steam release button please cut off power supply to make it cool naturally
till the float drops before opening the lid.
13
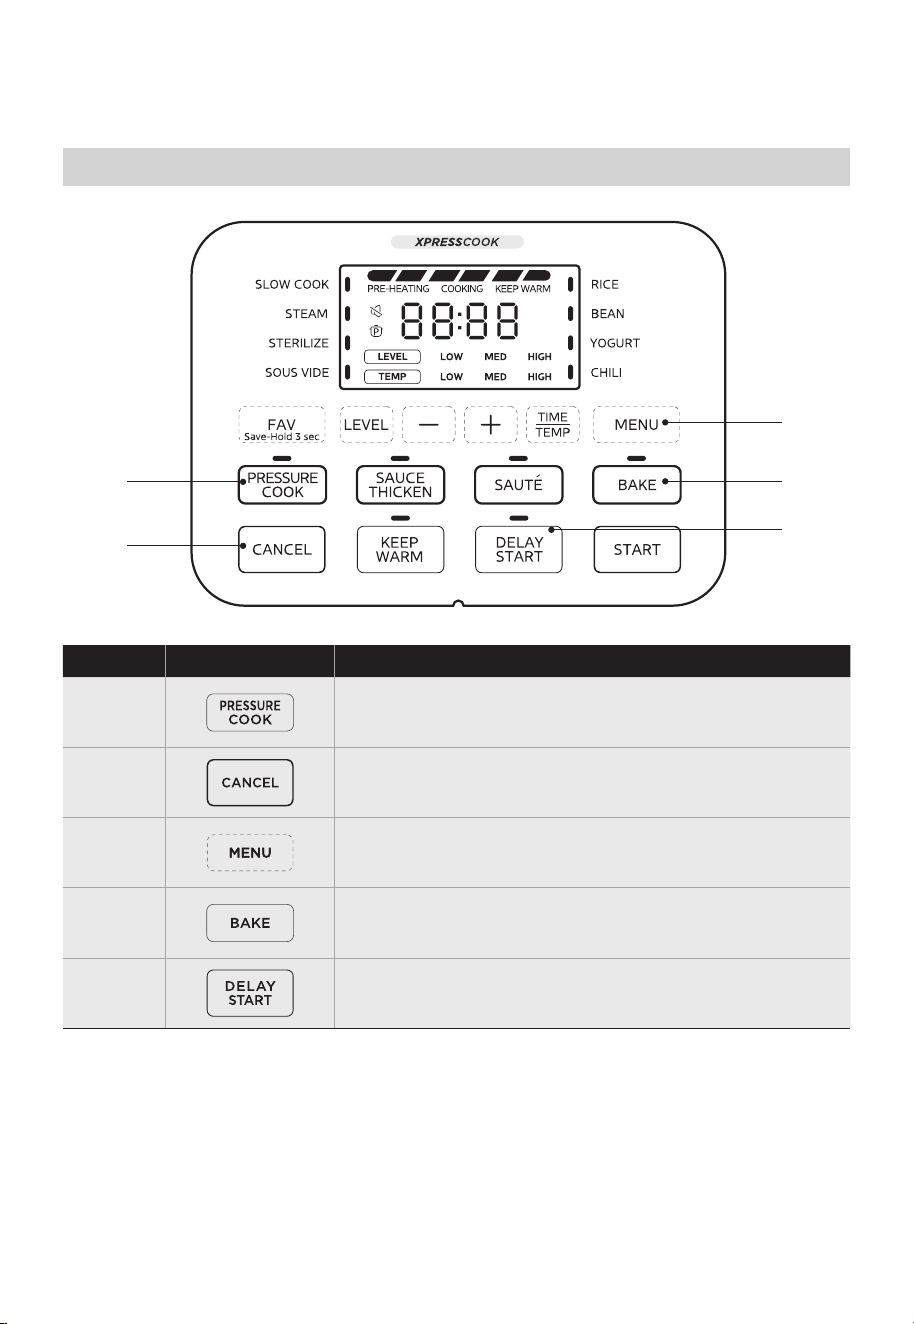
Operation Part
Function description
●
Bake Button
●
Deplay Start Button
●
Menu Button
●
Pressure Cook Button
●
Cancel Button
1
2
3
4
5
OPERATION INSTRUCTIONS
4
3
5
1
2

14
Operation GuidelinesFunction
START
●
During function setting or delay start setting, press the
“START”
button to start heating or delay start.
CANCEL
●
During function setting or delay start setting, press the
“CANCEL”
button to return to standby mode. During the heating or delay
start waiting process, pressing the “CANCEL” button to cancel
heating or delay start and return to standby mode.
FAV Save-
Hold 3 sec
●
●
●
During the function setup process, if the function setup is
completed, press and hold the
“FAV Save-Hold 3 sec” button for 3
seconds to allow the current function and parameters to be saved
as favorites. After successful saving, the display shows “SEt” for 3
seconds;
In standby or function selection state, if a function has been saved
as a favorite, pressing the “FAV Save-Hold 3 sec” button
immediately jumps to the corresponding favorite function and
parameter selection state. Pressing the
“START” button at this
time initiates the saved favorite functions.
To cancel a saved favorite function, press and hold the “FAV
Save-Hold 3 sec” button for 3 seconds in standby state. After
successful cancellation, the display alternates between “Not” and
“SEt” for 3 seconds;
KEEP
WARM
●
●
In standby mode, pressing the
“KEEP WARM” button to activate
the keep warm function, and the screen shows the keep warm
time. During the setup phase of certain functions, pressing the
“KEEP WARM” button to enable or disable the keep warm
function after cooking.
Note: Auto Keep Warm function is not available after the
completion of SOUS VIDE, YOGURT, SAUCE THICKEN, BAKE and
SAUTÉ functions.
SAUTÉ
●
In standby mode, press the
“SAUTÉ” button. The “SAUTÉ” button
LED will be ON, and the screen will show the cooking time and
temperature level. You can adjust the cooking time using the
“-”
and “+” buttons. If you need to adjust the temperature level, you
can press the “TIME/TEMP” button to switch to temperature
adjustment mode, then use the “+” or “-” buttons to adjust the
temperature level. Finally, press the “START” button to begin
heating.
SLOW
COOK
●
In standby mode, press the
“MENU” button and select the “SLOW
COOK” function. The
“SLOW COOK” LED will be ON, and the
screen will show the cooking time and cooking level. You can
adjust the time using the “+” or “-” buttons and adjust the level
using the “LEVEL” button. Press the “START” button to begin
heating. The appliance will automatically switch to keep warm
mode after cooking.
Function Selection

15
Operation GuidelinesFunction
YOGURT
●
In standby mode, use the
“MENU” button to select the YOGURT
function. The “YOGURT” LED will be ON, and the screen will show
the cooking time and temperature level. Adjust the time using the
“+” or “-” buttons. If you need to adjust the cooking temperature
level, press the “TIME/TEMP” button to switch to temperature
adjustment mode, then use the “+” or “-” buttons to select the
desired temperature level. Finally, press the “START” button to
begin heating.
SOUS
VIDE
●
In standby mode, use the
“MENU” button to select the SOUS VIDE
function. The “SOUS VIDE” LED will be ON, and the screen will
show the cooking time. Adjust the cooking time using the “+” or
“-” buttons. If you need to adjust the cooking temperature, press
the “TIME/TEMP” button to switch to temperature adjustment
mode. The screen will show the cooking temperature, and you
can adjust it using the “+” or “-” buttons. Finally, press the
“START” button to begin heating.
Special description of RICE function: It is recommended that the
rice water volume ratio of RICE function is 1:1.2, and users can
adjust the time and rice water volume ratio according to their
personal feeling;
STEAM,
STERILIZE,
RICE, BEAN,
CHILI
●
In standby mode, use the
“MENU” button to select the
corresponding menu. The corresponding menu LED will be ON,
and the screen will show the cooking time and cooking pressure
level. Adjust the time using the “+” or “-” buttons. You can also
adjust the cooking pressure level using the “LEVEL” button.
Finally, press the “START” button to begin heating. Once the
working pressure is reached, the countdown will start, and the
appliance will automatically switch to keep warm mode after
completion.
PRESSURE
COOK
●
●
In standby mode, press the
“PRESSURE COOK” button. The menu
button LED will be ON, and the screen will show the cooking time
and cooking pressure level. Adjust the time using the “+” or “-”
buttons. You can also adjust the cooking pressure level using the
“LEVEL” button. Finally, press the “START” button to begin
heating. Once the working pressure is reached, the countdown
will start, and the appliance will automatically switch to keep
warm mode after completion.
SAUCE
THICKEN
●
In standby mode, press the
“SAUCE THICKEN” button. The menu
button LED will be ON, and the screen will show the cooking time
and cooking heat level. Adjust the time using the “+” or “-”
buttons. You can also adjust the cooking heat level using the
“LEVEL” button. Finally, press the “START” button to begin
heating. Once the countdown is complete, the appliance will
return to standby mode.

Operation GuidelinesFunction
DELAY
START
●
●
Before starting menu cooking, press the “DELAY START” button.
The screen will show the preset start time. Adjust the delay time
using the “+” or “-” buttons. When you press the “START” button,
the appliance will start the countdown for the delay time. When
the countdown reaches 0, the cooking will begin.
Note: SOUS VIDE, BAKE, SAUTÉ, SAUCE THICKEN and YOGURT
functions cannot be set for delay start.
Modifying
parameters
mid-cooking
●
●
●
After starting the cooking, if you need to modify the cooking
parameters (cooking time, pressure level, heat level, temperature
level, or temperature value), you can enter the mid-cooking
parameter modification mode by pressing the
“LEVEL” button, “-”
button, “+” button, or “TIME/TEMP” button, and modify the
corresponding cooking parameters.
After completing the parameter modification, press the “START”
button to confirm the parameters and start cooking with the new
parameters.
In the mid-cooking parameter modification mode, if you only
modify the parameters without pressing the “START” button, the
mode will automatically exit after 10 seconds of inactivity.
Temperature
Unit Setting
●
In standby mode, simultaneously press and hold the
“-” button
and “+” button for 3 seconds to switch the current system
temperature unit. The screen will show the switched temperature
unit. You can switch the system temperature unit between “°C”
and “°F” using the aforementioned operation. Once set, the
product will remember this setting even during power outages.
Sound
Setting
●
In standby mode, simultaneously press and hold the
“DELAY
START” button and “KEEP WARM” button for 3 seconds to
toggle the mute function of the current system ON or OFF. When
the mute function is enabled, the mute icon on the display will
illuminate. Once set, the product will remember this setting even
during power outages.
Menu
Parameter
Memory
Function
and
Factory
Default
Settings
●
●
The parameters for all functions will be remembered after starting
the cooking process. The next time the corresponding function is
selected, the parameters will be initialized to the last remembered
values for quick and convenient use.
To restore the factory default settings, press and hold the
“CANCEL” button for 3 seconds in standby mode. After
successful operation, all LEDs will flash three times.
BAKE
●
In standby mode, press the
“BAKE” button. The “BAKE” button
LED will be ON, and the screen will show the default time. Adjust
the time using the “+” or “-” buttons. If you need to adjust the
cooking temperature, press the “TIME/TEMP” button to switch to
temperature adjustment mode. Use the “+” or “-” buttons to
adjust the cooking temperature. Finally, press the “START” button
to begin heating.
16

For use the product safely with a longer service life, please carefully check and maintain
it.
CLEANING AND MAINTENANCE
SolutionsIf followings occur
• Power cord and plug is expanded, deformation,
damaged and it color is changed.
• One part of the power cord and plug are hotter.
• Power cord is flexible with discontinuous power
supply.
• The electric pressure cooker has abnormal
heating and generates bad odor.
• There’s abnormal noise or vibration when supply
power.
• There’s dust or dirt on the plug or socket.
Stop using, and repair it by the
authorized repair center.
Remove the dust or dirt.
17
Safety Precautions
To avoid personal injury and property loss, be sure to observe the following safety
precautions.
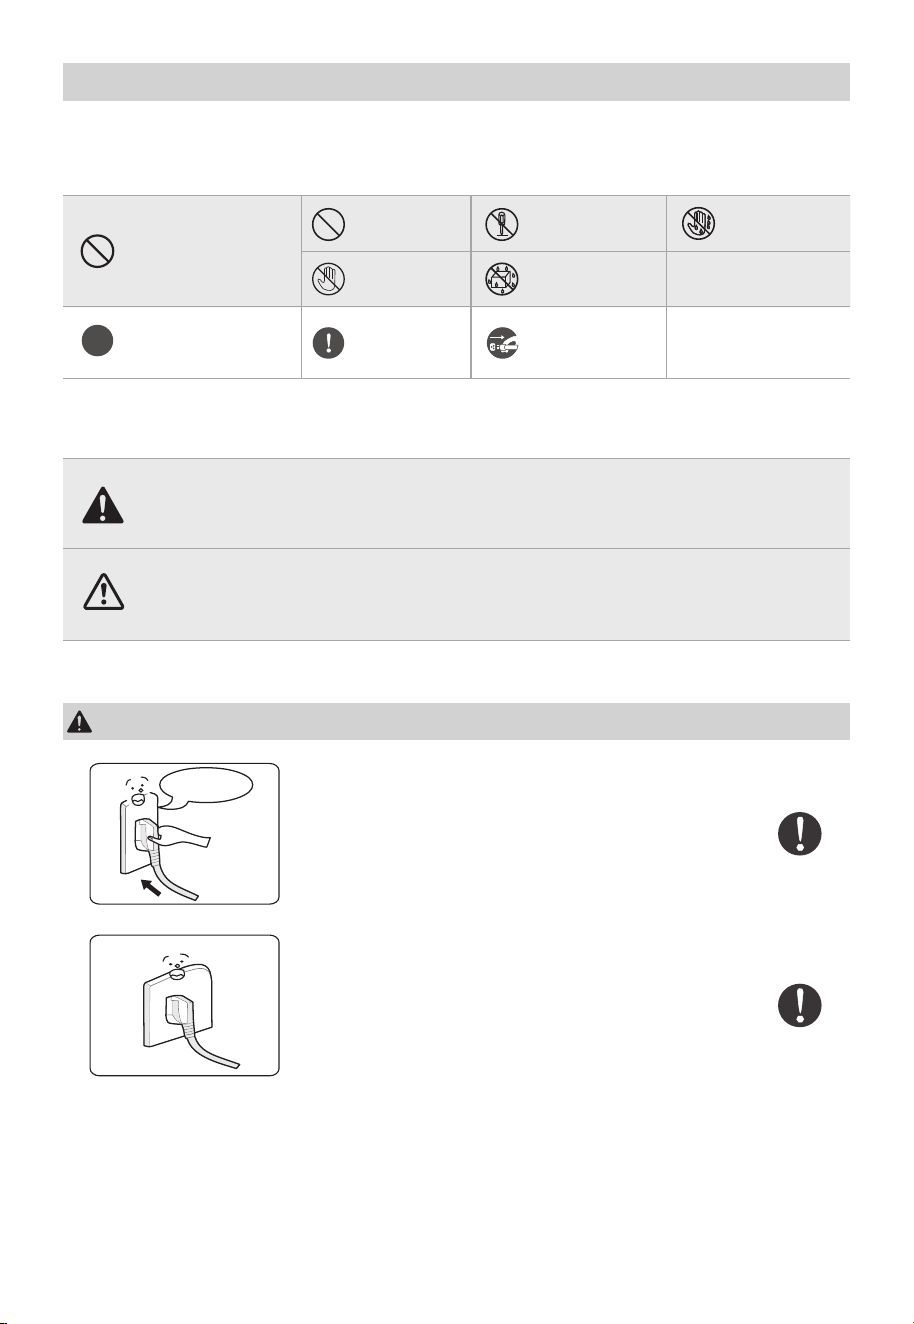
• Meanings of the marks:
• The danger caused by mistaken use if following warnings are neglected includes to two
grades.
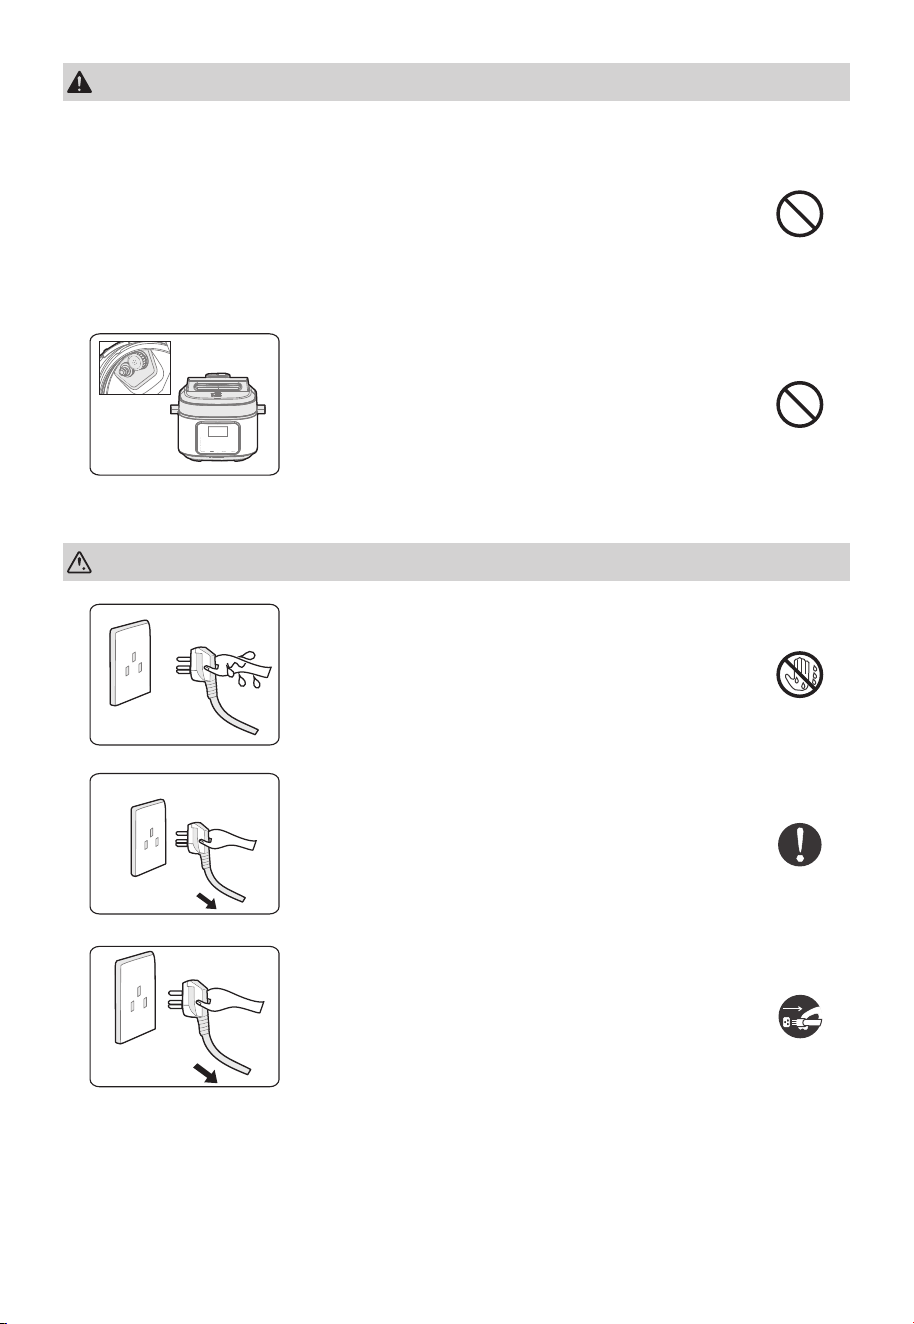
• Failure to use correct electricity can cause
fire or electric shock.
• Danger of fire if the bad socket is adopted.
Use correct power outlet (Refer to the label)
Means
“Forbidden” items
Means
“Mandatory” items
General
Forbid
Contact
Forbidden
Must be
executed
Disassemble
Forbidden
Wet hands
Forbidden
Spray Water
Forbidden
Remove the
power plug
AC
• A socket of more than 10A rated current with
grounding wire shall be used alone;
• If shared with other electrical appliances, the
socket may cause abnormal heat and result in
fire.
A socket shall be used alone
WARNING
It may possibly cause death or serious injury if the warming items are
disobeyed.
CAUTION
It may cause physical injury or property damage if the caution items are
disobeyed.
WARNING
18

• It is strictly prohibited to use other lid for
heating, and in the (switching on) process,
the use of non-original lid is not allowed.
• As this may cause electric shock or safety
hazards.
It is strictly prohibited to use other lid
• Replace the damaged power cord with
special soft cord or replace it with special
assembly purchased from the manufacturer
or authorized repair center.
Stop using if the power cord is damaged
• It is prohibited to insert metal shavings,
needles and other foreign matter in the gap.
• As this may cause electric shock or move-
ment anomalies.
Do not put foreign objects
• Place the appliance in a location out of reach
of infants.
• To avoid electric shock and scald.
Place the appliance in a location out of reach of infants
• Modification or repair by non-professionals is
prohibited.
• Violation may cause a fire or electric shock.
• Repair or replacement of parts shall be made
in a designated service center.
Modification is prohibited
• Doing so could cause electric shock and
electrical short circuits.
Products may not be immersed or sprinkled in water
WARNING
19
• When the electric pressure cooker is not working, there isn't pressure in
the pot, the float valve is down;
• When the electric pressure cooker is working, pressure in the cooker
rises, float valve ascends; do not fiercely open the lid before the pressure
has been completely released;
• If it is difficult to open the lid, please do not open it fiercely, otherwise, it
may cause scalding or physical injury.
Warning on Opening the lid
• Be sure to check periodically the block proof
cover and exhaust valve core to make sure
that they are not be blocked;
• Do not cover the exhaust valve with heavy
object or replace it with other object.
Check periodically
CAUTION
• To avoid electric shock.
Never pull the plug with a wet hand
• When pulling the plug, you must pinch the
plug;
• Do not pull the power cord, otherwise it will
damage the cord, causing electric shock and
short circuit.
When pulling the plug, you must pinch the plug
• Otherwise, it may produce leakage, fire or
failure.
Unplugging when not in use
WARNING
20
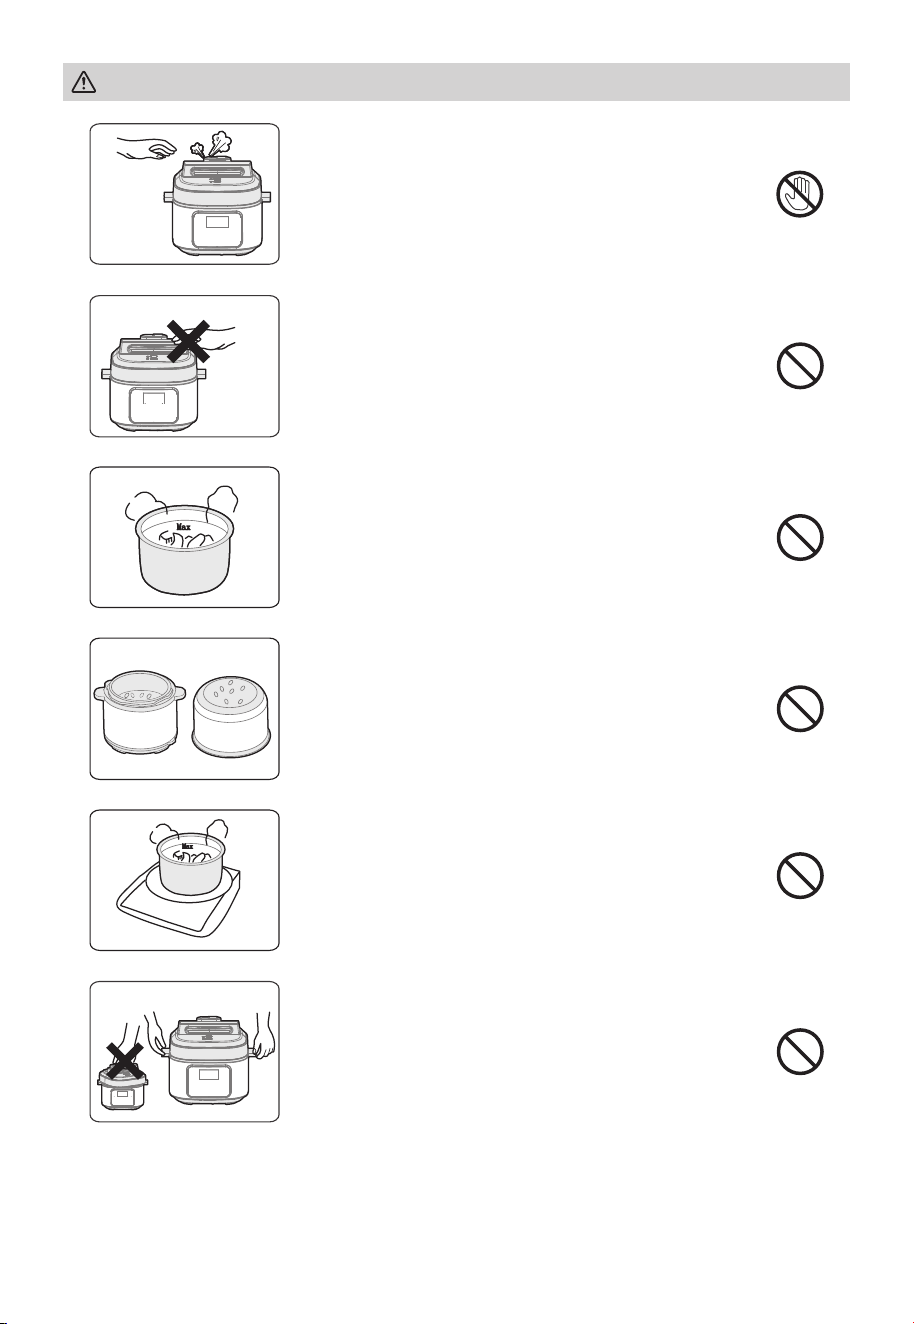
• In cooking process, never move your hands to
close to the exhaust port to avoid burns.
• During cooking, do not cover the vent with a
cloth and other items.
In working, never move your hands to close to the
exhaust port.
• When the cooker is working, lid has high
temperature, do not touch it;
• Otherwise, it may possibly cause scalding.
When the cooker is working, please do not touch
the lid
• The total amount of food and water can not
exceed Max scale, otherwise food may be
cooked unfamiliar, or cause malfunction.
The total amount of food and water can not exceed
Max scale
• When there is foreign object on the bottom
of pot and heating plate surface, remove the
foreign object before use.
• Otherwise, it may cause overheating and
work abnormalities etc.
Do not use a pot other than the dedicated pot
• In order to avoid deformation or fault.
• Please use the special inner pot.
Do not put the inner pot on other appliance for
heating
• When moving the product, do not directly
hold the handle of lid for avoiding lid
dropping.
When moving the product, please hold the handle
of cooker body
CAUTION
Max
Max
21

• Periodically clean the cooker and remove oil and dirt if it is stored on the table.
• Put the electric pressure cooker 11.81in away from other kitchen appliances.
Environment for Storing the Product
Clean after Use
• Do not use in unstable locations;
• Do not use in locations near water and fire;
• Do not use near walls and furniture;
• Do not use in locations exposed to direct sunlight and oil splatter.
• Do not use on the stove to avoid a fire.
Do not use in the following locations
1. Clean after each use.
2. Before cleaning and maintenance, please unplug the power cord until the product
cools.
3. Remove the lid and inner pot, clean with detergent first, then rinse well with water,
and wipe dry with a soft cloth.
4. Clean the internal side of the lid with water, the seal ring, block proof cover, exhaust
valve core and float valve can be removed for washing, timely and correctly install
them after washing, and then dry the internal side of lid with cloth.
5. Wipe clean the cooker body with a rag, and it is prohibited to soak the cooker body in
water or spray water to it.
CAUTION
22

• Clean the float valve
gasket.
• Replace the float valve
gasket.
• Food debris on the float
valve gasket.
• Float valve gasket
worn-out.
Steam leaks from float
valve.
Solution
TROUBLESHOOTING
Reason SolutionProblem
• Position the sealing ring
well.
• Lightly push the push rod.
• Sealing ring not installed
properly.
• The floater valve clamps
the push rod.
Difficult to close the lid
• Add water and food
according to the recipe.
• Send to the service center
for repair.
• Too little food and water
in inner pot.
• Steam leaks from the lid or
exhaust valve.
Float valve unable to rise
• Install the sealing ring as
required.
• Clean the sealing ring.
• Sealing ring installed
improperly.
• Food debris attached to
the sealing ring.
• Replace the sealing ring.• Sealing ring damaged.
• Close the lid correctly.
• The lid is not closed
correctly.
Steam leaks from the lid
• Press the float valve
lightly with a soup spoon.
• Open the lid after the
pressure is completely
released.
-
• Float valve in the popped
up position.
• Pressure exists inside the
cooker.
Difficult to open the lid
Operation of your appliance can lead to errors and malfunctions. The following tables
contain possible causes and notes for resolving an error message or malfunction. It is
recommended to read the tables carefully below in order to save your time and money
that may cost for calling to the service center.
23

SolutionReason SolutionProblem
• Turn the exhaust valve to
the sealing position.
• Send to the service center
for repair.
• Exhaust valve not in
sealing position.
• Pressure control fails
Steam comes out from
exhaust valve non-stop
• Send to the service center
for repair.
• Pressure switch fault.
• An exception in receiving
or sending information
during product
• Send to the service
center for repair
Display screen
displays E1
Display screen
displays E2
Display screen
displays EU
Display screen
displays E8
• Please check the power
socket.
• Send to the service center
for repair.
• Power socket bad
contact.
• Bottom sensor fault.
Power indicator doesn’t
light on
All indicators flas
24
• Add water accordingly.
• After cooking cycle
completes, leave the lid
on for 5 more minutes.
• Too little water.
• Lid opened prematurely.
Rice half cooked or too
hard
• Reduce water
accordingly.
• Too much water.Rice too soft
• Add a minimum 1.5 cups
(375 mL) of a thin liquid
to the inner pot.
• There is not enough
pressure.
Display screen
displays noPr
• If pressure has not fully
released after 60 minutes
contact the Customer
Care Team.
• excess pressure.
Display screen
displays PrSE
Self-diagnosed
Warning Displays
—— If the fault is not removed after above check, please contact our authorized service
center for repair.

logo, word marks, trade name, trade dress and all versions there of are
trademarks, copyrights and other intellectual property rights, and all goodwill derived
valuable assets of Midea Group and/or its affiliates (“Midea”), to which Midea owns
from using any part of an Midea trademark. Use of Midea trademark for commercial
purposes without the prior written consent of Midea may constitute trademark
infringement or unfair competition in violation of relevant laws.
This manual is created by Midea and Midea reserves all copyrights thereof. No entity or
individual may use, duplicate, modify, distribute in whole or in part this manual, or
bundle or sell with other products without the prior written consent of Midea.
All the described functions and instructions were up to date at the time of printing this
manual. However, the actual product may vary due to improved functions and designs.
TRADEMARKS, COPYRIGHTS
AND LEGAL STATEMENT
25

26
DATA PROTECTION NOTICE
For the provision of the services agreed with the customer,
we agree to comply without restriction with all stipulations of applicable data protection
law, in line with agreed countries within which services to the customer will be delivered,
as well as, where applicable, the EU General Data Protection Regulation (GDPR).
Generally, our data processing is to fulfil our obligation under contract with you and for
product safety reasons, to safeguard your rights in connection with warranty and
product registration questions. In some cases, but only if appropriate data protection is
ensured, personal data might be transferred to recipients located outside of the
European Economic Area.
Further information are provided on request. You can contact our Data Protection
Officer via [email protected]. To exercise your rights such as right to object your
personal date being processed for direct marketing purposes, please contact us via
[email protected]. To find further information, please follow the QR Code.

27
1 YEAR LIMITED WARRANTY
This is the only express warranty for this product and is in lieu of any other warranty or
condition. This product is warranted to be (1) year from the date of original purchase.
During this period, your exclusive remedy is repair or replacement of this product or any
component found to be defective, at our option; however, you are responsible for all
costs associated with returning the product to us and our returning the product or
component under this warranty to you. If the product or component is no longer
available, we will replace with a similar one of equal or greater value. This warranty does
not cover wear from normal use, and damages to the product resulting from accident,
alteration, abuse, or misuse. This warranty extends only to the original consumer
purchaser or gift recipient. Keep the original sales. This warranty is void if products is
used for other than single family household use or subjected to any voltage and
waveform. We exclude all claims for special, incidental, and consequential damages by
breach of express or implied warranty. All liability is limited to amount of the purchase
price. Every implied warranty, including any statutory warranty or condition of
merchantability prohibited by law, in which case such warranty or condition is limited to
the duration of this written warranty. Legal rights that vary depending on where you live.
Some states or provinces do not allow limitations on implied warranties or special,
incidental consequential damages, so the foregoing limitations may not apply to you.
Please note that failure to complete and submit this form does not diminish your
warranty.
In the event of a warranty period claim, question, comments or if service is required for
this product, please contact us at the following:
1-866-646-4332