Loading ...
Loading ...
Loading ...
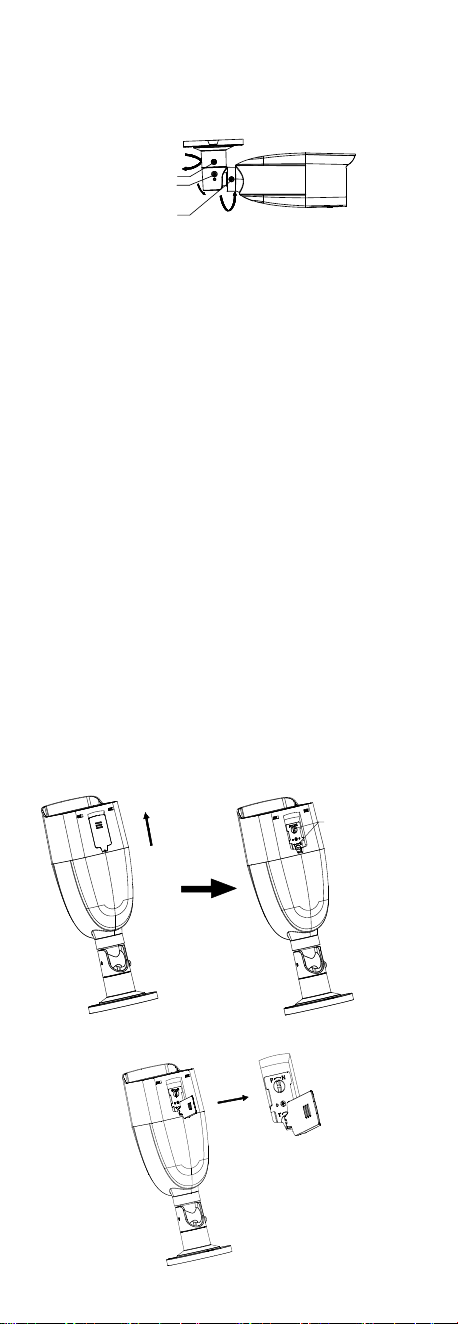
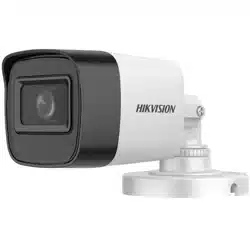
Figure 2-13 Install Camera on Wall
2. Power on the camera to check if the image on the
monitor is gotten from the optimum angle. If not,
adjust the camera according to the figure below.
Rotation Position
[0° to 360°]
Pan Position
[0° to 360°]
Tilt Position [0° to 90°]
T
R
P
Figure 2-14 3-Axis Adjustment
4). Loosen the T adjusting screw to adjust the tilt
position [0° to 90°].
5). Loosen the P adjusting screw to adjust the pan
position [0° to 360°].
6). Loosen the R adjusting screw to adjust the
rotation position [0° to 360°].
3. Tighten the screws to finish the installation.
2.2.2 Ceiling/Wall Mounting with Junction Box
Before you start:
You need to purchase a junction box in advance.
Steps:
1. Refer to steps 1 to 8 of 2.1.2 Ceiling/Wall Mounting
with Junction Box to mount the camera to the
junction box and connect the cables.
2. Refer to steps 2 of 2.2.1 Ceiling/Wall Mounting to
finish installation.
2.2.3 Adjust Zoom and Focus
Steps:
1. Remove the cover on the bottom of the device.
2. Tighten or loosen the screws by the cover to adjust
the zoom and focus.
F/N: Screw to the direction of F to focus far,
and screw to the direction of N to focus near.
T/W: Screw to the direction of T to zoom in,
and screw to the direction of W to zoom out.
Zoom & Focus
Adjusting
Screws
Figure 2-15 Remove Cover
Figure 2-16 Adjust Zoom and Focus
Loading ...
Loading ...
Loading ...