Loading ...
Loading ...
Loading ...

4
2. Remove the side handle, all accessories and the
grinder guard.
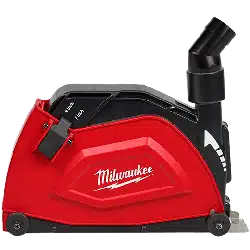
3. Press the shroud button to open the shroud and
expose the collar.
2
1
4. Place the collar on the grinder spindle. Make sure
it aligns properly. Install according to the guard
assembly instructions in the tool manual.
NOTE: The shroud will not work on grinders that do
not have the same spindle collar design.
NOTE: For cordless tools, use the collar provided
marked "cordless". For corded tools, use the collar
provided marked "corded".
5. WARNING! Always adjust the guard to provide the
operator with maximum protection while operating.
See tool manual for reference. Select the proper
cutting angle for the application.
6. WARNING! Only install diamond abrasive wheels
according to instructions. Flap discs and resin
bonded grinding wheels are not acceptable for this
shroud. Install the applicable diamond abrasive
wheel according to the instructions in the tool manual.
7. Rotate the shroud completely to expose the
grinder's spindle.
8. Install the proper ange, cutting wheel and nut
according to the instructions in the tool manual.
Ø 7”
Ø 9”
NOTE: For cordless tools, use the larger diameter
ange provided. For corded tools, use the smaller
diameter ange provided.
9. Press and hold the grinder's spindle lock. Use a
wrench to secure the cutting wheel.
1
2
10. Close the wheel cover and ensure the shroud
button is snapped in place.
1
2
11. Reinstall the grinder side handle. WARNING!
Do not use the grinder without the side handle
installed.
12. Attach the hose clip adaptor and dust extractor
hose to the shroud.
Loading ...
Loading ...
Loading ...
