

DS-K7R83X Remote Control Pad

Legal Informaon
©2023 Hangzhou Hikvision Digital Technology Co., Ltd. All rights reserved.
About this Manual
The Manual includes instrucons for using and managing the Product. Pictures, charts, images and
all other informaon hereinaer are for descripon and explanaon only. The informaon
contained in the Manual is subject to change, without noce, due to rmware updates or other
reasons. Please nd the latest version of this Manual at the Hikvision website ( hps://
www.hikvision.com/ ).
Please use this Manual with the guidance and assistance of professionals trained in
supporng the
Product.
Trademarks
and other Hikvision's trademarks and logos are the properes of
Hikvision in various jurisdicons.
Other trademarks and logos menoned are the properes of their respecve owners.
Disclaimer
TO THE MAXIMUM EXTENT PERMITTED BY APPLICABLE LAW, THIS MANUAL AND THE PRODUCT
DESCRIBED, WITH ITS HARDWARE, SOFTWARE AND FIRMWARE, ARE PROVIDED "AS IS" AND "WITH
ALL FAULTS AND ERRORS". HIKVISION MAKES NO WARRANTIES, EXPRESS OR IMPLIED, INCLUDING
WITHOUT LIMITATION, MERCHANTABILITY, SATISFACTORY QUALITY, OR FITNESS FOR A PARTICULAR
PURPOSE. THE USE OF THE PRODUCT BY YOU IS AT YOUR OWN RISK. IN NO EVENT WILL HIKVISION
BE LIABLE TO YOU FOR ANY SPECIAL, CONSEQUENTIAL, INCIDENTAL, OR INDIRECT DAMAGES,
INCLUDING, AMONG OTHERS, DAMAGES FOR LOSS OF BUSINESS PROFITS, BUSINESS
INTERRUPTION, OR LOSS OF DATA, CORRUPTION OF SYSTEMS, OR LOSS OF DOCUMENTATION,
WHETHER BASED ON BREACH OF CONTRACT, TORT (INCLUDING NEGLIGENCE), PRODUCT LIABILITY,
OR OTHERWISE, IN CONNECTION WITH THE USE OF THE PRODUCT, EVEN IF HIKVISION HAS BEEN
ADVISED OF THE POSSIBILITY OF SUCH DAMAGES OR LOSS.
YOU ACKNOWLEDGE THAT THE NATURE OF THE INTERNET PROVIDES FOR INHERENT SECURITY
RISKS, AND HIKVISION SHALL NOT TAKE ANY RESPONSIBILITIES FOR ABNORMAL OPERATION,
PRIVACY LEAKAGE OR OTHER DAMAGES RESULTING FROM CYBER-ATTACK, HACKER ATTACK, VIRUS
INFECTION, OR OTHER INTERNET SECURITY RISKS; HOWEVER, HIKVISION WILL PROVIDE TIMELY
TECHNICAL SUPPORT IF REQUIRED.
YOU AGREE TO USE THIS PRODUCT IN COMPLIANCE WITH ALL APPLICABLE LAWS, AND YOU ARE
SOLELY RESPONSIBLE FOR ENSURING THAT YOUR USE CONFORMS TO THE APPLICABLE LAW.
ESPECIALLY, YOU ARE RESPONSIBLE, FOR USING THIS PRODUCT IN A MANNER THAT DOES NOT
INFRINGE ON THE RIGHTS OF THIRD PARTIES, INCLUDING WITHOUT LIMITATION, RIGHTS OF
PUBLICITY, INTELLECTUAL PROPERTY RIGHTS, OR DATA PROTECTION AND OTHER PRIVACY RIGHTS.
YOU SHALL NOT USE THIS PRODUCT FOR ANY PROHIBITED END-USES, INCLUDING THE
DS-K7R83X Remote Control Pad
i

DEVELOPMENT OR PRODUCTION OF WEAPONS OF MASS DESTRUCTION, THE DEVELOPMENT OR
PRODUCTION OF CHEMICAL OR BIOLOGICAL WEAPONS, ANY ACTIVITIES IN THE CONTEXT RELATED
TO ANY NUCLEAR EXPLOSIVE OR UNSAFE NUCLEAR FUEL-CYCLE, OR IN SUPPORT OF HUMAN
RIGHTS ABUSES.
IN THE EVENT OF ANY CONFLICTS BETWEEN THIS MANUAL AND THE APPLICABLE LAW, THE LATTER
PREVAILS.
Data Protecon
During the use of device, personal data will be collected, stored and processed. To protect data,
the development of Hikvision devices incorporates privacy by design principles. For example, for
device with facial recognion features, biometrics data is stored in your device with encrypon
method; for ngerprint device, only ngerprint template will be saved, which is impossible to
reconstruct a ngerprint image.
As data controller, you are advised to collect, store, process and transfer data in accordance with
the applicable data
protecon laws and regulaons, including without limitaon, conducng
security controls to safeguard personal data, such as, implemenng reasonable administrave and
physical security controls, conduct periodic reviews and assessments of the
eecveness of your
security controls.
DS-K7R83X Remote Control Pad
ii

Contents
Chapter 1 Applicaon Scenarios ................................................................................................. 1
Chapter 2 Quick Sengs ............................................................................................................. 2
2.1 Acvate .................................................................................................................................. 2
2.2 Select Language ..................................................................................................................... 2
2.3 Set Security Queson ............................................................................................................. 3
2.4 Congure Network ................................................................................................................. 3
Chapter 3 Local Sengs ............................................................................................................. 5
3.1 Home Page ............................................................................................................................. 5
3.2
Turnsle Management ........................................................................................................... 5
3.2.1 Add Turnsle ................................................................................................................. 5
3.2.2 Turnsle Management .................................................................................................. 6
3.2.3 Barrier Open/Close ....................................................................................................... 7
3.2.4
Turnsle Group Control ................................................................................................. 8
3.2.5 Live View ....................................................................................................................... 8
3.3
Communicaon Sengs ........................................................................................................ 9
3.3.1 Set Wired Network ........................................................................................................ 9
3.3.2 Wi-Fi Sengs ................................................................................................................ 9
3.3.3 Set Device Hotspot ...................................................................................................... 10
3.4 Time
Sengs ........................................................................................................................ 11
3.5 Dene Buon ....................................................................................................................... 11
3.6 View User Manual ................................................................................................................ 12
3.7 System Maintenance ............................................................................................................ 12
Chapter 4 Quick
Operaon via Web Browser ............................................................................ 14
4.1 Language
Sengs ................................................................................................................ 14
4.2 Time Sengs ........................................................................................................................ 14
Chapter 5 Operaon via Web Browser ...................................................................................... 15
DS-K7R83X Remote Control Pad
iii

5.1 Login .................................................................................................................................... 15
5.2 Forget Password ................................................................................................................... 15
5.3 Live View .............................................................................................................................. 15
5.4
Conguraon ....................................................................................................................... 16
5.4.1 View Device Informaon ............................................................................................. 16
5.4.2 Set Time ...................................................................................................................... 16
5.4.3 Change Administrator's Password ............................................................................... 17
5.4.4 Account Security Sengs ............................................................................................ 17
5.4.5 Network Sengs ......................................................................................................... 17
5.4.6 Upgrade and Maintenance ......................................................................................... 20
5.4.7 Device Debugging ....................................................................................................... 20
Chapter 6 Congure the Device via the Mobile Browser ........................................................... 22
6.1 Login .................................................................................................................................... 22
6.2 Forget Password ................................................................................................................... 22
6.3 Home Page ........................................................................................................................... 23
6.4 Conguraon ....................................................................................................................... 24
6.4.1 View Device Basic
Informaon ................................................................................... 24
6.4.2 Time Sengs ............................................................................................................... 24
6.4.3 User Management ...................................................................................................... 26
6.4.4 Network ...................................................................................................................... 26
6.4.5 System Maintenance ................................................................................................... 29
6.4.6 Log Out ........................................................................................................................ 29
DS-K7R83X Remote Control Pad
iv

Chapter 2 Quick Sengs
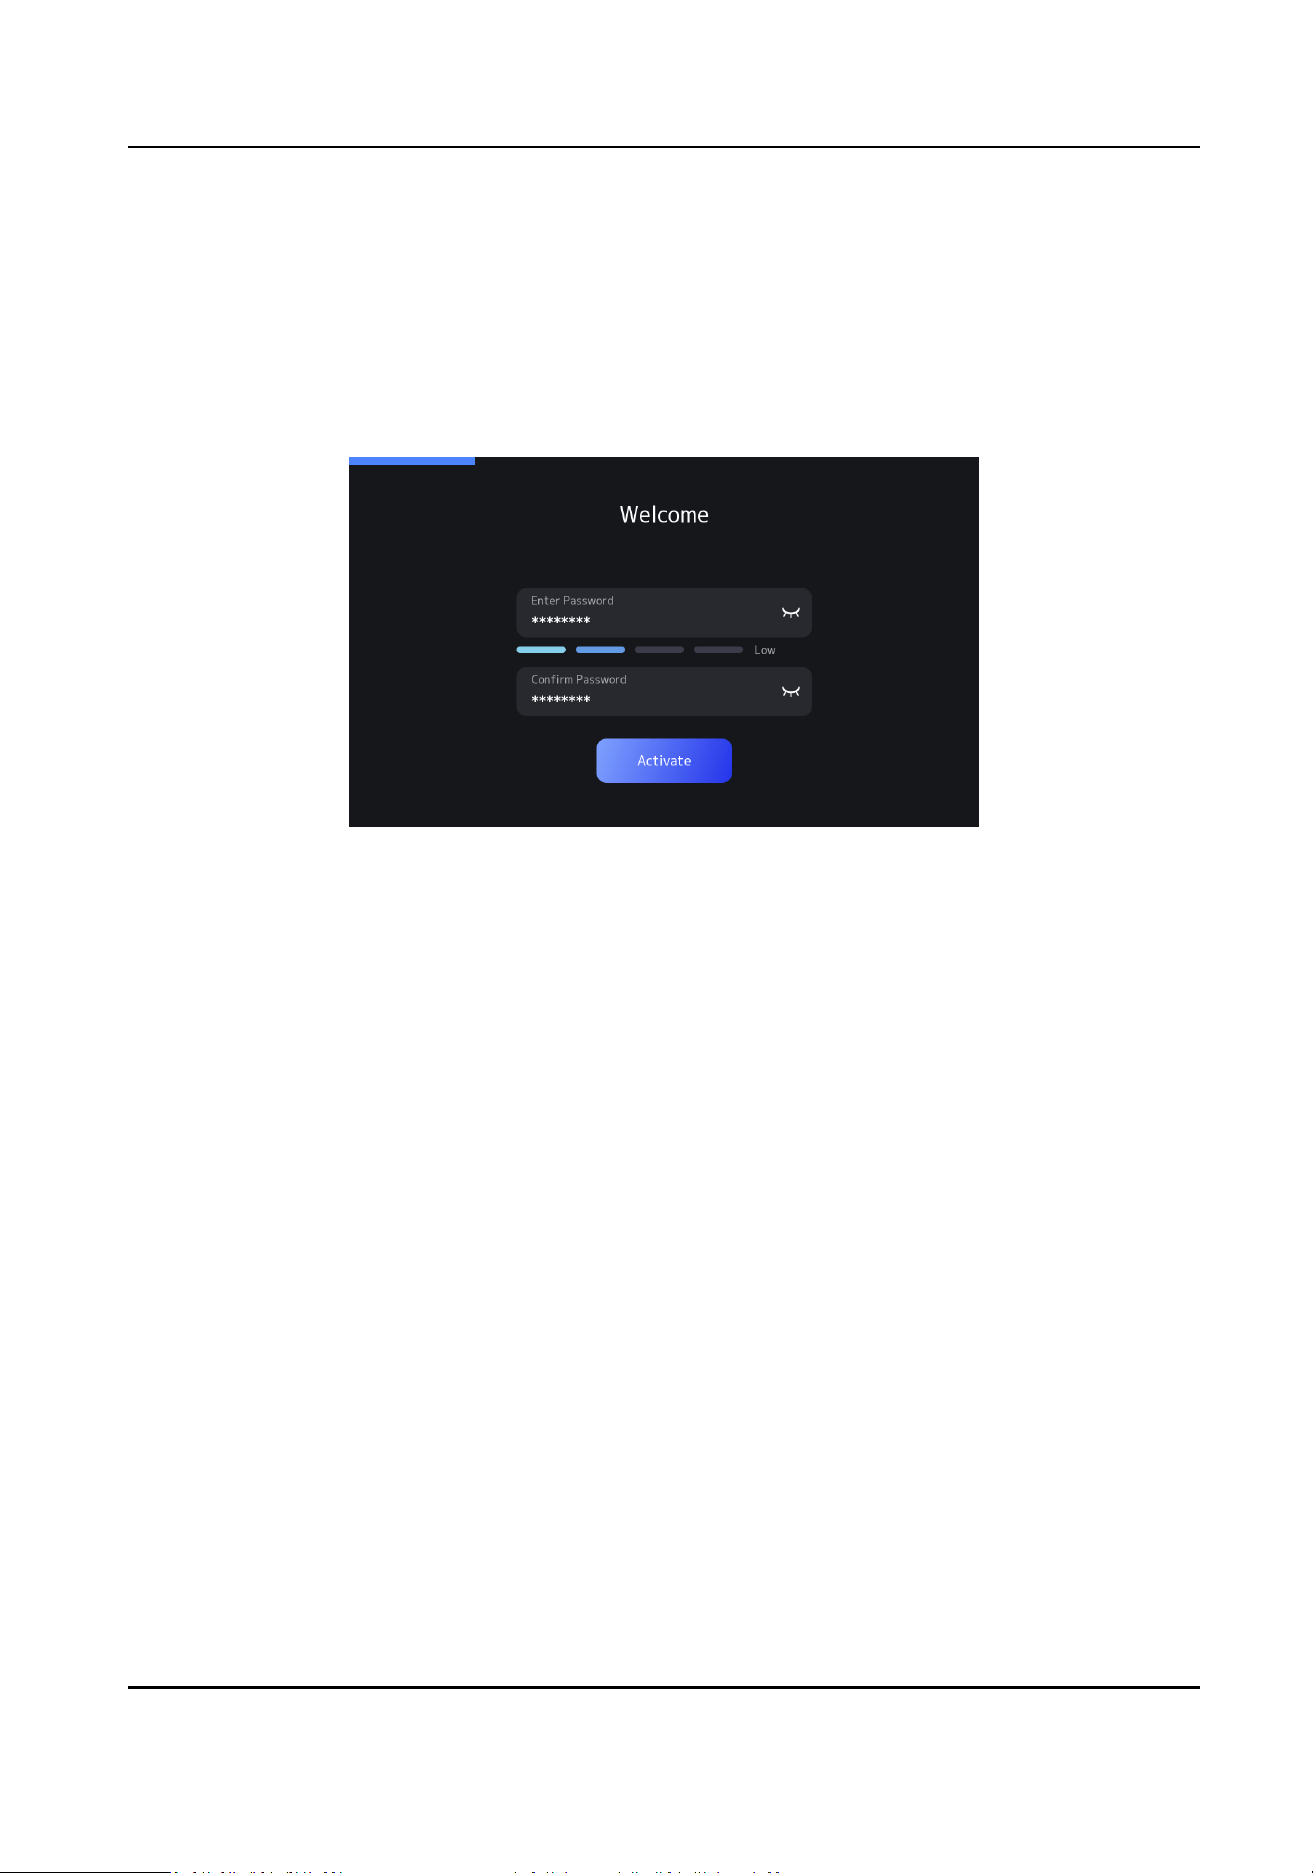
2.1 Acvate
Set an acvaon password to acvate the device.
Figure 2-1 Acvate
Power on the device, and the device enters the acvaon page automacally.
Create an acvaon password and conrm it.
2.2 Select Language
Aer acvaon, you should select a language.
Steps
1.
Select a language according to the actual needs.
DS-K7R83X Remote Control Pad
2
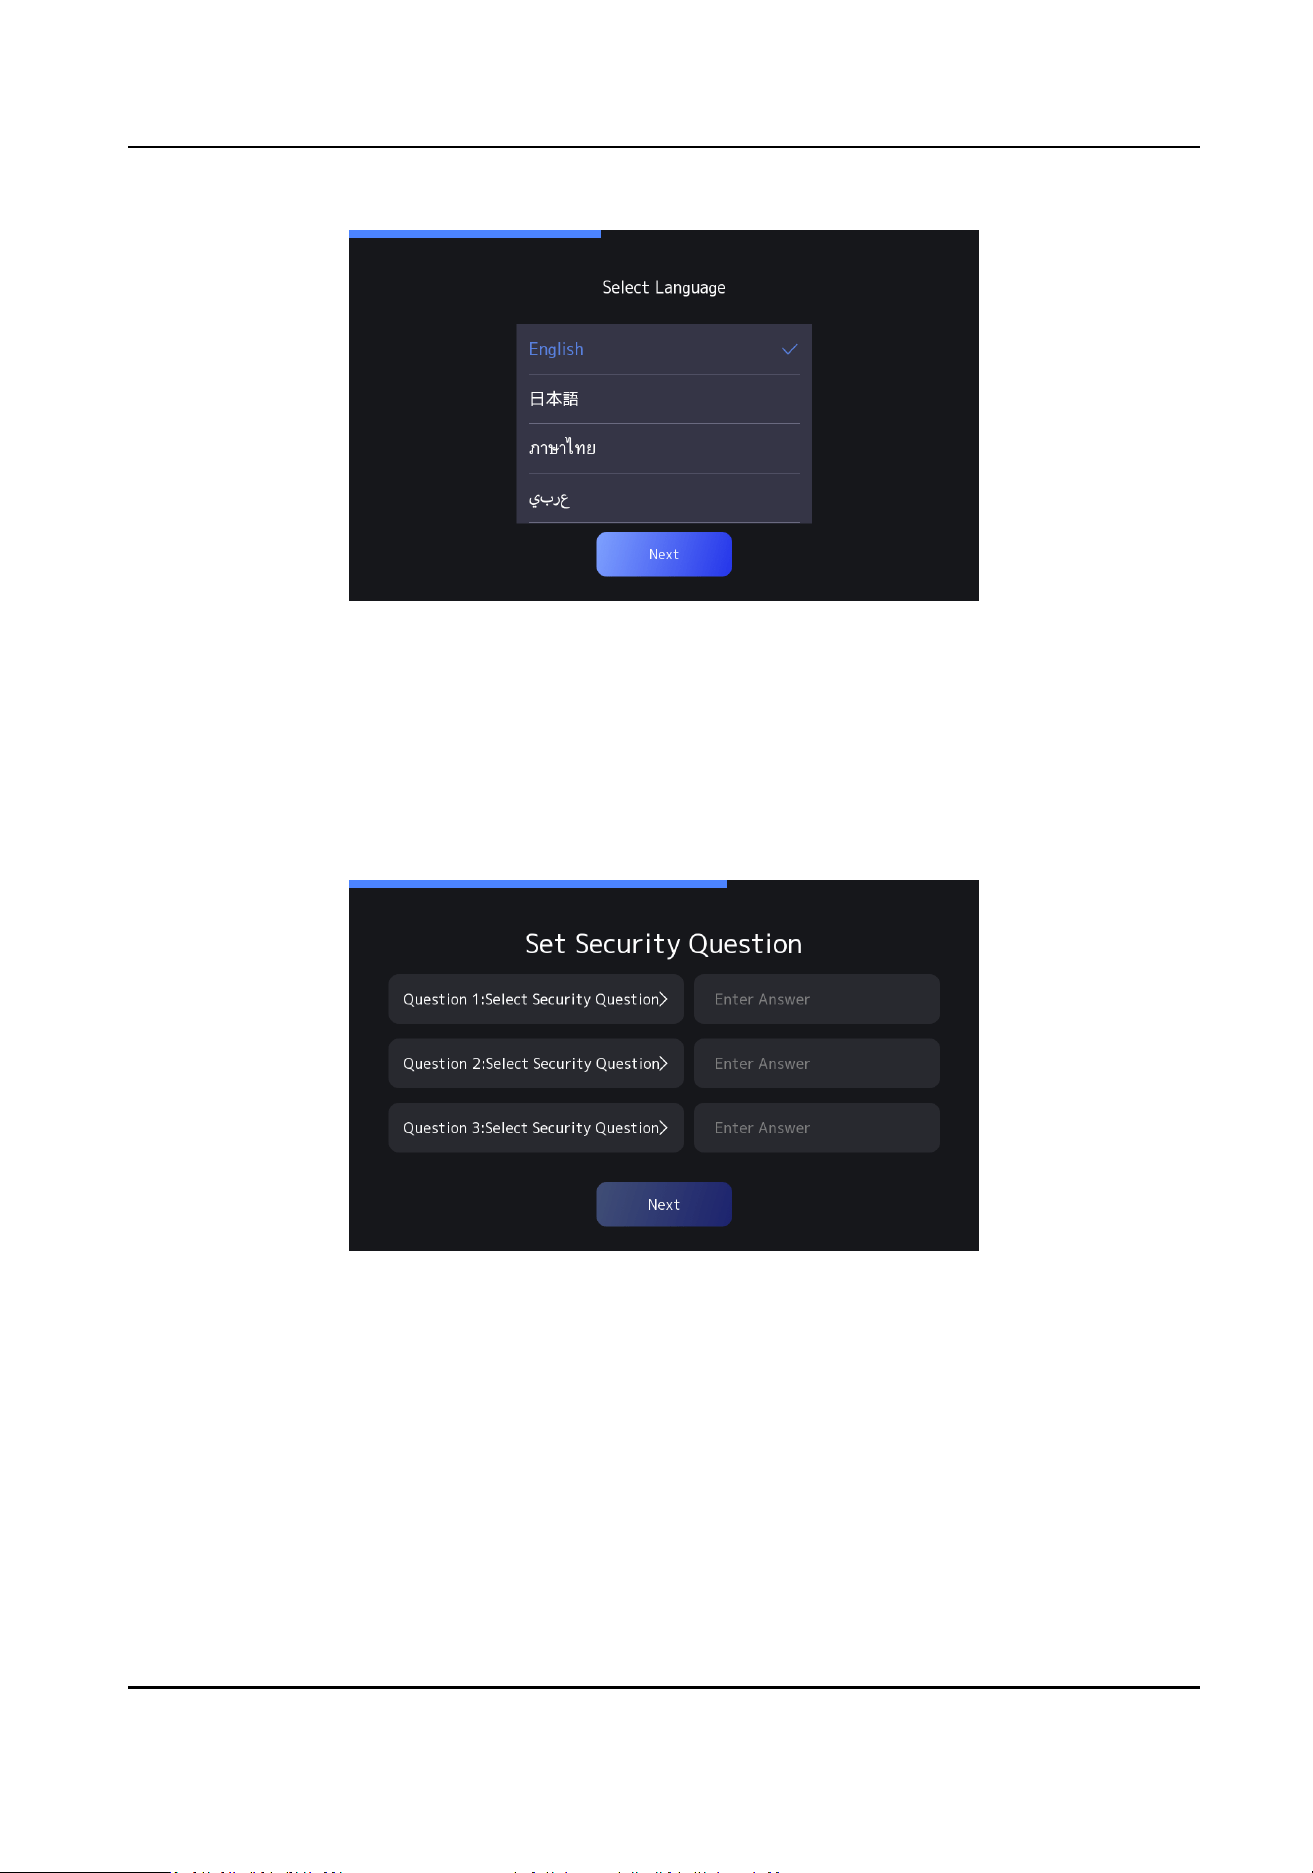
Figure 2-2 Select Language
2.
Click Next.
2.3 Set Security
Queson
If you forget the password, you can verify by security quesons and answers.
Figure 2-3 Set Security Queson
Select the security queson and enter the answer.
Tap Next.
2.4
Congure Network
Congure wired or wireless network connecon.
Tap Skip in the top-right corner to skip this conguraon step temporarily.
DS-K7R83X Remote Control Pad
3
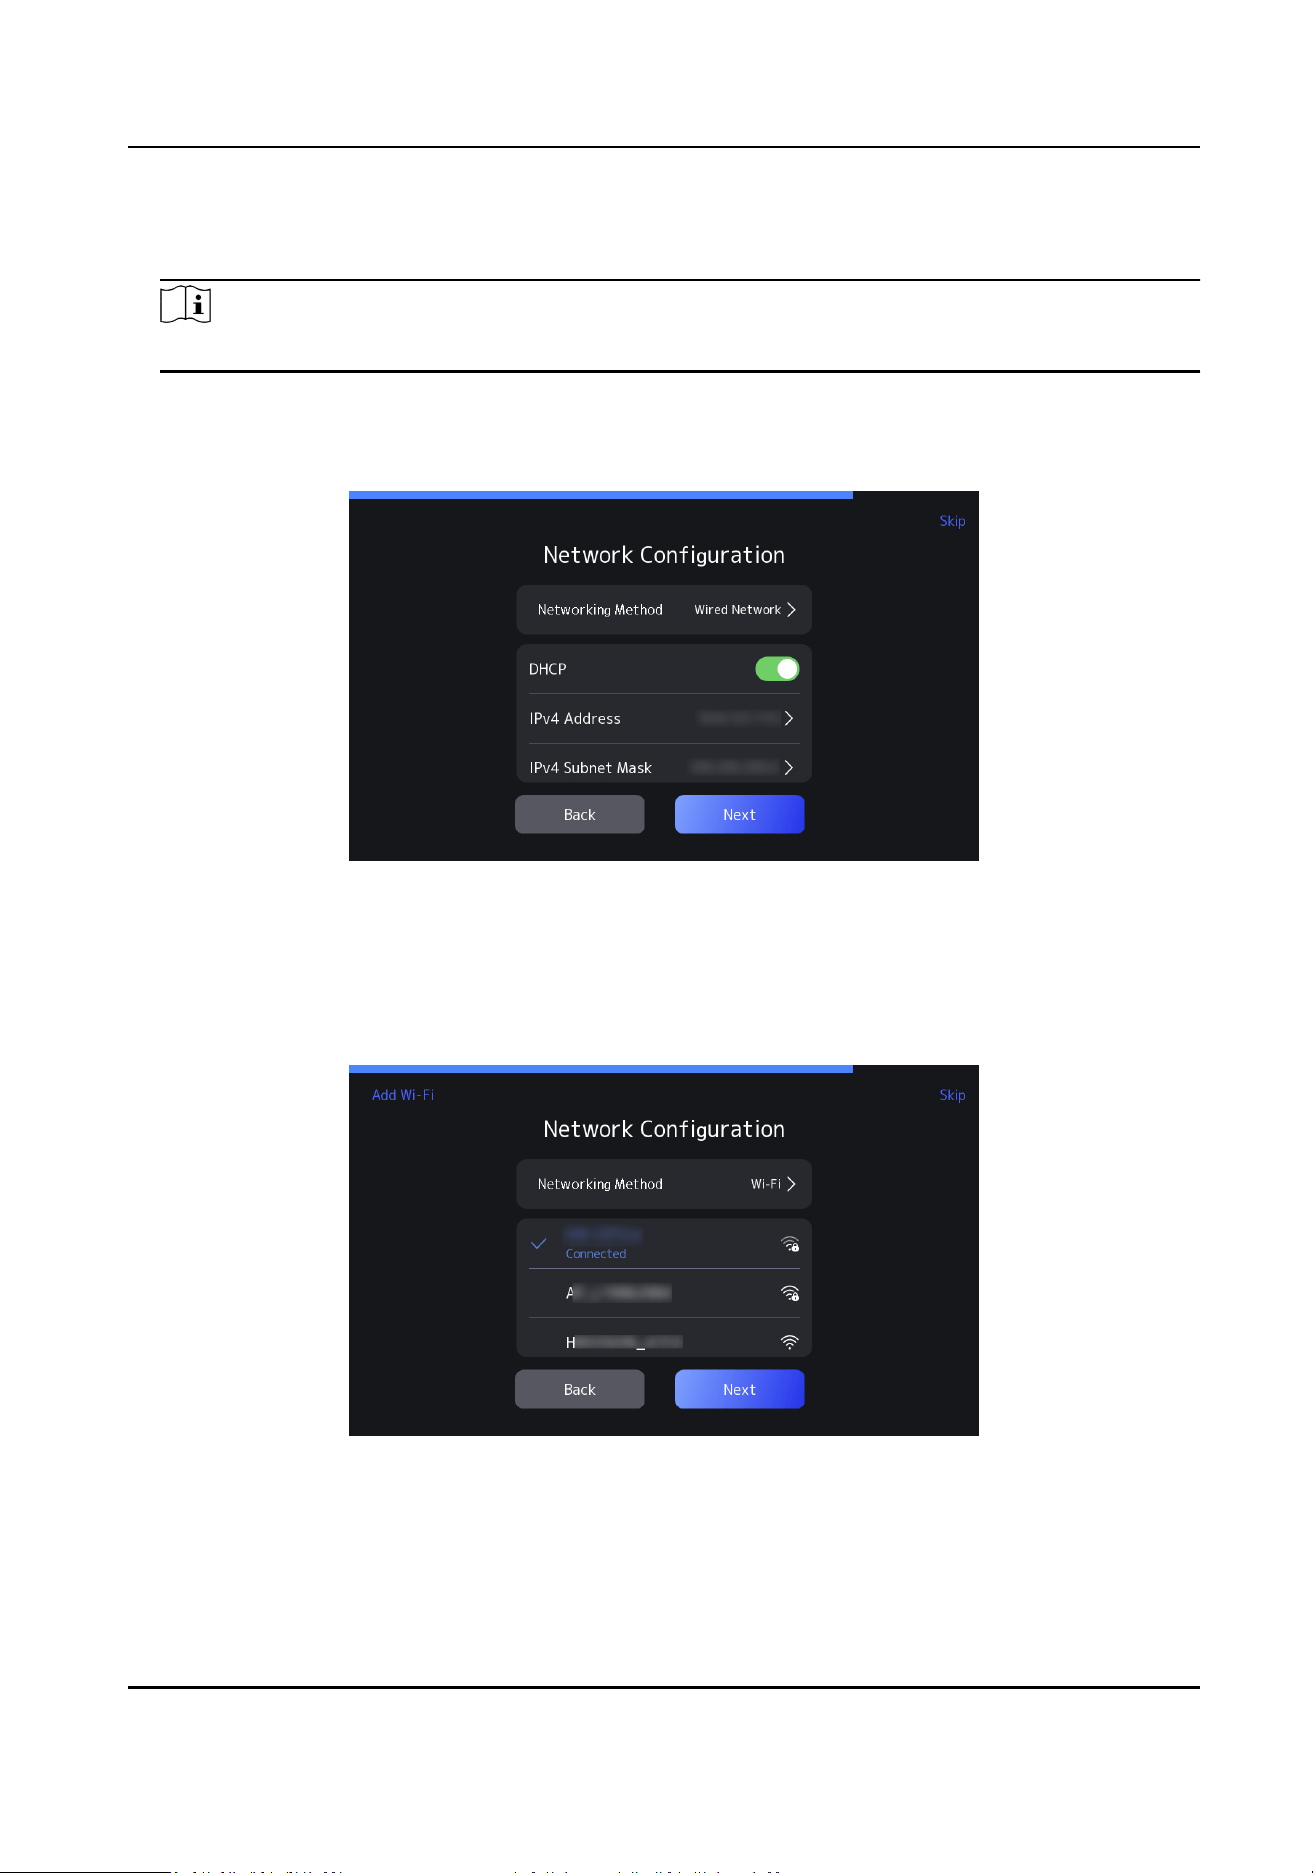
Select Wired or Wi-Fi, and click Next.
Wired Network
Note
Make sure the device has connected to a network.
If enable DHCP, the system will assign the IP address and other parameters automacally.
If disable DHCP, you should set the IP address, the subnet mask, and the gateway.
Figure 2-4 Wired Network Conguraon
Wi-Fi
Tap Add Wi-Fi, enter the Wi-Fi's name and the password, and tap OK to get connected.
Or select a Wi-Fi, enter the Wi-Fi's password, and tap OK to get connected.
Figure 2-5 Wireless Network Conguraon
DS-K7R83X Remote Control Pad
4
Chapter 3 Local Sengs
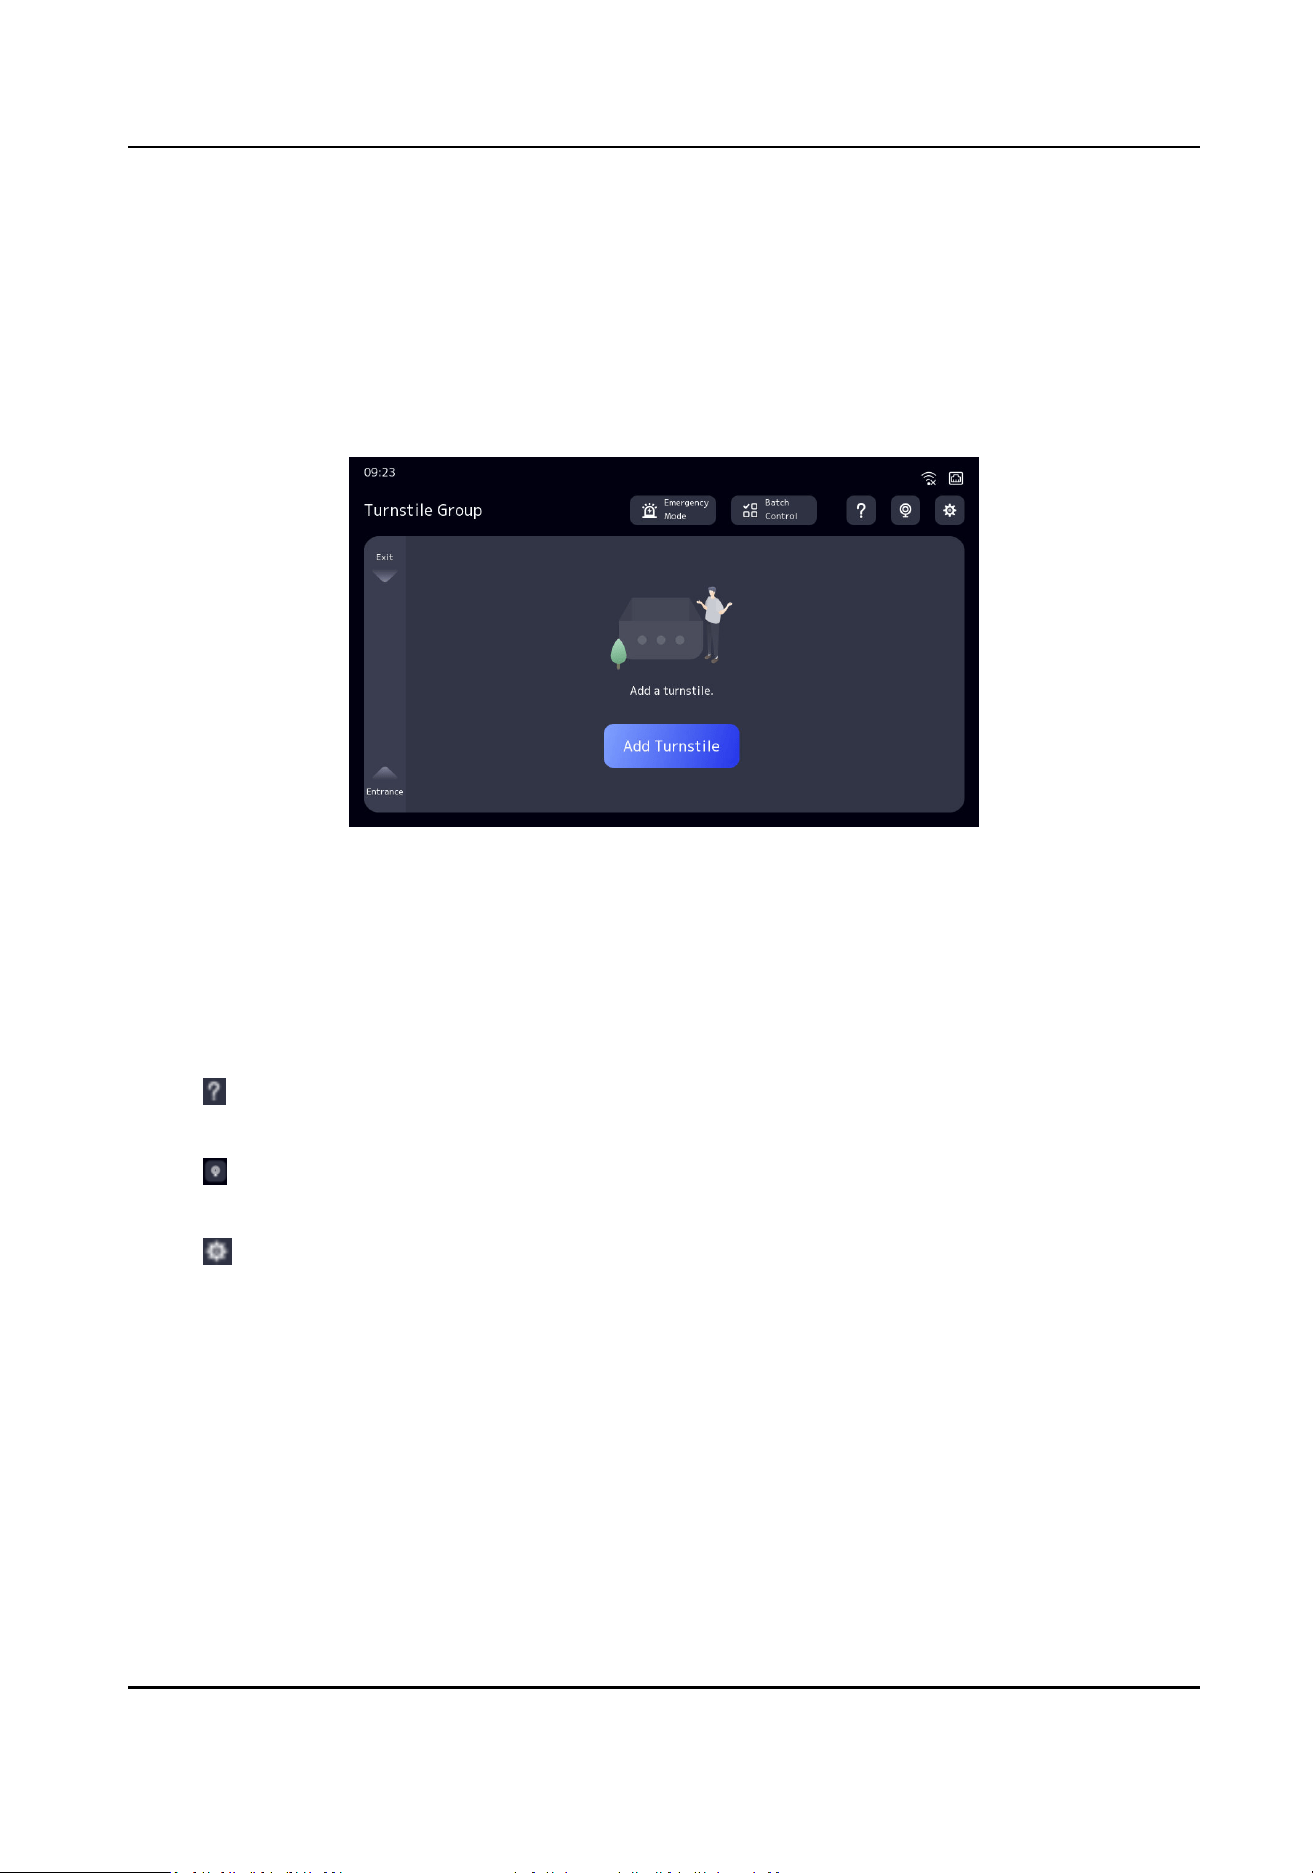
3.1 Home Page
Aer quick conguraon, the device enters the home page automacally.
Figure 3-1 Home Page
Turnsle Management
●
Tap Add Turnsle, you can add the turnsle to the device.
●
Tap Emergency Mode, you can open all barriers.
●
Tap Batch Control, you can control all added
turnsles’ barrier status.
Help Manual
Tap , you can view the help guide of barrier status control.
Live View
Tap , you can view turnsle videos.
System Conguraon
Tap , you can set system parameters.
3.2
Turnsle Management
3.2.1 Add Turnsle
Aer adding the turnsle, you can use the device to control the barrier status.
DS-K7R83X Remote Control Pad
5
Steps
1.
Tap Add Turnsle, enter password to enter the add turnsle page. Or tap , enter password to
enter the sengs page. Tap Turnsle Management → + to enter the add turnsle page.
2.
Enter the
turnsle group name, and tap Next.
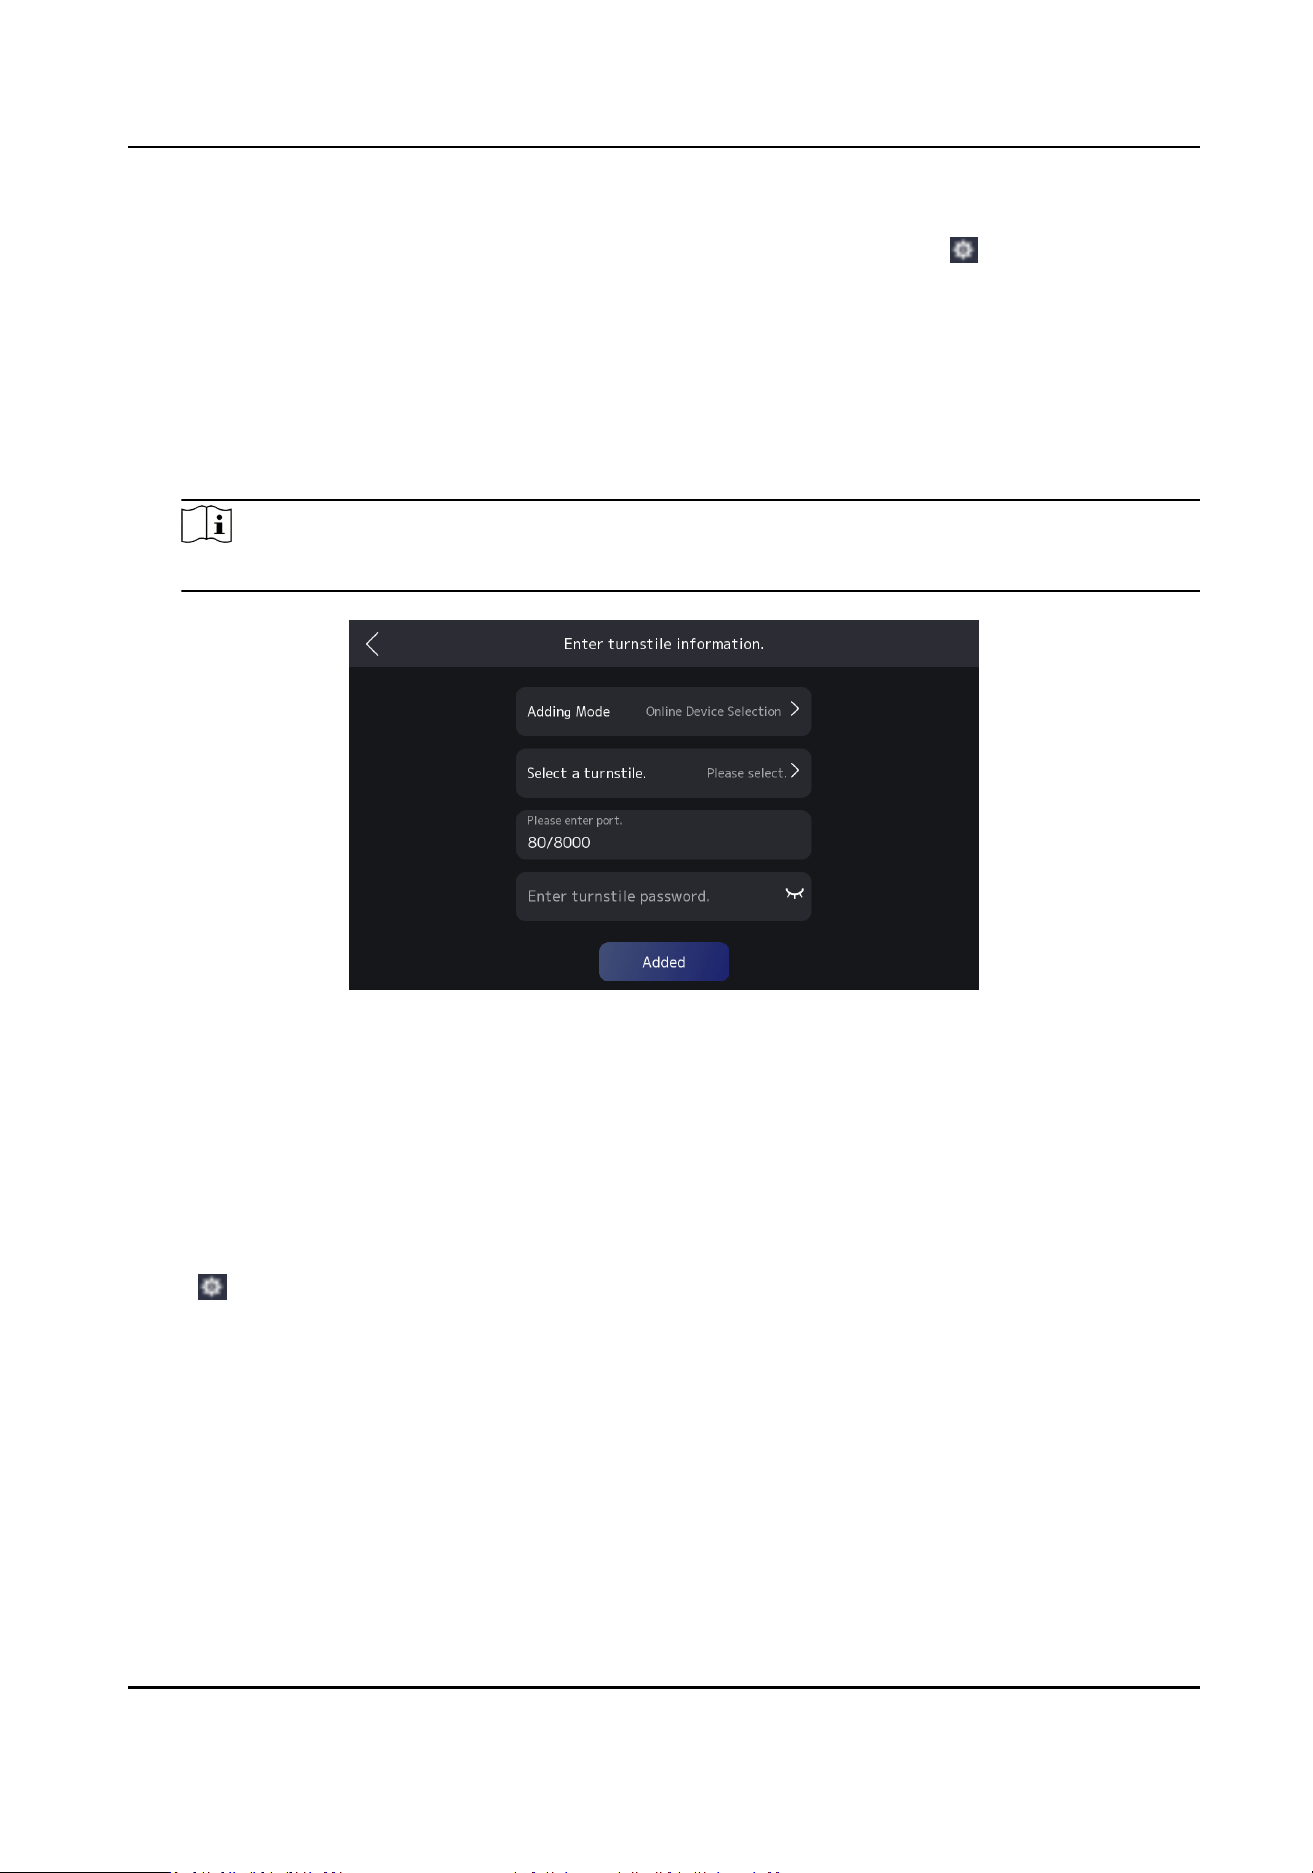
3.
Select the adding mode.
-
If you select the adding mode as Online Device
Selecon, select the online turnsle, and tap
OK. Enter port No. (oponal) and turnsle password.
-
If you select the adding mode as Manually Add, enter IP address and port No.
(oponal), and
enter
turnsle password. Tap Add More to add other turnsles.
Note
When the port No. is empty, the device will perform adapve login.
Figure 3-2 Add Turnsle
4.
Tap Added to complete the add steps.
3.2.2
Turnsle Management
Aer adding the turnsle, you can adjust turnsle order, view turnsle informaon, etc.
Steps
1.
Tap , enter the password to enter the conguraon page. Tap Turnsle Management and tap
turnsle group name to enter the details page.
DS-K7R83X Remote Control Pad
6
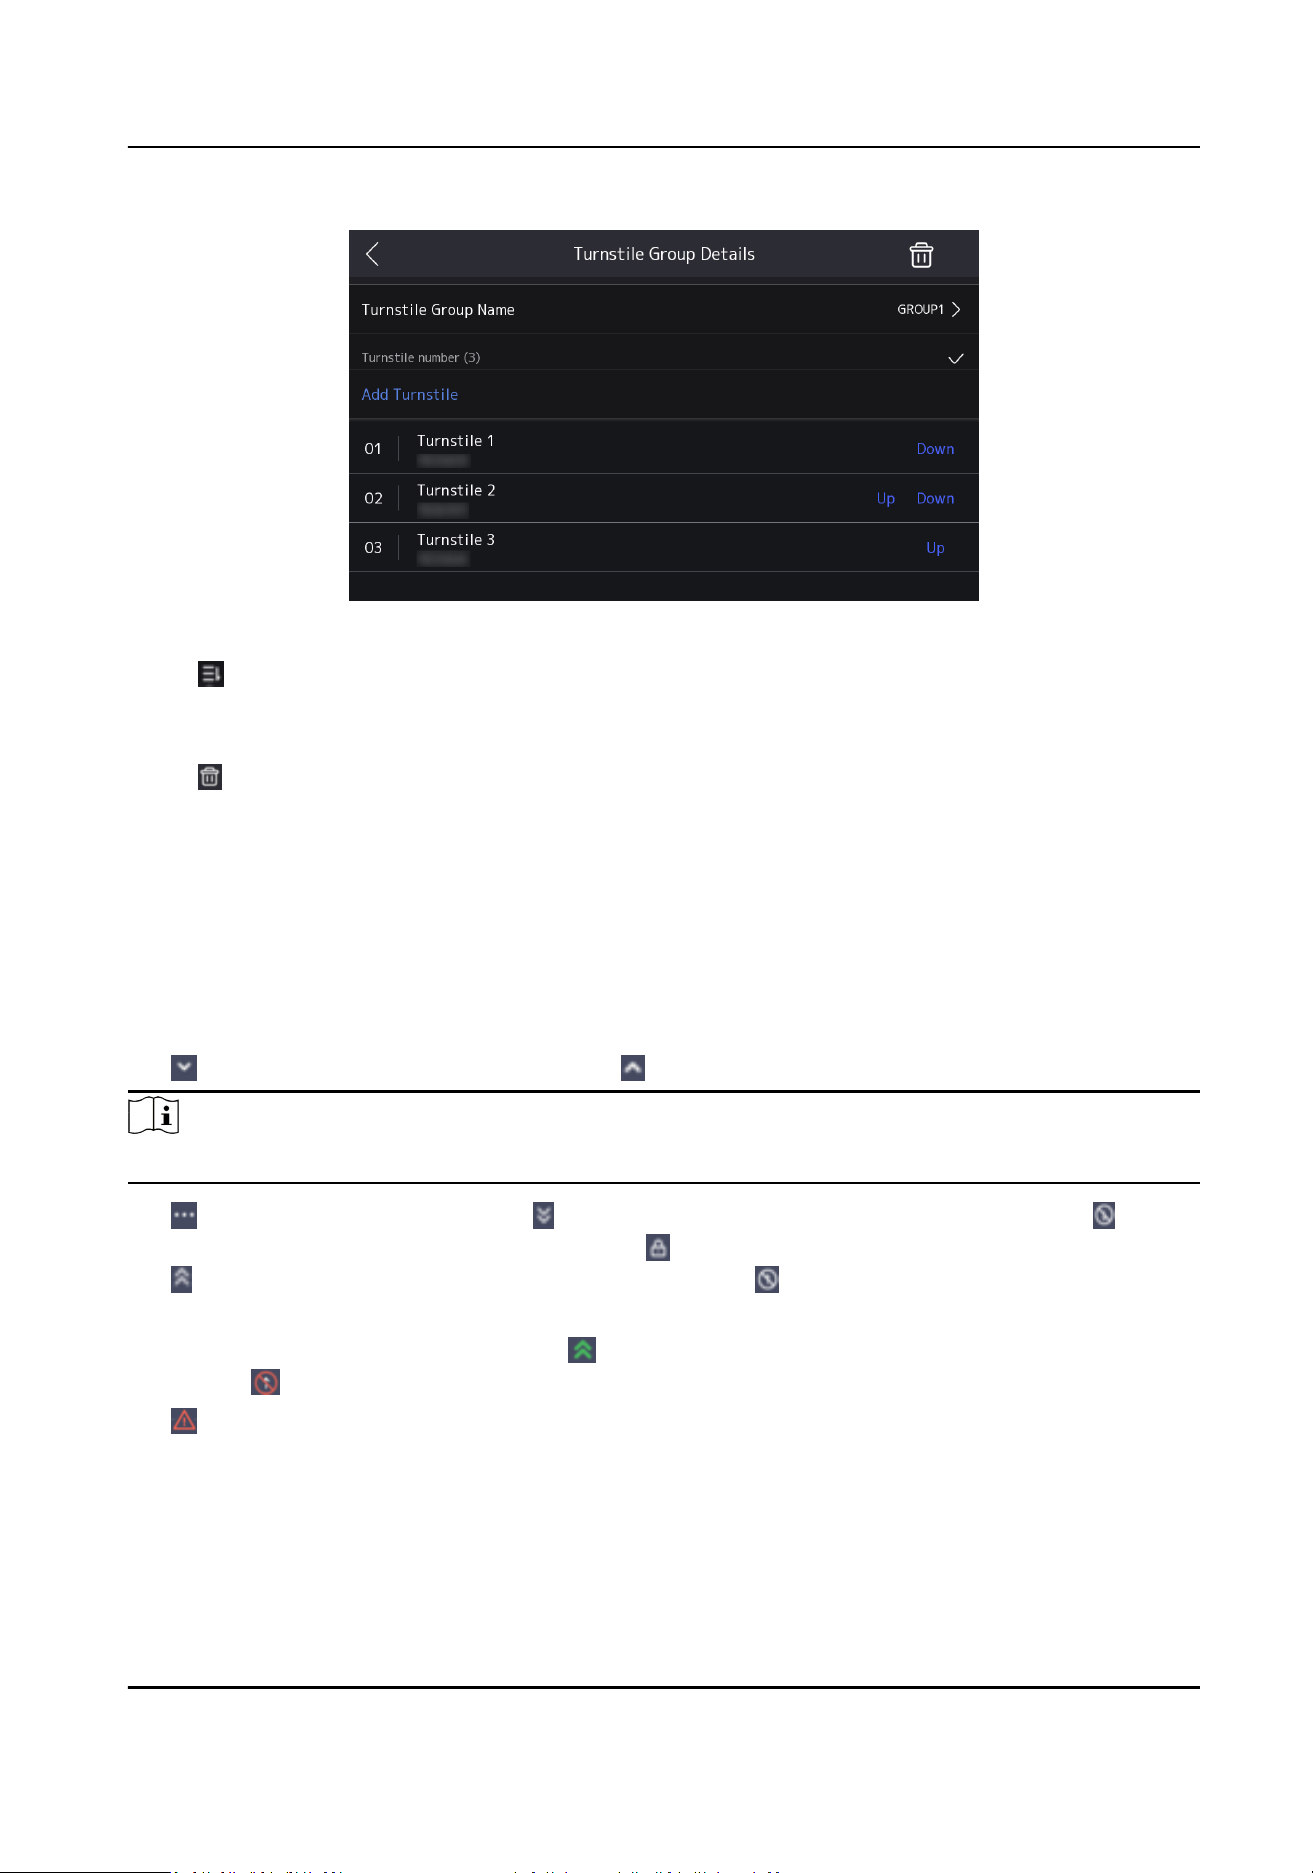
Figure 3-3 Turnsle Group Details
2.
Tap , tap Down or Up to adjust the turnsle order.
3.
Tap Turnsle Group Name to change the name.
4.
Tap Add
Turnsle to add other turnsles.
5.
Tap , conrm and delete this turnsle group.
6.
Tap added
turnsle, you can view the device model, turnsle status, and you can change
turnsle name, IP address and turnsle password.
3.2.3 Barrier Open/Close
You can control the barrier status.
Aer adding the turnsle, the home page displays the barrier status.
Tap
to control barrier open for exing. Tap to control barrier open for entrance.
Note
Aer the barrier open buon is triggered, tap the buon again in 3 s, the barrier will close.
Tap to unfold more operaon. Tap to control barrier remaining open for exing. Tap to
control barrier remaining closed for exing. Tap to control barrier closed for entrance or exing.
Tap to control barrier remaining open for entrance. Tap to control barrier remaining closed for
entrance.
When the barrier is remaining open, tap
to end the status. When the barrier is remaining
closed, tap to end the status.
Tap
to view the excepon informaon.
Tap Emergency Mode to open all added turnsles’ barriers.
DS-K7R83X Remote Control Pad
7
3.2.4 Turnsle Group Control
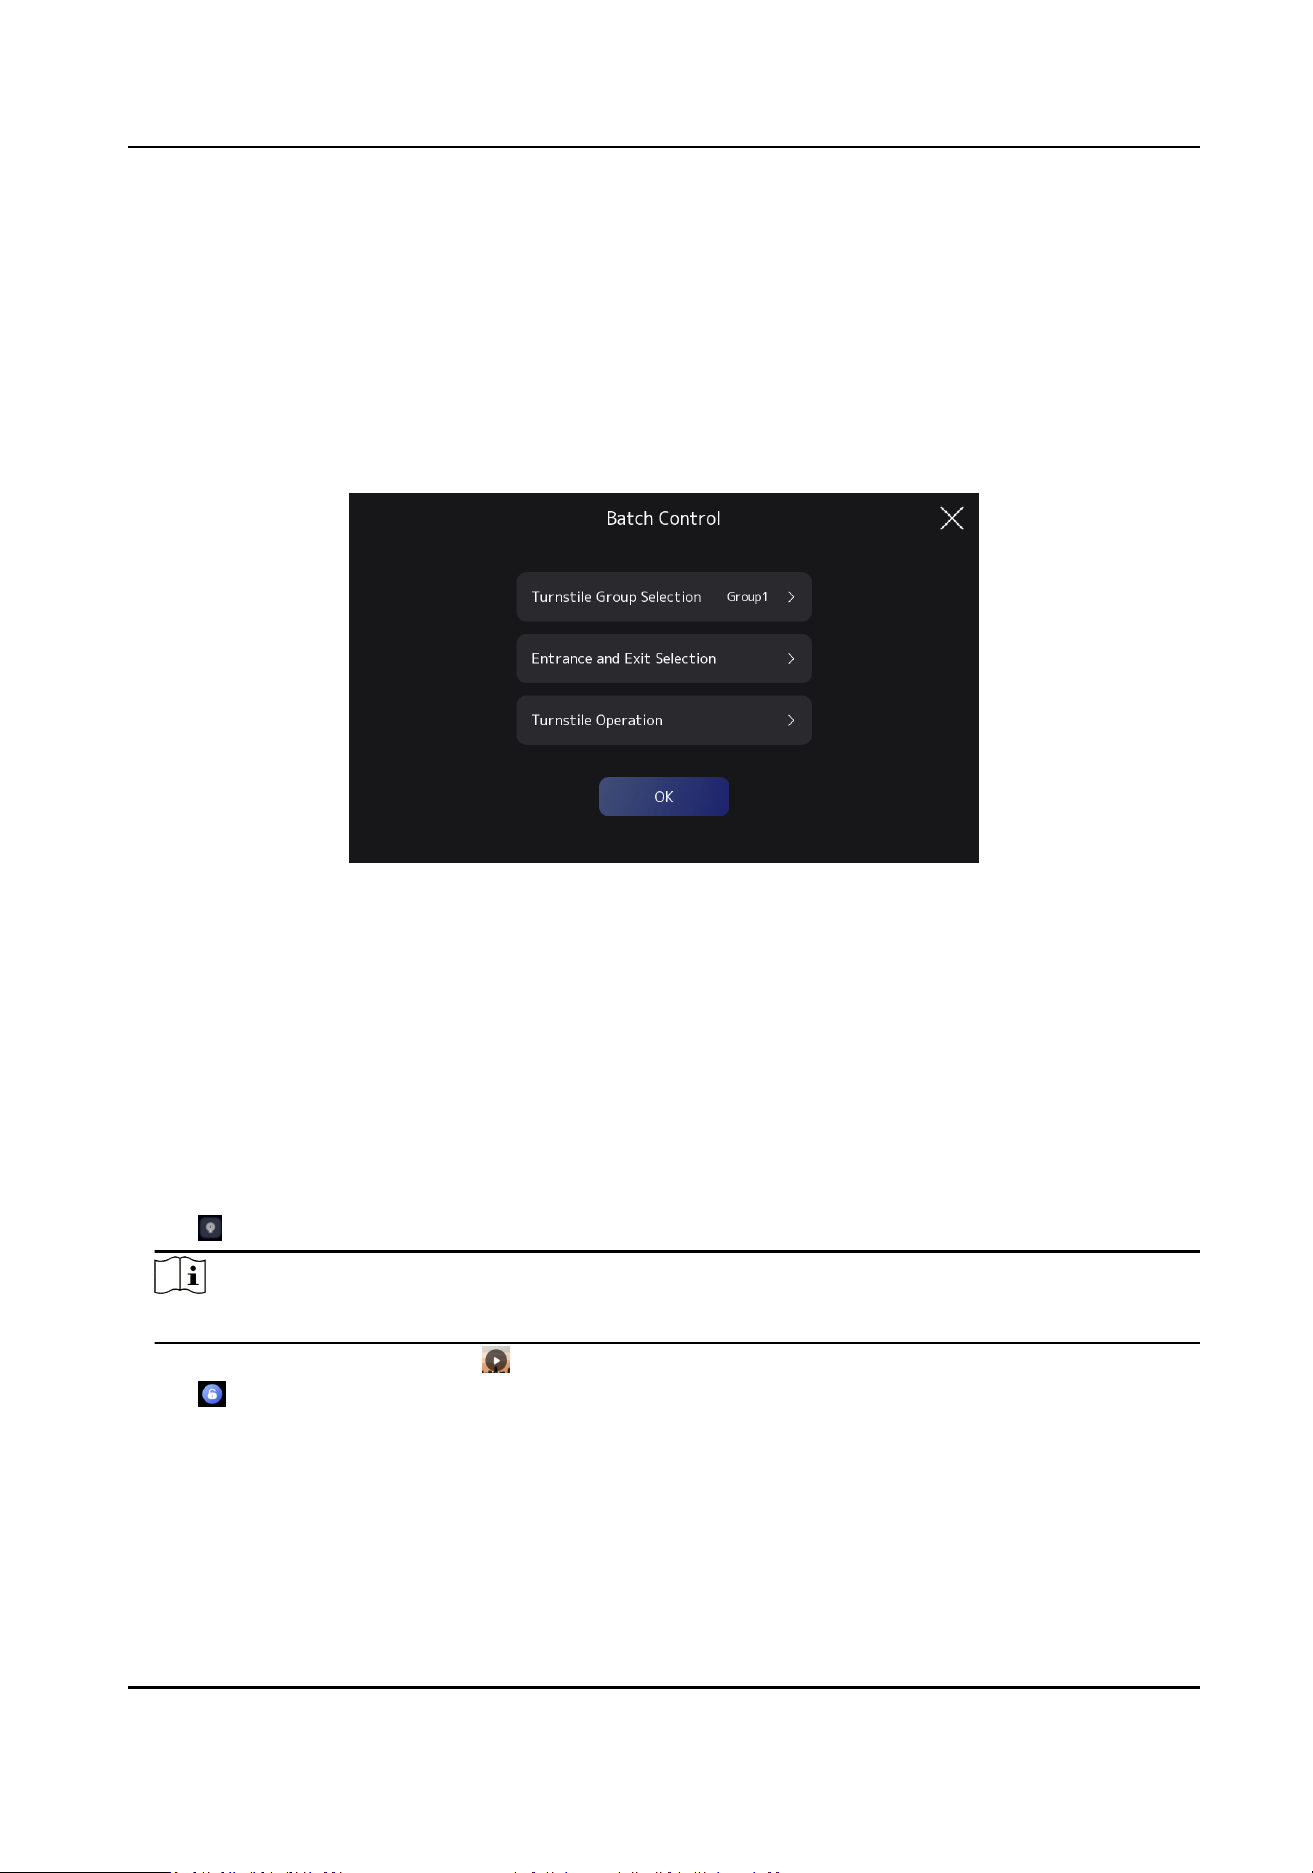
You can view the live image of the turnsle group and batch control the barrier status.
Aer adding the turnsle group, turnsle group name and turnsle number are shown in the
upper le corner on the home page. Tap the turnsle group name to view the live image. Select
the turnsle group to be controlled, tap the check mark in the upper right corner to conrm the
selecon.
Figure 3-4 Batch Control
Tap Batch Control to enter the batch control page. Tap Turnsle Group Selecon, check the
turnsle groups to be controlled. Tap Entrance and Exit Selecon, select the control direcon. Tap
Turnsle Operaon, select the barrier status. Tap OK to nish the conguraon.
3.2.5 Live View
Aer adding the turnsle group, you can view the turnsle videos.
Steps
1.
Tap to enter the live view page.
Note
Only turnsles that support live view funcon will be displayed on the page.
2.
Select the turnsle group, tap to see real-me status of turnsles.
3.
Tap to open or close barriers.
DS-K7R83X Remote Control Pad
8

3.3 Communicaon Sengs
3.3.1 Set Wired Network
Congure wired network. Aer Conguraon, the device can communicaon with client soware
and plaorm.
Steps
1.
Tap
, enter the password to enter the sengs page. Tap Communicaon → Wired Network .
Figure 3-5 Set Wired Network
2.
Congure network parameters, including DHCP, IP address, subnet mask code, gateway, DNS,
etc.
Note
●
If you enable DHCP, the system will allocate the IP address, subnet mask, gateway
automacally.
●
Set the preferred DNS server and the alternate DNS server according to your actual need.
3.3.2 Wi-Fi Sengs
Select to enable Wi-Fi and congure Wi-Fi parameters.
Steps
1.
Tap , enter the password to enter the sengs page. Tap Communicaon → Wi-Fi.
DS-K7R83X Remote Control Pad
9
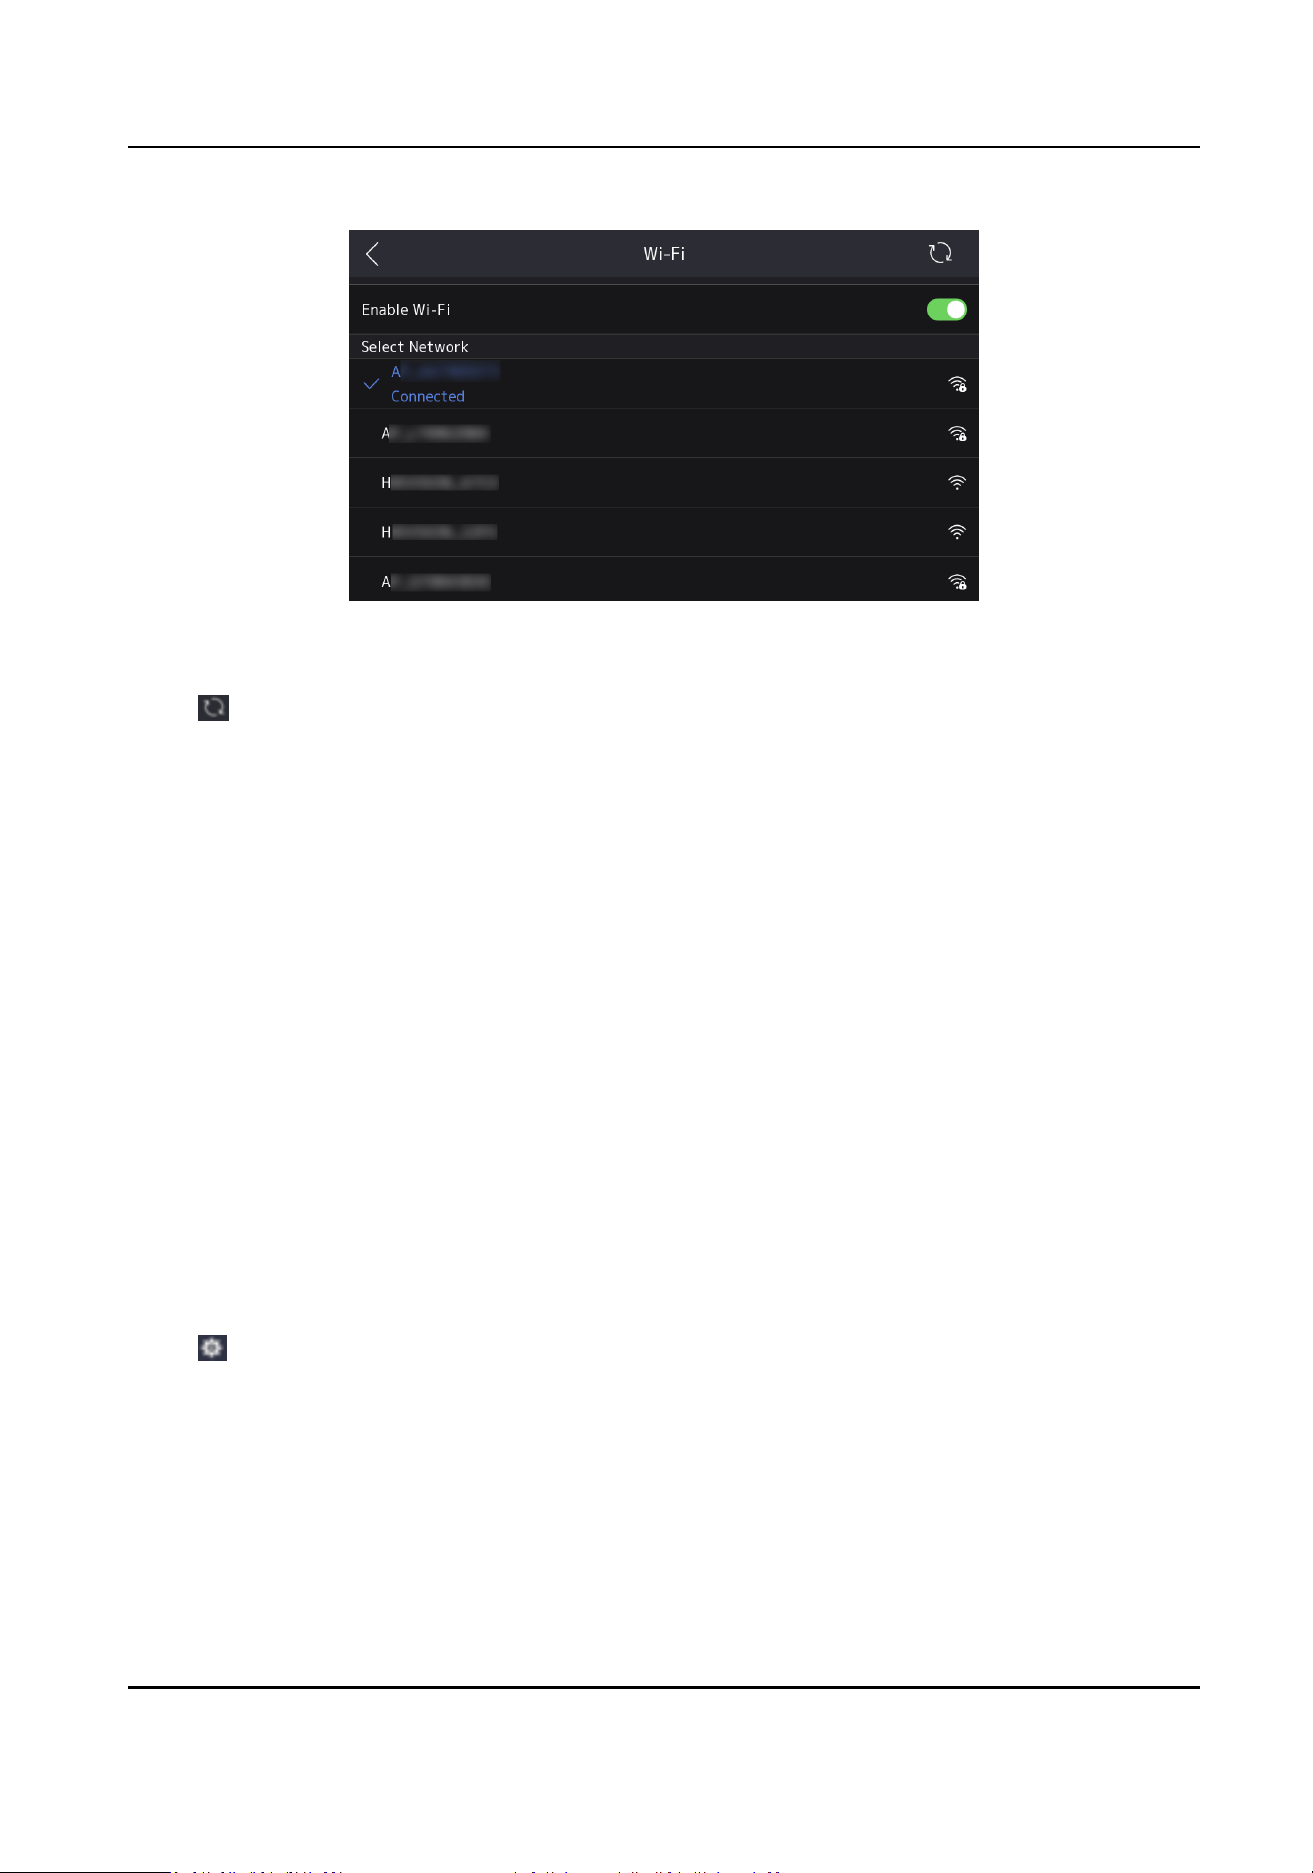
Figure 3-6 Wi-Fi Sengs
2.
Slide to enable Wi-Fi.
3.
Tap to refresh the Wi-Fi list.
4.
Congure Wi-Fi parameters.
-
Select the Wi-Fi on the list, and enter the Wi-Fi password. Tap OK to connect.
-
If there is no Wi-Fi on the list, tap Add Wi-Fi, enter the Wi-Fi name and select the security. Tap
OK to connect.
5.
Oponal: Tap connected Wi-Fi, and congure DHCP parameters.
-
DHCP is enabled by default. The system allocate IP address, subnet mask and default gateway
automacally.
-
If DHCP is disabled, you need to congrue the IP address, subnet mask and default gateway.
6.
Oponal: Tap connected Wi-Fi, and congure DNS parameters.
-
Auto Obtain DNS is disabled by default. You need to congure the preferred DNS server and
alternate DNS server.
-
If Auto Obtain DNS is enabled, the system will allocate the preferred DNS server and alternate
DNS server automacally.
3.3.3 Set Device Hotspot
You can select to enable device hotspot and congure parameters.
Steps
1.
Tap , enter the password to enter the sengs page. Tap Communicaon → Device Hotspot.
DS-K7R83X Remote Control Pad
10
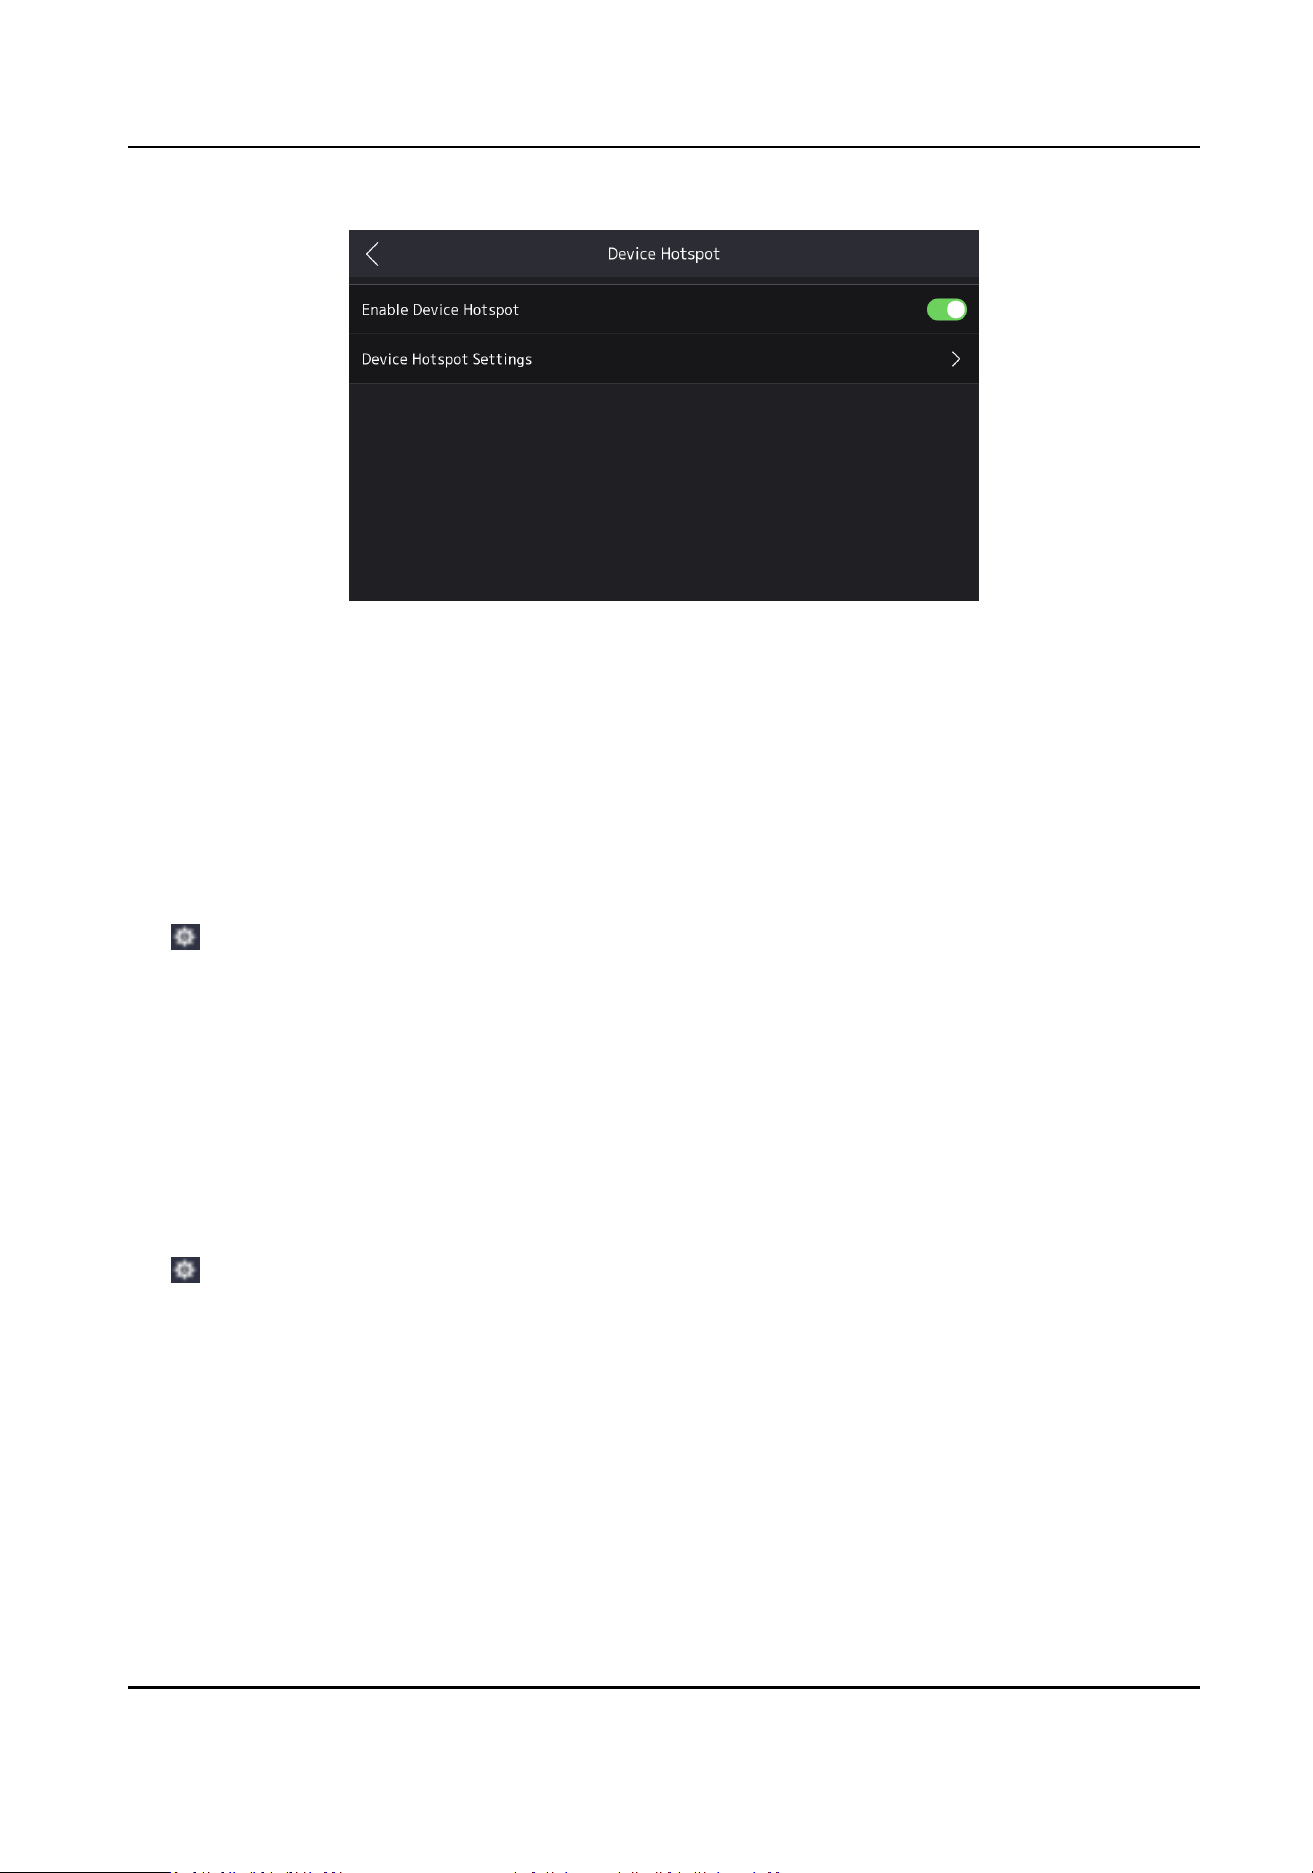
Figure 3-7 Hotspot Conguraon
2.
Slide to enable device hotspot.
3.
Tap Device Hotspot Sengs to congure hotspot name and password.
4.
Scan the QR code to login to the mobile web.
3.4 Time
Sengs
You can set the device me.
Tap , enter the password to enter the sengs page. Tap Basic Sengs → Time Sengs , select
the
me zone and set the current me.
Tap Basic Sengs → Select Language , change the device language.
Tap Basic
Sengs → Sleeping (s) , select the sleeping me. When the non-operaon me exceeds
the seng me, the screen will not display.
3.5
Dene Buon
You can congure the buon funcons.
Tap , enter the password to enter the sengs page. Tap Basic Sengs → Dene Buon .
DS-K7R83X Remote Control Pad
11
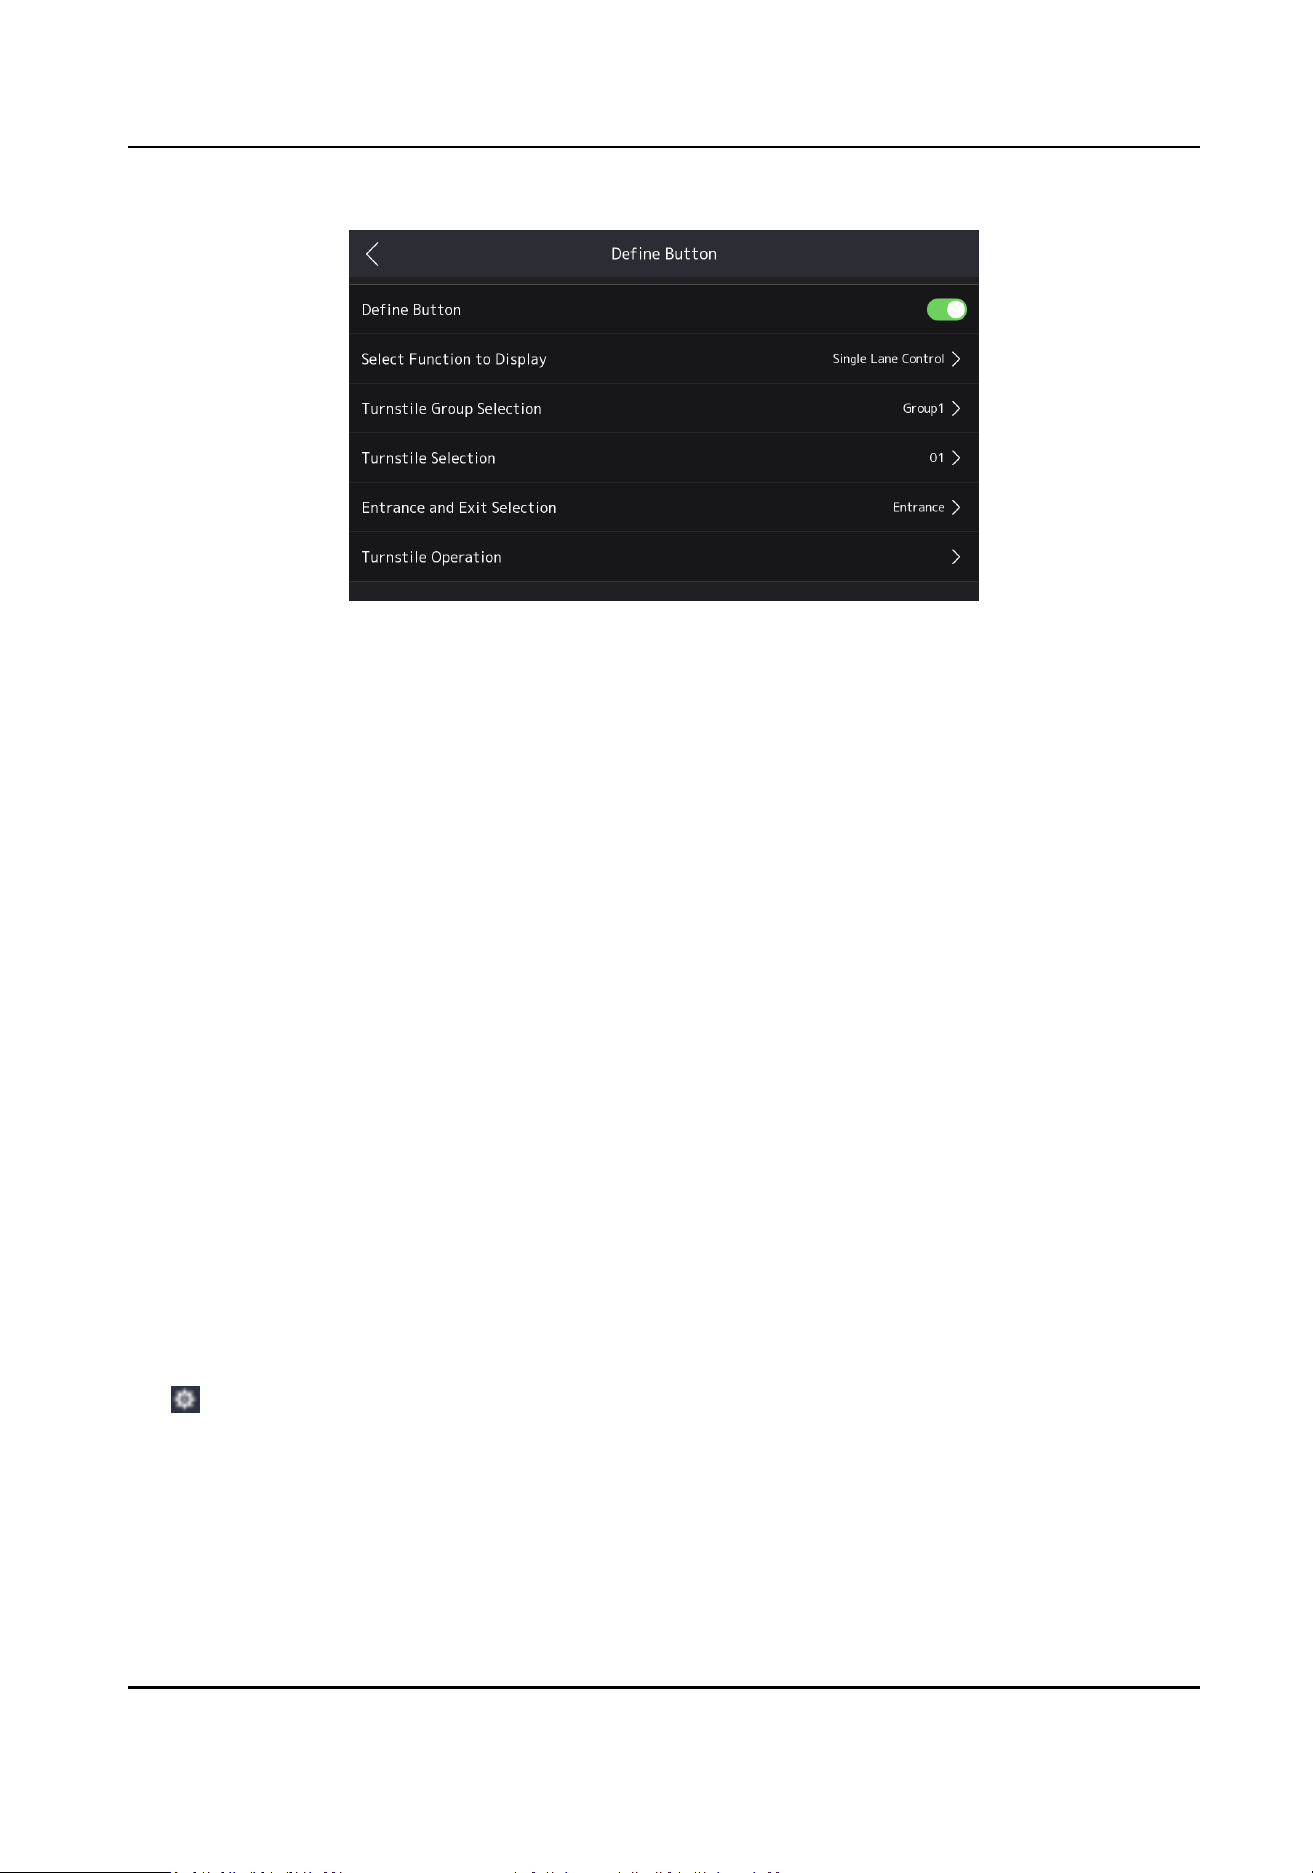
Figure 3-8 Dene Buon
Slide to enable Dene Buon and select the buon funcon.
Single Lane Control
Select the added turnsle group, direcon and operaon. When you press the buon, the
barrier will open, remain open or remain closed.
Batch Control
Select the added
turnsle groups, direcon and operaon. When you press the buon, the
barriers will open, remain open or remain closed.
Emergency Mode
When you press the
buon, all barriers will open.
3.6 View User Manual
You can view the QR code of the user manual.
Tap System Maintenance → User Manual , scan the QR code to view the user manual.
3.7 System Maintenance
You can view the system informaon. You can also restore to factory sengs, restore to default
sengs and reboot the device.
Tap , enter the password and clickOK to enter the sengs page. Tap System Maintenance.
DS-K7R83X Remote Control Pad
12
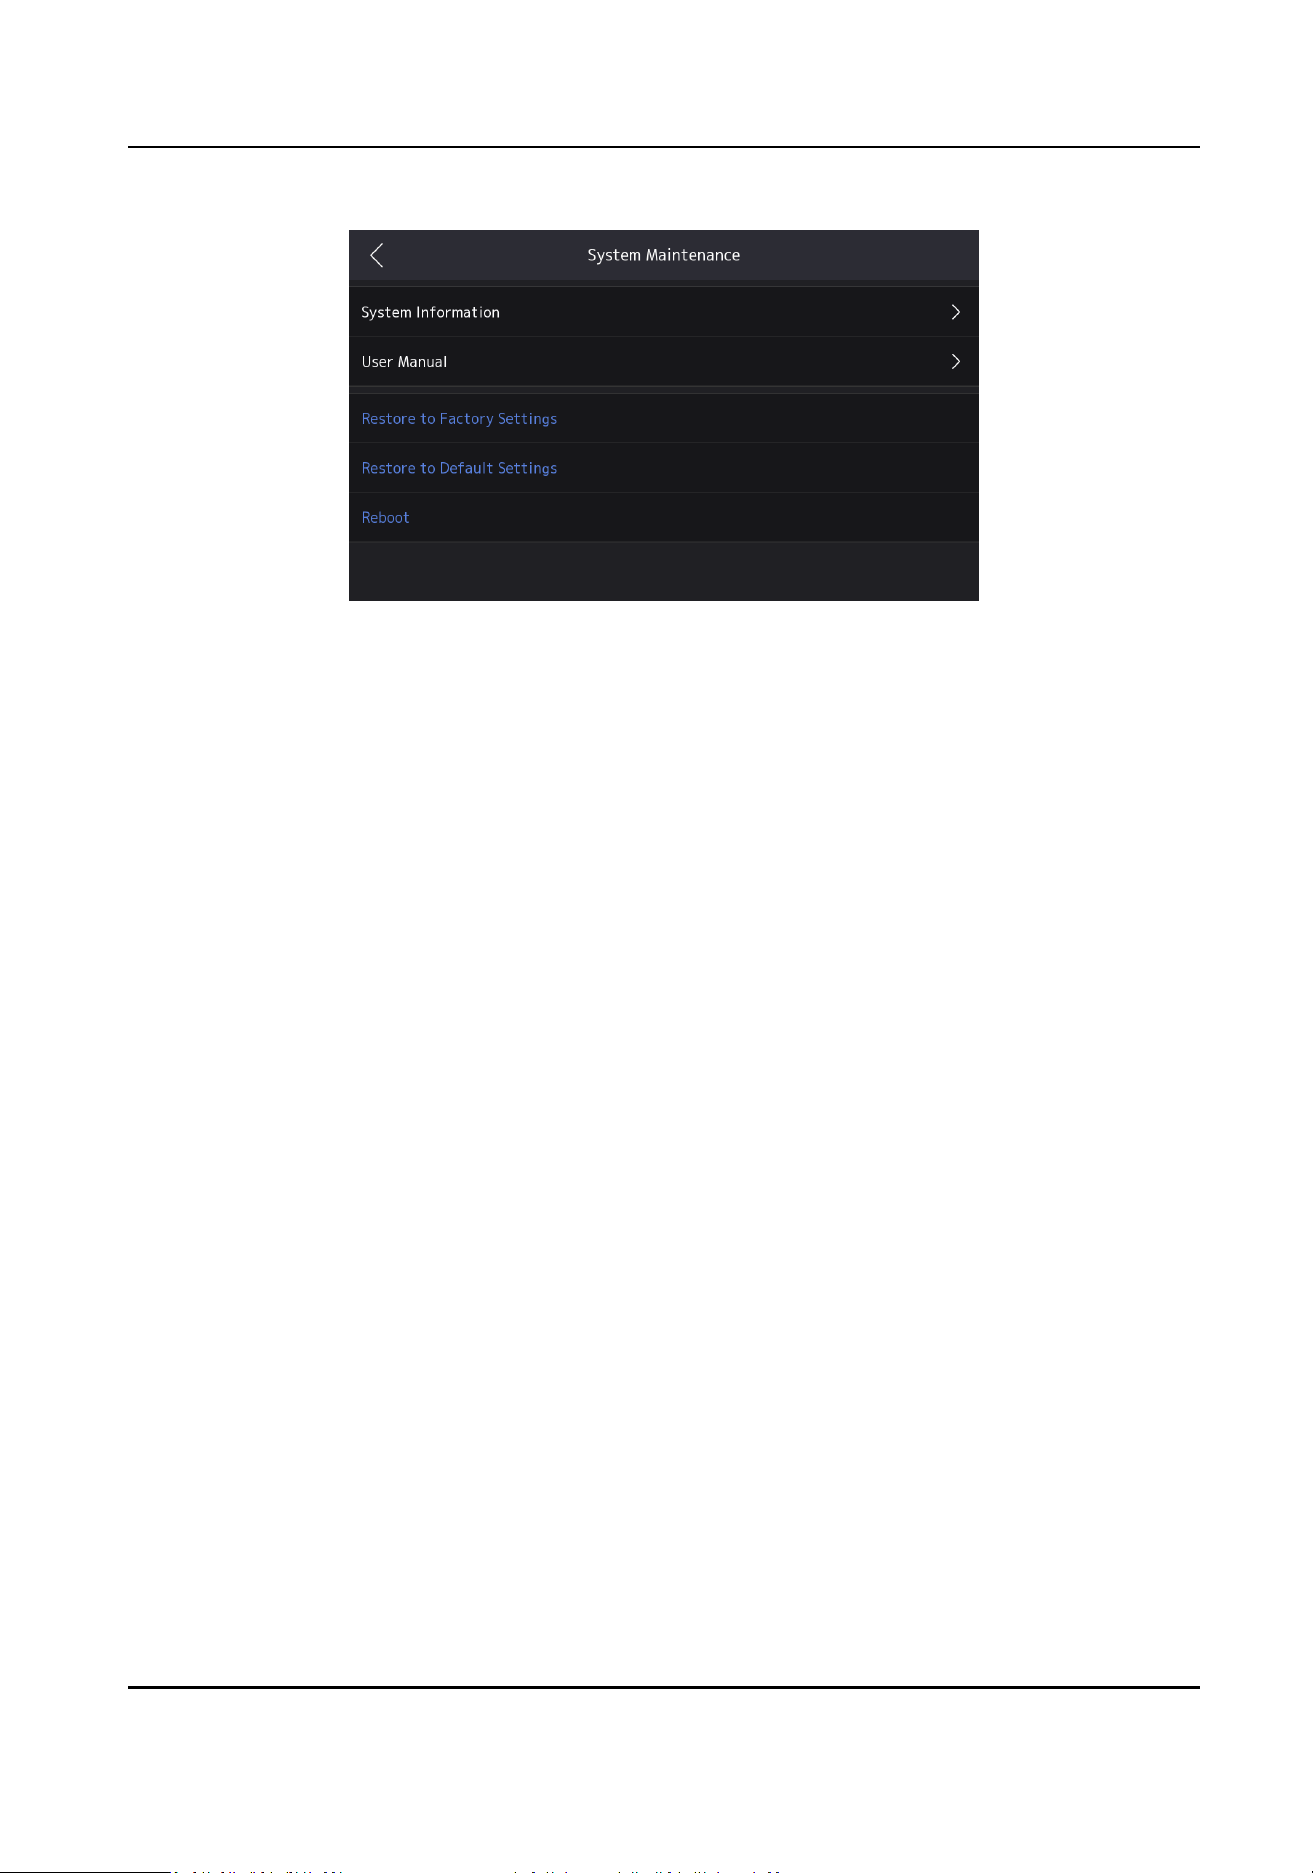
Figure 3-9 System Maintenance
System Informaon
You can view the device model, serial No., versions, address, producon data, and open source
code license.
Restore to Factory Sengs
All data will be cleared. The system will reboot to take eect.
Restore to Default Sengs
All parameters, except for the network sengs and user informaon, will be restored to the
default sengs. The system will reboot to take eect.
Reboot
Reboot the device.
DS-K7R83X Remote Control Pad
13

Chapter 4 Quick Operaon via Web Browser
4.1 Language Sengs
You can select a language for the device system.
Click in the top right of the web page to enter the Device Language Sengs page. You can
select a language for the device system from the drop-down list.
By default, the system language is English.
Click Next to complete the sengs.
4.2 Time
Sengs
Click in the top right of the web page to enter the wizard page. Aer seng device language,
you can click Next to enter the Time
Sengs page.
Time Zone
Select the device located me zone from the drop-down list.
Time Sync.
NTP
You should set the NTP server's IP address, port No., and interval.
Manual
By default, the device me should be synchronized manually. You can set the device me
manually or check Sync. with Computer Time to synchronize the device me with the
computer's me.
Server Address/NTP Port/Interval
You can set the server address, NTP port, and interval.
Click Complete to save the sengs.
DS-K7R83X Remote Control Pad
14
Chapter 5 Operaon via Web Browser
5.1 Login
You can login via the web browser.
Note
Make sure the device is acvated.
Login via Web Browser
Enter the device IP address in the address bar of the web browser and press Enter to enter the
login page.
Enter the device user name and the password. Click Login.
5.2 Forget Password
If you forget the password when logging in, you can change the password by security quesons.
On the login page, click Forget Password.
Answer the security
quesons.
Click Next, create a new password and conrm it.
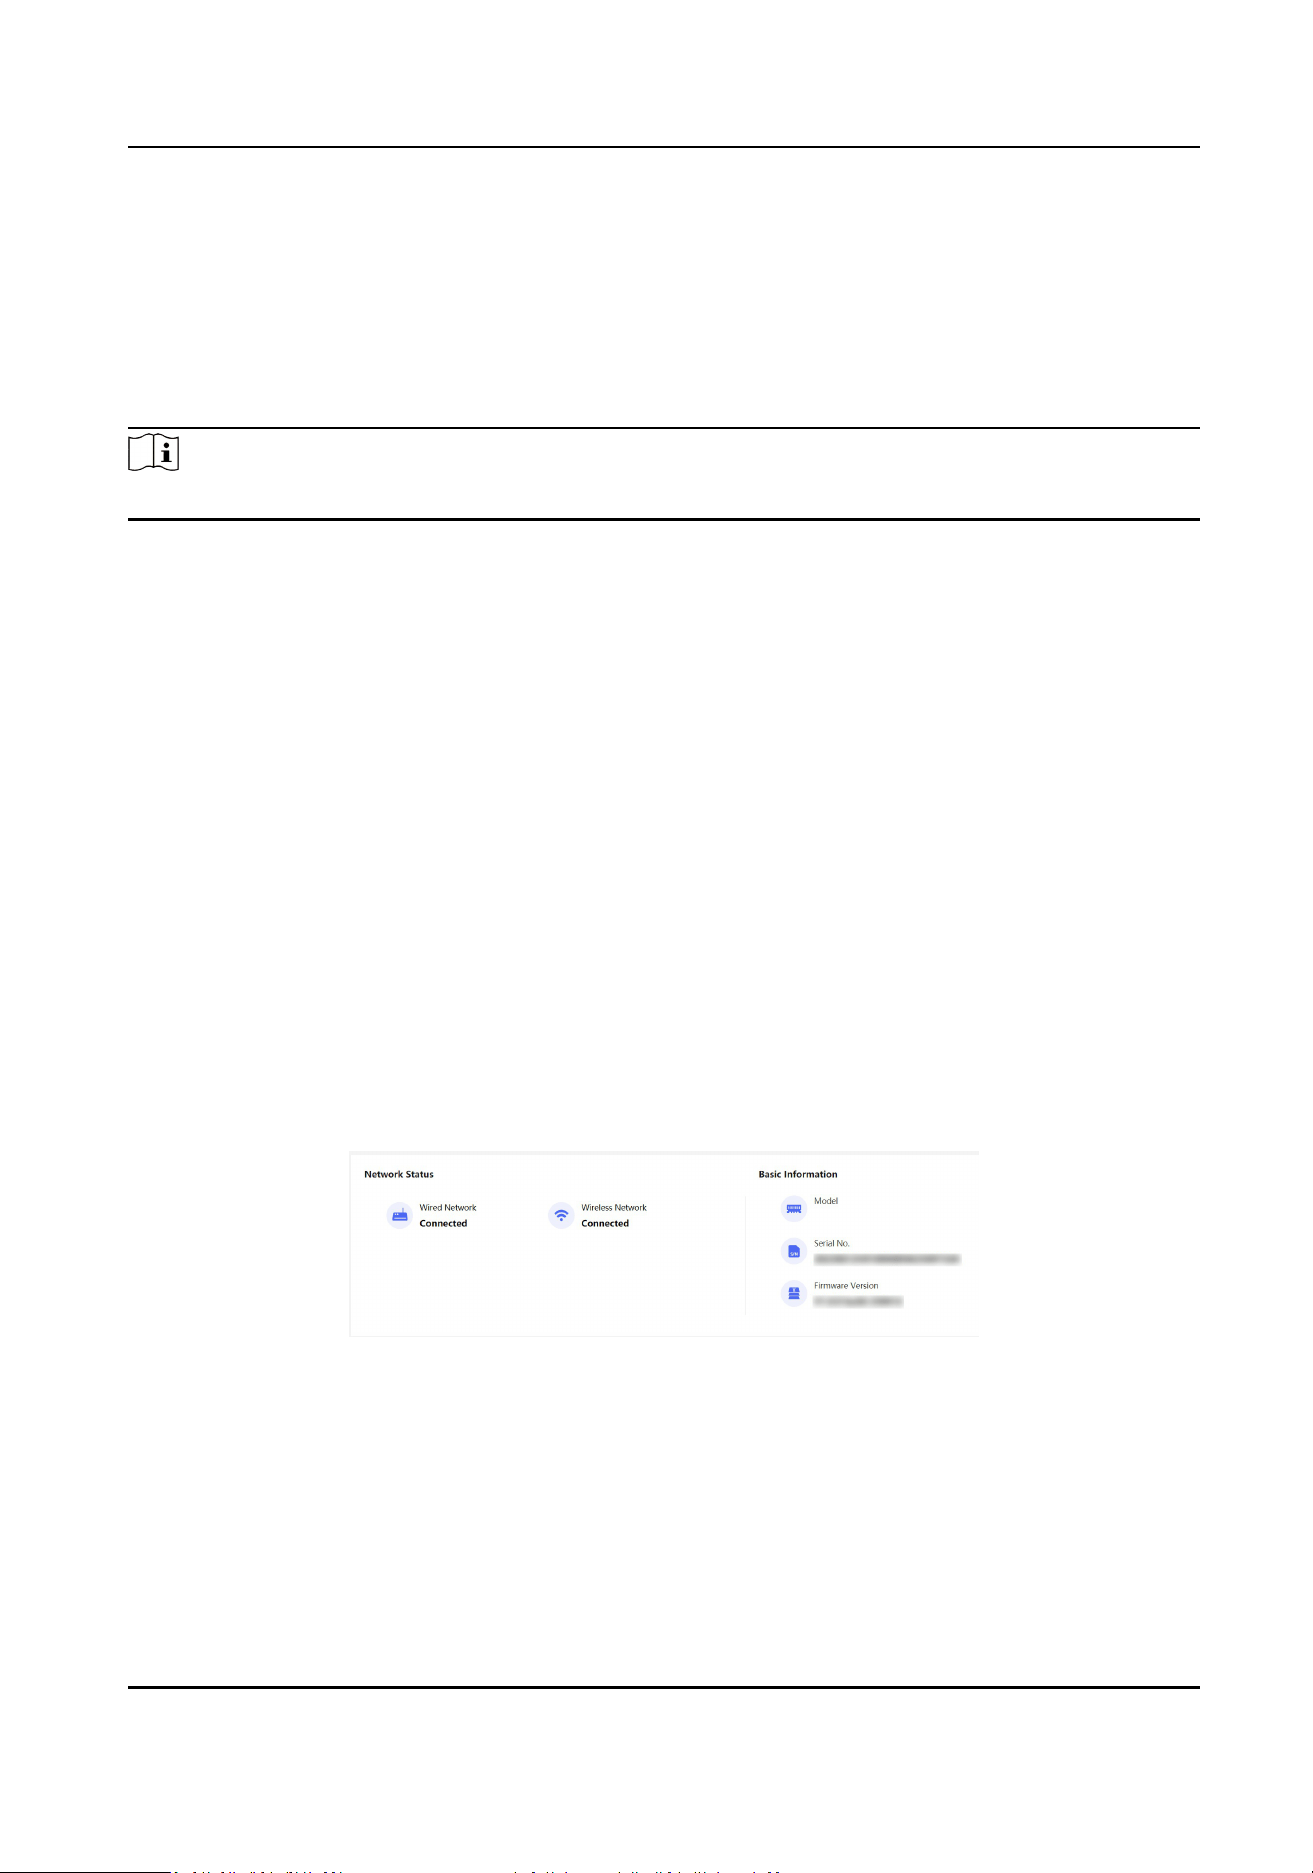
5.3 Live View
You can view the network status and basic informaon.
Figure 5-1 Overview
Funcon Descripons:
Network Status
You can view the connected and registered status of wired network and wireless network.
Basic Informaon
DS-K7R83X Remote Control Pad
15
You can view the model, serial No. and rmware version.
5.4 Conguraon
5.4.1 View Device Informaon
View the device name, language, model, serial No., version, etc.
Click Conguraon → System → System Sengs → Basic Informaon to enter the conguraon
page.
You can change the device name, and select the language.
You can view the model, serial No., version, etc.
Click Upgrade
aer the rmware version, it will enter the upgrade page.
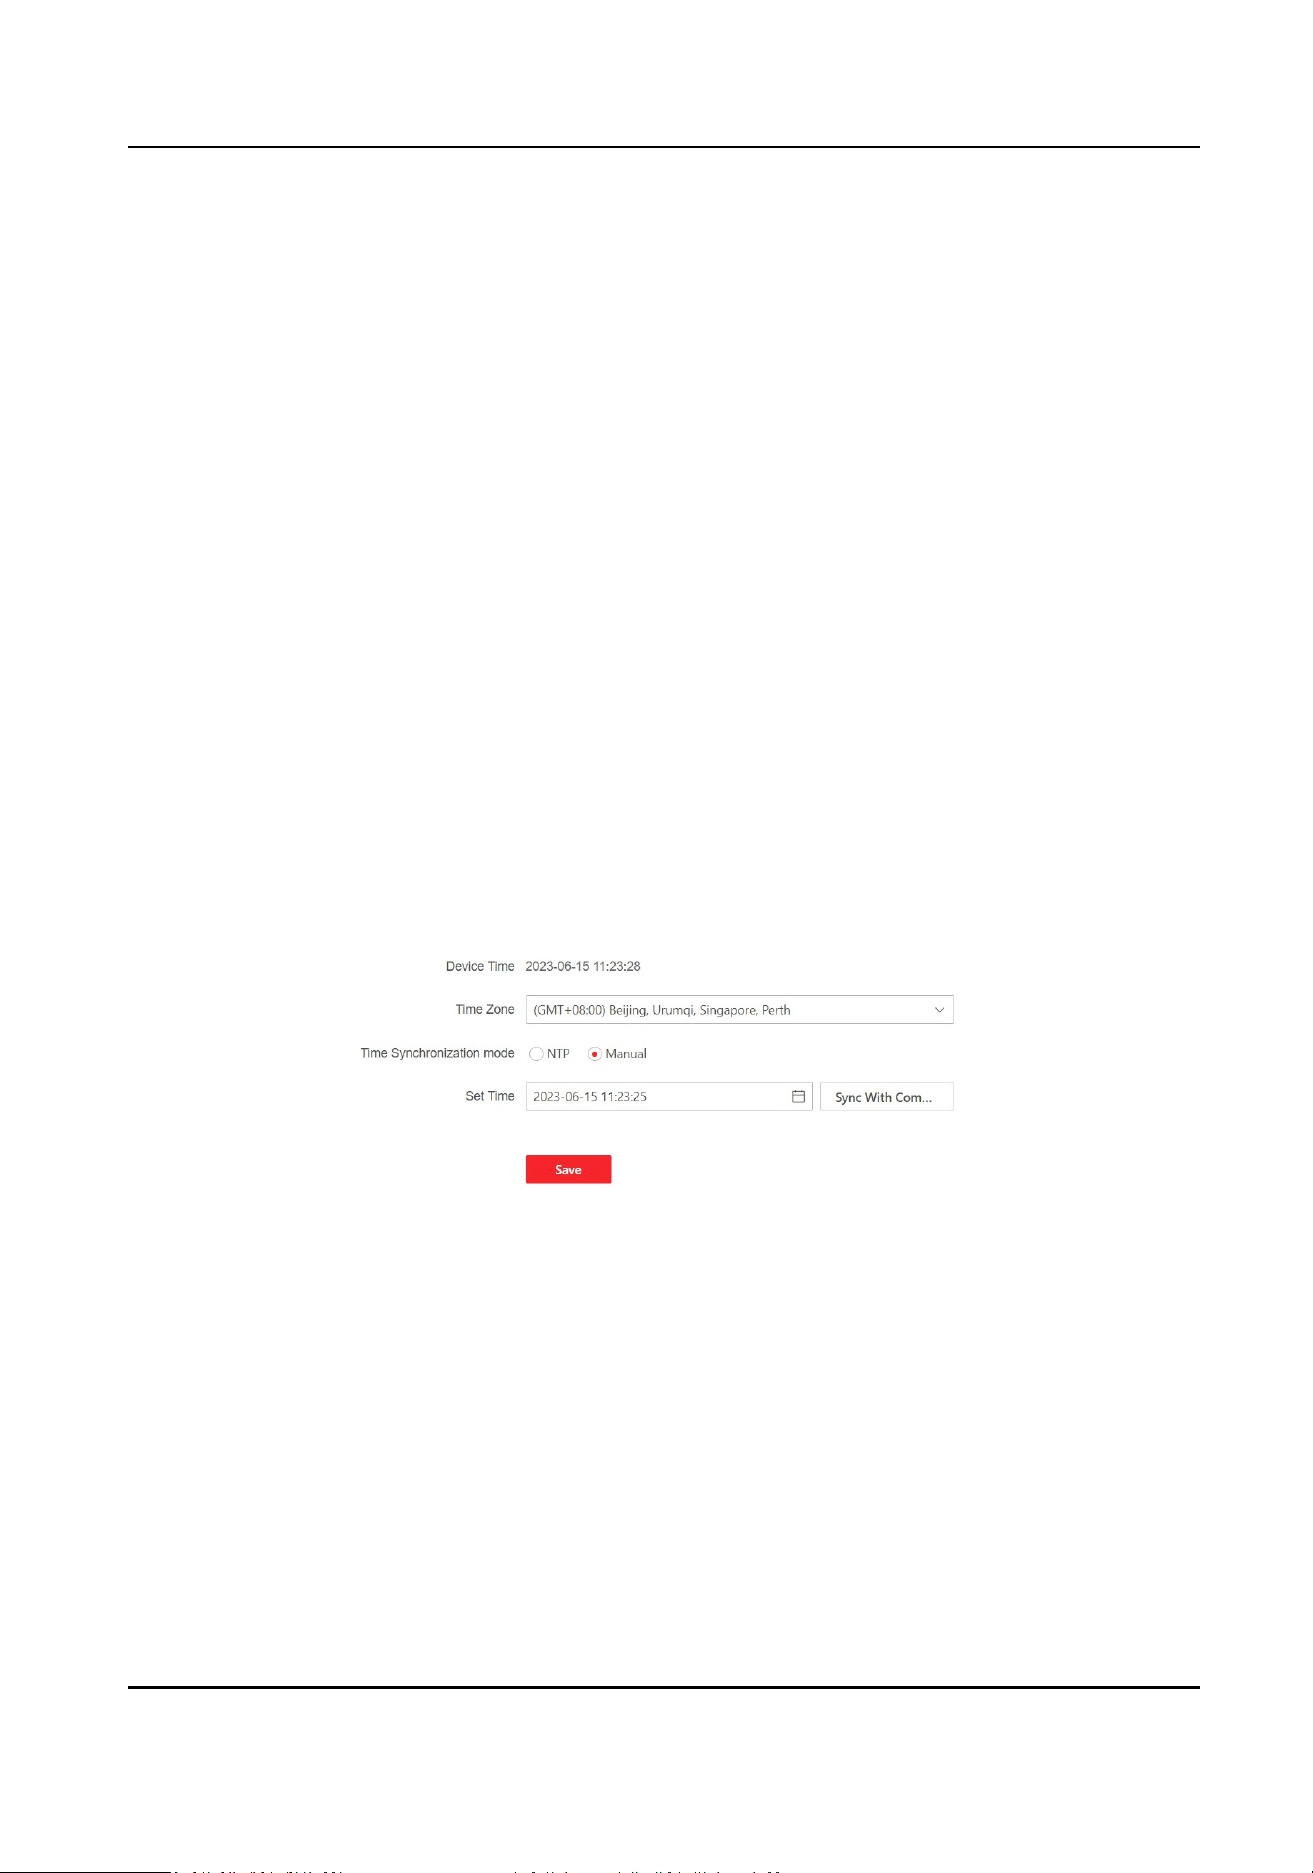
5.4.2 Set Time
Set the device's me zone, synchronizaon mode, server address, NTP port, and interval.
Click
Conguraon → System → System Sengs → Time Sengs .
Click Save to save the sengs aer the conguraon.
Figure 5-2 Time Sengs
Time Zone
Select the device located me zone from the drop-down list.
Time Sync.
NTP
You should set the NTP server's IP address, port No., and interval.
Manual
DS-K7R83X Remote Control Pad
16
By default, the device me should be synchronized manually. You can set the device me
manually or check Sync. with Computer Time to synchronize the device me with the
computer's me.
5.4.3 Change Administrator's Password
Steps
1.
Click Conguraon → System → User Management .
2.
Click .
3.
Enter the old password and create a new password.
4.
Conrm the new password.
5.
Click Save.
Cauon
The password strength of the device can be automacally checked. We highly recommend you
change the password of your own choosing (using a minimum of 8 characters, including at least
three kinds of following categories: upper case leers, lower case leers, numbers, and special
characters) in order to increase the security of your product. And we recommend you change
your password regularly, especially in the high security system, changing the password monthly
or weekly can
beer protect your product.
Proper conguraon of all passwords and other security sengs is the responsibility of the
service provider and/or end-user.
6.
Click Account Security Sengs, select security quesons and enter answers. Click OK to
complete security queson sengs.
5.4.4 Account Security
Sengs
You can change the security quesons and answers for the device. Aer change the sengs, once
you forgot the device password, you should answer the new quesons to reset the device
password.
Steps
1.
Click
Conguraon → System → User Management → Account Security Sengs .
2.
Change the security quesons or email address according your actual needs.
3.
Enter the device password and click OK to
conrm changing.
5.4.5 Network
Sengs
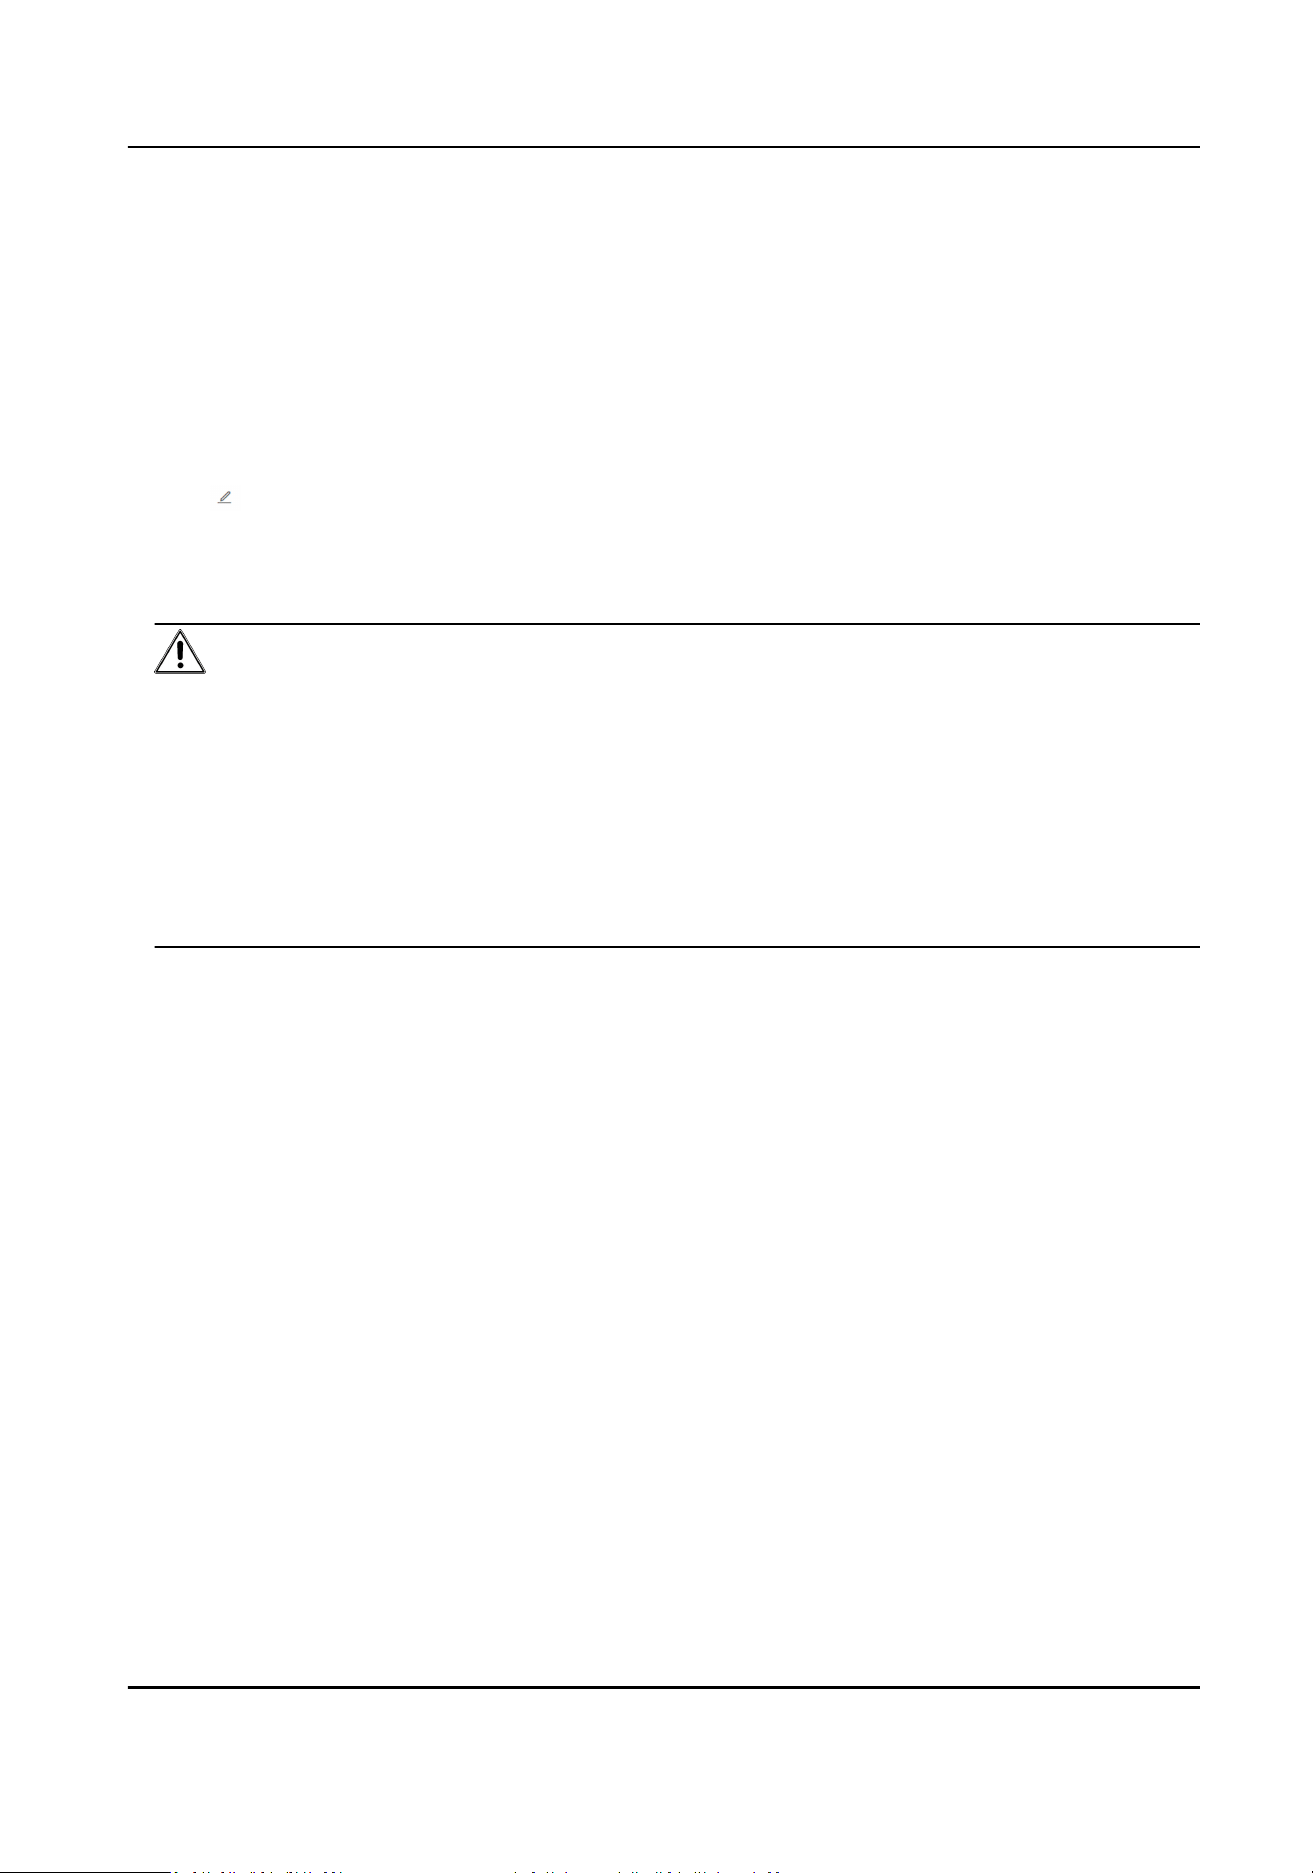
Set Basic Network Parameters
Click Conguraon → Network → Network Sengs → TCP/IP .
DS-K7R83X Remote Control Pad
17
Set the parameters and click Save to save the sengs.
Figure 5-3 TCP/IP
Network Card
Select a network to set.
DHCP
If disable the funcon, you should set the IPv4 address, IPv4 subnet mask, IPv4 default gateway.
If you enable the
funcon, the system will allocate the IPv4 address, IPv4 subnet mask, the IPv4
default gateway automacally.
DNS Server
Note
Only when DHCP is enabled can DNS server be set.
Set the preferred DNS server and the alternate DNS server according to your actual need.
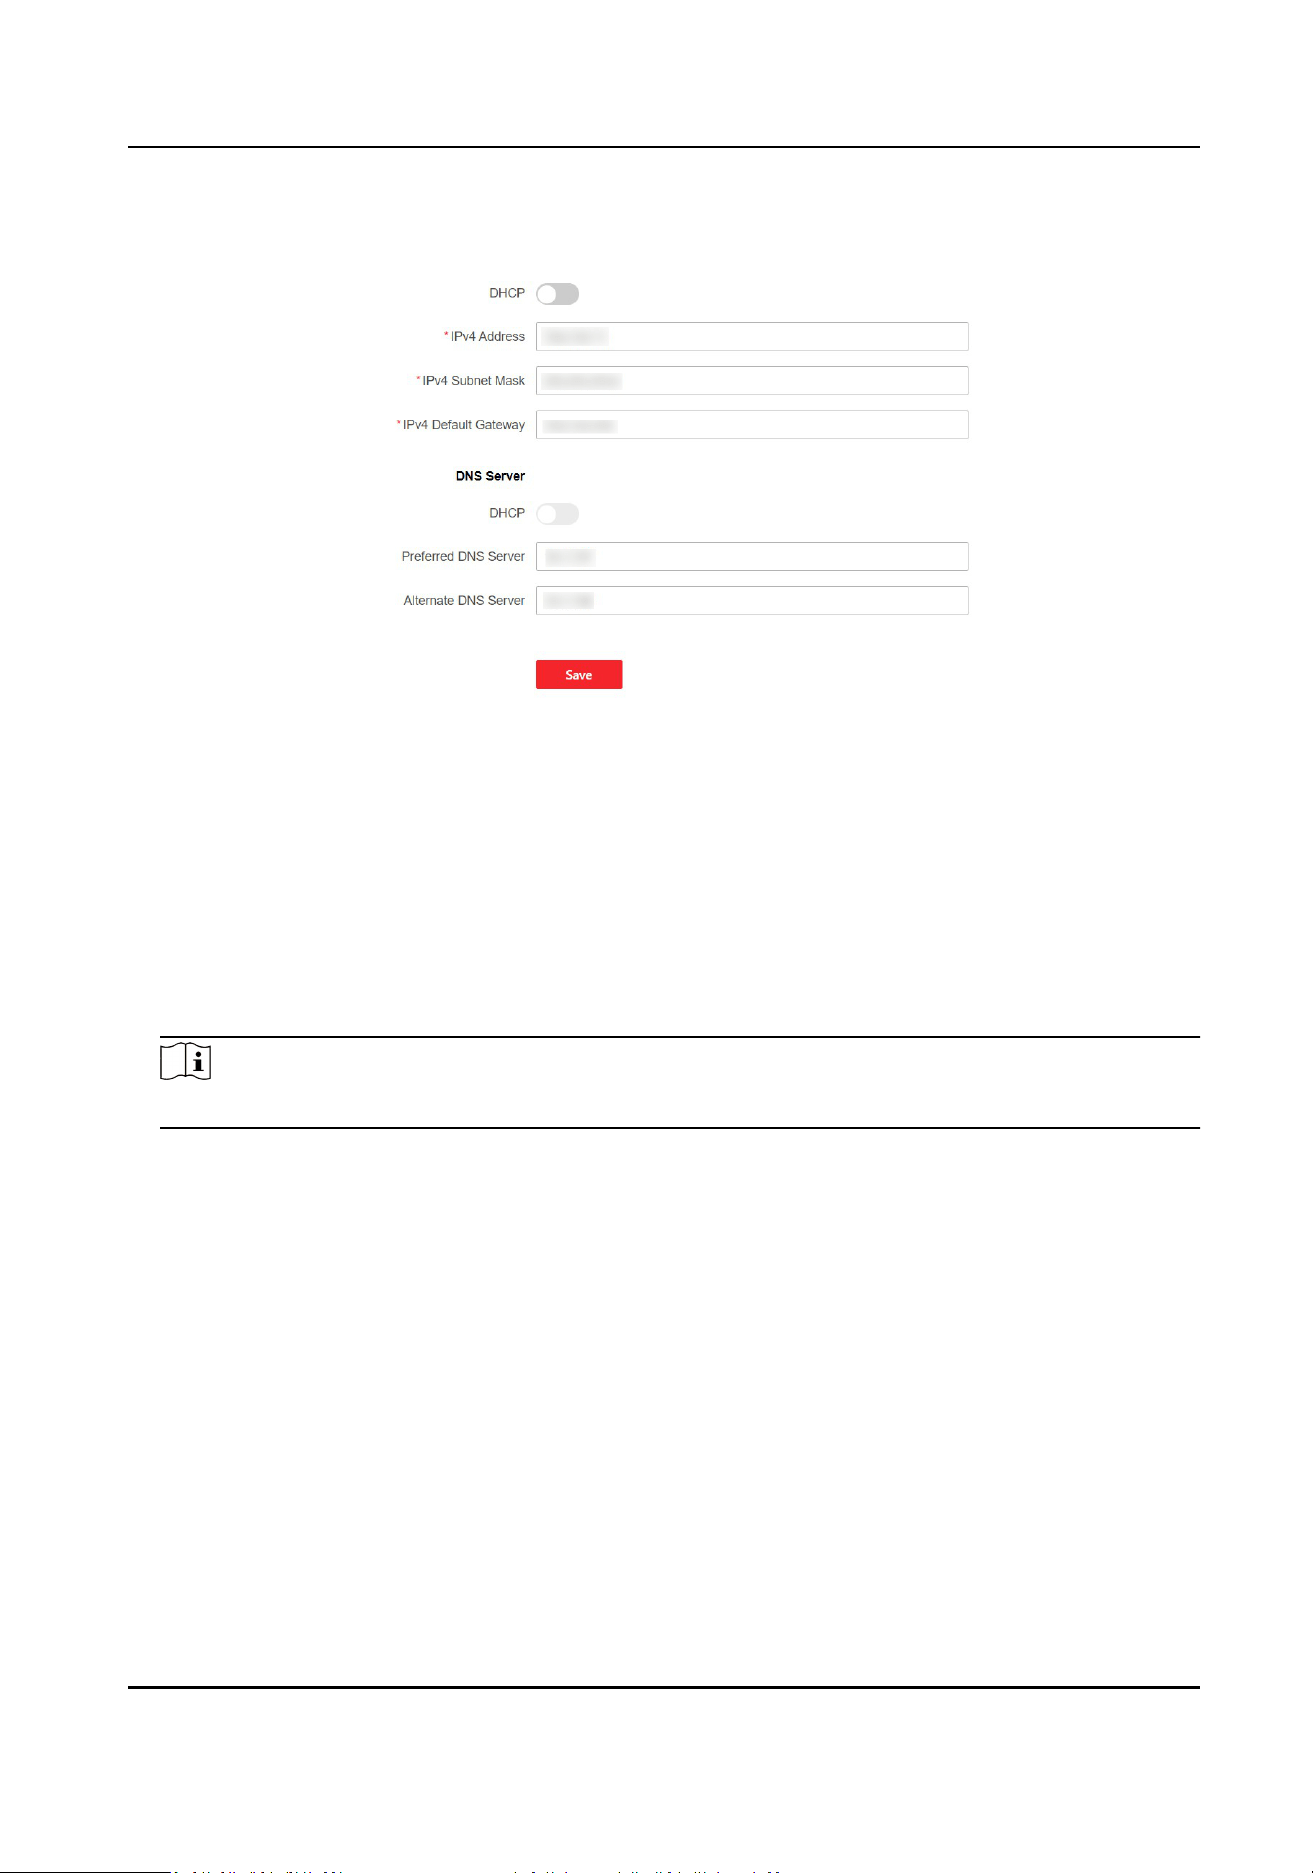
Set Wi-Fi Parameters
Set the Wi-Fi parameters for device wireless connecon.
Steps
1.
Click Conguraon → Network → Network Sengs → Wi-Fi .
DS-K7R83X Remote Control Pad
18
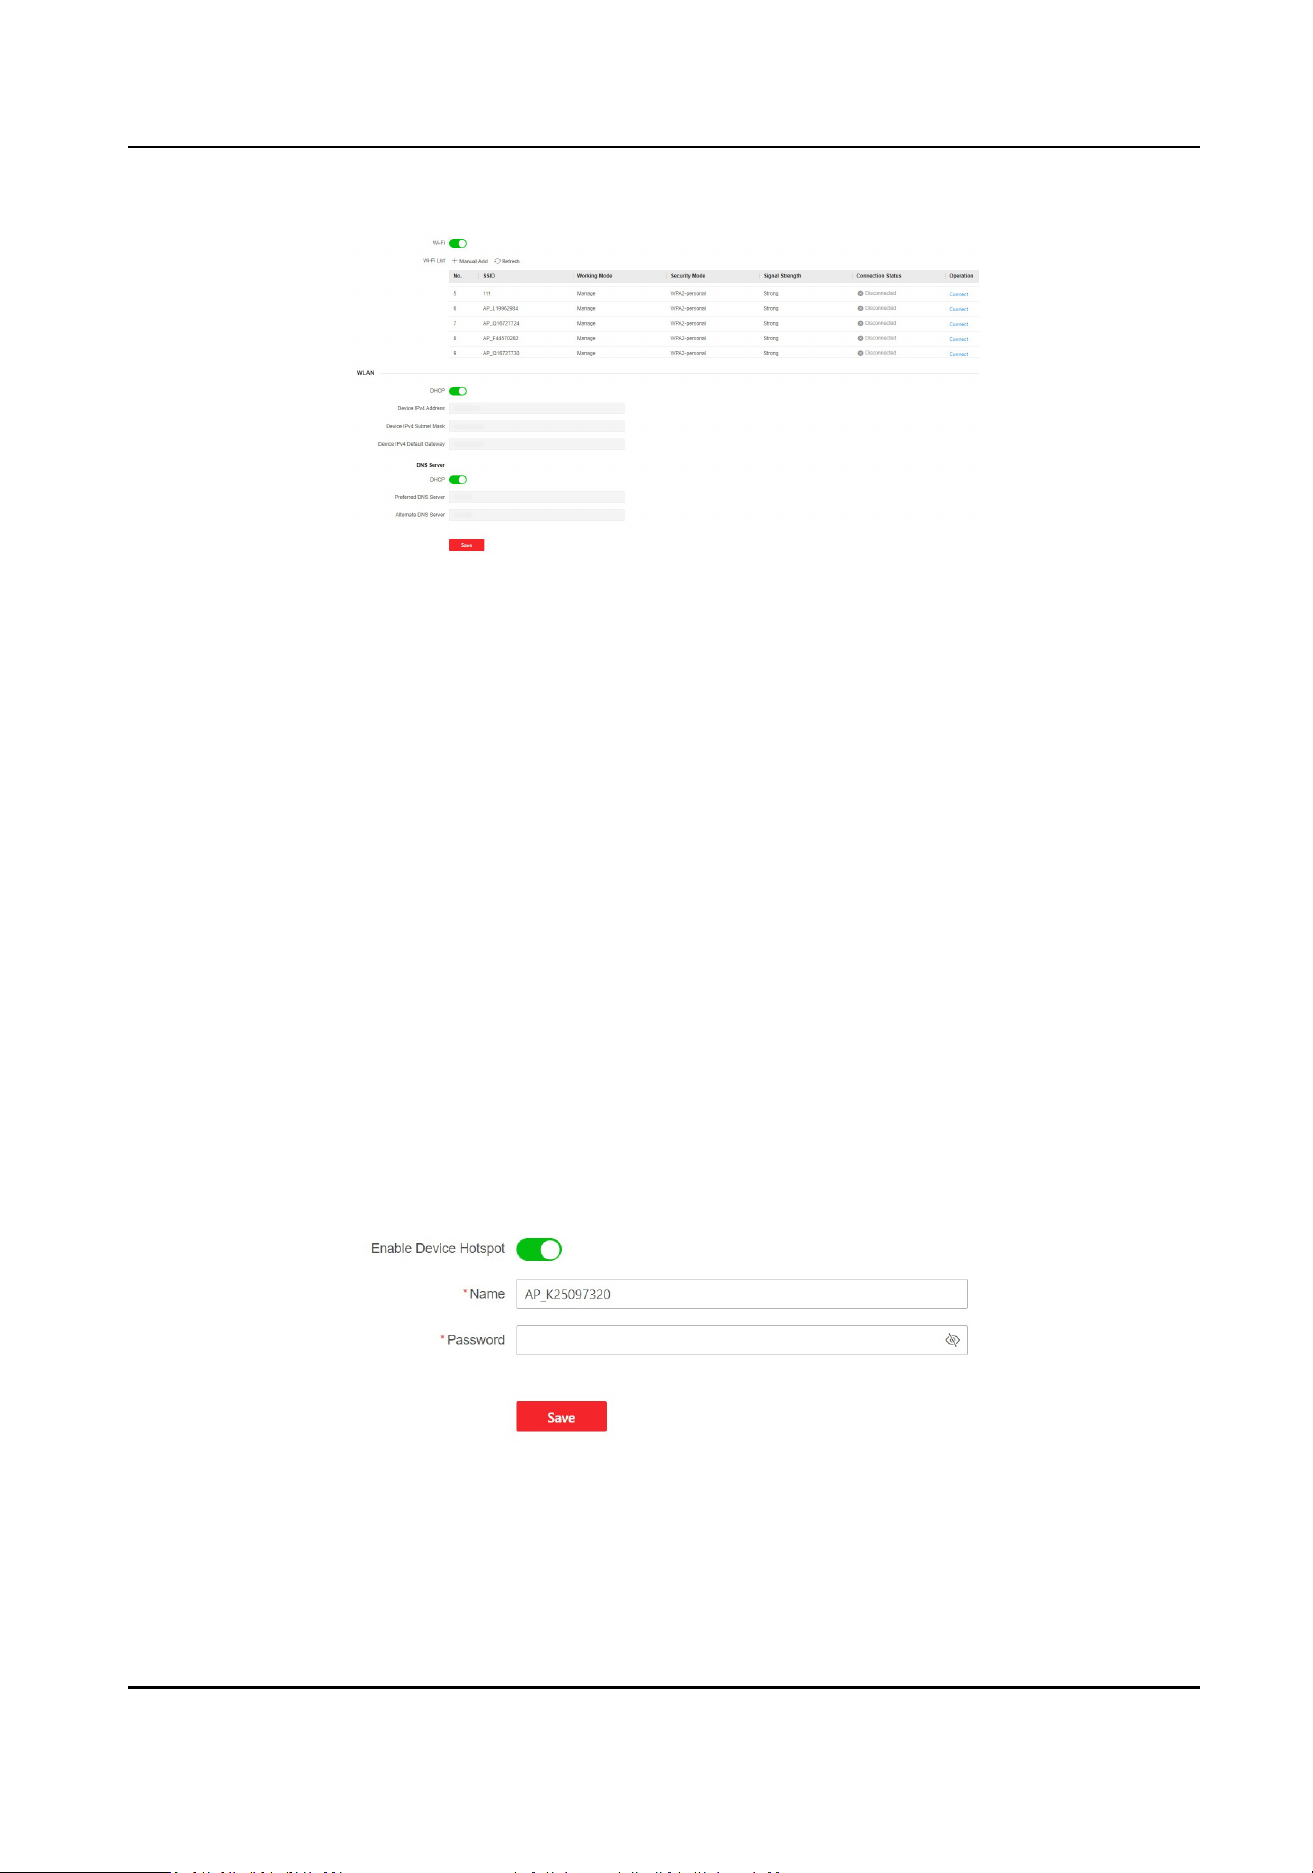
Figure 5-4 Wi-Fi
2.
Enable Wi-Fi.
3.
Add a Wi-Fi.
1) Click Manual Add.
2) Enter SSID, and select the security mode.
3) Click OK.
4.
The added Wi-Fi will be shown in the list. Click Connect, and enter the password to connect the
Wi-Fi.
5.
Oponal: Set the WLAN parameters.
1) Set the IP address, subnet mask, default gateway and DNS server address. Or enable DHCP
and the system will allocate the IP address, subnet mask, default gateway and DNS server
address
automacally.
6.
Click Save.
Device Hotspot
Set the device hotspot.
Click Conguraon → Network → Network Sengs → Device Hotspot .
Figure 5-5 Device Hotspot
Click to Enable Device Hotspot. Set hotspot Name and Password.
DS-K7R83X Remote Control Pad
19
Note
You can only set hotspot password on the web page. If you need to view the password, please
enter the local sengs page on the device.
Click Save.
5.4.6 Upgrade and Maintenance
Reboot device, restore device parameters, and upgrade device version.
Reboot Device
Click Maintenance and Security → Maintenance → Restart .
Click Restart to reboot the device.
Upgrade
Click Maintenance and Security → Maintenance → Upgrade .
Select an upgrade type from the drop-down list. Click
and select the upgrade le from your
local PC. Click Upgrade to start upgrading.
Note
Do not power o during the upgrading.
Restore Parameters
Click Maintenance and Security → Maintenance → Backup and Reset .
Restore All
All parameters will be restored to the factory
sengs. You should acvate the device before
usage.
Restore
The device will restore to the default sengs, except for the device IP address and the user
informaon.
5.4.7 Device Debugging
You can set device debugging parameters.
Steps
1.
Click Maintenance and Security → Maintenance → Device Debugging .
2.
You can set the following parameters.
Enable SSH
DS-K7R83X Remote Control Pad
20
To raise network security, disable SSH service. The conguraon is only used to debug the
device for the professionals.
Note
SSH is disabled by default. If the device reboots aer SSH is turned on, it will revert to the
disabled status.
DS-K7R83X Remote Control Pad
21
Chapter 6 Congure the Device via the Mobile
Browser
6.1 Login
You can login via mobile browser.
Note
●
Make sure the device is acvated.
Login by IP Address
The device network and the mobile Wi-Fi should be in the same LAN.
Tap , enter the password to enter the sengs page. Tap Communicaon → Wired Network .
Open the browser by mobile phone and enter the device IP address to enter the login page.
Login by Wi-Fi
The device Wi-Fi and mobile Wi-Fi should be in the same LAN.
Tap
, enter the password to enter the sengs page. Tap Communicaon → Wi-Fi . Tap
connected Wi-Fi, and tap QR Code. Scan the QR code by mobile phone to enter the login page.
Login by Hotspot
Enable the mobile Wi-Fi.
Tap
, enter the password to enter the sengs page. Tap Communicaon → Device Hotspot
to enable device hotspot. Tap Device Hotspot Sengs, and scan the QR code by mobile phone
to enter the login page.
Enter user name and
acvaon password, tap Login
6.2 Forget Password
If you forget the password when logging in, you can change the password by security quesons.
Steps
1.
On the login page, tap Forget Password.
2.
Select Vericaon Mode.
Security
Queson Vericaon
If you have set security quesons on the device or mobile web, you can enter the answers to
reset the password. Tap Security Queson Vericaon, and tap Next.
3.
Enter the answer of the security
queson, and tap Next.
4.
Enter the new password and conrm it.
5.
Tap Next.
DS-K7R83X Remote Control Pad
22
6.3 Home Page
You can view the turnsle pictures, network status and basic informaon.
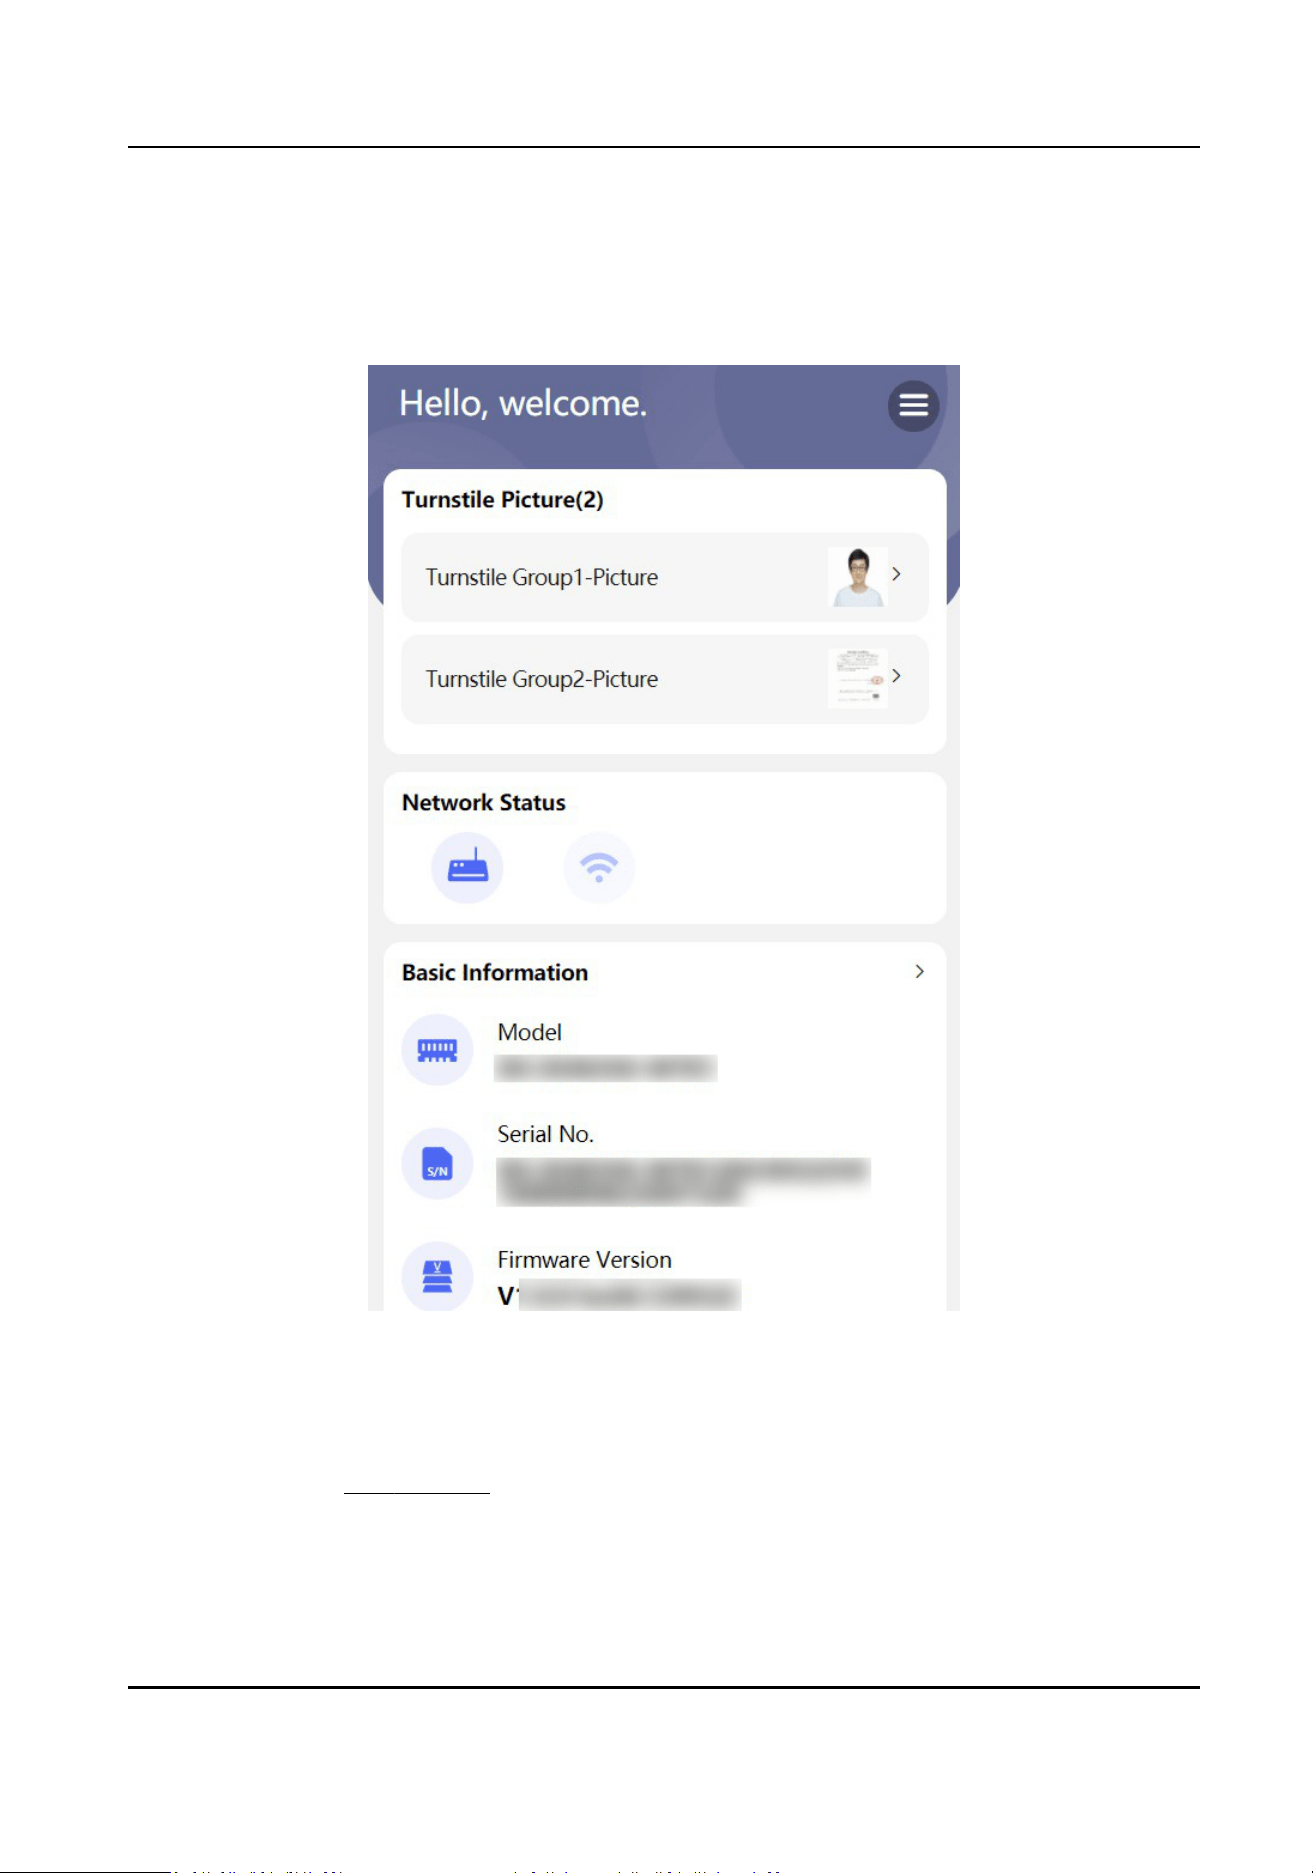
Figure 6-1 Home Page
Turnsle
Picture
You can view the added turnsle picture. When no turnsles are added, please add the turnsle
group rst. Refer to Add Turnsle for more details.
When no pictures are added, the page displays “Not Uploaded”. Tap to enter the picture
eding
page. Tap Add, take or select photos from the album. Aer adding, you can view turnsle pictures
on the device.
DS-K7R83X Remote Control Pad
23

When pictures are added, tap the picture to enter the picture eding page. Tap to change the
turnsle picture. Tap to delete the turnsle picture.
Network Status
You can view the network connecon status or enter the network conguraon page.
Basic Informaon
You can view the device model, serial No. and versions, or enter the basic informaon
conguraon page.
6.4 Conguraon
6.4.1 View Device Basic Informaon
You can view the device name, language, model, serial No., version, and Mac address, etc.
Tap → System Conguraon → Basic Informaon.
You can change the device name.
You can view the device language, model, serial No., version, and Mac address, etc.
Tap Save.
6.4.2 Time
Sengs
View current me and set the me zone.
DS-K7R83X Remote Control Pad
24
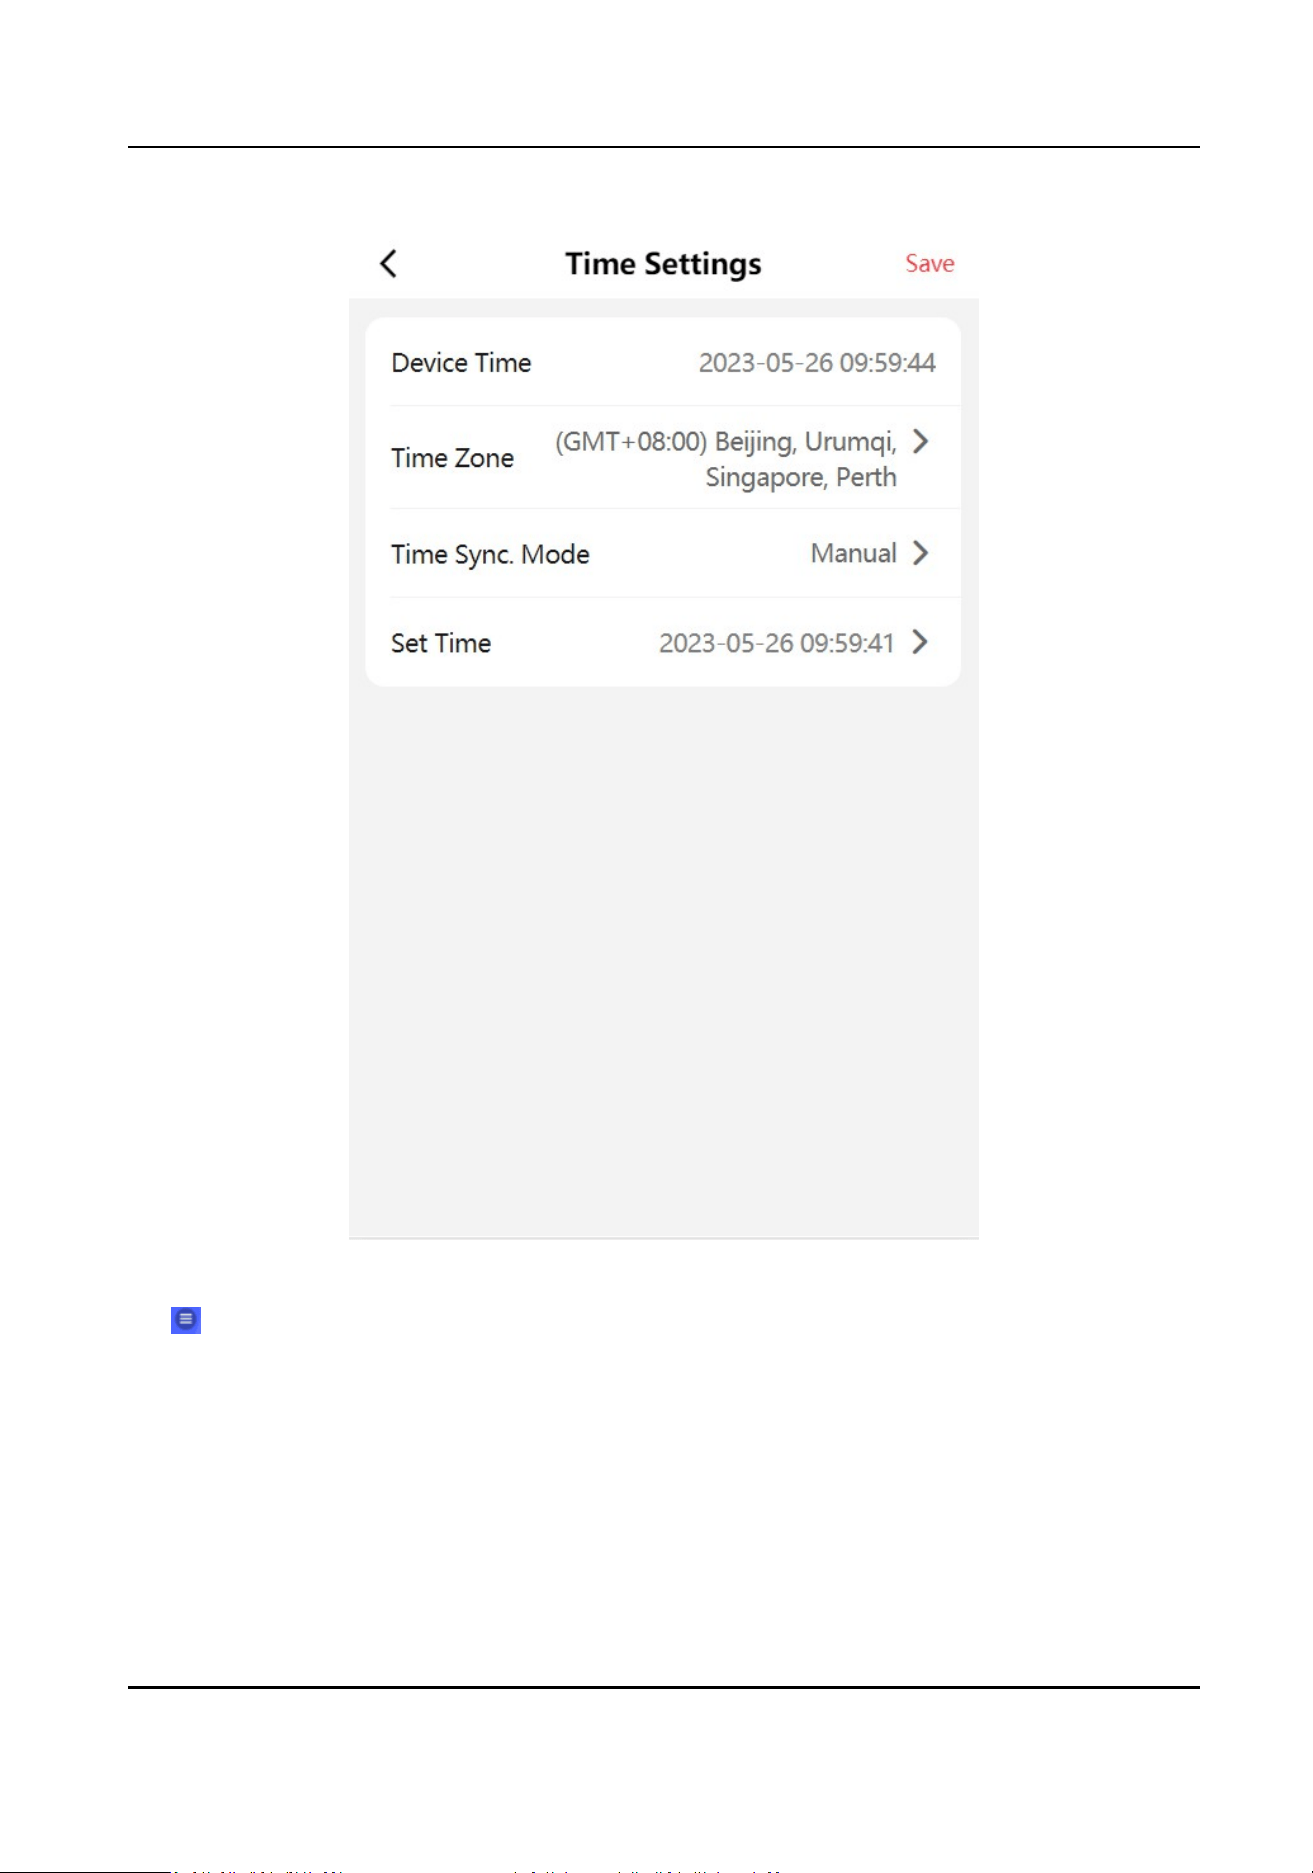
Figure 6-2 Time Sengs
Tap → System Conguraon → Time Sengs.
Device Time
You can view current me.
Time Zone
Select the me zone where the device is located from the drop-down list.
Tap Save.
DS-K7R83X Remote Control Pad
25
6.4.3 User Management
You can change user password.
Tap
→ User Management on the home page.
Tap the user, enter the old password and create a new password.
Tap Save.
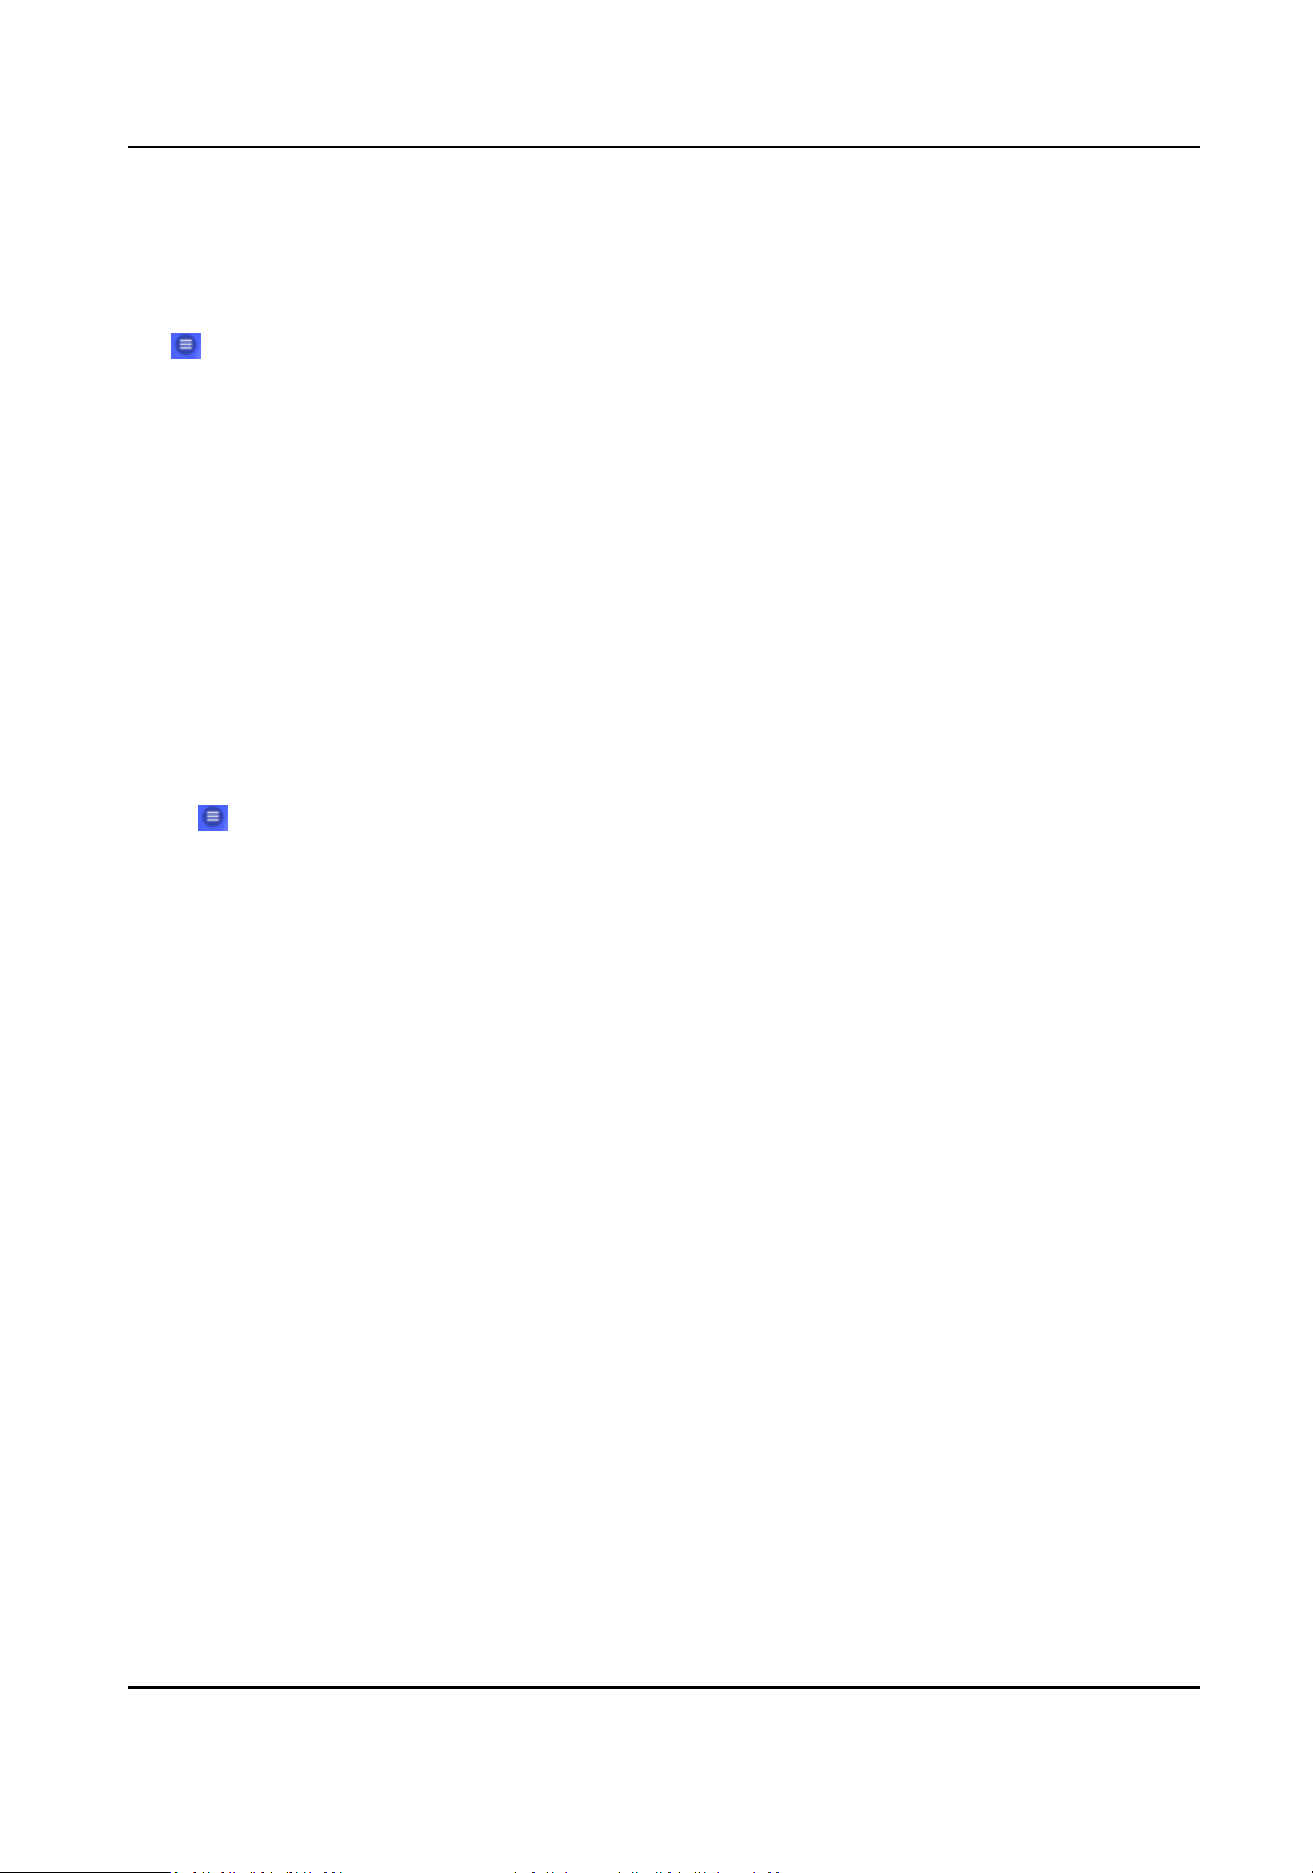
6.4.4 Network
Set Wired Network Parameters
Set wired network.
Before You Start
Device is connected to wired network.
Steps
1.
Tap
→ Communicaon → Wired Network.
DS-K7R83X Remote Control Pad
26
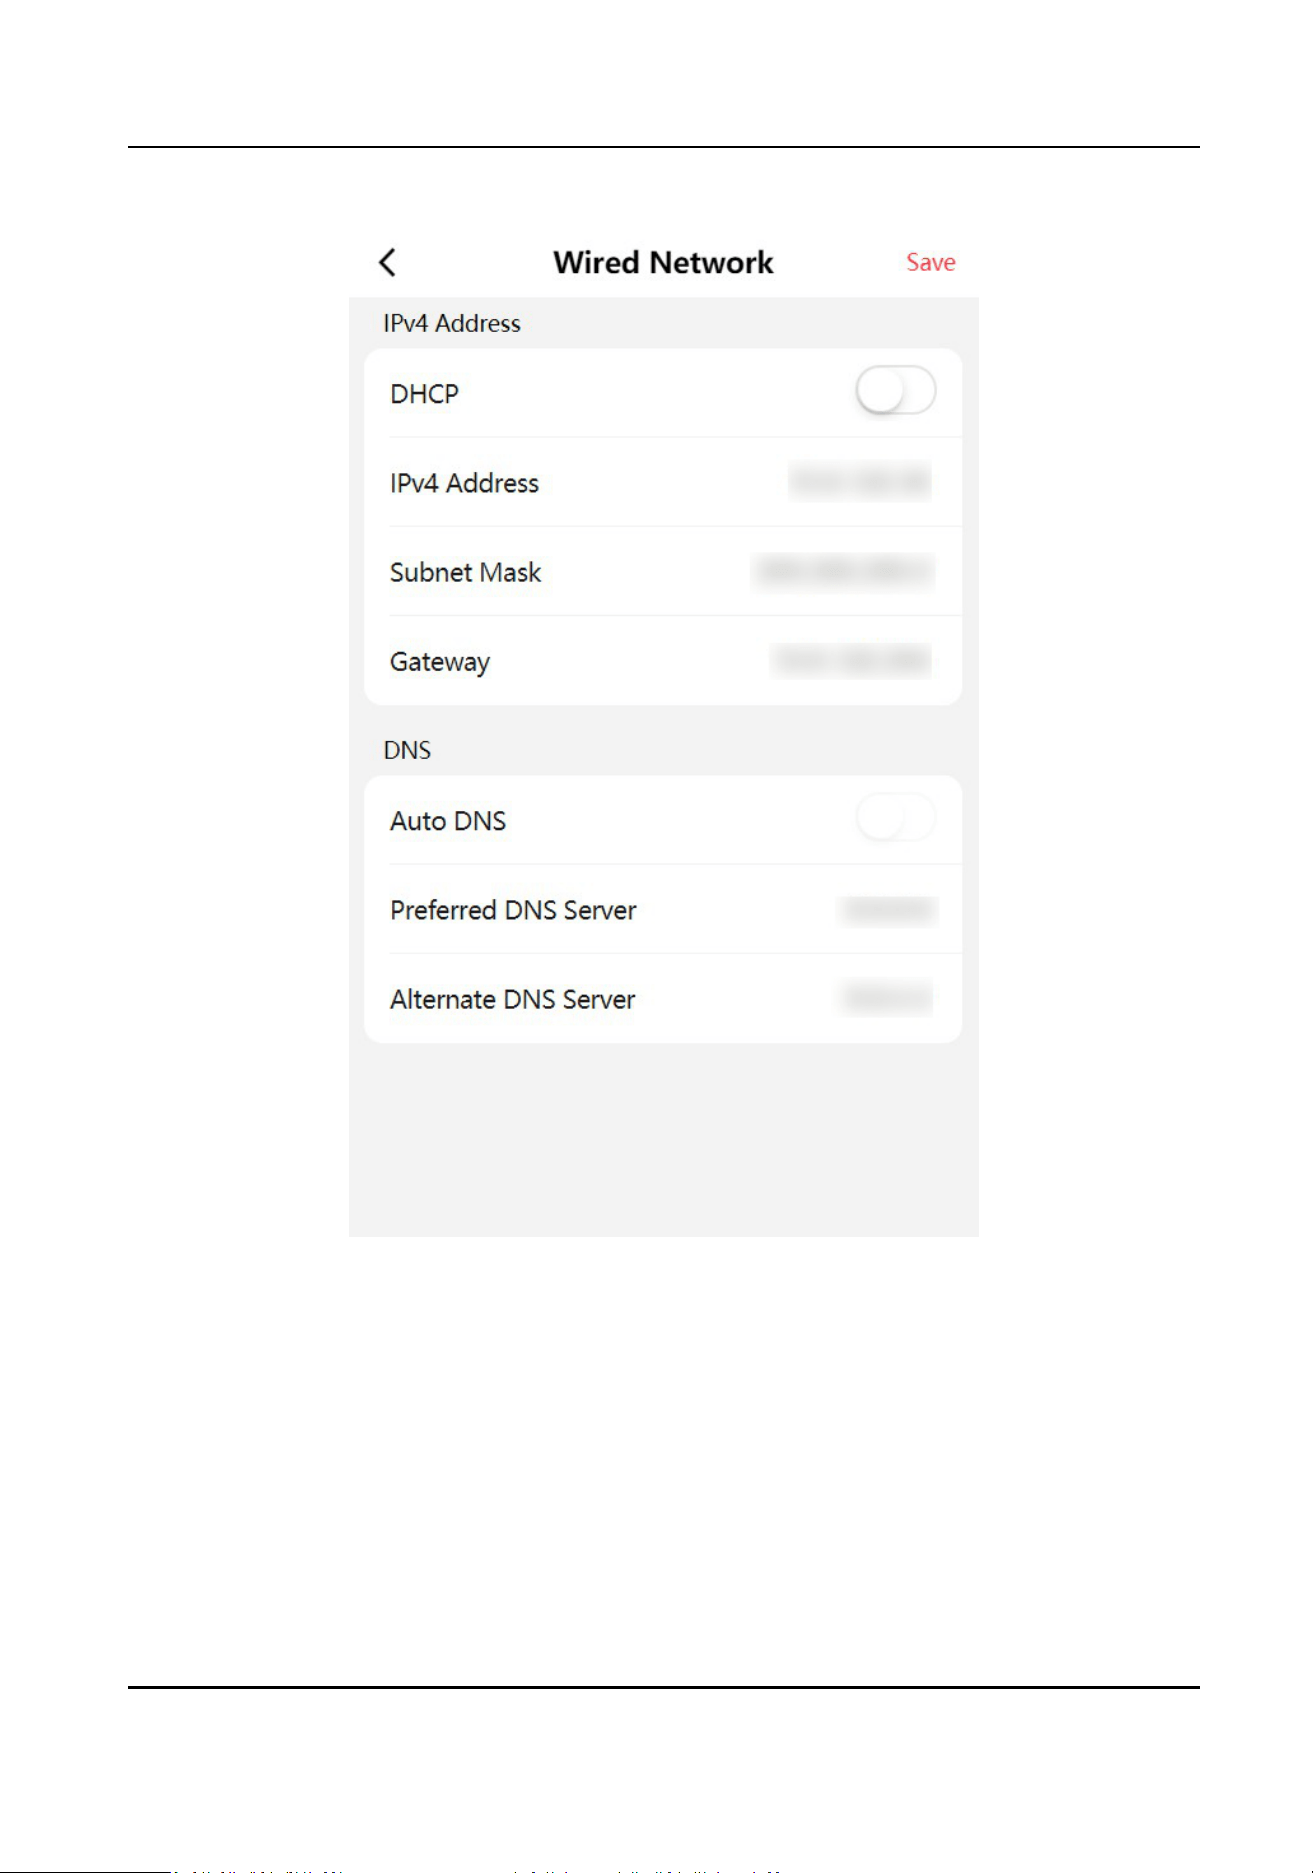
Figure 6-3 Wired Network
2.
Set wired network parameters.
DHCP
If you disable the
funcon, you should set the IPv4 address, IPv4 subnet mask, IPv4 default
gateway.
If you enable the
funcon, the system will allocate the IPv4 address, IPv4 subnet mask, the
IPv4 default gateway automacally.
Preferred DNS Server and Alternave DNS Server
Set the preferred DNS server address according to your actual need.
DS-K7R83X Remote Control Pad
27
3.
Tap Save.
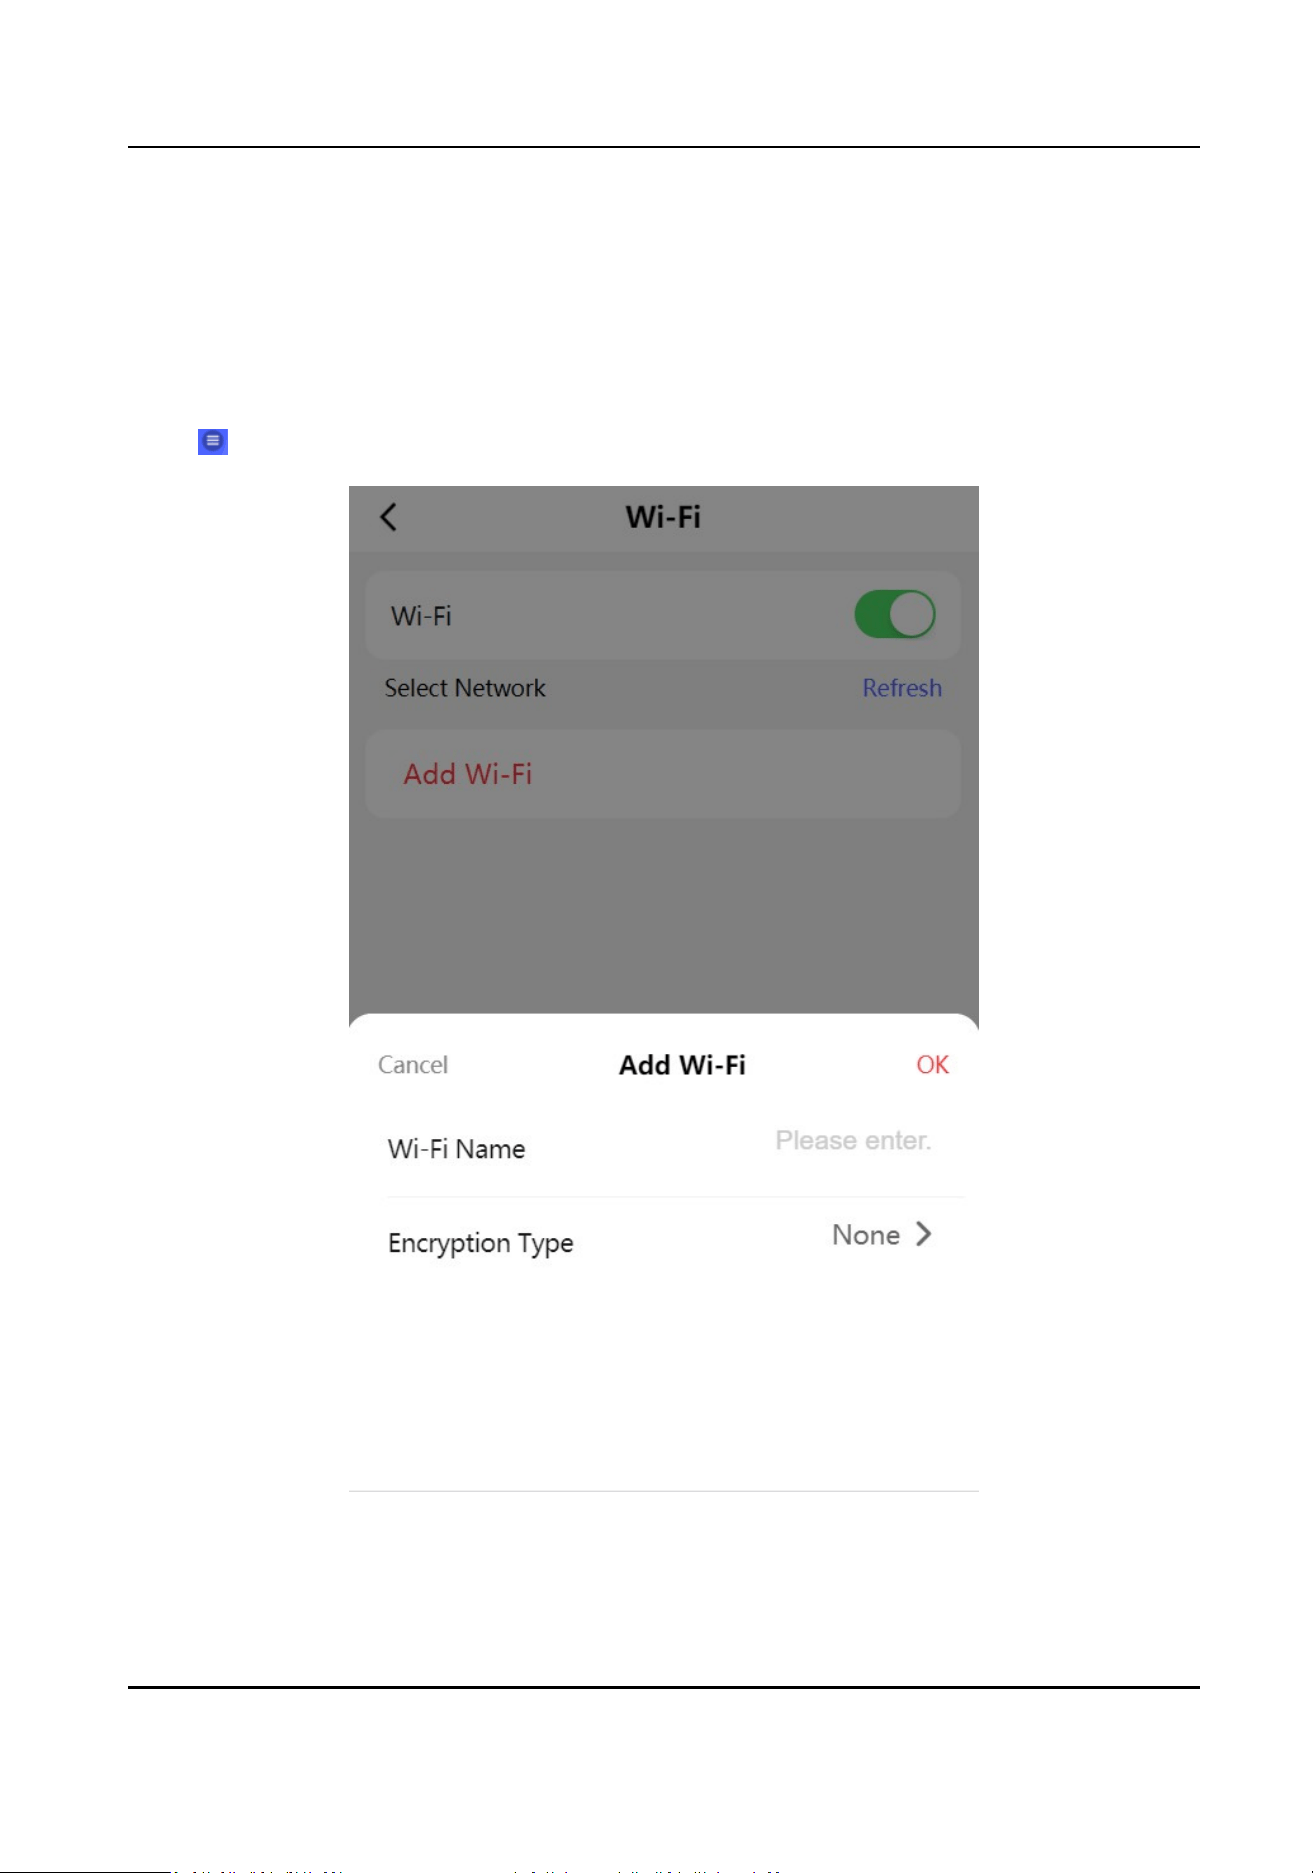
Wi-Fi Sengs
Set Wi-Fi parameters.
Steps
1.
Tap → Communicaon → Wi-Fi on the home page.
Figure 6-4 Wi-Fi Conguraon
2.
Enable Wi-Fi.
DS-K7R83X Remote Control Pad
28
3.
Select the Wi-Fi name, and enter Wi-Fi password to connect.
4.
Oponal: Add Wi-Fi.
1) Tap Add Wi-Fi.
2) Enter Wi-Fi Name , and select
Encrypon Type.
3) Tap OK.
Result
Aer Wi-Fi conguraon, you can congure the device remotely.
Device Hotspot
Set the device hotspot, and mobile phone can connect to the device to enter the mobile browser.
Tap → Communicaon → Device Hotspot.
Tap Enable Device Hotspot, set hotspot name and password. Tap Save.
6.4.5 System Maintenance
The device can reboot and restore.
Tap → Reboot on the home page.
Tap OK to reboot the device.
Tap
→ Restore → Restore to Default Sengs on the home page.
Tap OK to clear all data except for the network parameters and user
informaon.
Tap → Restore → Restore to Factory Sengs on the home page.
Tap OK to restore all
funcons and parameters to the factory sengs.
6.4.6 Log Out
Log out the conguraon page.
Tap
→ Log Out on the home page, tap OK.
If you need to enter the conguraon page, you need to enter the user name and password again.
DS-K7R83X Remote Control Pad
29

UD33564B