Loading ...
PAP
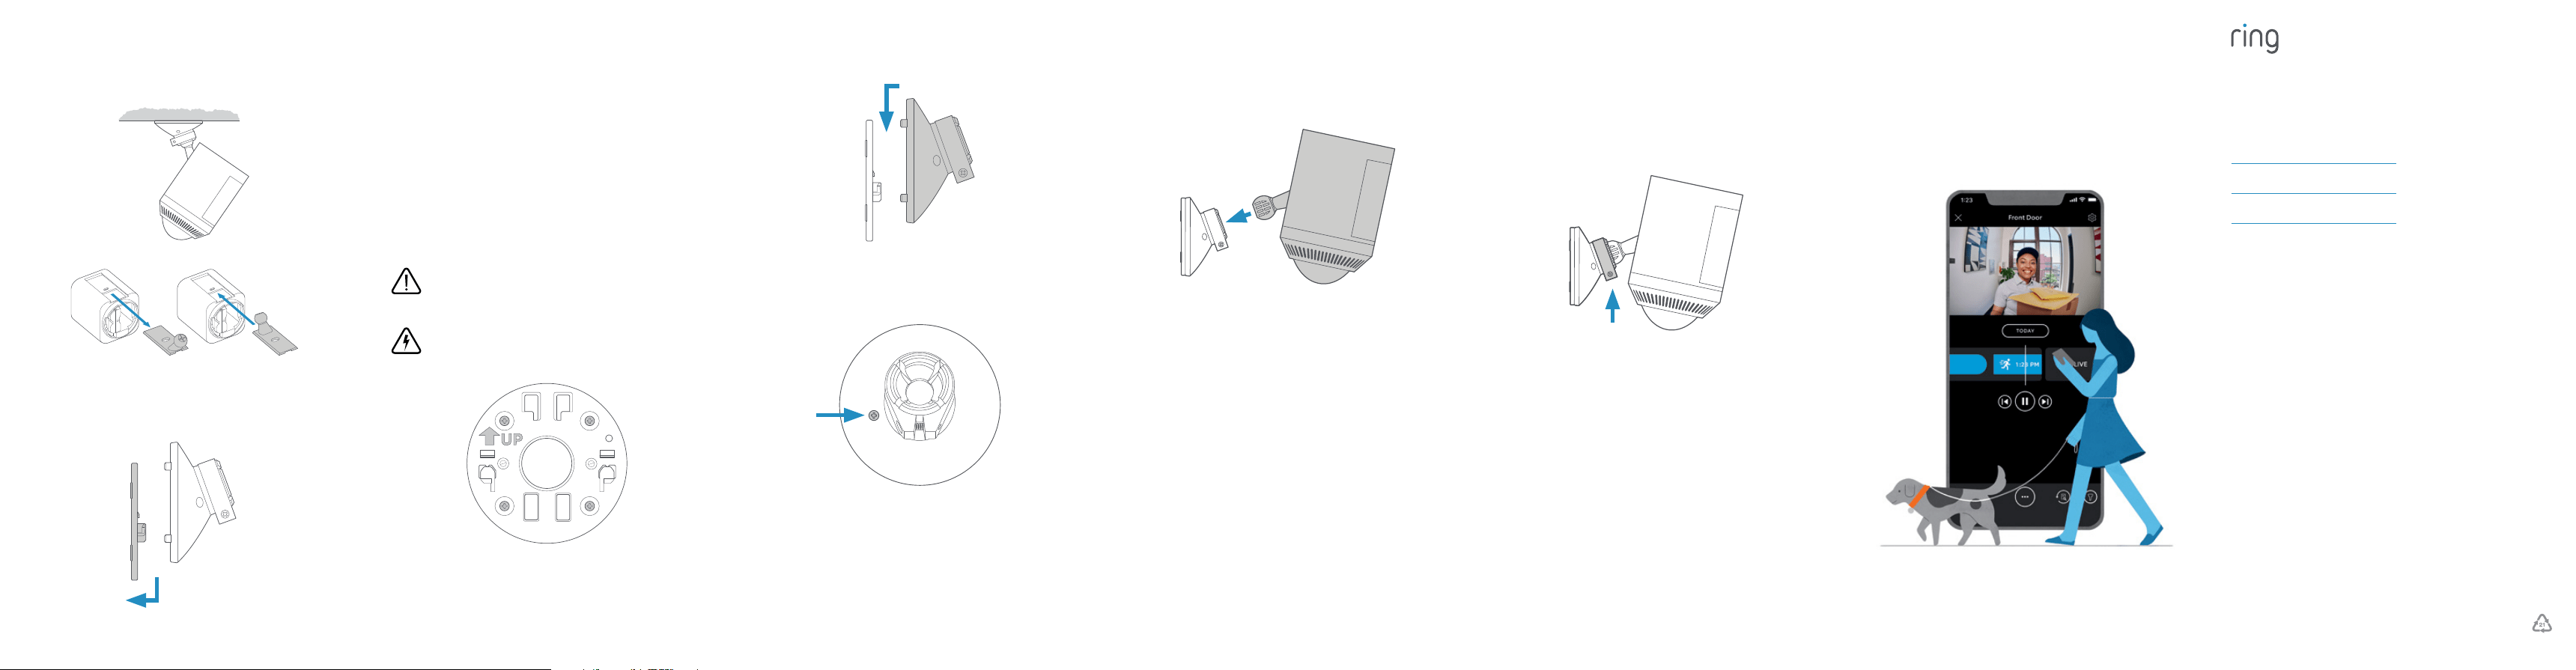
If installing on an eave or overhang…
Remove the battery compartment cover by twisting it
counterclockwise and insert the ball joint plate with the
ball joint pointing up.
8 9 10 11 12
For information on our warranty, theft protection,
and Ring Protect Plans, visit ring.com/legal
© 2022 Ring LLC or its aliates. Ring and all related
marks are trademarks of Ring LLC or its aliates.
For additional help, visit ring.com/help
Or give us a call
US 1 800 656 1918
Canada 1 855 300 7289
Worldwide +1 310 929 7085
For a list of all our customer support numbers,
visit ring.com/callus
* Your free trial isn’t applicable for locations with an existing Ring Protect subscription.
See ring.com/protect-plans to learn more about your plan’s retention period.
Remove the mounting plate.
Slide it down to remove it from the camera mount.
Free Ring Protect Plan for 30 days.
Your new device comes with a free, 30-day trial of
Ring Protect. This comprehensive subscription service
lets you review, save, and share your video and photo
history anytime so you never miss a moment.*
To continue using Ring Protect after your free trial ends, visit
ring.com/protect-plans to compare plans and pricing.
Attach your camera to the camera mount.
Loosen the metal collar on the bracket using a Phillips-head
screwdriver (not included).
Push the ball joint into the socket until it snaps into place.
Adjust the camera angle.
Rotate the camera to focus on the area of your choice. Look
at Live View in the Ring app to make sure it’s positioned at
your desired angle.
Tighten the security screw.
Then, tighten the screw on the metal collar to secure the
camera position.
Install the mounting plate.
For wall installation, the UP arrow should point up. For an
eave or overhang, the arrow should point toward the area
you want to monitor for motion.
If installing on a wood surface, screw the plate directly
into the wall.
If installing on a masonry surface, mark four screw holes
using the plate as a guide.
Drill pilot holes using a 1/4” drill bit. Insert the included
wall anchors, then drive the four mounting screws through
the mounting plate into the wall anchors.
Attach the camera mount.
Slide it onto the mounting plate.
Then, tighten the security screw.
WARNING!
Only use the included mounting screws
when securing the mounting plate.
CAUTION!
DO NOT drill into your home’s electrical wiring.