
Loading ...
Loading ...
Loading ...
audioengine A5+ setup guide audioengine A5+ setup guide
Setup and Operation (cont’d)
8 9
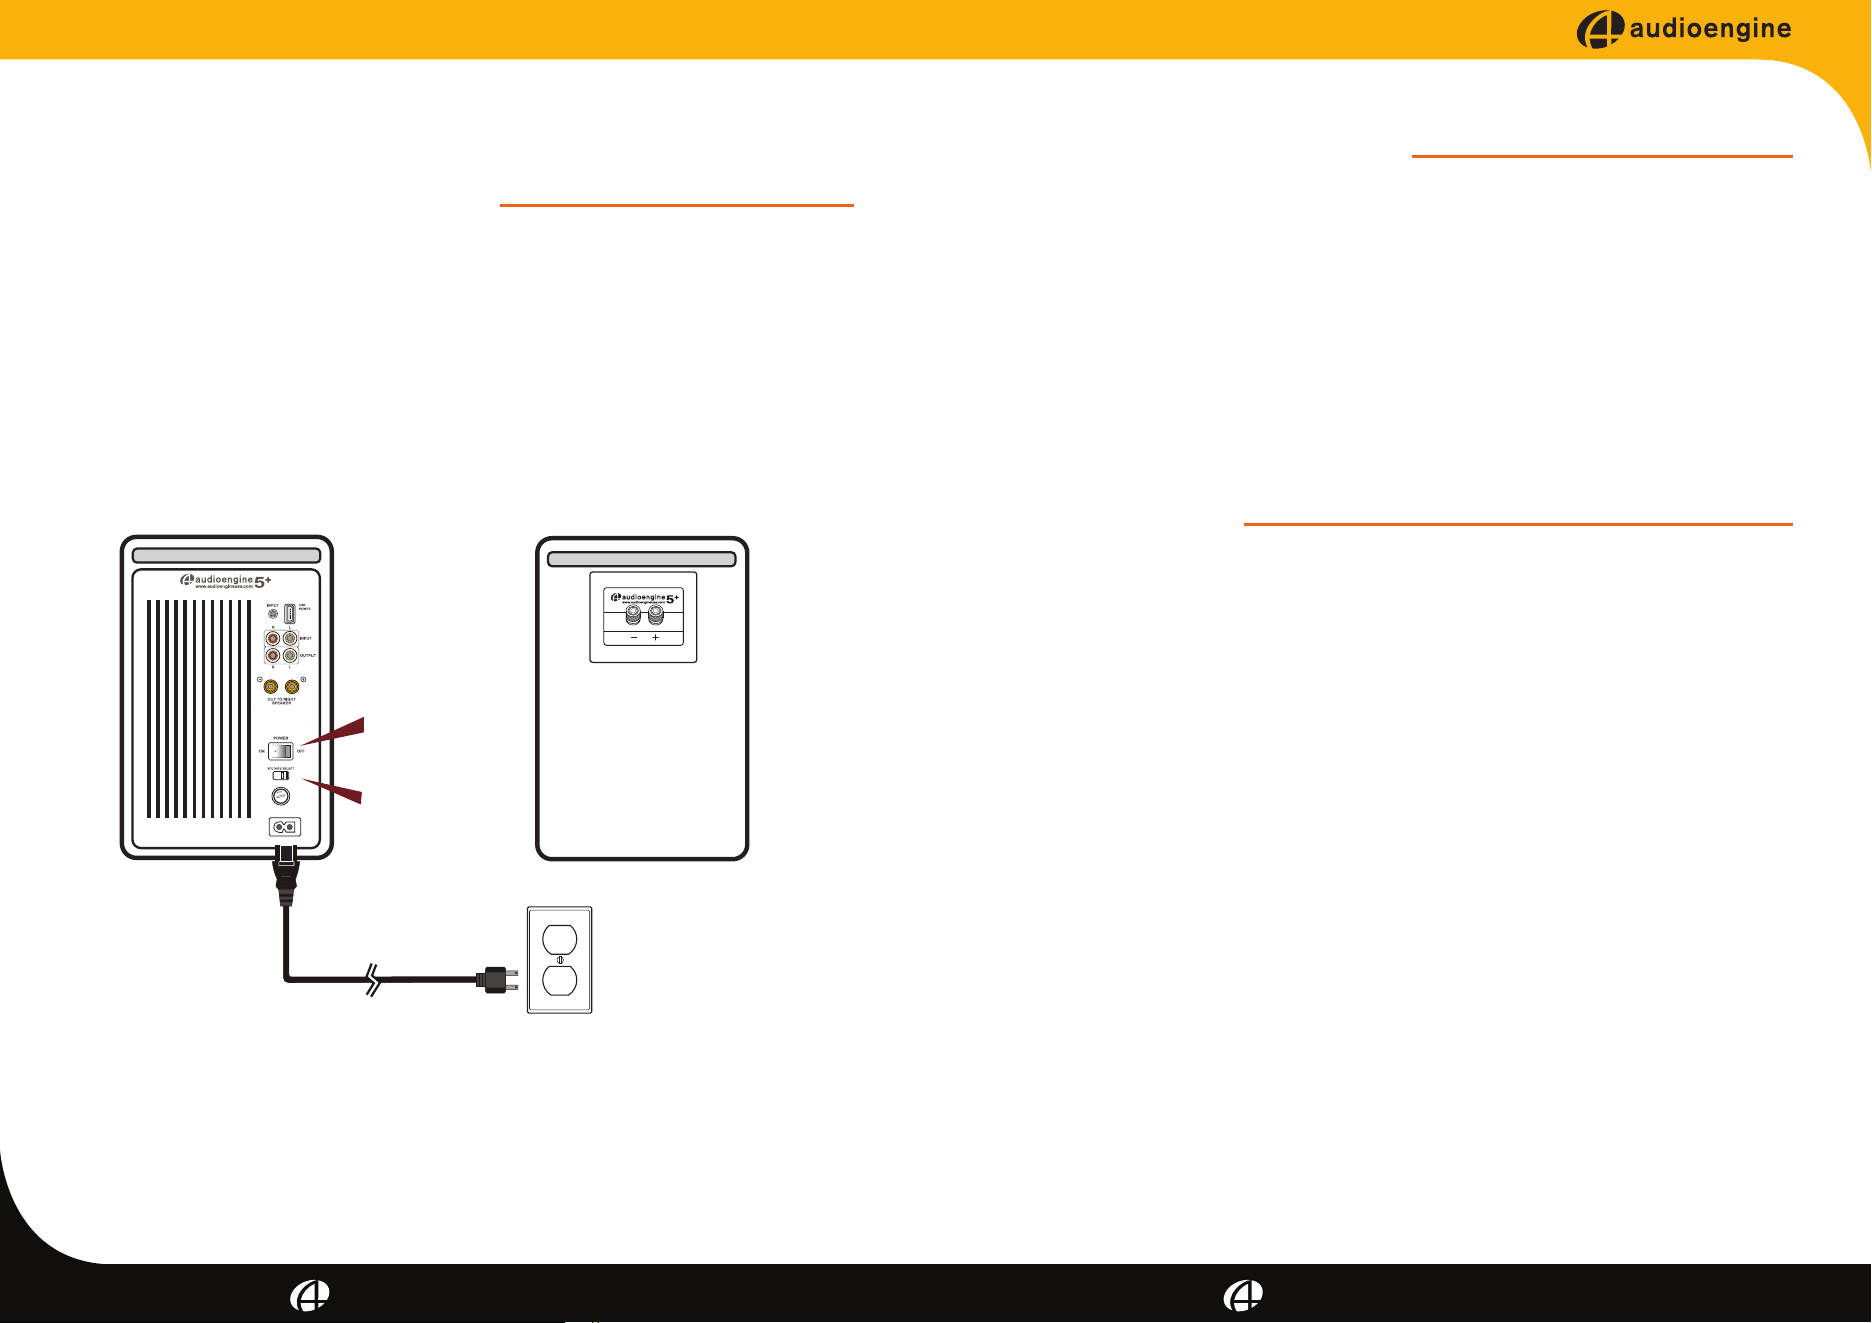
Step 3 – Connecting the Power Cord
1. Verify that the power switch on the left speaker rear panel is in the
OFF position.
2. Conrm that the rear panel voltage selector switch is set to the
proper voltage for your area.
3. Connect the power cord into the left speaker and the other end
into an AC power outlet.
Note:
We recommend using a high-quality surge suppressor and/or AC line
lter on all electronics equipment.
Using the appropriate audio cable (3.5” mini-jack and/or RCA cable),
connect your audio source (computer, iPod, etc.) to the A5+ audio
inputs. One of each cable type is included.
Note:
Both audio inputs on the A5+ are active so two audio sources may be
connected to the speakers at the same time without the need for an
input switch.
1. Move the A5+ rear panel power switch to the ON position. The left
speaker front panel power indicator should ash a few times then
go solid.
2. Turn on your audio input source and adjust the volume to the
desired listening level.
3. Adjust the A5+ speaker volume level with the volume knob on the
front panel or with the included remote control.
Break-in Period
Your speakers will sound great out of the box and will get better over
time. No need to do anything else but listen to them, but give them at
least 30 to 50 hours break-in time before doing any critical listening.
Cleaning
We don’t recommend using any solvents or cleaners on Audioengine
cabinets or speakers. Just wipe down with a soft, dry cloth.
Step 4 – Connecting Audio Cables
Step 5 – Operation
115
A5+ Back Left
OFF
A5+ Back Right
Loading ...
Loading ...
Loading ...