
Loading ...
Loading ...
Loading ...
- 26 - - 27 -
Risk of Injury:
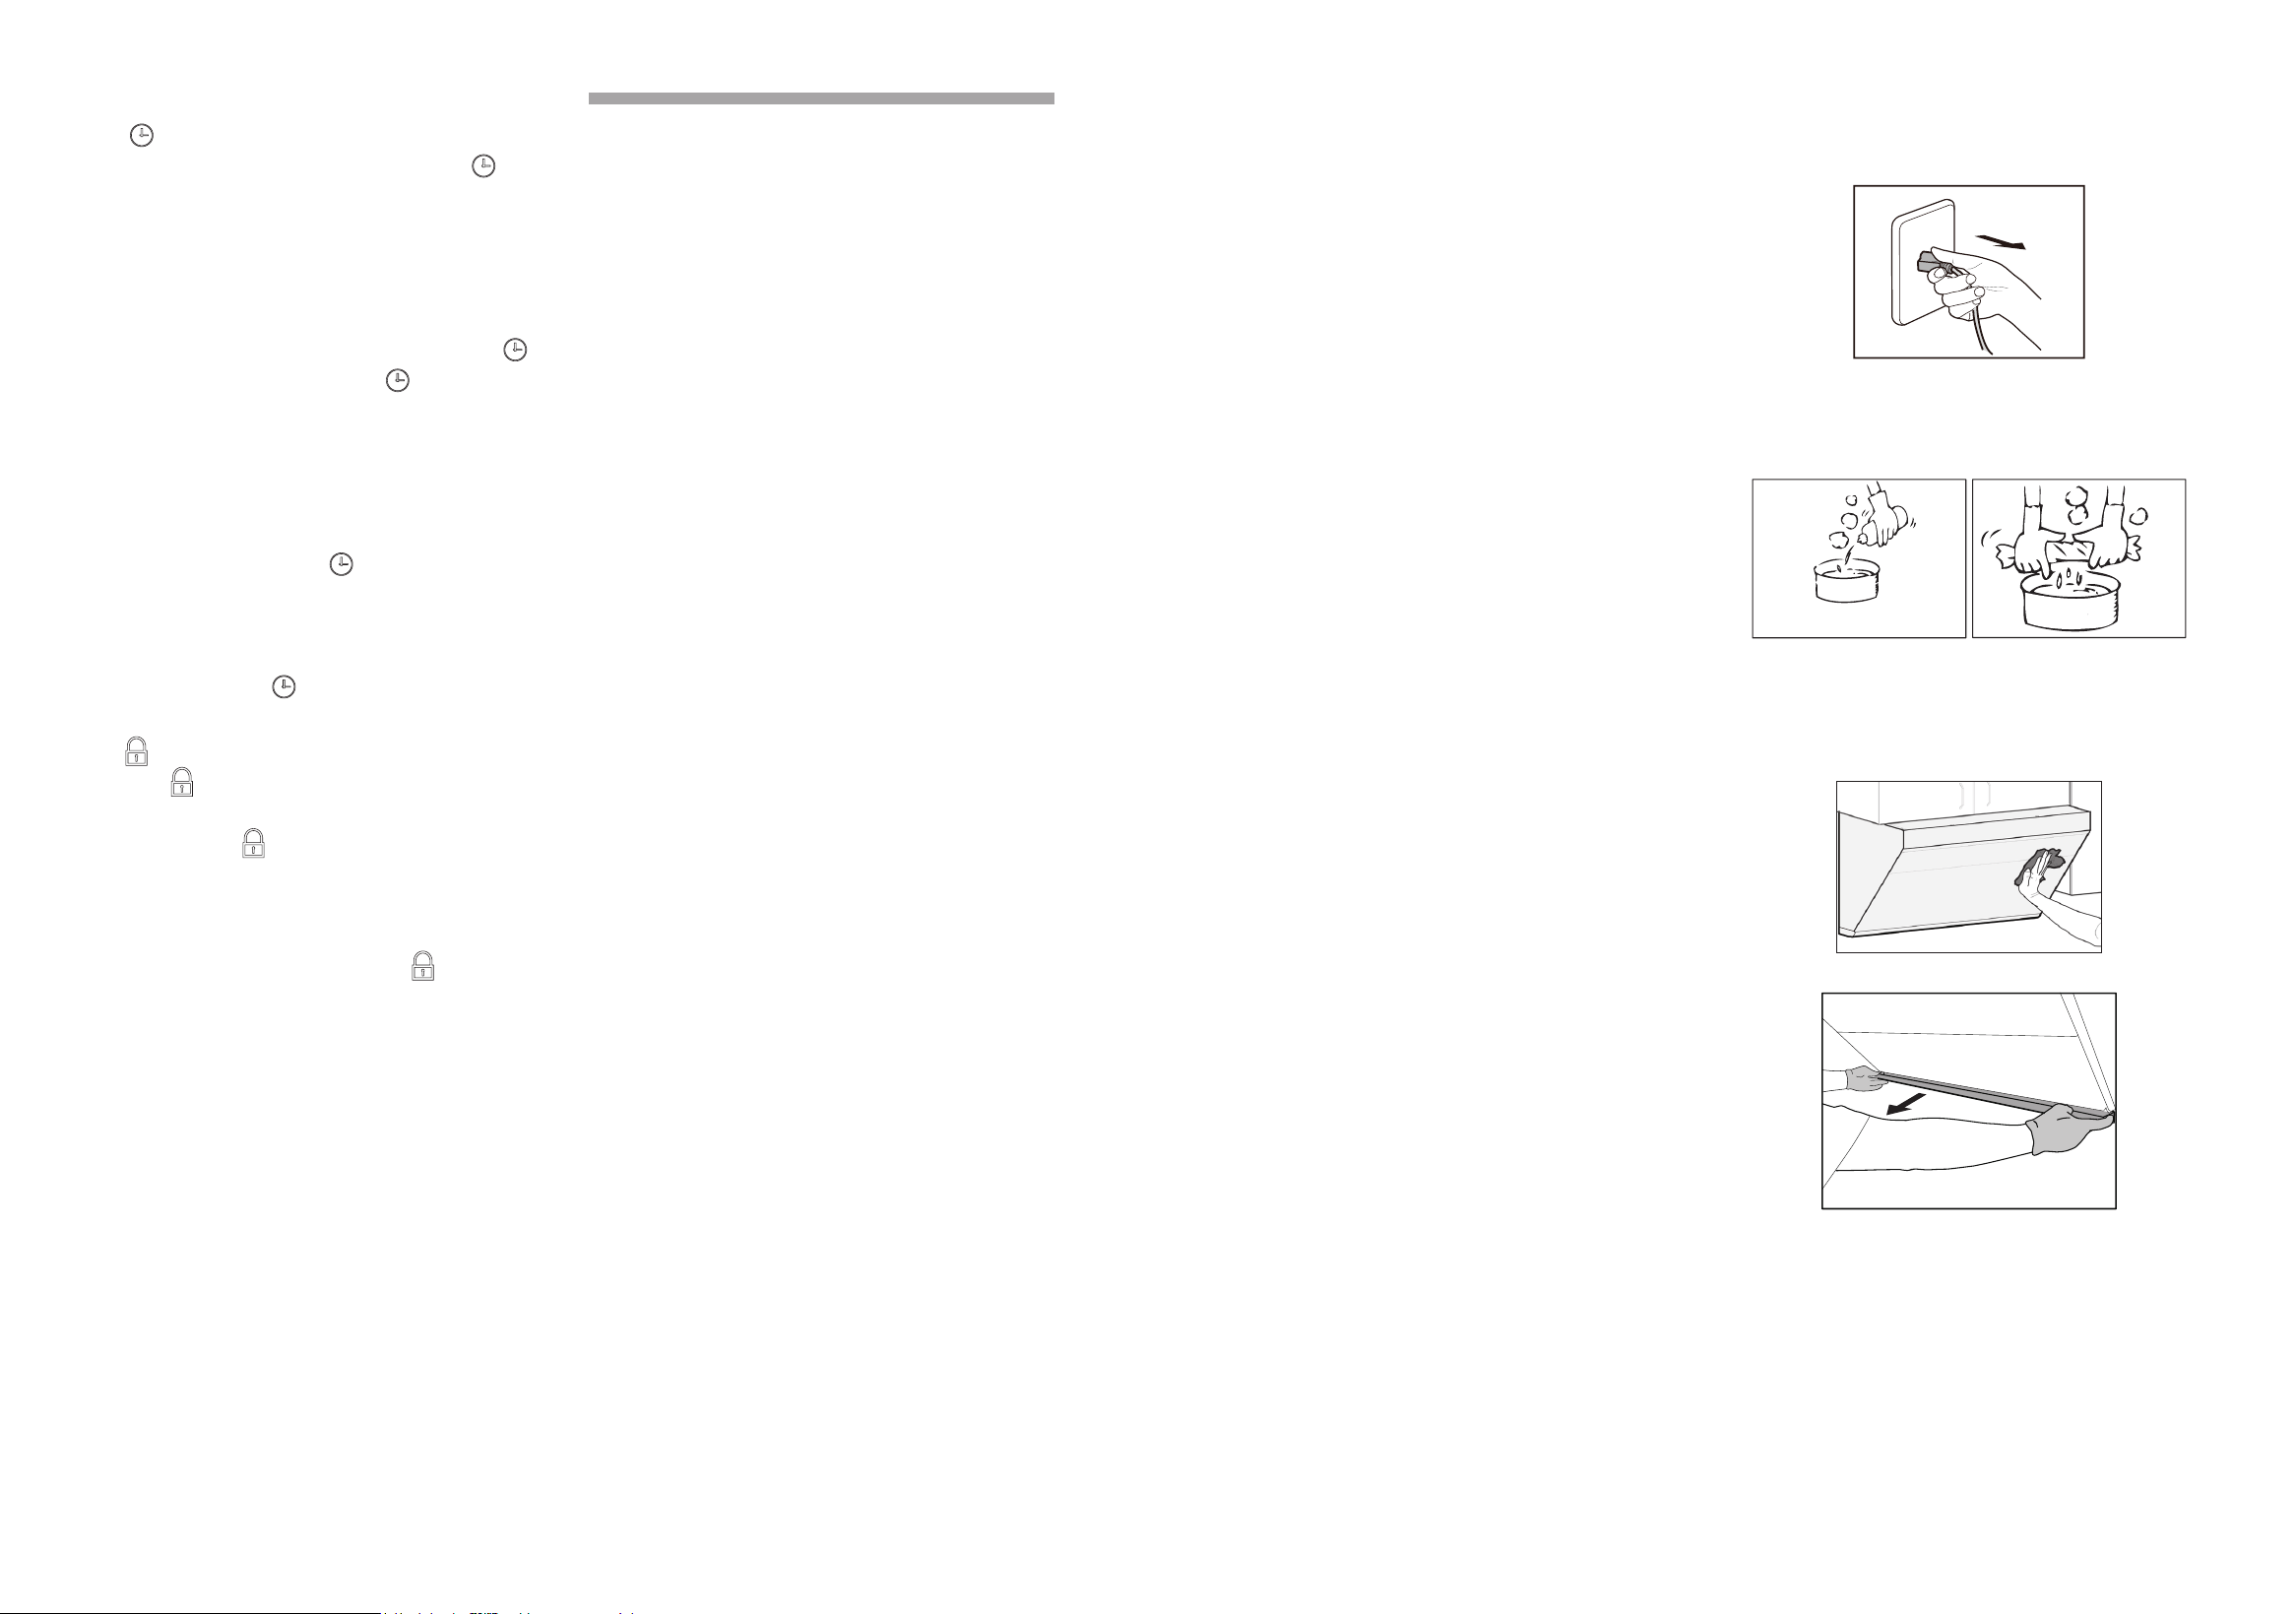
• Unplug the appliance from the mains or switch
off the circuit breaker in the fuse box before
installation, cleaning, maintenance and repair
in order to avoid electric shock.
• The range hood may have sharp edges. Be
careful to avoid cuts and abrasions during
installation and cleaning. Do wear qualified
protective gloves.
• While the range hood is in operation, do not
insert your hand into the area housing the fan.
• The appliance will become hot during
operation, especially near LED lights. Allow
the appliance to cool down before cleaning.
Do not touch lamps during or soon after
operation. Burns may occur.
• If you would like to schedule a deep cleaning
for your appliance, please contact our
authorized service center.
• Fotile suggests that you clean the surface of
the appliance for better use.
1) Neutral detergent may be used to clean
stains on the range hood. However, avoid
touching the control panel. Wipe some
detergent on the stains and let the detergent
sit. Do not let the detergent sit for an extended
period of time, as it can cause damages to the
appliance’s surface. Then, wipe off the stain
with a soft cloth and the left detergent with a
slightly wet cloth. Next, use another cloth to
dry the appliance.
2) Stains on the range hood should be cleaned
within a short time period, as to prevent the
stains from becoming permanent.
3) Abrasive detergents, such as a salt solution,
disinfectant or bleach powder cannot be used
to clean the appliance. Wipe off the detergent
with a wet, soft cloth. Next, use another cloth
to dry the appliance.
Warning:
Do not clean the appliance with
abrasive tools, such as steel wool, brushes,
and coarse cloths, as these materials will
permanently scratch the surface of the hood.
Preparations before Cleaning:
1.Unplug the range hood or turn off the power
socket.
2. Clear the cookware on the burners.
3. Prepare a neutral detergent and a soft cloth
(or soft brush) for stain removal and cleaning.
Washing and cleaning the surface, Grease
Cup, and grease lter: (The cleaning can be
done by the user)
1.Clean the surface of the range hood.
2. Take out the oil cup horizontally and wash it.
Warning:
For the safety of you and your family,
please regularly clean out the oil in the oil cup and
sediment on the external surface of the oil cup
to avoid fire risk. Please operate with protective
gloves.
3.Lightly press the POWER button. Then,
lightly press the LIGHTING button. After the
LIGHTING button is pressed, the smoke bafe
plate will open.
Important Note:
Reattach the grease filter after cleaning and
maintenance of the range hood. Do not operate
the appliance without the grease lter, as it may
cause safety hazards.
Caution:
Risk of demager due to corrosion.
• Always switch on the appliance while cooking
to avoid condensation. Condensate can
produce corrosion damage.
• Surface damage due to incorrect cleaning.
Clean stainless steel surfaces in the direction
of the grain only. Do not use any stainless
steel cleaners for operator controls.
• Surface damage due to strong or abrasive
cleaning agents.
• Replace faulty LED lights to prevent the
remaining lights form overloading.
Warning:
• The range hood should only be cleaned as
instructed; otherwise, it may ignite.
• Please remember not to wet the motor and/or
the control panel, as it may result in damaging
the electric circuits or potential hazards.
• Do not clean the appliance with chemical
agents, such as gasoline, acids, benzene and
solvents.
Risk of Electric Shock:
• Penetrating moisture may result in an electric
shock. Prior to cleaning and maintenance,
pull out the mains plug or switch off the circuit
breaker in the fuse box.
• Do not use any high-pressure cleaners or
steam cleaners, which can result in an electric
shock.
Risk of Fire:
• Grease deposits in the grease filter and
Grease Cup may catch re.
•
Please do not place ammable materials in the
oil cup, such as plastic wrap, paper towels, etc.
• Please avoid excessive accumulation of
oil and regularly clean oil cup and other
components which can accumulate oil.
CLEANING AND MAINTENANCE
return to low illumination.
(7) DELAY: Press the key lightly while the
range hood motor is working, the delay
indicator will fully illumination, and a two-minute
delay is activated; 2 minutes later, all functions
will turn off, the smoke baffle plate will be
closed automatically, and the range hood will
turn off.
During the delay, if you press the DELAY
button lightly once, the delay will be
stopped, the delay indicator will return to low
illumination, and the range hood will remain the
current working state.
Lightly press the any control panel button other
than the DELAY button once during the delay
to exit the delay, the DELAY indicator will
return to low illumination, and the function of
the pressed button operates.
When the range hood is not working, the
DELAY button is not working, and if the
button is pressed, an alarm sound will engage.
(8) LOCK SCREEN button: Once pressed and
held for 2 seconds when the range hood
fan is not operating, you will hear a “beep”
sound, the LOCK SCREEN button will
fully illuminate, all buttons will be locked, and
any pressing will be invalid; in order to unlock
the control panel, you must press and hold
the LOCK SCREEN button for another
2 seconds. When the range hood fan is in
operation, the LOCK SCREEN button is not
working, if the button is pressed, an alarm
sound will engage.
Hints:
1. The range hood will be turned off automatically
if it is not operated for 2 minutes in the standby
state;
2. It’s suggested that the range hood be turned
on during steaming to keep the kitchen air
fresh, otherwise, too much steam passing by
the Sensor Window may trigger the GESTURE
function.
Loading ...
Loading ...
Loading ...