MODEL 1PAFD6
OWNER’S MANUAL
6" 2-IN-1 CLIP-ON
OR TABLE FAN
2
SAFETY & PRECAUTIONS
ASSEMBLY / OPERATION
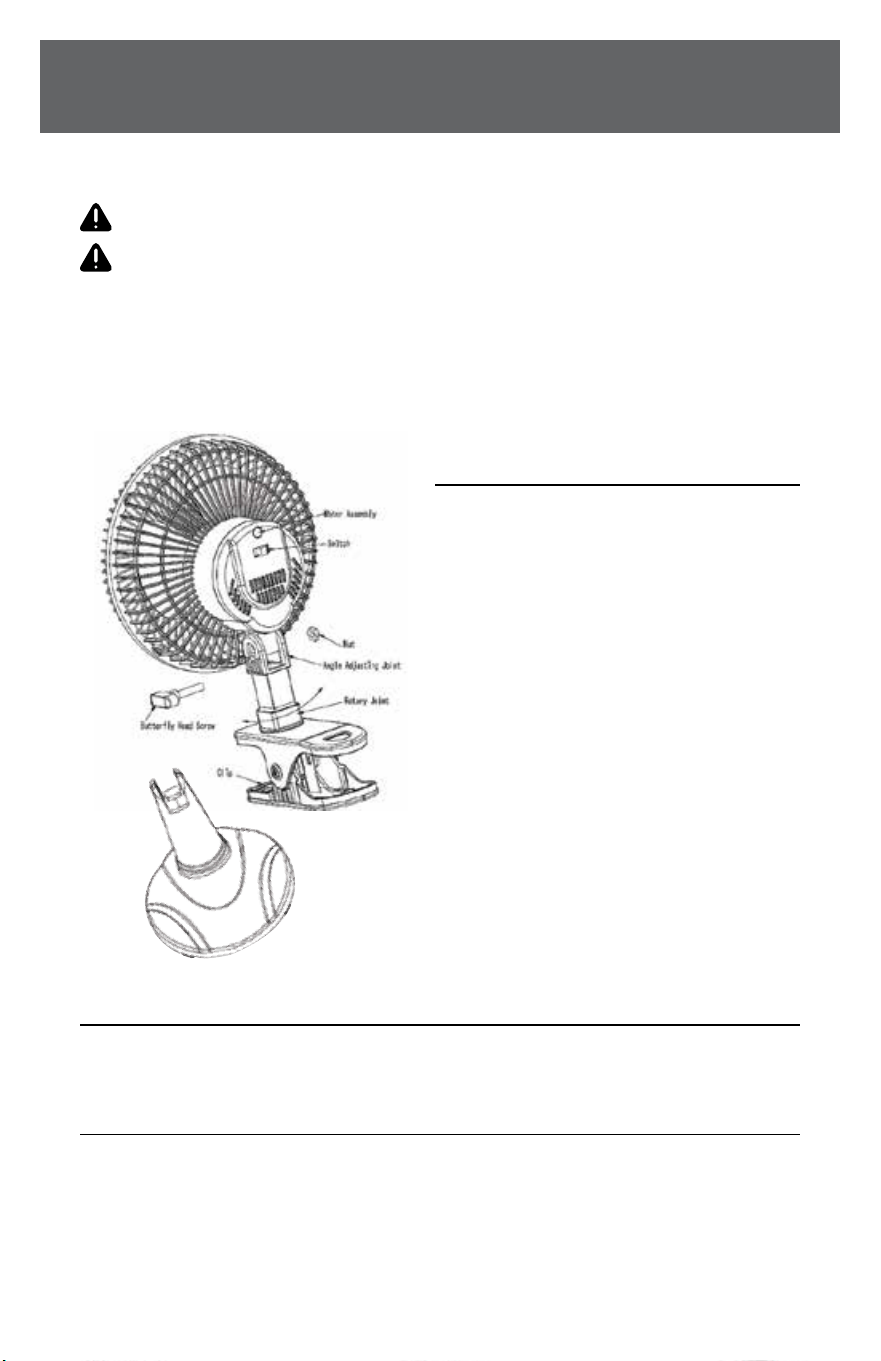
FAN ASSEMBLY
A. To convert the clip fan into a desk fan:
1. Disassemble the clip by loosening
the buttery head screw.
2. Attach plastic base to the fan head,
match locking tab to base, click into
position.
3. Tighten the buttery head screw
to secure.
B. To convert from the desk fan to a clip fan:
1. Detach buttery head screw
from base of the fan.
2. Remove base and attach clip to
the fan head.
3. Tighten the screw into the clip base
to secure the fan to the clip.
ASSEMBLY INSTRUCTIONS
Attach the motor assembly to the angle adjusting joint with the buttery head screw and nut.
OPERATING INSTRUCTIONS
1. Fan speed is controlled by the rotary switch: 1 (Low) - 0 (O) - 2 (High), the air ow can be
adjusted upward or downward by loosening the angle adjusting joint. Re-tighten knob securely.
2. The direction of air ow can be adjusted by turning the rotary joint.
3. Plug the power supply cord into a wall outlet.
CAUTION
Read Rules for Safe Operation and Instructions Carefully.
WARNING
• To reduce the risk of re or electric shock, do not use this fan with any solid-state control device.
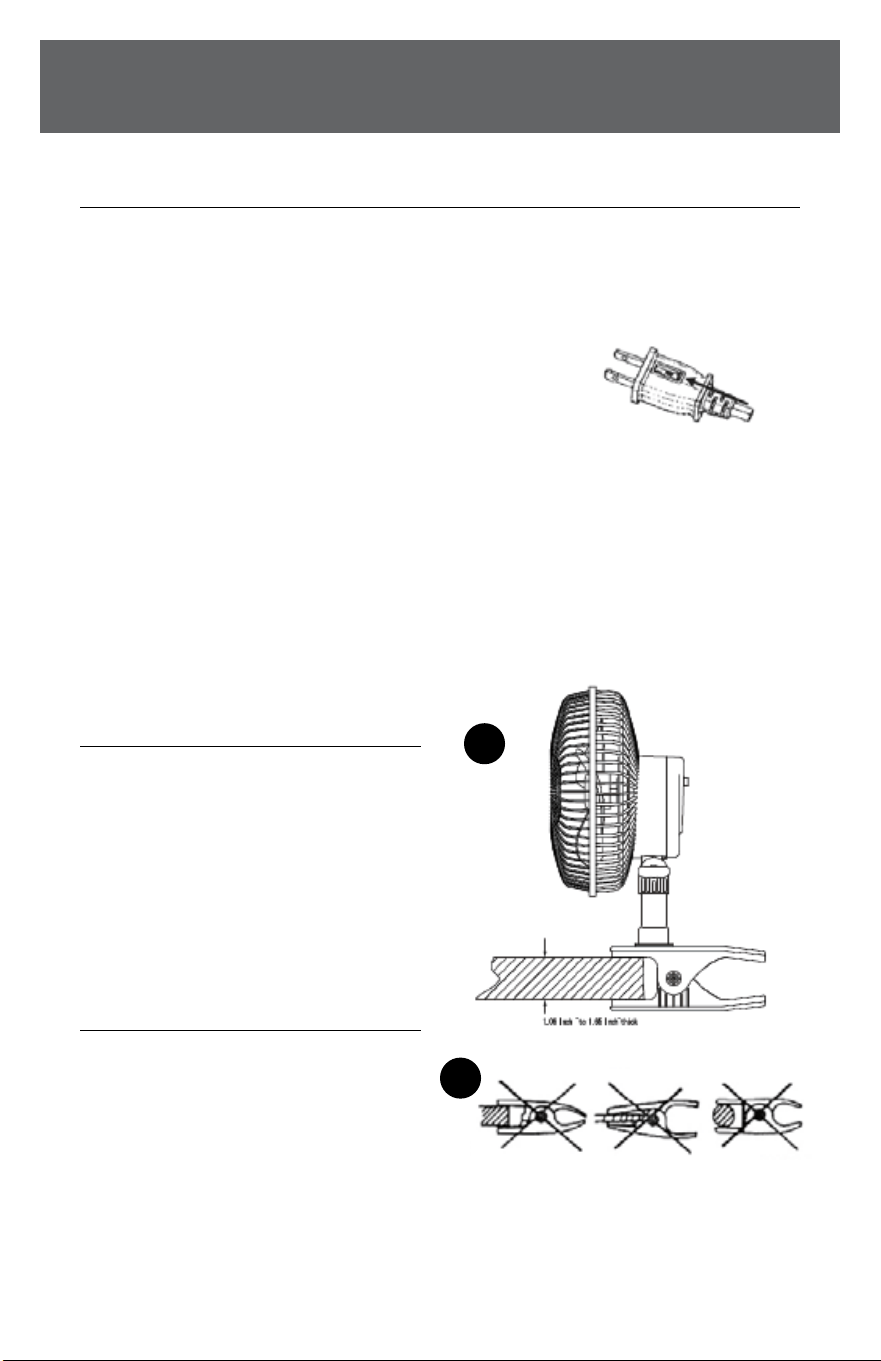
• This appliance has a polarized plug (one blade is wider than the other). To reduce the risk
of electric shock, this plug is intended to t in a polarized outlet only one way. If plug does
not t, contact a qualies electrician. Do not tamper with this safety feature.
• Do not leave the fan running unattended.
READ AND SAVE THESE INSTRUCTIONS
3
SERVICING / CLIPPING
USER SERVICING INSTRUCTIONS
1. Grasp plug and remove from the outlet. Do not unplug by pulling on the cord.
2. Open fuse cover. Slide the fuse cover located on top of the attachment plug towards blades.
3. Remove fuse carefully. Push the fuse from the other side or turn fuse holder over to
remove fuse.
4. Risk of Fire. Replace fuse only with 2.5 Amp, 125 Volt fuse.
5. Close fuse cover. Slide the fuse cover located on top of the
attachment plug away from the blades.
6. Risk of Fire. Do not replace attachment plug. Contains safety device (fuse)
that should not be removed. Discard product if the attachment plug is damaged.
Notice: When you replace the fuse, please don’t operate suddenly or overexert,
or else the product will be damaged or cause an accident.
If you feel it’s hard to replace the fuse, please make sure you have it inserted the right way.
2.
1.
CLIPPING INSTRUCTIONS
1. Place the clip onto a secure structure.
The clip can accommodate a 1.06”
to 1.65” thick structure.
2. Fig. 2 illustrates the wrong way to
clip to a structure and the wrong kind
of structures to clip. Clip as shown to
reduce the risk of damage.
CLEANING
• Be sure to unplug from the electrical
supply source before cleaning.
• Plastic parts should be cleaned with
mild soap and damp cloth or sponge.
• Be sure not to get water or other liquid
into the motor housing.

844-4PA-AIRE | 844-472-2473 | support@perfectaire.us
CANADA SUPPORT 877-997-2473 | supportcanada@perfectaire.us
www.perfectaire.us
Printed in China | 0822_M989
RULES FOR SAFE OPERATION
1. Never insert ngers or any other object through the guard when fan is running.
2. Unplug fan when it’s not in use, when moving it from one location to another,
or when removing guards for cleaning.
3. Be sure fan is clipped onto correct place as indicated in clipping instructions
on previous page.
4. Do not use fan in window, rain may create an electrical hazard.
5. Important information about the cord plug below:
• This product employs an overload protection fuse. A blown fuse indicates an overload
or short-circuit. If the fuse blows, unplug the product from the outlet. Replace the
fuse as per the User Servicing Instructions (follow product marking for proper fuse
rating) and check the products. If the replacement fuse blows, a short-circuit may be
present and the product should be discarded; you can also call a certies electrician
for examination and/or repair.
• Do not operate any fan with a damaged cord or plug. Discard fan or return to an
authorized service facility for examination and/or repair.
• Do not run cord under carpeting. Do not cover cord with throw rugs, runners,
or similar coverings. Do not route cord under furniture or appliances.
Arrange cord away from trac area where it will not be tripped over.
NOTE: Proof of purchase is required for all warranty claims.
NOTE: As a result of continual improvements, the design and specications of the
product within may dier slightly to the unit illustrated on the packaging.
SCAN CODE TO
LEAVE A REVIEW
THANK
YOU FOR
YOUR
PURCHASE!
As a small
business,
reviews are
everything!
5401 Dansher Road
Countryside, IL 60525