
Loading ...
Loading ...
Loading ...
26 49-2001186 Rev. 0
Porcelain Oven Interior
With proper care, the porcelain enamel finish on the
inside of the oven - top, bottom, sides, back and inside
of the door - will stay new-looking for years. Let the
oven cool before cleaning. We recommend that you
wear rubber gloves when cleaning the oven. Soap
and water will normally do the job. Heavy spattering
or spillovers may require cleaning with a mild abrasive
cleaner. Soap-filled scouring pads may also be used.
Do not allow food spills with a high sugar or acid content
(such as tomatoes, sauerkraut, fruit juices or pie filling)
to remain on the surface. They may cause a dull spot
even after cleaning. Household ammonia may make the
FOHDQLQJ MRE HDVLHU 3ODFH FXS LQ D VKDOORZ JODVV RU
pottery container in a cold oven overnight. The ammonia
IXPHV ZLOO KHOS ORRVHQ WKH EXUQHGRQ JUHDVH DQG IRRG ,I
necessary, you may use an oven cleaner that is certified
for use in a self-cleaning oven. Follow the package
directions.
• Do not spray oven cleaner on the electrical controls
and switches because it could cause a short circuit
and result in sparking or fire.
• Do not allow a film from the cleaner to build up on
the temperature sensor - it could cause the oven to
heat improperly. (The sensor is located at the top of
the oven.) Carefully wipe the sensor clean after each
oven cleaning, being careful not to move the sensor
as a change in its position could affect how the oven
bakes.
• Do not spray any oven cleaner on the oven door,
handles or any exterior surface of the oven, cabinets
or painted surfaces. The cleaner can damage these
surfaces.
Interior Surfaces
7KH GRRU LV YHU\ KHDY\ %H FDUHIXO ZKHQ UHPRYLQJ DQG OLIWLQJ WKH GRRU 'R QRW OLIW WKH GRRU E\ WKH KDQGOH
To Clean the Door Exterior and Interior
8VH VRDS DQG ZDWHU WR WKRURXJKO\ FOHDQ WKH WRS VLGHV
and front of the oven door. Rinse well. You may also use
a glass cleaner to clean the glass on the outside of the
door. Do not let water drip into the vent openings, holes,
or slots in the door.
,I D VWDLQ RQ WKH GRRU YHQW WULP LV SHUVLVWHQW XVH D
mild abrasive cleaner and a sponge-scrubber for best
results. Do not use this method on any other surface.
• Spillage of marinades, fruit juices, tomato sauces
and basting materials containing acids may cause
discoloration and should be wiped up as soon as
safely possible. When the surface is cool, clean and
rinse.
• Do not use oven cleaners, cleaning powders or harsh
abrasives on the outside of the door.
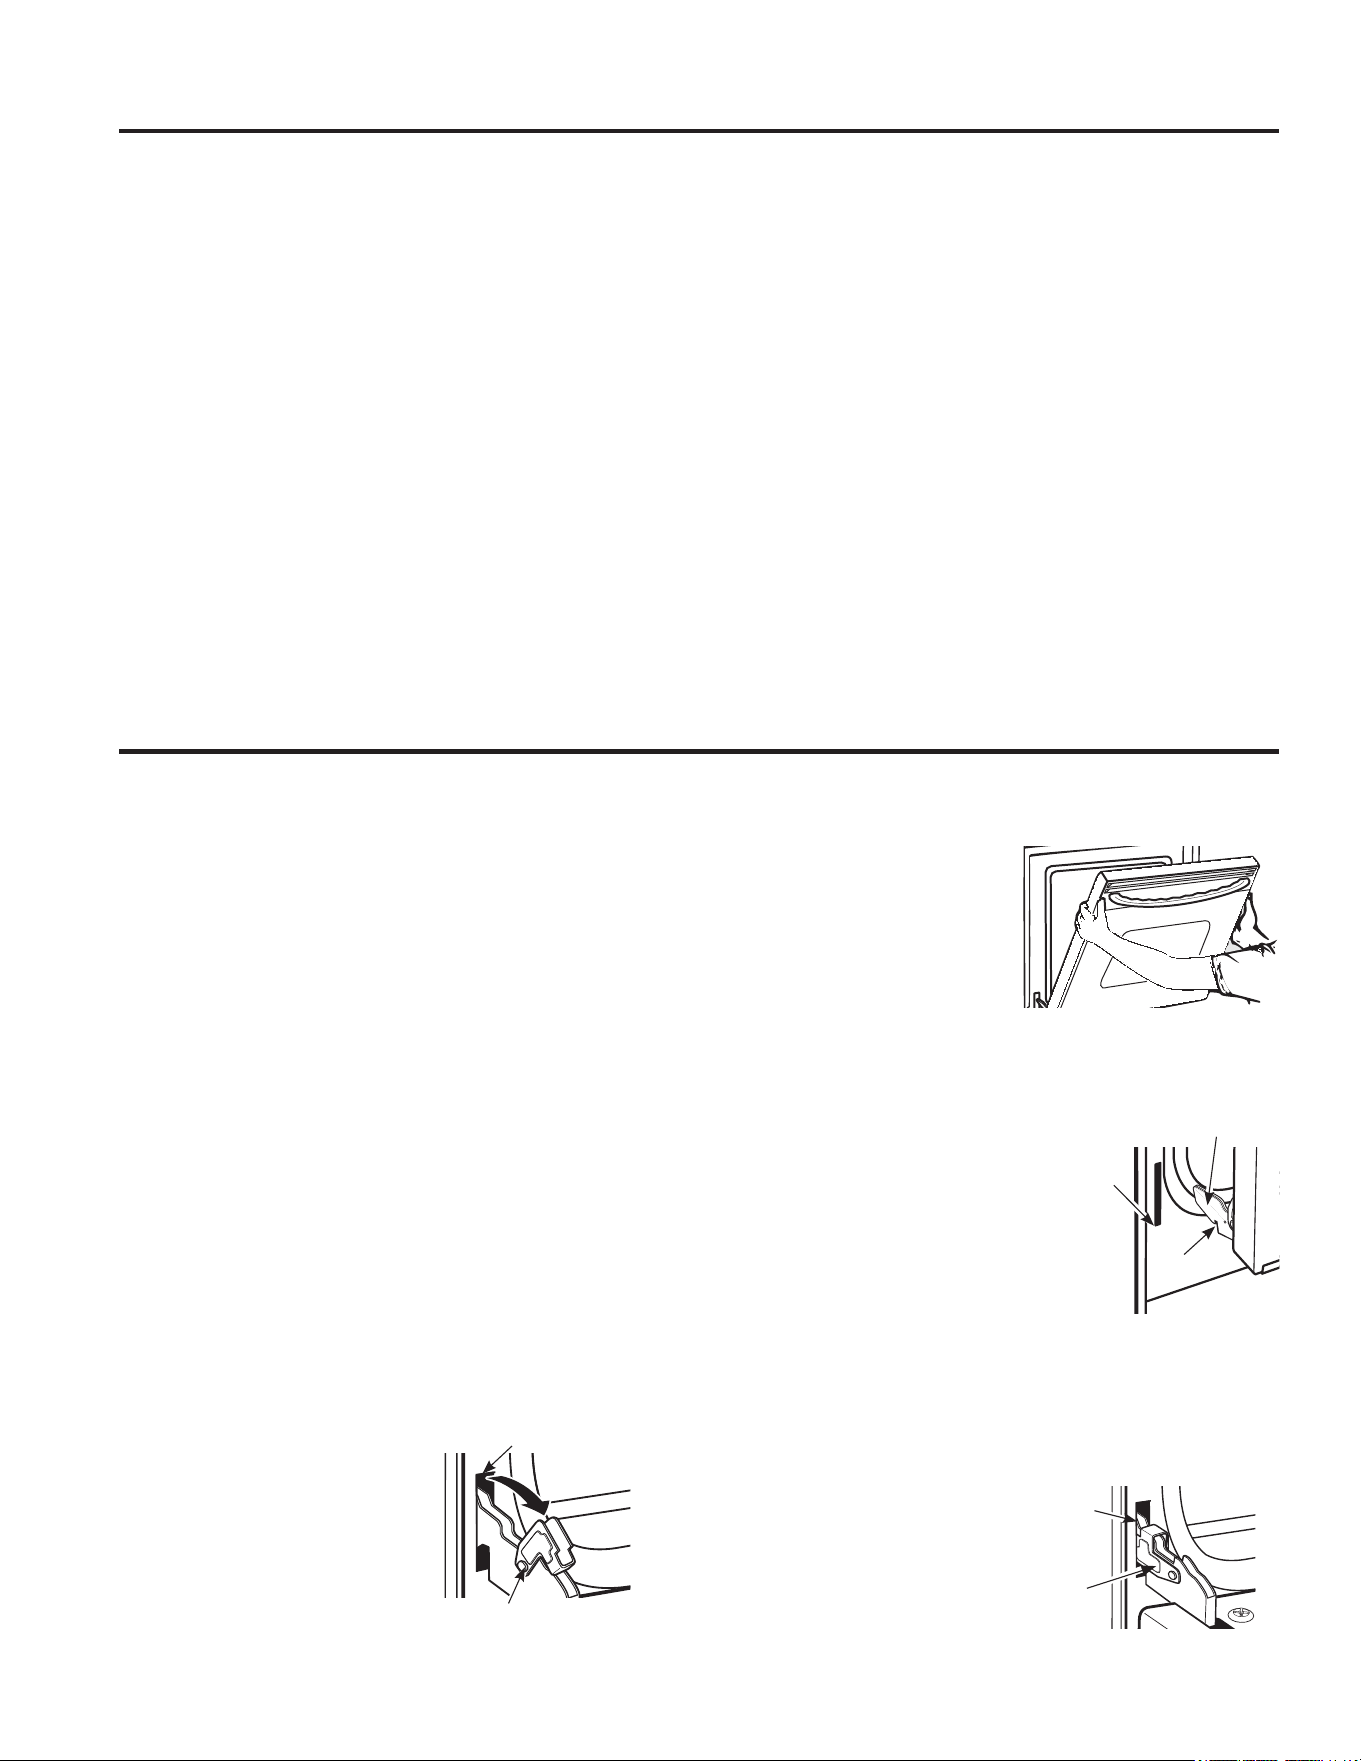
To remove the door:
NOTE: Door removal is not a requirement for installation
of the product but is an added convenience.
1. Fully open the door.
2. Pull the hinge locks down
toward the door frame, to
the unlocked position. A
tool, such as a small flat-
blade screwdriver, may be
required.
3. Firmly grasp both sides of
the door at the top.
4. Close door to the door removal position. The
door should be open
approximately 3" with no
obstruction above the door.
5. Lift door up and out until
both hinge arms are clear
of the slots in the range
frame.
To replace the door:
1. Firmly grasp both sides of the door at the top.
2. With the door at the same
angle as the removal position,
rest the notch in the bottom
of the left hinge arm on the
bottom edge of the left hinge
slot. The notch in the hinge
arm must be fully seated onto
the bottom of the slot. Repeat
for the right side.
)XOO\ RSHQ WKH GRRU ,I WKH GRRU ZLOO QRW IXOO\ RSHQ
the notches in the bottoms of the hinge arms are not
seated correctly onto the bottom edge of the slot. Lift
the door off the range and repeat the previous step.
4. Push the hinge locks down to
the locked position.
5. Close the oven door.
Removal position
Oven Door
CARE AND CLEANING: ,QWHULRU 6XUIDFHV 2YHQ 'RRU
Hinge lock
Slot
Pull hinge locks down to unlock
Push hinge locks
down to lock
Hinge
lock
Hinge
arm
Notch
%RWWRP
edge of
slot
Hinge arm
Loading ...
Loading ...
Loading ...