Loading ...
Loading ...
Loading ...
8
ASSEMBLY
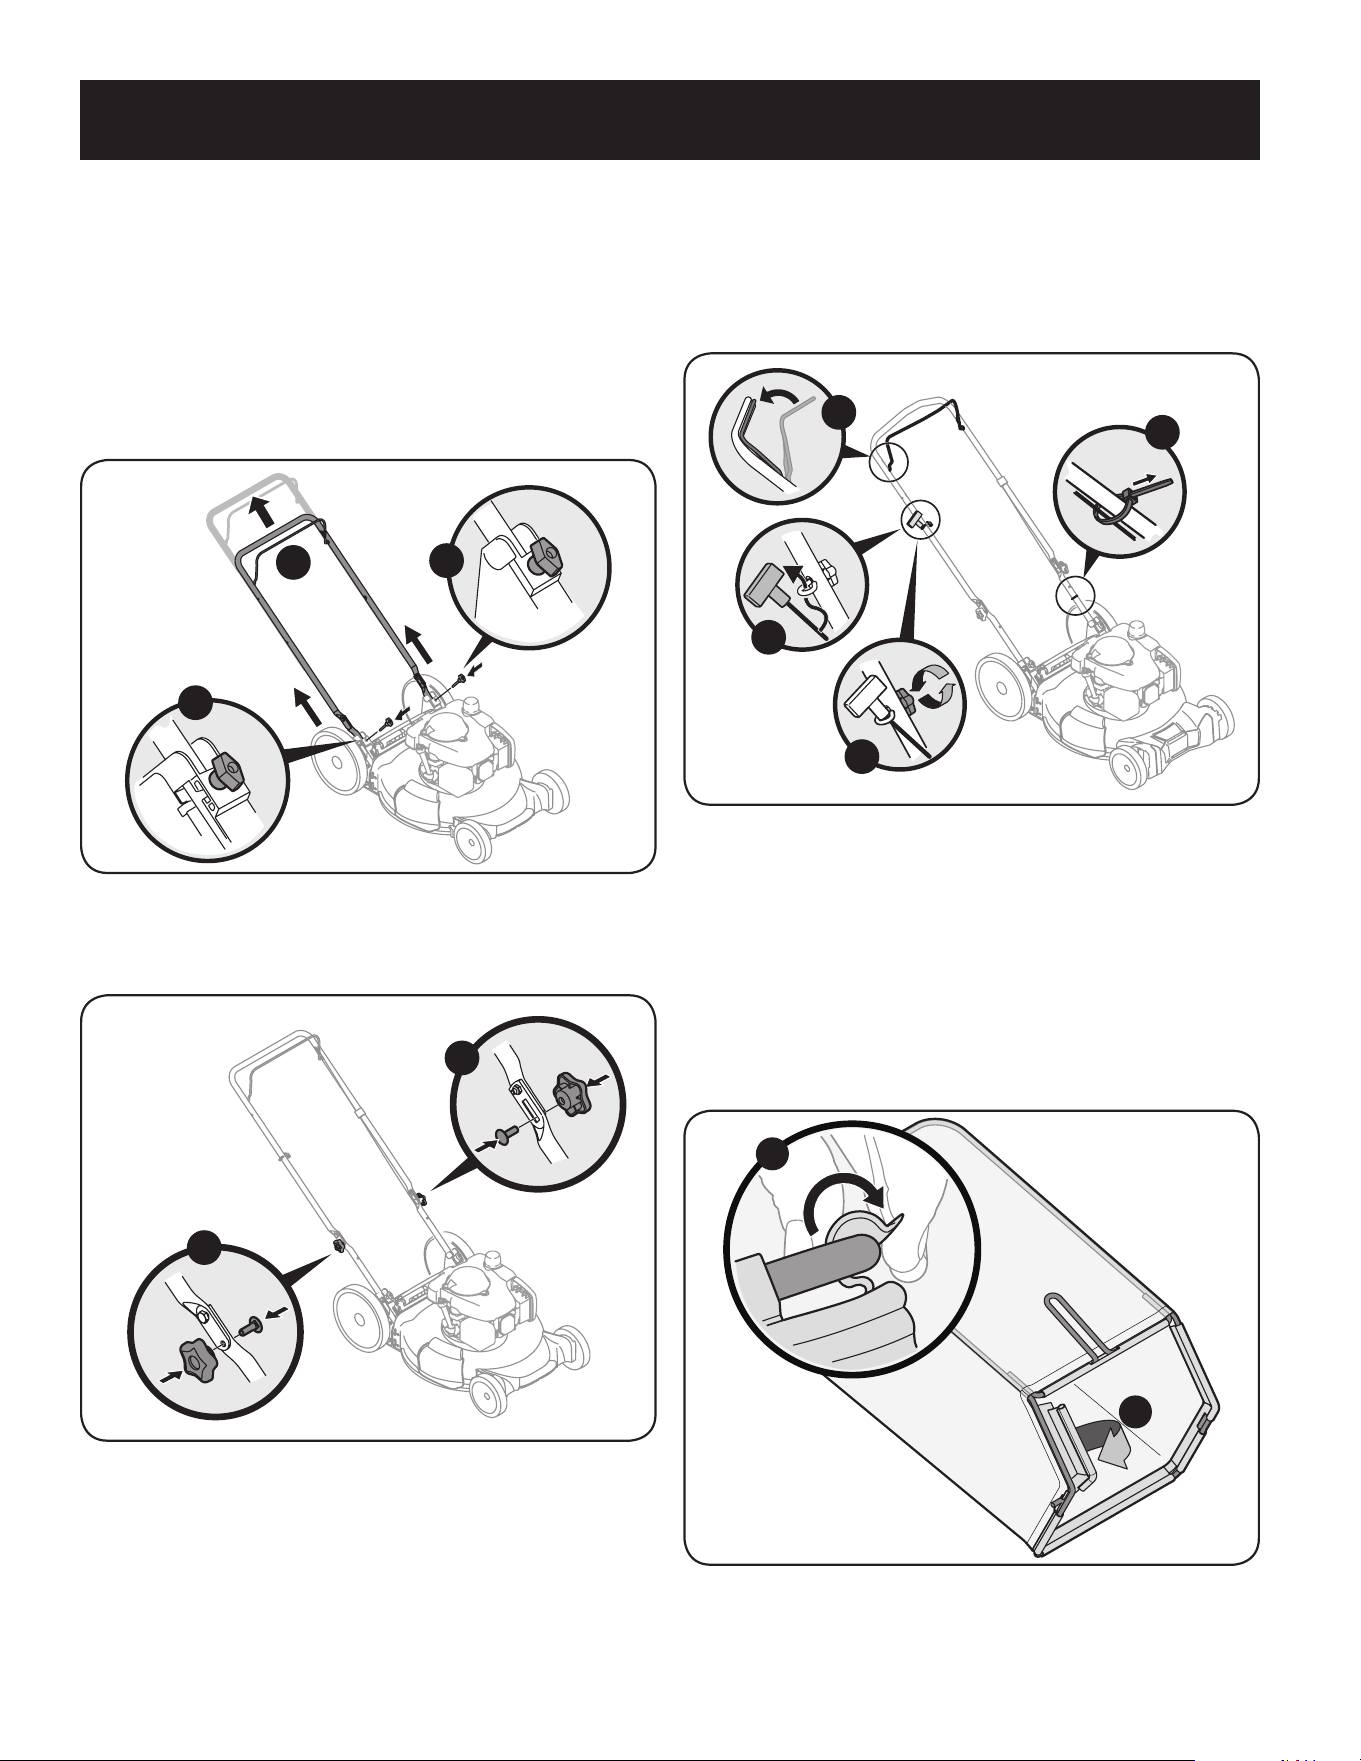
3. Follow the steps below to complete handle assembly:
a. Pull upward on the handle until holes in lower handle (shown in
Figure 3 deck cutaway) line up with holes in handle bracket.
See Figure 4.
NOTE: When pulling upward on handle, make sure to not pull handle all the
way out.
b. Insert the T-bolts removed in Step 2 through the handle brackets
and lower handle and tighten securely to secure the handle in place.
See Figure 4.
a
b
b
Figure 4
c. Reattach wing nuts and carriage bolts removed in Step 1 into lower
holes of handle as shown in Figure 5.
c
c
Figure 5
4. The rope guide is attached to the right side of the upper handle. Loosen the
wing knob which secures the rope guide. Refer to Figure 6.
a. Hold blade control against upper handle.
b. Slowly pull starter rope handle from engine and slip starter rope into
the rope guide. See Figure 6.
c. Tighten rope guide wing knob.
d. Use cable ties to secure blade control cable to lower handle.
a
b
c
d
Figure 6
Attaching the Grass Catcher
1. Follow steps below to assemble the grass catcher. Make certain bag is turned
right side out before assembling (warning label will be on the outside).
a. Place bag over frame so that its black plastic side is at the bottom.
b. Slip plastic channel of grass bag over hooks on the frame. See Figure 7.
2. Follow steps below to attach grass catcher:
a. Lift rear discharge door.
b
a
Figure 7
Loading ...
Loading ...
Loading ...