
Loading ...
Loading ...
Loading ...
Exhaust Hood Installation
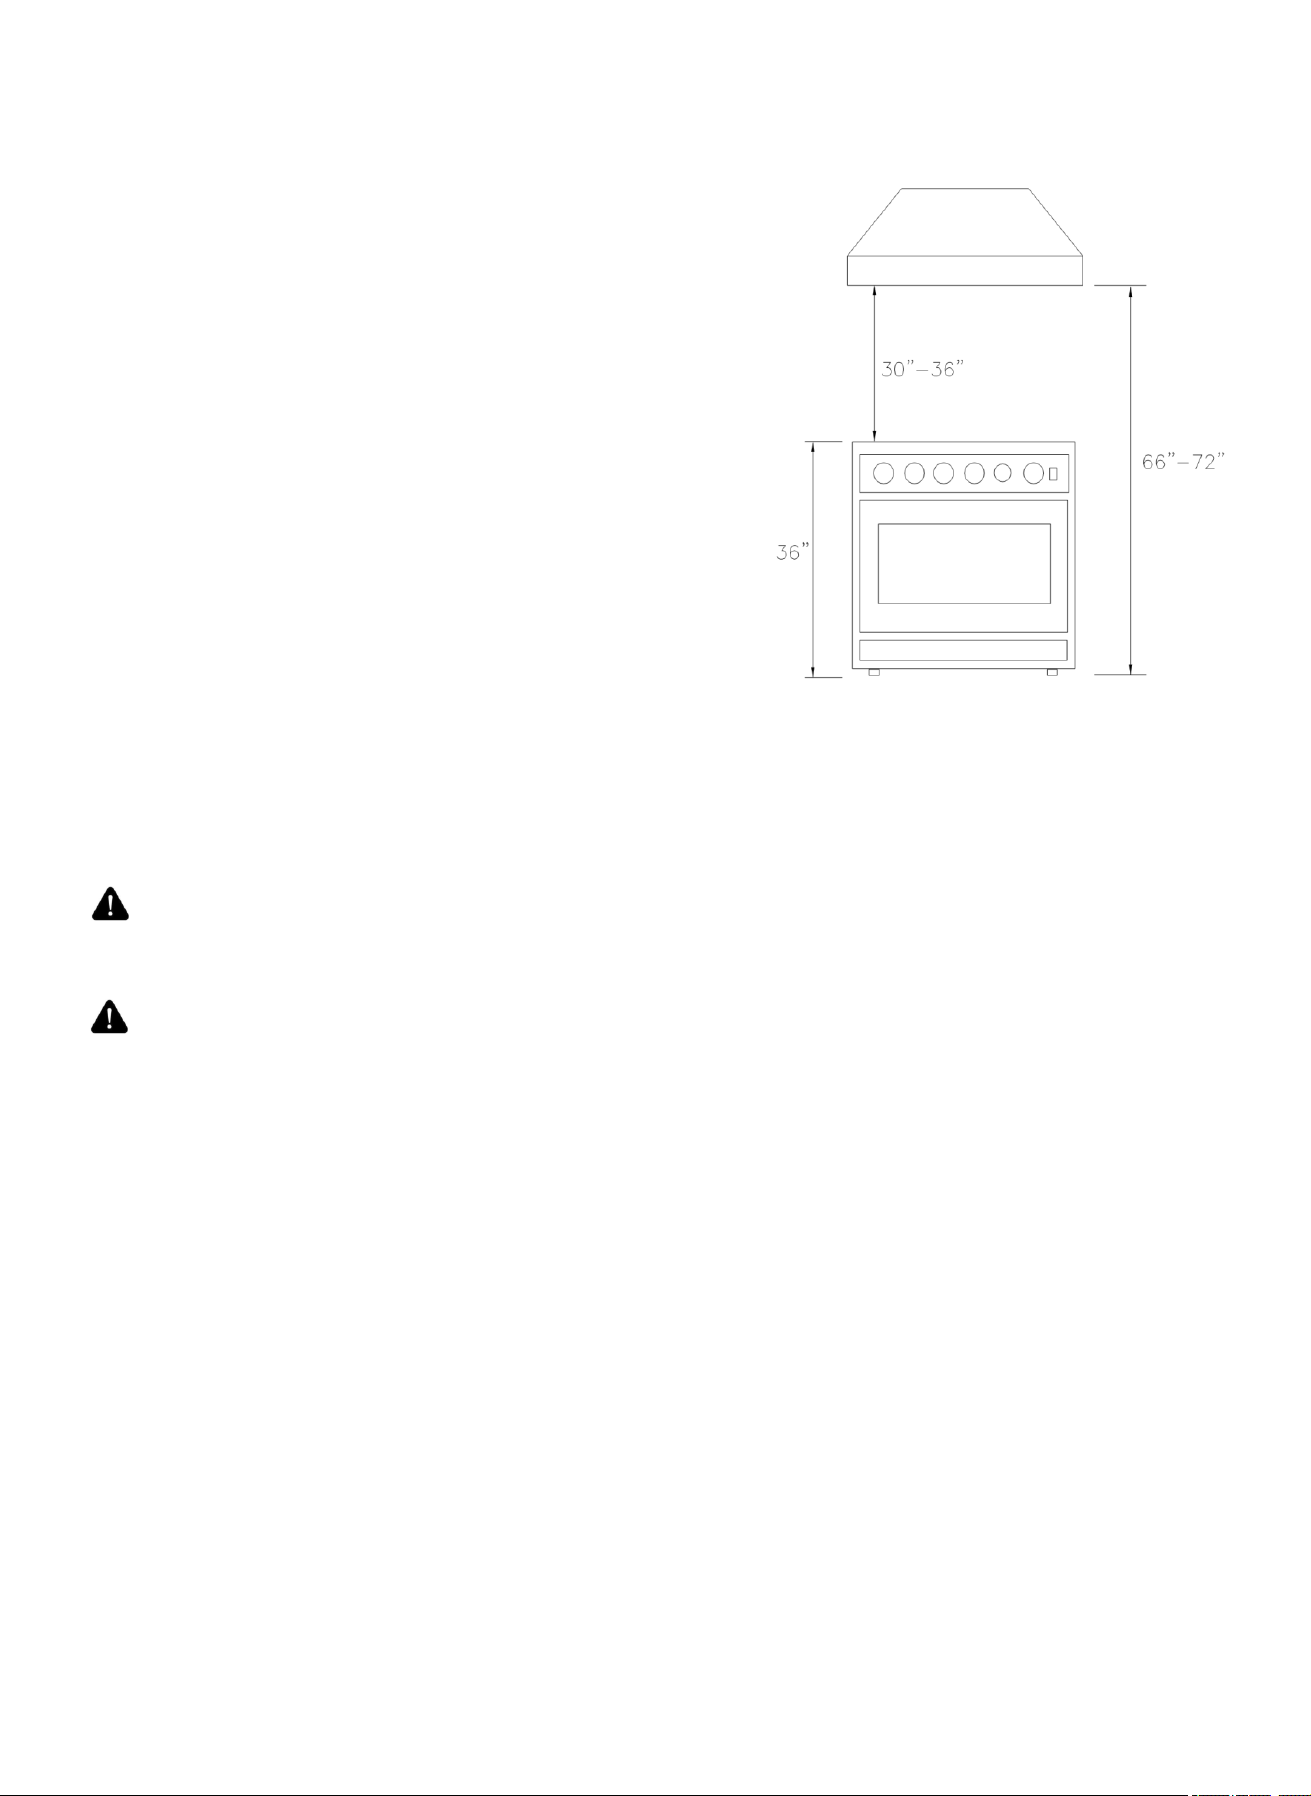
The bottom of the hood should be 30" min. to 36" above the
countertop. This would typically result in the bottom of the hood
being 66" to 72" above the floor. These dimensions provide
safe and efficient operation of the hood.
After Installation:
1. Check ignition of cooktop burners.
2. Check the air shutter adjustment – sharp blue flame, with no
yellow tipping or lifting flames.
3. Check ignition of oven burner.
4. Visually check tubular burner (oven burner) re-ignition to be
sure both rows of burner ports are relighting each time.
5. Check for gas leaks at all gas connections (using a gas
detector, never a flame).
6. Check oven bake and convection bake function.
Gas Conversion Operation
This cooking range can be used with LP gas and NG gas. It is shipped from the factory adjusted for use with
NG(Nature Gas). Injector for LP gas are included. Follow the instruction shown below for gas conversion.
WARNING Gas conversion shall be conducted by a factory- trained professional. Call
the customer service hotline to identify a factory-trained professional near your home.
WARNING Be
fore carrying out this operation, disconnect the range from gas and electricity.
Fail to do so, may result in fire, or electrical shock hazard can occur and result in injury or death. Do not
remove regulator or allow it to turn during servicing.
The gas conversion procedure for this range includes 5 steps:
1. Pressure regulator 4. Reconnect Gas and Electrical Supply
2. Cooktop burners 5. Installation of new rating label
3. Gas valve
The conversion is not completed if all 5 steps have not been concluded properly.
Before performing the gas conversion, locate the package containing the replacement nozzles shipped with
every range.
STEP 1: Pressure Regulator
To access the gas regulator, pull the range away from the cabinet wall. The gas regulator is located at the
bottom back left corner of the range.
a. Unscrew the cap from the regulator.
b.
Unscrew the brass insert from the cap. Do not remove the spring from the brass insert. Rotate the brass insert
with the fully extended spring 180° and screw back the brass insert on the cap. Insert the cap with the spring
first into the regulator. Make sure the cap is fully tighten on the regulator, if not done correctly a gas leak can
occur.
21
Loading ...
Loading ...
Loading ...