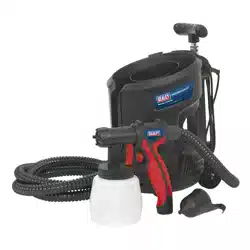
HVLP SPRAY GUN KIT 700W/230V
MODEL NO: HVLP3000
Thank you for purchasing a Sealey product. Manufactured to a high standard, this product will, if used according to these
instructions, and properly maintained, give you years of trouble free performance.
IMPORTANT: PLEASE READ THESE INSTRUCTIONS CAREFULLY. NOTE THE SAFE OPERATIONAL REQUIREMENTS, WARNINGS & CAUTIONS. USE
THE PRODUCT CORRECTLY AND WITH CARE FOR THE PURPOSE FOR WHICH IT IS INTENDED. FAILURE TO DO SO MAY CAUSE DAMAGE AND/OR
PERSONAL INJURY AND WILL INVALIDATE THE WARRANTY. KEEP THESE INSTRUCTIONS SAFE FOR FUTURE USE.
1. SAFETY
1.1. ELECTRICAL SAFETY
WARNING! It is the user’s responsibility to check the following:
Check all electrical equipment and appliances to ensure that they are safe before using. Inspect power supply leads, plugs and
all electrical connections for wear and damage. Sealey recommend that an RCD (Residual Current Device) is used with all electrical
products. You may obtain an RCD by contacting your local Sealey stockist.
If the lamp is used in the course of business duties, it must be maintained in a safe condition and routinely PAT (Portable Appliance
Test) tested.
Electrical safety information, it is important that the following information is read and understood.
Ensure that the insulation on all cables and on the appliance is safe before connecting it to the power supply.
Regularly inspect power supply cables and plugs for wear or damage and check all connections to ensure that they are secure.
Important: Ensure that the voltage rating on the appliance suits the power supply to be used and that the plug is tted with the
correct fuse - see fuse rating in these instructions.
8 DO NOT pull or carry the appliance by the power cable.
8 DO NOT pull the plug from the socket by the cable. Remove the plug from the socket by maintaining a rm grip on the plug.
8 DO NOT use worn or damaged cables, plugs or connectors. Ensure that any faulty item is repaired or replaced immediately by a
qualied electrician.
This product is tted with a BS1363/A 13 Amp 3 pin plug.
If the cable or plug is damaged during use, switch the electricity supply and remove from use.
Replace a damaged plug with a BS1363/A 13 Amp 3 pin plug. If in doubt contact a qualied electrician.
Class II products are wired with live (brown) and neutral (blue) only are marked with the
Class II symbol;
A) Connect the BROWN live wire to the live terminal ‘L’.
B) Connect the BLUE neutral wire to the neutral terminal ‘N’.
C) After wiring, check that there are no bare wires and ensure that all wires have been correctly
connected.
Ensure that the cable outer sheath extends inside the cable restraint and that the restraint is tight.
8 DO NOT connect either wire to the earth terminal.
Sealey recommend that repairs are carried out by a qualied electrician.
1.2. GENERAL SAFETY.
9 Familiarise yourself with the application, limitations and potential hazards peculiar to the spray gun.
WARNING! Disconnect the spray gun from the air hose before changing accessories, servicing or performing any maintenance.
9 Maintain the spray gun in good condition (use an authorised service agent).
9 Replace or repair damaged parts. Use recommended parts only. Unauthorised parts may be dangerous and will invalidate the
warranty.
9 Keep the spray gun clean for best and safest performance.
9 Wear approved safety respiratory protection and safety goggles.
9 Remove ill tting clothing. Remove ties, watches, rings, and other loose jewellery, and tie back long hair.
9 Locate the spray gun in the desired working area, keep area clean and tidy and free from unrelated materials and ensure that there
is adequate ventilation and lighting.
9 Keep children and unauthorised persons away from the working area.
9 Avoid unintentional operation.
8 DO NOT point spray gun at yourself, other persons or animals.
8 DO NOT carry the spray gun by the hose, or yank the hose.
8 DO NOT use the spray gun for any purpose other than for which it is designed.
8 DO NOT allow untrained persons to operate the spray gun.
8 DO NOT operate the spray gun if any parts are missing or damaged as this may cause failure and/or possible personal injury.
8 DO NOT direct air from the air hose at yourself, other persons or animals..
8 When not in use switch the unit off and disconnect from the mains power supply.
Wear
respiratory
protection
Refer to
Instruction
Manual
Recommended fuse rating
13 Amp
HVLP3000 Issue 3 (H,F) 03/08/20
Original Language Version
© Jack Sealey Limited
Wear
ear
protection
Wear
eye
protection
Wear
protective
gloves
Warning!
8 DO NOT use the machine in the presence of ammable liquids or gases, or on premises where explosive substances are stored.
8 DO NOT open the main unit or loosen or remove any of its retaining screws.
8 DO NOT mix or thin paint in an area where there may be functioning appliances producing a naked ame or electrical sparking.
This includes equipment that is electric motor powered.
8 DO NOT switch on the spray gun when paint is being mixed or thinned.
8 Ensure that any vapours have dispersed before switching on the spray gun.
8 Tightly recap all containers immediately after thinning or mixing paint, and store away from the spraying area.
8 DO NOT spray near any sources of ignition such as an open re, cigarettes, cigars or pipes, sparks, glowing wires or hot surfaces
or naked lighting.
8 Ensure that the air hose is rmly connected to the unit and the gun to avoid the possibility of any spilt material being drawn into the
unit.
9 When not in use, thoroughly clean the spray gun and then store it in a safe, dry, childproof location.
NOTE: This appliance can be used by children aged from 8 years and above and persons with reduced physical, sensory or mental
capabilities or lack of experience and knowledge if they have been given supervision or instruction concerning use of the
appliance in a safe way and understand the hazards involved. Children shall not play with the appliance. Cleaning and user
maintenance shall not be made by children without supervision.
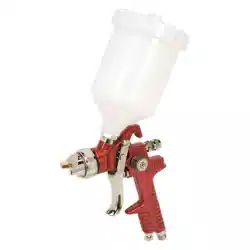
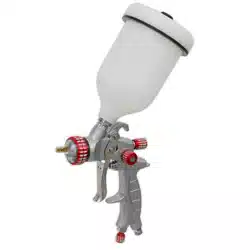
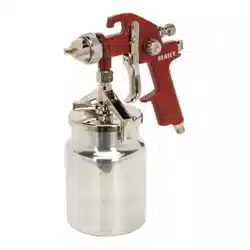
2. INTRODUCTION
700W Electric motor provides continuous high volume of air for even paint coverage. Extendible handle and hose storage provides easy
manoeuvrability. Suitable for interior and exterior use, applying water and oil based paints, lacquers, preservatives and stains.
3. SPECIFICATION
Model: ..................................................................HVLP3000
Hose length ....................................................................... 3m
Max. air pressure ....................................................... 4.35psi
Pot capacity ................................................................. 800ml
Power ............................................................................ 700W
Standard set-up .......................................................... 2.5mm
Voltage ...........................................................................230V
4. PAINT PREPARATION
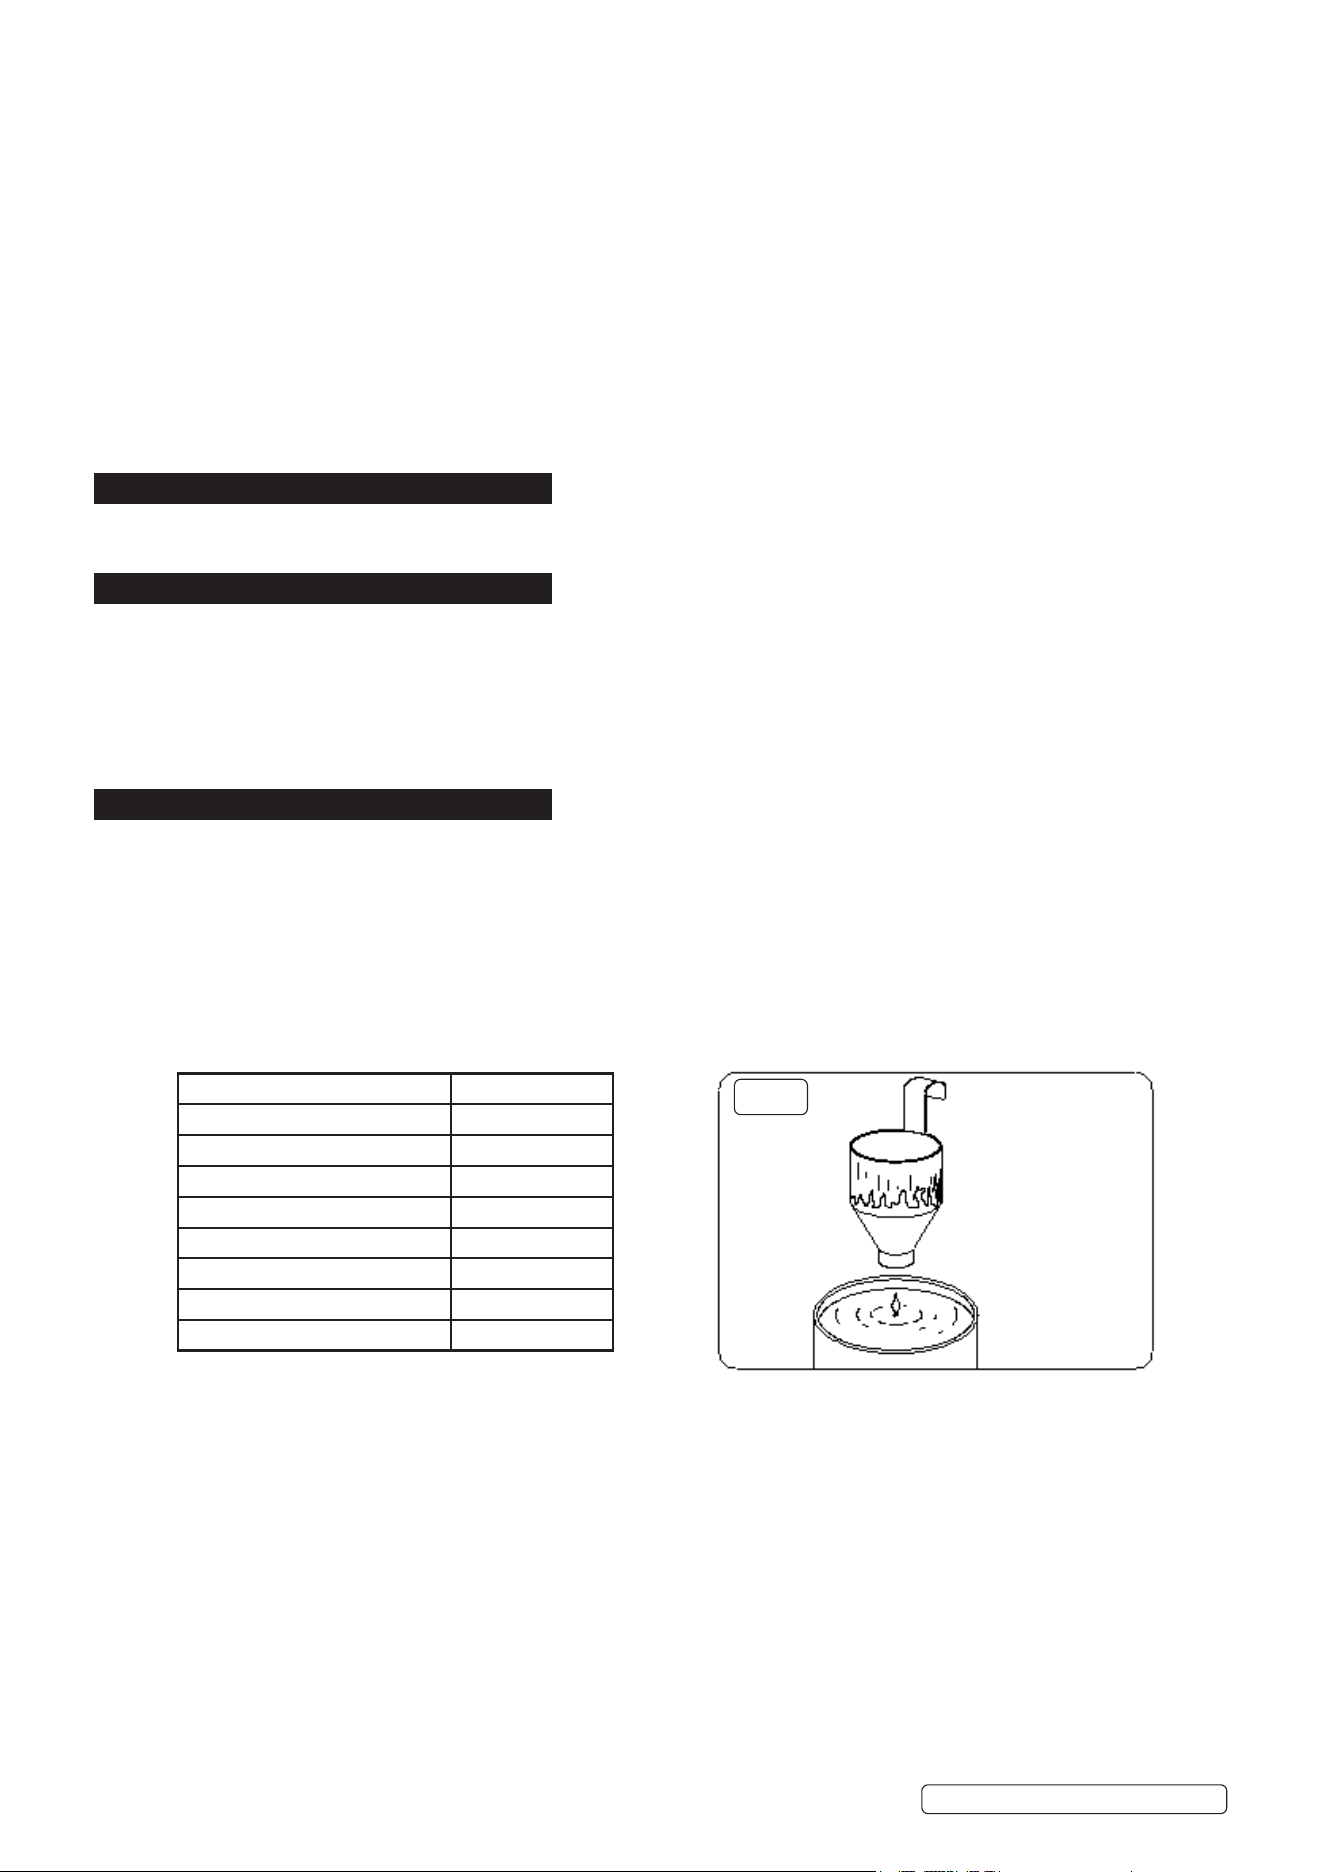
4.1. CHECKING PAINT VISCOSITY Refer to g.1
4.1.1. As most paints are made for brush or roller, it will normally be necessary to thin the paint to achieve proper atomisation and good
coverage.
4.1.2. Use the viscosity cup provided to check the viscosity of the material prior to thinning.
4.1.3. Stir the paint thoroughly.
4.1.4. Dip the cup (capacity 10cm³) completely into the coating material, below its rim level and allow it to ll.
4.1.5. Lift the viscosity measuring cup and measure the time in seconds elapsed until the cup is empty. This run out time is called
DIN seconds (DIN-s).
4.1.6. Use the viscosity table below to dilute the material to be sprayed. Refer to the coating manufacturer’s information for details and
suitability for spraying.
4.2. PAINT CONDITION
4.2.1. Any debris in the paint will clog the spray gun, which will then require a complete strip down and clean, before the spray gun will
function again properly. This is particularly important when using paint that has previously been opened.
The paint should be thoroughly mixed and free from any lumps. If necessary, strain the paint through a 60 mesh paint strainer,
to ensure a smooth nish. The paint should be strained into a clean container and if any paint is left over, it should be stored in
a clean container.
Coating Material Viscosity DIN-s
Solvent containing gloss paints 15-50
Primers 25-50
Mordants Undiluted
2 pack paints 20-50
Clear varnishes 15-40
Water soluble gloss paints 20-40
Motor vehicle enamels 20-40
Wood preservatives Undiluted
g.1
Original Language Version
© Jack Sealey Limited
HVLP3000 Issue 3 (H,F) 03/08/20
5. ASSEMBLY
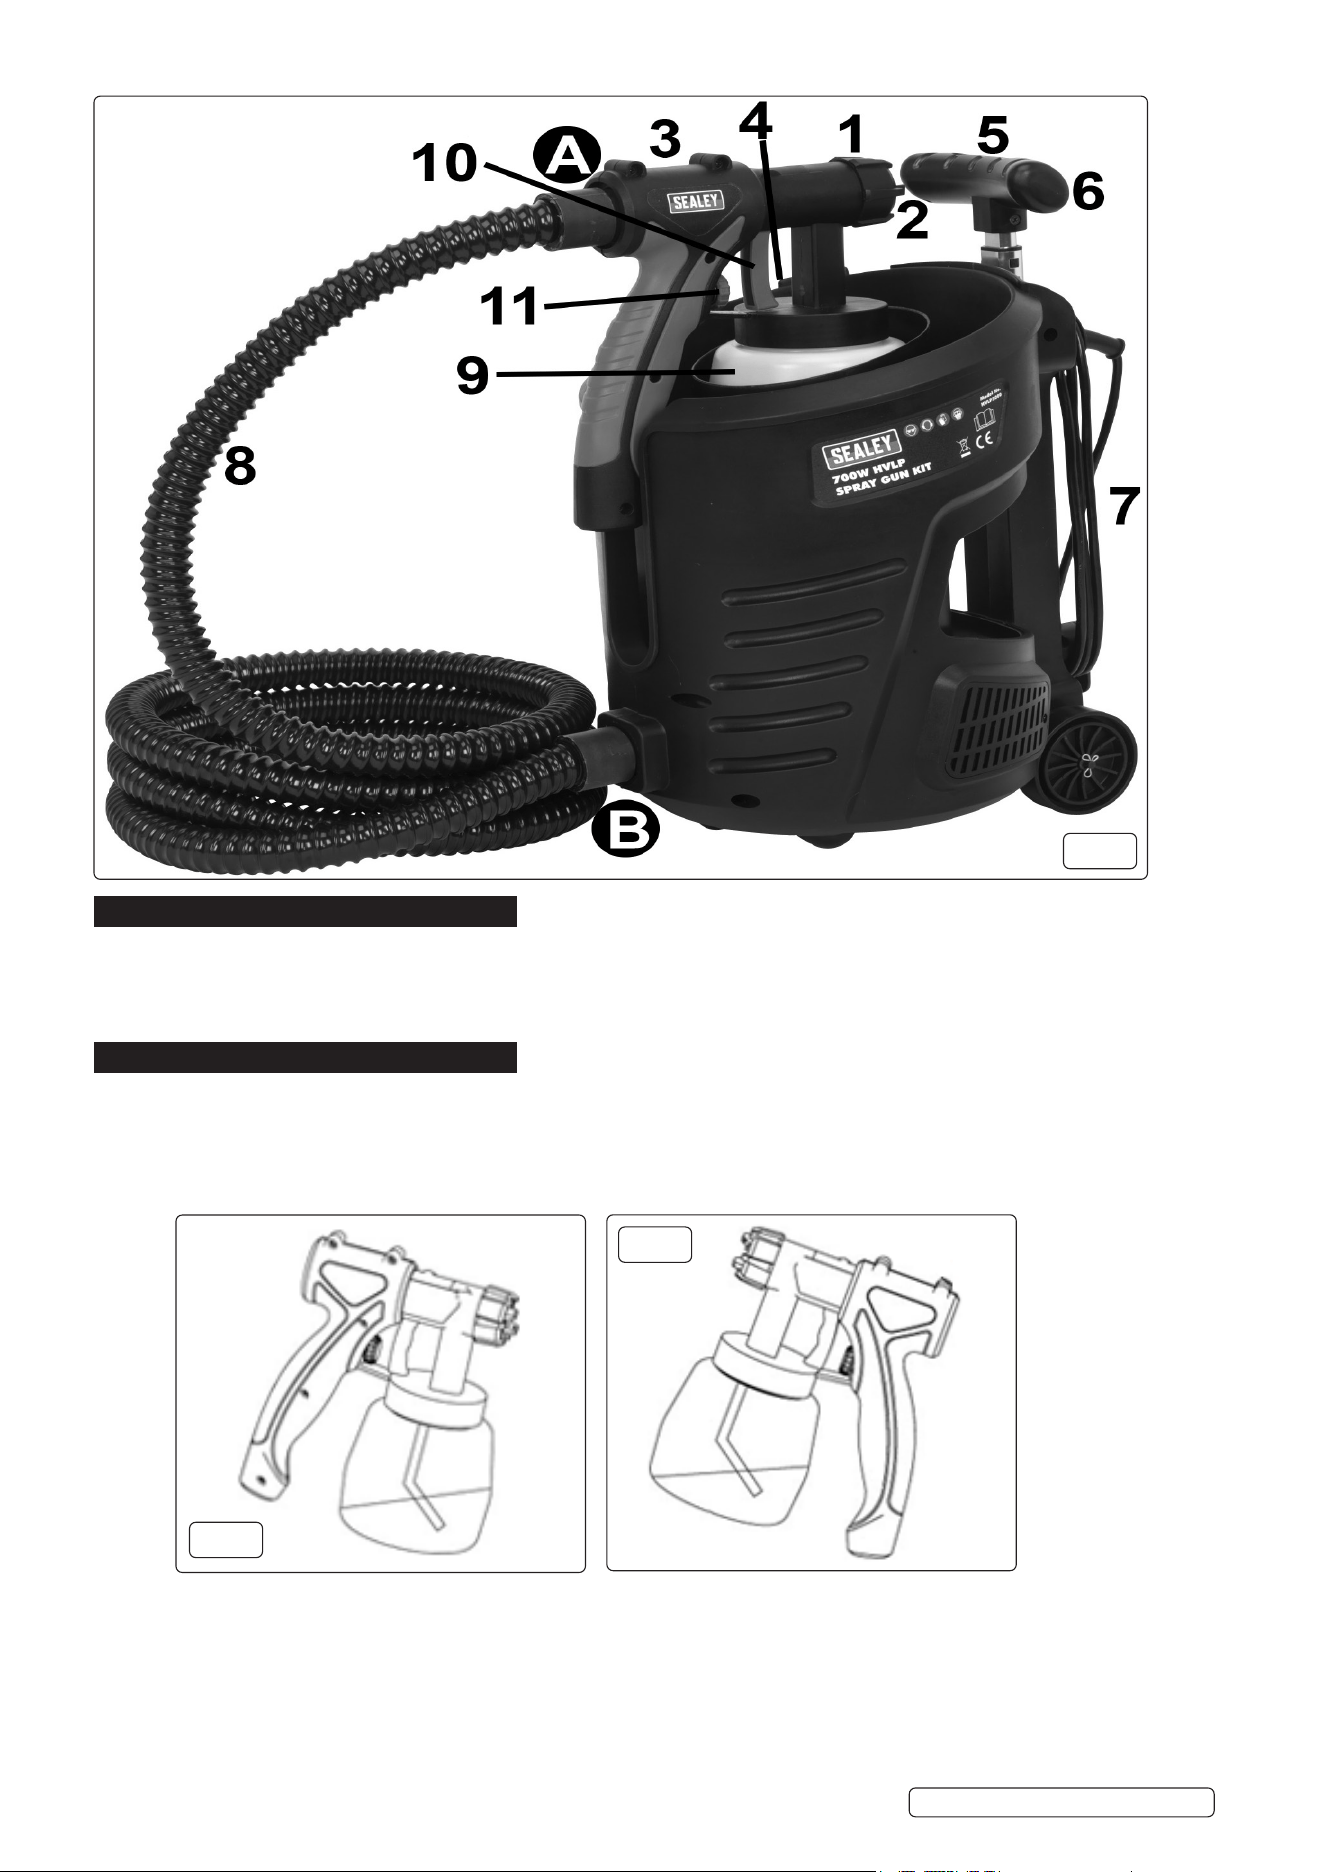
5.1. FIT AIR HOSE Refer to g.2 A and B
5.1.1. Both ends of the air hose are the same and tted with a bayonet connector.
5.1.2. Insert the bayonet into the air outlet and turn anticlockwise to lock.
5.1.3. Insert the other end into the back of the spray gun and turn anticlockwise to lock.
6. OPERATION
6.1. ADJUST PICK UP PIPE
6.1.1. It should be possible to spray until there is very little material left in the spray gun container.
6.1.2. Unscrew container from the spray gun.
6.1.3. For spraying horizontal objects adjust the pick up pipe as it is shown in g.3. (Turn the pipe forwards).
6.1.4. For overhead objects see g.4. (Turn the pipe backwards).
6.2. Fill the container with coating material and screw it back onto the gun.
6.3. Put the spray gun in the holder.
6.4. Position the spray gun assembly onto an even and clean surface, as it could pick up dust and dirt.
6.5. Connect to the mains.
6.6. Take the spray gun out of the holder and direct towards object being sprayed. Turn on using the ON/OFF switch.
g.4
g.3
Original Language Version
© Jack Sealey Limited
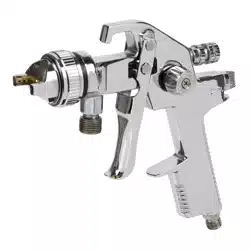
1. Air cap
2. Nozzle
3. Spray gun
4. On/off switch
5. Handle lock
6. Handle
7. Mains cable
8. Air hose
9. Container
10. Trigger
11. Material
adjustment
control
g.2
HVLP3000 Issue 3 (H,F) 03/08/20
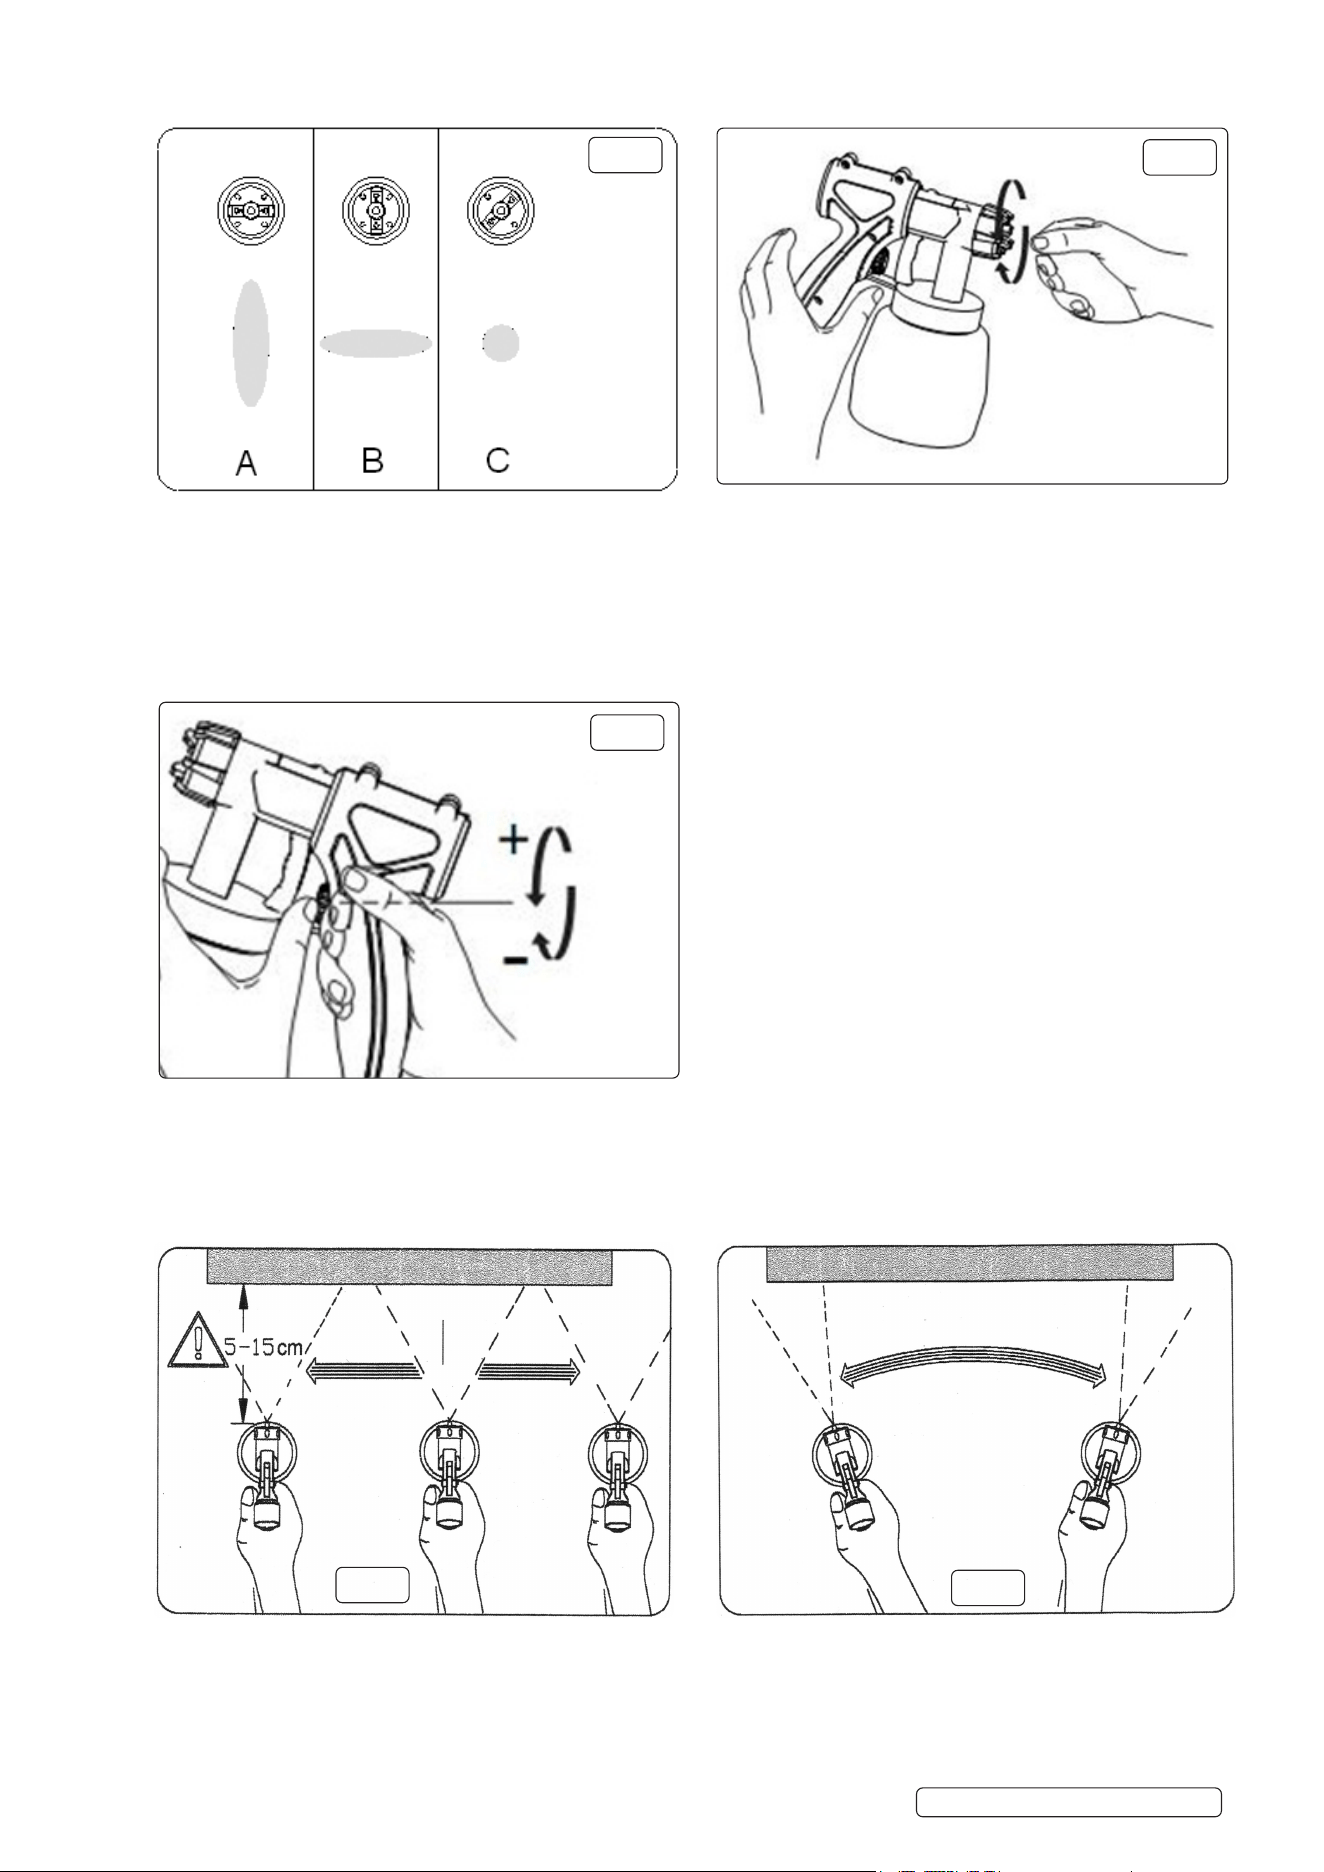
6.7. ADJUSTING THE SPRAY PATTERN See gs.5 and 6
6.7.1. Choice of spraying effects is:
A = vertical at jet for horizontal surfaces
B = horizontal jet for vertical surfaces
C = round jet for corners, edges and other inaccessible places.
▲ IMPORTANT Never pull the trigger when making adjustments to the air cap.
6.8. ADJUSTING THE AMOUNT OF MATERIAL See g.7
6.8.1. Turn the adjustment knob anticlockwise to the (+) for more material, turn clockwise to the (-) for less material.
6.9. SPRAYING TECHNIQUE
6.9.1. Successful spraying results depend on how smooth and clean the surface is before spraying is begun. The surface should be carefully
prepared and kept free of dust.
6.9.2. Surfaces that are not to be sprayed should be carefully masked off.
6.9.3. It is good practice to perform a trial spraying on a piece of wood or cardboard etc. to nd the most suitable spray gun adjustments.
g.7
g.8
g.9
Original Language Version
© Jack Sealey Limited
g.6
g.5
HVLP3000 Issue 3 (H,F) 03/08/20
▲ IMPORTANT! Begin spraying outside of the surface to be sprayed and avoid stopping on the surface.
6.9.4. Correct Spraying Technique See g.8
6.9.4.1. Always hold the spray gun at an even distance from the object to be sprayed approximately 5-15cm.
6.9.4.2. Move the spray gun evenly across or up and and down, depending on the adjusted spraying effect, see section 6.7.1.
6.9.4.3. Incorrect Spraying Technique See g.9
6.9.4.4. An uneven movement of the spray gun, for example in an arc, will lead to excessive paint mist and an uneven paint nish.
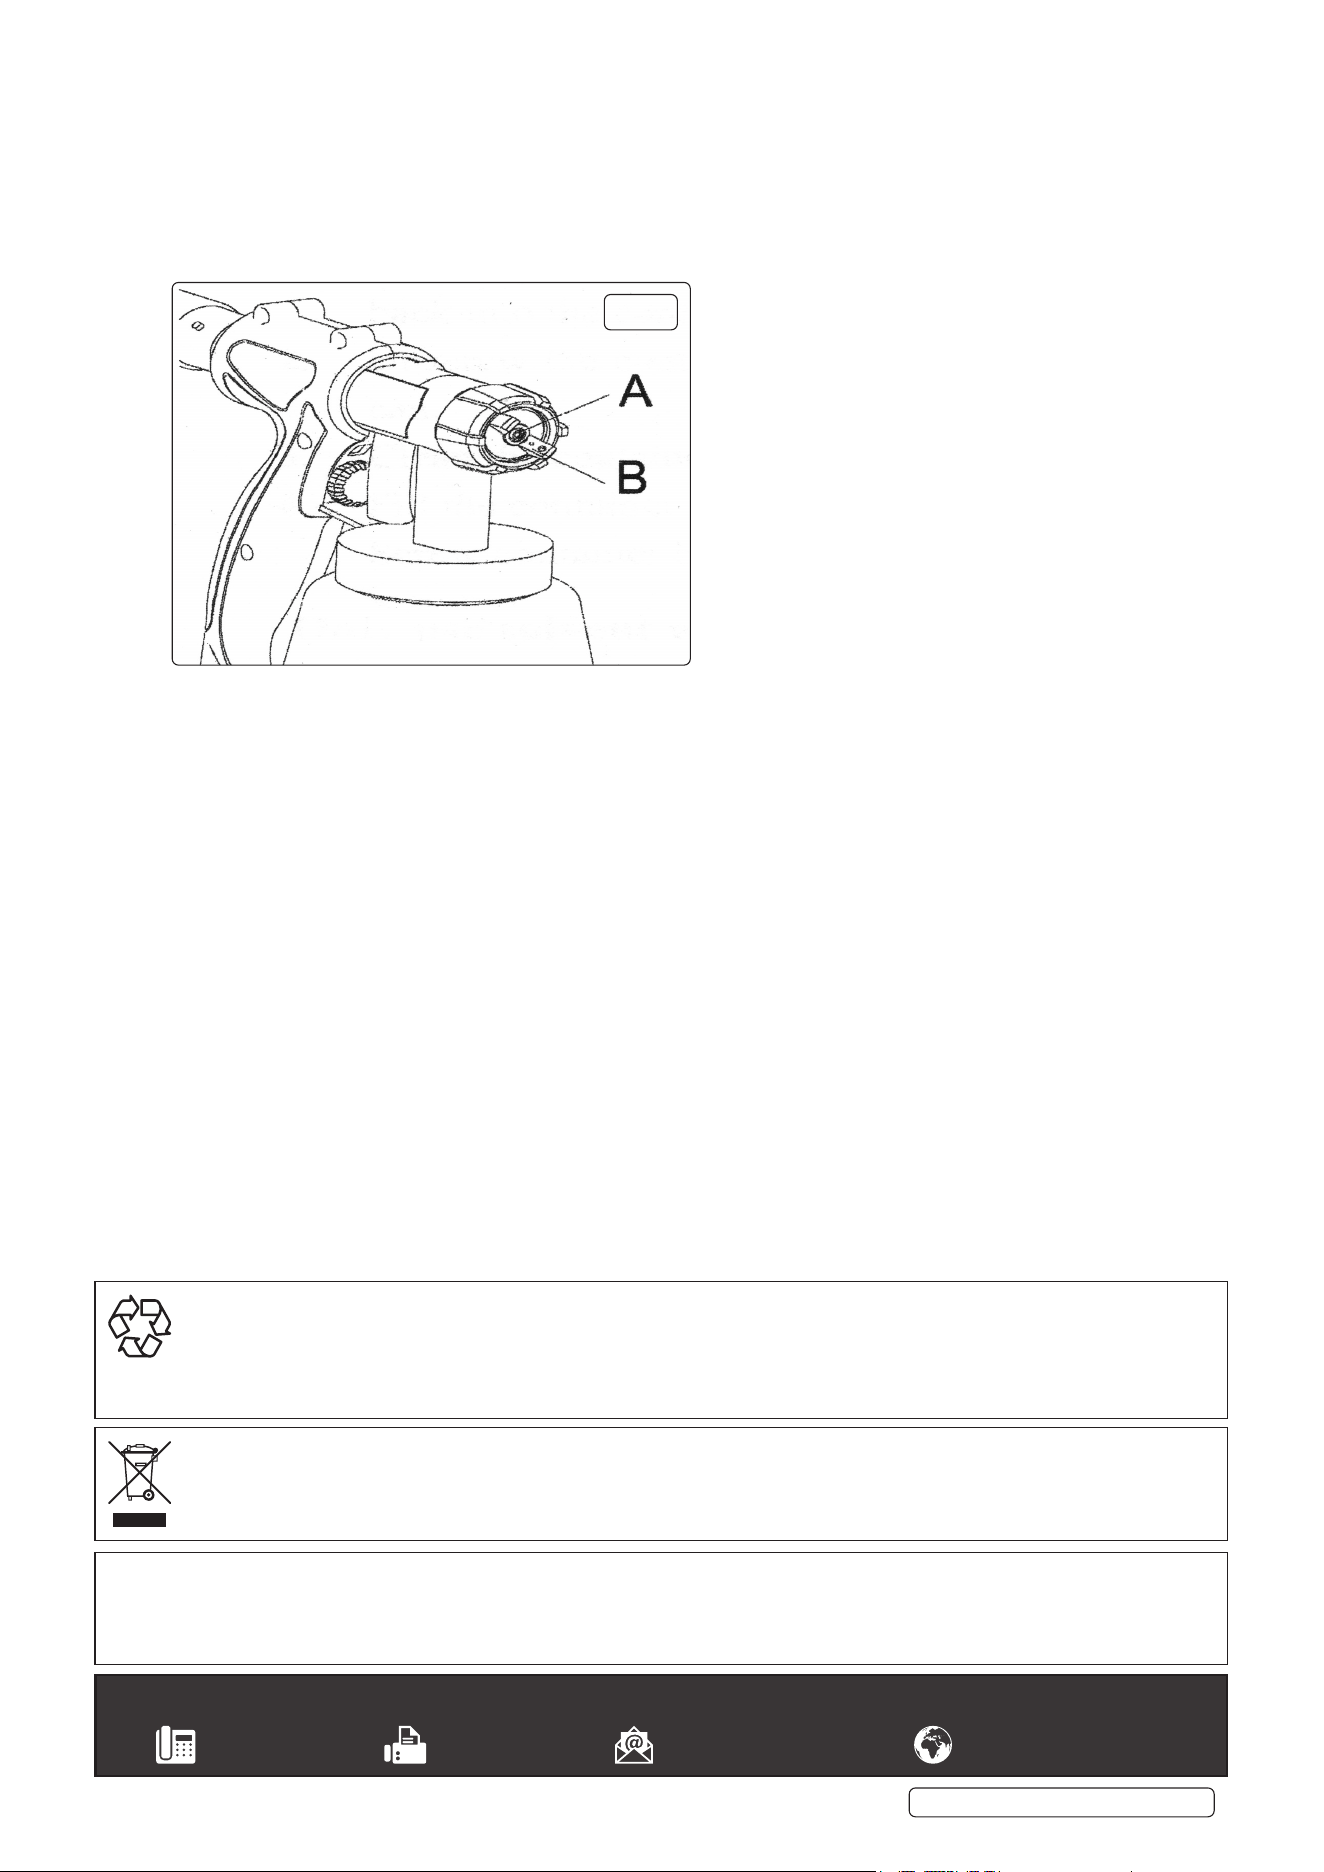
6.9.5. If coating material builds up in the nozzle A and air cap B, see g.10, clean both parts with solvent or water, depending on the
material being sprayed.
6.10. BREAK IN WORK
6.10.1. Turn off the sprayer.
6.10.2. Place the spray gun in its holder.
6.11. CLOSING DOWN AND CLEANING
6.11.1. Turn off the sprayer.
6.11.2. Open the trigger so that the coating material in the spray gun runs back into the container.
6.11.3. Unscrew the container. Return the coating material into the material can.
6.11.4. Clean the container and the pick up pipe with a brush.
6.11.5. Fill the container with solvent or water.
NOTE: Only use solvent with a ash point of over 21°C.
6.11.6. Turn on the sprayer and spray the solvent or water into a container. If a tube is not used solvent or water will be deposited outside
of the container, this is due to high air volume.
6.11.7. Repeat the above procedure until solvent or water runs clear out of the nozzle.
6.11.8. Turn off the sprayer and completely empty the container. Always keep the container seal free of coating material and check for
damage.
6.11.9. Clean the outside of the spray gun and the container with a cloth soaked in solvent or water.
NOTE: Never clean the nozzle of air hole of the spray gun with sharp metallic objects.
g.10
Original Language Version
© Jack Sealey Limited
HVLP3000 Issue 3 (H,F) 03/08/20
Sealey Group, Kempson Way, Suffolk Business Park, Bury St Edmunds, Suffolk. IP32 7AR
01284 757500 01284 703534 sales@sealey.co.uk www.sealey.co.uk
Note: It is our policy to continually improve products and as such we reserve the right to alter data, specifications and component parts without
prior notice.
Important: No Liability is accepted for incorrect use of this product.
Warranty: Guarantee is 12 months from purchase date, proof of which is required for any claim.
ENVIRONMENT PROTECTION
Recycle unwanted materials instead of disposing of them as waste. All tools, accessories and packaging should be sorted, taken to
a recycling centre and disposed of in a manner which is compatible with the environment. When the product becomes completely
unserviceable and requires disposal, drain any fluids (if applicable) into approved containers and dispose of the product and fluids
according to local regulations.
WEEE REGULATIONS
Dispose of this product at the end of its working life in compliance with the EU Directive on Waste Electrical and Electronic Equipment
(WEEE). When the product is no longer required, it must be disposed of in an environmentally protective way. Contact your local solid
waste authority for recycling information.