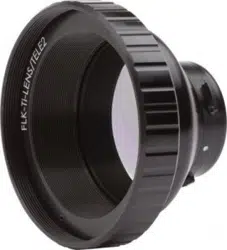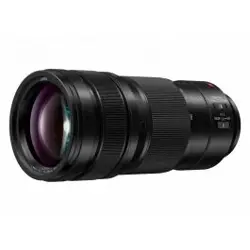

FLK-LENS/TELE2
FLK-LENS/WIDE2
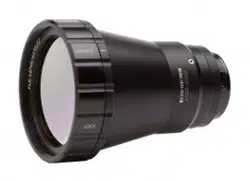
FLK-LENS/4XTELE2
FLK-LENS/25MAC2
Optional Lenses
Instruction Sheet
PN 4574065 March 2015
© 2015 Fluke Corporation. All rights reserved.
Allproductnamesaretrademarksoftheirrespectivecompanies.Speci�cationsaresubjecttochangewithoutnotice.
1
1
2
3
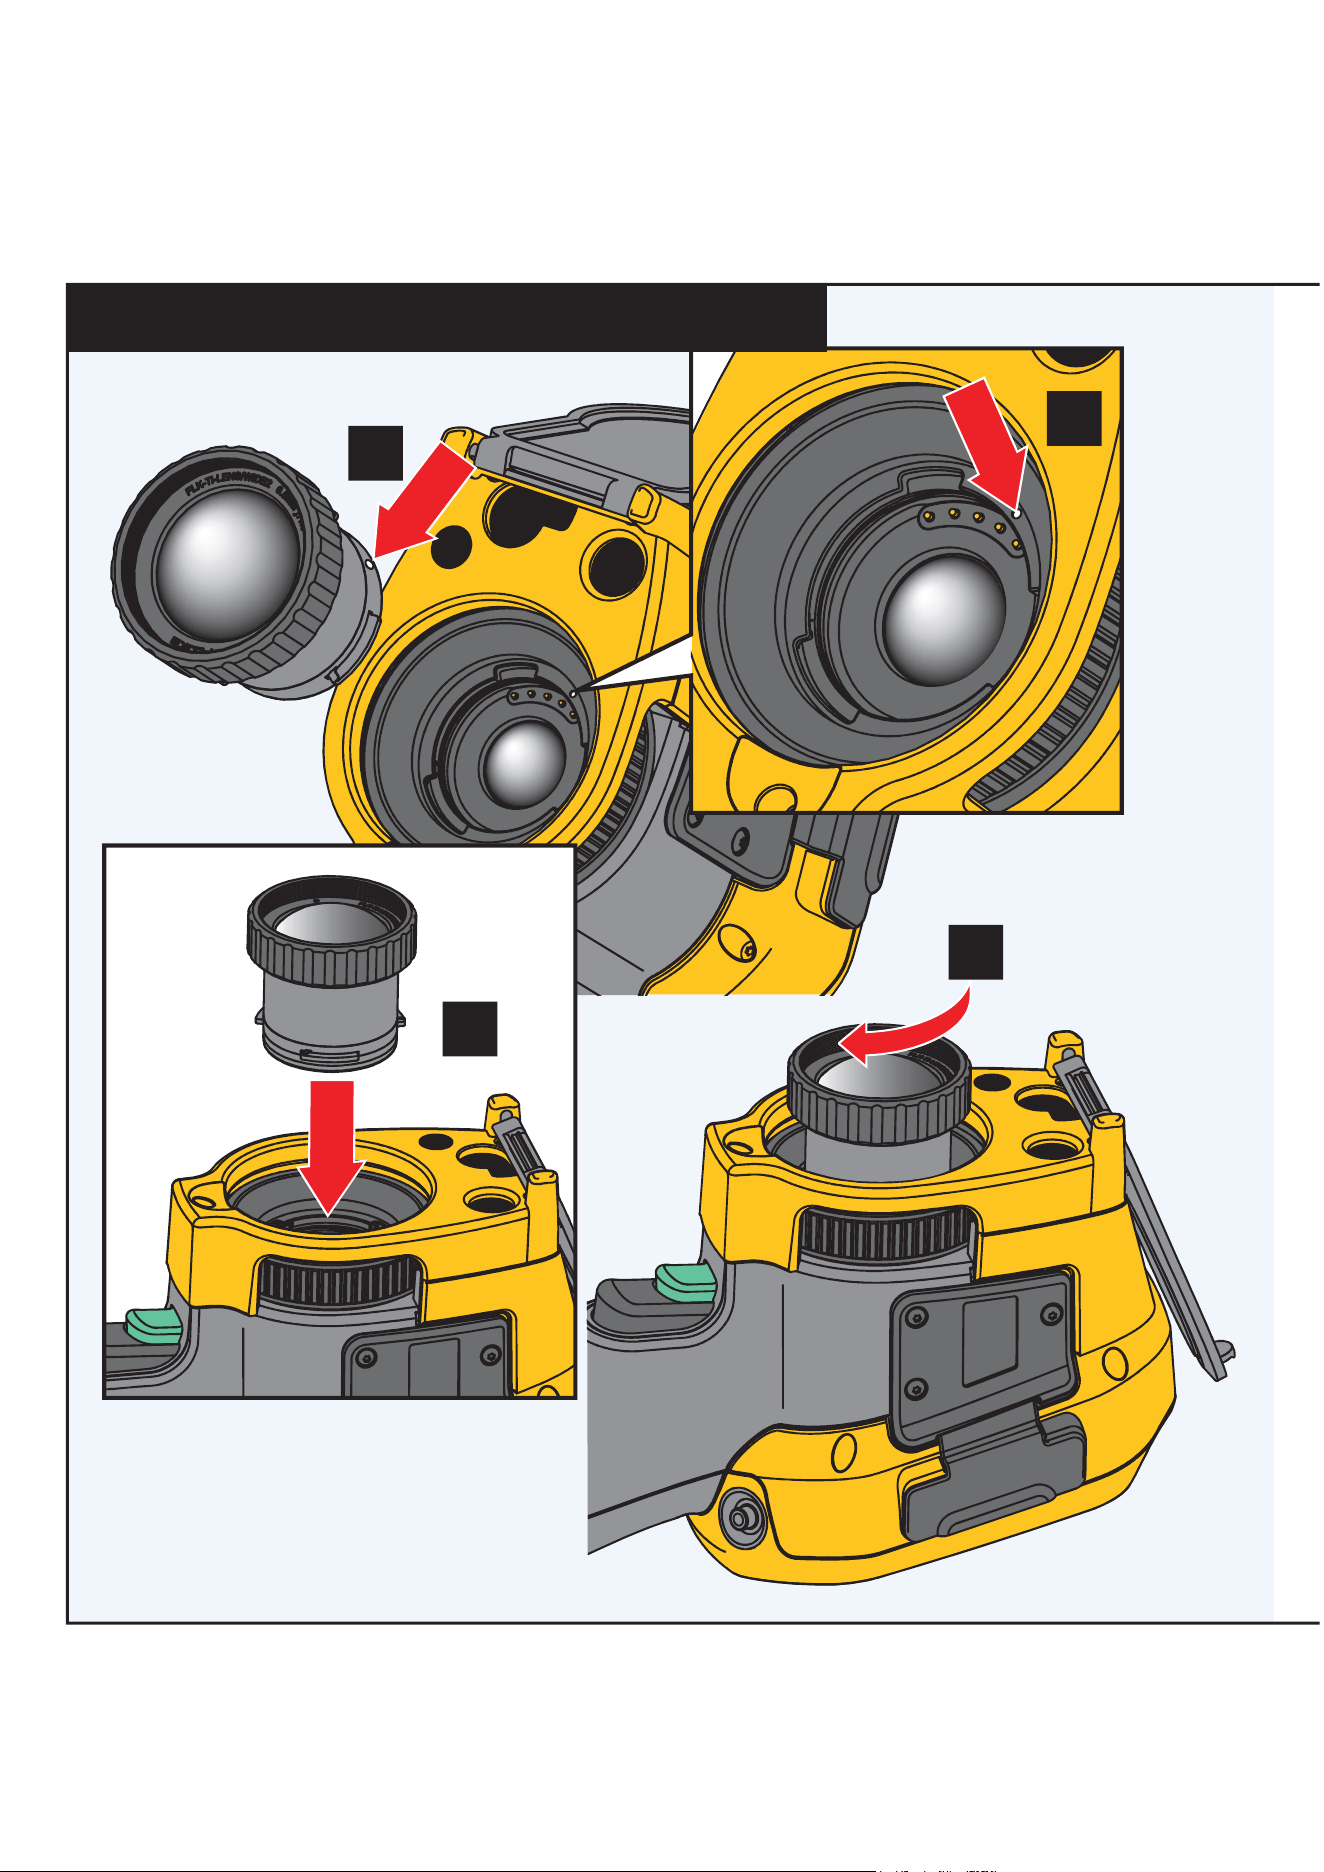
Models Ti200, Ti300, Ti400
Attachment and Removal of Optional Lenses
2
1
1
1
3
2
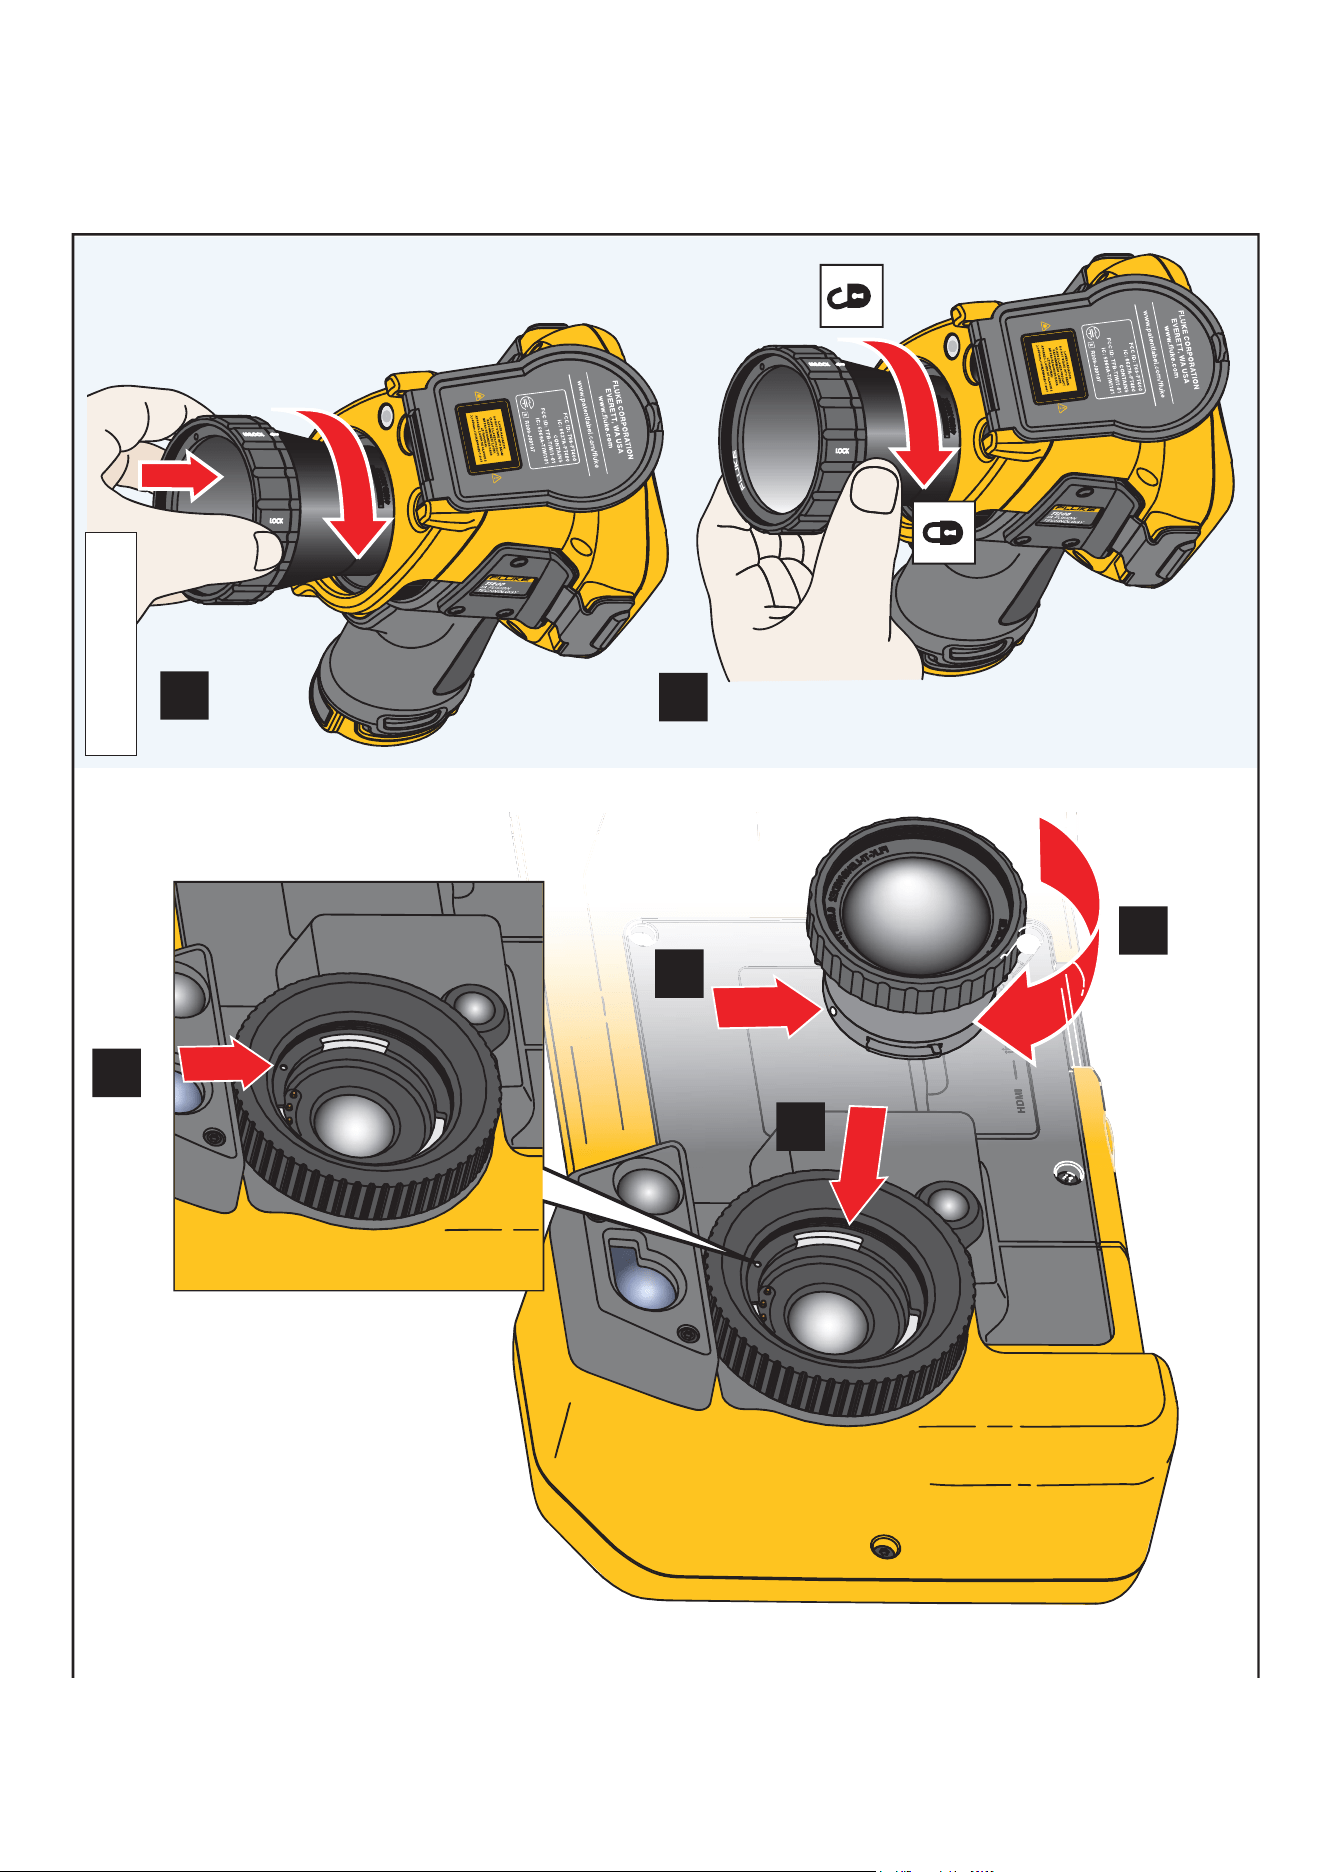
Models TiX520, TiX560
4X Telephoto
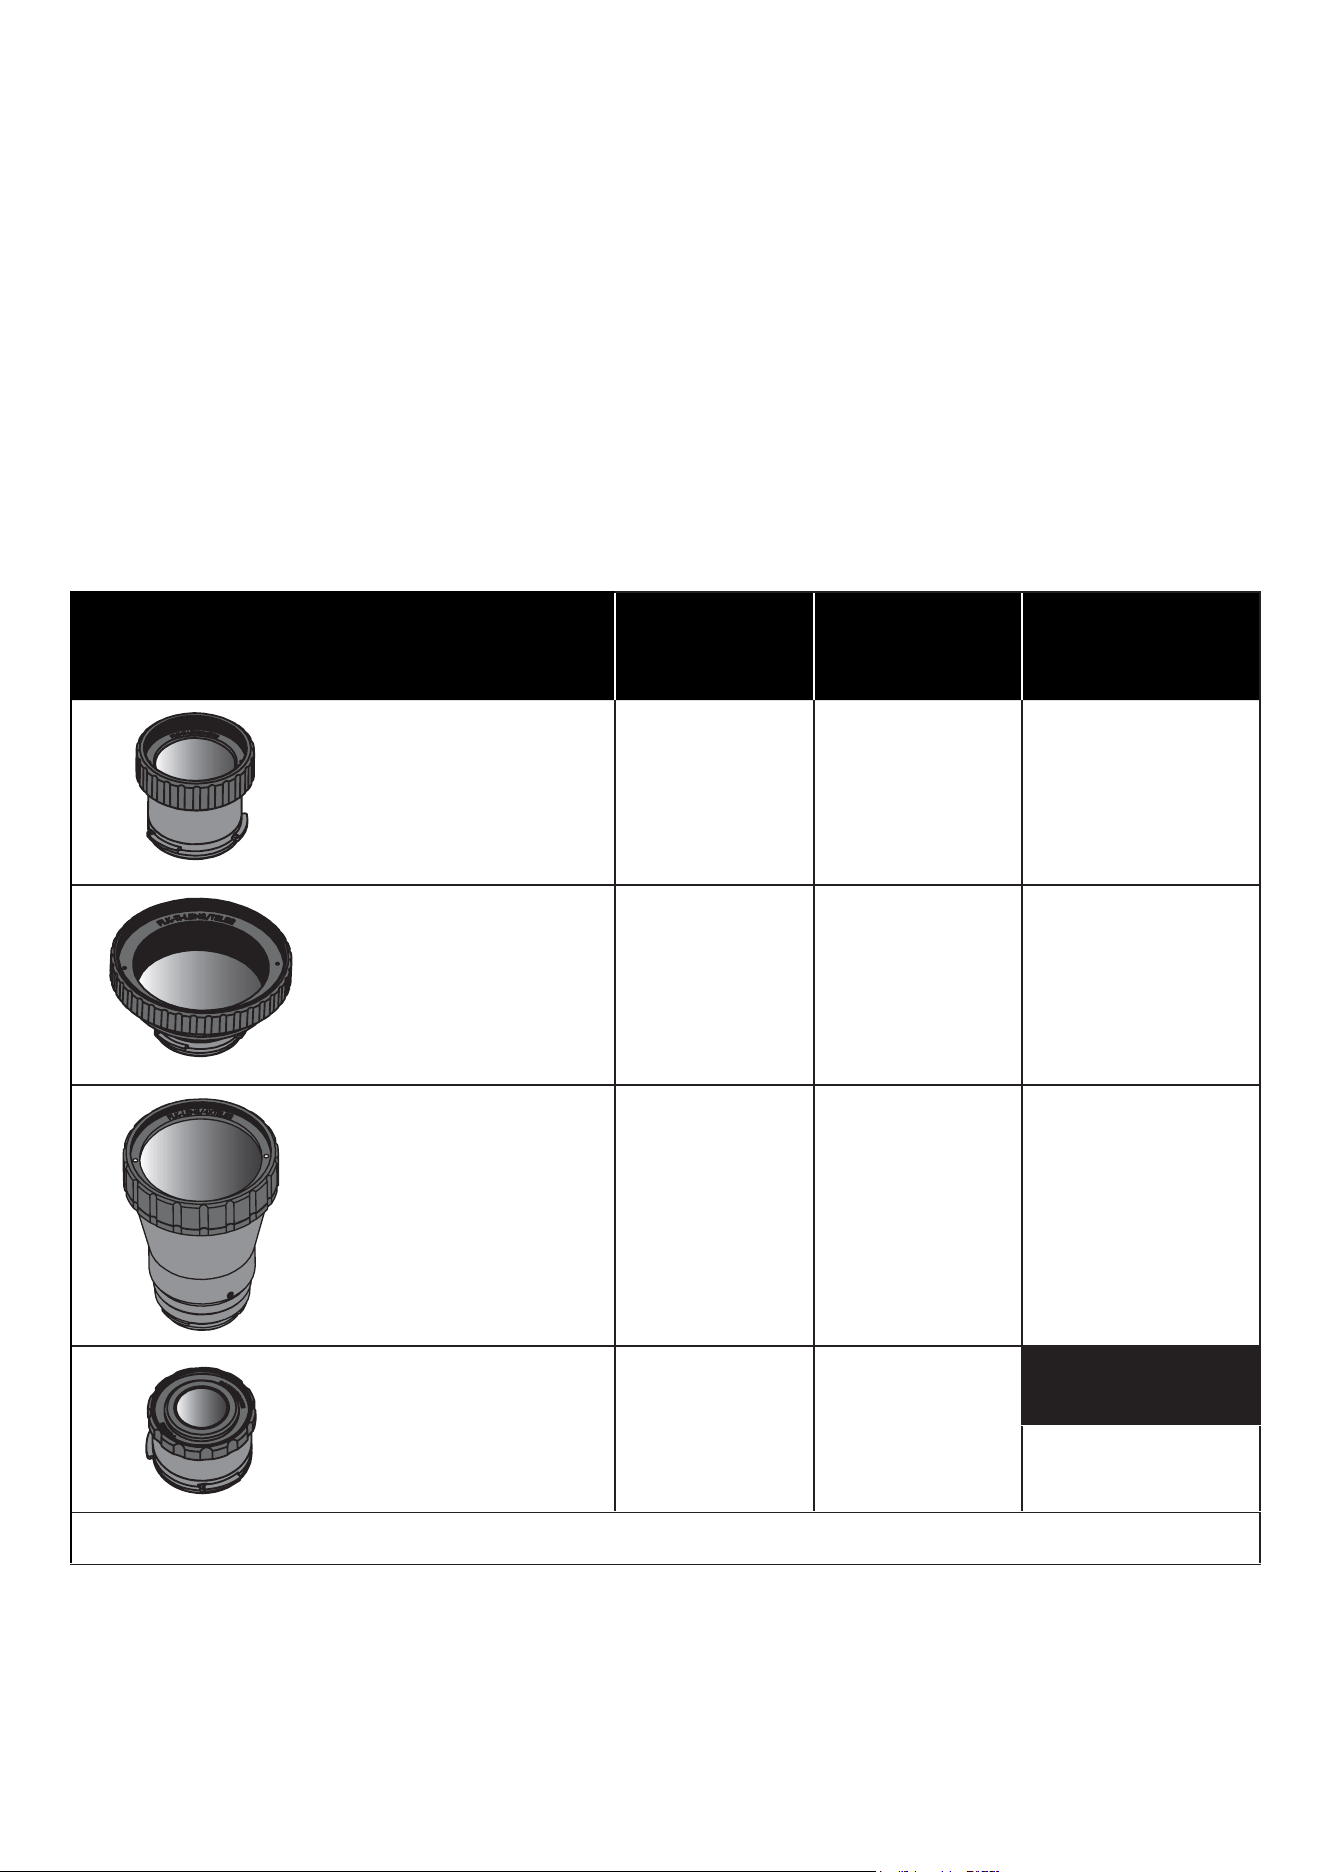
Lens Reference Table
Optional lenses are available for Fluke Thermal Imagers. These lenses expand the
exibilityandallowmoreapplicationsforinfraredinspectionwork.Lensesarecompatible
with models Ti200, Ti300, Ti400, TiX520, and TiX560.
Infrared Lenses
Model
Field of
View
Spatial
Resolution
(IFOV)
Minimum
Focus
Distance
FLK-LENS/TELE2
2x Telephoto
12 ° x 9 °0.65 mRad 45 cm (18 in)
FLK-LENS/WIDE2
Wide-angle
46 ° x 34 °2.62 mRad 15 cm (6 in)
FLK-LENS/4XTELE2
4x Telephoto
6.0 ° x 4.5 ° 0.33 mRad 1.5 m (5 ft)
FLK-LENS/25MAC2
25-micron macro 36.1 ° x 27.1 ° 1.97 mRad
Optimal Focus
Distance
10.2 mm (0.4 in)
Note: The spatial resolution listed is based on use with a 320 x 240 camera.

How to Install Optional Lenses
To install an optional lens on the Imager:
1. Remove the lens cover.
2. Position the optional lens onto the Imager by aligning the dot on the lens with the dot
on the Imager. See the illustration for more information.
3. Gently push optional lens into position and rotate clockwise until lens locks into
proper position.
When�nishedwiththeoptionallens,removeitfromtheImager:
1. Gently push in on the optional lens and rotate counter-clockwise until lens
disengages from Imager.
2. Remove optional lens and attach the lens cover.
3. Place the lens in storage case.
Note
For the best protection and longest life, always store an
optional lens in its protective case with the lens cover on.

LIMITED WARRANTY AND LIMITATION OF LIABILITY
This Fluke product will be free from defects in material and workmanship for one year
from the date of purchase. This warranty does not cover fuses, disposable batteries, or
damage from accident, neglect, misuse, alteration, contamination, or abnormal conditions
of operation or handling. Resellers are not authorized to extend any other warranty on
Fluke’s behalf. To obtain service during the warranty period, contact your nearest Fluke
authorized service center to obtain return authorization information, then send the product
to that Service Center with a description of the problem.
THIS WARRANTY IS YOUR ONLY REMEDY. NO OTHER WARRANTIES, SUCH AS
FITNESS FOR A PARTICULAR PURPOSE, ARE EXPRESSED OR IMPLIED. FLUKE
IS NOT LIABLE FOR ANY SPECIAL, INDIRECT, INCIDENTAL OR CONSEQUENTIAL
DAMAGES OR LOSSES, ARISING FROM ANY CAUSE OR THEORY. Since some states
or countries do not allow the exclusion or limitation of an implied warranty or of incidental
or consequential damages, this limitation of liability may not apply to you.
11/99