Loading ...
Loading ...
Loading ...

5
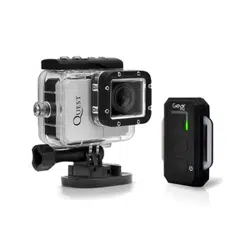
USB Connection
Connect the camera using included USB cable.
Access Media Files on PC (Transcript)
To view images captured and video clips recorded, connect the Gear Pro via USB connection cable. Select ‘Storage’ on the
Gear Pro camera following by pressing the power button to initiate access to the files. The screen will read, “USB
connecting…”. Your computer should then automatically recognize your device has been connected (if you have a
compatible SD memory card inserted in the Gear Pro). The Gear Pro will then appear as a removable disk drive and you
should be able to browse the captured media files.
On PC:
1. Double click “My Computer” and locate “Removable Disk”.
2. If “Removable Disk” is not showing, close “My Computer” folder and reopen it. The
“Removable Disk” icon should appear.
3. Double click “Removable Disk” icon.
4. Double click “DCIM” folder icon.
5. Double click “100media” icon to view all video / photo files.
6. Copy / move files to the computer or external hard drive.
On MAC:
1. Connect the camera to MAC using included USB cable.
2. Power on, select the “Mass Storage”.
3. The MAC recognizes the camera as an external hard drive.
4. Double click icon for external drive to access files.
5. Copy/move files to computer or external hard drive.
* When deleting files from the memory card, empty the trash before removing the
memory card or unplugging the camera.
Wi-Fi Configuration
Wi-Fi camera allows you to connect to the smartphone / tablet via the App.
Wi-Fi ON
Automatically turns on within 30 seconds*, Wi-Fi icon in green to indicates successful
connection. Now go to your smartphone/tablet setting, turn on the wifi network and select
Network Name: Gear Pro Quest Password: 12345678
Wi-Fi ON / OFF
Press and hold , Menu > Setting> Wifi>
Select “ON” or “OFF”, Press
for OK.
The 'Gear Pro Quest' App lets you control your camera remotely using a smartphone or tablet. Features include full camera
control of all settings
#
, live video preview, streaming video, download and playback. The App is available for free at the Apple
App Store and Google Play Store. See what your camera sees and view it on your smartphone or tablet screen.
Wi-Fi Configuration Transcript:
Connecting Wi-Fi Remote
*Make sure the Wi-Fi setting in the Gear Pro is turned on prior to attempting to connect
1. Hold the bottom Camera button located on the bottom of the Wi-Fi remote until remote lights green.
2. Hold in the Camera button on the Gear Pro until the Blue LED light begins to blink.
3. Power on the Gear Pro once the blue LED stops blinking and blue light remains on.
4. Allow the Gear Pro to locate the Wi-Fi remote and will be ready for use once the signal bars on top of the Gear Pro
LCD shine green.
5. On the Wi-Fi remote, press the Camera button to take a picture, press the Video button to begin recording video.
*Hold in the Power (top) button on the wireless remote to wirelessly power off the Gear Pro.
Notice:
If the ‘BUSY’ icon appears on the LCD screen, please allow a few seconds for the camera to load.
1080i video format and video ‘lapse mode’ is not available during Wi-Fi recording.
Loading ...
Loading ...
Loading ...